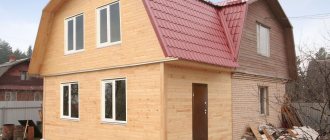
The veranda allows you to profitably expand the useful space of a residential building. In a properly constructed and well-equipped extension, you can comfortably spend time both in the warm and cold seasons.
DIY veranda
Read the recommendations for choosing building materials, understand the technology, and you can independently build a reliable, beautiful and durable extension.
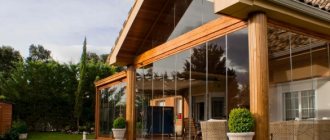
Winter glazed veranda
Recommendations for planning a veranda
It is best to build the extension so that it covers the entrance door to the main house. Therefore, you will not be able to build a veranda on any desired side of the already finished main building. Otherwise, the veranda will be separated from the main building and you will have to enter it from across the street.
Glazed veranda
The dimensions of the extension are selected individually. For a family of 3-6 people, a veranda measuring 3x4 m is enough. It is also important to take into account the general view from the street. For example, if you live in a large two- or even three-story house, and the veranda is very small, the overall architectural ensemble will turn out to be inharmonious. For compact houses, you can safely add verandas the width of the entire wall of the main building - it looks great.
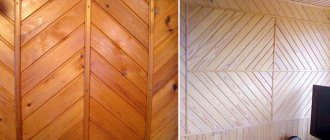
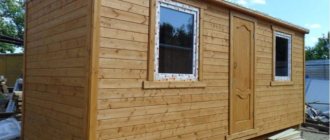
Veranda in a wooden house
Important note! Regardless of the chosen dimensions and the overall features of the extension, its construction must first be legalized. To do this, you must have a project on hand. You can make it yourself, find it in open sources, or order it from a specialized company.
Take your project to your local architectural department. Department employees will study your project, make the necessary changes and issue a permit. Keep in mind that on average it takes about 2-3 months to review and approve a project, so it is best to resolve this issue in the winter, before the start of the construction season.
House with a glass veranda
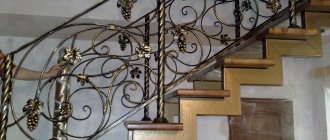
Veranda
Estimate
Construction project
Eighty percent of errors can be avoided thanks to a properly designed veranda for a wooden house. The main thing is to think it over thoroughly in all details. Then there will be enough material, and there will be a minimal amount of flaws. It is interesting to prepare your own wooden veranda project, and then turn to the Internet for clarification of unclear places. When it is compiled, the sequence in which the work will be performed must be indicated. Then all stages of construction of the structure are better visible.
The addition of a veranda made of wood is usually carried out from the end part. In this case, there is an entrance door opening inside the room. The length of the structure is commensurate with the dimensions of the walls. The width is two or three meters. Then the total area is calculated.
The photo shows a ready-made version of an open veranda made by hand.
Note!
DIY metal bench: instructions with step-by-step guide (100 photo ideas)
Blinds for gazebos: wooden, metal, bamboo. Instructions for installing blinds yourself
Adding a terrace to your house with your own hands: step-by-step instructions on how to easily and quickly add a veranda or terrace (100 design photos)
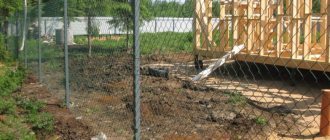
Construction site marking
We are starting to prepare our construction site.
First step. We remove about 150 mm of the top layer of soil from the perimeter of the future building and take it to the flower beds, vegetable garden or other place.
Second step. Align the resulting depression.
Third step. We carry out the markings. First, focusing on the project, we drive in metal or wooden pins at the corners of the site, then in the same way we drive in intermediate pegs every 1-1.5 m, and then we pull a rope between the pins. We will use it to guide us in the process of arranging the foundation.
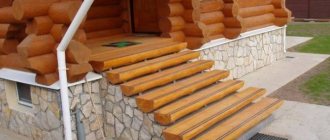
Photo of a terrace at the dacha with your own hands
Read here How to make a greenhouse with your own hands: projects and the best options for self-building (105 photos)
Did you like the article?
0
Making the foundation
Most often, verandas are built on columnar or strip type foundations. The depth of the support is assumed to be equal to the depth of the foundation of the main house. It is strongly not recommended to connect the main support to the foundation of the extension, because these structures will have widely varying weights. Consequently, the degree of their shrinkage will also vary. To prevent a heavy house from dragging down a relatively light extension, the latter must be built on a separate foundation. To do this, leave approximately a 3-4 cm gap between the foundations.
Important point! When choosing the type of foundation, consider, first of all, the soil characteristics in your region and the total mass of the veranda. For the construction of heavy structures on heaving soils, monolithic strip foundations are best suited. Lightweight structures, for example, made of wood, can be built on columnar supports.
Tape base
A strip-type foundation is optimally suited for the further construction of a veranda on it from building blocks or bricks. The thickness of the base, as already noted, is maintained equal to the thickness of the foundation of the house. If this is a new building, keep the thickness at 70-80 cm.
First step. We dig a trench around the perimeter of the walls of the extension.
Digging a foundation pit
Second step. We level the bottom and walls of the trench, set the formwork from wooden boards or panels to the height of the future concrete support.
Third step. We successively fill the bottom of the trench with a 10-centimeter layer of sand and the same layer of crushed stone, making sure to compact each ball of backfill.
Fourth step. We lay a reinforcing mesh of 10-12 mm bars. The recommended mesh size is 10x10 cm. This way the base will be as strong as possible.
Fifth step. We pour concrete prepared from a portion of cement, three portions of sand, 4-5 portions of crushed stone and water.
Carefully level the fill and leave it to dry and gain strength for 3-4 weeks. In hot weather, we pour concrete every day to prevent it from cracking.
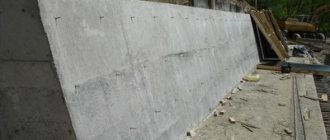
Strip foundation
Columnar base
For a veranda made of timber or polycarbonate, a columnar base is perfect. It is recommended to make holes for posts with a depth of 80-110 cm. If the veranda is small (up to about 3x4 m), it will be enough to install supports in the corners. However, professional builders recommend installing intermediate posts for any size veranda. We maintain the distance between supports within 0.8-1 m.
Columnar foundation for the veranda
First step. We dig holes in the places where the pillars will be poured. The most convenient way to do this is with a drill.
Second step. We fill the bottom of each depression with a 15-20 cm layer of sand. Additionally, it is recommended to pour approximately 10 cm of crushed stone. We compact each layer.
Third step. Pour the concrete to the ground level and let it harden.
Fourth step. We coat the finished concrete supports with bitumen.
Fifth step. We fill the gaps between the ground and the supports with sand.
Columnar foundation
Sixth step. We erect the above-ground part of the pillars from brick. We make the height equal to the height of the foundation of the main house.
How to quickly and cheaply make a columnar foundation
How to quickly and cheaply make a columnar foundation
How to quickly and cheaply make a columnar foundation
Building a terrace for a house with your own hands: how to make a foundation
There are two main rules for building a terrace for a house with your own hands: the floor should not sag or spring underfoot, and the railings should be strong, stable and safe. Since such structures generally represent a continuation of the building, they are most often attached to it. Let's look at the construction of such a terrace using a specific example.
When building a deck foundation, keep in mind that it supports the entire deck structure and prevents it from moving or sinking into the ground. Typically these are concrete blocks measuring 30 x 30 cm, buried 15 cm in undisturbed compact soil.
How to make a foundation for a terrace yourself? Each concrete block should be placed on a sand bed, protruding 15 cm above the ground surface, so that the posts or beams of the terrace frame are not subject to rotting under the influence of the soil.
Instead of ready-made concrete blocks, you can use homemade ones cast in plank formwork. However, this solution is suitable only for regions of a warm climate zone, in conditions of non-freezing or slightly freezing soil. In the conditions of the middle zone, when erecting buildings on heaving soils, constructing a foundation for a terrace with your own hands can be different. The main thing is that this base ensures the stability and rigidity of the entire structure. The design of the foundation of the main building should also be taken into account so that the mutual displacement of the main building and the extension does not lead to noticeable deformation of the structures.
These photos show the foundations of the terrace for the house, made by yourself:
Before you implement the task called “building a terrace with your own hands,” familiarize yourself with the main stages of the work.
Making a subfloor
After building the foundation, it is recommended to start arranging the subfloor. We first cover the support with roofing felt in two layers.
The floor can be wooden or concrete. For example, in a frame veranda made of wooden beams, a wooden floor would be more appropriate. Concrete pouring will best fit into a brick extension.
Subfloor
We make a wooden subfloor like this:
- We fix the beam of the lower trim on the foundation. We use suitable fasteners, for example, anchors. To connect the beams directly, we first make samples at the places of their joints and additionally fasten them with galvanized nails;
- We attach wooden logs to the bottom trim. We keep the step at 50 cm - this way the floor will definitely not fall through. We use the connection option described above;
- fill the space between the joists with expanded clay;
- We make the flooring from unedged boards or plywood about 50 mm thick. We attach the flooring elements to the joists with galvanized nails or self-tapping screws.
We make a concrete screed like this:
- fill the base with a 10-centimeter layer of sand;
- pour a layer of expanded clay on top;
- lay the reinforcing mesh. For the floor of the veranda, a mesh of rods with a diameter of 6-8 mm with cells of 25x25 cm is sufficient;
- pour concrete.
The recommended thickness of the screed on the veranda is from 30-50 mm. For greater convenience and accuracy of pouring, we can pre-set beacon slats every 2-4 m.
Important! The screed should be as even as possible. We carry out the work with the obligatory use of a level.
Option #3. Terrace on a columnar foundation
A wooden terrace on a columnar foundation is the traditional and most win-win option. The structure is adjacent to the house and, in fact, forms one whole with it. A columnar foundation is capable of raising the platform by 15-60 cm. At the same time, the ventilated space formed under the flooring promotes effective ventilation of the terrace elements and minimizes the possibility of wood rotting.
Step-by-step construction instructions:
1. To connect the future terrace area with the house, the first beam is fixed horizontally on the wall adjacent to it (at the level of the terrace). A galvanized steel drain is mounted above the upper edge of the beam.
2. Excavations are made in the places where concrete pillars are installed. The columns should be installed in increments of 1.5-2 m. The recesses are made taking into account the desired elevation of the terrace, the height of the columns and the required layer of gravel backfill, 10-15 cm thick.
3. Gravel filling is poured into the recesses, then trapezoidal concrete columns are installed. A metal embedded part for square beams is attached to the top platform of each column.
4. The support beams are placed into the embedded parts on the posts and secured with screws.
5. Platform beams are mounted on top of the support beams, perpendicular to them, at a distance of 40-60 cm from each other.
6. Screw the terrace boards to the platform beams, maintaining 2-3 mm gaps between them. The gaps serve to prevent rainwater from accumulating on the deck and allow it to flow freely into the subfloor.
7. If unprepared edged boards are used for the deck, the surface of the deck may look uneven after installation. Therefore, the floor is leveled with a grinder, bringing all points of the terrace to the same level. After sanding, wood dust is removed and the boards are treated with impregnation - antiseptic or coloring. When using a special decking board, additional surface sanding is not required.
A columnar foundation for a terrace can also be built from flat concrete blocks. A similar option for constructing a terrace is presented in the video:
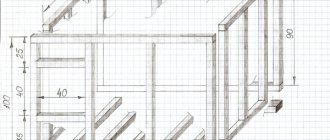
Building a wooden veranda
Basic properties of the material
Wood is one of the most popular and ancient building materials. Even after the appearance on the market of all kinds of blocks and other low-cost and easy-to-arrange elements, wood practically did not lose ground.
Almost anyone can handle the construction of a simple frame wooden veranda. You just need to properly mount the frame posts and cover them with shields, clapboard or other suitable material.
The undeniable advantages of wood are its environmental friendliness, beautiful appearance and relatively low weight. The latter property allows you to abandon the construction of expensive and difficult to construct foundations.
The main disadvantage of a wooden veranda is its fire hazard - installing a barbecue in such an extension or in the immediate vicinity of it is a very important undertaking that requires taking into account many nuances and details. Therefore, it is better to move the source of fire somewhere further outside the wooden veranda.
Another significant disadvantage of wood is its poor tolerance to high humidity, which is why the material requires serious pre-treatment with special antiseptic preparations. Without such preparation, the wood will rot very quickly.
Construction order
Scheme of beam fastening
To construct the frame, we use high-quality wooden beams with a cross-section of 100x100 mm. We already have the bottom trim and subfloor, so we continue to work, adhering to the instructions below.
Bottom frame beam
Bottom frame beam
First step. We cut grooves in the beam of the lower trim for installing vertical supports. We maintain a half-meter step.
Second step. We install vertical racks. To fasten the frame elements we use staples and screws or nails.
Mounting options that can be used
Important! The roof of our veranda, as noted, will be sloping. Therefore, we make the vertical beam installed at the bottom point of the slope 50 cm below the opposite posts.
Frame assembly
Veranda frame
Third step. We mount the beam of the upper trim. On higher racks no questions will arise - we perform the connections in exactly the same way as in the previous stages.
When installing the strapping of lower supports, we do the following: first we connect the pillars longitudinally with a strapping beam, and then we fix the transverse crossbars connecting the high and low posts at the height of the low posts. We fasten the crossbars to the high posts using pre-created samples and nails.
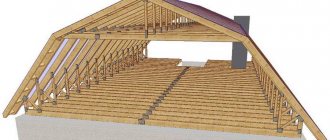
Fourth step. The top trim is ready. The resulting slope will allow us to lay the rafters for the roof. Additionally, we nail a girder near the roof slope. To fasten the beam to all supports, we use anchor bolts. For greater reliability, it is recommended to fasten the strapping beams with transverse boards or beams, if possible and necessary (we focus on the weight of the future roofing material). We will attach racks and struts to them for greater strength of the rafter system.
Fifth step. We install the rafters in increments of 50 cm. For this we use a wooden beam with a section of 100x200 mm. We connect structural elements using any of the previously discussed methods.
Installation of rafters
Veranda frame with roof
Sixth step. We cover the frame. Lining is perfect for interior cladding, and siding or other material for exterior cladding. We lay layers of hydro- and thermal insulation between the external and internal cladding materials. We attach the film to the frame. The position of the insulation is fixed by transverse slats. The finishing material is also attached to them. When covering, do not forget to leave openings for windows and doors.
Frame covering
Veranda covered with plywood
Veranda trim
Prices for various types of timber
timber
Choosing flooring material
For example, summer terraces have one very important feature. This is the quality of the floor. As a rule, summer terraces are made of an open type, which means that moisture has a special effect on the floor of this structure.
If you make a floor from an ordinary planed board, it will soon rot, and in some places cracks will appear from the constant change in temperature.
Therefore, for the floor, choose a terrace board, which is specially made for service in conditions of high humidity. Thus, the floor on the terrace can last for decades.
When and how to prune grapes in the fall before covering- Do-it-yourself cellar in the country: types of construction, features, choice of location on the site. Optimal DIY construction sequence
Which house is cheaper to build - advice from builders, opinions of engineers and a review of the most effective construction options (110 photos and videos)
Brick verandas
Basic information about building materials
Brick is excellent for constructing permanent verandas. A building made from this material will be cool in the summer and, provided the insulation is properly insulated, warm in the winter. Brickwork is durable, fireproof and easy to maintain.
The main disadvantage of a brick building is its heavy weight. Such structures are erected exclusively on monolithic foundations, which does not have the best effect on the total cost of construction.
The procedure for constructing a veranda
The foundation is ready and waterproofed, the screed is poured, the base is level and does not require any additional preparatory measures. Let's start laying out the walls.
Option for building a brick veranda
We first select the appropriate type of masonry. The simplest options, perfect for constructing a veranda yourself, are as follows:
- spoon masonry. The final wall thickness will be 120 mm;
- bonded masonry. Wall thickness – 250 mm;
- chain laying. Allows you to obtain walls with a thickness of 380 mm.
First step. We attach a mooring cord to two opposite ends of the foundation with a tie. It should run along the edge of the base.
Second step. We place the corner bricks along the cord, and then fill the space between them in accordance with the chosen masonry method. To fasten building elements we use standard cement mortar.
Option for building a brick veranda
Third step. We check the evenness of the first row and similarly lay out the walls to the required height, not forgetting to leave openings for doors and windows.
Important! The roof of the veranda will be sloping, so we make the wall at the bottom of the slope, as well as the side walls adjacent to it, a row lower compared to the wall supporting the top of the roof.
Having laid out the last row of walls, we arrange an armored belt. To do this, we fix formwork about 70 mm high on each wall along the upper surface of the walls, place anchor bolts in the corners, lay reinforcing bars and pour concrete.
We let the concrete harden, and then attach a wooden beam with a section of 10x10 cm to the anchor bolts. The further procedure for arranging the rafter system remains similar to the situation with a wooden veranda.
If the veranda is planned to be used throughout the year, the walls can be laid in two rows, filling the gap between the rows with thermal insulation material. With single masonry, insulation, moisture insulation and interior finishing are carried out by analogy with a wooden veranda. Exterior decoration is at your discretion. You can simply carefully unstitch the seams and call it a day.
Construction of a brick veranda
Construction of a brick veranda
Construction of a brick veranda
Construction of a brick veranda Construction of a brick veranda
Construction of a brick veranda
Covering the veranda
Covering the veranda Covering the veranda
| Masonry size | Length, L | Width, V | Height, N | Number of bricks excluding mortar joint thickness, pcs. | Number of bricks taking into account the thickness of the mortar joint 10 mm, pcs. |
| 1 m3 single brick masonry | 250 | 120 | 65 | 512 | 394 |
| 1 m3 thickened brick masonry | 250 | 120 | 88 | 378 | 302 |
| 1 sq. m of masonry in half a brick (masonry thickness 120 mm) | 250 | 120 | 65 | 61 | 51 |
| 1 sq. m of masonry in half a brick (masonry thickness 120 mm) | 250 | 120 | 88 | 45 | 39 |
| 1 sq. m of masonry in one brick (masonry thickness 250 mm) | 250 | 120 | 65 | 128 | 102 |
| 1 sq. m of masonry of one and a half bricks (masonry thickness 380 mm) | 250 | 120 | 65 | 189 | 153 |
| 1 sq. m of masonry of one and a half bricks (masonry thickness 380 mm) | 250 | 120 | 88 | 140 | 117 |
| 1 sq. m of masonry in two bricks (masonry thickness 510 mm) | 250 | 120 | 65 | 256 | 204 |
| 1 sq. m of masonry in two bricks (masonry thickness 510 mm) | 250 | 120 | 88 | 190 | 156 |
| 1 sq. m of masonry in two and a half bricks (masonry thickness 640 mm) | 250 | 250 | 65 | 317 | 255 |
| 1 sq. m of masonry in two and a half bricks (masonry thickness 640 mm) | 250 | 250 | 88 | 235 | 195 |
Prices for construction and facing bricks
Construction and facing bricks
Tools
Before you start creating a modern veranda for your dacha, you must first make sure you have all the tools:
- Hammer and mallet.
- Drill with a set of drills.
- Yamobur.
- Rope.
- Wheelbarrow.
- Shovel.
- Circular saw.
- Spirit level.
- Chalk.
- Meter ruler.
The veranda can be made in any shape; often a standard shape or a hexagon is chosen. The veranda can be placed close to the house, and also make a warm transition.
You can relax on the covered veranda all year round. It also reduces heat loss through this wall
We “Kak-Sdelano.ru” recommend erecting buildings close to each other, because the soil under the base will shrink differently.
There are also walk-through verandas - this is when in order to get into the house you pass through it. Such extensions are located on the front side of the house, sometimes on the yard side if there are two exits from the house. Entrance to impassable buildings is only from the house. It is impossible to get outside from such a veranda.
An extension can cover one, two or more sides of the house. If it covers two adjacent parts of the house, it is called a corner. Some of them occupy only part of the wall.
The forms are different. More often it is a rectangle, less often - a hexagon, a semicircle, or other non-standard shapes (these are more difficult to build). In short, these are all types of verandas attached to the house, but without taking into account the materials.
The perimeter extension gives the house an extravagant look
What materials are they made from?
Most often, wooden verandas are made in our area. It is easier to work with wood, and it is not as expensive as in other countries. In areas where wood is very expensive, structural elements are made of metal, and the cladding is selected to suit your taste. It can be glass (double-glazed windows), polycarbonate.
The walls of the veranda are built from brick, shell rock, rubble stone, and building blocks. Just like a house, they are then finished or not, depending on the design of the main building. They can simply make a fence, as in the photo above.
Veranda made of a metal frame and special window blocks
If wood is expensive, or you are reluctant to work with it on a regular basis, the veranda frame is assembled from metal. For this purpose, a profile pipe, corners or channels are most often used - it depends on the material and size of the extension. It is easier to attach double-glazed windows to metal; instead of glazing, you can use polycarbonate. This material can be of different colors and varying degrees of transparency. Despite its apparent fragility, there is a fairly strong material that is used for the construction of greenhouses. And if so, then in the veranda, if it is closed, it will keep the heat well.
Polycarbonate veranda attached to a brick house. The entire frame is assembled from a profile pipe
Making a veranda roof
Mauerlat and rafters are installed. All that remains is to make the sheathing, install the insulating layers and lay the finishing roofing material.
The lathing can be solid (for rolled materials) and sparse (for sheet roofing). We make continuous sheathing from OSB boards. To do this, we attach them to the rafters with a 1-centimeter gap. We fasten the sparse sheathing beams at a pitch recommended by the manufacturer of the selected roofing material. On average, it is 30-35 cm. To attach the sheathing to the rafters, we use galvanized nails or self-tapping screws.
We fill the cells between the sheathing beams with mineral wool for thermal insulation. We lay a waterproofing film on top and attach it to the sheathing using a stapler with staples. In the case of arranging a continuous sheathing, we fix the thermal insulation from the inside of the room. We secure the insulation boards using transverse slats, nailing them to the sheathing.
Finally, all that remains is to install the roofing. It is better that it matches the roof covering of the main house. For the rest, we focus on our preferences and available budget.
Veranda roof
Insulation of the veranda roof
Finishing the floor
If the subfloor is wooden, we install joists, lay insulation in the space between them and fill the flooring of edged boards to the joists. We paint and varnish the boards.
You can also install a boardwalk on top of the concrete screed, similar to the previous method, or lay another material of your choice, for example, linoleum.
Warming the veranda
The floor is covered with plywood sheets, linoleum flooring is planned
Finally, all that remains is to install windows and doors, furnish the furniture at your discretion and connect lighting if necessary. We won't pull the wiring. It is enough to remove the extension cord from the house and turn on the necessary lighting fixtures.
Veranda
Good luck!