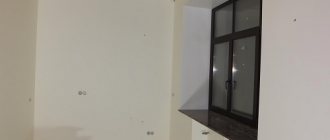
Plasterboard sheets are distinguished by their ability to create a good basis for finishing work; partitions in rooms are also made from them. For this reason, they have been used frequently recently. However, to obtain a durable result, it is necessary to correctly select the materials that can be used on this base before gluing the wallpaper. Among the required steps is surface puttying. How to putty drywall under wallpaper will be discussed below.
Why putty gypsum board under wallpaper?
Not all beginners understand whether it is necessary to putty drywall before gluing wallpaper, and why professionals include this stage in the list of mandatory ones. Confusion often arises when the wallpaper is dense and able to cover minor defects; gluing it to the cardboard base itself does not seem difficult. However, the process is necessary due to the following reasons:
- If there is no putty layer, then updating the design by gluing new canvases involves removing the previous ones, but the process most often occurs with the removal of part of the plasterboard layer. As a result, the damage to the material can be significant, which will result in the need to replace the drywall itself completely;
- The material is created in different types, and their differences when selected are emphasized by color; in addition, markings are applied to the sheets to make it easier to understand what purpose the sheets have. Such bright elements can appear through a thin and light type of wallpaper, spoiling the overall appearance of the finish;
- It is necessary to align the seam elements and screw caps so that the areas are not visible;
- When installing gypsum plasterboards was done by beginners, usually there were some imperfections on the surface; a putty solution would help to repair them.
It is necessary to align the seam elements and screw caps so that the areas are not visible.
Purpose of drywall
Before understanding the question of whether it is necessary to putty drywall, let’s consider its main types and purposes:
- Standard plasterboard sheets. They are gray in color. The sheets are marked in blue or black. The thickness of the slabs is 6 mm, 9 mm and 12.5 mm. Sheets of 12.5 mm are used for cladding walls and installing partitions, and the rest for installing arches.
- Moisture-resistant plasterboard sheets. They come in green. Designed for use in rooms with high humidity.
- Fire-resistant plasterboard sheets. They can be recognized by their red or pink color. Equipped with reinforcing elements that prevent the spread of fire in the room. They are used in production, for arranging attics, ventilation shafts, etc.
- Combined plasterboard sheets. They combine both moisture resistance and fire resistance. The surface of the sheets is green with red markings.
Tools at work
Do-it-yourself drywall putty under wallpaper also involves purchasing tools that will be used during the process. High-quality and suitable options should be used that can facilitate application. To make it easy for a beginner to cope with a task, which is more difficult for him than for a professional with extensive experience.
The list is not very large, so you won’t have to spend a lot of money. You need to prepare the following tools:
- Spatulas, you will need several, differing in size;
- Roller;
- A knife with a sharp blade to easily remove the chamfer;
- An electric drill with an attachment for preparing solutions, or a construction mixer;
- Rule;
- Container for mixing the composition.
Professionals note that the best result without stains will be provided by a stainless steel metal spatula.
High-quality and suitable options should be used that can facilitate application.
Surface preparation
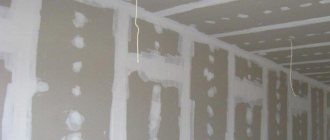
Do-it-yourself puttying of walls under wallpaper on plasterboard begins with the preparatory stage. Clean sheets of dust. Inspect the surface, identifying the protruding caps of the screws; it is easier not to miss the convex barriers by running a spatula along the base.
The following actions are performed:
- Found screws that interfere with the evenness of the sheet are screwed deeper into the sheet under the top layer with a screwdriver.
- If fasteners are found to be screwed in too deeply, they are unscrewed and installed in another place.
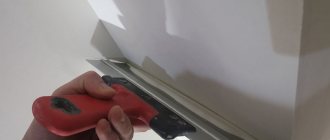
- If there is no special chamfer on the edges, then you can do it yourself. They are cut at an angle of 45 degrees, this will help improve the filling of the joint with putty.
- The peeled layer of cardboard is cut with a sharp knife, and a primer will be applied to this area.
Self-tapping screws that interfere with the evenness of the sheet are screwed deeper into the sheet under the top layer with a screwdriver.
Surface primer
The technology for preparing the base includes priming. It is recommended to prime the surface; such treatment helps to reduce the consumption of the putty mixture, which will lie on the primed wall more easily and adhesion will be higher.
You should choose a primer solution that is suitable for substrates that have a strong penetrating property for liquid solutions. The primer coat must be applied to all areas, leaving no gaps. Corner and joint areas are especially well impregnated in order to process them efficiently. As a standard, a single-layer primer is sufficient, but if the work is carried out in rooms with high humidity, then two layers can be done.
It is allowed to proceed to puttying only after the primer layer has completely dried, so that the compositions do not mix.
Such treatment helps to reduce the consumption of putty mixture and adhesion will be higher.
The procedure for puttingtying a wall
In order for the putty to be more securely attached to the drywall sheets, they must be treated with a water-based primer. It is enough to use a roller to go over the entire wall twice, waiting until the first layer of primer dries. When the second layer has dried, you can mix the putty for work.
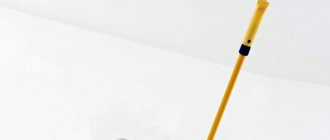
It is most convenient to apply the primer using a roller with an extended handle.
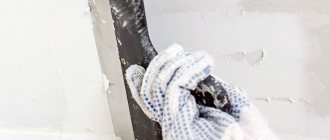
Using a small spatula, apply the solution in an even layer onto the large one. After this, the solution is spread over the wall with wave-like horizontal movements. You need to rub it into drywall in a thin layer.
You need to work with a small amount of material so that it does not bulge when spread on the drywall. The solution is applied over the entire wall in an even layer, after which it is allowed to dry.
It is recommended to start work from the least visible corner of the room. The further the work progresses, the more thorough it will become, and all the flaws will remain where they are least visible.
Plasterboard putty under wallpaper should be applied in two layers. Moreover, there is no need to prime, because a kind of fur coat has formed on the first layer, which will improve the adhesion of the second layer. A new layer is applied in the same way as the first one was applied. After this, the surface should dry (usually wait until the next day).
The dried surface has many roughnesses, sagging and bumps (the less experience, the more such defects). But all this can be easily eliminated with grinding. You can use a regular grater with sandpaper placed on it. The entire wall is sanded and becomes smooth, just right for wallpapering.
A special grater for attaching sandpaper to it
Now you know how to putty drywall under wallpaper correctly. However, there are certain difficulties with working in corners, so we will dwell on these points in more detail.
Applying putty
Puttying the surface involves several separate works to obtain a smooth base. It is necessary to get rid of scratches and deep-seated defects on the sheets, cover areas where screws are screwed in, process seams and joints, and work with corners.
The putty layer is distinguished by its ability to shrink after drying, for this reason the thickness of the application is made with a margin for it.
Areas with self-tapping screws are closed by moving a spatula in the form of a cross, this helps to fill the recess efficiently. Working with seams includes preliminary gluing of reinforcing mesh. It is necessary to ensure that the groove is located in the middle of the sickle. Afterwards you can begin to putty the seam area, using two spatulas. The principle of operation is that a narrow tool is moved from top to bottom to cover the seam with putty, and a wide type of spatula helps to even out the application of the solution.
Working with seams includes preliminary gluing of reinforcing mesh.
We putty corners - a special approach
Processing corner areas has its own characteristics; in order to cope with putty yourself, you need to take these nuances into account. The process is carried out according to the following scheme:
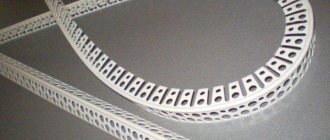
- A perforated corner for right angles is selected for this area; you can also use a plastic profile designed to work with curved surfaces. The material is applied to the area where it will be installed, and the boundaries are outlined with a pencil.
- According to the drawn marks, it is necessary to create a recess; their thickness will be deeper than the thickness of the corner profiles.
- The created deep parts are covered with putty solution, then the profile is installed, monitoring the depth, it should be deeper than the sheets.
- The excess solution is leveled, after which a new layer is added, the task is to completely cover the profile with the solution so that it is securely fixed with putty.
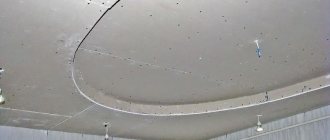
Work with internal corners is carried out using reinforcing mesh. The solution is applied along the grid on each side of the corner, doing this one by one, then it is easier to achieve uniform distribution of the solution. When this stage is completed, the treated areas with putty must be primed again. The use of serpyanka profiles helps to strengthen the corners, increasing their resistance to mechanical loads to which corners are more often exposed than other surfaces.
Work with internal corners is carried out using reinforcing mesh.
External and internal corners
External and internal corners on plasterboard walls and partitions are made using:
- reinforcing paper;
- serpyanka;
- perforated aluminum corners;
- special metal corners Shitrok with paper.
There are different perforated corners, but it is more convenient to work with the metal corner Shitrok
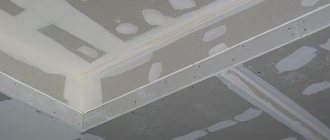
Paper and serpyanka are most often used to decorate internal corners - the junction of walls, as well as walls and ceilings. The technology is similar to seam sealing. A certain amount of putty is applied to the corner, paper or sickle is glued onto it, the reinforcing strip is pressed into the composition with a narrow spatula, and excess putty is removed. After this, they go through the corner again, applying a thin layer of putty on top.
Perforated corners are used to design external corners - slopes, protrusions, etc. First, a piece of the required length is cut. The metal is very thin, it can be cut even with ordinary large scissors, but if you have metal scissors, the work is easier. Edges are cut at an angle of 45° or less, rather than at 90°. So, when puttingtying drywall, the edge will not curl up.
Decorating the outer corners of plasterboard walls using a perforated corner
Putty is applied to the outer corner on both sides in small islands approximately every 10 cm (can be done in a checkerboard pattern). A perforated corner is pressed into the solution, its installation is checked whether it is vertical or horizontal, and adjusted. Use a spatula to pick up excess mortar, aligning the edges in one plane with the surface of the sheet. The installed corner is left for some time until the putty dries, after which it is sanded and puttyed again if necessary.
What is different about the metal corner Sheetrock? Thin strips of metal are applied to a paper base. They are more rigid than simple reinforcing paper, but it is more convenient to work with them than with conventional perforated ones, since due to the presence of paper the transition to plane is smoother.
Sanding seams and corners
Sanding can be carried out minimally when the preparatory treatment of seams and corners with putty was carried out carefully, and the leveling of the layer was done efficiently. Reducing the amount of sanding will help avoid large amounts of dust and also save time.
Dust after sanding the wall is released in its smallest fractions, which fly throughout the room from any movement. Professionals advise placing damp rags on the floor to contain dust. Also, close the doors with a damp cloth to prevent dust from going into other rooms.
First, using a sharp spatula, which should not have any irregularities, remove the protruding elements. At this stage, it is sufficient to use a grinding tool with 180-200-size cells. To identify uneven areas, a flashlight is used to illuminate the surface, the illumination is done at an angle, then the shadow will show all the defects. But it is not necessary to achieve a perfectly smooth wall now; it is not required for wallpaper.
The technician must wear safety glasses and a respirator to protect against flying dust. It is also advisable to wear gloves.
After applying the primer solution to the entire wall, dust particles settle throughout the room, and they will worsen adhesion to the material.
Sanding can be carried out minimally when the preparatory treatment of seams and corners with putty was carried out carefully, and the leveling of the layer was done efficiently.
Finishing
Finishing putty is available ready-made or in the form of a dry mixture. If the second option is chosen, then it is first mixed with water according to the manufacturer’s instructions written on the packaging. The result should be a creamy solution. The tool is a wide type of spatula.
The movements are made wide, trying to apply the composition in a thin layer, and level it as much as possible over the surface. In this case, a slow pace is chosen to obtain a high-quality and even result. If sagging on the base remains noticeable, they are removed using sandpaper.
After the area has been completely processed and all imperfections have been eliminated by sanding, the dust is removed and a layer of primer is applied. For an ideal result, you can use a two-layer putty, but most often one layer is enough before wallpapering; for painting you need a more even result.
The movements are made wide, trying to apply the composition in a thin layer, and level it as much as possible over the surface.
Calculation of putty consumption
Drywall is most often installed using the frame method, and at this stage the number of required sheets and profiles is calculated. When working with surfaces, you need to decide how many bags of mixture you will need. First, calculate the total area of the treated surface.
Afterwards, they will find out the average consumption of putty, which is prescribed by the manufacturer on the label. Usually the millimeter layer is taken into account. Multiply the area by the consumption rate, and the thickness of the layer and their number. The result is obtained in kg/sq. m of surface.
It is recommended to purchase the mixture with a 10% reserve.
First, calculate the total area of the treated surface.
The article revealed the answer to the question: is it necessary to putty drywall before wallpapering? Do not neglect this stage, only then the finishing work will be carried out easily and will have a long-lasting result. And you can update the design without fear of ruining the gypsum board. There are many putty mixtures suitable for this material on the construction market, which create a good basis for wall finishing.
How to do it yourself?
It is necessary to prepare drywall for wallpapering step by step. First you need to prime the drywall.
Thanks to the primer, the putty will have better adhesion to the surface of the HA sheets, in addition, it will protect the material from the appearance of mold and mildew. The most common acrylic primer , however, each master has his own vision of the best option.
For work, use a regular brush. You should try to use it to distribute the primer over the entire plane of the wall as evenly as possible. After treating the entire wall, you need to wait until it dries completely, which takes 10-12 hours. All primers must be used in strict accordance with the instructions.
Advice
It is recommended to buy a concentrate of the composition - this will help you save money.
Gluing joints between sheets of HA using serpyanka . Serpyanka is a lavsan or fiberglass tape with an adhesive substance on the surface. In appearance it resembles a classic medical bandage. The serpyanka is glued as tightly as possible to the joints between the HA sheets, trying to prevent the formation of air cushions. If the process is going slowly, you can add a little PVA glue to the solution.
Starting putty. At the first stage, putty is needed to seal and hide the joints and screw heads. On the seams of plasterboard sheets with a non-standard chamfer (cut by hand), the corner should be trimmed with a knife, otherwise the solution may not penetrate inside properly. Serpyanka is applied over the seams.
The corners are puttied in turn - first one side, then the opposite. The caps of the screws, which look outward and spoil the view, are covered with criss-cross movements. After the first layer has dried, re-application is carried out.
The corners of drywall need to be covered using a special perforated corner . Here is the algorithm of actions:
- Having measured the required length, the corner is cut off;
- a layer of putty is applied to one of the joining surfaces;
- the cut corner is applied and pressed tightly;
- the side of the corner should be pressed;
- adjust the overlap so that the angle is strictly along the line;
- putty is applied on top of the perforated joint.
Finishing putty. At this stage of work, two spatulas are used - a narrow one and a wider one. The first one acts as a kind of assistant - it is used to apply the mixture to its larger brother and remove excess from it.
A large spatula is needed directly for puttying the surface . They do this from wet to dry, that is, the movements begin on a dry surface. You should not start from a damp place because stains will form on the surface and it will become uneven.