Choice of putty
Preparing plasterboard ceilings for painting or other types of finishing begins with choosing a suitable material for puttying. The final result and appearance of the ceiling will directly depend on its quality and technical characteristics. It is better to purchase putty from a well-known brand that has proven itself in the construction market. When choosing, you need to pay attention to the following factors:
- The mixture is ready for use. All putties are divided into dry and ready-to-use (paste-type). The former are much cheaper, can be stored sealed for a long time, but require mixing with water before use. Ready-made compositions can be applied immediately, simply stirring with a spatula to avoid delamination. Usually their price is an order of magnitude higher, so such products are used for finishing small areas.
- Purpose. Starting solutions contain coarse fillers. They repair large defects that were formed during the installation of fasteners, and also eliminate cracks and chips in drywall sheets. Finishing putties allow you to completely putty a plasterboard ceiling. They have a fine-grained, even texture and eliminate minor defects, preparing sheets for painting. Also in stores there are universal mixtures that can be used at any stage of working with drywall.
- Composition of the material. Gypsum putties are snow-white, smooth, easy to apply and spread over the surface, but due to strong moisture absorption they can only be used in dry rooms. Puttying a plasterboard ceiling with cement products is carried out in wet rooms - in the kitchen, bathroom, indoor pool, etc. Polymer putties have proven themselves to be the best, having high moisture resistance and excellent strength properties, although their price is an order of magnitude higher than the cost of mineral mixtures.
Composition for sealing gypsum board joints
And then the nuances begin
The usual workflow looks like this:
- installation of a plasterboard ceiling;
- primer and surface putty;
- painting the ceiling.
After installation, the structure should acclimatize in the room for several days
. However, this procedure is erroneous. Because before finishing work, drywall must have time to “get used to” the new microclimate. So the right thing to do is to leave the ceiling hanging in this form for at least 10 days after installation for acclimatization.
After this, puttying begins.
Calculating the consumption of putty for a plasterboard ceiling
Since the gypsum board sheets themselves are smooth, the putty does not need to be applied in a thick layer. Material consumption will be minimal, although the exact figure is largely determined by the qualifications of the craftsman, the composition of the mixture, the quality of base preparation, and the number and depth of defects from fasteners.
Typically, no more than 0.5-1 kg of mass is consumed per 1 square meter of area with a layer thickness of 0.5-1 mm. For a double layer, the amount of putty will double. In addition, to seal the seams, approximately another 0.5-0.6 kg of product will be spent per square meter of area (depending on the number of joints). If the installation was carried out using large sheets, the material consumption will be reduced.
Tools and materials for work
To putty a plasterboard ceiling, you need to buy the proper amount of putty, as well as a number of tools, devices and consumables:
- plastic bucket for mixing dry putty;
- several spatulas of different widths (5-25 cm);
- sandpaper or abrasive mesh with different grain sizes for sanding the starting and finishing layers;
- plastic holder for sandpaper or block;
- construction mixer or drill with a mixer attachment;
- sharp construction knife;
- a tray and a roller (or brush) for priming the ceiling;
- deep penetration primer (for wet rooms - with the addition of antiseptic components);
- sickle tape up to 5 cm wide;
- rule for cleaning plaster over a large area (about 60-70 cm in size);
- screwdriver or screwdriver;
- personal protective equipment - gloves, goggles, respirator.
It must be remembered that for complete cladding of gypsum board sheets, only the finishing composition is used. Starting materials are not suitable for this purpose, and they are purchased only if it is necessary to repair significant chips and holes from fasteners.
Nuances at work
To get a good result from the work done, you must adhere to the following recommendations:
- Plasterboard puttying for painting is carried out at temperatures from +5 to +30 degrees.
- Avoid direct sunlight when leveling.
- To prevent the putty from forming cracks after application, it is important to follow the work technology. A common mistake is an incorrectly prepared solution.
- Cracks can form when applying the mixture in a layer of more than 1.5 mm at a time. Only the use of a primer at each stage of work will allow for a thin application.
- Be sure to wait until the putty has completely dried before applying the next layer.
- Do not allow drafts in the room.
Well, in addition to following all the technology for applying the material, its high quality remains important, so purchase putty only from trusted manufacturers.
Surface preparation
Before finishing work begins, the suspended structure must remain undisturbed for at least a week. This is necessary for the gypsum board sheets to finally take shape and occupy their final position. Also, during downtime, the ceiling covering will adjust to the existing temperature and humidity levels.
During the preparatory activities, the fastening points of the self-tapping screws, with the help of which the sheets of drywall are mounted, are covered. First, carefully inspect the surface of the ceiling and evaluate the correctness of screwing in the fasteners. If the technology has not been violated, then their caps are slightly recessed inside the gypsum board. The cavities that appear are hidden with a plaster mixture. Untightened screws that protrude above the surface are re-tightened using a screwdriver or screwdriver. Afterwards, mix a small amount of gypsum plaster (it dries the fastest), and spot-fill the cavities from the screws with the smallest spatula.
Preparing for finishing
Also, during the preparation of the ceiling for puttying, the condition of the places where the plasterboard is fixed to the frame guides is checked. The sheets must be securely fastened, not move away, and not sag down. Otherwise, the solution will not lie flat on the ceiling surface, and the integrity of the coating will sooner or later be compromised. If there are areas of cardboard detachment from the base, it is carefully trimmed, and the damaged area is sanded with the finest sandpaper.
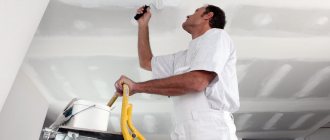
Then they begin priming the drywall before puttying. It is impossible to do without this stage, since the primer binds residual dust, strengthens the base, and gives the gypsum board sheets greater hardness and strength. In addition, the primer increases the moisture resistance of the ceiling covering and prevents the putty from peeling off in the future.
When priming, special attention is paid to joint lines, places where screws are attached and corners. This is where the most dust and dirt accumulate, which impairs the adhesion of the putty to the base. When planning to wallpaper the ceiling, apply 2 coats of continuous priming so that the finish remains as strong as possible and does not peel off along with the cardboard.
Ceiling primer
Water-soluble compounds are used to prime drywall. When applying them, it is important not to overdo it. If you wet the surface of the drywall too much, not only the top paper layer will get wet, but also part of the internal gypsum filling. This will lead to cardboard peeling, wrinkles, and later bubbles.
Prices for acrylic paint
acrylic paint
- The roller is placed on a long handle - this way you don’t have to constantly carry a stepladder or stand.
- The primer is applied in two layers. The first is along the long side of the drywall sheets, the second is perpendicular to the first. The surface of the ceiling is quickly rolled with a roller, without stopping in one place to avoid waterlogging. Dry the primer completely between coats.
- The joints are primed with a brush, since the roller does not penetrate into the cracks and gaps. Do the same with corners and junctions with walls.
Important! You cannot use alkyd-based primers for drywall - they destroy the paper layer, and later it will creep along with the paint.
Ceiling primer
Preparation of putty
Do not prepare the putty solution ahead of time - it will dry out and begin to set, so it will be spoiled. Ready-made mixtures are opened immediately before work, carefully stirred with a stick or a construction mixer at low speeds so that the mass does not separate, is homogeneous and as plastic as possible. Much more often, professionals prepare putties from dry mixtures. In this case, the process looks like this:
- pour the amount of water indicated in the instructions into a plastic container;
- pour dry putty in portions, beat the mixture with a mixer, making sure that no lumps or clots appear in it;
- finally mix the putty for a couple of minutes, achieving the consistency of thick sour cream;
- Allow the putty to stand for another 2-3 minutes, then begin applying it.
If the mixture is too airy, it means there are too many air bubbles left in it. It is ideal for continuous puttying, but for sealing seams it is better to grind the mixture on the board so that excess air comes out of it. In this case, adhesion to the coating will improve.
Jointing and finishing seams
Seams between factory semicircular thinned edges (PLUC) do not require jointing. This activity is carried out only on cut sheets in order to optimally fill the joints with putty so that there are no free cavities left inside. If jointing is not done, there is a risk of cracks appearing along the gypsum board seams. To embroider, cut edges are chamfered at an angle of 45 degrees using a knife. It is more convenient to operate using a plane. The width and depth of the chamfer should be approximately 3-5 mm.
Joint jointing before puttying
Mesh attachment
To putty drywall joints, reinforced mesh or tape is used, and the second option is much more convenient. The most effective tape is with a self-adhesive base, which is simply glued to the desired location, and then a thin layer of putty is applied on top. The serpyanka will have to be glued onto the putty mixture that has already been applied, carefully pressing it into the solution with a spatula. Afterwards the seam is leveled, made unnoticeable, and excess putty is removed. When working, make sure that an acute angle is maintained between the spatula and the ceiling, and that no threads stick out from the tape.
Some craftsmen prefer to use paper tape instead of serpyanka. Working with it looks similar:
- fill the seam with putty, without leveling it, but only removing obvious excess;
- after passing one joint, unwind the paper tape and apply it to the putty;
- cover the entire seam with tape, cut off the excess;
- take a wide spatula, press it into the tape as tightly as possible, but carefully;
- remove the excess mixture onto a second spatula and put it back into the container;
- Immediately apply a second layer of putty and smooth it thoroughly.
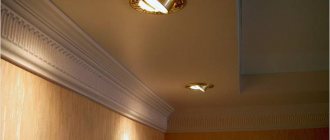
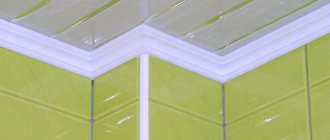
Corner processing
Often, a plasterboard ceiling is a complex structure with internal and external corners. In this case, you will have to additionally buy perforated corners made of metal or plastic to reinforce the corners. This is especially important if the latter will not be subsequently covered with finishing - baguettes, plastic profiles.
Installation of perforated corners
The internal corners are reinforced with sickle tape, securing it from the center line and to the sides, and then covering it with a thin layer of putty. The profile is attached to the outer corners with gypsum mortar, temporarily fixed using self-tapping screws or 20 mm nails. The corner joints of the sheets are also sealed with serpentine and leveled with a special corner spatula.
Applying finishing putty for painting
You can skip the complete puttying stage only when subsequently gluing the ceiling with thick wallpaper or ceiling tiles, which is rarely done. In other situations, it is important to thoroughly putty the surface, and only then subject the gypsum board sheets to final finishing. If the work technology is strictly followed, the ceiling turns out to be perfectly flat, and the layer of putty can be thin. If there are installation errors or plane defects, additional application of the starting mixture will be required.
For puttying you will need a new or perfectly clean spatula. The presence of dried grains of the solution is completely excluded, as they cause scratching of the surface. Scoop up the putty with a small tool, transfer it to a wide spatula, and then quickly distribute the mass, stretching it over a large area at once. You can also apply a rule at this stage.
They start working from the corner of the room, move along the plane, each time slightly overlapping the last layer. After passing the entire ceiling, allow the putty to dry completely. On the second day, you can begin stripping the layer and, if necessary, reapplying the material.
Recommendations for puttying plasterboard ceilings
For work you need to choose only high-quality compounds. A good solution is easier to work with and has a greater chance of successfully filling the surface yourself. Do not neglect the starting putty. The final result will depend on the quality of work at the initial stage.
You need to check the work carefully, because any minor or small flaw can ruin the entire appearance of the structure after painting. It is better to entrust ceiling putty to professionals. Self-plastering of the ceiling can be done after competent study of the technology and process of working with plasterboard structures.
Surface grinding
Rough grinding of the starting layer or individual areas is carried out with coarse sandpaper. The final grouting is done using fine sandpaper attached to a grater or block. First, put on goggles and a respirator and ensure high-quality ventilation in the room, otherwise dust may enter the respiratory tract. It is also worth placing a directional light source next to the surface being treated, which will allow you to immediately see all the errors and irregularities. They are carefully rubbed with sandpaper until perfectly smooth.
Sanding the ceiling for painting
Do-it-yourself finishing and puttying of a plasterboard ceiling does not present any serious difficulties. Even a beginner will be able to master this technology, which will allow the work to be completed in a short time and save a significant amount of money.
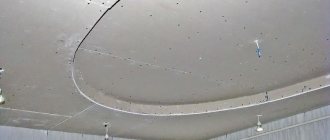
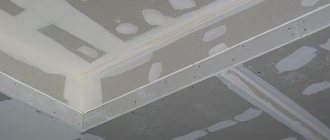
Each seam has its own technology
The next step is sealing the seams. Keep in mind that there will be two types of seams on a plasterboard ceiling. Those that are formed by natural joints of sheets (factory), and those that appeared due to manual trimming to obtain the desired design. Processing methods are slightly different.
Direct factory seams are filled with universal putty so that a small depression remains. It will serve as a guide for reinforcing the seams with serpyanka - a special construction tape. Otherwise, you can easily “lose the right course” and stick the tape next to the seam.
Serpyanka is glued to the seam, slightly embedded in the plaster. The mixture is applied to the tape in such a layer as to level the seam with the rest of the surface. It is convenient to work with a small spatula.
It will not be possible to reinforce cut seams: after this, bulges will form on them, which will require a thick layer of finishing putty. Therefore, they are first widened and deepened, cutting them at an angle of 45°. Then fill with the mixture and level with a spatula. Do this in two passes, allowing each layer to dry.
Screw marks and seams have been repaired. Ahead - primer and plaster
You can’t leave more than one seam unattended.
The further course of work will be common to both types of seams - the dried surface is thoroughly sanded and cleaned of dust.
Before you start sanding the ceiling, keep in mind that this process is dusty and dirty. Therefore, it is correct and safe to wear goggles and a respirator to protect your eyes and respiratory tract, and cover doorways with a thick, damp cloth. Otherwise, cleaning after such repairs will take a long time.
Tip: if the project provides for a multi-tiered ceiling structure, it is more convenient to use an angled spatula to seal the seams. This work must be done efficiently and carefully, otherwise unevenness will appear both during the application of plaster and during the painting process.