Drywall is an easy-to-use material that allows you to quickly finish an apartment. In this case, the necessary evenness of the walls and even the ceiling is achieved. But at the joints of the plasterboard sheets, seams form; on each element there are many recesses from self-tapping screws. In order to ultimately make the surface perfectly smooth, drywall putty is used. Let's try to understand the choice and technology of applying this material to plasterboard walls.
Choosing putty for drywall: dry mix or ready-made?
Putty mixtures can be dry and ready-made. If the question is which mixture is better, then when answering it you need to consider several factors:
- At the same level of quality, finished putty is more expensive.
- Dry putties last longer and are less demanding on storage conditions. It should be taken into account that they reach stores, passing through many warehouses; as a result, the finished mixture may turn out to be unusable within a couple of months after purchase.
- The dry mixture must be prepared correctly, achieving the desired consistency and absence of lumps; beginners may have difficulty with this process. In addition, you will need a special tool - a mixer or a drill with an attachment.
- Dry putty can be made thinner or thicker depending on the purpose of use. For example, it is easier to cover joints and seams with a thicker solution; for the finishing layer, the putty should be more liquid than for the starting layer.
- Finished putty that has been left in an open container for some time cannot be stored.
Advice. To save the finished putty until the next cycle of repair work, you do not need to scoop it directly from the bucket, but put aside the amount required for work in another container. The bucket containing the unused remainder must be tightly closed. In this case, the finishing material can be stored for another six months or even more.
Thus, ready-made putty is more convenient to work with and does not require preparation, so it is well suited for beginners, but dry putty has a lower cost and allows you to adjust the consistency depending on your needs.
USEFUL INFORMATION: Types of kitchen hoods: what are they and how to choose?
Tools for working with putty
It is very important to use the right tools when working with different types of putty, which are best suited for a given situation. This may seem like a minor aspect at first glance, but it is actually very important.
There are two different types of spatula that are used in different situations during putty - wide and narrow. Branded spatulas are better suited for the job than others, they even make the work less labor-intensive. A wide spatula is used for basic work, and a narrow one is an auxiliary tool for situational situations.
And it’s also worth remembering that if you use dry putty, then in some cases you need to use water to dilute the mixture, and in others you need to use a primer. Be careful with this aspect and always follow the instructions carefully.
If, after leveling the wall with putty, it is still not level enough, you can use a special aluminum profile. It is used to straighten curved non-plasterboard walls. Together with putty, it can even out any unevenness in different walls. This same aluminum profile is frozen vertically along the primed surface along the entire wall, and after that a layer of putty is applied. In this process, the profile serves as a support.
Start or finish?
For high-quality finishing of a plasterboard surface, one type of putty is not enough. For sealing seams and continuous puttying, different mixtures are used:
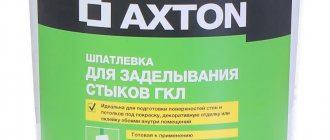
- For joints and seams, a mixture specially designed for these purposes is used - “Knauf Uniflott”, “Knauf Fugen”, “Volma Shov” - or, at worst, a regular starting putty of good quality.
- To putty the entire surface of the gypsum board, use a starting and then a finishing mixture or a universal one, which can replace these two types.
Therefore, if you are wondering which putty to choose for drywall, the best solution would be to buy a universal mixture and a special mixture for joints.
What is the maximum layer of putty that can be applied to drywall?
When you are thinking about renovating your home, many questions always arise. For example, how to install drywall correctly, whether you can do it yourself, whether it needs to be primed, and what putty to buy. The drywall itself is smooth and even, but it comes in certain sizes, so it is impossible to avoid joints between them.
These irregularities, as well as the screw heads that are visible, must be sealed with putty. For drywall, gypsum plaster is best suited. Polymer has also proven itself well. If you can afford it in the price category, then you can take it. Large construction stores usually have a huge selection of everything - not only putty, but also other accessories for repairs.
Therefore, it is very easy to make a mistake and buy something that is not exactly what you need. How to choose the right putty? First you need to understand what it is.
Firstly, among the many types of putties, you will immediately understand that not all are suitable for your purposes. There are putties for ceilings and floors, there are those for covering up cracks and chips, and there are generally purely decorative ones that will not fulfill either the first or the second task 100%. This work is not difficult, but it takes quite a lot of time. First you need to decide on the putty.
Putty is a white powder-like substance that is used in construction. Using this material, smooth walls, floors and ceilings are created. You can apply paint or wallpaper over the dried putty.
Putty mixture base
There are also putties:
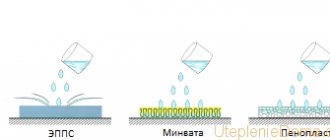
- Cement. This type of finishing is best suited for bathrooms, toilets and kitchens, since cement will easily withstand moisture.
- Plaster. Gypsum mixtures, on the contrary, are better to choose for dry residential areas, since gypsum does not tolerate high humidity.
- Polymer. This type of putty is the most versatile. It is best used for finishing plasterboard sheets. Polymer mixtures have high plasticity and fairly low consumption.
Under no circumstances should alkyd putty be used on drywall. This will lead to the destruction of the top layer of plasterboard sheet.
Such characteristics of various putties as frost resistance, fire resistance, etc. are not particularly important for the interior decoration of an apartment.
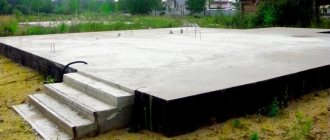
Preparation
First you need to prepare the walls for the putty process. The wall should be flat, without protruding screw heads (they need to be screwed in 1 mm deeper than the sheet level). It is also necessary to check the joints of the plasterboard: the layer of paper should not peel off from the internal filling of the plasterboard sheet. If this happens, carefully cut off the peeling area and sand the surface. Otherwise, drywall from such joints may fall off or bubble over time.
USEFUL INFORMATION: General principles for preparing mortar for plastering walls
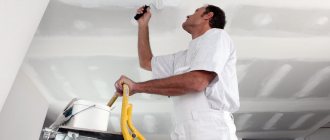
The next step is priming the drywall. This is best done with an acrylic-based primer mixture. It must be applied in two layers, using a wide soft roller to evenly cover the surface. The final layer of primer is applied only after the first has dried.
For ease of application, you can purchase a primer painted in a specific color. Then you will see exactly what part of the wall is already covered with a primer layer.
Pre-priming
After the gypsum board sheets are properly secured to the frame, you can proceed to treating their surface with a primer.
Priming is a mandatory procedure carried out before applying any finishing mixture to the supporting base. It is necessary to coat the surface with primer compounds before puttingtying the drywall for painting.
The primer increases the adhesion of materials, preventing the putty from peeling off from the base. In addition, primer compositions make it possible to create additional protection for gypsum boards from dampness and damage by fungi and mold.
Primer selection
Monitor the compatibility of primers and putties.
There is a huge range of different primer compositions on the modern market.
They differ in their content, scope and compatibility with other finishing materials.
Below is a table of compatibility of primers and putties of different types.
When choosing finishing compositions, it is necessary to take into account the compatibility indicators of primer and putty mixtures.
Otherwise, you may encounter such an unpleasant phenomenon as swelling, cracking and peeling of the putty layer from the base of the wall.
The chemical composition of a particular primer mixture can be found out by reading the technical instructions on the packaging or by consulting the seller.
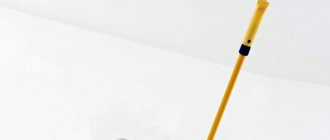
Applying the composition to the wall
Treat the surface of the gypsum board 2 - 3 times.
Apply primers to the wall using a roller or wide paint brush. To increase the effect of the treatment, it is recommended to apply the primer in 2-3 layers. In this case, each of the subsequent layers should be applied only after the previous one has completely dried.
The time for complete drying of the primer layer depends on the type of mixture, temperature and humidity in the room and can range from 2 to 12 hours.
When purchasing a primer composition, you should remember that you cannot coat plasterboard sheets with alkyd primers. These mixtures are not compatible with the cellulose contained in the cardboard covering of gypsum boards. This can lead to swelling and cracking of the sheet surface.
When the entire surface of the wall has been treated with a primer mixture, you can proceed to the process of applying the putty composition.
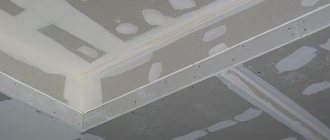
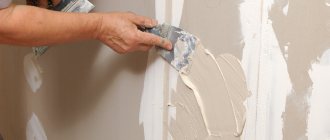
Processing of joints
Puttying plasterboard walls should begin by filling the joints, which are glued with reinforcing tape. Stir the dry mixture until it becomes thick sour cream.
A layer of putty is applied so that all seams and joints are completely filled with it. The excess is carefully removed with a spatula. After applying the first layer, you need to wait until it dries and apply another layer of the mixture to the joints. And after the putty has completely dried, it can be carefully sanded.
If in some places a sheet of plasterboard is adjacent to a plastered wall, the seams between them are glued with a separating polymer self-adhesive film.
Here you can also putty the heads of the self-tapping screws - this is done with criss-cross movements to fill the holes as tightly as possible.
Putty layer: 8 questions on wall putty technology
The starting one differs from the finishing one in the coarse grinding of the filler and, accordingly, slight shrinkage. It is designed to eliminate relatively serious foundation defects (cracks, seams, potholes, small blockages). The thickness of the putty layer can reach 5 millimeters. Apply it with a narrow spatula to a wide one and apply it to the wall with sliding movements.
Periodically change the direction of movement to perpendicular: this way you can remove stripes from the spatula. Not necessary, but desirable. The fact is that the seams between the additional gypsum board sheets cut in place are thick and make the wall uneven.
Puttying the entire sheet with a millimeter layer will completely hide the seams.
- Nitro enamels, oil and alkyd paints are removed with a spatula after softening with a remover or heating the surface area with a construction hairdryer;
- Whitewash and weak plaster can be removed without dust with the same spatula, having first moistened it generously with water twice at an interval of 10-15 minutes;
- Water-based paints can be removed by sanding.
Let's first separate the flies from the cutlets. The putty is intended for finishing the surface and preparing it for painting or wallpapering. To level out significant defects, there is another material - plaster.
Putty corners
This is the most labor-intensive work, which is performed in two stages.
First, one side of the corner is puttied. The surface must be carefully leveled, especially in the part that is closer to the corner. After applying the second layer and drying, you can begin working on the second side of the corner. This way you need to create a perfectly even drywall joint. Here the putty is applied in a thinner layer.
In order to create a perfectly even corner, you can use a special corner spatula.
An aluminum construction angle must be attached to all window and door slopes to create an even and sufficiently rigid angle. You can attach it to the wall using a small amount of putty mixture. The corner must be cut to fit the dimensions of the slopes and installed around the perimeter of the openings or other external corners.
USEFUL INFORMATION: Types of devices for carrying plasterboards: handle and belt, trolley, mounting support
After installing the corners, they are covered with putty so that the mixture penetrates into all the holes. Using a wide spatula, the applied layer is leveled over the corner and surface of the plasterboard sheet.
External and internal corners
External and internal corners on plasterboard walls and partitions are made using:
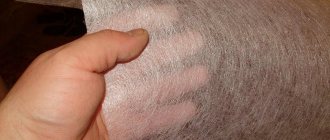
- reinforcing paper;
- serpyanka;
- perforated aluminum corners;
- special metal corners Shitrok with paper.
There are different perforated corners, but it is more convenient to work with the metal corner Shitrok
Paper and serpyanka are most often used to decorate internal corners - the junction of walls, as well as walls and ceilings. The technology is similar to seam sealing. A certain amount of putty is applied to the corner, paper or sickle is glued onto it, the reinforcing strip is pressed into the composition with a narrow spatula, and excess putty is removed. After this, they go through the corner again, applying a thin layer of putty on top.
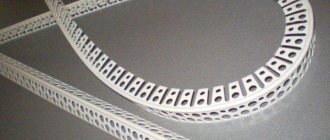
Perforated corners are used to design external corners - slopes, protrusions, etc. First, a piece of the required length is cut. The metal is very thin, it can be cut even with ordinary large scissors, but if you have metal scissors, the work is easier. Edges are cut at an angle of 45° or less, rather than at 90°. So, when puttingtying drywall, the edge will not curl up.
Decorating the outer corners of plasterboard walls using a perforated corner
Putty is applied to the outer corner on both sides in small islands approximately every 10 cm (can be done in a checkerboard pattern). A perforated corner is pressed into the solution, its installation is checked whether it is vertical or horizontal, and adjusted. Use a spatula to pick up excess mortar, aligning the edges in one plane with the surface of the sheet. The installed corner is left for some time until the putty dries, after which it is sanded and puttyed again if necessary.
What is different about the metal corner Sheetrock? Thin strips of metal are applied to a paper base. They are more rigid than simple reinforcing paper, but it is more convenient to work with them than with conventional perforated ones, since due to the presence of paper the transition to plane is smoother.
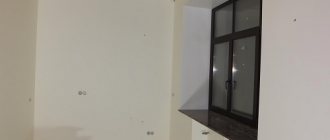
Surface putty
After you have processed all the joints of the plasterboard sheets and the corners of the room, you can begin to putty the entire surface of the wall.
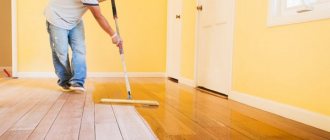
How to putty walls? The first layer of the mixture should not be too thick; the wider the spatula, the better. After the first layer has dried, the second is applied, and then it is important to sand the surface of the entire wall well with sandpaper.
At the last stage, the putty wall is treated with a primer in two layers in exactly the same way as the first time.
This method will allow you to level the plasterboard walls before finishing them.
Why putty drywall?
Nobody wants to work extra hard, waste precious time on unnecessary work, so we often wonder - is it possible to do without finishing putty, because it is much easier to putty only with rough putty? Yes, in some cases it is possible, but not in all.
Every time after working with drywall, we have to seal the joints, hide the screw caps, and smooth out any unevenness that arose during installation. Also, long-term storage of gypsum boards or improper transportation can also make their own adjustments.
, which is one of the flagships of our market for the production of drywall, makes it possible to avoid puttying gypsum board sheets when using them under wallpaper or tiles, not counting only the corners, joints and the screw heads themselves.
They achieved this goal with the help of a special primer - water-dispersion paint diluted with water. This primer on the surface of the sheet being processed turns into a thin film layer that combines perfectly with any type of adhesive, and also protects the drywall from damage if the wallpaper breaks.
Therefore, the question of how to putty drywall is irrelevant if you choose.
Nuances of putty for different finishes
There are several nuances when processing plasterboard sheets with putty, on which the quality of the final finish will depend:
- If you plan to stick paper wallpaper on the walls, then you need to stir the putty with special care. You also need to take care to eliminate all possible flaws in the wall, since all the unevenness and cracks will appear through the wallpaper.
- When using heavy wallpaper in finishing, on the contrary, you need to create a rough layer of putty. This will make it easier to stick the wallpaper and not be afraid of it peeling off due to better adhesion of the materials.
- The most difficult thing is to putty the walls for further painting. In this case, the surface must be perfectly flat. To achieve this effect, you can examine the wall under the light of a lamp (the shadow will reveal small irregularities).
Finishing plasterboard walls with putty will allow you to prepare the room for finishing with any material. The main thing is to follow the technology and act as carefully as possible. Then you don’t have to worry about the durability and beauty of your walls!
Plastering drywall: what and how to do it
- ready-made dry or paste mixture;
- container for preparing dry formulations;
- primer;
- spatulas with narrow and wide blades;
- mesh for painting work;
- paint brush (preferably several different lengths);
- construction knife;
- devices for grouting.
The seams of plasterboard sheets must be filled with putty and leveled along the entire length. To do this, it is recommended to use narrow spatulas. Then the solution is covered with a reinforcing mesh, which needs to be pressed a little. Then the mesh needs to be completely covered with an additional layer of putty.
A spatula with a wide blade is already used here. When applying the primer mixture, any omissions are unacceptable, and the joints are glued with tapes (serpyankas), and then covered with special reinforcing compounds. On a dry surface, such lines are erased, removing slight deformations and sagging. The actual difference between putty and plaster comes down to the grain size of the material. By reducing it, developers make the applied layer thinner, and it also becomes less rough.
It should be taken into account that in any finishing material the actual size of the fractions is less than the maximum specified by the manufacturer. But at the same time, when producing putty, the raw materials are sifted more thoroughly than when producing plaster.