Why do deformities appear?
Repairing masonry is a specific set of measures, which includes a general assessment of the structure, removal of certain elements that have reached an unusable state, cleaning, preparation of mortar and restoration measures. All this is necessary to extend the operational life of the facility.
Considering the degree of destruction of the walls, one of the existing methods is used to restore it.
The main reasons for the destruction of brickwork are:
- the difference in the density of the soil composition, due to which the structure begins to subsidence;
- significant load impacts on the foundation;
- absence of expansion joints;
- negative impact of atmospheric phenomena and groundwater.
Why is it important to repair and restore on time?
If defects are not repaired in a timely manner, the wall may become unsafe in the future. It will have to be demolished and the brickwork re-done.
A few more consequences of lack of timely repairs:
- No energy saving.
- Reducing the strength of a brick wall.
- Destruction of the cladding.
- The appearance of mold, mildew and dampness.
- Heat loss.
- Freezing of brick walls in winter, which leads to its destruction.
This entire list of consequences will not be long in coming if you neglect repairs.
After a visual inspection of the masonry, it is recommended to call a specialist or begin restoration yourself. If you have no experience in repair work, then it is better not to take risks and leave the matter in the hands of professionals.
Stages of destruction
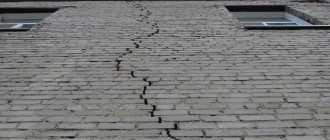
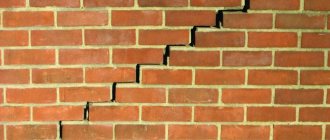
Under the influence of one or a whole complex of reasons, the strength of the masonry is impaired. Initially, tension is created in the walls, invisible to others due to the absence of obvious defects. Somewhat later, tonic cracks appear, which gradually unite into larger ones. To avoid serious damage, it is recommended to determine the volume of deformations and the causes of their occurrence in advance and take comprehensive measures to eliminate them.
Step-by-step repair technology
The first thing to do is to carefully remove all delaminated, cracked, crumbled seams . If the affected area is large, then all the grout is removed - then repairs will make sense. To do this, use an entrenching hammer with a long handle and a chisel or chisel.
It is set at an angle of 45 degrees or more, shockingly, and struck several times with a hammer on the handle of the chisel, thereby removing the old coating from the cracks. The work is long and requires patience.
Once it is completed, you can proceed to the main repair:
- Cleaning. Take a hard, large brush with synthetic bristles and carefully clean the joints of any debris that has formed, while simultaneously completing the previous work. If the brush does not fit into the cracks everywhere, you can use a small brush.
- Flushing. To prevent the brick from subsequently drawing water from the mortar or grout, the surface must be treated. To do this, connect a hose with clean water and carefully, under low pressure, pass through all the cracks where dirt was removed.
Preparation of the solution .
The mixture is prepared according to the instructions on the package. Often, this requires sifting sand through a fine metal sieve, clearing it of large impurities. Add cement in a 2:1 ratio. Then add water, achieving the consistency of thick sour cream. The solution should not be liquid.If you purchased a ready-made grout mixture, then pour 6 liters of water into a bucket and gradually pour out the grout, mixing with a drill with a “mixer” attachment. The consistency should be slightly thicker than sour cream. The grout or mortar is left to swell for a while - after which the repair can begin.
- Joining. The prepared solution is placed on a wide spatula. The tool is applied tightly to the gap. Using an additional spatula, the mixture is quickly pressed into the seams and closes all cavities. There should be no air remaining in the cracks, otherwise holes will appear, and over time the jointing will again become unusable.
- Vertical seams . They are filled most easily from the palm of your hand. The master holds a little mortar in his palm and quickly fills the vertical cracks with jointing. First, it is better to unstitch the vertical joints, then proceed to the horizontal ones.
When the grout has dried slightly, use a large brush again. They actively clean out excess mortar, making the brick beautiful and well-groomed. If during the application of the solution there is too much of it in the holes, it is important to immediately remove the excess material before it hardens.
Repair of brickwork seams - in the video:
Types of damage
In order to perform high-quality finishing of the brickwork, it is necessary to correctly determine the type of damage. These include:
- chipped areas, cracks, other mechanical defects;
- the appearance of deformations causing cracking and peeling of the plaster coating from the brickwork;
- the appearance of rusty spots, confirming the development of corrosion on metal embedded elements. Such phenomena have a negative impact on the structure and destroy it;
- protrusion of stones due to errors made during the laying process, the negative influence of weather factors.
Repairing a large vertical crack with liquid mortar
Pouring the solution
A long, wide, vertical crack in a low, non-load-bearing wall can be repaired more quickly by pouring grout into the crack instead of filling the cracks with thick grout. Clean the crack first. Prepare the solution in a bucket by adding enough water so that the solution flows easily through a wide funnel. Do not add more water than required - the more water in the solution, the more it will shrink as it hardens. Wet the bricks around the crack with a wet brush. Then seal the bottom of the crack with 300-500mm long strong adhesive tape. Pour the solution through a funnel into the sealed area of the crack (below). If necessary, push the solution with a stick. Fill the next area with the solution in the same way. And so on up to the top of the wall, but do not try to fill areas longer than a meter.
Installation of formwork for mortar
While the solution in the crack is wet, it must be held in place. Press the board onto the tape until the solution hardens (two to three hours). Install this formwork immediately after pouring if the tape does not adhere well, for example, to wet bricks. If the tape holds well, then the board can be installed after filling about a meter of crack.
Attention! This method should not be used when repairing a load-bearing or high wall. Even a narrow crack in such a wall can be a sign of structural weakness, and you should definitely consult a professional.
Brickwork repair: from fixing seams to filling cracks
House Brick Masonry Wall Repair
Recovery process
Let's figure out how to properly repair brick walls.
Necessary tools for successful completion of work:
- pneumatic hammer;
- Sander;
- boaster;
- jointing;
- jumper;
- trowel;
- scrap;
- pick;
- sledgehammer;
- wedges;
- electric drill;
- hammer, brush.
In addition, materials will be required to restore the seams in accordance with the chosen repair method.
Three ways to change the look of a brick wall
Brickwork can become the highlight of an interior if you work on it a little. Among the options for its transformation, the most popular are cladding, painting and artificial aging. The choice will depend on the initial quality of the surface and the style in which the entire room is decorated.
Cladding with brick panels
Often, even after professional repairs, an old wall looks unsightly, although there are no complaints about its strength. In the case when you don’t want to lose the texture, but you couldn’t bring the surface into decent shape, you can cover it with decorative panels that imitate masonry.
This can be base brick siding, panels made of polyvinyl chloride, MDF or gypsum, as well as clinker tiles or thin facing bricks. And thermal panels are perfect for finishing and insulating external walls.
The installation method for these materials is different:
- Wall panels are attached to the frame;
- The facing tiles are glued to the surface using glue.
Look at some examples of such materials and their applications:
PVC panels
Gypsum panels
Panels based on fibreboards
Facing tiles
Fineber – beige brick basement siding
Thermal panels for brick
Don't be afraid to experiment with materials, but always pay attention to their characteristics and application. For example, brick siding can be used for interior decoration. But gypsum tiles are not suitable for external cladding.
Painting
You can preserve the relief and transform the perception of space by painting the masonry. This technique is very common among designers, as it allows you to decorate a room in different styles depending on the chosen color and painting method.
But it should be remembered that subsequently it will be impossible to return the wall to its original appearance by getting rid of a layer of paint. Therefore, before making this decision, think carefully and look at examples of such interiors.
Accent wall in the bedroom
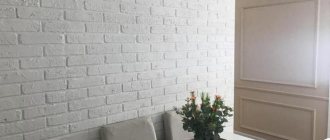
Living room with white wall
Elegant combination
Painted brick in a loft-style nursery
Transformation of the loggia
An interesting solution with a translucent coating
Oil paint will protect the wall from moisture
Partial dyeing in different colors
The choice of finishing composition is of great importance. When deciding how to paint sand-lime brick on the outside, pay attention to the following characteristics of the paint:
- Waterproof. It should protect the facade from precipitation and humid air.
- Vapor permeability. The wall must “breathe”, otherwise it will be damp, which will lead to mold.
- Resistant to fading due to UV rays.
- Resistance to alkaline environments, since masonry mortar containing alkalis can destroy the coating.
Facade paint for sand-lime brick, ceramic brick and stone
The requirements for paints for interior work are softer, so the choice is almost unlimited. The only thing that may upset you is the high price. But if instead of silicone or latex coatings you choose acrylic or ordinary slaked lime, the result will be no worse.
Advice. Brick is very hygroscopic, so before painting the masonry must be treated with an acrylic-based penetrating primer. This will save on paint.
One more tip. You shouldn't paint new walls. You need to wait at least a year for the leaching process to complete and for the masonry to dry out and shrink. Before painting, the walls must be cleaned of dust, dirt, salt deposits and mold and dried.
Aging
Many interior solutions require turning new, smooth and even masonry into old, time-worn ones. As you know, breaking is not building, and the problem of how to age a brick wall is much easier to solve than the reverse.
To do this, use the following methods (all in bulk or selectively):
- Treating the surface with abrasives - coarse sandpaper, a wire brush or even a sandblasting machine.
A grinder with a grinding wheel is also an option
- Installation of chips and dents. They can be done along the edges and corners of the brick or on its faces in a chaotic manner. Tools – chisel and hammer, hammer drill.
- Imitation of efflorescence using white paint applied with a sponge or swab, also in a random order. Or imitation of the remains of plaster.
A little putty and a putty knife will turn a new wall into an old one.
- “Dirtying” of the surface. Excellent black spots and stripes that will not crumble and stain clothes are made using a blowtorch, which is used to burn the walls until the color changes.
After this treatment, the walls will need additional protection. So that they do not collapse and can easily be cleaned, they are coated with a special oil or water-based varnish.
Visual inspection
First of all, an assessment of the technical condition of the object is carried out.
During the inspection of brick facades, the following problems are revealed:
- delamination of masonry;
- open faults;
- deviations from vertical position;
- destruction of individual stones in the brickwork of external walls;
- bulging of some areas with their subsequent destruction.
As soon as initial faults and deformations are discovered, the causes contributing to this should be identified and eliminated, and the situation should be continuously monitored. If this is neglected, cracks may form again after restoration measures.
Deformation processes should be monitored from the moment the cracks open by more than ten millimeters. The action consists of measuring the depth of the faults and installing beacons made of gypsum mixture or paper strips along problem areas.
When the wall is covered with plaster, the stones are exposed at the points where the beacons are placed.
Restoration of the brickwork of the facade begins if the exposed beacons signal that the phenomenon of deformation has disappeared.
Sealing cracks
Cracks, the degree of expansion of which does not exceed five millimeters, are sealed with a cement mortar mixture. Before repairs begin, the problem area is cleared of small debris and moistened. The surface is cleaned with a brush, a grinder or an installation that pumps air under high pressure.
In order for the restoration of the brick facade to be successful, and for the stone to firmly adhere to the masonry mortar, it is recommended to knock down its edges a little using a hammer.
Cracks whose width is five to ten millimeters are repaired in a similar way, only in this case a regular masonry mixture is used.
Places where the width of the cracks exceeded one centimeter deserve special attention. In this case, the repair of the brick facade of the building is carried out using various methods:
- Vertically located cracks are sealed with foam for installation work. It is blown into the cracks, cut out a couple of centimeters inward, and the gap areas are covered with a mortar mixture;
- horizontal cracks along the entire length at certain points are anchored using dowels and sealed with mortar;
- Partial dismantling of the old brick wall and repairs are being carried out. Part of the masonry from the top to the bottom zone is dismantled, the free area is sealed with restoration bricks placed in a “lock”.
Renewal of sutures
Weathering of delaminated mortar from the seams initially seems like an insignificant defect, but you need to know that water entering the room through damaged joints becomes the main reason for the onset of wall destruction.
The reasons for weathering of seams are different, and you should not waste time identifying them - it is better to take measures to eliminate the problem. The algorithm of actions is as follows:
- the seam areas should be cleaned of mortar residues using a special hammer or chisel, and sweep away the dust with a hard-bristled brush;
- the area prepared for repair is abundantly moistened;
- the seam is filled with an adhesive mixture and stitched.
Waterproofing
The main danger to the wall is water, and it is necessary to carefully protect the masonry from such a negative impact. After carrying out repair and restoration activities, it is necessary to devote part of the time to waterproofing measures, for which purpose special cement-based compounds are used.
The main condition for applying such compounds is a dry and clean surface.
If the wall previously had a covering layer of paint, which was damaged during repairs and also requires updating, the restored area is covered with a primer.
Stages of breaching the integrity of walls
If cracks occur, provide them with beacons.
When cracks or deformation occur, the first step is to find and eliminate the cause that is negatively affecting the building.
After this, monitor the building. Beacons are installed at the locations of cracks and the dynamics are monitored.
Repair work is carried out after eliminating the causes leading to destruction.
Connected cracks lead to masonry collapse
The destruction of masonry takes place in several stages:
- under the influence of negative factors in the building, tension arises that is invisible to a layman;
- microcracks form in individual bricks, then they expand to the width of a hair;
- cracks in the brickwork unite with each other and capture vertical seams, this leads to a serious violation of the integrity of the building.
Deformation can be determined using measurements, visually, by calculating the permissible load on the brickwork.
If you start repairs without understanding the reasons leading to destruction, then the violation of the integrity of the brickwork will continue.
Replacing masonry
Restoration of external walls is possible using one of the following technologies:
- counter drilling. Holes are drilled at a certain distance, placing them sequentially or in a checkerboard pattern. If the wall is thick, it is best to drill from both sides, along one axis. After this, the holes are filled with creamy hydrophobic compounds;
- dismantling of individual sections of the wall with subsequent restoration. This method involves financial costs. Its meaning is that the deformed area is dismantled, after which the restoration of the masonry begins with new brick intended for restoration;
- saw technology. The brick surface is sawn horizontally, the cut zones are caulked with materials that have waterproofing properties, the gaps are filled with a mineral-based suspension, which is intended to stabilize the statics of the brickwork. The repair method is considered effective, but is quite expensive;
- strengthening walls. A good option for preserving the integrity of a load-bearing wall and restoring its load-bearing capabilities. It is carried out using metal, composite, reinforced mortar or reinforced concrete frames.
Steel clip
This is a frame system made of large cross-section reinforcing bars, iron corners, steel strips, on top of which a metal mesh is fixed. After this, the surface of the wall is plastered with cement-based or polymer-based mortars, and the second method is more effective, since the polymer-cement based mortar mixture does not create additional load on the structure and increases its load-bearing capacity by sixty percent.
Use of composite materials
Such repair of seams and other damaged areas of the facade brickwork ensures the strength of the walls against vertical compression, shear and shear along the cross section. Carbon or glass fiber is used as a reinforcing material.
Reinforced concrete cage
Its components are metal reinforcement and concrete mortar. The main characteristic is considered to be excellent strengthening ability, but there is a significant drawback - the large mass of the structure, which creates an additional load on the foundation base.
The frames may be based on pilasters, meshes or reinforcement cages. The material is fixed to the brick wall with anchors or studs, and a mortar mixture is applied on top.
According to installation methods and purpose, rigid belts are divided into several types:
- local;
- general;
- a clip mounted around the entire perimeter;
- a belt used when tearing off a corner;
- a clip installed at the point where the wall breaks;
- a belt used when the inner wall moves away from the façade.
In case of destruction of brickwork, it is recommended to use a special brick stone for restoration work. It is made by firing; the material differs in the form of non-standard sizes.
Repairing a damaged wall
Replacing bricks
Remove any mortar from around the damaged bricks and use a chisel to break up any damaged or cracked bricks. If the damaged section of the wall consists of several bricks, remove the top ones first, then the bottom ones.
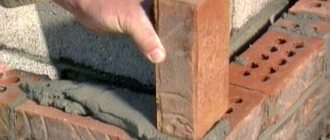
Use a brush to remove any remaining mortar and broken bricks. Wet the damaged area of the wall, as well as the new bricks, with water and lay them in the same way as if you were laying a new wall. Apply the mortar to the side faces of the bricks and lay them on the mortar, not forgetting to make a groove in it. When the mortar has set, unstitch the seams using the same method as used in the remaining seams of the wall. Keep the solution wet for three to four days.
Making a new opening
There are situations when do-it-yourself restoration of brickwork involves creating a new opening at the site of destruction. Sometimes this is easier to do than to completely repair the wall. The algorithm of actions is as follows:
- the ceiling must be reinforced with beams, supporting elements and wedges;
- the outer side of the wall is reinforced with strips resting on the stands;
- the support points for the beams are moistened and filled with mortar;
- the deformed area is dismantled and a brick opening is built in its place.
Emergency condition of the walls
Such a structure requires major repairs.
The fact that the masonry is in disrepair is indicated by the following changes:
- deviation of the wall in the vertical plane or its bulging by 1/3 of the thickness or 1/200 of the height;
- overhanging bricks, facing tiles peeling off from the main structure;
- cracks that cross more than four consecutive courses of brickwork;
- mechanical damage more than 20 mm deep;
- loss of integrity and delamination.
Restoring brickwork for these damages involves performing major repairs.
Recommendations
So, we figured out how to repair a bulging brick wall or other defect. Let us once again repeat the recommendations of experts who will help you in your independent work:
- determine the cause of the defect;
- monitor the dynamics of the development of cracks and other deformations;
- prepare everything you need for work;
- restore the integrity of the walls or carry out restoration work.
During the work process, proceed as follows:
- Before starting restoration measures, eliminate the causes that caused the identified deformations;
- When rearranging façade walls, be sure to use multi-tiered additional fasteners;
- removal of fasteners is permitted if at least one week has passed since the completion of the repair;
- an additional thermal insulation layer will not only create protection from cold weather and moisture, but will also hide the consequences of repairs;
- When filling cracks, use a trowel and a shield with a handle. Apply the mortar mixture from bottom to top vertically into cracks, and from left to right into horizontal cracks.
Correctly assess the scale of the problem and your own strengths, determine the nature of the damage. If you have the slightest doubt, seek help from experienced professionals.
Remember that only high-quality restoration guarantees the continued operation of the building without recurrence of problems.
Repair of brickwork seams
Seam cleaning
Using a plumber's chisel, cut out the mortar in the joint to a depth of about 16 mm. To ensure good adhesion, clean the surface of the bricks at the joint. Clean the joint thoroughly with a brush to remove dust. Attention: be sure to carry out this work wearing safety glasses.
Laying the mortar
Wet the seam with a brush and water or a hose with a spray gun. Place a 10 mm thick layer of mortar on the falcon (a wooden board with a handle to hold the mortar while working). Using the bottom plane of a cutting blade, which is smaller than a regular trowel, cut a thin piece of mortar and press it onto the seam. Since you are pressing the solution away from you, pick it up with the bottom plane of the cut. To fill long seams with mortar, you can use a flat surface jointer.
If you need to repair a large area, fill no more than two square meters with the solution at a time. meters of wall. Work from bottom to top and from left to right, being careful not to stain the bricks with mortar.
