- November 10, 2018
- Construction
- Ekaterina Komisarova
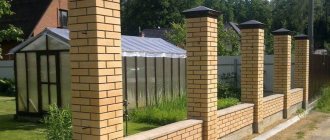
Today, a huge number of objects are being built in our country. When building brick walls, special attention must be paid to laying the corners. These elements are the basis for the construction of the building. It doesn’t matter what you are building – a cottage, a garage or a bathhouse. Errors made when laying out corners can disrupt the symmetry of the walls and negatively affect their stability and strength. In this review we will look in detail at how to lay brick corners.
Features of work
Let's look at this in more detail. Not all craftsmen know how to correctly draw the corners of a house. It is considered to be a fairly simple process, but in fact it has many features. You will have to choose in advance the dressing method, installation technique and even materials for future finishing. The load-bearing capacity of the walls will depend on the purpose of the building.
The brick has standard dimensions and correct geometry. Based on this, the design and calculation of the future structure is carried out.
The most important requirements for the technology of working with this material include:
- Using high quality components, strict adherence to proportions. Mortars must be prepared in strict accordance with the manufacturer's instructions.
- The solution should be evenly distributed between adjacent products and rows of structures. If this requirement is violated, excess mixture consumption and deviations from the level may occur.
- Control over the linear arrangement of rows, creating exclusively vertical or horizontal seams.
- Checking each corner and row with a building level.
Preventing the appearance of dampness
Following certain rules will help reduce dampness to a minimum and prevent its occurrence in the future.
- Laundry should be dried outside living rooms or with the hood turned on for air removal.
- When cooking, pots and pans should be covered with lids to prevent steam from escaping.
- In the bathroom, where the highest concentration of humidity is, as well as in the kitchen, hoods and ventilation openings should be regularly cleaned to remove excess debris, and these rooms should also be ventilated daily.
- In a private house, you can insulate the attic and also cover the walls with a waterproofing material, preferably with pores.
- All flammable substances that form a lot of moisture, in particular paraffin, should be used extremely rarely indoors.
- All rooms in the house should be ventilated daily.
- Correct errors in the heating system in a timely manner.
- Use a dehumidifier to reduce humidity. This household appliance can easily cope with the problem of dampness, and its compactness allows you to move the dehumidifier from room to room.
We recommend: Why do you need a level?
Low temperature operation
So what do you need to know about this? Weather conditions deserve special attention. Not everyone knows, but bricklaying can not be carried out at any temperature. Frost and heat can have a serious impact on the correct hardening of the building mixture. Winter work should be avoided due to the risk of freezing of the water in the solution and impaired hydration. At temperatures below -5 degrees, it is prohibited to use conventional brick laying methods. It is permissible to continue the construction of walls provided that the structures are heated and special frost-resistant admixtures are introduced. However, if you lack experience, you should not carry out work yourself in such conditions.
Which masonry mortar is better?
In order to provide the material with stronger and better adhesion, one type of solution is used. Builders distinguish three types of mixture:
- cement;
- cement-lime;
- sand-cement.
In what case is it better to use one or another type of solution, we will consider further.
Lime mortar has a warmer composition, however, unlike cement mortar, the strength is much lower. Due to the fact that this solution has poor resistance to destruction, it is used only in rare cases.
Cement mortar is considered the most durable. However, it is less warm and is characterized by high rigidity and inconvenient use. Heating a room built on the basis of cement mortar will require large energy costs when heating it.
Lime-cement mortar does not have such shortcomings as those listed above. It is considered the most durable, practical and elastic. To make this type of solution, quicklime is diluted with water and then strained to remove any lumps. Cement and sand are mixed separately, after which diluted lime is added and everything is mixed well. This type of mortar is used for almost all types of masonry.
The nuances of laying various types of bricks
This aspect deserves special attention. For full and hollow varieties of building bricks, the laying procedure will be approximately the same. There are special varieties of hollow bricks with holes that make work easier. This will greatly simplify the process for beginners. The type of dressing should be chosen in such a way that the voids are hidden inside the brickwork.
The most difficult thing is to lay out the facing material correctly. Such brickwork does not allow deviations from the width of the joints. They should be neat, clean and tightly filled. Traces of solution on the front surface are unacceptable, since this may cause the material to change its color. It is best to control the process of applying the solution using special templates. You can only knock out such a brick with a perfectly clean hammer.
The method of laying will depend on the size of the brick: for load-bearing walls - one, one and a half or two, for partitions - a quarter.
Brick laying process
We start laying from the corners, the rows of which are placed opposite each other at the same level. Why from the corners? Because the corners will serve as guidelines along which the walls will be laid out using a mooring cord. The cord is stretched between 2 adjacent rows of bricks that make up the corner. Therefore, it is very important to maintain horizontal and vertical angles running at the same level opposite each other.
First of all, you need to prepare the so-called “bed” from the solution. If you don’t have much experience, we recommend putting the mortar on one brick that you are going to lay. The thickness of the laid mortar should be somewhere around 20-25mm (by eye), so that when pressing the brick, the thickness of the horizontal seam becomes 12mm (standard horizontal seam). Apply the solution with a trowel. Our bed should not reach the edge of the foundation (or the underlying brick) by 20-30mm if we are going to open the seams, or 10-15mm if we are going to trim them. In order to get the 12 mm seam we need, we can use a template (12x12mm metal rod), which we lay along the very edge of the foundation in the place where we will lay the brick. We will need a rod template before installing the order. Then, to maintain the thickness of the horizontal seam, it will be possible to use divisions in order. Using the marks on the foundation, we control the location of the vertical seams of the first row.
Let's move on to the process of laying bricks on the mortar. We take a brick, place it on the bed and lightly press it down. Then, using a level, we check the horizon and vertical in 3 directions and if we see discrepancies somewhere, lightly knock the brick with a pick-hammer or the handle of a trowel.
Tools
What do you need to know about this? Before you figure out how to lay brick corners, you need to provide a mandatory list of construction tools for the work:
- trowel;
- container for preparing the solution;
- jointing;
- device for supplying mortar to masonry;
- scouring;
- hammer;
- roulette;
- level;
- plumb line;
- square
When carrying out the work, you will probably need scaffolding. Use extreme caution when working with them.
Materials and tools
In order to properly lay out the walls and corners of a brick house, you need to prepare the following construction equipment:
- corner;
- roulette;
- plumb line, usually level;
- jointing;
- trowel;
- fines;
- concrete mixer for preparing mortar mixture;
- buckets;
- shovel.
To bind the bricks together, it is necessary to prepare a sand-cement mortar. For this you will need the following materials:
- cement of the required grade;
- sand;
- water.
In order for the resulting mixture to be of high quality, first the bulk materials are thoroughly mixed together in the required proportions, and then water is added.
Features of the construction of corners
Now let's take a closer look at how to make brick corners. First you need to take two blocks and lay them on the solution. In this case, the bricks should form a right angle. They should be lightly tapped with the handle of a trowel. The gap between them is filled with mortar. The horizontal lines must be adjusted using a level. After this, the masonry is carried out according to a predetermined pattern. The thickness of the joints between the rows after the mortar has hardened should not be more than 10-15 mm horizontally and 6-8 mm vertically. 3-4 bricks are laid on each side of the corner. At the same time, make sure that the verticals and horizontals are even. After this, the second, third row and so on are laid.
Remember to align the corners. This is done by jointing and scraping until the solution hardens. The easiest way is to recess the seams a little into the masonry. It will be enough to run a jointer over them and remove the remaining mortar from the wall.
As for the direction of work, it doesn’t really matter: you can do what’s most convenient for you. It will be easier for right-handed people to move the structure from right to left, and for left-handed people vice versa. If the construction of walls is carried out by a team of masons, then the corner of the house is laid with brick on four sides at once. In this way, 5-6 rows are driven out. After this, the walls are built up while maintaining the initial gap. The corners should be 5-6 rows ahead of the walls.
Preparation
In order for the bricklaying of the corners and walls of the future building to proceed without delays, you must first prepare a workplace, which includes the object being built itself and a working area with a distance of up to 3.5 m around the walls being constructed. Scaffolding, equipment and materials can be placed here. To make the walls and corners strictly vertical and even, you need to set boundaries around the perimeter of the finished base, using a special cord for this. It is important to ensure that the cord lines intersect at right angles. It is recommended that a person who does not have construction experience lay the first row of bricks first without using a mortar mixture. All blocks are laid out on the base, and it will be possible to understand in which area the inserts will need to be laid - quarters, three-quarters and floor bricks.
It is important to be especially careful when laying corners. The peculiarity of the process is that during their construction you will definitely need an insert formed from quarters and three-quarters. Therefore, it is recommended to place the angle at the level of 3-4 orders, not forgetting to also pay attention to how the vertical seam is bandaged. Once you have fully understood the stages of constructing corner projections and walls, you can proceed directly to construction.
Laying walls with a well
What is special about this method? This installation method is only suitable if the work is not carried out alone. The following procedure is used. First, two corners are adjusted to the desired height. After this, 1-2 rows of bricks are placed between them. After this, the third corner is laid out and connected to the second. Well, finally, the fourth one is kicked out and connects with the first and third. In this way, work should be carried out, raising the brick walls around the perimeter in a circle by 1-2 rows until the brickwork is completely completed. When forcing corners, you will inevitably have to make grooves and stepped cliffs. Partly this will be due to the use of cut bricks and partly due to the need to ensure strong connections between the walls and corners.
Laying the first and subsequent layers
Laying the plinth begins from the first row. If some inaccuracies were made in the preparation, there is still an opportunity to correct and correct them when laying the first row.
The main thing is to use high-quality materials and compositions for laying the plinth and performing formwork. The solution must be prepared exactly according to the instructions, otherwise it will not be viscous enough, which will affect the quality and reliability of the entire structure.
The thickness of the masonry layer is determined depending on whether insulation will be used and what its heat capacity is. For standard brickwork of the plinth, a thickness of 1.5-2 bricks is used.
When laying, you should pay attention to the external seams. The solution needs to be removed a little from them, which will make it easier to carry out plastering work and protect them from being washed out.
Periodically it is necessary to check the evenness of the masonry using a level. To visually control whether the layers are made well, pull the thread perfectly evenly at the bottom.
The construction of the basement requires a lot of attention and accuracy. If a mistake is made at the very beginning, in the end the ideal base will not work out, which will affect almost all stages of construction, and it will be almost impossible to correct the situation. Therefore, it is better to immediately carry out the work slowly, efficiently and accurately.
Verticality control
You already know how to lay a corner out of brick. In order for the entire building to be strong and level, it is necessary to make the corners strictly straight and vertical. You can use a square to check. The brick should fit tightly to the tool. The verticality of corners 7-8 rows high should be controlled using a plumb line. To ensure horizontal alignment, a building level is used. Professional builders take measurements every 4-5 rows. If you have no experience, you should check verticality and horizontality more often.
We insulate the house before winter
In September, which is usually quite warm and dry, we carry out thermal modernization of the house. Then the moisture, which even seeps through the external facade, will stop in the absorbent layer of polystyrene foam or mineral wool and will not reach the wall. An effective way to protect the facade is to insulate it using the former BSO ETICS system (seamless insulation system). Two types of thermal insulation material:
- expanded polystyrene,
- mineral wool.
We recommend: How to choose automatic gates?
Each of these materials has its own advantages and disadvantages. Both will protect walls from direct contact with moisture and low temperatures. However, mineral wool, as a completely natural product, will provide the building not only with high thermal insulation, but also with high vapor permeability. This provides greater safety by avoiding interlayer condensation in the walls, eliminating the formation of fungi indoors. Therefore, this material will be much better for old, damp walls. Using mineral wool, we also obtain non-flammable barriers with high sound insulation.
The only thing you should pay special attention to is full compliance with the manufacturer's instructions and carrying out work under proper conditions. Particular attention should be paid to the areas around windows and doors, as well as the roof and its junction with the walls. These are places where cold bridges (or thermal bridges) can occur - points through which heat loss occurs. This is worth knowing! Cold bridges - due to their formation - are divided into geometric, structural and material. Geometric cold bridges are created in places where the surface that receives heat is smaller than the surface that releases heat (for example, the corners of buildings, where a decrease in internal temperature is also a consequence of limited air circulation in that area). Also, thermal bridges are created as a result of the use of materials with different thermal conductivities (for example, anchors passing through an insulation layer disrupt its continuity and a point, material thermal bridge occurs). In turn, the occurrence of structural cold bridges is associated with errors during the construction of the building.
Video: How to remove freezing of walls in the house
Masonry schemes
Let's look at this in more detail. To give the brickwork the required strength, it should be tied with longitudinal, transverse and vertical seams. Most laying schemes use not only whole bricks, but also inserts of halves and quarters. To make an undersized piece, use a pick. It is better to take bricks with defects for this purpose. Such blocks are laid with the broken edge inside the masonry. The whole side should face outward.
Seams running horizontally are called longitudinal. It is necessary to bandage them in order to evenly distribute the tension running across the width of the wall. In addition, horizontal ligation does not allow the brickwork to separate into thinner layers. To perform dressings, rows laid out across the main direction of laying are used. In another way they are called tychkovye. Such rows should be erected at the rate of one bonded row for 4-5 rows of simple masonry.
The seams between the bricks inside the masonry are called transverse. They give the constructed wall solidity and strength. For ligation of transverse seams, spoon rows are mainly used. In them, bricks are laid with the long side along the direction of the masonry with each laid row shifted by a quarter or half of a brick.
Step-by-step masonry technology
If the internal load-bearing wall according to the project is also made of blocks, its installation is carried out simultaneously with the external walls. In this case, the blocks in the masonry are bandaged. Don’t forget to also leave openings for the entrance and interior doors in the aerated concrete walls, the installation of which can be found in this article https://izbloka.com/dom/steny/bloki/gazobeton/dveri-g.html.
At the first stage, you need to check the heights and horizontality of the foundation . Differences of up to 5 cm are allowed, since with such a thickness the solution does not shrink.
Other cases are considered defective and require repair. Any imperfections that are not too pronounced need to be cut off or filled with cement mixture. Very significant unevenness will require the installation of additional formwork, followed by filling the surface with a concrete mixture with plasticizers, and further leveling. The height of the leveling layer should be about 30-50 mm. Laying can be done after the layer has dried.
At the next stage, the cut-off waterproofing is laid . The surface is covered with rolled waterproofing with overlapping material at the joints.
A waterproofing layer has been made, blocks are placed evenly in the corners according to a level or level, the lace is stretched in a horizontal position.
Masonry begins at the corners, and the highest point of the foundation serves as a guide . It is at this point that the first block is installed. Then blocks are placed in other corners. Installation of corner blocks with a tongue-and-groove connection is carried out with the ridges facing outward.
The correct installation of corner aerated concrete blocks can be checked with a building level or an optical level. If necessary, adjustment of corner block elements is carried out with a special rubber hammer.
Install the corner blocks on the mortar , checking the mortar thickness value written on each block. Install the blocks exactly level. Use an optical level to check the height of the block corner. If there is a discrepancy, press down the block with a mallet, or add mortar.
Further along the cord, focusing on the lighthouse blocks, block masonry is installed, checking horizontally and vertically.
After the first blocks have been laid and the cement mortar has completely set, it is very important to carry out reinforcement. Read about the reinforcement of aerated concrete and its necessity in this article: https://izbloka.com/dom/steny/bloki/gazobeton/armirovanie-gazosilicata.html.
Before further installation, you need to wait until the solution has completely hardened, which will prevent the risk of deformation of the starting blocks by the weight of subsequent rows.
This short story shows the main points that you should pay attention to when laying the first row.
Single-row and multi-row masonry
What makes them special? Regardless of the bandaging scheme, one important rule must be followed: the wall should begin and end in a row of studs. Moreover, it is necessary to take only whole bricks for such masonry.
How to lay brick corners? Single-row masonry is considered the strongest, but also the most labor-intensive. It alternates spoon and butt rows. When using this type of masonry, a large number of three-quarters will be required. Only an experienced mason can do it.
Multi-row masonry is considered simpler. A corner of two bricks, surprisingly, is easier to lay out. When using such schemes, it is necessary to vertically limit the walls by laying out three-quarters at the beginning of the first two rows. During further construction, partial and whole blocks are alternated in the tray rows. During the laying process, the spoon rows should overlap those laid below by half a brick.
Another variety of multi-row is three-row masonry. Its peculiarity lies in the alternation of three spoon rows with one back row. This is the only pattern in which the vertical seams in all three rows of spoons can coincide.
It should also be taken into account that multi-row and single-row schemes are designed for different loads. Single brick masonry is valued for its strength. The three-row scheme is used if it is necessary to build reliable walls and pillars. Laying a corner of one and a half bricks gives the surface an unusual look.
Types of masonry by alternation
Looking at photos of bricklaying with their own hands, craftsmen notice that different types of bricklaying are used. And we’re not talking about thickness: by alternating blocks with a spoon, a poke, and even pastels, builders create real patterns.
Laying facing bricks with your own hands can be as follows:
- chain masonry - alternating tie and spoon rows;
- cross - spoon masonry is tied with seams horizontally;
- Dutch - poked and combined row, the combined row is created from horizontal alternation of blocks with a poke and a spoon;
- English - one brick, dressing in two;
- well - two half-brick walls without ligation are connected by a bridge from above.
Beginners are advised to choose chain, well or English masonry. To avoid confusion, you should have a simplified diagram with you.
