It is too early for buyers of apartments in new buildings to relax after receiving the keys, because if the housing was purchased without renovation from the developer, then the new owner gets literally bare walls.
We decided to remind new residents about the basic technologies and stages of rough finishing, the quality of which determines the quality of the future decor.
Technological memo
Currently, there are two main design schemes for apartment buildings.
Firstly, these are houses whose frame and external walls are built from reinforced concrete panels. And secondly, these are houses whose frame is made of monolithic reinforced concrete, and the openings are filled, as a rule, with blocks of cellular concrete.
There may be other design schemes, but they make up a small percentage of newly built apartment buildings, explains Alexander Bortnikov, head of the training center of Knauf Gips LLC.
“It should be noted that newly constructed buildings using reinforced concrete as the main material are subject to shrinkage. Shrinkage is a feature of all cement-based materials, since cement stone decreases in volume as it hardens.
Therefore, it is recommended to begin finishing work when all shrinkage phenomena have passed, and this is about a year after construction, or to take this phenomenon into account when choosing certain materials and systems for finishing,” the expert recommends.
Where to start repairing walls in an apartment with your own hands?
Repairing walls in an apartment is (don’t consider it pathetic) a kind of art, but it is important that everyone can learn it, absolutely regardless of age and gender. By the way, my brother’s wife is a first-rate ace in the matter of repairs, and with walls (would you believe it?) she has been on good terms for many years. So, all conclusions are from personal observations. However, let’s not focus such close attention on my person, but let’s continue our educational program about walls.
So, we have made a meaningful and balanced choice: DIY wall repair is what we intend to do. Where to start? That's right, precisely from a careful study of the subject, that is, from ascertaining the presence of certain defects on your home “verticals”. Walls are rarely perfectly straight. But for high-quality repairs, they must be like that. There is a way out: alignment. Here, for one second, I will focus your attention on seemingly trifles: the method of this very alignment directly depends on the “finish” with which you are going to complete the repair of the walls. Will it be wallpaper? Or do you prefer tile or paint?
So, what does DIY wall repair mean? In the famous film “Autumn Marathon,” the main character limited himself to gluing wallpaper. The step is undoubtedly also heroic. In any case, (in a whisper) taking into account Buzykin’s personal background. But we are not striving for a change in the decorative layer, but for the strength and durability of the repaired base. That is why just changing the surroundings will not suit us. We need to act from within.
The walls are different. And wooden, and concrete, and reinforced concrete. And “bringing them to their senses” is also offered in different ways. But remember, my friends, what constitutes the unshakable basis of wall repair: their alignment. A smooth wall is the key to a beautiful room with any covering: whether it be a layer of paint, graffiti, ceramic tiles or the same familiar (but modern) wallpaper. It is important to understand what your walls need to be strong and aesthetically pleasing.
Thinking through the design
Oddly enough, even before starting the rough work, it is necessary to decide on the interior design, since, based on this, it will depend on where and what communications to lay and what finishing solutions to use.
Before proceeding with rough finishing, if necessary, windows, heating radiators, plumbing communications and electrical wiring are replaced.
Replacement of all of the above can be carried out either completely or selectively; it is important that all this work is completed before performing rough finishing, Bortnikov points out.
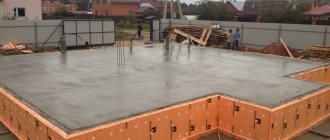
Leveling the floors
The first step is to level the floor.
If your apartment is completely “bare”, then you have a monolithic slab on the floor, which must not only be leveled, but also insulated, because it transmits all vibrations and sounds.
To do this, it is advisable to first fill in a layer of expanded clay, which has excellent sound and heat insulation properties (layer thickness is approximately 5 cm).
Before starting work, you need to make sure that there are no cracks in your concrete floor, otherwise water from the screed may leak down to the neighbors.
Typically, holes may remain in the area of risers and ventilation shafts. They need to be sealed with foam or adhesive mixture. Next, we fill in the expanded clay, starting from the place that has the greatest depth.
We pour the expanded clay with a solution of liquid concrete, the consistency of which resembles milk. This solution dries in about a day or two. You can also immediately make an expanded clay-cement-sand mixture and lay it on the base.
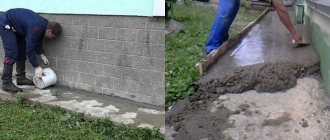
For bathrooms, it is advisable to make floor waterproofing before laying expanded clay, extending up to 10 cm onto the walls. If it has already been done before handing over the house, then its quality must be checked, since defects often occur.
Next, we begin directly leveling the floor.
This can be done using a cement-sand screed or self-leveling floor. The main advantage of cement-sand screed is its price, from 90 rubles (on average 150 rubles) per 40 kilograms, depending on the manufacturer, region and composition. The consumption of the screed depends on the applied layer.
However, the screed does not allow you to obtain a perfectly flat and smooth surface, and its drying time is 28 days, which significantly delays the progress of repair work. Self-leveling floors are a more technologically advanced option.
Due to its fairly liquid consistency, the mixture spreads over the floor surface and takes on the level of the horizon, that is, it self-levels.
The master needs to select the optimal amount of water and slightly help the mixture to spread over the surface.
It must be said that before installing a self-leveling floor, the base must be primed. You can prime with a regular or acrylic primer, rollers or brushes.
Concrete contact is usually used when the apartment is from an old foundation and the foundation is very poor - there is no point in using it in a new building, especially considering the difference in price (3-4 times more expensive than primer, namely 1500-2000 rubles per 10 liters).
Priming should be done either in two layers, or immediately with a generous layer - before applying the second layer of primer, the previous one must dry.
Also, the installation of a self-leveling floor should be carried out over a dried primer, but the time gap between priming and the completion of floor laying work should not be large - no more than a day, and preferably an hour or two, in order to avoid dust settling on the surface.
The only drawback of self-leveling floors is the price - from 240 rubles per 25 kilograms (average 400 rubles), so usually self-leveling floors are used for height differences of no more than 4 cm.
Also, the self-leveling floor can be laid on a cement-sand screed (after it has dried), this will allow you to get a more even surface at a lower cost. You can walk on self-leveling floors after 5 hours, lay linoleum or tiles after two days, and wooden floors after 7 days.
Under some finishing coatings, it is advisable in any case to use a self-leveling floor, for example, under a laminate - it is not attached to the floor, but simply lies on the substrate, which is why it can move and rub against the surface during use.
If you just have a sand-cement screed on the floor, dust will form, but self-leveling floors completely eliminate this.
Another way to level the floor and prepare the base for laying the finishing coating is to use dry prefabricated floors, says the Knauf Gips expert. “When using this solution, floor elements or, for example,
“Knauf-superfloor” are laid either directly on the base, or on an insulating layer (expanded polystyrene or mineral wool boards), or on a layer of dry expanded clay sand backfill.
The latter option of dry prefabricated flooring is the most popular because it allows you to quickly level the floor surface.
The use of this method of preparing the base makes it possible to install the finishing coating within a day after laying it, and at the same time, the issues of reducing the load on the floors are resolved, and the sound insulation of the floor is improved,” says
Bortnikov. Gypsum fiber boards (GVL board) can be up to 20 millimeters thick. Their cost ranges from 315 to 566 rubles.
Choosing finishing material
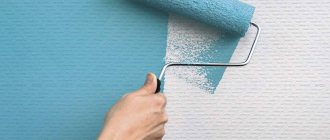
Wallpapers have been and remain the most popular among users. A variety of patterns and textures allows you to add originality to the interior, visually adjust the shape of the room, set the desired tone, hide imperfections in surface treatment and be easily replaced if necessary. The disadvantages of this material include a synthetic composition (in most cases), as well as problematic care, unless we are talking about washable collections.
Painting walls comes second after wallpapering. Today there are so many types and shades of paints on the market that designers are tirelessly experimenting with creating unique designs, abstractions, and combinations. The most diverse color scheme is the prerogative of this particular material.
The advantages of painting are obvious: such walls are easy to clean, there is an unlimited choice of paint composition and shade palette, and repainting the finished surface is very quick and easy. The disadvantages of this finish include the filigree preparation of the wall, the likelihood of cracking over time, one tone that does not contain drawings (if you do not use stencils). The price tag for painting walls will be approximately equal to the equivalent for wallpapering.
Decorative plaster is a layer of building material that can be used to simultaneously level and decorate walls. The main purpose of such finishing is decoration, in which you can choose to imitate the selected analogue: granite, textured wallpaper, metal, etc.
The range of shades and textures of plaster is limitless; such walls are easy to clean and it is easy to hide unevenness with the help of plaster. Due to this quality, you will spend much less money and effort on preliminary preparation of the walls, plus the good thermal insulation properties of the material. This type of finish lasts a very long time: 35 - 65 years, so the economic benefit here is obvious.
In addition, decorative plaster will successfully fit into the finishing style you choose. But there are also disadvantages: high price, complexity of application and equally complex dismantling. When applying and embossing the material, it is better to trust the specialists, since plaster finishing contains a lot of features.
Paneling made of wood or plastic is not so popular, but is also worth special attention. It is widely used in private homes, hotels, and country houses. Lining, laminate, solid wood, block house and other materials in this segment demonstrate different “behavior” under temperature changes and humidity levels.
Fire protocols and environmental friendliness are worth considering here. With good composition characteristics, these materials are able to maintain an optimal indoor microclimate, retain heat and regulate humidity, and have a timeless design. It is quite difficult to care for such walls; under the influence of external factors, wood can change its appearance and lose its fire-resistant properties over time. Quite expensive, but always beautiful and pleasant-smelling material is definitely worthy of your attention.
Cork cladding is also a durable, environmentally friendly and easy-to-install material. When repairing walls with your own hands, you will be able to easily cope with its moderate elasticity. With the help of cork on the walls, the microclimate, sound insulation, and optimal air humidity are perfectly maintained.
The fireproof material is easy to clean with wet cleaning, therefore it is extremely hygienic and hypoallergenic. The limited design options are the only drawback that cork has. But even the decor that is available to the average person today can add originality to every corner of your home.
Ceramics are the best companion for bathrooms. It washes well, exhibits soundproofing, antifungal, and fireproof characteristics. Excellent for rooms with high humidity, very durable and relatively inexpensive. A related material is decorative stone.
The only difference is the friability of the surface, which can be eliminated if necessary by coating with varnish. Stone is used for zoning or emphasizing certain areas of the area. Easy to install, durable and strong stone is made from natural raw materials, has a huge selection of designs and is equally suitable for every room in the house.
Before making high-quality wall repairs with your own hands, you need to consider decorative panels, 3D composites, linkrust and other equally progressive options. Due to their low popularity in our latitudes, we will not dwell on them in detail, but will pay attention to the preparatory stages of wall finishing.
Plastering the walls
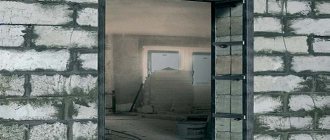
As for the walls, indoors you can encounter various surfaces made of reinforced concrete, cellular concrete, very often gas silicate and ceramic bricks, with the help of which internal partitions can be made, notes Bortnikov.
It should be noted that currently some manufacturers produce reinforced concrete panels with a high surface quality, which can only be puttied, but in most cases, leveling the walls with plaster is required. “Indoors, it is more advisable to use gypsum-based plasters, with the exception of rooms with high humidity (bathrooms, showers).
Before applying plaster, the surface of the walls must be primed. For weakly absorbent surfaces, such as concrete, a primer like Knauf Betokontakt is used to improve the adhesion (adhesion) of the plaster to the surface,” explains the expert.
For priming highly absorbent surfaces, such as ceramic bricks and aerated concrete, primers are used that reduce the absorbency of the substrate and prevent uneven setting of the plaster mortar.
The maximum thickness of the plaster of one layer should not exceed 50 millimeters. The interface between various surfaces, for example, cellular concrete and reinforced concrete, must be reinforced with fiberglass mesh with a mesh size of 3x3 or 5x5 mm.
If it is necessary to perform leveling with a thickness of more than 50 millimeters, it is recommended to use cladding on a metal frame covered with plasterboard or gypsum fiber.
In rooms with high humidity, you should use cement-based plasters or wall cladding on a metal frame using slabs (aquaplates). The cost range for plaster is from 250 to 550 rubles per 25 kilograms.
Classification of leveling materials
Almost every manufacturer presents putty in the form of a line of materials with different compositions. Let's look at how to make the best choice for a specific object. The information is presented in the table below.
| Subspecies | Technical description | Features of application | Release form |
| Ready-made paste in a plastic or metal container with an airtight lid. Packaging from 0.2 kg. | This is a putty based on a polymer binder. More often the base is an acrylic or latex component. There are specialized compounds for plastic or metal, for example, epoxy resin. | Just stir the finished paste before use. The thick mass can be further diluted following the recommendations from the manufacturer. | For latex or acrylic paste, this is clean water. For complex compositions, organic solvents are often used (described in the instructions on the packaging). |
| Dry mixtures in sealed bags. Packaging from 2.5 kg. | Dry powder, to which no other components need to be added. | Only clean water is required before use. | For walls, a composition based on gypsum or cement binder is more often used. There are also two-component putties, for example, with the addition of lime. |
Putty - dry, paste-like
ADVANTAGES OF DRY MIXTURES
We put up barriers
In houses built from monolithic reinforced concrete, apartments are sold with an open plan: that is, there are no interior partitions and the owner creates the interior space at his own discretion.
The best option for installing partitions in this case is the use of dry construction systems, that is, structures consisting of a metal frame and sheathed with plasterboard sheets or high-strength sheets.
The advantage of this solution is that such structures have less weight compared to other options, allow the creation of curved partition configurations, and have good soundproofing properties. In addition, their installation is completed in a short period of time.
But it is important to remember some features when constructing such structures, Bortnikov emphasizes.
“Installation of plasterboard and gypsum fiber partitions should be carried out when all wet processes in the room have been completed, or rather, plastering of existing walls should be completed and the plaster layer should dry,” he says.
To construct the frame, the expert recommends using a profile with a metal thickness of 0.6 millimeters.
It is better to use plasterboard 12.5 millimeters thick as cladding for the frame. Its cost ranges on average from 200 rubles per sheet to 360 rubles.
When installing sockets on both sides of the partition, they should not be placed opposite each other, as this worsens the soundproofing characteristics of the structure, notes the agency’s interlocutor.
Options for repair work on walls
Repair options refer to the scale of the work.
Three are considered relevant:
- capital;
- cosmetic;
- with a change in the building plan.
Capital
This type of repair involves the complete removal of external and internal coatings (including plaster) and a fundamental change in appearance.
The reason for the work is cracks and chips that appear suddenly or over time.
Such repairs are carried out according to the canons of preparatory and construction work. You can use any suitable material here that is preferable to the owner of the apartment.
Cosmetic
Cosmetic repairs involve minor changes in the appearance of the walls. For example, in case of small abrasions on the coating material. Such repairs do not take much time and are the most affordable.
With a change of plan
A radical repair method that involves a complete change in the structure of the partitions and the removal of individual parts. Carrying out such work is possible on non-load-bearing walls or in agreement with the developer.
Attention to the ceiling
Another surface in apartments that may also need leveling is the ceiling. It can be plastered (layer no more than 20 millimeters). Before plastering, the ceiling surface must be primed to avoid peeling of the plaster layer.
“To level the ceilings, suspended structures can be created on a metal frame and covered with gypsum-based sheet materials.
Suspended ceilings have two main frame designs: one-level and two-level. If finishing is carried out in buildings where shrinkage phenomena have not occurred, it is recommended to make a choice in favor of a two-level ceiling.
In this case, the frame is secured to the ceiling using hangers and is not attached to the walls and, accordingly, is less susceptible to deformation, explains Bortnikov from Knauf Gips.
Finishing rough finish
“We have leveled the walls and ceiling, now we can begin finishing, but depending on what material will be used for this, final puttying of the surface of the plaster or sheets may be required,” says the expert.
“If tiles are glued to the surface or decorative plaster with a fraction of more than 1 millimeter is applied, then there is no need to perform finishing putty.
But when using matte paints and structural plasters with a fraction of less than 1 millimeter as a finishing layer, it is necessary to putty the surface,” he instructs.
In this case, puttying is performed in a thin layer using the “scraping” method. “The technique of puttying “to strip” is that a putty mixture is applied to the surface, then a wide (at least 600 millimeters wide), rigid spatula is pressed against the surface at an angle of approximately 70 - 80° and passed along the surface.
With this method, excess putty is “ripped off” from the surface, and small irregularities below the level of the spatula are filled with putty mixture,” Bortnikov explains the intricacies of the technology.
When using, for example, vinyl wallpaper, glaze or medium gloss paint, the putty is applied to the surface in a layer of up to 1 millimeter and smoothed with a thin, elastic spatula (at least 600 mm wide, but it is better to use a wider spatula).
Puttying is performed using a bright lamp (spotlight), the light from which is directed at an acute angle onto the surface in order to see irregularities. After the putty has dried, grind it to remove small burrs that remain from the edges of the spatula. If necessary, the puttying operation is repeated, the expert explains.
For finishing puttying of the surface, putties based on gypsum or polymer binder can be used. Polymer putties can be ready for use, that is, just open the container with putty, mix the contents and you can use it.
“Gypsum-based putties require experience and skill because you need to apply and work the mixture fairly quickly, otherwise it will set. Polymer putties allow you to work more measuredly.
In addition, polymer putties prepared from a dry mixture retain their properties and can be used for 72 hours, provided that the container with the product is closed.
Ready-made polymer putties retain their properties and can be used for several months, but it is also necessary to hermetically seal the container with the product,” the agency’s interlocutor points out.
The cost of putties ranges from 200 to 1.3 thousand rubles per 25 kilogram, depending on the quality and purpose.
On average, materials for rough finishing will cost 6 thousand rubles per square meter.
We continue to repair the walls with our own hands
Repairs are, of course, expensive. After all, you need to decide on a palette of walls, then choose a floor for them, I would like to hang beautiful ceilings and lamps for them.
And plumbing and electrics are generally on guard... How to inexpensively make repairs in an apartment? Calmly! Don't panic! Builders have come up with several “tricks” that will help update and modernize your nest at a very reasonable price.
1. Instead of wallpaper - decorative plaster.
It is especially suitable for those who have small children or animals in the house. You can draw on this coating, smear plasticine, and scratch it.
You can really wash and peel off everything from it without damaging the appearance.
“But mainly, plaster is durable,” says builder Oleg Zyabnev.
– Mineral, for example, can last up to 30 years, silicone up to 60 years, and polymer in general up to half a century. The same cannot be said about wallpaper. The most reliable ones will last a maximum of 20 years.
There are a lot of plasters and, in general, this pleasure is not cheap. But among this material you can also find inexpensive “candy”. For example, textured plaster.
– It comes in several subspecies: “Lamb” (has stone grains of different sizes), “Fur Fur” (the surface is rough, in the form of a slight “hairiness”) and “Bark beetle” (resembles the surface of corroded wood).
The cost per square meter starts from 250 rubles. Agree, a worthy competitor to wallpaper.
2. Ceilings – suspended.
The question of choosing a stretch ceiling or painting arises quite often. The main thing is that it is beautiful, practical, and even cheap.
“Stretch ceilings can be installed in just a few hours,” continues our expert. – Preparatory work is minimal, and after installation there is virtually no dirt or dust. Before painting, the ceiling must be cleaned, primed and plastered.
In addition, a suspended ceiling made of PVC can prevent leaks and save from flooding, as it can withstand a large weight of water.
It does not require special care and is durable to use.
As for the price, a square meter of stretch ceiling with installation will cost from 250 rubles.
Paint will cost about the same, but it will be a lot more hassle. So stretch ceilings are becoming increasingly popular. Well, it’s very convenient and practical.
3. The optimal floor is laminate.
It is quite difficult to answer the question “which gender is better.”
It all depends on your budget and personal preferences. First, let's look at all the options.
– Solid boards are universal and suit almost any interior. Durable - up to 50 years, but reacts sharply to the indoor microclimate: temperature and humidity.
Its cost reaches 9 thousand rubles. per square.
– Block parquet – you can create different designs from blocks.
It lasts up to 50 years and requires a high-quality subfloor. The cost per square meter is about 5 thousand rubles.
– Parquet board – the material is already sanded and varnished. The service life is short - up to 20 years maximum. Price – from 2 thousand.
rub. sq. m.
– Cork flooring is warm, resilient, pleasant to the touch and useful for walking. The main disadvantage is that it is easy to damage. Serves up to 15 years, costs from 2 thousand.
rub. sq. m.
– Laminate – wear resistance, extreme ease of installation.
There is a “but”: he is afraid of water. Service life – up to 20 years. Costs from 300 rubles per square meter.
– Natural linoleum is an environmentally friendly, warm and easy-to-install and maintain material. Lasts up to 30 years, but is very unstable to alkalis.
Price – from 700 rub. per sq. m.
– PVC linoleum – unlimited choice of colors and patterns. Very economical coating. There is a big disadvantage: the coating is artificial, so it can cause an allergic reaction.
Service life up to 7 years, cost – from 500 rubles. sq. m.
– Carpet is a cozy soft material.
Does not require subfloor preparation. However, do not forget that this is a large dust collector. Therefore, such coating should be cleaned carefully and often.
It lasts a short time - up to 5 years, costs from 500 rubles. sq. m.
In general, laminate won in our rating. It is optimal in price and has no obvious disadvantages. You should wipe it with a slightly damp cloth, and it will be grateful to you for this for many years.
4. Hide the side of the toilet in the wall.
A wall-hung toilet looks more beautiful than a floor-standing one.
All valves, pipes, etc. are hidden in the wall into which the installation is built. And in that place you can hang shelves, a closet or a heated towel rail. Which already gives the bathroom an aesthetic appearance.
“In a wall-hung toilet, the flushing system works much better due to the design features,” notes Oleg Zyabnev. – In addition, all such systems have a double flush button, which allows you to waste less water.
In addition, a wall-hung toilet takes up less space, even though the installation is attached to it.
It is usually more than 20 centimeters wide, while a regular toilet stands further from the wall, and its tank is wider.
By the way, many are sure that if, for example, a pipe breaks, they will have to break the wall where the barrel is walled up. Nothing like this! The hole where the button for the wall-hung toilet is located provides access to the flush mechanism.
5. Throw out the closet and make a dressing room.
Most of the people in our country live in small apartments, where every centimeter counts. Therefore, issues of size often play a decisive role. The cabinets have outlived their time.
They are bulky and uncomfortable. You can’t go in and change clothes in front of a mirror. Therefore, it has become fashionable to have dressing rooms in apartments.
– The smallest dressing room can have an area of 1.2 - 1.5 square meters.
meters,” says the expert. – This room is also often made into a corner room.
This option is even more spacious than a rectangular one of similar size: with an equal area, the length of the sides on which shelves and storage systems can be placed will be greater.
Construction and furniture stores sell inexpensive wardrobe systems. You can meet 20 thousand. On one side, hang men's things, for example.
On the other hand, women's. And in the middle there is a mirror. What a beauty!
Throwing out the closet and making a dressing room Photo: Mikhail FROLOV
6. Instead of chandeliers - spotlights.
This advice is only useful for those who want to save money.
Large chandeliers will certainly remain classics forever. No matter where you hang them, the room will instantly bloom. However, their prices are rather high.
You won't find anything for less than a thousand rubles. Therefore, if you don’t have the opportunity to fill your entire house with high-quality lamps, you can purchase spotlights. But again, you need to understand that they can only be installed on suspended and suspended ceilings.
– The ideal lamp for a suspended ceiling would be an LED lamp (40 W), which practically does not heat up and will not damage the canvas.
LED lamps are able to provide an uninterrupted flow of light of various colors, which does not tire the eyes or impair vision.
You should choose them based on personal wishes and purposes of use. Their cost varies from 100 rubles.
To ensure the safety of the ceiling, the following rules should be followed:
– The power of the light bulb should not be more than 50 W;
– The presence of a mirror part to reflect light;
– No sharp ends that could damage the ceiling during installation.
7. Batteries – bimetallic.
Bimetallic batteries offer good heat dissipation, low weight, and elegant design. And if you correctly calculate the number of radiator sections and its power, they will serve faithfully for many years.
The main advantage of such batteries is that they can be regulated independently. Is it hot at home?
No problem! I turned up the valve and it became cooler. Or, on the contrary, it was frosty outside. Once - and made it hotter.
– The main advantage is a long service life. They can last up to 50 years.
In addition, radiators of this type have significant heat transfer rates. The aluminum outer casing promotes rapid heat distribution in the room.
In the most standard models with a distance between the axes of 500 mm, the heat transfer is up to 190 W, which is much more than in single-element radiators.
These batteries are distinguished by their high durability. This property is achieved due to the steel core, which not only resists high pressure, but is also not afraid of strong hydraulic shocks, which are characteristic of central heating systems.
It is better to take radiators of at least 10 sections for an apartment or house (for a room from 10 to 30 square meters). Otherwise, the heat can be reduced.
But you certainly won’t freeze. They cost more than conventional batteries - from 7 thousand rubles. But you shouldn’t save money on this matter.
Stages of wall repair in an apartment
Wall repairs are carried out after basic repairs to the floor and installation of the false ceiling frame, but before installation of the ceiling sheathing. This will allow you to cover the uneven ends of the wallpaper with the ceiling plinth. An exception is covering the ceiling with solid laminate or MDF boards followed by wall cladding: in this case, wall cladding will provide additional support for the ceiling and increase the overall strength of the room cladding.
The stages of repairing walls in an apartment are as follows:
Cleaning
When cleaning walls, you need to take measures to protect against dust: a respirator, goggles, a hood with a cape, closed clothing, gloves.
If surface stripping under wallpaper is carried out, the following must be observed:
Complete cleaning for replastering is carried out after generously spraying the walls with water and keeping it indoors for 24 hours.
Remove with metal shea
with a wide spatula, in layers. The remains are cleaned with a drill and a cord brush. The walls must be cleaned down to the brickwork or concrete monolith.
Drying and disinfection
Dry with a construction hairdryer, then impregnate with a deep penetration primer with biocidal additives. Rusts (seams between slabs) are foamed in layers using a polyurethane foam gun with a long spout.
Plaster
First, beacons - plaster markers - are mounted on the wall. Install them vertically. The pitch is slightly less than the width of a metal spatula, but there should be a beacon in each corner.
The next stage is starting (primary) plaster. It is produced using a cement-based starting plaster mixture. Knead in portions according to the instructions and plaster the spaces between the beacons alternately from bottom to top; level with a spatula along the beacons.
The corners are passed either with the angle of a spatula, if it is at 90 degrees, or with a special corner spatula in the form of a triangle with a right angle at the apex and sides slightly larger than the installation pitch of the beacons. The latter method allows you to get perfectly even corners without having to be a qualified plasterer.
After the starting plaster has dried, the finishing plaster is applied - white, gypsum-based. The normal thickness of the finishing plaster layer is 1 mm; the thicker one will then peel off, so thicker coatings are applied in layers, each subsequent layer after the previous one has completely dried. But multi-layer finishing plaster is not so durable, so the evenness of the walls and corners must be achieved at the starting stage.
Repairing walls in an apartment with your own hands step by step:
- The first is cleaning.
- Then - drying, which includes disinfection along with insulation.
- Next, we plaster and install the grating (under the cladding).
- In conclusion, we are directly engaged in decorating our walls.
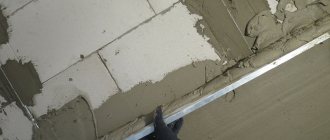
If your preferences turn out to be wallpaper and paint, then feel free to use any of the two proposed alignment methods. But, when choosing tiles to decorate a wall surface, you cannot do without a building mixture. The fact is that the tile requires particularly strong adhesion to the plane that will be its base. In our case, it is a wall, and the building mixture will be the most appropriate leveling option.
So, we’ve sorted out this stage. For example, you preferred the construction mixture. I hasten to please you: this method is quite simple and even a beginner can do it. I explain the algorithm.
Select one of the corners in the upper part of the wall and drive in a nail. But not completely. The hat should not “sink” into the wall: it needs to be separated from the wall surface by about 3 mm. Next, we hang a thread from the nail, and an improvised weight from the thread. At least a screw. Now you see that the sinker has stopped swinging on the thread, and a clear straight line has appeared. We drive a nail into the lower part of the wall, focusing on this straightness, that is, the nail will be exactly under the nail.
Now we do the same on the other wall part. Here a certain square has been formed, the corners of which are marked with hammered nails. We connect these corners diagonally. It turns out that the ropes (threads) are arranged in the manner of the St. Andrew’s flag - “crosswise”. They should not touch the wall surface. Now we take a flat (straight) board and apply it to the nail caps on either side. Pour the mixture that was diluted in advance into the gap between the wall and the board. The mixture, having hardened, becomes an even guideline for us, on the basis of which we complete the alignment of the walls with our own hands.
It may seem strange, but wall renovation is a very exciting activity. Take a spatula, dip it in the diluted construction mixture, apply it to the wall surface... Agree, it’s almost a culinary show. And why? Because it’s both appetizing and promises excellent results. You are creating (whether knowing it or not) a very important “dish” that can turn your home not only into an indestructible fortress, but also into a place where all members of your family will strive.
Any business initially resembles science fiction. Indeed, how can you independently transform your living space into even “more residential”? We (mostly) are not builders. But it is possible. Believe me. Very much. And for this you need very little: to be a little more attentive and a little... well, if I may say so, more responsible. Everything else will work out just like that, believe me.
That's all the main wisdom of the mini-course: Repairing walls in an apartment with your own hands step by step - where to start wall reconstruction? Spatula in hand - and towards smooth walls! A little experience, and soon you will confidently agree, even if you are asked to repair the Great Wall of China. Good luck!
If the article was useful to you, share it with your friends by clicking on the buttons: Below, leave your comments, suggestions, ask questions, express your opinion - this is very important to us!
Lathing
Wall sheathing can be made from either U- and C-profiles or wood.
Metal wall sheathing is more of a tribute to fashion, since the wall sheathing is loaded several times less than the ceiling.
Excellent sound and heat insulation will be provided by foam plastic slabs laid in the cells of the sheathing. Fiber insulating mats are not suitable for walls: in a vertical position they will soon shrink and cease to perform their functions.
In the sheathing you need to immediately lay cords for sconces and signal cables: television, telephone, Internet. Possibly – split system refrigerant pipelines; even with wooden sheathing, the usual height of its beams, 40-80 mm, completely allows them to be installed. But laying power wiring in the sheathing is unacceptable!
The sconce cords should extend outward and end with plugs; It is permissible to combine several lamps into one group and provide them with separate switches.
Sheathing and cladding
The walls can be sheathed with laminate, MDF, plastic lining, wooden panels or slats, plywood painted with stain. In addition, no one has canceled the leveling of walls with gypsum board for subsequent painting or finishing.
An economical and aesthetic option for cladding - half-height or full-height, and whitewash or wallpaper to the top. This provides the following benefits:
Completes the wall covering, and with it the repair of the walls in the room, installing door and window frames on glue with self-tapping screws or small nails. At the same time, if provided, decorative overhead ribs are also installed.
When tiling (tiles, porcelain stoneware), you need to remember that the underlying surface must be no less durable than the facing material.
If, for example, you line a wall with artificial stone on gypsum plaster according to all the rules, it will soon begin to fall off along with the layers of plaster.
Therefore, the starting plaster for stone cladding is reinforced, and in any case, the lining is made using the starting plaster, and the finishing plaster is applied after.
Do-it-yourself repair of old walls
Useful tips and tricks to help you repair old walls yourself. Stages of work, finishing materials, application technologies and tools
Repairing walls is one of the main ways to put your house or apartment in order, because it is this element of the room that our eyes most often direct.
For this reason, increased demands are placed on methods and materials for wall finishing.
It’s not difficult to disguise minor flaws in the condition of the ceiling or floor, but this trick won’t work with walls.
Experts recommend: before starting work, clearly define the repair technology, carefully study it and select materials that are ideal for your conditions.
Do-it-yourself major wall repairs: when necessary
In most cases, we start working on walls only after major renovations. Cosmetic interventions every few years do not count. If you follow the advice of experienced builders and finishers, the first signs of a major overhaul are:
Strange sounds when tapping plaster. If, when knocking, the wall begins to sound like an empty drum in at least half of its area, do not tighten it.
The plaster can fall off at any time, and re-pasted wallpaper will not only not hold it in place, but will also become an aggravating circumstance. Wet external walls. Have you noticed such a problem?
The reason is the leakage of the walls and their constant contact with the street environment.
A simple replacement of drywall or wallpaper is not enough; you need to work closely with the plaster. Worn-out electrical wiring. To replace communications you will have to make a lot of effort.
If the problem is local, then you can get by with local repairs, but in the case of laying new electrical wiring throughout the entire apartment or room, it is better not to save money and do two things at once.
The initial stage of reconstruction of the walls in the apartment
Tidying up walls is a process that combines technology and skill. Any person with basic knowledge in the field of construction can cope with this task. In the process of implementing this task, you will not have to perform any particularly complex work; you will not need complex expensive tools, as well as hard-to-find materials. Therefore, we can say that repairing walls on your own is not a difficult task. It is enough to take it seriously and carefully follow the technology for performing each stage, and you will get an impeccable result at no extra cost.
So, if the walls in your apartment require repairs, and you decide to do it yourself, then the first thing you need to do is analyze the situation and think through an action plan. First of all, assess the condition of the walls - what defects are there, how serious they are, whether there are cracks, depressions, bulges, etc. Assess the degree of evenness of the walls. Problems arise with this parameter very often. And in order to perform high-quality finishing with modern materials, the walls must be perfectly smooth. Therefore, most likely, alignment cannot be avoided. When starting a renovation, it is important to think it through to completion at the initial stage. The decisions made at the beginning determine the further course of work. Therefore, when choosing what materials you will use to level the walls, think about how they relate to the finishing that you would like to do in the future - paste wallpaper, lay tiles, use decorative plaster, etc.
Each person has their own ideas about wall repair. For those whose ultimate dream is to change the wallpaper. And someone prefers to do everything thoroughly and for centuries, so they take on the reconstruction of the walls. Some people like to do everything quickly, while others take a thorough approach. If your task is not only to replace the decorative coating with a more modern one, but to create a durable, high-quality, even base on which any material will look advantageous, then you cannot do without wall reconstruction. Do you want to make high-quality repairs that will preserve freshness and beauty for many years? Then you'll have to start from the very basics.
As we said above, the material for walls can be wood, concrete, or reinforced concrete. And the choice of the method by which the walls will be reconstructed is determined by the material they are made of. The focus is on alignment. This procedure is the basis for wall repairs. After all, smooth walls are necessary for any decoration. Neither decorative plaster, nor wallpaper, nor paint will hide unevenness and cracks on the walls. Therefore, it is so important to choose the optimal leveling method, taking into account the material of the walls and their condition.
The most practical and accessible for doing it yourself are two ways to level walls:
- Installation of plasterboard sheets;
- Application of construction mixtures.
Of course, in addition to the basic technologies, their features and nuances of implementation, it is important to know in what sequence to perform all the work. The order of execution is very important to achieve a good result. Violation of the correct sequence can lead to the fact that already completed steps will have to be redone, because they interfere with the correct execution of other types of work. Carrying out all work in a strictly established and correct order will allow you to bring the premises into impeccable appearance in the shortest possible time and without extra costs.
So, when is it time to tackle the walls? Work on leveling the walls begins after the work on the floor and ceiling is completed. At the same time, the finishing trim has not yet been installed on the ceiling. Why? Because in the future, all the unevenness and sloppy ends of the wallpaper on top can be hidden under the ceiling plinth. It would seem like such a small thing, but it’s the little things that distinguish an impeccable renovation from a simply good one.
Repair of old walls in a private house: stages of work
After determining the scope of work and purchasing the necessary finishing materials for the walls, you can begin repairs. The process includes several stages:
Dismantling old wall coverings. The technology for removing old coating depends on the characteristics of the material that was previously used. Preparing the wall for finishing and leveling the surface.
At this stage of work there is no need to save or rush, because the final result depends on it.
Using a plumb line and level, check the condition of the wall horizontally and vertically. Before finishing, it is necessary to apply a layer of primer: it guarantees uniform absorption of the new material and ensures perfect adhesion to the surface.
For priming, use a roller or a construction brush.
Only after the wall is completely dry can you begin finishing. Applying finishing material. The technology of work largely depends on which repair method you choose.
In practice, most often the walls are painted, covered with wallpaper, and also covered with ceramic tiles, decorative plaster or natural stone.
Procedure
Do-it-yourself wall repairs are carried out in stages:
- assessment of the condition of the walls;
- removal of old finishes;
- elimination of various defects;
- surface leveling.
After all these steps, the walls in the apartment are finished with new materials.
Surface condition assessment
Often, when purchasing apartments on secondary markets, you may be faced with very crooked walls. The curvature of the surfaces can reach 15 cm. In this case, it is almost impossible to repair old walls, and it is not necessary. It would be better to completely get rid of the plaster, which will save materials and expand the space of the room.
In addition, any work on finishing the walls can only be carried out if they are of high strength. If the plaster is outdated and is coming away from the surface in some areas, it would be better to get rid of it. To check the strength, it will be enough to tap the wall with a mallet or other tool.
If a dull sound is heard or slight vibration is felt, the finish must be removed.
Removing old coating
Preparing walls for repairs always begins with dismantling the old covering. Since there are a lot of finishing materials, each of them has its own removal nuances:
- Wallpaper. Removing wallpaper is the simplest procedure and does not require special equipment. Problems can only arise when removing thin sheets. You will need to pre-moisten them with water and wait until the moisture is absorbed. The wet coating is removed with a scraper or an ordinary knife. You can also use a special solution to dissolve wallpaper glue.
- Plaster. Various plaster solutions have gained great popularity. Regular plaster can be removed with a wet sponge, but decorative mortar is protected from moisture, so you will need to use a construction scraper.
- Dye. Peeling trim can be removed with a knife. If the paint holds well, you will need to use a hair dryer. After heating, the coating will easily come off the surface. However, the hair dryer must be used by a specialist.
- Tile. To remove it you will need to use a jackhammer or hammer drill. Since the cost of such devices is quite high, it is recommended to rent them.
Wallpaper removal procedure
Elimination of defects
Often, various damages in the form of cracks form on the walls. They can be discovered after the finish has been removed. To repair cracks, you will need to perform the following procedures:
- Free the damaged area and clean it of dirt and dust.
- The crack is wetted with water, a reinforced tape is laid inside and about 2 mm of putty solution is applied.
- Putty is applied to the crack until it is completely sealed.
- The drying time of the solution will be approximately 2 hours, after which the area is cleaned using a grinding machine or a block.
During work, the putty should be applied not only to the damaged area, but also to the plastered coating near it.
To repair cracks in brick walls, you need to use a scraper, a block and a mortar brush.
Crack sealing procedure
The building is insulated during the construction stage. To replace the insulation, you will need to remove not only the finishing materials, but also the plaster.
Alignment of walls
Repairing walls in an apartment with your own hands is not complete without first leveling them. This process consists of the following steps:
- First, a primer is applied, which will increase the level of surface adhesion. This treatment will also strengthen the base and prevent the formation of mold or mildew.
- The walls are being puttied. The mixture is applied in at least 3 layers. The drying time for each of them is at least 12 hours.
- Plastering is in progress. It is this cladding that allows you to create smooth walls for further wallpapering, painting or other finishing.
To check the evenness of the coating, you need to apply a 2 m rule to it. If the work was done correctly, there will be a gap of no more than 2 mm between the wall and the tool.
You can learn more about wall repairs from the following video.
Useful tips from experienced finishers
To paint walls, you can only use special paints based on acrylic or water-based solutions.
Try to give preference to products from well-known manufacturers: this will provide the coating with visual appeal and long-term operation.
The paint is applied with a roller, evenly and only in one selected direction.
Use decorative plaster as a finishing material only if you know the technology well and have some experience. Otherwise, it is better to entrust the work to professionals.
A layer of primer is first applied to the wall, and after it has dried, you can begin working with a trowel or spatula.
Using tiles or stone as a finishing material provides additional moisture resistance, hygiene and an attractive appearance.
The wall is pre-cleaned and primed, and then the tiles are laid on an adhesive or cement mortar in a given proportion.
Preparing walls for repairs
Before you begin applying new wall cladding, you should get rid of the old coating. Each type of coating has its own individual characteristics. And removing different coatings requires a special approach. Let's look at some types of cladding like:
Wallpaper is the most popular and easiest to remove coating. In order to remove old wallpaper, practically nothing is required. The thick layer is removed manually; here you may only need a spatula to pry up the edge. If the layer is thin, it is moistened with water and removed with a scraper. There are also special solvents for removing wallpaper glue.
Plaster can be easily removed with a wet sponge. However, decorative plaster, which is easy to clean, is currently very popular. It is removed using a spatula or scraper.
The paint is removed with a knife, a metal brush or a special construction hairdryer. The latter can only be used by professionals.
Tile. This option is more realistic when renovating bathroom or kitchen walls. Here you can’t do without a hammer drill or a chipper. They should only be used by specialists.
Direct repair: leveling and plastering of walls
Leveling and plastering walls is the most important element of preparation for repairs
For leveling, you can use both plastering the walls and covering them with various building materials, for example, sheets of plasterboard or gypsum fiber, various types of panels, etc.
If your choice is plastering the walls, then you need to take into account several important points. Leveling plastering is carried out using special beacons. Layers of plaster should be applied sequentially, only after the previous layer has completely dried.
In order for the plaster to adhere better to the primary surface of the wall, you need to artificially make irregularities on it - for example, you can make notches on a concrete or brick wall with an ax.
If the condition of the primary wall surface does not allow applying the required layer of plaster, then fixing a reinforcing mesh to the wall using self-tapping screws can solve this problem. How and what is the best way to plaster walls made of shell rock, brick, concrete and wood, read the link.
The first layer of classic plaster is done using the spray method. The resulting surface is not leveled.
The second layer is soil. If the wall is very uneven, then there will be several layers of soil. The first of them is done using the spraying technique, and the next ones can be done using the spreading technique.
If the wall curvature is very large, special metal profiles are used for leveling. The final layer is the covering. This layer should be about 2-3 mm.
Plastering walls with gypsum mixture - photo
If plastering is done with a gypsum mixture, then it is spread with a wide spatula, from bottom to top, successively applying and leveling the plaster solution over an area of about 1 sq.m.
Smoothing of this plaster can be done with the same solution, in a thinner layer. Gypsum plaster does not allow for leveling along the beacons, but in the final finish it can be made glossy.
After the plaster has completely dried, its surface is sanded with sandpaper.
After this, the walls are puttied - with rough and finishing putty. After finishing putty, they are sanded again. In this form, the walls are suitable for further decoration - paint, wallpaper or decorative coatings.
Wall putty
To apply the first layers of putty, a polymer finishing putty is often used. The proportions of the solution are indicated on the packaging, it is recommended to adhere to them. Please note that the solution must be mixed immediately before starting work.
- pour the putty into a container;
- fill with the specified amount of water;
- mix the solution manually or using a drill;
- maintain a technological pause of 15-20 minutes;
- Stir the solution again.
After applying the first layer of putty, you need to wait for it to dry. The time is determined depending on the temperature and humidity level in the room, but not earlier than 2-3 hours. When the layer has dried, use a spatula to scrape off uneven areas, seams and bumps.
After this, a second layer is applied. When it dries, it is thoroughly cleaned. To do this, you can use sandpaper (150), sanding with a dry primer “under a lamp.”
If you plan to wallpaper, then these steps are enough and the walls are ready. But if you are interested in how to repair walls for painting or thin wallpaper, then a few more steps are needed.