Concreting and waterproofing
In order to carry out concreting, it is necessary to purchase: reinforcing mesh, steel wire or rods, asbestos-cement slabs or boards treated with an antiseptic, formwork material and a cement-sand mixture.
It is necessary to build formwork around it, install reinforcement, and then pour it using concrete mortar.
It is imperative to insulate the basement covering from moisture. Waterproofing is laid between the base and the plinth.
If brick or stone was used to create the base surface, a layer of roofing material should be placed between the rows of masonry or bitumen should be poured. In the case of concreting, insulation is made in two layers.
For insulation, it is better to use foam sheets. They must be laid inside the structure. The insulation must exceed the height of the ceiling.
To attach the foam, you can use special glue. After laying the insulation, you should begin the final finishing. This can be done using:
- Decorative facing stone;
- Porcelain tiles;
- Clinker tiles;
- Basement siding;
- Mosaic plaster.
How to close the foundation from the outside, simulating brickwork - watch the video:
If you have already built a house and have not finished finishing the foundation, you should quickly begin to solve this problem. The house will become much warmer, it will take on a more beautiful appearance. You will feel comfort not only being inside the room, but also contemplating it from the outside.
Hello! On the website, we got a lot of ideas for decorating and building a residential building, and today we decided to repay our favorite site by presenting to the readers our version of the answer to the question: “how to cover the pile foundation of a frame house from the outside?”
When starting a construction project, we, like many other people who decided to build a house with their own hands with the minimum possible amount of money spent, chose the most budget-friendly foundation option that allows us to quickly “get down to business” - a foundation on screw piles. And once we’ve built it, we’ll think about what we’ll use to cover it with.
Time passed unnoticed. A year has flown by, the frame house is standing and blown by all the winds, siding has been ordered to finish the house, but as it turned out, another 50-60 thousand rubles need to be spent on the basement siding. according to the most conservative estimates. At that time, we did not have such funds, but after installing the fence we had sheets of corrugated sheets that were exactly the color of our metal tiles. We decided to use these sheets to cover the pile foundation from the outside.
Economy option: concrete plinth and its finishing with plaster
This method is not only the simplest, but perhaps the most economical. Does not require large financial costs, significant effort to dig a trench or install guides. Just making a blind area. The base is finished with waterproof elements (for example, asbestos-cement boards). Below, near the surface of the earth, the gap between the finishing panels and the soil is sprinkled with sand. However, plaster will be the most optimal finish in a situation where financial capabilities do not allow purchasing more expensive cladding.
Now a new, more expensive type has appeared on the construction market, created on the basis of acrylic resins - mosaic plaster. This is another solution to the problem than covering the base of a house on stilts. The plaster not only looks impressive in a variety of colors, but also gives the plinth high moisture-proof properties.
Having made the right choice of material for finishing the plinth, taking into account its operational characteristics, local climatic conditions, and observing the work technology, it is not at all difficult to give the “windswept” facade an aesthetic, finished look with your own hands.
Should you close the vents for the winter or not?
There are two points of view on whether to close the ventilation holes in the underground for the winter or not. If they are left open, moisture will not accumulate. And this is good, but in return we get a cold floor and increased heating costs. The solution is enhanced floor insulation so that ventilation does not affect its temperature and does not require increased heating.
If the vents are closed for the winter, moisture accumulates in the soil. Warm, moist air from the house enters the floor, falling on cold surfaces, and in winter these are the walls of the basement, the moisture condenses and flows into the ground. This means that later, in the summer, it will evaporate from there, increasing the humidity in the basement.
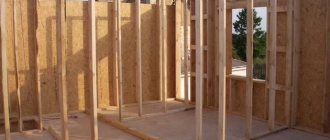
Hanging structure
Making a hanging structure is not difficult. You just need to follow the order:
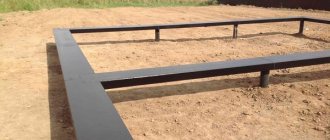
A sheathing is created from metal corners, pipes or wooden boards.
- Guides are attached to the piles using any convenient method (with self-tapping screws or welding). This could be a metal profile, wooden beams; a kind of frame for fixing panels or asbestos-cement slabs, combined systems with insulation or slate sheets on it.
- Before installation, a “cushion” of sand up to half a meter thick is poured around the perimeter.
- Corners are formed in a convenient way using accompanying components.
- All seams are sealed with a sealed solution.
- The design is complemented by the installation of ebbs and other elements that are missing for the finished design of the base.
- The crowning achievement is the finishing decorative finish.
Pile-screw foundation base
Perhaps the most popular and at the same time practical way of finishing the foundation is the construction of a suspended plinth. The principle of the design is to attach sheet facing materials to the sheathing, which in turn is attached to the piles (see also the article “Waterproofing the foundation plinth - protecting your home”).
Gap between base and soil
Advantages
Wall-mounted cladding has a number of advantages, among which are the following:
- High construction speed and simple installation, which you can do yourself. In one working day, two people can cover the foundation of a house measuring 6x6m.
- Minimum cash costs. Covering the foundation with a suspended plinth costs several times less than constructing a strip foundation.
- Good ventilation and at the same time protection from dampness. Since the underground space is ventilated, the possibility of mold occurring in the cool season is eliminated.
- Great looks. Modern materials imitate wood and expensive stone.
Diagram of the suspended structure
Manufacturing of hanging structures
The instructions for making a hinged plinth are as follows:
- First of all, it is necessary to perform the sheathing. To do this, a metal or wooden frame is attached to the piles. If the sheathing is made of wood, then it is necessary to pre-impregnate it with an antiseptic. Metal elements must undergo anti-corrosion treatment.
- Before closing the base of the pile foundation, it is advisable to fill the junction of the base and the soil with sand. The filling depth can be 500-700 mm.
- Then the facing material is attached to the sheathing, for example, asbestos-cement slabs, slate sheets or special insulated facade slabs.
- Next, you should carefully bring the corners of the structure together.
- After this, the remaining additional elements are installed.
Metal sheathing
Note! It is necessary to leave a gap of about 5-8 cm between the base and the soil. Otherwise, the base may be damaged as a result of frost heaving of the soil.
Plastic panels
When using decorative panels made of plastic, a cheaper coating is obtained, but less aesthetically pleasing. Products made from natural brick or stone look more attractive. But such finishing material hides the foundation of the piles well.
If the panel sheet has an increased thickness, it can withstand quite large loads. He is not afraid of chemical and biological influences.
If curtain panels are used, the space between the house and the ground surface remains empty. Water cannot collect in it and condensation cannot form due to free air circulation.
The panels are very similar in appearance to the monumental base. At the same time, they retain all the properties of a foundation base on piles. This is especially noticeable in areas with significant elevation changes and other terrain difficulties.
Watch the video to appreciate all the benefits of covering the base of the house with decorative panels:
Types and features of basement siding
Manufacturers offer the buyer several types of finishing materials. Siding differs in raw materials:
- Vinyl - made from PVC. Therefore, the panels are light and easy to work with.
- Metal base siding - galvanized steel is chosen for production. They are also treated with protective compounds, both on the front and back sides. The weight is greater than the previous version, but the strength is much greater.
Base material is distinguished for finishing and texture:
- Brick panels - completely imitate brickwork. From a distance it is almost impossible to distinguish from the original. Everything is achieved due to the fact that for the manufacture of panels they use impressions of ordinary bricks along with chips and cracks.
- Stone cladding. There are several options for panels for the base of a pile foundation. The choice will have to be made from imitations of rubble, burnt, rock stone and alpine granite. Each of these materials has excellent characteristics and is perfect for finishing the base.
Let's figure out why basement siding is so popular for finishing. Everything is connected with several advantages that this material has:
- Availability. The price is affordable, so almost everyone can afford to buy it.
- Mechanical stability. If you decorate a pile-screw foundation with basement siding, then it will not be afraid of even the strongest blows.
- Biological inertia. Insects, mold, fungi and rodents do not damage the material.
- UV resistance. The panels retain their original color for many years. Only the shade changes, but this will happen evenly and unnoticed by the owner.
- Duration of operation. Some manufacturers indicate a period of 45–50 years.
- Easy to install.
- Versatility. Installed on any foundation.
But this material has several disadvantages. Firstly, these are linear changes with temperature. Secondly, flammability. This only applies to vinyl siding.
How to close screw piles
The final stage of construction is finishing the basement space. In houses with pile foundations, space is left, giving an unfinished look.
In this regard, it is important to understand the finishing and study all the nuances that you should pay attention to when performing it. Let's consider how to cover the base of a house on screw piles, the advantages and disadvantages of finishing materials
Let's consider how to cover the base of a house on screw piles, the advantages and disadvantages of finishing materials.
Advantages of finishing the basement space
Finishing the space between the pile foundation and the house has advantages:
- increases thermal insulation;
- prevents medium and large animals from entering under the floor;
- prevents snow and rainwater from accumulating under the house.
In order for the finishing to perform all of the listed functions, when choosing a material you need to carefully study all the advantages and disadvantages of each type.
Finishing methods
To prevent the floors in the house from being blown through, it is necessary to insulate the basement space
The open space between the soil and the floor is blown by the wind and exposed to sub-zero temperatures, resulting in a cold floor in the house. We close the piles under the house using:
- shallow strip plinth devices;
- hanging finishing material between the piles, having previously built a frame.
When choosing a finishing method and material, we consider:
- soil type;
- groundwater level;
- climatic conditions.
First of all, we install the support sheathing from a profile pipe; it will serve as a connection between the supports. The guide spacing should be 300-400 mm. The profile is selected with different side widths (40x20).
To prevent communications from freezing, we insulate them with mineral wool or foil roll insulation.
When choosing a material, we take into account that it is in contact with the surface of the earth, therefore, if water is close to it or flooded, it will be affected by all the harmful factors.
Flat slate
Asbestos boards are not an environmentally friendly material
Every year this material is losing its popularity; it is being replaced by modern, environmentally friendly materials.
Advantages:
- resistant to atmospheric influences;
- durable.
Flaws:
- asbestos is dangerous to human health and pollutes the environment;
- fragile;
- unattractive appearance.
The base of a screw foundation covered with flat slate will not harmonize with a building made from modern materials.
Blind area
The blind area insulates the base from moisture
Upon contact with soil, the quality of the facing materials is lost, so the surface must be isolated from moisture and a blind area made. For waterproofing, we use roofing felt or dense polyethylene, one end of which is tucked under the blind area, and the other edge is folded onto the frame sheathing under the finishing material.
Upon completion of the cladding, we arrange a blind area that will prevent rain and melt water from leaking under the building. To ensure the drainage of water and condensate, it must be mounted with an inclination of 1.5 degrees from the base.
Concrete is poured evenly into the formwork, in which a mesh of reinforcement is laid. We lay an expansion joint at the junction with the foundation plinth.
For more information about blind areas in a house on screw piles, see this video:
If the house is located on a slope, part of the underground can be equipped as a cellar; in this case, we provide for the installation of a door.
How to cover a pile foundation from the outside: materials, photos, videos
› Foundation work ›
One of the final stages of construction is the finishing of the basement area. Always in houses where there is a pile foundation, there is space left, because of which the entire building takes on an unfinished appearance.
Therefore, it is important to understand whether it is worth finishing, what materials are best to use for this purpose, and also to thoroughly study the correct technique for performing finishing work. In this article we will look at how you can cover a pile foundation from the outside, the advantages of each type of material, as well as how to perform the work
In this article we will look at how you can cover a pile foundation from the outside, the advantages of each type of material, as well as how to perform the work.
What are the advantages of finishing work?
In addition to the fact that manipulations allow you to create a finished, aesthetic appearance for the entire building, it is also worth noting some other advantages of the finishing:
- you can increase the thermal insulation of the entire house several times, which means that in winter the room will always be warm;
- prevents precipitation from accumulating under the building;
- eliminates the possibility of medium-sized and large-sized animals getting under the floor of the house.
Of course, these factors play an important role, which is why many owners of private houses and penthouses prefer to carry out work of this kind.
Let's consider the materials that are relevant to use for finishing the foundation.
Brick
If desired, the cladding of the house can be done from more serious materials that will last for a long time - brick is considered to be such a material. In addition, it has an aesthetic appearance and is durable. But it is worth noting that in this case the work will have to be completed longer, and it will be more labor-intensive.
To close a pile foundation, you must first arrange the foundation for the masonry. Just as in the case of siding, it will be necessary to provide a special layer that will prevent soil heaving.
One of the most suitable options for mounting bases is a monolithic tape. Experts recommend using it in cases where construction is planned on soil that is easily deformed.
Let's consider the advantages of decorating the foundation of a house with bricks:
- serves as an excellent thermal insulation material (considered the most reliable of all available);
- does not require any additional finishing;
- can always be repaired if necessary;
- durable.
But brick also has disadvantages as a finishing material. It is quite heavy and expensive; it is difficult to install it yourself (you will need the help of specialists).
Plastic panels
You can also use this material to finish the foundation of a house; in this case, the installation technology will be exactly the same as in the case of siding. If you decide to design a foundation using these particular materials, then you will be able to appreciate the following advantages:
- pleasant appearance of the building;
- you can choose any color or texture of the panels;
- providing additional rigidity to the house;
- the material does not rot;
- resistant to both chemical and mechanical influences;
- has an affordable price.
However, when choosing plastic panels, it is worth remembering that in any case, natural stone or brick will look much better.
Profiled flooring
If you are thinking about how to cover a pile foundation, without resorting to the help of specialists, then it is worth mentioning corrugated sheeting. Its installation is easy; the frame is mounted in the same way as for installing siding.
Corrugated sheeting is durable and easy to use both in terms of operation and installation. A significant advantage is also the fact that a large number of color solutions are provided.
If you have never encountered foundation finishing work, it’s not worth the risk. It is best to immediately seek help from experienced specialists who will do all the work quickly and efficiently.
How to cover the pile foundation from the outside? Link to main publication
Stages of work on finishing the basement of a frame house on screw piles
We had sheets measuring 1200 mm by 1800 mm (you can take 2000 mm), the clearance between the ground and the house is standard for dry areas of 500 mm. Therefore, it was very convenient to cut one sheet across the stiffeners into 4 equal parts of 1200 mm by 450 mm (just the ventilation gap remains), using metal scissors. Cost 475 rub. per sheet, thus, a linear meter of our plinth costs only 99 rubles, while the cheapest plinth siding will cost 480 rubles. per linear meter, not counting the cost of the necessary sheathing.
This is what the gap between the frame house on screw piles and the ground looked like before the homemade basement panels were installed.
The cut parts of the profiled sheet were screwed with self-tapping screws directly to the wooden frame of our foundation.
In order to avoid the need to do ebbing from the base, it was decided to place the corrugated sheeting under the level of the main siding, i.e. It was necessary for the corrugated sheeting to be located on the same level as the still unfinished wall. In some places, it was necessary to put “liners” on the OSB sheets so that it was flush with the wall.
The lower edge of the sheets was tied with a bar using self-tapping screws. The result was a fairly stable structure that did not require attachment to the piles themselves.
Theoretically, it can be secured to piles in the future.
The sheets were bent at the corners, this gives additional rigidity. You need to bend in certain places so that the corner profile fits, not on the stiffener.
The starting strips of the main façade siding are already attached on top of the sheets.
In the end it turned out like this:
In our opinion it is beautiful. All that remains is to make a blind area.
Classic finishes
As an option, you can use standard systems of ventilated facades under the tiles, but in this case the tiles may be subject to bending loads and impacts, since the base is a vulnerable spot and will collapse. On top of any type, a flashing is installed along the entire perimeter of the building.
Ceramic and stone tiles must be fixed with a special adhesive for facades and plinths. The surface is pre-leveled with plaster and cement mortar.
The brickwork is laid from a 125x125 mm corner, which is welded from the outside on embedded elements to a columnar foundation or concrete plinth according to the level. Brick finishing can be done with insulation, if you first place the corner from the columnar foundation to the thickness of the insulation using metal inserts, and after welding the corner is insulated. Laying half a brick. Bricks are used without holes, not silicate; it is better to use clinker. Laying on cement mortar with dressing in half a brick, maintaining the pattern, if there is one in the project.
Every four rows, a reinforcing bar is laid in the brickwork, and anchors are attached to the piles of a columnar foundation or base in increments of at least one and a half meters.
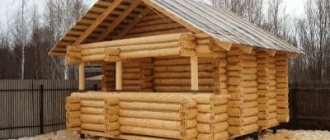
Screw piles are a product of new technologies, a type of columnar foundations that are indispensable for construction on soft soils. This technology makes it possible to reach stable soil layers without additional costs of equipment and materials. Piles are considered the best foundation option for private construction. Reliable, safe, and most advantageous in all respects, the supports make foundation construction simple and quick. It can be made in a few days, in any weather, at any time of the year, and the supporting structures are installed immediately.
Insulation of a pile foundation: step-by-step instructions
Any owner of a site, when planning to build his own house, tries to minimize the total cost estimate as much as possible. Fortunately, the abundance of modern technological developments makes it possible to choose the least expensive approaches to construction, naturally, without losing the performance qualities of the future building.
Insulation of a pile foundation
One of the most material-intensive, expensive, and time-consuming stages of construction was usually considered to be the construction of the foundation of a house. However, for many types of residential and ancillary buildings, pouring a strip or monolithic slab base is not required at all. It is enough to confine yourself to installing piles, which are tied on top with a grillage - this will become a reliable basis for raising the walls. This approach is good for everyone, but very often the house, especially with very uneven terrain, turns out to be “floating in the air,” that is, below the floors of the first floor there is a space blown by all the winds. It’s okay - you need to properly insulate the pile foundation, and the building, even externally, will not differ at all from those buildings that are installed on a “classical” concrete base.
A few words about the pile-screw foundation
The pile-screw foundation has a number of significant advantages.
- First of all, it becomes the most profitable solution if the house is being built on unstable, waterlogged soils that tend to swell in winter. The lower screw part of the pile reaches depths below the freezing level, stable layers of soil, and seasonal fluctuations in the surface do not have any negative impact on the constructed house.
- Such a foundation is the most economical and easiest to construct when building houses on sites with rugged terrain - achieving horizontal bottom trim with this approach is the easiest way.
- The construction of a pile-screw foundation is less dependent than others on the season and weather - construction can be carried out at any time of the year.
- In terms of construction time, such a foundation also has no equal.
- The technology for its arrangement is quite simple and, subject to certain conditions, can be implemented on its own.
- From a cost point of view, the construction of a pile foundation is the most economical.
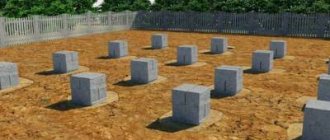
The entire technology for creating a pile-screw foundation for building a house can be briefly presented as follows:
| Illustration | Brief description of the operation performed |
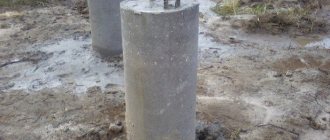
| Piles are pipes with a diameter of 100 mm or more made of high-quality steel, with a wall thickness of at least 4 mm. Specific parameters of piles, including their length, are calculated by designers depending on the level of planned loads, the general picture of soils and topography at the construction site. The lower end of the pile has a sharp point with one or more spiral-shaped cutting blades welded on. | |
| A set of piles usually consists of pile heads to which mounting platforms are welded. The diameter of the heads is such that they fit tightly onto the pile pipe. | |
| After marking the pile field, pits with a depth of about 300 ÷ 500 mm are usually dug in the places where the supports are installed. They are often shed with plenty of water to facilitate the initial screwing of the pile into the ground. | |
| The pile is placed vertically in the pit, and a pin is inserted into the hole in its upper part. pipe-levers are put on it for screwing. | |
| With the efforts of two people (sometimes more are required), the pile rotates, gradually plunging deeper into the thickness of the soil. At this stage of work, the most important thing is strict control of the vertical screwing of the support. Screwing continues until the pre-set depth mark is reached. Many construction organizations have specialized equipment to mechanize this most labor-intensive operation. | |
| After all the piles are installed, using a laser or water level, an accurate mark of the common protruding part of the supports is made on each pipe. It must be below the hole where the pin was inserted. | |
| Next, all piles are trimmed to a single horizontal level. | |
| The concrete solution is mixed, and through the funnel the pile is completely filled to the top with it. | |
| The consistency of the solution should be sufficiently liquid and fluid so that the pipe cavity is filled completely, without air bubbles. It is typical that there is no need to wait for the concrete to set. They immediately move on to the next operation. | |
| The standard caps are placed on the piles until they stop, so that the installation sites are oriented correctly. The heads are tightly welded with a continuous seam | |
| To completely eliminate any vibrations of the supports, it is recommended to provide an auxiliary strapping made of a metal profile, which is welded into the piles below the head. If the piles protrude to a considerable height, sometimes several rows of strapping are welded. This operation is especially important if the crown beam will be directly attached to the mounting sites of the piles. | |
| There is another approach - installing a common belt (grillage), for example, from a channel of the appropriate size. The grillage will become the basis for the further construction of the walls of the house. | |
| The installation of a pile-screw foundation must be completed by cleaning the weld seams from slag and high-quality treatment of all metal parts with anti-corrosion compounds. |
The table focuses on creating a grillage from rolled steel. However, the options may vary.
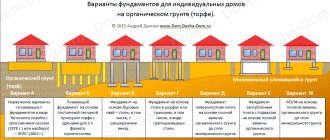
Several options for piping (grillage) of a pile-screw foundation
- Figures “A” and “B” show a welded grillage made from an I-beam and a channel, respectively.
- Fragment “B” - the grillage is not used at all, and the lower crown beam is attached to the mounting sites of the piles.
- And finally, option “G” is pouring a reinforced concrete grillage. In this case, a kind of “symbiosis” is created between the pile and strip foundations.
This option is the most labor-intensive, and is most often resorted to if it is necessary to create a reliable foundation for building a house made of brick or gas silicate blocks.
In this case, at the stage of pouring concrete into the piles, a reinforcement structure is installed in the pipes - it should protrude from above. After the piles are installed, the formwork for the grillage is installed, and a reinforcing belt is laid, which must be connected to the internal reinforcement of the piles. The solution is poured, and the created structure will be ready for further construction operations only after the concrete has fully matured (no earlier than a month).
Structurally, such a grillage can be raised above the ground, located on the surface, or be an analogue of a traditional shallow foundation strip. But in any case, it rests not on the ground, but on piles.
Various options for the location of a reinforced concrete grillage
1 – screw pile;
2 – internal reinforcement in the pile;
3 – grillage reinforcement belt;
4 – reinforced concrete grillage.
Such close attention was paid to the types of pile binding because the technological approach to the insulation of a pile foundation directly depends on this.
Why is it necessary to insulate a pile foundation?
It would seem, what is the point of insulating a pile foundation? It rests deep in layers of non-freezing soil, that is, it is not in danger of swelling. If high-quality anti-corrosion preparation of the structure has been carried out, then there is no particular fear of the destructive effects of soil and atmospheric moisture.
However, very vulnerable areas remain, as well as a number of other unresolved issues:
- If a reinforced concrete grillage is poured, then regardless of its position relative to the ground level, this structure becomes a very powerful cold accumulator. Naturally, a massive grillage will “pull” heat from the walls and ceilings resting on it, which will lead to significant heat losses and increased costs for replenishing them with the heating system.
A reinforced concrete grillage is always a powerful “cold accumulator.”
In fact, the goals of insulation in this case largely coincide with the task of thermal insulation work on a conventional monolithic strip foundation - reducing heat loss, and protecting the reinforced concrete structure itself from the effects of temperature changes.
- If the walls are installed on a wooden or metal grillage, then there is space under the house that is blown by the wind. During the cold season, this will also lead to cooling of the ground floor floor and the lower part of the walls. Of course, it is possible to provide very reliable multi-layer thermal insulation of the ceiling, but it is still better to eliminate heat loss completely by covering the gap with an insulating structure.
- If the house is equipped with at least minimal “conveniences” - running water and even the simplest sewerage system, then engineering communications will pass through this underground space. Insulation of the pile foundation will increase the level of protection of communications from freezing and from mechanical damage.
Insulation and protection are required by utility lines running in the underground room.
- Just from an aesthetic point of view, the house will look much more advantageous if the basement part of the pile foundation is insulated and beautifully finished externally. In addition, garbage and dirt will inevitably be blown into the open space by the wind, which in itself is unpleasant and will require additional efforts to put things in order.
- The house will receive maximum protection if a blind area is installed around the perimeter of its walls. An integrated approach to the insulation of any foundation also implies the creation of a high-quality blind area that is not subject to swelling, that is, thermally insulated from below.
Now that the reader is apparently convinced of the need to insulate a pile foundation, we can proceed to consider some typical cases of work.
Insulation of a pile foundation with a reinforced concrete grillage
This is one of the most difficult cases, since the goal is not only to block access to cold air into the underground space, but also to provide thermal insulation protection for the grillage itself so that it is not subject to destructive influences and does not become a powerful bridge of cold.
There may also be several options, and they will depend on the height of the basement part of the pile foundation, the position of the reinforced concrete grillage, the features of the first floor ceiling, etc.
Let's look at one commonly used scheme:
The first option for insulating a pile foundation with a reinforced concrete grillage
1 – soil at the construction site.
2 – installed foundation pile, which ends at the top with a massive reinforced concrete grillage (item 3). The grillage itself is the basis for the construction of an aerated concrete (brick) wall (item 4).
On the outside (this is a prerequisite) there is a layer of insulation of the required thickness (item 5). As a thermal insulator, the best solution would be to use extruded polystyrene foam, for example, Penoplex-Foundation boards. This material is resistant to high static and dynamic loads, is not afraid of exposure to atmospheric and ground moisture, and has excellent thermal resistance.
Penoplex slabs - comprehensive home insulation
The Penoplex range of thermal insulation boards covers literally all areas of private construction. Read more about the advantages of Penoplex insulation and the technologies for its use in a special publication on our portal.
A layer of horizontal insulation (item 6) is tightly joined to the grillage insulation, without gaps, which will prevent freezing and swelling of the soil around the walls and thereby ensure the integrity of the concrete blind area poured along the perimeter (item 7). Often the blind area is not poured, but laid out, for example, from paving stones.
On top, also without a gap, the façade insulation (item 8) is joined together as in the diagram, or, better yet, overlapped, so as not to create a “cold bridge” at the border of the base and the wall.
Prices for Penoplex insulation
Penoplex insulation
With this approach, floor insulation is solved in the following way:
Sand filling is made inside, about 500 mm thick (item 9). Instead of sand, the pillow can be made of loose insulation - expanded clay, or a complex, layer-by-layer option can be used. From above, this backfill must be covered with a waterproofing layer (item 10) - this role is usually played by a couple of layers of roofing material laid with overlapping overlaps.
A rough screed with reinforcement is poured on top (item 11). A layer of insulation (item 12), for example, the same Penoplex, is laid on top of it. Well, above that there will be a finishing screed with a thickness of 60÷70 mm, in the thickness of which a water or electric “warm floor” can be provided.
This scheme almost completely blocks access to the cold to the grillage and walls, and there is simply no underground space as such.
Another option is when it is impossible to do without an underground, for example, when the first floor floor slab is laid on the grillage.
And in this version, the grillage is also insulated from below, from the ground
At the beginning, everything is the same - soil (item 1) with a screwed-in pile (item 2) and a reinforced concrete grillage (item 3). Differences - from the grillage comes the base brickwork (item 4), which already becomes the basis for the construction of walls made of bricks or blocks (item 5)
Vertical insulation of the base is carried out with the same extruded polystyrene foam (item 6). But in this case, horizontal insulation of the grillage itself is also provided from below. To do this, first lay out a gravel layer (item 7), then a compacted sand cushion (item 8), and then a layer of the same insulating material (item 9). The best solution is to carry out such a design even before pouring the grillage, that is, the horizontal layer of insulation in this case will act as the lower surface of the formwork. Thus, the foundation tape received reliable insulation from the outside and from the bottom.
Decorative cladding is provided on the outside of the plinth and facade wall (item 11) - these can be panels, siding with a ventilated gap, or a plaster layer using “wet facade” technology.
The diagram shows a blind area (item 10) without its own insulation, but such thermal insulation should not be ignored. This will significantly increase the viability of this structure, since the freezing of the soil under the blind area has not been canceled.
The floor slab (item 12) is laid on the grillage, and an underground (item 13) inevitably remains below it. Next, thermal insulation of the floor is carried out in the usual way. First, a layer of roll or coating waterproofing (item 14), then a layer of insulation (item 15), and then a finishing screed or “warm floor” system.
The entire grillage (tape) must open to the base. There will be no problem if the lower part of the insulation is below ground level - as already noted, Penoplex is not at all afraid of such an impact.
Before attaching the insulation to the grillage, all surfaces, concrete and metal, are first carefully waterproofed - for this, special bitumen-based mastics are usually used, and to obtain a guaranteed result, it is also recommended to use high-quality roofing felt.
It is recommended to fix the insulation on a concrete waterproofed surface using a special glue designed specifically for thermal insulation work. It can be in the form of a dry construction mixture, a ready-made paste composition, or in tubes like polyurethane foam.
One of the types of glue for insulation work
Penoplex panels have lamellas for easy joining without leaving gaps. But if the gaps still remain, then they are filled with polyurethane foam. If foam is used, it is recommended to coat all seams with bitumen mastic on top, after trimming off the excess.
There is no provision for fastening the panels to the concrete strip below the ground level, but in the basement part, if necessary, you can use “fungi” dowels.
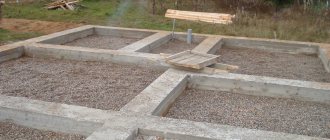
As already mentioned, in the case under consideration, it is imperative to provide horizontal thermal insulation along the perimeter of the building, under the blind area. To do this, a trench is dug in advance, about 400 mm deep. A sand and gravel cushion is poured into the bottom and compacted, and then the insulation boards are pricked so that they fit tightly with the vertical insulation.
Joining vertical and horizontal insulating belts and installing reinforcing mesh
Reinforcing mesh is laid on top of the insulation. Formwork is installed along the outer perimeter of the future blind area. Then you can pour concrete so that a small difference in height is ensured - about 30÷50 mm with a slope from the wall.
Pouring the blind area with concrete
In fact, at this point the insulation of the pile foundation with a reinforced concrete grillage can be considered complete. It remains only after the blind area has completely hardened to provide external cladding of the base - panels, tiles, plaster, etc.
The question of the thickness of the insulating layer, vertical and horizontal, remained unresolved, and this is also of great importance in this case.
It is easy to calculate this parameter, guided by the normalized values of heat transfer resistance for building structures calculated for a specific construction region. These indicators can be determined, for example, on the attached map diagram - in this case we are interested in purple numbers - for the walls.
Map diagram with normalized heat transfer resistance values
Knowing the thermal conductivity coefficients of building and insulating materials and the thickness of the foundation tape (grillage), it is easy to calculate the required thickness of thermal insulation. We will not give calculation formulas, but rather suggest using a convenient calculator:
Calculator for calculating the thickness of vertical insulation of a pile foundation with a concrete grillage
Other materials that can be used as a layer of thermal insulation include ordinary polystyrene foam (foam), polyurethane foam in the form of panels, or applied by spraying. All this is also taken into account in the calculator.
The resulting value is rounded and reduced to standard thicknesses of insulating materials.
Go to calculations
Without much error, you can use another tabular method for determining the thickness of insulation.
By the way, it allows you to determine the recommended dimensions of the horizontal layer of thermal insulation in terms of thickness and width from the wall. In addition, it is recommended to thicken the insulation in the most vulnerable areas - namely in the corners of the house.
Thickened areas of horizontal insulation at the corners of the building
The parameters of such reinforcement - the total thickness of the layer and the length of the section from the corner of the house, will also be obtained from the table.
First, you need to determine approximately (rounded to 500) the so-called “frost index” for your region. To do this, you can use the following map diagram:
Schematic map with frost index isotherms
Now all that remains is to enter the table and determine the necessary parameters for the vertical and horizontal thermal insulation of the foundation:
| “Frost index”, MI (degree-hours) | up to 35000 | 35000 | 40000 | 50000 | 60000 | 70000 | 80000 | 90000 |
| Vertical foundation insulation: | ||||||||
| — thickness of the vertical insulation layer (mm) | 84 | 91 | 98 | 112 | 126 | 140 | 154 | 168 |
| Horizontal insulation along the perimeter of the foundation: | ||||||||
| — thickness of the horizontal insulation belt (mm) | not necessary | 18 | 32 | 49 | 63 | 81 | 102 | 133 |
| — S — width of the horizontal insulation belt (m) | not necessary | 0.3 | 0.6 | 0.9 | 1.2 | 1.5 | 1.8 | 1.8 |
| — thickness of the thickened section (mm) | not necessary | 25 | 44 | 69 | 95 | 121 | 152 | 200 |
| — L — length of thickened sections from the corners of the building (m) | not necessary | 1.2 | 1.2 | 1.5 | 2 | 2.5 | 3 | 3.5 |
The obtained values, if necessary, can be rounded in one direction or another (depending on the more accurate value of the “frost index”), and brought to the standard thicknesses of manufactured insulation materials.
Insulation of a pile-screw foundation with a metal grillage or timber frame
The main difference between this option is the absence of a massive cold accumulator that would “pull” heat from the walls. And therefore, the main efforts should be directed not so much at external thermal insulation, but at ensuring the most efficient basement floor of the first floor.
As usual, a pile-screw foundation with a similar piping implies a fairly high location of the “zero level” above the ground surface, which can also be aggravated by uneven terrain. Filling the entire internal space with soil, and then creating a sand-expanded clay insulation cushion is possible in principle, but in most cases it is absolutely not justified from the point of view of uneconomicality and too much labor. Therefore, the basement floor is usually raised above the ground, leaving a ventilated space below. This satisfies certain requirements for high-quality thermal insulation of the floor.
Insulation of the basement floor
Most often, in such construction, floors are used on floor beams. The insulation diagram for such a floor is shown in the figure:
Scheme of the insulated basement and floor of the first floor
1 – floor beams made of wooden beams of calculated cross-section. Usually – at least 100×200 mm.
Skull bars (item 2) with a cross-section of approximately 50×50 mm are attached to the bottom of the beams. They become the basis for laying subfloor boards (item 3) about 25 mm thick. For the subfloor, you can use not the highest quality material. Often, for the sake of economy, it is not even made continuous, with gaps between the boards, but in such a way that the insulation material is guaranteed to be retained.
Waterproofing (item 4) is laid on the subfloor boards, extending onto the floor beams. This may be a special high-density waterproofing film, but it is quite possible to use inexpensive roofing felt. Overlaps of adjacent waterproofing strips must be taped.
Insulation boards are laid on top of the waterproofing (item 5). In this case, the best option would be mineral basalt wool with a density of 35÷40 kg/m³. The thickness of the insulation is determined by calculations or is taken equal to 200 mm.
Please note that the diagram shows logs for laying the finished floor (item 6). This is a high-quality timber of the required cross-section (for example, 75×75 mm). But they are usually mounted perpendicular to the floor beams. And at the same time, insulation is performed in two layers. The first row of thermal insulation mats is laid between the tanks, and the second - already between the joists, perpendicularly. This ensures an almost complete absence of cold bridges through the wooden parts of the ceiling.
How to install floor beams and joists
The quality of the floor and the duration of its operation directly depend on the correct selection and installation of load-bearing elements. How to choose the required section and how to install floor beams and joists - read in a special publication on our portal.
A layer of vapor barrier film (item 7) with a vapor permeability of no more than 1 g/m²/24 hours is laid on top of the insulation. It is fixed with counter-lattice boards (pos. thickness from 30 to 50 mm - this will create the necessary ventilation gap.
Prices for thermal insulation adhesive Ceresit
thermal insulation adhesive Ceresit
And finally, the finishing floor covering (item 9) from high-quality boards with a thickness of 35÷40 mm is installed along the counter-lattice boards.
Before installing such a floor structure, all wooden parts (with the exception of only the top “finishing” board) must undergo thorough treatment with special compounds that will prevent biological decomposition of the wood, its infection with fungus, and give the material the necessary fire resistance.
All wooden parts must undergo careful preparation
You should not skimp on impregnation - it is better to carry out the treatment in several layers. Under the conditions under consideration, this will be extremely important; attention will be focused on this below.
If a slab was used as the basement floor of the first floor, it is recommended that in addition to the internal insulation of the floor of the first floor, it is also recommended to provide an external layer of thermal insulation. The fact is that with such a scheme without external insulation, the dew point will inevitably be shifted into the thickness of the internal insulation, which will lead to its gradual saturation with moisture. The outer layer of thermal insulation will bring the dew point outside.
Insulation of the basement around the perimeter of the building
The next question is what to do with the gap between the soil surface and the frame, that is, with the uncovered base part of the pile foundation.
Opinions on this matter vary quite a lot.
- Many builders argue that high-quality insulation of the floor is quite enough, and the lower space should remain ventilated, and it is enough to simply decorate it with decorative cladding.
- Opponents of this approach are of the opinion that insulation is still necessary, since unnecessary heat loss, especially on extremely cold winter days, will be very significant, and it is better to avoid it completely.
Probably the truth lies somewhere in the middle. Insulation in any case will not hurt, but it must be done in such a way as not to harm the entire structure of the floor.
How can you perform vertical insulation of the basement part?
Brickwork
One option is to build a brick basement wall. With careful laying, this will achieve a certain insulation of the underground space and at the same time create a decorative cladding.
To lay a brick wall (usually half a brick), it is necessary to prepare the base. This can be a shallow foundation strip, approximately 200 mm wide, poured around the perimeter of the house. True, there is a certain danger in this option.
The fact is that, as already mentioned, a pile foundation is usually installed on unstable soils, that is, the immobility of the building itself is ensured. But a shallow strip foundation for brick cladding will not have such stability, and winter swelling of the soil will inevitably lead to its deformation. How long will such brick cladding of the basement last?
This means that it is advisable to connect the base for the brickwork with stationary piles. This can be achieved, for example, by welding a channel to the piles along the perimeter, aligning it exactly horizontally.
For brickwork, a base has been prepared from a channel welded to the piles
The size of the channel is selected so that the brick fits into it. The metal profile, after anti-corrosion treatment and creation of a waterproofing layer, becomes a kind of “strip foundation” for the brickwork. A clear example of this approach is shown in the video:
Video: How to cover the basement of a pile foundation with bricks
Closing the basement opening with a fence
Another solution to the problem is to install a wall (fence) made of sheet material or special panels. This involves installing the partition on a frame structure.
In principle, there should be no issues with the frame - reliable vertical posts are already there - these are the piles themselves. If, even during the construction of the pile foundation, additional piping with a metal profile was immediately carried out (as was shown in the table above), then we can say that the frame is already completely ready.
Approximate diagram of fastening the pick-up to the metal frame of the piles
1 – soil surface.
2 – screw pile.
3 – strapping beam.
4 – Two rows of welded additional pile piping – profile pipes.
5 – Pickup. It can be, for example, sheets of flat slate, cement-bonded particle boards (CSP), and often even simply insulating boards of extruded polystyrene foam.
6 – External decorative cladding.
The metal frame is not a dogma at all. It is quite possible to limit yourself to a wooden structure, having thought through its fastening to vertical piles, for example, by welding small gussets-brackets into the pipes for screwing boards or beams. Of course, all wooden elements of such a structure must first undergo appropriate processing.
You can also use a wooden frame
Insulation of the fence can be carried out both from the outside and from the inside. The photographs below show that DSP sheets can be mounted on top of the insulation layer for further finishing, or the insulation itself (extruded polystyrene foam) itself is the basis for finishing work.
Various options for the location of insulation boards
An option is possible in which the thin, strong wall of the intake is insulated from the inside, from the underground space. For example, you can use sprayed polyurethane foam for this.
Thermal insulation is made from the inside by spraying polyurethane foam
Often, special panels are used as a material to create such a false base, which combine the properties of both insulation and decorative finishing. They are made of polystyrene foam or polyurethane foam, and on the outer surface they have imitation stone or brickwork, or even clinker tile cladding. As a rule, such thermal panels have a well-thought-out system of fastening and joining to each other, which allows the work to be completed in the shortest possible time - issues of insulation and finishing are resolved simultaneously.
Base thermal panels - both insulation and finishing at the same time
If a regular insulated fence is installed, then its finishing can include a very large number of options - all at the discretion of the homeowner. At the same time, during finishing, the issue of basement flashings is immediately taken into account.
Finishing the base and flashings
A well-designed basement always affects the “solidity” of the entire house. What options exist for finishing the plinth - read in a special publication on our portal.
What should be the thickness of the insulation? In principle, you can use the same calculation system as given above - just enter a zero value in the “grillage thickness” field in the calculator. You can also use the data from the table given there, including to create an insulated blind area.
The blind area can also be joined to a false base, as shown above. True, sometimes they prefer another option - the lower edge of the fence is not covered with soil and does not meet the blind area, but a ventilation gap is left there. True, the thermal insulation qualities of such a false base are significantly reduced. But for regions with mild winters it is a very good option.
Options for the relative position of the basement fence and blind area
On the left is a diagram with complete closure of the basement clearance, on the right - with leaving a ventilated gap.
1 – soil.
2 – pile.
3 – frame for fastening the pick-up.
4 – pick up.
5 – a layer of waterproofing that ensures the outflow of atmospheric moisture into the drainage. Please note that it is located differently.
6 – external decorative finishing of the false base.
7 – sand cushion.
8 – blind area (paving slabs can be used).
9 – basement ebb.
10 – drainage pipe.
The blue arrow in the right figure shows the remaining ventilation gap (about 30 ÷ 50 mm).
If it is planned to completely close the space between the soil and the piping, then one extremely important point must be taken into account. In the insulated underground space there will be increased humidity and dampness will certainly begin to accumulate. This can have the most negative impact on the condition of all wooden parts of the basement floor and frame structure - another important argument in favor of their conscientious preliminary preparation.
Prices for popular insulation
To avoid the destructive effects of dampness, it is necessary to provide ventilation vents - one on each side of the house. They are equipped with closing windows, and in winter, when heat conservation comes to the fore, the vents can be kept closed. With the onset of the warm season, the vents open and the underground space receives the necessary ventilation.
The total area of the vents must be at least 1/400 of the area of the resulting basement room. For example, for a house 7 × 10 m, that is, with a basement of 70 m², the total area of the vents should be at least 0.175 m². If you make, say, 6 vents, then the area of each will be about 0.03 m², and you can choose a size of 20 × 15 cm. However, only the area is important, and the specific dimensions and shape of the vents can be arbitrary.
Video: What are the consequences of mistakes in insulating a pile foundation?
In order to always maintain dry soil around a house on a pile foundation, it is recommended to install a drainage system - one of the diagrams shows its pipe. But this is already a topic for detailed consideration in a separate article.
How to cover piles under a house
There are two options for external cladding of the foundation base made of screw piles:
- Hinged screen;
- Strip foundation (shallow).
According to statistics, the technology of suspended cladding is used more often. Its essence lies in the fact that after installation, wooden or metal guides (sheathing) are welded or fixed with self-tapping screws onto the screw piles. After this, sheet material is attached to them (flat slate, corrugated sheets, vinyl siding, thermal panels).
The work is completed by finishing the surface and installing shaped elements (drips, junctions, drips).
The advantages of a suspended plinth include:
- Low costs (costs are 2-3 times lower than when pouring a strip foundation);
- Simple and short installation (2 people can complete cladding on a house measuring 6x8 meters in 10 hours);
- Good ventilation and protection of the underground space from dampness;
- Aesthetics (modern finishing materials reliably imitate expensive types of finishing made from natural wood and stone).
A strip foundation (shallow) for facing a pile grillage is made using heavy materials: brick or stone. The labor intensity of such work is higher than when installing a hanging screen.
Preparatory operations and stages of arrangement:
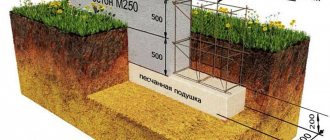
- A trench is dug along the perimeter of the building (depth 20-30 cm, width 15-20 cm);
- A frame made of reinforcement with a cross-section of 12 mm is placed in the recess and filled with concrete;
- After giving the foundation time to gain strength (1-2 weeks), a half-brick thick brick wall is erected on it or natural rubble stone is laid;
- From the inside, the brick base of the foundation made of screw piles is sheathed with insulation (foam plastic, mineral wool);
- On the outside, if necessary, it is finished with decorative plaster.
To increase the service life and increase the rigidity of the foundation, some builders make the concrete “ribbon” wider and raise it 20-25 cm above ground level. In this case, the monolithic foundation covers the lower part of the piles - the most vulnerable place for metal corrosion.
This type of foundation for brick cladding reliably protects piles from corrosion and increases the strength of the foundation
Another option for covering a foundation made of screw piles can be called intermediate. It does not require pouring concrete to support the brickwork and does not require the installation of tracks to which the curtain wall is attached.
Brick cladding of the base using a steel angle
In this case, a steel corner is welded to the piles at a distance of 5-7 cm from the ground. The size of its shelf is 100 or 120 mm. The rigidity of the profile is quite sufficient to support masonry half a brick thick. The gap between the corner and the ground serves to ventilate the underground space.
Features of pile foundations
If the house is built of brick or block, the pile field is usually crowned with a reinforced concrete grillage. The foundation for wooden and frame-panel houses is a steel channel, or timber. So:
- This type of foundation is chosen if the soil on which you plan to build the house is heaving, or, conversely, too dense. Or the area is subject to seasonal flooding from time to time.
- But the main selection criterion is the price of the structure, which significantly saves the construction budget. Indeed, in this case, you can save not only on the foundation itself (see: Cladding the foundation of a wooden house or the house will not stand on a rotten foundation), but also on the construction of basement walls by creating a so-called false base.
- Its essence lies in the fact that the basement space is masked with some kind of sheet material. The foundation cladding should cover not only the opening between the house and the ground, but also the visible part of the grillage.
Basic methods and functions of finishing a pile foundation
The pile foundation is masked in several ways, that is, there are several options for how to cover the base in a pile-screw foundation, this is done using:
- Hanging elements.
- Shallowly recessed strip base.
In the first case, light and thin materials made of wood, composite or polymers are used as hanging elements. They are attached to stilts or a frame. This is a more economical way to cover a pile foundation, the arrangement of which will not take much time. In addition, the above materials provide very little load on the screw supports.
For the second method, brick, natural stone, cinder blocks, concrete and other durable and heavy building materials are used. The design turns out to be more reliable, durable, and better protects the pile frame.
Which material is better to choose?
When deciding how and with what to cover a pile foundation, you need to rely on aesthetic considerations and financial capabilities. Finishing a suspended plinth does not require significant material costs and is characterized by quick installation, so facade work can be done with your own hands.
Basement siding remains the most affordable and easy-to-implement way to close an underground space. From the point of view of compatibility with external wall decoration, the material can be replaced with corrugated board or composite tiles. If the owner does not have experience in construction work, then it is better to immediately turn to professionals who can simultaneously build a blind area for the house.
Only a specialist can lay out the laying of a shallow brick strip correctly. As a rule, developers undertake to deliver building materials, and in this case, in addition to stone, it is also necessary to supply sand, crushed stone and cement.
Application of basement siding
If you only need to decorate the base, and no additional insulation is required, you can use siding. The material is presented in a wide range, including products with different textures and colors.
With its help, the base will take the form of a neat pedestal, with a building rising on it.
To install siding you will need:
- Clear the construction site of excess debris;
- Select soil around the outer perimeter of the house;
- Form a trench half a meter deep. It should extend slightly under the wall;
- After excavating the earth, a slight slope should form;
- Cover the entire surface of the pit with a layer of waterproofing;
- Pour crushed stone on top and lay a polyvinyl chloride drainage pipe around the perimeter;
- Draw out wells for drainage;
- Fill the trench with sand and compact it well;
- Form a blind area. It can be made from paving slabs or paving stones;
- Weld holders to the surface of the piles. Guides will be installed on them;
- Make a wooden or metal frame. To prevent wood from rotting, it must be treated with an antiseptic;
- Install siding panels;
- Install drip tides. They are needed to remove moisture.
Basement siding: practical, fast, aesthetically pleasing
If the design should serve only the function of decoration without additional insulation, then siding panels are quite suitable. A variety of textures and colors of the material can transform an unfinished open area of work into a neat pedestal on which the building rises. It can be brickwork, tiles or ceramic tiles, decorative stone.
Siding will be the ideal solution to the problem:
- It is very easy to solve a problem like: how to cover the base of a house on stilts, using this simple and understandable material. For independent work you will need the following tools and devices: a cord, a building meter or tape measure, a set of wooden pegs, a plumb line, a building level, boards, a shovel, roll-type waterproofing.
- Before starting work, the area between and around the piles is cleared of vegetation and debris.
- Soil is selected along the outer perimeter of the house near the walls. A trench is formed up to half a meter deep and 0.3-0.4 m wide. In this case, its internal border should be located, slightly extending under the walls, and the excavation itself should be carried out with the formation of a slight slope in the direction from the walls: 1-5 cm for every 2 m.
- The entire excavated pit, including the walls, is covered with a layer of rolled waterproofing.
- A drainage perforated polyvinyl chloride pipe is laid around the perimeter on a small layer of poured crushed stone.
- In several places, drainage wells are brought to the surface - an “ambulance” when the system becomes silted for flushing it.
- The pipes are covered with a layer of 0.1 m of fine gravel. The trench is completely filled with sand along the upper boundary, which is compacted well, sloping away from the walls.
- A blind area is formed. Alternatively, it could be paving slabs, paving stones or concrete screed.
- Holders are welded onto the piles, onto which guides will be attached through holes.
- The frame is made of wooden (40x100 mm) or metal elements. To prevent wood from rotting, it is pre-treated with an antiseptic substance.
- Using the J-profile, external and internal corners with fasteners, siding panels are installed. In this case, a compensation gap of 3-5 cm is maintained for possible expansion when the temperature changes between the panels and the blind area.
- An ebb is installed on top of the finished structure, through which precipitation is removed from the base.
By the way, it is never too late to start work on arranging the basement; it is even preferable to do this after the house begins to live its own life. All communication wiring has already been connected to it, so there is time to slowly start finishing.
Hanging plinth. Installation stages
Before starting work, you need to decide what you want to cover the base of the pile foundation with. As we have already said, the choice here is quite wide. Of the materials offered on the market (corrugated sheeting, siding, flat slate, thermal panels), basement siding is the most popular.
These are plastic panels on the surface of which the texture of brickwork, wood or natural stone is applied. Working with them is easy and simple. The most expensive operation is that the basement siding does not need finishing. Its service life is at least 30 years
It is also important that PVC plastic does not rot and does not require updating by painting
Shaped elements (external and internal corners, connecting, starting and finishing strips) are sold complete with plastic cladding.
Any beginner can do the installation of a plastic screen with his own hands.
Let us describe the main stages of this work:
- Before sheathing the pile foundation begins, part of the soil is removed along the outer contour of the building (excavation depth 20-30 cm and width 50-60 cm). Roofing material is laid at the bottom and covered with sand on top. This is done in order to protect the metal of the screw piles from rain and snow moisture. To quickly drain water, a drainage pipe is laid in the sand bed;
- The finishing process involves installing a sheathing (frame) to which the siding will be attached. The lathing consists of two or three horizontal rows of wooden blocks or a 40x20 mm profile pipe. The frame is fixed to the piles through steel angles (brackets) welded to their surface. The size of the corners is selected so that the cladding protrudes beyond the surface of the grillage by 3-4 cm;
- The corner siding elements and the starting profile are attached to the installed frame and the installation of panels begins, moving from the corner from left to right. A gap of 3-5 cm is left between the sheathing and the surface of the blind area. It performs two tasks: ventilating the underground and compensating for frost heaving of the soil;
- The sheathing is secured with self-tapping screws, screwing them into the sheathing through oval holes made in the plastic. To avoid thermal deformation of the panels, self-tapping screws are 1-2 mm to their surface. This allows the plastic to expand and contract under the influence of ambient temperature without warping;
- Having completed the cladding, ebbs made of sheet steel coated with a polymer film are attached to the supporting frame of the foundation. They cover the line where the panels meet the sheathing.
Scheme for installing basement siding on a screw foundation
When using 16 mm thick cement particle boards (CSP) or flat slate for cladding the base, you can refuse to install the sheathing. The rigidity of these materials is quite high. Such cladding will not withstand severe frosts and summer heat.
It should be noted that, while saving on the sheathing, you will have to spend money on finishing. Leaving nondescript gray slate or fiberboard without a decorative layer is not the best option. To improve these materials you will have to hire a plasterer.
When considering materials for finishing a pile foundation, let’s pay attention to thermal panels made of polyurethane foam. Unlike PVC siding, they combine three functions at once: screen, finishing and insulation.
Corrugated sheeting can be classified as budget cladding. The technology for its installation is not fundamentally different from installing basement siding, DSP boards and thermal panels on the sheathing. Profiled sheet grade C (wall) is best suited for the job. It is lightweight and has a low wave height.
In addition to plain-colored materials, today you can purchase corrugated sheets with a pattern that imitates masonry. Low price and durability make this cladding option quite popular. It goes well with walls made of profiled timber, rounded logs and a facade covered with plastic panels.
Application of sheet materials
A sheathing of two to three horizontal rows of wooden slats or a metal profile is attached to the pile-screw foundation. The facing materials are attached to the sheathing with self-tapping screws. As in the previous case, on very heaving soils, a gap is left between the base and the ground and covered with an elastic tape. The finishing of the plinth is carried out with the following sheet materials:
- flat asbestos cement sheets;
- slabs of natural or artificial stone (porcelain stoneware);
- metal or plastic siding;
- moisture-resistant laminated or painted plywood;
- corrugated sheeting
Cladding the base of a screw foundation with sheet materials allows you to:
- with little labor costs, decorate the plinth in any style - sheet materials have a rich range of colors, imitate natural stone, brick, lining, wood;
- perform insulation using ventilated facade technology.
How to make ventilation in the foundation
There are several factors that determine how exactly the basement ventilation needs to be arranged:
- building location;
- foundation type;
- climatic features;
- soil composition.
Taking these features into account, a project is being drawn up for natural ventilation of the underground space and the foundation of the building.
Basic rules for placing ventilation openings:
- the distance between openings is no more than 3 m;
- distance from the inner corner – 1.5 m, no less, to avoid the formation of air pockets;
- the height from the ground level to the middle of the opening is at least 30 cm;
- for construction in a lowland, the number of ventilation openings increases by 1.5-2 times;
- for buildings on hills, on the contrary, it can be reduced;
- the approximate dimensions of the ventilation holes are 15-20 cm in cross section, or 15 cm on the side of a rectangular/square opening.
Design of a shallow foundation
The finishing of the base covering is carried out after pouring the strip base:
- Brickwork is installed on the strip base;
- It is brought under the walls, vents are formed;
- The final finishing of the façade is in progress. Plaster or plastic panels can be used for this.
Advantages of brick finishing:
- This masonry additionally protects the lower part of the structure;
- When finishing, much less insulation is consumed than in a suspended structure;
- The design of the strip plinth is carried out simultaneously with the construction of the blind area;
- The time of construction operations is reduced;
- It becomes possible to create a basement;
- The aesthetics of the structure increases. You can choose any form of finishing.
How to make a shallow strip plinth with your own hands?
Soil preparation
- The site is cleared of vegetation and debris.
- A trench 50 * 40 cm is dug, the inner border of which goes under the walls of the house.
- The bottom is treated with geotextile.
Installation
- A frame made of reinforcement is installed.
- The trench is filled with cement mortar.
- Brick or cinder concrete is placed on the strip base.
- The masonry is brought under the walls, vents are installed.
- The finishing is done in the same way as a suspended plinth.
On soft soils, you need to make a trench 30 cm deeper to create a cushion: 20 cm for sand, 10 cm for gravel and roofing felt.
Base finishing
A variety of materials are used to finish the base. The main requirement is that they be strong enough to withstand being in water.
Optimally, the foundation cladding is carried out with a special one or covered with a profile metal sheet. The siding imitates the classic stone materials used for the base - rubble stone, brick, flagstone, etc.
Corrugated sheeting in soft colors for the base will also look quite beautiful. Their main advantage is that they can be easily washed from dust and dirt, and your base will always have a presentable appearance. Siding can be metal or plastic. It is better to use special siding for the base; siding for walls will not work here.
Before starting work, it is necessary to install the sheathing. It is made from wooden blocks with a cross-section of 50x50, which must be treated with a composition against rotting and fungus, or special plastic guides. Since the bars will be in a humid environment with poor air circulation, it is imperative to treat them with special compounds!
The bars are attached to the piles or monolithic base of the house using self-tapping screws. The fastening spacing depends on the type of siding panels. Typically, large-sheet siding is used with a spacing of fastening bars of 30 cm; the same rule is also suitable for corrugated sheeting. Then a metal corner is fixed at the bottom. The corner should be higher than the blind area, so it can be done in advance and the inner perimeter can be aligned with the corner.
After this, siding or corrugated sheeting is attached to the bars, cutting it along the lower corner, and maintaining a straight line on top. The corrugated sheets are fastened with the sheets overlapping into two waves. The corners are sealed, the windows are decorated with slopes. At the end of the work, a drip lining is installed in the upper part to prevent water from getting under the siding.
Finishing materials and technologies
Siding finishing
The simplest and fastest way to externally arrange a plinth - it does not require special skills, is economical, and the installation process takes a minimum of time.
An example of siding finishing.
Features of the material
- Durable . The service life can reach 50 years.
- It is resistant to environmental influences - ultraviolet radiation, temperature changes, precipitation, etc.
- Resistant to mechanical stress.
- It has increased strength and reliability thanks to special manufacturing technology .
- A large assortment , ranging from ordinary, unremarkable panels to imitation stone, brick and other materials.
Finish installation technology
Stage 1. Surface preparation
The working base is cleaned, if necessary leveled by plastering (permissible surface deviation - 2 cm), and primed.
It should be taken into account that the working surface must be dry - moisture will provoke the formation of mold/rust, deformation of the sheathing and the development of fungal microorganisms. In areas with a high groundwater level, before proceeding with the installation of the lathing frame, a layer of waterproofing should be laid.
Stage 2. Installation of sheathing
The sheathing for the siding is made of galvanized steel profile (usually it comes complete with finishing material). It is not recommended to use a wooden frame, as it may fail before there is a need to replace the siding.
Making foundation sheathing for siding installation.
When arranging wooden sheathing, it is necessary to use wood that has been pre-treated with biological and fire-retardant impregnation.
- The lathing is attached to the false base from the bottom up, the first profile is at a distance of 10 - 15 cm from the ground surface. On soils not subject to heaving, the structure can be arranged so that it is in contact with the ground.
- The distance of the frame from the wall should be equal to the thickness of the siding panel. If the base is planned to be insulated, then the distance between the wall and the sheathing is equal to the thickness of the heat-insulating layer.
- Wooden slats or a metal profile are attached in the form of a lattice with square cells. The side of the square is approximately 50 cm.
Stage 3. Finishing the frame.
Siding can be fastened in two ways - using the locking method and using pins. In the first case, installation is carried out from the bottom up, in the manner of installing ordinary siding for walls. In the second case, installation is performed from top to bottom.
Installation work.
- First of all, the starting profile is installed, which is attached 10 cm from the corner. The distance between the fastening points is 30 cm. Installation is carried out strictly horizontally, the line is controlled using a level during the installation process.
- The installation of the first panel is carried out 2 centimeters below the starting profile, then moves to the left until it stops, is treated with sealant and docked with the corner part.
- The panels of the second and subsequent rows are brought to the starting profile and adjusted to the panel of the previous row.
- After all rows have been installed, the J-profile (or internal corners) must be secured.
- The last step is to install the finishing boards, which are attached to the last row of siding panels.
Plastering
The method is economical and simple. Despite some disadvantages, plaster is popular due to its versatility and decorative properties.
Plastering the foundation.
Features of the material
- Unstable under mechanical influences.
- Short-lived. After several years, it begins to crack and crumble.
- Susceptible to moisture.
Plastering technology
Stage 1. Surface preparation
The base must be clean and dry. But not too dry, otherwise the adhesion of the solution to the surface will be weak and it will begin to peel off. To improve the adhesive properties of the surface, it is moderately moistened with water.
Stage 2. Installation of sheathing
The lathing for plastering can be wooden or metal. For metal, ready-made sections of mesh are usually used, which are attached to the surface using dowels with a wide head. At least 16 dowels are distributed per 1 m2, more is possible.
Wooden frames are rarely used, usually for finishing wooden surfaces. They are made from slats several centimeters wide. You can attach it directly to the work surface, or you can assemble the wooden frame separately, and only then attach it to the plinth.
Stage 3. Plastering the surface
Consists of several steps.
- Spray application. That is, the first layer of plaster. The spray has a liquid consistency and is applied with a thickness of 3 to 5 mm. Serves for better adhesion of the subsequent layer to the surface.
- Applying the base layer. Its thickness is from 7 to 9 mm. The main layer is applied after the spray has set a little.
- To improve appearance and level the surface. Often a third layer of plaster is applied, up to 3 mm thick.
- The coating is thoroughly leveled and rubbed with special graters.
- After the plaster has dried, it is painted.
Applying plaster to the foundation.
If decorative types of plaster are used, then the work is carried out in accordance with the technology for applying a specific type of mortar. Typically, decorative plastering is carried out in two layers - spray and finishing coat.
Today, decorative plaster is in no way inferior in aesthetics to other types of finishing, but it is easy to apply and costs several times less than many finishing materials.
Cladding with clinker tiles
Features of the material
- Has moisture-repellent properties.
- Externally it resembles a brick.
- Thickness – 8 -10 mm.
- Unlike clinker bricks, the weight of tiles is much less.
- Durable and resistant to external influences.
Clinker tiles on a “refined” foundation.
Installation technology
Stage 1. Preparatory
First, the required amount of material is calculated. To do this, measure the height of the plinth, and then divide this value by the width of the tile + the width of the tile joint, and then make the appropriate calculations taking into account the length of the plinth.
The surface for laying must be flat and dry.
Stage 2. Cladding
Fastening is carried out using a special adhesive composition that is resistant to various influences - frost, high humidity, mechanical stress.
There are several varieties of reinforced tile adhesives, but epoxy adhesives are the most durable. They are resistant to any impact, durable (or rather eternal, since the tiles will fail much earlier) and are firmly attached. The only drawback is that they set very quickly, so it is not recommended for amateurs to work with them; it will no longer be possible to correct the error.
Installation of clinker tiles with glue.
The adhesive composition is applied in a thin layer to the base and back surface of the tile for better bonding. It should be noted that when working with epoxy-based adhesives, the composition should be applied to a small area, since its hardening time is only a few minutes.
Stage 3. Filling joints between tiles
The seams are filled with an adhesive solution, which is tightly compacted and rubbed, after which its excess is removed, and the tiles are wiped with a damp cloth.
Artificial stone finishing
The appearance of such finishing is in no way inferior to cladding with natural material, but it costs much less.
Artificial stone looks great when used on a foundation.
Features of the material
- Has increased frost resistance.
- Imitates a large number of natural materials - rocks, river stones, stones with a torn structure, etc.
- Has less weight than natural stone.
- Durable.
Installation technology
Stage 1. Surface preparation
The base needs to be leveled and strengthened, since the material has a decent weight. To strengthen the surface, it is necessary to concrete or plaster it, having previously secured a reinforcing mesh to it. Reinforcement is necessary so that the base can withstand the weight of the facing material.
Armor mesh - installation
The surface must be absolutely flat - this is controlled by the building level. For better adhesion, the base is coated with a primer.