The easiest way to cover spans and install horizontal supports is to lay floor slabs. Such slabs come in different types and each of them has its own special characteristics, operating rules, sizes and shapes. It is thanks to the wide selection of floor slabs that they can be used to cover spans of any complexity. However, you should definitely take into account the special criteria for installing floor slabs.
Floor slabs: pros and cons
Precast concrete slabs are primarily designed to delimit floors and dissipate the load, which is then transferred to load-bearing walls and foundations. Due to the considerable number of positive qualities, floor slabs are used both for conventional residential construction and for the construction of industrial buildings.
Most often, slabs with voids are used, the holes in which can have different shapes and diameters. Let's study the main advantages of hollow products:
- Compared to the production of monolithic floors, much less money and labor is spent.
- High strength is achieved due to the reinforcement of the product. The same cannot be said about prefabricated or wooden floors.
- Due to technological voids, heat and noise insulation throughout the building increases.
- Compared to monolithic floors, which greatly load the load-bearing walls and foundation of the building with their weight, hollow core slabs have less weight.
The disadvantages include the possibility of covering only rectangular spans; in other cases, it will be necessary to resort to the use of monolithic floors. You also need to order special equipment to install the slabs.
Is it possible to lay floor slabs on a gas block?
A floor slab (SP) is a horizontal structure that separates different levels of a building. Ceilings are not only interfloor, but also attic, basement, and attic. Structural calculations are performed at the design stage. During the calculation, strength, stiffness, and crack opening are determined. When making calculations, engineers are guided by STO 501-52-01-2007.
You can use concrete PP when building a house from aerated block if certain requirements are met:
Use of lightweight slabs. To separate floors, standard floors are used, manufactured in accordance with GOST 26434-2015, of the following types:
- 1P - 120 mm thick;
- 1 PC - 220 mm thick with 160 mm round holes.
Floor slabs are not used on aerated concrete blocks marked 2P and 2PK, since they are made of heavy concrete.
Sufficient wall thickness. The minimum thickness of an aerated concrete wall for floor slabs depends on the brand of aerated concrete block. For D500 blocks with a strength class of at least B2.5, this figure is:
- for interfloor ceilings - 300 mm;
- for attics or attics - 200 mm.
Expert opinion Vitaly Kudryashov builder, aspiring author
Ask a Question
The depth of support for the PP must be at least 120 mm.
The presence of an armored belt. Safe support of the slab on a wall made of aerated concrete is only possible with an armored belt made of monolithic concrete. The armored belt promotes uniform distribution of the load created by the slabs on the gas-block walls. The height of the armored belt is 20 cm. It is permissible to lay the armored belt from prefabricated reinforced concrete products, for example U-blocks.
If at least one of these overlap conditions is not met, the gas block is squeezed out of the wall. As a result, cracks appear in the masonry and the structure of aerated concrete is disrupted. In serious cases, the house becomes dangerous to live in, and there is a danger of the load-bearing walls collapsing. But even if the walls do not collapse, it will be uncomfortable to live in such a house: cracks are bridges of cold, so the walls will begin to freeze.
What are the main types of reinforced concrete slabs?
| Purpose | Peculiarities | Appearance |
| PB, 3.1PB and 1.6PB | Lightweight slabs 1.6PB and 3.1PB. They have a thickness of 160 mm and are used only in the construction of low-rise buildings. PBs have the usual height for floor slabs of 220 mm. Development is carried out on special machines where formwork is not used. After hardening, the workpiece is cut into slabs of equal size. | |
| PNO and PC | PNOs are lightweight, their thickness is 160 mm, and PCs have a standard height of 220 mm. They are produced using older technology using formwork; reinforcing mesh and special void-forming structures are installed in the mold and concrete is poured. Smoothing is carried out on special vibrating machines. |
Factories also produce special slabs that are used for construction in seismically active areas. Such slabs are called ribbed due to the presence of additional stiffeners on both sides.
Main types of unloading belts
Depending on the location of the armored belt, it can have different names and take on certain functions:
- Grillage - placed between the columnar or pile foundation of the house and the walls. However, they don’t build it out of brick - it’s too important a site.
- The plinth is the second level of unloading and reinforcement, which is used in the construction of houses on a foundation made of concrete blocks. It provides the base with greater rigidity on moving soils and is also made of reinforced concrete. Although a fairly common option is brickwork, which serves as permanent formwork for subsequent pouring.
- Unloading is an intermediate reinforced belt under the floor slabs, which not only takes on their weight, but also ensures the rigidity of the building above one floor at each level. When building from lightweight concrete blocks, you cannot do without it, and here the best way is brick.
- A support under the Mauerlat is a mandatory element of a house made of aerated concrete or other porous blocks that do not easily absorb point and multidirectional loads. In addition, fastening the timber itself with studs in such walls turns out to be unreliable even when using chemical anchoring. Here, the reinforced belt for walls made of aerated concrete turns into a kind of connection between the blocks with which it is connected with mortar, and the roof truss, reinforced through a mauerlat beam.
Features of laying on aerated concrete
As a rule, the brick belt is made 4-7 rows high and the width of the wall being strengthened. Reinforcement must be performed in each horizontal seam using a steel mesh with a cell size of 3-4 cm or rigid wire with a thickness of at least 5 mm. Installation is carried out in the same way as in the case of conventional brick walls:
- with seams offset by 1/3 of the length;
- with tie dressing in every third row.
If the reinforced belt for aerated concrete made of brick serves as a support for the mauerlat, you can immediately wall up vertical pins - metal threaded rods with a diameter of 12-16 mm - into the masonry. They are installed in increments of 1-1.5 m, and the depth of their embedding will depend on the thickness of the beam - it should be twice as long as the free end for attaching the Mauerlat. However, many builders advise immediately embedding cuttings to the entire height of the armored belt.
After the mortar has set, roofing felt or two layers of roofing felt are spread on the surface of the masonry. This is waterproofing that will protect the timber itself and the brick superstructure from the accumulation of condensing moisture. Next, the Mauerlat is outlined and drilled at the required points, threaded onto the stud releases and fixed on the reinforcement belt with nuts for wide washers.
Since ceramics have greater thermal conductivity than the main wall material, it turns into a kind of cold bridge (although monolithic reinforced concrete in this case behaves even worse). To avoid problems during the further operation of the building in winter, you can try to “close” the contour of the cellular blocks in parallel with laying the bricks. To do this, a thin GB partition is removed from the side of the premises, as if hiding the armored belt inside the aerated concrete wall. If a gap has formed between the surfaces, experts recommend additional thermal insulation.
How are floor slabs installed on walls of different materials?
Very often, inexperienced builders have difficulty with how to install reinforced concrete slabs on load-bearing structures. It all depends on the material from which the “box” of the future building was made. Let's study a couple of examples.
Brick walls
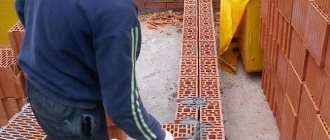
When installing reinforced concrete slabs on structures made of brick or concrete, they can be laid directly on load-bearing walls using a special solution of sand and cement approximately 2 cm thick. However, the planting depth must also be taken into account; for brick walls this is 12 cm.
Expanded clay blocks: wall structures
The question of how to lay floor slabs on expanded clay blocks is quite difficult for builders. Since these blocks are not as strong as, for example, bricks, the rules recommend installing a belt of reinforcement on load-bearing structures with a maximum thickness of 20 cm, which will distribute the load more evenly.
Naturally, the slabs are installed only after the belt has gained strength and is able to withstand reinforced concrete slabs. The best support depth for expanded clay blocks is 10-15 cm.
Aerated concrete “box”
As in the case of expanded clay blocks, aerated concrete requires the installation of a reinforcing belt over the entire area of the supporting structure.
Depending on the layer of the reinforcing belt and the size of the slabs, the planting depth for aerated concrete should be in the range of 10-17 cm.
Walls made of porous blocks
In the case of porous blocks, the floor slabs are laid on a so-called cushion of 3 centimeters of mortar and reinforcing mesh. The diameter of the wire used is 4 mm, and the mesh cells are 5x5 cm in size.
There are other layout methods. For example, they make a layer of three layers of hollow brick, on which slabs are subsequently laid.
Depth of support of floor slabs on various types of walls
Current regulatory documents and building rules regulate the following dimensions of the supporting surface for walls made of various materials:
- large-panel structures – 5–9 cm;
- brick supports - 9–12 cm;
- aerated concrete walls – 12 cm;
- foam block elements – 12 cm;
- external, main walls – up to 25 cm.
Compliance with these recommendations when performing installation work guarantees the reliability of the buildings being erected.
With their help, the internal space of the building is divided into floors, and the attic and basement spaces are also separated
Storage of slabs on site
To store slabs on site for a long time, the following rules should be observed:
- If the task is to store a large number of slabs, then the height of one stack should not be more than two and a half meters.
- Laying reinforced concrete slabs on top of each other without wooden spacers is strictly prohibited.
- Wood blocks are installed on both sides with a 20 cm indentation from the edge between each slab.
- The lowest slab should be laid on a large beam so that the slab cannot come into contact with the ground surface.
Correct support of the slabs
We have already described above how to lay slabs on different materials. However, it should also be recalled that designers must specify a standard value when drawing up the technical plan. This value should be 12 cm.
As a rule, in the process of designing the construction of load-bearing structures, designers start from the length of the floor slabs and subtract 24 cm from it, which is equal to the depth of the supports on both sides. The result of this work is the correct amount of emphasis.
Cell division
You need to pay close attention to the layout of the floor slabs. To calculate this, you need to know exactly the area of the span to be covered and, based on this information, select slabs of the appropriate size.
The maximum length of a reinforced concrete slab can be up to 11 meters, and the width can be from 1 to 1.8 meters.
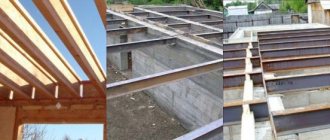
When drawing up a floor plan, you need to specifically mark openings for communications, for example, ventilation or a chimney. Therefore, we should not forget about monolithic floors, which in the future will need to be carried out directly on site.
Floor installation process
Typically the layout process consists of 5 steps:
- Preparatory stage - this process begins after installing the reinforcing belt or laying the last row of bricks. It is necessary to adjust the height of the structures on which the slabs will be installed. This is done to reduce flexion. Careful preparation and leveling of the wall surface for installation is carried out. In the process of installing reinforced concrete slabs on the foundation, you need to make sure that the waterproofing is reliable.
- Mixing the mortar - a mortar of cement and sand should be mixed in a ratio of 1:3 to a thick consistency. The laying of their solution is laid out in a layer of 1.5 to 3 centimeters for the slab. Some craftsmen, based on their experience, can prepare a pillow for several slabs at the same time. Depending on the material of the load-bearing walls, a reinforcing mesh or a belt of their reinforcement is laid.
- Installation of reinforced concrete slabs - as a rule, the installation process begins from the place closest to the crane or from the places where the communication passes.
- Leveling the slab - this procedure is carried out simultaneously with laying the slab on the load-bearing walls. When the slab is already lying on the wall, it cannot be moved after a couple of minutes and alignment is carried out strictly along the axis of the wall using crowbars. At the end of the installation process, the slings are removed and you can proceed to work with the next slab.
- Anchoring - the procedure involves joining the floor slabs together with ties made of flexible reinforcement of small cross-section. The slabs are joined to the walls using an L-shaped fastening.
Supporting hollow core slabs during installation
To perform panel installation work, it is necessary to prepare special equipment and tools:
- a truck crane, the lifting capacity of which allows you to lift the slabs;
- rigging equipment - slings corresponding to the weight of the panels and a mooring cord;
- inventory scaffolding, facilitating the performance of work at height;
- mounting crowbar, which allows you to adjust the position of the slabs during installation;
- plumb line and level necessary to control the location of the panels;
- anchors that fix the slabs after they are installed on the supporting surface of the walls.
The material used for the production of floor slabs is reinforced concrete
To seal the gaps, you will also need a cement mortar, which must be prepared before installation.
When installing elements in brick buildings, observe the dimensions of the supporting surface. Carry out work according to the following algorithm:
- Check the horizontality of the supporting surface of the brick walls on which the support beams are to be installed. The height difference should not exceed 1 cm.
- Place pre-prepared cement mortar over the entire area of the supporting surface. Level the surface in the contact area.
- Sling the ceiling element and move it to the installation site. Smoothly lower, coordinating the position of the panel using crowbars.
- Check the size of the supporting surface and finally lower the panel to be mounted. Remove the sling elements.
- Anchor the formed floor by fixing the panels to the walls. Place anchors at equal intervals of 2–3 m.
When installing floors in buildings made of various types of cellular concrete, it is important to pay attention to the density of aerated concrete or foam concrete blocks. To ensure the strength and stability of the structure being built, the density of the building material must exceed D500. The panels are laid not on the surface of the cellular blocks, but on a power armored belt located along the perimeter of the building. A reinforced contour made of durable concrete absorbs the load, ensuring the integrity of the walls.
Slab cutting
In some cases, it is impossible to lay a solid slab on the site or you simply need to make a technological hole for laying communications. It is in such cases that the technology of cutting reinforced concrete slabs is used. However, it is worth noting that cutting this type of product is an extremely traumatic undertaking. Plus, this leads to a deterioration in the quality of the slab, in particular, the declared strength. It is recommended to order this procedure from the manufacturer or professionals.
Naturally, situations arise when you need to cut a slab quickly and right on the spot; in this case, you need to stock up on a grinder for cutting concrete and an autogen for sawing reinforcement.
Be sure to follow the sequence of actions:
- Apply markings.
- Find a rigid substrate that matches the shape of the slab and place the slab on it.
- Make a cut along the previously drawn lines using a grinder.
- Knock out the cut material using a sledgehammer; you should start from the hollow areas, this will be easier.
- Cut the reinforcement very carefully with an autogen so that the metal does not lose its connection with the concrete.
- Next, you need to fill the voids in the slab with a solution with self-expansion property.
Joining partitions made of different materials
The method and sequence of installation of the fence differs depending on the type of material.
- Plasterboard. A partition made of this material does not overload the ceiling, does not require labor-intensive plastering and allows for trouble-free installation of communication wires. To assemble the frames of plasterboard objects, notching is used. Using a tool resembling pliers, a hole with bent edges is made in the two contacting walls of the profiles. This type of fixation facilitates faster installation, and the plasterboard sheet lies perfectly flat. But the cutter is less durable and requires a self-tapping screw pitch of 250 mm.
- Porous ceramic. These blocks are several times lighter than bricks and hold fastenings well. When using chemical anchors on a wall with a thickness of 130 mm, it is possible to install attachments. The large format of the blocks facilitates quick installation, the grooves on the side ends add strength to the partition, and the uneven surface ensures strong adhesion to the plaster. Among the disadvantages is the relatively high water absorption. This problem is solved with the help of a water-repellent primer and cement plaster.
- Tongue-and-groove gypsum. The slabs are larger compared to foam blocks. The tongue-and-groove connection of the fence is stable. Instead of reinforcement, in this case, anchoring to the walls and strengthening the corners using plaster corners made of galvanized steel are used. Among the disadvantages of the material, the impossibility of cutting it stands out. During sizing, grooves and ridges are removed and the masonry is then reinforced with reinforcing bars or plates. The disadvantage is compensated by increased throughput and environmental safety.
- Concrete. Foam blocks with a thickness of 80–100 mm are used in construction. Elements with smaller dimensions do not provide sufficient noise insulation and load resistance. Concrete partitions need plastering, which causes difficulties if you want to add decor to them. Expanded clay concrete fencing is moisture resistant and durable. The laying is done by professionals, and the surface is leveled with a thick layer of plaster.
- Brick. Installing a brick partition requires official permission from the housing inspection authorities. The structures are too heavy - at 500 kg per meter of length when laying half a brick. Together with the floor screed, they place unacceptable loads on the floors. In addition to significant loads on the interfloor beams, installing a brick fence is time-consuming and requires professional skills.
A common mistake when installing partitions is their incorrect location. The owner incorrectly estimates the dimensions of the room, the architect misunderstands the customer’s wishes, the foreman interprets the plan incorrectly. As a result, the wall is dismantled and rebuilt. To avoid such circumstances, it is important for all participants in the process to reach all agreements in advance.
Filling joints between slabs and voids in them
Experienced builders strongly recommend sealing the joints between slabs and void openings. This procedure is performed with the usual solution of sand and cement.
There are several ways to seal the joints between slabs. It depends on the width of the gap:
- Floor deficiencies and large gaps are filled using monolithic pouring technology with reinforcement.
- The average size of the seam is a gap of 2 centimeters; it is filled with high-hardness concrete and longitudinal reinforcement is laid.
- Small gap - up to 2 cm wide, filled with cement.
Life hacks and difficulties you may encounter
To lay a slab on a brick wall, its last layer must be bonded. The reinforcing belt can be erected using homemade formwork.
Filling the voids with mortar is required only in those areas that will go outside the building; this protects the structure from severe freezing. Installation of holes for communications must be done on the ground, when there is free access to the slabs, otherwise this may become a problem.
It is necessary to prepare the site for the crane in advance. If the soil at the construction site is loose and crumbly, then this will definitely lead to difficulties. Cranes should not be used near basements; the load on the ground may cause the slab to break. To do this you need to use equipment with a long boom.
If you need to order floor slabs, you should contact IS GROUP. We are ready to provide various designs to any region of the country. Here you can find various road slabs, airfield slabs, FBS blocks, PILES, floor slabs and many other reinforced concrete slabs. Delivery is carried out by rail. If there is no company in your city that can provide you with building materials, then be sure to contact us by phone +7 (495) 175 23 21.
Basic options for houses with brick walls and concrete floors
In design developments for the construction of an individual brick house, one of the two most common options for the building frame can be used:
- external and internal load-bearing walls on which hollow-core floor slabs are laid and brickwork is carried out on the already assembled floor . In this case, it is important to ensure a minimum amount of support for the precast reinforced concrete slabs on the wall (this size cannot be less than 120 mm for any slab length and wall thickness). With this option, concrete floor slabs do not necessarily have to have voids filled at the ends of the structure, since the load that falls on the floor from the overlying walls of an individual building is small. For the installation of prefabricated floors of low-rise brick buildings, both standard hollow-core floor slabs of the PC type and lightweight slabs of the PNO type, having a thickness of 160 mm versus 220 mm for traditional ones, can be used. PNO slabs are used in individual construction, and are also designed to withstand loads from brick walls;
- external and internal brick walls are laid on monolithic reinforced concrete floors. In this case, the entire load from the wall fence is transferred to the floor slab, so the masonry is affected by the weight of only one floor, which allows the use of low-strength bricks. However, reducing the cost of brickwork corresponds to a more complex technology for constructing a monolithic floor - assembling formwork, reinforcing the slab, supplying concrete to the floor level, heating the concrete when performing work in subzero temperatures. Despite this, monolithic floor slabs make it possible to adopt the floor plan of a house without regard to standard concrete floor slabs, which can only cover certain spans and at the same time with a fixed pitch, which quite strictly regulates the size of the rooms.
Both of these options can be used with equal success in the construction of individual residential buildings with brick walls. But if the first option - prefabricated reinforced concrete products - makes it possible to prepare a floor for brickwork quite quickly and regardless of the season, then the second allows for a free layout of the house, although this involves significant labor costs directly on the construction site.