SHARE ON SOCIAL NETWORKS
FacebookTwitterOkGoogle+PinterestVk
Door upholstery with dermantine never completely lost its popularity. Even the appearance of laminated surfaces and various cladding panels did not supplant this method of insulating and improving doors. Fast, uncomplicated, inexpensive, practical and concise. Or you can use a bright, extraordinary, bold color – scarlet, white, purple canvas. Upholstering a door with dermantine is a unique opportunity to update the facade of a house or the central entrance to an apartment.
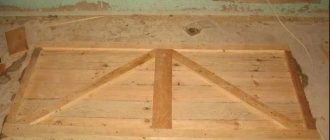
Door upholstery with dermantine is fast, inexpensive and practical
Upholstering a door with dermantine: advantages and disadvantages
The choice of dermantine for door upholstery is due to its consumer properties, which are not inferior to, and in a number of parameters superior to, natural leather. Among them:
- reasonable price - the material is available to all segments of the country’s population;
- counteracting the development of various microorganisms, as a result of which the material does not rot or become moldy, which is typical of natural leather;
- high tensile strength;
- resistance to abrasion and aggressive environments (some types of acids and alkalis);
- Easy care - wash with laundry soap or any washing powder. Heavily contaminated areas are washed with a cotton swab moistened with ammonia;
- immunity to the influence of rain, frost (withstands an infinite number of freezing cycles), ultraviolet radiation;
- durability - service life, with regular care, is at least 10 years, during which the texture and color scheme retain their original appearance;
- good heat and sound insulation properties;
- a wide variety of textures and colors - can be chosen to suit any interior.
There are also weaknesses:
- the upholstery cannot be repaired even with a minor cut - only reupholstery;
- It is easily flammable, which is sometimes used by intruders by setting the door on fire.
The listed disadvantages, although unpleasant, are not critical, requiring the abandonment of dermantine as an upholstery material for doors. After all, you can replace damaged material yourself at minimal cost - you only have to buy upholstery.
What to look for when choosing a door trim kit
Dermantin is used for door upholstery. The name of this fabric translates as “material that can replace leather.” The basis of this fabric is cotton fabric, which has a nitrocellulose coating. It can be either on both sides of the material, or only on one.
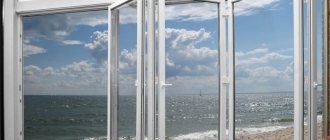
entrance to the house
This leatherette has important features due to which it is used for upholstery:
- It is important that such matter has a long service life.
- During the entire period of operation, dermantine retains a respectable appearance.
- It is moisture resistant. The fact that it does not absorb moisture contributes to its strength and durability.
- This material is not vulnerable to rotting, fading from sunlight, or temperature changes. Doors covered with dermantine will not change their appearance even if they are located outdoors.
- It can be cleaned using specialized household products.
Note! A door upholstered with this material will last at least ten years.
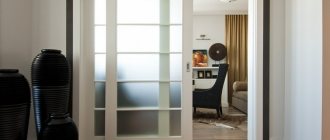
Samples of dermantine upholstery
In addition to dermantine, the following can be used for this purpose: PVC film, vinyl or genuine leather. However, the material in question combines affordable price, high quality and durability in the best possible way.
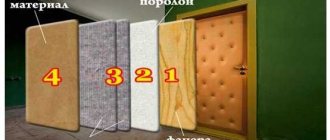
Foam rubber is the best option for a budget insulation layer. For upholstery, a layer 1-2 centimeters thick is enough. You can use felt for this purpose.
If you need glue, you can take “Moment” for this purpose. No more than 100 milliliters will be required for one side of the door leaf.
You might be interested in what artificial leather is: what is the difference between the substitute and what does it consist of?
Features of the choice of materials
Correctly sheathing the sash is not enough to achieve the desired effect. You also need to understand what exactly it is. Dermantin is commonly called differently: leatherette, granitol, eco-, amidis- or vinyl artificial leather. The latest technologies make it possible to supply the market with material in various modifications, differing in texture, shades and a number of properties. Therefore, dermantin gradually became a generalized term. But door upholstery with leather (natural or its synthetic analogues) is produced using the same technology, with only slight variations, depending on what goals the master is pursuing (just decoration or also insulation), and what the canvas is made of (metal, wood) .
Seal and box
Particular attention should be paid to the box. It is necessary to nail the rollers along its width so that the aesthetics of the door are not lost. It is also important to glue the insulation. It should not interfere with the door closing, so before work it is important to measure the gap between the leaf and the frame.
Installing Items
It is important to correctly measure and install the locations of the lock, peephole and handle. It should be cut so that part of the material is present under the elements, then the desired result will be achieved.
Article on the topic: Crafts from plastic bottles for the cottage and garden: ideas, tips and 100 photos
In conclusion, it remains to add that during work the canvas must be secured and lie on some hill.
Upholstering a door with dermantine - preparatory work
All preliminary preparations of the entrance system for covering the surface with a substitute can be divided into several stages:
- Dismantling the door leaf and all fittings.
Door dismantling process
- Removing old finishing material from the outside of a wooden door (upholstery, paintwork).
- Surface restoration.
And only after this you can begin finishing the front door with granite.
Materials and tools
Any homeowner, be it a house or an apartment, can upholster the front door on their own, including women, since the technological process does not involve significant physical exertion - upholstery can be done on an installed door. To begin work, you need to prepare basic and consumable materials and tools. You will need:
- leatherette (we discussed above how to upholster a door instead of leatherette in its classical sense);
- insulation. Here you need to purchase material that will simultaneously solve two problems: insulate the door and create the basis for obtaining a beautiful relief. These requirements are best met by foam rubber and isolon. You can use other types of insulation: mineral wool, batting, etc. You can learn more about the types of insulating materials, their pros and cons in the work “How and how to insulate a metal entrance door in an apartment?”;
- decorative nails 70-80 g/m2 (for metal doors - furniture buttons, for wooden doors - ordinary nails with a decorative head);
- construction nails (consumed 50-55 g per 1 m2);
Attention: for metal doors, polymer glue is purchased instead of nails.
- decorative, usually made of brass, wire, cord (braid), suitable for decoration in texture and color, or fishing line;
- polymer glue;
- paint brush for glue;
- a construction knife with replaceable blades or scissors for cutting dermantine and insulation;
- a screwdriver with Phillips and slotted bits or a set of screwdrivers;
- roulette;
- construction pencil;
- hammer (for metal doors - construction stapler).
Everything you need is at your workplace. Now let’s look at how to cover a door with dermantine with your own hands quickly, efficiently and beautifully.
Dismantling works
Before upholstering the door with dermantine with your own hands, you need to dismantle the door for more convenient work. The fabric must be removed from the loops. The process itself can be performed in two ways, depending on the design of the canopies.
Input sheets are usually secured in the box using card dismountable loops installed with an insert.
Dismantling in this case is quite simple, you need to open it and lift it. After which the door can be easily removed. Internal entrance panels are often secured to non-removable card canopies. To remove them, you need to unscrew the fastening screws screwed into the frame, and then dismantle the door. You also need to remove all the fittings: the locks are disassembled and removed, the handles are unscrewed, and the peephole is removed.
Recovery process
All old finishes must be removed, including the paint layer. If there are defects, it is not necessary to eliminate everything; the main thing is to get smooth and strong edges and end parts of the canvas. Also, to preserve the surface, you need to paint the canvas or open the wood with varnish.
Particular attention should be paid when the sides of the door are distorted due to dry wood. It is important to plan the parameters of the canvas so that after upholstery it always works smoothly.
Attaching the insulation
Here people's opinions differ - some believe that insulation is not needed, others are inclined to believe that it is still necessary. But experts say that insulation, even of small thickness, is still needed. It will act as a substrate on which it will be much easier to attach dermantine, and you can completely eliminate the appearance of wrinkles on the upholstery over time.
The insulation is secured using glue or staples. There is nothing complicated about this, the main thing is that there is a gap of 1 cm around the perimeter of the canvas between the edges and the insulation.
Instructions for attaching the roller
To make a roller, take a strip of dermantine 10-15 cm wide, into which scraps of insulation or material specially produced for this purpose are placed. The step-by-step process of attaching the rollers to the door leaf is as follows (regardless of whether the attachment is made under the upholstery or on it):
- From the remains of the dermantine (after cutting out the pattern for the door), strips are cut out for the rollers - one for the side where the handle and locks are, two for the top and bottom, if the hinges are external. If hidden, then 4 blanks are cut. Width - 10-15 cm, length - 6-7 cm larger than the size of the side of the door where they will be nailed (2-2.5 cm on each side). The overlap is necessary to form a beautiful angle where the adjacent rollers join;
- For the side of the door with external hinges, five strips are cut out - two are attached opposite the hinges to the door frame (so as not to interfere with the movement of the leaf when opening), three on the door itself;
- dermantine strips are nailed (wooden door) or glued (metal) to the edge of the door leaf face down so that the formed roller protrudes beyond the edge of the door no more than 3 cm;
- the insulation is laid in the form of a bundle (you can use a ready-made one or make it from scraps of insulation);
- the strip is wrapped to form a roller and attached to the door.
The roller is attached to the door frame in the same way. The only difference is that the rollers located on the frame should cover the door by only 5 mm, and on the hinge side they can be installed flush with the door leaf.
Classic upholstery technology
This is the easiest way to cover a door with dermantine yourself. The design of the canvas can be wooden or metal. This factor implies significant differences in performance.
To finish a wooden door leaf:
- place insulation between the padded rollers and secure it with a stapler or glue it;
- Tuck the leatherette fabric around the edges and spread it on the surface so that it goes under the rollers;
- secure the leatherette with decorative nails along one long side, at a distance of 5-7 mm from the edge of the roller, with a fastening step of 100-120 mm;
- after that, at the same distances, hammer nails along the top and bottom sides, and then along the remaining edge.
In the laid and secured canvas, cut holes for the elements of locks and fittings. Installation locations are easily determined by touch. The surface decoration process will be discussed later.
When covering a metal sheet: it is impossible to hammer in nails and therefore special self-tapping screws are used, which are screwed in with a screwdriver or a low-speed drill. Moreover, they are twisted at the points marked on a pre-drawn diagram of the wire clamping decor.
Marking.
Button fastening.
But first the insulation, and on top of it the leatherette, is temporarily fixed with glue. The decorating process completes the work and secures the canvas completely.
What to consider when attaching the upholstery?
- When finishing the canvas with insulation, its edges along the perimeter of the door are folded in order to increase the strength of the dermantine in the places where it is fastened with nails;
- The dermantine on the rollers needs to be slightly tucked, that is, overlapped;
- Its fixation on the canvas should begin from the top, gradually descending to the bottom, while checking the correct installation of the upholstery. If a slight distortion occurs, it is not difficult to eliminate it;
- At the bottom of the canvas, rigid fixation is made after air is removed.
Video lessons on the topic
Vinyl leather for door upholstery is sold both by the meter and in sets. In some sets, the method of fastening may be different: they have plastic profiles that are attached around the perimeter of the door leaf. These profiles have a fixation system similar to that used in suspended ceilings.
The following video shows the process using roll material.
How to insulate and upholster the front door. The second type of bead formation technique is that it is nailed last.
How to properly upholster a door with dermantine yourself?
In order to properly upholster a door with dermantine with your own hands, you first need to purchase the necessary material and tools. There are two types of doors - either metal or wooden structures. Depending on their type, the required amount of material is selected. In order not to make a mistake with the footage, you need to first measure the length and width of the door leaf and, based on the obtained values, purchase the material. Wooden structures are upholstered with a piece of leatherette not exceeding the area of the door leaf by more than 15 cm on each side. And for metal doors, a margin of 10 cm is enough.
To upholster a wooden door, in addition to covering the main surface, additional elements such as rollers are usually used. They are nailed along the perimeter of the door leaf and serve not only as an additional decorative element, but also cover the gaps between the door leaf and the frame. As a rule, these strips are prepared in advance from leatherette and insulating material. The width of leatherette strips varies between 10-15 cm, and the length depends on the size of the door. Strips of insulating material should be slightly smaller in width (8-10 cm).
When selecting insulation, you need to take into account not only the price, but also the service life of the material. The most common material is foam rubber. It is affordable, and its service life varies between 13-15 years. You can also choose batting, which has a slightly higher cost compared to foam rubber. Its service life does not exceed 30 years and, in addition, it has significant weight, so it can significantly burden the structure of the door leaf.
The most modern insulation material is insulation tape. The service life of this material is within 60-75 years. Very often, insulation tape is used together with foam rubber. Thanks to this combination, the entrance door even better protects the room from the penetration of noise and cold, and also when decorating it, a beautiful relief surface is formed.
In addition to materials, you need to prepare tools. Scissors are needed to cut the material. A sharp knife will be needed to remove excess insulating materials. Screwdrivers and pliers will be needed in the process of dismantling locks and other work.
Nails will be required to attach the material to the wooden structure. Using a stapler, the door is sheathed with insulating material. Glue will be required to bond the metal surface with insulation and leatherette. Using decorative nails, a design will be applied to the surface.
Instructions - trim with dermantine
In the process of upholstering a product, you need to adhere to a certain technology. It will allow you to make maximum use of the beneficial properties of the material and ensure a long service life. The procedure includes the following steps:
- surface preparation;
- upholstery with insulation;
- leatherette upholstery;
- decor with accessories.
Each stage has its own nuances, so you need to carefully familiarize yourself with the specifics of performing the listed points.
Preparation
If the casing is being replaced, you need to stock up on a knife, pliers and, if necessary, a screwdriver. The procedure is as follows:
- Remove from hinges.
- Dismantling of fittings.
- Using pliers, all decorative nails are removed.
- Leatherette and insulation are removed. Removing the insulation may take some time if it was attached to the metal door with glue.
- The surface is prepared for covering.
If the door was not previously chipped, then all the fittings are simply removed. It is necessary to remove all elements that stick out on the surface. There should be a flat surface underneath the leatherette, so you can level the relief using a slab of plywood. It can be secured with regular nails.
It is important not to forget to treat the wood with special means
Insulation
First you need to decide on the insulation material. The most suitable for leatherette are:
- Foam rubber. Low price, wide range of densities and thicknesses. Has a service life equal to leatherette. Has average insulating properties;
- Batting. Inexpensive material with a service life of up to 30 years. However, over time it dents and can absorb moisture. It is toxic when burned;
- Izolon (a subtype of polyethylene foam). The most modern option. Has good insulating properties. The most expensive of all materials, but the final cost will not be too high.
The insulation is secured to the wooden surface using a stapler. On the outside, you need to retreat up to 8 cm from the edges. Insulation is applied to the entire area, without indentation. Markings are applied for working with a stapler or driving nails. The step between staples or nails should be 10–15 cm. Treatment is carried out along the entire perimeter.
For a metal surface you need glue, which is also applied around the perimeter, up to 8 cm from the edges. Don't forget to cut off the insulation on the handle, lock and peephole.
Preparation of tools and accessories
To use your time efficiently, before upholstery you need to acquire a set of necessary tools. The set includes:
- hammer;
- stationery knife and, if necessary, scissors;
- stapler (if not, use a hammer);
- roulette;
- marker;
- brushes (for metal surfaces).
The list of tools and materials for wooden and metal doors is slightly different. Therefore, each material has its own cladding technology.
It is also important to acquire all the materials at once:
- leatherette;
- insulation;
- staples or nails (wooden surface);
- glue (metal);
- decorative nails;
- braid (in case you need to additionally fix the leatherette and decorate the door).
Upholstery technology
Working together will go much faster. A second person will help stretch the fabric for comfort and evenness of the relief. The edges of the fabric are always bent inward, which will make the upholstery durable and aesthetically pleasing. The folds should be a few centimeters wide. The wooden door is covered with nails with a decorative cap. Step from 10 to 15 cm.
Leatherette should not cover the door to the very edges. A few millimeters need to be retreated to ensure free movement.
Curly decoration using decorative nails is often used. Soft insulation allows you to create a relief on the surface, which will completely transform the door. Be sure to use a marker to mark the locations for installing accessories. Next, nails are hammered into the designated places, which usually have a removable decorative cap so as not to damage it during installation.
There are a large number of patterns that can be created on the surface: from simple dots to geometric shapes such as rhombuses and squares. On the Internet you can find many patterns for decorating with furniture nails. You can stretch a decorative thread between the nails, which will change the pattern and relief.
For a metal door, you need to come up with a design at the preparation stage in order to secure the bases of the screw buttons with glue. Small holes for screw buttons are made in advance in the insulation and leatherette.
Do-it-yourself door upholstery with dermantine: video materials
Better to see once than hear a hundred times. You can't argue with this expression. The information provided above about possible ways to upholster a door with dermantine with your own hands should be visualized by watching videos on the Internet. For example, the video below will give detailed visual information on how to replace upholstery.
There is no voice acting; actions on the screen are commented on in alphabetic text. Such viewing is much more effective in the sense that no sound errors or illegible expressions interfere with full perception, and pauses between changing phrases allow you to comprehend what you read. The information is presented in detail, emphasizing the most important points.
For those who find it more convenient to perceive voice information accompanying the process of replacing the front door trim, it is appropriate to recommend another video. A significant part of the information in the presented video material is devoted to ensuring sound insulation.
Helpful advice! On the Internet, you should watch videos on the upholstery of exactly the type of door you will be working with. The use of inappropriate technologies may lead to undesirable results.
How to beautifully decorate an old nursery door yourself: ideas, photos
DIY updated door in a children's room
A children's room is an area of creativity, leisure and intellectual work for a child. Consult with him before you start updating the door to the nursery.
Even better, involve your child in the process.
For inspiration, we will add a number of ready-made solutions for decorating the door to the children's room.
decor options for doors to a children's room after updating them, example 1
decor options for doors to a children's room after updating them, example 2
decor options for doors to a children's room after updating them, example 3
decor options for doors to a children's room after updating them, example 4
decor options for doors to a children's room after updating them, example 5
decor options for doors to a children's room after updating them, example 6
decor options for doors to a children's room after updating them, example 7
decor options for doors to a children's room after updating them, example 8
decor options for doors to a children's room after updating them, example 9
decor options for doors to a children's room after updating them, example 10
decor options for doors to a children's room after updating them, example 11
decor options for doors to a children's room after updating them, example 12
decor options for doors to a children's room after updating them, example 13
How to cover a door with dermantine without removing it from its hinges
When upholstering the front door with dermantine, is it necessary to remove it from its hinges? It’s better to do just that; it greatly simplifies the process and ensures high-quality results. In cases where removal entails additional hassle in the form of removing trims that cannot be separated from the box without damage, you can do the upholstery by weight.
The upholstery of a hung door should start from the top and at the same time constantly monitor the level of tension of the canvas
In such situations, it is necessary to ensure comfortable working conditions:
- place the tools at arm's length so that you can always change the knife for a hammer, easily take nails from the tray, etc.;
- organize a sufficient level of access to the highest points of the door;
- fix the door leaf in the position required for the work;
- ensure sufficient illumination of the place.
To understand how to sheathe a hung door with dermantine, you need to decide on the measurement method. If the dimensions are taken correctly, the risk of making a mistake with the choice of technology is minimized. It is very important to perfectly lay the top horizontal side. Even with a minor mistake, it will be difficult to tighten the leatherette evenly in the future.
You should start covering a hung door from the top, constantly monitoring the tension level of the door leaf. Decorative nails can be passed along the vertical perimeter lines using a plumb line.
With proper sizing, the risk of damaging the fabric is minimized.
How and with what can you update paper doors?
updated paper doors in the interior
Renew paper doors with lightweight materials that will not weigh them down and cause the fabric to tear. For example:
- self-adhesive film
- decoupage
- gluing individual elements, for example, paintings, three-dimensional drawings
- painting with paints
- stencils
What to paint with?
Over time, a door covered with leatherette may lose its attractive appearance. If the resulting abrasions are local in nature and there are not many of them, then there is no point in changing the leatherette; it can be restored using special paints.
Painting leatherette is a completely inexpensive and affordable way to tidy up a door covered with it. The main thing is to choose the appropriate option.
You can paint over damaged areas using acrylic paints. They adhere perfectly to a wide variety of surfaces, including leatherette. You can use special paints for leather. Due to their composition, these paints remain on the surface for quite a long time, do not fade or peel off over time.
In order to more accurately select a color that is closest to the original material, it is better to purchase a set of paints. Mixing colors will allow you to choose the closest possible shade.
To properly paint a leatherette door, you must first prepare the surface. First, clean it of dirt and dust, and then treat the area to be painted with alcohol. Now we prepare the desired shade. You can mix shades on a special palette, or you can take a sheet of foil and apply paints to it. To make working with paints easier, you need to add a little acetone.
Now you can start painting. The paint is applied either with a brush or with a foam sponge. 15-20 minutes after applying the paint, when the first layer is completely dry, you can apply the second.
How and with what can you update paneled doors?
old panel doors after updating with paint, options in decor
Panel doors in the interior look interesting. However, it is not always convenient to treat their worn surface. We won't go into details. Let's look at restoration options.
Successful solutions:
- painting in several colors highlighting protruding areas
- gluing wallpaper in segments, adhesive tapes along the contour, on panels
- decoupage of individual segments
- varnish coating
The cardinal method is to disassemble the door panels and replace them with laminated hardboard. To do this, you cover the door frame with it and select the color especially carefully when gluing its ends.
If there is glass in the door, decorate it with special paints or imitate stained glass. Stencils for decoration are also suitable.
How to smooth it out?
A situation often arises when leatherette becomes wrinkled from long-term storage in rolls, and it is not possible to carry out repairs with this material. But there is a way out - you can smooth it out. The main thing is to be patient and follow certain rules.
You can smooth this material using water . To do this, a piece of leatherette needs to be spread on a prepared surface. Then take a piece of wet cloth (you can take a sheet), wring it out thoroughly and place it on the leatherette. As the piece of fabric dries, the leatherette cut will smooth out.
There is another method. The prepared piece of leatherette is laid out face down on the ironing board. The temperature on the iron is set to one. A damp cotton fabric is placed on the leatherette and ironed. You can not wet the cotton fabric, but use the steam function on the iron.
With this treatment, leatherette cannot be laid face up, as there is a high risk of burning it, despite the presence of cotton fabric as a protective layer.
Door upholstery
The correct choice of upholstery material allows you to get a completely new look for the door. Finishing can be done not only to repair old door panels, but also to create new designs for wooden and iron structures. Excellent quality upholstery allows you to:
- Change the appearance of products by color, texture and shape.
- Carry out volumetric design. You can create a real masterpiece from simple or old doors.
Insulation is a material with low thermal conductivity. It is used as insulation and also has excellent sound-absorbing qualities. Doors made of iron and wood without padding may shake when closing, which makes some people nervous.
Sheathing allows you to get rid of such manifestations. Multilayer options for sound insulation, thermal insulation and finishing provide the greatest effect.
Decorative trim on the door
To make the entrance door, upholstered in leatherette, more interesting and attractive, you can make drawings on it with your own hands. On doors with foam rubber or isolon lining, convex rhythmic patterns look original. These can be squares, rhombuses and other geometric shapes with angles.
This pattern is made using the same decorative nails that are used to fill the sides along the perimeter of the canvas.
Decorative design of the door upholstery will make it more original
Important! It is necessary to perform precise preliminary markings. The slightest displacement will lead to a violation of symmetry and proportionality.
If your own creative imagination cannot create an interesting option, you can turn to the Internet, where there are quite a lot of schemes. Most of them offer diamonds as the main design. This method of decoration visually increases the height of the door. To make the lines between the fragments of the pattern clearer, a decorative cord is used, which is fixed to the upholstery with nails.
You can make an asymmetrical pattern on the front door. It is more appropriate for brightly colored dermantine, pastel tones without a pronounced texture. This pattern is placed offset to the side where the canvas is hung. The decoration at the bottom of the door looks original. It is worth considering that the thicker the insulation substrate, the more expressive the pattern will be.
A displacement from the previously made markings can lead to a violation of symmetry and proportionality
How and with what you can update the color of old wooden doors: ideas
a girl paints an old wooden interior door with white paint.
After you have completed work on restoring the surface of the old interior door, choose a new color for it.
Among the ways that can help you in this moment, we note:
- Painting with stain, paint or opening the wooden surface of the door with varnish. Remember, for the best result, brush along the fibers, then all the cracks will be filled with dye.
- Accents on moldings, or painting protruding door parts with contrasting or similar colors. If such elements are missing, glue them from wooden or polyurethane slats and paint them.
- Artistic painting, coloring using stencils. The method is suitable for creative owners who want to bring originality to their interior.
- Pasting wallpaper, large drawings on paper, pieces of fabric. Decoupage. In this case, follow all the requirements for fixing the material on the surface of the door - soak it with water, glue, and treat it with a stream of hot air on top.
- Stained glass painting on glass. If you are good at drawing or have some interesting stencils, buy special stained glass paints and decorate the glass elements of your old door.
- Pasting vinyl stickers. Note that this method saves you time preparing the old door. In other words, you can not even remove it from the hinges, but immediately glue the vinyl elements.
Further use of the upholstery
The upholstery surface, covered with polyester, polyurethane or a mixture of leather fibers and latex crumbs, is easy to clean with a soap solution. Chemical detergents may be used. However, to avoid discoloration, test the cleaning solution on a scrap of upholstery material first.
If abrasion appears and the color of the material changes, these places can be easily touched up. The most important thing is to accurately guess the color shade. To do this, contact a specialized workshop and bring there a sample from the remaining and saved scraps.
Modern leatherette is a strong and durable material that usually does not require additional care other than cleaning it from dust and dirt.
How to beautifully decorate an old kitchen door yourself: ideas, photos
updating an old kitchen door with mosaics
To make the kitchen door transformed after restoration, choose a concept for its decor. It can be:
- painting
- opening with varnish
- decoupage
- gluing wallpaper and any adhesive surfaces
- art painting and stencils
- stained glass elements
- mosaic and gluing of loose, small elements
See below for implemented ideas with updated kitchen doors.
embodied ideas for restoring an old kitchen door in the interior, option 1
embodied ideas for restoring an old kitchen door in the interior, option 2
embodied ideas for restoring an old kitchen door in the interior, option 3
embodied ideas for restoring an old kitchen door in the interior, option 4
embodied ideas for restoring an old kitchen door in the interior, option 5
embodied ideas for restoring an old kitchen door in the interior, option 6
embodied ideas for restoring an old kitchen door in the interior, option 7
Beautiful examples in the interior
Thanks to leatherette you can change the appearance of any door. Surface decor can be simple and minimal, or it can be a more complex and interesting solution.
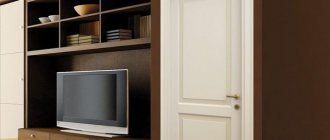
You can upholster not only entrance doors, but also interior doors. Upholstered lining will look great on cabinet doors. The main thing is to choose the right color and decide on the pattern.
Sources
- https://ProDverivdome.ru/obivka-dverej-dermantinom-svoimi-rukami-poshagovaya-instruktsiya/
- https://StroyGuru.com/dveri/kak-obshit-dver-dermantinom-svoimi-rukami/
- https://dekoriko.ru/dveri/obivka-dermantinom-svoimi-rukami/
- https://oboiman.ru/inside/obivka-dverej-dermantinom-svoimi-rukami-32-foto-kak-obsit-s-uteplitelem-posagovoe-rukovodstvo-po-obsivke-vhodnoj-dveri-kak-pravilno-obtanut. html
- https://o-dveryah.ru/dizajn/kak-obit-dermantinom-svoimi-rukami-poshagovo-foto/
- https://remoo.ru/okna-i-dveri/obivka-dveri-dermantinom
- https://DomZastroika.ru/dveri/vhodnye/kak-obit-dver-dermantinom-svoimi-rukami.html
2 301
How and with what can you update painted doors?
a man paints old previously painted interior doors.
Your first task is to remove the old paint from the doors and prepare them for restoration work. Their sequence:
- decide on the location of the door in space - either lay it on horizontal supports, or remove it from its hinges and leave it vertically,
- use a spatula to go over the entire surface and remove the layer of old paint,
- sand with sanding paper,
- treat with a special primer for wooden surfaces,
- let dry and sand again,
Seal off areas of the door that you do not plan to paint or open with varnish.