Required materials and tools
A large set of tools and consumables is not required to install a wooden interior door. This is not a sewer, electrical or plumbing installation in a private home. In the case of a door block, all consumables (anchor bolts, self-tapping screws, nails, handles and awnings) are already included with the product. Additionally, you only need to purchase polyurethane foam.
Installing doors yourself is not so difficult, but nevertheless this work requires attention and certain skills
To install an interior door, the tools you will need are:
You will also need small thin pieces of wood for spacers so that the door does not jam after foaming. Polyurethane foam expands two to three times in air. To prevent the canvas and jambs from moving when applying it, you will need to first insert wedges in several places while the adhesive sets and hardens.
Step-by-step instruction
If the installed interior doors exactly fit the existing opening, then it is recommended to install them at the final stage of renovation of a cottage or apartment. Then, when the ceiling has already been whitewashed and the wallpaper has been hung. But if the doorway needs to be widened, then this work should be done at the rough finishing stage. A lot of dirt and dust is generated when breaking walls.
Step-by-step instructions for installing interior doors
Direct installation of interior doors with your own hands is carried out in six steps:
- Assembling the box.
- Installation of hinges.
- Door leaf canopy.
- Installation of thresholds and extensions.
- Fastening platbands.
- Installation of door fittings (locks and handles).
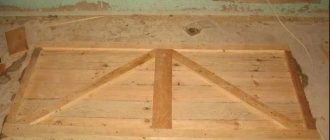
Box assembly
When studying which pipes are better for plumbing and easier to install, you have to consider many metal and plastic options. It’s much easier with door blocks for interiors. Almost all of them are made from lumber. Structures made of plastic or aluminum are extremely rare in private homes. As a result, when installing interior doors, you only have to work with wood, which is not so difficult.
Types of door frames
There are two ways to assemble a wooden door frame:
- cutting the corners of the top crossbar and vertical posts at 45 degrees;
- connecting crossbars and posts end-to-end without corner cuts.
The first option looks more elegant. However, the second one is easier to cut yourself. Only with it you need to be very careful when cutting the side on the top crossbar so that the vertical bars stand up straight and without gaps. At the same time, it is recommended to choose the method of assembling the external frame of the interior door depending on the interior design.
Required dimensions and tolerances for door frame assembly
To prevent the canvas from sitting too tightly in the box later, when cutting the crossbar, an additional 3 mm should be added to the left and right. The horizontal and vertical parts are fastened in the corners from above with self-tapping screws into the end of the racks from the outside. And so that when screwing in these screws the frame bars do not crack, you must first drill into the holes with a thin drill (a millimeter thinner than the fastener).
At the same time, the supporting post, where the hinges will be, should not be pulled tightly to the end at this stage of door installation. It should only be lightly fixed in its intended place.
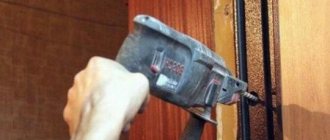
Installing hinges
The hinges are first hung on the canvas with an indentation of 200–250 mm at the top and bottom. Hinges for interior doors can be overhead (“butterflies”) or hidden. The first ones are enough to be attached to the end with the inner small part and secured with self-tapping screws. And for the second, you will have to pre-cut the grooves.
Necessary measurements for installing hinges
Next, the canvas is inserted into a box laid on the floor. And the places where the hinges are attached to the racks are marked. But first, between the end of the canvas and the parts of the box, you need to insert pieces of wood (pieces of fiberboard) 3 mm thick, so that there will be gaps there later.
Then the supporting post, which is not fully tightened, is unscrewed from the crossbar and the loops are screwed to it. And then it is put in place and finally fixed with self-tapping screws.
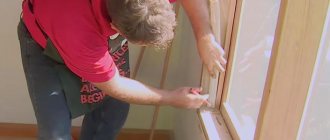
Door leaf installation
After the almost completely assembled interior door should be placed in the opening and adjusted vertically and horizontally using a level. To fix the block in the desired position, wedges and pieces of wood are used.
Sealing cracks, holes and installing extensions
It is allowed to leave a gap of 0.5 to 3 cm thick between the outside of the block and the end of the wall. But if the house is wooden, then this gap should be at least 1.5 cm in case of shrinkage of the log house.
Accessories options for interior doors
The box is secured with anchor bolts, which are placed under the hinges and the lock plate. To do this, first holes are drilled in the vertical racks on both sides to the wall. Then the block is removed and the interior partition itself is drilled. If you use a drill without cleaning the box, there is a serious risk of accidentally damaging its decorative coating.
The box can also be secured with metal hangers. They are first screwed to the racks, and then, after bending them onto the wall, they are attached to it with dowel screws.
If the wall is thick, then you will need to install extensions (false slopes, additional beams). The box has a so-called coverage area. This is the interior space that needs to be decorated. Extensions are made from solid wood, fiberboard or MDF. After cutting them to the required dimensions, you just need to put them on the box and screw them to it with long self-tapping screws. Then, along the entire perimeter of the opening, spacer wedges and a spacer in the middle are also placed under them.
Instructions for installing the accessory
Then all that remains is to spray the mounting foam and leave the block closed for a while alone. It is recommended to continue installing the interior door the next day. The foam adhesive must completely harden and secure the door frame.
Installation of threshold and trim
The threshold and trim are installed after fixing the frame with anchors and polyurethane foam. The first is a metal strip with holes for dowel screws. It needs to be cut to the width of the opening, holes drilled in the floor and “nailed.”
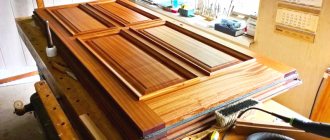
Platbands for interior doors come in the following forms:
- semicircular;
- flat;
- teardrop-shaped;
- curly.
They are fastened using a tongue-and-groove joint, nails or glue. They are cut at the upper corners of the door at 45 or 90 degrees. In this case, the joints of the crossbar and vertical slats should be made as tight as possible. The slightest irregularities and errors during sawing will later be visible.
Options for arranging the threshold of interior doors
Installation of interior door fittings
At the end of the installation, locking fittings are installed. Moreover, usually for interior doors a two-in-one mortise product (handle + lock) is selected. Such a device can be of a rotary or push type. But in both cases the principle of operation is the same.
Installation of the mortise handle is carried out as follows:
- The canvas is marked at a height of about a meter from the floor.
- A hole is drilled for the fittings.
- A handle with escutcheons (sockets) is installed and bolted together.
- Opposite, a groove is cut out in the jamb beam for the tongue and a counter metal strip is installed.
Step-by-step instructions for installing a door arm
It is best to drill a hole with a crown of the appropriate diameter so that it turns out even. And the counter on the box and the mounting strip on the door leaf should be recessed so as not to interfere with the closing of the door.
How to take measurements for door installation
This stage is the most important, since it determines whether the prepared doors will fit into the opening and whether the installation will be of high quality and easy. To take measurements you need to take the following tools:
- a sheet of paper for notes;
- pen;
- construction tape (it is recommended to choose a 3-meter tape measure);
- a square for measuring the width of the box, that is, the thickness of the wall.
There are two ways to measure a doorway. You can use any of them, since the veracity of the result in both cases will be high.
A wooden door can be used both as an interior door and as an entrance door to an apartment or house
The first of them can be called construction, since it is used by professionals:
- Determining the height of the opening. You need to start from the floor to the top of the opening.
- Measuring the width of the opening from one wall to another from the inside.
- Determining the thickness of the opening. This parameter is needed to determine the width of the frame of the future door. That is, you should measure the thickness of the partition.
These are the main parameters for a wooden door. Additionally, you need to determine whether there will be thresholds, as well as on which side the door will open. This is quite easy to do. You should stand facing the door so that you can open it towards you. Now you need to see which side the loops are located on. This information will indicate the direction of the door. If the hinges are on the left, then it is a left-handed door.
Wooden doors usually have standard sizes
The second method of measuring a doorway can be used if the old door has not yet been dismantled. Measurements must be taken in the following sequence:
- First you need to measure the width and height of the already installed door leaf.
- Next, you need to determine the width of the door frame, for which you need to measure the thickness of the wall.
- For the next measurement, it is recommended to carefully remove the trim and measure the width and height of the door opening. This is necessary because different manufacturers consider different values as standard.
In addition to the specified parameters, you need to know exactly what kind of flooring will be used, its thickness, floor height, and whether there will be a gap between the door and the floor. That is why it is recommended to order doors in advance, indicating all the parameters, because according to standards they must be manufactured 1.5 months after measurements.
Recommendations and tips
To ensure that self-installation of interior doors does not end in failure, you should:
- Screw in all self-tapping screws only after drilling thin holes for them, otherwise the beam and canvas may crack;
- install the block strictly vertically (even if the slopes are crooked or at an angle);
- Properly dose polyurethane foam; a large amount of it can lead to distortion of the block;
- leave a gap of 10–15 mm between the canvas and the threshold to ensure natural ventilation.
Everything should be done carefully and without haste. Marking and cutting of wooden parts must be done only after two or three measurements. Removing an extra centimeter, much less adding it, won’t work here. You can clean and prepare the drainage pump for dirty water for winter in a couple of hours. In order to install the door block according to the rules, it will take at least a day.
On the one hand, it is necessary to carefully measure and prepare the walls, and on the other hand, do not forget about the time it takes for the polyurethane foam to harden. The latter not only fills voids, but is also an element of rigid fixation of the block in the opening, ensuring its resistance to external loads. There is no need to rush installation and neglect the rules.
Recommendations for door placement
If the opening is too high for the selected door, then you can close the empty space at the top using wooden blocks and drywall. On top they will be covered with wallpaper or other wall decor. If everything is done carefully, it will be difficult to distinguish the finish in this place.
Four main mounting methods
We have already described the methods of fastening the door frame above. Now let's select them as expected:
- on polyurethane foam. You shouldn’t do this - in the end, the door may simply fall out of the opening;
- at three points. The most common technique. This is a fast and easy method that is relatively reliable. Suitable for laminated doors and for those passages where there is not much traffic;
- at six points. Even GOST recommends this technique. It is considered optimal. The only negative is the plugs because they can ruin the appearance of the door;
- using plates. Ideal for expensive doors that you don’t want to spoil with plugs. The plates are attached from the back.
Now let's look at mounting options at six points and using plates in more detail.