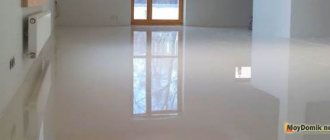
What is self-leveling floor
A mixture of cement and sand was usually used to level the floor. But the solution turned out to be heavy; it was not possible to fill small depressions in the base with it and create the most smooth surface possible. Then, to increase plasticity, special components were added to the cement-sand mixture - this is how a self-leveling floor with the necessary characteristics was obtained.
The advantages of self-leveling floors over screed are obvious
Cement- mixtures are used mainly for preparing the base with the subsequent installation of floor coverings made of finishing materials - parquet, tiles, linoleum.
Polymer compositions have been developed specifically for the ideal finishing coating , which form a glossy surface when hardened.
A special feature of self-leveling floors is the minimum thickness of the fill, which is 3 mm.
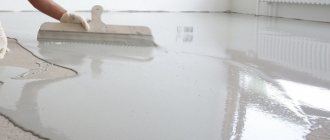
All types of self-leveling floors are united by a common installation technology. The mixture in liquid form is poured onto the prepared base, leveled and rolled with a roller with needles.
The type of dry mixture or composition is determined depending on the humidity of the room, the required leveling thickness and the intensity of mechanical loads during further operation.
Comparison of characteristics of self-leveling floors
Surface level and placement of beacons
Many owners are interested in how to fill the floor in an apartment efficiently and evenly? To do this, be sure to determine the level of the screed and install beacons (special slats).
Using a level, check the evenness of the base. We indicate the level of the intended coverage on the walls.
From plastered areas, remove the plaster 0.25 cm above this line. Using these notations we identify the highest point of the surface. This is a guarantee of proper filling.
Here the working algorithm is:
- We measure 1 m up the wall, counting from the door threshold. We draw a line.
- We draw a line around the perimeter of the room. We maintain its parallelism using a level.
- The second parallel is drawn at a distance of 1 m under the control symbol.
- We drive nails into the corners of the room on the bottom line and stretch the wire.
Thanks to the marks on the load-bearing components, it is easier to place beacons in a new apartment. The distances between beacons correspond to the length of the rule. We apply the rule to level the mixture.
The final result depends on the placement of the slats. After all the work, the slats are removed. They leave recesses that can easily be filled with the same solution that was used for the screed.
With guidelines it is much easier to fill the screed. And so we get the necessary flat surface. We install beacons even for work on a small area.
Bedding question
Before you make the working composition and pour it onto the required area, you need to make a bedding. This is the so-called pillow. It consists of three layers.
- The initial one is gravel. Density: 5 -10 cm. Water it with water and tamp it down. To control the thickness of the layer, be sure to drive pegs directly into the soil. We put them by level. Having slept and compacted this layer, we take them out.
- The second one is sandy. Density -10 cm. We also adjust the thickness with pegs. We water the sand and compact it using a vibrating plate.
- Shchebnevy. Thickness – 10 cm. We carefully level it and make it denser. There should be no sharp edges on the surface. Suitable crushed stone has a fraction of 4-5 cm. After compaction, sprinkle it a little with sand and tamp it again.
Horizontal level adjustable
Video guide for installing beacons
Main types of self-leveling floors
Based on the composition of the starting materials, self-leveling floors are divided into two main groups:
- mineral;
- polymer.
The former are a mixture of cement with fillers and belong to the category of self-leveling coatings. They have good binding qualities, so they easily form the base and final surface.
Polymer compositions are used to create a continuous finishing coating.
Self-leveling
Self-leveling floors on a cement-sand base contain additional components that give the mixture plasticity and easy horizontal alignment when installing the coating. Glue, granular filler and tint pigments are also used as additives. The dry mixture is diluted with water to the consistency of liquid sour cream.
After hardening, a smooth and even surface is obtained, in contrast to the use of a conventional cement screed, on which roughness occurs. To install such a coating, professional training is not required; the process is simple and does not take much time. The floors are not afraid of moisture, therefore they are considered universal for indoor spaces and outdoor areas.
Polymer
Depending on what binder is included in the composition, polymer floors are divided into the following categories:
- polyurethane;
- epoxy;
- methyl methacrylate.
The components are mixed using a nozzle attached to a drill for 5 minutes at low speed. The resulting compound is applied as a pour and evenly distributed onto the surface to be treated. The polymer floor is laid on concrete, metal or wooden bases.
Note! The hardening process of thermoplastic resin occurs quickly, so all work from mixing to rolling with a roller with needles is completed within 40 minutes!
Polyurethane
The floor mixture is prepared on the basis of a urethane prepolymer with the addition of a hardener. The mass easily spreads over the surface and after hardening retains elasticity, so during further use it reliably withstands vibrations and temperature changes. The floor is resistant to deformation and shock loads.
Polyurethane coatings are used in industrial and residential premises. Suitable for agricultural enterprises for raising animals and plants, as well as in industrial freezing complexes. For a variety of colors, it is possible to tint the mixture with acrylic paint.
Epoxy
The coating is created from a two-component polymer - epoxy resin and hardener. For the formation of adhesive contact, the degree of heating of the epoxy mixture is of great importance. At elevated temperatures, the viscosity of the resin decreases and a tighter adhesion of dissimilar surfaces is achieved, which ensures long service life.
It is the epoxy floor that creates a glossy surface that resembles the smoothness of glass. Reliable strength allows it to be used in industrial production with intense chemical and moderate physical loads, since high-power pinpoint impacts can destroy the epoxy layer. Due to its abrasion resistance, the coating is even used in parking lots.
Methyl methacrylate
The base is methacrylic acid methyl ester. In the middle of the last century, methyl methacrylate began to be used in the production of plexiglass. Today, improved by polymerization, the composition is used to create particularly durable flooring. The resulting defects or fragments of destruction are easily corrected by local application of the mixture.
Note! Working with methyl methacrylate requires respiratory protection from toxic fumes. It is necessary to use a respirator and provide supply and exhaust ventilation in the room.
Floors made of methyl methacrylate do not deform in the cold; the composition can be applied even at negative temperatures. High strength and abrasion resistance allow the use of MMA in production areas with intense mechanical loads. To form a durable coating, it is recommended to lay the mixture on a concrete base, the thickness of which is at least 70 mm.
Self-leveling 3D floors
A separate type of self-leveling floors can be considered transparent coatings with a pattern or decorative composition. Such a surface is obtained as a result of polymerization of the compound. When applied, it resembles regular varnish - it spreads well, and after hardening, a very transparent, durable film remains. This floor consists of six layers:
- Concrete or wooden base;
- Primer layer;
- The base polymer layer serves to level the surface and serve as the basis for the pattern. The base material must be compatible in its characteristics with the finishing layer;
- Decorative layer (banner fabric with print, stone chips, film, paint, wood, shells, etc.);
- A lens layer of special varnish to give a volumetric effect;
- Protective transparent layer 3-4 mm thick.
Attention! The fundamental difference from traditional self-leveling flooring is the finishing layer. It uses a two-component polymer or epoxy mixture consisting of a resin and a hardener. It gives the surface strength and elegant appearance.
You can order a banner with a printed design at any printing house. You can try to find the original drawing yourself. To do this, you will need a camera and any graphic editor, for example, photoshop. We load a photo of a room or a section of floor into the editor and begin experimenting with various pictures and drawings.
A marine theme looks good in the bathroom, landscapes and vegetation in the hallway and kitchen. We select the resolution of the drawings to be no less than 300 dpi, otherwise there will be no clear lines when printing in full format. By using this method, you can reduce the cost of purchasing a ready-made substrate for a 3D floor.
Antistatic self-leveling floors
To protect industrial premises and residential areas from the formation of static electricity, a special coating installation technology is used. A conductive circuit made of self-adhesive copper tape is laid on the concrete base, forming a grid with cells of one to two meters. Be sure to ground the ends of the copper strips into a single building system.
Note! Antistatic floors are always used in areas sensitive to electromagnetic fields - computer rooms, air traffic control rooms, laboratories.
To increase the resistivity, a primer layer containing carbon black is applied to the surface prepared in this way. For the finishing coating, polymer compositions with reinforcing fibers made of metal or graphite are used. This results in surface resistance of less than 110 ohms and static leakage in the range of 105 to 108 ohms.
Useful video on how to fill a floor with your own hands
Viewed times: 7,719
Great article 5
Author's rating
Author of the article
Oleg Grishin
Flooring specialist with 10 years of experience. Oleg has something to share with our readers
Articles written
105
- Even more interesting:
- How to make a 3D floor with your own hands: step by step and with photos
- How to fill a self-leveling floor with your own hands
- What is an epoxy self-leveling floor?
High-strength floors
To create a smooth surface with a strength of at least 25 MPa, a combination of cement, fractional additives and polymer fillers is used. The mixture is poured with water, mixed and applied to the prepared base within 40 minutes in a layer of 40 to 100 mm. The solution takes a long time to dry, so you can walk on it only 24 hours after pouring.
The composition is intended for basic and final leveling of concrete surfaces, mainly for further laying of finishing coatings. Used in rooms with intensive operating loads - warehouses, basements, garages. Also suitable for underfloor heating systems and the formation of screeds on the separating layer.
Areas of application of self-leveling floors
| Self-leveling | Places with heavy traffic, factories, factories, warehouses, basements, garages. Used as a preparatory layer for subsequent installation of decorative coatings. |
| Polyurethane | Freezers, production workshops, sports facilities, unheated premises, parking lots. Hospitals, clinics, sports facilities, waiting rooms |
| Epoxy | Industrial enterprises, laboratories, utility rooms, hangars, nuclear power plants, medical institutions, shopping and entertainment centers. Country houses, apartments, schools, canteens, restaurants. |
| Methyl methacrylate | Pharmaceutical enterprises, factory floors, industrial freezing units, sports grounds, parking lots, ramps. |
Decorative design of polymer floors
To add decorativeness, epoxy and polyurethane coatings are made with geometric or pictorial patterns. a 3D effect look especially impressive . To do this, a three-dimensional pattern is glued onto the prepared surface, and after 24 hours it is filled with transparent epoxy resin.
The graphic image is applied to paper, fabric or special film. To create a spatial effect with visual perspective, photo printing is used. Fashionable 3D floors are actively used in shopping centers, offices and institutional halls. The hypoallergenic nature of epoxy resin makes it possible to decorate children's playrooms with three-dimensional designs.
flocks - when pouring .
They are available in various colors and sizes. Apply immediately after pouring and rolling, until the coating layer has hardened, by hand or using a flock gun. After 12 hours, the dried surface is coated with colorless varnish or transparent epoxy resin.
Note! Self-leveling floors with silver, gold and multi-colored sparkles look original. The manufacturing technology is the same as creating a coating with flocks. Shiny floors create a festive atmosphere and are used in cafes, restaurants and shopping centers.
Another interesting decoration option is a stone carpet .
Quartz sand with a rich color palette or stone chips are added to polymer resins. To obtain a catchy pattern, several shades are used in one coating, which are applied using stencils.
Depending on the place of use, the stone carpet is made in two versions:
- Open. It has a rough surface that has anti-slip properties. Used in rooms with high humidity or outdoors.
- Closed. It is carried out in two stages - after applying a mixture of mineral filler and polymer component, leave it for 12 hours and apply a transparent layer of epoxy resin. The result is a glossy coating with decorative inclusions inside.
A stone carpet looks original when one of the filling elements is shell rock with a fraction of 50-60 mm. This coating is appropriate to use when decorating the space around swimming pools and artificial reservoirs.
To create luminous floors and paths in the garden, a luminescent component is added.
Choosing a filling composition
The choice of screeding agent is a very important issue. And when deciding how and what to fill the floor in a new apartment, consider the following factors:
- The cement-sand composition sets within an hour. After which it is problematic to level it. Here you need to work in a duet. One creates a mixture. The second one is to fill it and level it.
- Ready-made formulations have a more liquid consistency. They spread out, aligning horizontally. This results in a smoother surface.
- Concrete finally hardens in 4 weeks. And the composition in a couple of days.
After filling and leveling, protect the surface from the following influences:
- temperature jumps,
- ultraviolet,
- air flows.
We cover it with film. This prevents the appearance of cracks in it.
To find out whether the screed is ready, we can use a special support component. If the screed has hardened thoroughly, remove the guide rails. We fill the voids with the composition.
We grind the concrete floor. After this operation, the floor covering can be installed on the base.
Floors filled with leveling mixtures can be loaded within 6-12 hours.
The type of flooring planned dictates certain conditions. After installing the screed, some defects and sagging can be ignored if ceramic tiles are laid.
Advice
If you are planning laminate, parquet or linoleum, we use mixtures with a self-leveling effect. This way the surface will be perfectly smooth with a mirror reflection.
We prepare the mixtures strictly according to the instructions, pour them onto the floor. For leveling we use a special brush.
Then we treat the surface using a needle roller. This is a measure to eliminate air bubbles.
But even though the base is considered ready, I do not recommend placing furniture on it. This can be done in 5-7 days.
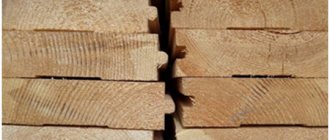
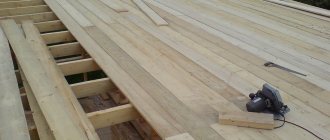
Working with wooden floors
When you need to remove wooden floors in a house and install concrete surfaces, you need to follow the following algorithm:
- Dismantling old floors.
- Leveling the site.
- Making a pillow.
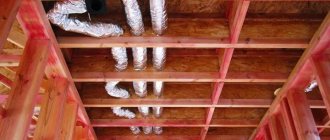
- Installation of insulation.
- Creating the composition and filling.
How to remove wooden floors and then pour screed, we consider in detail according to the indicated stages.
- We dismantle old floors using a crowbar. We follow safety precautions.
- Clean the surface of debris. Level the soil with a shovel.
- Making a pillow. We use crushed stone with a fraction of 2-4 cm. We form a layer of 5 cm. We compact it.
To compensate for the thermal expansion of the entire screed, we equip the perimeter of the room with foam sheets. Polystyrene foam is also a permanent formwork here. The thickness of one sheet is 20-50 cm.
The crushed stone layer is covered with a sand layer with a density of 10 cm.
- We organize insulation using extruded polystyrene foam with a thickness of at least 5 cm. Sheet parameters: 120 x 60 cm.
When laying, their locks are fastened, creating a monolithic surface. This material is moisture resistant, so we do not waterproof it.
Sheets are laid using a level. Add sand in the required areas. Again, check the evenness of the sheet positions.
- We work in two cycles. We put up formwork from boards. The composition elements and their proportions are as follows:
- cement: 1 share,
- sand: 2 shares,
— granite screening: 3 shares.
If all the elements are dry, the granite screenings are sent first into the concrete mixer, followed by sand, and cement last. Mix everything thoroughly. Then add water.
If the sand is wet, pour water into the bucket to fill half its volume. Next comes cement. Mix it thoroughly. Add sand, then sifting. Finally, add water to obtain the mixture of the required consistency.
The mixture is neither liquid nor very thick.
Apply the resulting composition and level it using the rule. The density of the screed is 4-5 cm.
After pouring, the composition needs two days to harden.
Then we prepare the second half of the room. Operations are identical
We align the fresh screed in density with the previous screed
After complete pouring, the concrete hardens for 2 days. Then you get this result:
For your information
The screed will be completely strengthened in a month. During this period, we water it twice a day from a watering can. On the created base you can install warm floors or floor coverings.
How to calculate the required amount of mixture
To ensure that there is no excess solution left or a shortage of it is discovered during the pouring process, it is necessary to first calculate the exact consumption of the material. To do this, you should know the basic parameters:
- The area of the room that is planned to be filled is S.
- How thick will the layer be – H.
- The mixture density value is P.
By measuring the perimeter of the room with a tape measure, you can easily calculate the area to be filled. The size of the layer is determined depending on the purpose of the self-leveling coating. The density of the mixture is always indicated on the commercial packaging.
To calculate how much mixture is needed, you need to multiply three parameters:
Flow = S x H x P
Then divide the result by the weight of one package and get the exact amount of material needed.
EXAMPLE:
A room of 30 square meters is filled with a layer of 10 mm. The density of the mixture is 2 kg/m2/mm. Packaging 25 kg.
Consumption = 30 x 10 x 2 = 600 kg or 24 bags.
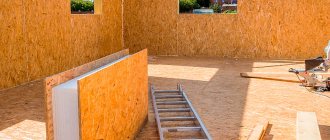
Preparing the base - leveling and waterproofing
It is necessary to fill the floors in the apartment step by step. This is the most important condition for obtaining the proper result.
The first step is preparing the base. We remove the old coating. We carry out a thorough cleaning. We eliminate dust and dirt. We use a vacuum cleaner. Degrease the surface with a simple soap mixture.
If you need to fill the floor in a room that does not have a threshold, we create one. For this we use slats. This prevents the leveling agent from leaking into adjacent rooms.
Important
Before the pouring process, it is important to remove outdated baseboards. And we must glue the wall-floor joints. There is a good tool for this - damper tape.
Next, the floor in the room is covered with a primer. Thanks to it, the floor adheres better to the base. Apply at least two layers of primer. Apply the second layer only after the first layer has completely dried. Priming continues while it is still absorbed by the base.
.
The primer enhances the strength of the surface and its adhesion to future materials.
When we work with classics (concrete-sand composition), we use a universal primer. In rooms of modest size, we apply it with a brush. In large rooms - a roller.
Before starting other work, the primer dries for about two hours.
The main work starts one day after this operation.
At this stage the level. We walk around the room with him. And we make horizontal marks on the walls. We will rely on them during the pouring process.
Pouring technologies
Self-leveling floor
Work begins with preparing the base - cleaning it from dust, dirt and elements that can weaken adhesion. If there are cracks, they should first be sealed using a thick cement-based mortar. Then the base is treated with a primer and allowed to dry for an hour. A damper tape is fixed around the perimeter of the surface being poured; this is done to compensate for thermal expansion. Beacons are installed on the base prepared in this way, checking the horizontal position using a level.
The mixture is diluted with water at the rate of 200 ml per 1 kg, it turns out that 5 liters of liquid are needed for a 25 kg bag. Mix to obtain a homogeneous mass using a drill with an attachment or a professional mixer. Take a break for 5 minutes and then stir again. The floor must be poured no later than 40 minutes from the start of mixing.
Note! Excess water will cause the mixture to separate and reduce the strength of the coating.
The floor begins to be poured from the area furthest from the entrance, gradually moving towards the exit of the room. The solution spilled over the surface is leveled with a T-shaped lath and then rolled with a needle roller to remove air bubbles. Until the floor has completely hardened, which will take 24 hours, it is necessary to protect the coating from temperature changes and mechanical stress.
The nuances can be seen in our video:
Polymer floor
The poured polymer compound can be laid on a concrete, wooden or metal base. All gaps, cracks and delaminations must be sealed with special compounds designed to work with a specific material, and then the surface is treated with a primer. A deformation tape is laid around the perimeter and beacons are placed.
Benchmark for self-leveling floor
If the floor is poured in a room with high humidity, then the binder must be waterproofing.
The polymer floor consists of two components, one of which is a hardener. They are mixed for 2-3 minutes in a large container using a spatula attachment attached to a drill. Since a thermal reaction occurs during the mixing process, it is recommended to cool the tank where the mixing is carried out by immersing it partially in cold water.
The floor is poured at a temperature not lower than +10 degrees; at lower values, the floor becomes less plastic. They start from the farthest corner and do not stop, because the finished mixture must be poured in 30-40 minutes. During the pouring process, remove air bubbles using a roller with needles.
During hardening, drafts should not be allowed in the room, because the layer must dry evenly, otherwise cracks will appear.
Depending on the type of polymer and added components, the self-leveling floor can dry to the stage of possible mechanical load from several hours to 3-5 days. Some types of polymer coatings take a week to dry.
Application of Dekotla epoxy self-leveling floor:
Preparation steps before making a poured floor
For preparatory and main work we use the following arsenal:
- Reiki. They are necessary for beacons.
- Metal brush.
- Container for working personnel.
- Roller for priming.
- Sidewalk scraper.
- A small brush for applying primer to hard-to-reach or small areas.
- Putty knife.
- Needle type roller.
- Drill with a nozzle for mixing the solution.
- Primer.
You can fill the floors in your apartment correctly if you act strictly step by step. And the stages of work are as follows:
- Surface preparation. Removing old coating, cleaning from dust and dirt.
- Padding.
- Waterproofing.
- Thermal insulation.
- Checking horizontality.
Next comes the screed itself. Then we wait for the surface to dry and lay the base coating.
Have questions ? Call!