Schemes for installing a floor on the ground in a house, basement, garage or bathhouse
In houses without basements, the floor of the first floor can be made according to two schemes:
- supported on the ground - with a screed on the ground or on joists;
- supported on walls - like a ceiling over a ventilated underground.
Which of the two options will be better and easier?
In houses without a basement, floors on the ground are a popular solution for all rooms on the first floor.
Floors on the ground are cheap, simple and easy to implement; they are also beneficial to install in the basement, garage, bathhouse and other utility rooms.
A simple design, the use of modern materials, and the placement of a heating circuit in the floor (warm floor) make such floors comfortable and attractive in cost.
In winter, the backfill under the floor always has a positive temperature. For this reason, the soil at the base of the foundation freezes less - the risk of frost heaving of the soil is reduced. In addition, the thickness of the thermal insulation of a floor on the ground may be less than that of a floor above a ventilated underground.
It is better to abandon the floor on the ground if backfilling with soil is required to a too high height, more than 0.6-1 m. The costs of backfilling and compacting the soil in this case may be too high.
A ground floor is not suitable for buildings on a pile or columnar foundation with a grillage located above the ground surface.
Three basic diagrams for installing floors on the ground
In the first version
a concrete monolithic reinforced floor slab rests on load-bearing walls,
Fig. 1
.
| Fig.1. Monolithic flooring on the ground (suspended floor) |
After the concrete hardens, the entire load is transferred to the walls. In this option, a monolithic reinforced concrete floor slab plays the role of a floor slab and must be designed for the standard load of the floors, have the appropriate strength and reinforcement.
The soil is actually used here only as temporary formwork when constructing a reinforced concrete floor slab. This type of floor is often called a “suspended floor on the ground”.
A suspended floor on the ground has to be made if there is a high risk of shrinkage of the soil under the floor. For example, when building a house on peat bogs or when the height of bulk soil is more than 600 mm. The thicker the backfill layer, the higher the risk of significant subsidence of the fill soil over time.
Second option
- this is a floor on a foundation - a slab, when a reinforced concrete monolithic slab, poured onto the ground over the entire area of the building, serves as a support for the walls and a base for the floor,
Fig. 2.
| Fig.2. Floor on a slab foundation |
Third option
involves the installation of a monolithic concrete slab or the laying of wooden logs in the spaces between load-bearing walls supported on bulk soil.
| Fig.3. Floors on the ground |
Here the slab or floor joists are not connected to the walls.
The load of the floor is completely transferred to the bulk soil,
Fig. 3.
It is the latter option that is correctly called a floor on the ground, which is what our story will be about.
Ground floors must provide:
- thermal insulation of premises in order to save energy;
- comfortable hygienic conditions for people;
- protection against penetration of ground moisture and gases - radioactive radon - into premises;
- prevent the accumulation of water vapor condensation inside the floor structure;
- reduce the transmission of impact noise to adjacent rooms along the building structures.
The main advantages of reinforcement and differences from conventional screed
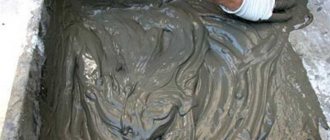
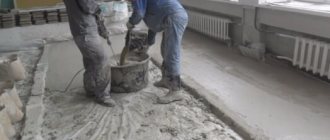
And although outwardly a regular screed and a reinforced screed are no different, they are still two different types of subfloors. And the difference between them is very great. The main difference is the presence of an additional layer in the form of a reinforcing stack. There is also a significant difference in installation and operational characteristics. For example, it is much easier to lay concrete in an even layer on a curved floor using a reinforcing mesh - it will allow you to easily level the base. If the room is flooded, a screed with a reinforcing layer will withstand this situation much better.
Self-reinforcement of floor screed
Advantages of a reinforced screed:
- increase in floor performance indicators;
- increasing strength and resistance to various factors;
- reducing the risk of cracks;
- reducing the thickness of the screed layer;
- saving construction solutions;
- the ability to easily cope with large uneven floors.
On a note! We also note that there are certain requirements for the screed, which are specified in certain documents. These are SNiPs and VSN, as well as MDS. For example, SNiP 2.03.13-88, VSN-9-94 DS, etc.
Reinforcement of floor screed with mesh
Backfilling the soil cushion for the floor on the ground
The surface of the future floor is raised to the required height by installing a cushion of non-heaving soil.
Before starting work on backfilling, be sure to remove the top soil layer with vegetation. If this is not done, the floor will begin to settle over time.
Any soil that can be easily compacted can be used as a material for constructing a cushion: sand, fine crushed stone, sand-gravel mixture, and if the groundwater level is low, sandy loam and loam. It is beneficial to use the soil remaining on the site from the construction of the foundation, well and septic tank (except for peat and black soil).
The soil of the pillow is carefully compacted layer by layer (no thicker than 15 cm) by compacting and pouring water on the soil. The degree of soil compaction will be higher if mechanical compaction is used.
Do not place large crushed stones, broken bricks, or pieces of concrete into the cushion. There will still be voids between large fragments.
It is recommended to make the thickness of the bulk soil cushion within the range of 300-600 mm.
It is still not possible to compact the fill soil to the state of natural soil. Therefore, the soil will settle over time. A thick layer of fill soil can cause the floor to settle too much and unevenly.
To protect against ground gases - radioactive radon, it is recommended to make a layer of compacted crushed stone or expanded clay in the cushion. This underlying captage layer is made 20 cm thick. The content of particles less than 4 mm in size in this layer should be no more than 10% by weight. The filtration layer must be ventilated.
Read: “Protecting your home from radioactive soil gas radon”
The top layer of expanded clay, in addition to protecting against gases, will serve as additional thermal insulation for the floor. For example, a layer of expanded clay 18 cm thick corresponds to 50 mm in heat-saving capacity. polystyrene foam To protect insulation boards and waterproofing films, which in some floor designs are laid directly on the backfill, from crushing, a leveling layer of sand is poured on top of the compacted layer of crushed stone or expanded clay, twice the thickness of the backfill fraction.
Before filling the soil cushion, it is necessary to lay water supply and sewerage pipes at the entrance to the house, as well as pipes for the ground ventilation heat exchanger. Or lay cases for installing pipes in them in the future.
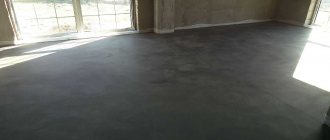
Concrete floor on the ground
| Fig.4. Floor construction on the ground. 1 - Concrete preparation; 2 - Hydro-gas insulation; 3 and 4 - Thermal insulation; 5 – Floor screed with “warm floor” system; 6 and 7 - Finish floor; 8 - Separating edge layer. |
Floors on the ground are a multi-layer structure, Fig. 4
. Let's go through these layers from bottom to top:
- is placed on the soil cushion that prevents moisture
contained in freshly laid concrete from filtering into the soil (for example, a plastic film with a thickness of at least 0.15 mm). The film is applied to the walls. - Along the perimeter of the walls of the room, to the total height of all layers of the floor, a separating edge layer
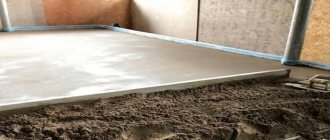
of strips 20 - 30 mm thick, cut from insulation boards, is fixed. - Then a monolithic concrete preparation of the floor
with a thickness of 50-80 mm is arranged.
from lean concrete class B7.5-B10 to a crushed stone fraction of 5-20 mm. This is a technological layer intended for gluing waterproofing. The radius of concrete contact with the walls is 50-80 mm. Concrete preparation can be reinforced with steel or fiberglass mesh. The mesh is laid in the lower part of the slab with a protective layer of concrete of at least 30 mm. To reinforce concrete bases, steel fiber with a length of 50-80 mm and a diameter of 0.3-1 mm can also be used. During hardening, the concrete is covered with film or watered. Read: “Composition and preparation of lean concrete class B10” - onto the hardened concrete floor preparation .
Or two layers of rolled waterproofing or roofing material on a bitumen basis are laid on mastic with each layer placed on the wall. The rolls are rolled out and joined with an overlap of 10 cm. Waterproofing is a barrier to moisture and also serves as protection against the penetration of ground gases into the house. The floor waterproofing layer must be combined with a similar wall waterproofing layer. Butt joints of film or roll materials must be sealed. - on the hydro-gas insulation layer .
Extruded polystyrene foam will probably be the best option for insulating floors on the ground. Foam plastic with a minimum density of PSB35 (residential premises) and PSB50 for heavy loads (garage) is also used. Polystyrene foam breaks down over time upon contact with bitumen and alkali (these are all cement-sand mortars). Therefore, before laying foam plastic on a polymer-bitumen coating, one layer of polyethylene film should be laid with an overlap of sheets of 100-150 mm. The thickness of the insulation layer is determined by thermal engineering calculations. -
(for example, a polyethylene film with a thickness of at least 0.15 mm) is laid on the thermal insulation - Then a monolithic reinforced screed
with a “warm floor” system (or without a system) is laid.
When heating floors, it is necessary to provide expansion joints in the screed. The monolithic screed must be at least 60 mm thick. made from concrete of class not lower than B12.5 or from a mortar based on cement or gypsum binder with a compressive strength of at least 15 MPa (M150 kgf/cm2). The screed is reinforced with welded steel mesh. The mesh is placed at the bottom of the layer. Read: “How to properly make a concrete floor screed.” To more thoroughly level the surface of a concrete screed, especially if the finished floor is made of laminate or linoleum, a self-leveling solution of factory-made dry mixes with a thickness of at least 3 cm is applied on top of the concrete layer. - The finished floor is mounted
on the screed .
This is a classic ground floor. Based on it, various design options are possible - both in design and in the materials used, both with and without insulation.
Professional answers to popular questions about finishing screed
To save money in general and ensure better operation in particular, some builders sometimes try to replace the recommended materials for rough floor screed on the ground with others.
- Is it advisable to replace crushed stone with expanded clay for adding screed?
Such an original solution can provide additional thermal insulation. However, professionals do not recommend using expanded clay for soil with close groundwater, which can lead to this material getting wet.
- Can crushed bricks or other construction waste be used instead of gravel?
The use of such materials is strictly not recommended. Brick is not a water-resistant material; it absorbs water and quickly collapses. Consequently, such a subfloor on the ground will lose its strength and integrity. In addition, waste and broken bricks have different fractions, so it will not be possible to compact them tightly.
- Is it possible to install waterproofing only under the rough screed and not use it in the future?
The answer is negative. Firstly, the polyethylene film is responsible for other functions: it prevents cement laitance from leaving the solution. Secondly, after some time, the waterproofing loses its tightness and breaks under the influence of uneven point loads on the floor.
- Is it possible to replace a rough screed by pouring the floor over the ground?
Pouring involves pouring a special layer of liquid solution onto the bedding under the rough screed. Its height depends both on the thickness of the backfill layers and on the intensity of compaction. If the backfill is very dense, the liquid solution will not be able to penetrate more than 4-6 cm. As a result, the load-bearing properties of the floor base will be reduced. Thus, the answer to this question must be given taking into account the possible loads on the floor surface.
Option - concrete floor on the ground without concrete preparation
Using modern building materials, a concrete floor on the ground is often made without a layer of concrete preparation . A layer of concrete preparation is needed as a basis for gluing roll waterproofing on a paper or fabric base impregnated with a polymer-bitumen composition.
In floors without concrete preparation, a more durable polymer membrane specially designed for this purpose, a profiled film, which is laid directly on the ground pad, is used as waterproofing.
A profiled membrane is a fabric made of high-density polyethylene (HDP) with protrusions molded on the surface (usually spherical or truncated cone-shaped) with a height of 7 to 20 mm. Material is produced with a density from 400 to 1000 g/m2 and is supplied in rolls with a width of 0.5 to 3.0 m and a length of 20 m.
Due to the textured surface, the profiled membrane is securely fixed into the sand base without deforming or moving during installation.
Fixed into a sand base, the profiled membrane provides a solid surface suitable for laying insulation and concrete.
The surface of the membranes can withstand the movement of workers and machines for transporting concrete mixtures and solutions (excluding crawler-mounted machines) without breaking.
The service life of the profiled membrane is more than 60 years.
The profiled membrane is laid on a well-compacted sand bed with the spikes facing down. The membrane spikes will be fixed in the pillow.
The seams between the overlapping rolls are carefully sealed with mastic.
The studded surface of the membrane gives it the necessary rigidity, which allows you to lay insulation boards directly on it and concrete the floor screed.
If slabs made of extruded polystyrene foam with profiled joints are used to construct a thermal insulation layer, then such slabs can be laid directly on the ground backfill.
A backfill of crushed stone or gravel with a thickness of at least 10 cm neutralizes the capillary rise of moisture from the soil.
In this embodiment, the polymer waterproofing film is laid on top of the insulation layer.
If the top layer of the soil cushion is made of expanded clay, then you can dispense with the insulation layer under the screed.
The thermal insulation properties of expanded clay depend on its bulk density. Expanded clay with a bulk density of 250–300 kg/m3 is enough to make a thermal insulation layer 25 cm thick. Expanded clay with a bulk density of 400–500 kg/m3, in order to achieve the same thermal insulation ability, will have to be laid in a layer 45 cm thick. Expanded clay is poured in layers 15 cm thick and compacted using a manual or mechanical tamper. The easiest to compact is multi-fraction expanded clay, which contains granules of different sizes.
Expanded clay is quite easily saturated with moisture from the underlying soil. Wet expanded clay has reduced thermal insulation properties. For this reason, it is recommended to install a moisture barrier between the base soil and the expanded clay layer. A thick waterproofing film can serve as such a barrier.
Large-porous expanded clay concrete without sand, encapsulated. Each expanded clay granule is enclosed in a cement waterproof capsule.
The base for the floor, made of large-porous sand-free expanded clay concrete, will be durable, warm and with low water absorption.
Read: “Large-porous encapsulated expanded clay concrete - properties and preparation”
Floor on the ground with dry prefabricated screed
In ground floors, instead of a concrete screed as the top load-bearing layer, in some cases it is advantageous to make a dry prefabricated screed from gypsum fiber sheets, from sheets of waterproof plywood, as well as from prefabricated floor elements from different manufacturers.
For residential premises on the first floor of a house, a simpler and cheaper option would be to install a floor on the ground with a dry prefabricated floor screed, Fig. 5.
A floor with a prefabricated screed is afraid of flooding. Therefore, it should not be done in the basement, as well as in wet rooms - bathroom, boiler room.
The ground floor with a prefabricated screed consists of the following elements (positions in Fig. 5):
| Fig.5. Floor on the ground with dry prefabricated screed in a private house. |
1 - Flooring - parquet, laminate or linoleum.
2 - Glue for joints of parquet and laminate.
3 - Standard underlay for flooring.
4 - Prefabricated screed made of ready-made elements or gypsum fiber sheets, plywood, particle boards, OSB.
5 - Glue for assembling the screed.
6 - Leveling backfill - quartz or expanded clay sand.
7 - Communications pipe (water supply, heating, electrical wiring, etc.).
8 - Insulation of the pipe with porous fiber mats or polyethylene foam sleeves.
9 - Protective metal casing.
10 — Expanding dowel.
11 - Waterproofing - polyethylene film.
12 - Reinforced concrete base made of class B15 concrete.
13 - Foundation soil.
The connection between the floor and the outer wall is shown in Fig. 6.
| Fig.6. Connection to the outer wall of the floor along the ground. |
The positions in Fig. 6 are as follows: 1-2. Varnished parquet, parquet, or laminate or linoleum. 3-4. Parquet adhesive and primer, or standard underlay. 5. Prefabricated screed from ready-made elements or gypsum fiber sheets, plywood, particle boards, OSB. 6. Water-dispersed adhesive for screed assembly. 7. Moisture insulation - polyethylene film. 8. Quartz sand. 9. Concrete base - reinforced concrete screed of class B15. 10. Separating gasket made of waterproofing roll material. 11. Thermal insulation made of polystyrene foam PSB 35 or extruded polystyrene foam, thickness as calculated. 12. Foundation soil. 13. Plinth. 14. Self-tapping screw. 15. External wall.
As mentioned above, the soil cushion at the base of the floor always has a positive temperature and in itself has certain heat-insulating properties. In many cases, it is enough to additionally lay insulation in a strip along the outer walls (item 11 in Fig. 6.) in order to obtain the required thermal insulation parameters for a floor without underfloor heating (without heated floors).
Read: “How to properly make a dry prefabricated floor screed in a private house .
Fig.7. Be sure to lay insulation in the floor, along the perimeter of the outer walls, with a tape at least 0.8 m wide. From the outside, the foundation (basement) is insulated to a depth of 1 m.
The temperature of the soil under the floor, in the area adjacent to the plinth along the perimeter of the external walls, depends quite strongly on the temperature of the outside air. A cold bridge forms in this zone. Heat leaves the house through the floor, soil and basement.
The ground temperature closer to the center of the house is always positive and depends little on the temperature outside. The soil is heated by the heat of the Earth.
Building regulations require that the area through which heat escapes be insulated. For this, it is recommended to install thermal protection at two levels (Fig. 7):
- Insulate the basement and foundation of the house from the outside to a depth of at least 1.0 m.
- Lay a layer of horizontal thermal insulation into the floor structure around the perimeter of the external walls. The width of the insulation tape along the external walls is at least 0.8 m (item 11 in Fig. 6).
The thickness of the thermal insulation is calculated from the condition that the overall resistance to heat transfer in the floor-soil-basement area must be no less than the same parameter for the outer wall.
Simply put, the total thickness of the insulation of the base plus the floor should be no less than the thickness of the insulation of the outer wall. For the climatic zone in the Moscow region, the total thickness of the foam insulation is at least 150 mm. For example, vertical thermal insulation on the base is 100 mm, plus 50 mm. horizontal tape in the floor along the perimeter of the external walls.
When choosing the size of the thermal insulation layer, it is also taken into account that insulating the foundation helps reduce the depth of freezing of the soil under its base.
Read: “An insulated, thermally insulated foundation is the best for a home.”
These are the minimum requirements for ground floor insulation. It is clear that the larger the size of the thermal insulation layer, the higher the energy saving effect.
Laying thermal insulation under the entire floor surface for energy saving purposes is only necessary in the case of installing heated floors in the premises or building an energy-passive house.
In addition, a continuous layer of thermal insulation in the floor of a room can be useful and necessary to improve the heat absorption parameter of the floor covering surface . Heat absorption of the floor surface is the property of the floor surface to absorb heat in contact with any objects (for example, the feet). This is especially important if the finished floor is made of ceramic or stone tiles, or other material with high thermal conductivity. Such a floor with insulation will feel warmer.
The heat absorption rate of the floor surface for residential buildings should not be higher than 12 W/(m2 °C). A calculator for calculating this indicator can be found here.
Base slab made of class B 12.5 concrete, 80 mm thick. over a layer of crushed stone compacted into the ground to a depth of at least 40 mm.
Wooden blocks - logs with a minimum cross-section, width 80 mm. and height 40 mm., it is recommended to lay it on a layer of waterproofing in increments of 400-500 mm. For vertical alignment, they are placed on plastic pads in the form of two triangular wedges. By moving or spreading the pads, the height of the lags is adjusted. The span between adjacent support points of the joists is no more than 900 mm. A gap of 20-30 mm wide should be left between the joists and the walls.
The logs lie freely without attachment to the base. During the installation of the subfloor, they can be fastened together with temporary connections.
For the construction of the subfloor, wood boards are usually used - OSB, chipboard, DSP. The thickness of the slabs is at least 24 mm. All slab joints must be supported by joists. Wooden lintels are installed under the joints of the slabs between adjacent logs.
The subfloor can be made from tongue-and-groove floorboards. Such a floor made from high-quality boards can be used without floor covering. The permissible moisture content of wood flooring materials is 12-18%.
If necessary, insulation can be laid in the space between the joists. Mineral wool slabs must be covered with a vapor-permeable film on top, which prevents microparticles of insulation from penetrating into the room.
Rolled waterproofing made of bitumen or bitumen-polymer materials is glued in two layers onto the concrete underlying layer using the melting method (for fused roll materials) or by sticking on bitumen-polymer mastics. When installing adhesive waterproofing, it is necessary to ensure a longitudinal and transverse overlap of the panels of at least 85 mm.
To ventilate the underground space of floors on the ground along the joists, the rooms must have slots in the baseboards. Holes with an area of 20-30 cm2 are left in at least two opposite corners of the room.
| Fig.5. Floor on the ground on posts |
There is another structural design of the floor - this is a wooden floor on the ground on joists,
laid on posts, Fig.5.
Positions in Fig. 5: 1-4 - Elements of the finished floor. 5 - Prefabricated screed made of sheet materials.
6-7 - Glue and screws for assembling the screed. 8 - Wooden joist. 9 — Wooden leveling gasket. 10 - Waterproofing. 11 - Brick or concrete column. 12 - Foundation soil.
Arranging the floor on joists along columns allows you to reduce the height of the ground cushion or completely abandon its construction.
Details about floors without concrete screed
, read about the lags here.
Types of rough screed
Rough screed, like regular screed, can be of different types. It all depends on the installation technology and materials used. It can be performed using both dry and wet methods.
A dry floor screed is a kind of multi-layer cake, where the layers are vapor barrier (or waterproofing) material, expanded clay or sand, which acts as a dry “cushion”, as well as any leveling material such as chipboard, OSB, plywood or gypsum fiber, depending on the wishes of the future owner Houses. Often the material can be laid not in one, but in two layers, with individual sheets fastened with self-tapping screws.
Backfilling dry screed along beacons
A wet screed is made on the basis of a cement-sand mixture, which will be poured on top of previously laid other layers and carefully leveled. A waterproofing layer and insulation can be laid under it, and a sand cushion is mandatory.
Wet floor screed
On a note! There is also a semi-dry screed. If in the previous version the mixture during preparation and use will resemble the consistency of sour cream, then in the version with a semi-dry screed it will look like wet sand.
Semi-dry screed over heated floor
Floors, soils and foundations
Ground floors are not connected to the foundation and rest directly on the ground under the house. If the soil on the site is heaving, then the floor in winter and spring can “go on a spree” under the influence of the forces of frost heaving of the soil.
To prevent this from happening, the heaving soil under the house must be made not to heave. The easiest way to do this is to insulate the base and underground part of the strip foundation.
The design of pile foundations on bored (including TISE) and screw piles involves the installation of a cold base. Insulating the soil under a house with such foundations is a rather problematic and expensive task. Floors on the ground in a house on a pile foundation can only be recommended for non-heaving or slightly heaving soils on the site.
When building a house on heaving soils, it is necessary to insulate the base and underground part of the foundation to a depth of 0.5 - 1 m.
| In a house with external multilayer walls with insulation on the outside, a cold bridge is formed through the base and load-bearing part of the wall, bypassing the insulation of the wall and floor. |
In addition, insulating the base will help eliminate the cold bridge, and will also reduce the thickness of the floor insulation. You can find out how to determine the required thickness of vertical thermal insulation of the base and underground part of the foundation here.
about the design features of different flooring options on the ground
in other articles on this topic.
More articles on this topic:
⇒ Concrete floor on the ground in a stone private house. ⇒ How to make the right concrete floor in a wooden or frame house.. ⇒ Wooden floor on joists in a private house. ⇒ Floor with dry prefabricated screed made of gypsum fiber board, chipboard, OSB or plywood
⇆
More articles on this topic
- How to make a house warm. Energy saving house
- Height, dimensions, waterproofing and insulation of the basement of the house
- Heating scheme with solid fuel boiler and heat storage tank
- Dew point, vapor barrier and ventilated wall gap
- DIY sewerage in a private country house
- We are building a house, walls made of concrete blocks
- Self-learning room thermostat for gas boiler
- Norms and rules for planning a private house, cottage