Properties of drywall
When planning to make window slopes from plasterboard with your own hands, you need to learn about the advantages and properties of the material. The first thing to notice is the ability to carry out work with your own hands, without the help of craftsmen. The final result will please you and meet all repair requirements.
After cladding, the material can be sheathed, the opening can be decorated with tiles and other finishing materials, for example, using painting or wallpapering. The main properties of drywall when designing slopes are presented in the table:
| Properties: | Description: |
| Decent level of sound insulation and thermal insulation: | If you need a window opening and window sill, you can not only cover it with plasterboard, but also lay an additional layer of insulating materials to strengthen the structure and insulation qualities. |
| A light weight: | Due to the small mass of plasterboard, there is no need to use special technologies for installation; installation is carried out on a metal profile from which the metal frame is created or on adhesive mixtures. |
| Ideal plane: | The plasterboard sheets are perfectly flat, due to which the slopes on windows and doors will be smooth, which greatly facilitates the process of finishing with putty, and also speeds up the creation of slopes. |
| Breathability: | Due to its properties, the slope does not allow deformation, even if there are strong temperature changes or there is high humidity in the rooms. |
| Environmental friendliness: | Although plasterboard sheets may contain additives, the material is environmentally friendly and slopes can be made in children's rooms. Drywall does not emit toxic substances. |
| Minimum amount of garbage: | During installation work, there is almost no waste, dust and other debris from the plasterboard material. |
For window slopes made of plasterboard, it is necessary to choose the right sheets, which will have certain types of additives and other additives:
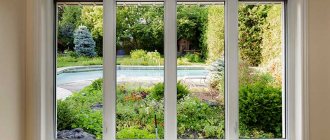
Drywall window slope
- To design slopes in a normal environment, in a residential building or apartment, standard drywall is used, which can withstand humidity up to 70%.
- When using plasterboard on the street side or in the bathroom and other damp places, moisture-resistant plasterboard is used; the material additionally contains antifungal and hydrophobic impurities.
- To reduce the likelihood of fire, fire-resistant material is used for the slopes of windows and doors, which already contains admixtures of mineral wool and fiberglass. This type of plasterboard sheet is rarely used, but it is very durable in itself.
Important! Drywall is a breathable material, due to which it can absorb moisture and, if necessary, release it into the atmosphere without changing its shape.
Finishing a window slope with plasterboard (video)
Materials and tools for work
In practice, there are many ways to seal slopes with plasterboard. But all of them are based on 4 basic technologies:
- glue landing;
- fastening to a rigid frame made of metal profiles;
- simultaneous use of a metal profile and glue (combined or mixed method);
- fastening with polyurethane foam.
To complete the work you will need the following materials and tools:
- plasterboard - moisture resistant (there is always high humidity in the window area), at least 12 mm thick (subject to significant mechanical loads, unlike the ceiling);
- Perlfix glue in the form of a dry gypsum mixture (can be replaced with ready-made gypsum-based putty);
- primer for treating walls and gypsum boards before painting;
- gypsum putty;
- water-based paint or acrylic enamel;
- polyurethane foam;
- mineral wool for slope insulation;
- acrylic or silicone sealant for sealing joints;
- guide profile NP (UD), size 28×27, attached to the window sill and the top of the opening;
- ceiling profile PP (CD) with a section of 60×27. Serves as a frame for gypsum boards;
- metal L-shaped profile;
- self-tapping dowel 6×60 mm (8×80 mm) for installing NP guide profiles;
- “bug” hardware (9 mm) for connecting the guide and ceiling profile;
- hammer drill or electric drill - necessary when using frame elements;
- grinder or hacksaw for cutting metal profiles;
- self-tapping screws 35 mm long. They are used to fasten sheets of plasterboard with sheathing;
- screwdriver with a cross-shaped tip;
- metal perforated plaster corner;
- construction knife;
- level;
- construction pencil;
- roulette;
- set of spatulas;
- glue container;
- paint brush.
The above list is standard. For each method of constructing slopes, those materials and tools that are required in a particular situation are selected.
Advantages of plasterboard cladding
The material has been used for window and door slopes for quite some time. This is not surprising, because it has a number of advantages:
- Environmental friendliness and safety for human health.
- Low material cost.
- Easy to install.
- Minimal maintenance of ready-made slopes.
- Stylish look.
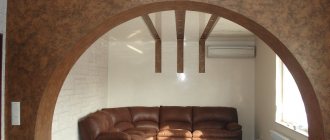
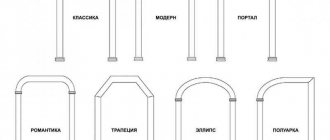
- The ability to make an arched opening and other complex shapes.
- Long service life of plasterboard slopes.
- Possibility of additional insulation of windows or doors.
- Versatility: used not only for windows and doors, but also used for leveling ceilings and walls.
Important! Although plasterboard material has a number of advantages, it also has a disadvantage: the sheets are easily damaged mechanically, even material protected from water can be destroyed due to prolonged contact with it.
Preparation for finishing
Before making slopes from plasterboard, you will need to prepare a window or door. In terms of preparation, a plasterboard door slope and a window slope are almost the same, but for doors the following is taken into account:
- Presence of communications. For example, wires for the Internet, electricity or a call. The installation is done before the installation of the doorway begins.
- Possibility to install second entrance doors. The need arises if the first door is not insulated, and the sound insulation of the doors does not matter.
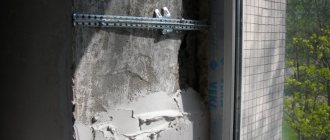
Removing foam from a slope
Preparing the opening is as follows:
- When an old window or door is dismantled and a new product is installed, the foam remains and its remains are cut off.
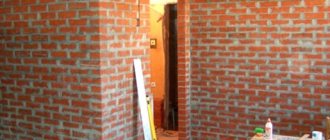
- Use a hammer or other device to remove plaster and other protruding parts on windows and doors. Often there may be a metal pin and other elements under the plaster; they are cut off.
- The gap, hole and other defects in the opening must be puttied.
- The joints that appear between the window frame or interior doors must be coated with sealant.
- After the putty and other mixtures have dried, a primer is applied in two layers around the perimeter of the opening.
At the end of the preparatory work, the opening is completely cleaned of dirt. Everything is swept and dried. In order not to damage the window or door frame, it is sealed with masking tape and cardboard.
Sealing cracks and decorating outer corners
The final touches before finishing the door slope are sealing the cracks. They can be glued with a special tape for sealing corners, and then puttied. This method is suitable in the place where the drywall is connected to the door frame or where the vertical and horizontal parts of the slope are connected. If the cracks here are very small, you can simply cover them with putty and smooth them out well.
Corner tape can be paper or fiberglass. Both do their job well - preventing cracking
There are also several ways to design the other side. The first is to cover it with the same tape to finish the corners. But this method is suitable if the angle is smooth, there are no problems. This situation rarely occurs for beginners. Much more often the angle needs to be “outlined”. In this case, use a metal paint corner. It has two perforated sides, which allows you to secure it in several ways:
- into pieces of plasticine;
- on thick putty;
- on screws or nails.
In the case of carnations, you need to be careful: you can get hurt when working with them. In general, this method is convenient, but again, if the angle is almost perfect.
Having secured the corners, the plasterboard slopes are finally put in order - they are puttied
Perforated corners are set level and in the same plane as the main wall. The resulting voids are filled with putty diluted to a paste. For initial leveling, use starting putty. After it dries, all irregularities are smoothed out with a special mesh. It is used instead of sandpaper, which gets clogged with putty instantly. Mesh for sanding putty is sold in the same stores that sell drywall. A layer of finishing, leveling putty is then applied to the leveled surface. After drying, it also needs to be brought to a perfectly smooth state. They do this with the same mesh, only thinner.
If such a hassle with putty seems complicated to you, read about how to make slopes from MDF. There's definitely no putty there.
In general, without experience, it is difficult to make external corners ideal. Even when working with drywall. By installing perforated metal corners, we make our task much easier. But still, it’s not always possible to do everything perfectly. But even in this case, there is a solution: decorative plastic corners. They are installed after the walls are finished. They are selected either to match the door or to match the finish. Glue on liquid nails. All you need to do is cut them to the required length. They are cut with ordinary scissors. The main thing here is to cut an even 45° angle at the top.
A decorative corner for slopes will hide all defects
If wood is more suitable for your design style, you can find a similar corner made of wood.
You can also decorate the outer corner of the slope using a wooden corner
In fact, the role of a decorative corner for slopes is not only decoration. It also protects the corner from damage. This is especially true for entrance doors. If everything is covered with wallpaper, it also protects it from damage, which also happens quite often. That's all, the slopes are made of plasterboard, and with your own hands.
All these methods can be combined, as, for example, in a video.
Installing a new front door is always a big deal. And for the first impression of the apartment - special thanks, and for the reliability of protection from unwanted guests, which has increased. However, the matter has not yet been completed, since it is possible to make slopes on the doors only after the polyurethane foam has completely hardened, which means after the installers have left, in a separate step. And such operations are rarely included in their sphere of activity. While waiting for the moment when you can finally finish the front door, it’s time to choose how this will be done.
What to use for finishing: options
There are a wide variety of ways to make door slopes. Each of them has its own advantages and, of course, certain disadvantages. When choosing, you should start from their favorable ratio in the direction of the predominance of advantages.
- The classic of the genre is plastering. Cement-sand mixtures are durable, not destroyed by moisture, and cheap. Among the negative qualities are the need for certain plastering skills, a large amount of dirt and a rather long wait for drying before finishing.
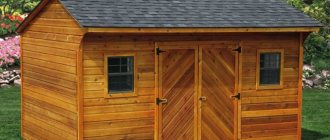
- One of the most popular options today for sealing the slopes of the front door is plasterboard sheathing. The good advantages of the material are the speed, simplicity and cleanliness of finishing. Even a person who has never encountered such work, but knows how to hold tools in his hands, can handle it. A significant objection may be the low moisture resistance of gypsum plasterboard. It is used to cover door jambs in apartment buildings, where the formation of condensation is prevented by the entrance. And it is still advisable to use a moisture-resistant type of drywall.
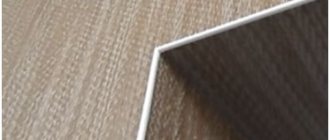
- Laminate flooring is quite good as a cladding material for making slopes on the front door. An opening made in this way looks quite noble. However, the frame “eats up” the space, and the laminate itself is also not very friendly with moisture.
- MDF looks very beautiful, but has almost the same disadvantages as laminate, plus it is very unstable to physical influences - it can even be scratched by a plastic button. In addition, it absorbs all odors, and it is almost impossible to remove stains that appear. But it is placed on polyurethane foam, which even an inexperienced installer can handle.
- An attractive way to make slopes on doors is tiling. You just need to choose it from unglazed floor options, otherwise the doorway will look too shiny. The advantages are resistance to moisture and strength, the disadvantages are that the work is dirty, it requires experience, time to set and sew up seams.
- PVC panels can be considered a disposable option. They are cheap, look budget, but can be pierced even with a finger, which is not very good for an external doorway.
Choosing drywall for finishing doors
In most cases, when they plan to decorate door slopes with their own hands, people choose drywall. In addition to the ease of installation, it is attractive because it can subsequently be decorated in almost any way, gently blending into the overall interior of the hallway.
Option No. 1: adhesive installation
It allows you to quickly and without wasting space install gypsum plasterboard door slopes with your own hands. If everything is done correctly, they will turn out perfectly smooth and without a frame. The plating algorithm will be like this.
Step by Step Actions
- The door leaf is covered with construction polyethylene to prevent accidental contact with the adhesive composition.
- Using a sharp knife, cut off the frozen polyurethane foam close to the wall.
- The surfaces of the openings are impregnated with a primer - this will permanently prevent their possible shedding or the formation of fungus under the plasterboard slabs.
- Along the perimeter of all slope elements (top and side), holes are drilled with a hammer drill every 20 cm. Dowels are hammered into them and screws are screwed in so that their heads stick out from the socket. All heads must be located in the same plane, which is checked by a level: the plasterboards will rest on them, and they are responsible for the evenness of the sheets.
- Drywall sheets are cut to size using a utility knife. The upper slope should occupy the entire space - the sides will rest against it. Vertical sheets are cut taking into account the distance that the top sheet will take.
- The glue is diluted if it is in the form of a dry mixture. Please note that the composition must be suitable for working with drywall and be based on gypsum, not cement. You need to start with the upper component of the slopes. The distance between the dowels is coated with glue. Dotted strokes are evenly applied to the plasterboard.
- The sheet is applied to the desired location. A level is used to check its horizontalness, after which it is pressed until it fits tightly onto the screw heads.
- The side parts of plasterboard door slopes are installed in the same way.
It is very important to ensure that there is no excess glue under the sheets - it can bend the panel. To do this, when installing slopes on the front door with your own hands, each element is lightly tapped through a board or a piece of gypsum board.
Option No. 2: frame installation
It is used if the doorway is very uneven and full of sharp protrusions that cannot be knocked down - in this case, plasterboard door slopes can be damaged from the inside, from the wall, even at the installation stage, and even more so during operation , for example, when bringing in something large. The frame is also used if you need to hide incoming cables. For do-it-yourself lathing, you can use wooden slats or a metal profile for wall cladding. Considering the conditions in which the door slope will operate, it is better to prefer metal that is not subject to rot and mold.
Carrying out work step by step
The start of the process is the same as option 1, so the first steps remain the same. And then we proceed as follows.
- The dimensions of the racks and horizontal guides are measured.
- Use metal scissors or a grinder to cut the necessary elements.
- In the opening along the entire perimeter, holes are made with a puncher every 30-40 centimeters. Plastic dowels are inserted into them.
- Each segment is fixed with self-tapping screws or self-tapping screws with mandatory checking of the geometry by level.
- To make the frame stronger, it is reinforced with profile jumpers.
- When the sheathing is ready, you can additionally insulate the opening using mineral wool laid in its cells.
- Using a sharp knife (a construction knife, the plasterboards are cut to carefully measured dimensions.
- The elements are fastened with self-tapping screws with an indentation of 20 cm around the entire perimeter. Their caps are buried in the covering material no deeper than 1 mm.
- The outer corners of the structure are reinforced with perforated corners, which are attached to self-tapping screws.
Do-it-yourself plasterboard slopes mounted on glue or a frame undergo final processing: the seams are glued with serpyanka, the entire surface is puttied, and after the finishing layer has dried, the finishing is applied. The doorway is ready, we hope that it will be used for as long as possible: well, time will tell! How and what did you use to make the slopes for the front door?
Author of the article
36 years
professional builder - experience since 2005.
For an inexperienced person, finishing work is a serious challenge. What then can we say about slopes for entrance doors - without proper experience, their installation can take quite a long time, regardless of the material used.
However, not everything is as complicated as it seems at first glance, and, armed with instructions, you can complete all the work at the level of a professional installer.
It is preferable to install door slopes with your own hands from plasterboard - working with it does not require special skills and tools, and it will not be difficult for a beginner to cope with it.
Frame method of finishing slopes
Frame method of finishing slopes
The frame method of decoration is convenient and practical. True, installation of the material is somewhat more complicated, because the U-profile needs to be fastened with self-tapping screws, which is more difficult and takes longer. The fixation is carried out securely, everything is screwed in flush with the drywall so that the frame is strong. Step by step, you can make the sheathing of the opening yourself like this:
- Wooden planks or metal profiles are used for the frame.
- The material is cut to fit the opening. The slats need to be installed along the entire perimeter of the slope, at the internal and external corners. For reliability, cross bars are attached.
- If desired, insulation, in the form of mineral wool, is placed into the frame; it is installed in ready-made cells.
- Now the plasterboard sheets cut to size are fixed. Trimming is carried out only if the manufacture of the frame is completed.
- At the end, sheathing is carried out with plasterboard sheets directly to the profile or slats.
The advantage of this method is the need to line the slope and adjacent walls. The disadvantage of this method is that it reduces the space in the opening, especially when it comes to a door.
Various installation options
Finishing slopes with plasterboard is carried out in three main options:
- Installation using polyurethane foam.
- Pasting on putty.
- Frame mounting.
Various options for installing plasterboard slopes
Each of these methods is suitable for independent use and gives a complete understanding of how to make slopes in different situations. These methods are used for finishing all types of surfaces.
Using polyurethane foam
It is believed that the use of polyurethane foam is one of the fastest and easiest procedures for installing slopes. Indeed, this option is quite convenient. But it must be taken into account that an error with the amount of material is a guarantee that the coating will be deformed.
Applying polyurethane foam to a plasterboard slope
Window and door slopes made of plasterboard on foam are laid in the following order:
- All preparatory activities are being carried out.
- The foam container shakes well. Of course, it is much more efficient to work with professional materials that are applied with a special gun. But for small volumes of work, it makes no sense to purchase them.
- The substance is applied in a thin layer (snake) to the underside of the cut parts.
- The element is applied to the desired area. But they do not leave it in place, but immediately tear it off.
- The fragment is left for ten minutes. After which, it is finally installed on the selected area. First, the first vertical part is placed, then the horizontal and again the vertical.
- After 24 hours, finishing work begins.
This method will be an ideal solution if you need to refine interior openings or make window slopes from plasterboard in a short period of time.
Landing on putty
But how can you make plasterboard slopes more reliable so that no problems arise? The option with putty is perfect for this.
The procedure is as follows:
- Careful preparations are being made. The dry mixture is diluted.
- The solution is applied to the reverse sides of the parts. It is placed along the entire perimeter of the panel, and also dotted areas are made in the center.
- The workpiece is placed in the selected location and pressed. It is necessary to ensure that the fragment adheres well.
On a note! To achieve better adhesion, the surface is sprayed with water. Needs a little moisture. To increase the fixation force and its reliability, spacers are installed.
Thus, a reliable surface is obtained. This option is great for making slopes on the front door made of plasterboard.
Cladding on the sheathing
This solution allows you to obtain a practical coating. But it is important to consider that the material will be attached using self-tapping screws. Therefore, it is necessary to follow the rules of fixation, which are that the screws are tightened flush with the surface, without excessive deepening.
Installation of plasterboard slopes on a frame
The sheathing is created quite simply:
- Wooden bars or metal profiles are used for installation.
- The guides are cut into segments, which are determined by measurements. It is important to install elements along the entire perimeter at the inner and outer corners. We must not forget about the crossbars.
- If required, the made frame can be insulated. For this purpose, mineral wool is used, which is driven into the resulting cells.
- Next, the gypsum board parts are installed. But it is necessary to take into account that they are measured and cut only after the sheathing has been created.
- All fragments are fixed with self-tapping screws.
This option is most often used when the finishing of window slopes with plasterboard is carried out together with the cladding of adjacent walls. Working with a doorway can be difficult because its size will be reduced.
Installation of slopes on the frame is most often done when finishing adjacent walls with plasterboard
Glue method for finishing slopes
Glue method for finishing plasterboard slopes
There is an option for decorating a slope using an adhesive solution or putty. Instructions on how to glue drywall are presented below:
- Place putty or glue on the cut parts. When using putty, it is better to use a finishing compound. The material is applied around the perimeter and slightly in the middle.
- The prepared slopes are moistened with water and drywall can be glued to the slope. Initially, the top element is installed, and then the side parts.
- When the wall and drywall are connected, you can press down the sheet and shake it a little to the sides so that the glue spreads and the drywall itself sticks.
- If the sheet is fixed tightly and does not move, then everything is left until it hardens completely. According to the advice of the experts, it is better to wait about a day or even two. If the drywall is not securely fixed, it is recommended to support it with strips at the edges and in the middle. When the mixtures dry, the planks are removed.
The disadvantages of the method are similar to the frame technology, but the advantages are obvious: the work is done faster, not as expensive, and as reviews show, the installed slope lasts for 10 years, nothing lags behind the walls. From the outside, the glue is immediately removed if it comes out, until it hardens.
Installation of plasterboard elements of window slopes
The top part is installed first. To do this, you need to prepare it in advance by cutting it from a whole sheet of drywall. But first, take the necessary measurements so that the gypsum plaster blank is sufficient in length and width.
The established dimensions are transferred to the surface of the sheet, and, focusing on them, the cutting lines are marked with a ruler and pencil.
Using a construction knife, a plasterboard element for the upper slope is cut along the marked lines.
When starting to install the cut piece, you should prepare all the necessary tools and materials. To complete this task you will need:
- level-bar, the length of which is comparable to the size of the installed panel;
- spatula for applying the mixture to the surfaces to be joined;
- plasterboard slab cut to size;
- ready-made adhesive composition, mixed as described above.
When everything is prepared, begin applying the adhesive mixture. It is better to place it around the perimeter, adding a few “bloopers” in the central part. To simplify the work process, it makes sense to apply part of the mixture to the base surface closer to the frame. And the second part is on the edge of the plasterboard, on the side that will be removed from the window.
The next step is to install the plate in the desired position. Focus on the lines drawn during the preparatory activities.
How to achieve horizontality of the upper slope?
To achieve strict horizontality of the upper slope of plasterboard, it is necessary to check its location during installation using a level in two directions.
If any place needs to be brought closer to the wall of the opening, this can be done by lightly hitting the drywall. But you shouldn’t pull the plate in the opposite direction. The mixture does not have the properties of rubber and will not return to its previous state. Therefore, it is better to apply a layer of the mixture with a reserve, and the excess substance will spontaneously distribute between the surfaces being connected, partially filling the voids.
Some craftsmen, for the upper slope of plasterboard, come up with supports or use dowels to fix the slab in the desired position. In most cases, this is not necessary. Surface tension forces can easily hold the drywall, preventing it from changing its spatial location.
Installation of side slopes
As for the side slopes made of plasterboard, their installation can begin after the adhesive mixture that holds the top slab has hardened. This procedure follows the same procedure as described above for the top panel:
- a part is cut out from plasterboard;
- the adhesive mixture is mixed;
- the finished composition is applied to the surfaces to be joined;
- the plasterboard part is installed in the place intended for it;
- The position of the slab is adjusted along the marking lines and using a level.
The only difference is that the level check is performed vertically in one direction.
Covering cracks with adhesive mixture
When all the plasterboard elements of the window slope are in the proper position and the adhesive mixture has hardened, it is necessary to cover all the cracks between the plasterboard and the walls of the opening with the same composition.
After this, you can proceed to the last stage - puttying the drywall.
Installation on polyurethane foam
Fastening window slopes with polyurethane foam
You can seal the slope by fixing drywall with polyurethane foam. The sealing is very simple, but it is used if there are few defects on the slopes and the holes are small in size, up to 3 cm. For larger sizes, the defects need to be sealed with foam before installation; the correct method for sealing potholes is using cement mortar or a starting type of plaster. You need to sew it like this:
- Dismantle the old coating, remnants of plaster and foam. Next, large potholes are filled.
- When the holes are dry, polyurethane foam is applied to the drywall from the back side of the material. The foam layer is no more than 1 cm. The material is applied in the form of a snake.
- The plasterboard material is placed on the slope and pressed against it. The pressure on the drywall must be strong so that the foam adheres to the slope.
- After this, the drywall comes off, leaving foam on the slope and finishing material. After 10 minutes the foam will increase in size.
- The drywall is again mounted into the slope and pressed against the wall. If necessary, fix the material with spacers and leave it for up to 24 hours without continuing work.
- The next stage is sealing the drywall seams on the slopes using plaster.
Puttying a window slope
The disadvantages of this design of door and window slopes are quite large. The biggest disadvantage is that the surface will first need to be leveled, otherwise the sheet of drywall will not work. Drywall on slopes may bend during installation. There are voids left on the door/window slope, making the fixation not very reliable. But this is the fastest method for finishing slopes with plasterboard. When a window or doorway is covered with plasterboard, using any described method, the opening is finished with various materials. But before finishing the slopes, you need to do the following:
- The slope is puttyed with a thin layer.
- On the outside of the opening, protection is placed and a corner is formed using a plastic perforated corner, which is covered with putty.
- Another layer of putty is laid down to completely level the surface.
- Finishing material is selected.
Advice! Painting is used for decoration; you can paint it in any color, for example, the color of a door or window, wallpaper in a room, or use standard white paint. Photos on the Internet will help you decide on your choice; a bay window in an apartment in different colors looks very nice.
Painting is not durable, so for part of the slopes a panel type of material is used, for example, plastic for slopes, instead of plasterboard, PVC panels and other materials, this is a good material, made according to GOST, and is distinguished by its durability. The video shows step-by-step work with drywall; you can use the method for doors and windows:
Installation using adhesive composition
The main advantage of this method is that it does not reduce window space. The absence of a metal frame saves space. The covering occurs using a special adhesive composition.
The appearance of the glue resembles powder. It is a dry mixture. Before use, dilute to the desired consistency with water. It is best to dilute in a large container. Stir the composition thoroughly. The mixture should be homogeneous, smooth, without lumps. It is most convenient to mix a large volume with a drill.
Manufacturers recommend applying a primer first. Thanks to it, the surface stops collecting dust. The adhesion of the glue to the primed surface is much stronger. The adhesive mixture is applied to the previously prepared part. The part is attached to the slope only after the primer has completely dried. After installation, the finishing stage begins:
- trim the corners, putty, attach the perforated corner;
- slopes are puttyed, leveled, all fastenings are hidden;
- after the first layer of putty has dried, apply the second;
- the prepared surface is ready for decoration.