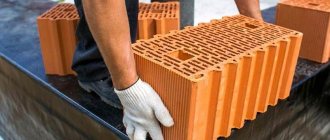
Construction technologies are constantly updated. New materials appear, replacing old ones. Thus, relatively recently, a large-format building material called warm ceramics or porous ceramic blocks appeared on the market. The blocks contain high-quality clay, sawdust and water. These components are environmentally friendly, which means that products made from them meet high environmental safety requirements. The blocks have a porous structure, which improves sound absorption and thermal insulation properties. These and other features of ceramic blocks have made them especially popular in the construction of single- and multi-story buildings in many European countries. This article will talk about how to lay ceramic blocks, but first, we suggest you familiarize yourself in more detail with the advantages of this material.
Advantages and disadvantages
Warm ceramics are used by both professionals and amateur craftsmen. For the sake of objectivity, the pros and cons of the material will be given below. So let's start with the benefits. This list includes:
- Stability and strength. Modern block manufacturing technologies have made it possible to obtain a unique combination of low thermal conductivity and high strength grade of the material. Ceramic blocks retained the parameters of ordinary red brick and acquired new properties.
- Energy efficiency. Ceramic blocks provide high quality air-heat balance. This means that fresh air will flow into the room with minimal heating costs.
- Environmental safety and natural air conditioning function. Thanks to the capillary structure of the blocks, air penetrates through the pores of the walls, creating natural moisture exchange. Thus, the walls will play the role of a natural air conditioner: if there is excess moisture, it will be absorbed into the walls, and if the air in the room is too dry, the walls will make up for the lack of moisture. Thanks to this, the likelihood of the formation of fungi and mold on the surface of the walls is eliminated.
- Cracks will not appear on plastered walls, since ceramic blocks do not shrink.
- Tongue-groove joint. The tongue-and-groove joining technology makes it possible to lay blocks even in a vertical position.
Tongue-to-groove joining
- Plastering ceramic block walls is very simple, as they have a slightly rough corrugated surface, which ensures reliable adhesion of the plaster mixture to the wall surface. This is also very economical, since to plaster a wall made of ceramic block you will need one and a half times less plaster mixture than for a wall made of ordinary red brick.
- Ceramic blocks are more voluminous than ordinary bricks. Due to this, walls made of this material are erected several times faster than those made of brick. Thus, the cost of construction is reduced.
- The light weight of the blocks reduces the load on the foundation. Savings can be up to 40%.
- Ceramic blocks have high thermal insulation properties, so there is no need for additional insulation of structures built from them.
Block dimensions
Each material has both advantages and disadvantages.
Therefore, it is worth mentioning the disadvantages of the material. The main disadvantage is considered to be the low load-bearing capacity and strength of warm ceramics. Therefore, when building a house from ceramic blocks, it needs to be further strengthened. It will not be possible to screw racks, ladders and other heavy products to the walls.
Expert advice
If you independently lay walls from ceramic blocks, you may have questions about how to lay them correctly, in order for everything to work out, you need to adhere to the developed technologies and listen to the advice of experts:
- Ceramic blocks can be used in both private and multi-storey construction, but in the latter case the requirements for the foundation increase.
- Working with ceramic blocks is the same as with ordinary bricks, they are simply larger in size and are connected to each other using a groove and a tongue.
- For exterior finishing, you can use plaster or a ventilated facade. When finishing the walls, in order not to disturb their vapor permeability, vapor barrier materials, such as impregnation or gypsum plaster, are used inside, and vapor-transparent materials, such as mineral wool or insulating plaster, are used outside.
- When building a single-layer wall, you cannot use regular mortar; in this case, use warm mortar.
- If you plan to install insulation, you can use ordinary cement mortar.
- The use of a “warm” mixture compared to the usual one allows you to improve the thermal insulation performance of a house by 15-20%.
- To lay a cubic meter of wall, you will need about 0.07-0.1 cubic meters of mortar.
- If the walls are made of blocks with a width of 380, 440 or 500 mm, then insulating them is not advisable, since they have high thermal insulation characteristics. The money you are willing to spend on insulation is better used for exterior wall decoration or for installing high-quality windows and doors.
- The markings may vary from manufacturer to manufacturer, but usually they indicate the width of the block.
- When laying, use a jig, this is a device to facilitate and speed up the laying process, to evenly lay the adhesive composition with the creation of an air gap that reduces the thermal conductivity of the mortar joint.
- If you decide to hire builders, the cost of laying ceramic porous blocks from 380 mm thick will be from 1,700 rubles/cub.m.
Preparation of masonry mortar
Laying ceramic blocks cannot be done using the mortar used for laying ordinary red brick. In this case, special masonry thermal insulation solutions should be used. This is due to the difference in the thermal properties of these materials.
Note!
If you make seams from ordinary cement-sand or lime-cement mortar, they will create cold bridges. Consequently, the thermal insulation properties of the walls will be significantly reduced.
Thin layer of mortar
The binder of the so-called warm mortar is cement, and expanded clay sand, perlite or pumice are used as fillers. It is worth noting that the use of warm masonry mortar is advisable when laying external walls. For the construction of internal walls, ordinary mortar is used. It is prepared manually or in a concrete mixer at low speed.
Masonry with thin seam
Ready-made mixtures are available for sale, sold in dry form. All that is required from the builder to prepare the solution is to add water according to the instructions included with the mixture. The solution should be medium dense. It should not fill the voids of the blocks.
Note!
Warm solution improves the thermal performance of masonry by 17%.
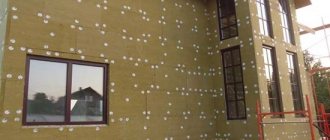
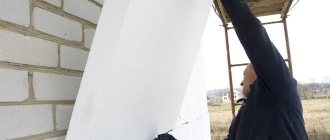
Additional insulation of a house made of ceramic blocks
If the thickness of the external wall made of ceramic blocks does not exceed 300 mm, additional insulation will be required. In turn, the thickness of the insulation is calculated during the design process of the house, depending on the temperature conditions in the given area.
The vapor permeability of the insulating material must be no less than that of the ceramic blocks used. Otherwise, moisture will begin to accumulate inside the walls.
Below is a comparison table of two insulation materials for a wall 250 mm thick.
| Insulation | Glass wool in slabs or rolls | Stone wool with a density of 60–80 kg/m3 |
| Insulation method | outside | outside |
| Thermal conductivity, W/(m*degrees Celsius) | 0,042 | 0,047 |
| Recommended thickness, mm | 75 | 75 |
| Vapor permeability, mg/(m*h*Pa) | 0,56 | 0,3 |
| Heat transfer resistance, m2 * degrees Celsius / W | 1,786 | 1,59 |
| Installation conditions | The insulation is installed using Z-profiles. It is necessary to ensure that the slabs fit tightly. | During the installation process, it is necessary to avoid crushing the umbrella dowels. You also need to ensure that the slabs fit tightly. |
| Approximate price per sq. m, dollars | 5–5,2 | 7–7,1 |
Joints used for laying ceramic blocks
When laying ceramic blocks, a so-called bed seam is used. It is important to maintain a certain balance. A very thin seam will not equalize the horizontal errors of the blocks, and a thick one will worsen the strength of the masonry. The optimal seam thickness is 12 mm. The solution is applied evenly.
Note!
Load-bearing walls are subject to static load, so the masonry joint must be continuous. When building partitions, the masonry seam may be intermittent.
In the south of the country, external walls can be built from less thick blocks. When laying brick walls, you need to make not only horizontal, but also vertical joints. Ceramic blocks are connected to each other using tongue-and-groove technology, which eliminates the need to fill vertical joints with mortar. This not only helps save mortar, but also reduces construction time.
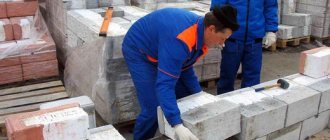
Laying technology
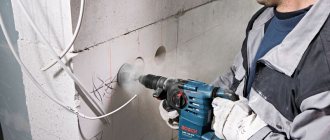
The technology for carrying out these works is similar to the construction of brick walls, but everything is done much simpler and faster. You won’t be able to move such a block with the handle of a trowel, so you need to purchase a rubber mallet . For cutting blocks, an alligator type saw is used; for precise cutting, a band saw is used.
Reinforcement
When building from ceramic blocks, it is not necessary to reinforce the walls, but it will not be superfluous. Typically, masonry mesh is used in places where beams and slabs rest; here an armored belt is made from mesh and a rod with a diameter of 3 mm and the whole thing is filled with a 30 cm layer of cement mortar.
Installation
If we talk about the speed of construction with ceramic blocks, it will be 2-3 times higher than when using bricks. The first row must be laid only on a horizontal surface ; masonry mortar is used to level it and everything is controlled using a level.
To lay walls from porous large-format ceramic blocks,
you will need the following tools:
- container for mixing the solution;
- building level;
- concrete mixer or construction mixer;
- trowel;
- rubber hammer;
- alligator type saw.
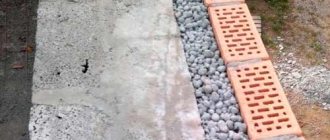
To protect the wall from moisture, a waterproofing layer is laid, it can be roofing felt or film, the overlap of the strips is at least 10 cm. The work begins with laying the corners , which rise three rows and only then begin to build the walls.
To prepare the solution, you can use a concrete mixer or a construction mixer. The finished dry mixture is diluted with water, in accordance with the manufacturer’s recommendations, to obtain 30 liters of solution you will need about 20 kg of dry mixture. When laying blocks on waterproofing, you must ensure that there are no sharp particles in the solution that could damage the waterproofing material.
Before laying, it is recommended to wet the blocks so that water from the solution does not quickly absorb into them; if this is not done, the solution will quickly set and it will not be possible to level the position of the blocks.
What to put it on
Laying can be done using ordinary cement-lime mortar, warm mortar or glue for ceramic blocks. Using the latter makes it possible to obtain a seam with a thickness of 2-3 mm. Vertical seams are not filled with mortar , as they are connected using a tongue-and-groove method.
Warm masonry mixture for installation
For laying ceramic blocks, “warm” glue is usually used, which, in addition to cement, includes pumice, fine expanded clay or perlite. When creating internal partitions, you can use a regular cement composition.
To evenly distribute the glue in the horizontal seam, first the blocks are connected with grooves, and only then pressed. The work is carried out according to the principle of brickwork, that is, with ligation of rows.
Usually, it will take no more than an hour to build a 1 m wall of ceramic blocks, but this depends on the qualifications of the person doing the laying.
You can build a house from ceramic blocks at an air temperature of at least +5 degrees; anti-frost additives can only be used in a regular solution.
During construction, it is necessary to adhere to the optimal thickness of the seam, which when using a solution is 10-12 mm. For load-bearing walls, a continuous bed seam is used, and for partitions it can be intermittent.
Features of masonry
Before laying begins, a waterproofing solution is laid on the base, on which a waterproof material should be laid. In this case, the width of this material should exceed the thickness of the masonry by 2–3 cm.
Rubber hammer for work
Note!
Reliable waterproofing between the base and the wall being built is a guarantee of the strength of the house.
After waterproofing the base, a bed or horizontal seam should be applied. It needs to be leveled. In this case, you should start at the highest point. Walls made of porous ceramic blocks are laid in warm, dry weather. The air temperature should be above +5℃. Unfinished walls should be covered with waterproof material at night and during rainfall.
Forming an angle
Masonry starts from the corners. The first blocks are laid in the corners and connected to each other along the outside with a mooring cord. Subsequent blocks are inserted into one another along a cord. In this case, horizontal displacement of the masonry should not be allowed.
Laying blocks along a cord
It happens that the block sizes are slightly different. In this case, they need to be cut down with a tabletop circular saw or a hand-held electric chain saw. When laying the first row, it is important to strictly observe the horizontal and angles. If there is a slight deviation from the horizontal, the blocks are tapped with a rubber hammer. The surface of each row is moistened with water before applying the solution and laying the next one. If mortar leaks onto the outside of the wall, it should be collected. This can be done with a spatula.
Laying a wall along the width of the block
Window and door openings
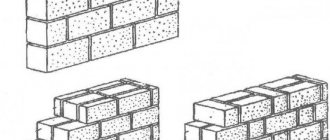
The dressing of masonry and walls deserves special attention. The integrity of the structure depends on this. The shift of blocks in adjacent rows must be at least 0.4 of the block height. The connection of the outer wall with the inner wall is carried out with perforated steel anchors. They are laid in horizontal seams in odd rows.
Cutting ceramic block
So, now you are ready to build walls from porous ceramic blocks. For clarity, we have placed video materials at the end of this article. If you still have questions, ask our expert. He will kindly provide you with additional information.
Block sizes and proportions
Because of their shape, the blocks are very practical for laying walls. The technology of their production itself involves the use of high-precision equipment. As a result, the products have very precise dimensions.
Ceramic blocks are joined together using vertical grooves. On their inner edges there are several longitudinal grooves, which serve to tightly connect the material without the use of mortar.
This method of installation does not in any way affect the thermal conductivity of the wall. Since the vertical seam is closed, the edges of the grooves and the wall are subsequently plastered on both sides. For practical plastering, there are small longitudinal grooves on the outside of the blocks.
Block sizes vary. Their length is 25, 30, 38, 44, 50, 51 cm, and their width is 23, 24, 25 cm. There is one rule - the height of the product is always a multiple of the brickwork, which greatly simplifies the work.
The thickness of the structure depends on the length of the product, since the grooves are located on its long side, and with this part the blocks are laid across the wall.
Load-bearing walls are made from products whose length is more than 30 cm, and internal partitions are made from 25-centimeter ones. Narrower products are used for cladding inside buildings and monolithic belts.
When building walls, it is more profitable to use large-format ceramic blocks, since less mortar is consumed and less physical effort is spent than when working with other materials.
How much does it cost to build a house from ceramic blocks? Video:
House made of ceramic blocks or aerated concrete: which is better?
It is obvious that if one technology had serious advantages, the other would simply not be used. But in construction, both ceramic blocks and aerated concrete are actively used, depending on specific tasks.
Let's start with the fact that houses are made of stone and wood. The walls of stone buildings are made of single-layer or two-layer. In the first case, the material used is both load-bearing and plays the role of insulation. In double-layer walls, one layer is made of structural material, and the second provides thermal insulation. Single-layer walls are erected from aerated concrete or ceramic blocks.
The choice of suitable material depends on the specific requirements of the private developer. In general, the house should be safe, functional, visually attractive and comfortable to live in, as well as affordable for purchase and liquid for subsequent sale. All these criteria will be discussed in detail below.
- Which house is safer to live in?
Aerated concrete structures can reach a height of 5 floors, and PCB buildings even exceed this number of floors. Considering that individual residential buildings can be a maximum of three stories, both of these materials are quite suitable for their construction, subject to the construction technology. In addition, both aerated concrete and ceramic blocks fully meet fire safety requirements.
Environmental friendliness of materials implies the absence of release of toxic substances above the maximum permissible concentrations. But to evaluate this parameter, it is necessary to understand that the inside of any wall will be plastered. And the environmental friendliness of the building as a whole will be influenced by the plaster, putty and finishing materials.
If you do not take into account the quality of finishing materials, aerated concrete and ceramic blocks are produced in accordance with current requirements for environmental friendliness. Both building materials are produced by large companies. It is logical for the wave that they are all interested in the impeccable quality of their products and their environmental friendliness, among other things.
- Which house is more comfortable to live in?
- Which house is warmer?
- 2,550 kWh – through floors on the ground;
- 3,400 kWh – through the attic floor;
- 11,150 kWh – through external window and door openings;
- 7,400 kWh - through the ventilation system.
Comfort in the house is ensured mainly by modern communications. Thus, comfortable housing can be created from both aerated concrete and PCB.
A ventilation system will be required to provide the premises with fresh air. The existing widespread myth that ventilation is not needed in a house with supposedly breathable walls does not stand up to criticism. In this case, the building should have cracks, but there is no question of any comfort of living here.
How many ceramic blocks do you need per house to keep it always warm? How much material is needed for an aerated concrete building to keep it warm? Both of these questions make no sense, since the heat in the house is created and stored by the heating system, and not by building materials. Here, different technologies should be compared based on the cost of heating. But this is a purely financial issue, not related to comfort.
Heating costs in an aerated concrete house will be lower than in a ceramic block house. Let us illustrate this with the example of a building with an area of 200 square meters. m. The house is located in the Moscow region, the calculation will be made within the heating season. It is logical that heat leaves the building not only through the walls, but also through other fences and structures.
In our case, let’s take the following losses per year:
So, without taking into account losses through the walls, a total of 24,500 kWh of heat leaves the house during one heating season.
Next, we will consider a turnkey house made of ceramic blocks with a wall thickness of 510 mm. Heat loss during the heating season through these walls will amount to 12,100 kWh. If our house in the Moscow region is built of aerated concrete, then the meaning will be different. With a wall thickness of 500 mm, 7350 kWh of heat will be lost through the walls in the same season.
But it’s much more interesting to convert kilowatt-hours into rubles. First, let's find the difference in heat loss between two different technologies. It will be: 12100 – 7350 = 4750 kWh for the same heating period. Let us assume that 1 kWh of heat obtained by burning main gas will cost about 70 kopecks. Multiplying 4750 by 0.7, we get the amount of 3325 rubles.
Now it’s clear how much money you can save on gas heating every season if you use aerated concrete instead of ceramic blocks. Is this a significant enough amount to make a choice in favor of this material? It's up to you to decide.
Next, we will look at the option of heating with electricity. Today, the price for 1 kWh of electricity is approximately 5.5 rubles. We multiply 4750 by 5.5 and end up with 26,125 rubles in savings. This amount is already much more significant. And here again, everyone makes their own choice.
- Which house is cheaper to build?
The house must fit the budget. This is another important quality criterion that every developer tries to adhere to. Everyone wants to have the highest quality housing for as little money as possible, so the financial issue is also relevant. How much does a house made of ceramic blocks or a similar building made of aerated concrete cost? Here, first of all, it is necessary to consider the cost of erecting and finishing the wall, as well as subsequent heating costs.
As for the masonry work itself, if ceramic blocks and aerated concrete are used, they will cost approximately the same. In practice, some contractors specializing in both technologies estimate the construction of walls from PBC to be slightly more expensive than construction from aerated concrete blocks.
For example, let's take a house with a total area of 200 square meters. m. The cost of just one box will be about 6 million rubles, and the difference when using warm ceramics and aerated concrete is about 15,000 rubles (that is, only 0.25% of the cost of the box). It is clear that this insignificant share will decrease even more if you evaluate a house that is completely ready for living.
Comparing the materials themselves by cost will be a little more difficult, given that in both cases there are many brands offered in a wide price range. But if we take the cheapest segment of products, then products made from aerated concrete will be cheaper than ceramics. Although the quality characteristics of the material are very difficult to trace.
Next, you need to consider how much wall decoration will cost. Compared to ceramics, aerated concrete blocks are smoother and, accordingly, require less plaster. If we compare both technologies in terms of the cost of plastering, then for a house with an area of 200 square meters. m, the difference in favor of aerated concrete will be approximately 30–40 thousand rubles, or about 10–12% of the cost of work and materials. This percentage is already more noticeable, but in comparison with the total cost of the house it is still very insignificant.
The difference in heating costs has already been discussed earlier. From this point of view, aerated concrete is cheaper than ceramic blocks due to its better thermal properties.
So, let's draw a conclusion on the financial part. The costs of constructing aerated concrete and ceramic block walls are approximately the same, but in terms of finishing costs and heating costs in total, walls made of ceramic blocks will be more expensive.
List of advantages of ceramic blocks – pros and cons
Today, ceramic blocks are one of the most reliable masonry building materials. They are durable, environmentally friendly, and quite economical in price if you calculate the total cost of construction. A house built from ceramic blocks can (according to the manufacturers, of course, in practice no one has yet been able to experience such a period due to the short life of this technology) stand for at least 150 years.
What is their strength
Many people question the fact that a block with a microporous structure cannot be durable. Nothing like this. Ceramic blocks can be used to create a wall of any height that is possible in ordinary, generally accepted construction. Large-format ceramic blocks (38 centimeters in length) have a strength level of M-100. Small-sized and often M-150.
If a simple (not facing) brick can withstand from 15 to 35 cycles of thawing and freezing without signs of deformation of the base and destruction, then the ceramic block is almost always grade F50 and can easily cope with 50 cycles of freezing/thawing (F - from the English “frost resistance” - resistance frost, literally. F-50 – the ability of a ceramic block to withstand 50 cycles of alternating freezing and thawing without beginning to deteriorate).
Fire resistance
Since ceramic blocks undergo a high-temperature firing stage during their production, they are non-combustible building materials. A house made of them can withstand fire for 4-5 hours or more.
Ceramic blocks have excellent, if not excellent, soundproofing characteristics, which they owe to the porous properties of clay as their main component.
The environmental characteristics of ceramic blocks are also at a very high level, almost unattainable for many conventional building materials. There is a good, constant temperature regime and a constant level of humidity favorable for human habitation. The walls made of them “breathe”, creating a natural microclimate in the house.
Bonding of facing masonry with masonry from large-format blocks.
Testing dowels for pulling out of hollow stones
The main advantages of porous ceramic blocks There are quite a lot of advantages of porous ceramic blocks, let's consider the main ones.1 Environmental friendliness of the material; 2 Good ventilation; 3 Excellent sound insulating properties; 4 Very low thermal conductivity; 5 High strength and reliability of the building material; 6 Small weight; 7 Low cost and availability; 8 Cost-effectiveness. Almost every person who has at least a little knowledge of construction knows that bricks and porous ceramic blocks are environmentally friendly building materials. The vast majority of construction companies, and indeed people who decide to build their own home, look first of all at this indicator when choosing building materials. The issue of ensuring good ventilation of premises is very pressing.
Due to their structure, many building materials cannot provide good ventilation of rooms; this in no way applies to porous ceramic blocks. The capillary structure of porous ceramics allows for good moisture exchange and makes the walls in the room literally “breathe.” This property of porous blocks reliably protects them from dampness and eliminates the possibility of mold or toxic fungus. Thermal conductivity and sound insulation are one of the most important characteristics of building materials.
Porous ceramic blocks have high thermal inertness and sound insulation. The minimum sound absorption in a building where porous blocks are used is 51 dB for load-bearing walls and 46 dB for partitions. High thermal inertia, achieved due to the large area of the building material, allows you to reliably retain heat in rooms during the cold season. Thanks to the good balancing of low thermal conductivity, porous ceramics have the highest strength, which other building materials cannot compare with.
The popularity of porous blocks is to a certain extent due to the low weight of this building material. The low weight of porous blocks is achieved due to the unique structure of this material. With their appearance, porous ceramic blocks have allowed many construction companies to significantly reduce the cost of building materials. When constructing buildings using porous blocks, a single-layer wall is sufficient to ensure thermal conductivity and sound insulation, and additional insulation is no longer required.
Porous ceramic blocks: history, features, application At the end of the 70s of the last century, the ensuing energy crisis forced most construction companies to begin searching for new building materials that would retain heat in the premises and at the same time provide good ventilation in the premises. By the beginning of the 80s years can be attributed to the appearance of the first porous ceramic blocks. It was at this time that the technology for the production of new “warm” ceramics was patented in Spain and Italy.
Currently, a patent for the production of porous ceramic blocks has been acquired in 32 countries around the world. Porous ceramic blocks, or in other words “warm” ceramics, are environmentally friendly building materials made from high-quality clay and possessing all the properties of ordinary bricks. Unlike ordinary bricks, porous blocks have less weight, as well as lower thermal conductivity. Comparing ordinary bricks and porous blocks, we can draw several main conclusions in favor of porous ceramics: - Porous structure of the material; - Larger size of the material with less weight; - Large strength and reliability. Currently, there are quite a large number of types and formats of porous ceramic blocks, among them the main and most popular are: 2.1 NF, 4.5 NF, 10.8 NF and 14.5 NF. NF coefficients indicate how many times a porous ceramic block is larger in volume than a conventional brick. Porous ceramic blocks can rightfully be considered one of the best building materials, enjoying enormous popularity. Porous ceramic blocks have found their main application in the construction of low-rise and high-rise buildings, where they are used in as the main load-bearing walls and partitions. The construction of buildings from porous ceramic blocks allows for a good, healthy microclimate, low thermal conductivity and high sound insulation in all rooms.
Ceramic blocks are increasingly being chosen as wall materials not only for housing construction, but also for the construction of administrative and office buildings. Although at first glance the laying of ceramic blocks is not very different from brick, there are still enough differences.
The differences begin already from the preparatory stage. Porotherm brand blocks are quite strong and can withstand large weight loads in load-bearing walls, but at the same time they are more fragile than ordinary bricks.
Considering that the price of blocks is not so low as to purchase them with a margin of even 10-20 percent, care should be taken both during transportation and unloading. Ceramic blocks can only be stored in their original plastic packaging until the very start of laying. The material is porous and has a high moisture capacity.
Installation and laying of Porotherm ceramic blocks, (Porotherm) – Saw (from the Wienerberger off-channel)
Laying Porotherm ceramic blocks - video
For homeowners:
Ceramic block - to insulate or not?
It all depends on the type of ceramic blocks. For example, for walls made of Porotherm 38 P + W, Porotherm 44 P + W, Porotherm 50 P + W blocks, insulation is not required, regardless of the type of cladding. For other blocks, insulation is necessary. So, for walls made of Porotherm 25 P + W, you need to use mineral wool with a thickness of at least 9 cm.
The table provides a list of ceramic blocks, indicates their resistance to heat transfer in the wall and provides information about the need for additional insulation.
Walls lined with clinker bricks, regardless of the presence or absence of insulation, must be constructed with a ventilated gap between the front layer and the load-bearing layer. The width of the ventilated gap must be at least 4 cm. The connection of the facing masonry to the load-bearing wall is made using metal or basalt-plastic rods. Metal rods must be corrosion-resistant, at least galvanized, and preferably stainless steel. If the wall is insulated with mineral wool, then the insulation should be covered with a windproof film on the side of the air gap.
| Name ceramic block | Heat transfer resistance, m2 x °C/W | Insulation | Minimum insulation thickness, mm | |
| Subject to laying on a warm solution | Subject to laying on cement mortar | |||
| Porotherm 50P+W | 2.94 | 3,85 | Not required | – |
| Porotherm 38 P + W | 2.78 | 3,33 | Not required | – |
| Porotherm 44P+W | 2.44 | 2,86 | Not required | – |
| Porotherm 30P+W | 1.47 | – | Necessary | 60 |
| Porotherm 25 P + W | 0,97 | – | Necessary | 90 |
TOOLS FOR CRAFTSMAN AND CRAFTSMAN, AND HOUSEHOLD GOODS VERY CHEAP. FREE SHIPPING. THERE ARE REVIEWS.
Below are other entries on the topic “How to do it yourself - for a homeowner!”
- How you can measure the required amount of fertilizer using improvised means. Memo for the gardener - mass...
- Do-it-yourself bench for a bath - photo Bench for a bath - how...
- Do-it-yourself solutions for processing and spraying seedlings How to prepare solutions for seedlings...
- Conventional designations: floor coverings, laminate, ceramic tiles Laminate and tiles are symbolic...
- Laying floor joists - calculation table How to calculate the thickness of the boards and...
- Calendar for protecting the garden from diseases - Memo to the gardener STAGED SCHEDULE TREATMENT AND SPRAYING OF THE GARDEN VEGETABLE VEGETABLE FROM...
- Support, adjustable with your own hands (for a machine, workbench, table) Adjustable support in height with your own…
Subscribe to updates in our groups and share.
Let's be friends!
With your own hands > How to choose or how to make > Encyclopedia of building materials > House made of ceramic blocks: do-it-yourself masonry and characteristics of ceramic blocks
Masonry solutions
Previously, all mortars for masonry and plaster were usually mixed from individual components (lime, cement, sand, water) directly at the construction site . Modern construction work requires stable quality of the mortar, and it is no longer possible to mix the mortar in this way, and therefore the vast majority of construction companies (maybe with the exception of a small number of private developers) have switched to the use of dry mortar mixtures (DMC). Production technology and constant monitoring of products ensure consistently high quality of CPC. Depending on the mixing method, SRS can be prepared for different purposes. Masonry mortars can be divided into two groups - ordinary and light mortars. Conventional mortars are a mixture of aggregate, mineral binders and additives that facilitate work and improve the quality of the mortar. Compressive strength ranges from 2.5 to 10 MPa, and solutions are generally intended for manual application. Lightweight mortars additionally contain lightweight aggregates that reduce the bulk density to below 1,000 kg/m³ and improve thermal properties. The characteristics of the solution - compressive strength, bending compressive strength, density and thermal conductivity - depend on the type of lightweight aggregate (usually perlite is used) and its quantity. Based on thermal properties, light solutions can be divided into two groups, which in Germany are designated LM 36 and LM 21. The LM 21 group of solutions includes all solutions with a thermal conductivity of less than 0.21 W/m K, the LM 36 group includes solutions with thermal conductivity from 0.21 to 0.36 W/m·K. Solutions of the LM 36 group improve the overall thermal resistance of the masonry by approximately 10%, solutions of the LM 21 group - by approximately 17%, which, given the modern desire for maximum thermal resistance of the masonry, is a significant advantage. For interior masonry with POROTHERM stones, you can use all types of conventional masonry mortars available on the market. It is recommended to use lightweight (thermal insulating) masonry mortar Baumit TM for external masonry, developed specifically for masonry using POROTHERM stones. The thermal conductivity of the solution (l<0.20 W/m·K) is comparable to the thermal conductivity of POROTHERM stones, the diffusion of water vapor in the bed joints of the masonry is almost the same as that of bricks. Therefore, laying with light mortar does not cause cracks at the seams.
What mortar is used to lay ceramic blocks?
In order to fully preserve all the characteristics of ceramic blocks, you need to choose the right solution on which to lay them.
For installation, it is better to use an adhesive solution with the addition of perlite or expanded clay sand - it is commercially available. The cooking method is described in detail on the packages - in short, “just add water.” This solution allows you to lay out ceramic blocks with a joint width of no more than one centimeter recommended by the manufacturer, while all the heat-saving characteristics of the ceramic blocks are preserved.
This method increases the heat-saving properties of the wall by almost 15-17 percent by reducing heat loss, which usually occurs through masonry seams.
The Germans, for example, in their video of master classes on laying ceramic blocks use glue, which is applied with tape to the surface of the block. With this approach to installation, it does not fall into pores and voids, and the seams are almost invisible neither outside nor inside.
Warm solution for ceramic blocks
As mentioned above, when laying ceramic blocks, manufacturers recommend using not ordinary cement mortar, but the so-called “warm” or light composition.
It differs from the first one in that the same cement is added to it for bonding, but porous materials act as filler. It can be pumice, expanded clay (sand), or even better, perlite. In terms of cost, it will, of course, be more expensive, but very soon it will pay for itself due to savings on heating and light bills. In addition, it should only be used for laying external walls; for internal walls, as well as for the construction of partitions and partitions, ordinary mortar is suitable.
This “warm solution” is prepared in almost the same way as a regular one, at the masonry site. First make a prance, then add water and mix everything thoroughly again.
The thermal conductivity of a light mortar is several times less than that of a regular mortar, so the wall turns out to be almost thermally homogeneous. This makes it more energy efficient and durable.
Read more: Recipes and preparation of various types and types of mortars