After any repair, for example, wallpapering, installing doors or windows, finishing work remains, including attaching corners to slopes. They will protect walls and other surfaces from mechanical damage that occurs from careless touch, for example, when moving furniture, and will give the interior an aesthetic appearance. They are used to hide corner joints, which is especially important when using different materials. Most often, rigid PVC is chosen for finishing, which is made by “hot” bending the sheet. You need to know how and with what to glue such corners to the slopes so that the product lasts as long as possible.
Wall plastic corner
Material characteristics
Buyers choose plastic corners for slopes for the following positive qualities:
- ease of use - when installing and cutting out the desired size and shape, which is done using scissors or a knife, and the burrs and ends are sanded with appropriate paper;
- smooth out unevenness, forming a 90° angle in the finishing areas;
- strength - protect corners from damage, while remaining unharmed;
- resistance to moisture, ultraviolet radiation, temperature changes;
- light in weight, which is also important for ease of installation;
- long service life - 20-25 years, during which they do not lose their qualities, including color;
- affordable price;
- do not require painting;
- unpretentiousness in care, in which they are easily washed using home remedies.
It is worth mentioning the disadvantages of the material:
- melts in the event of a fire, releasing harmful substances;
- fades after the expiration date;
- contact with sharp objects leaves unsightly scratches.
Preparing for work
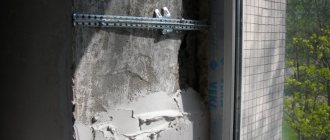
Before attaching the plastic corner to the work areas, they are freed from dust particles and construction contaminants. If there are protruding parts, remove and level the surface, otherwise the profile will lie crooked.
Tools
For work you need to prepare the following devices and tools:
- glue gun;
- roulette;
- construction knife;
- masking tape;
- square, preferably made of metal;
- miter box (you can do without it).
Clean and dry surfaces to be bonded are degreased with any solvent.
It is important to correctly measure the window slopes and prepare the finishing material. The basis should be one of the sides of the corner, which is cut off from the outside with a margin of 20 mm, this applies to the vertical, upper parts, taking into account both sides. All parts must consist of one whole segment; connections are not allowed.
External corners are joined in the following ways:
- overlapping each other, then leveled with putty to match the color of the plastic;
- cutting at an angle of 45°;
- by cutting one of the allowances to the base (the top one remains with a margin, and the vertical ones are cut flush).
Example of a cut
It is advisable to check the accuracy of the cut elements by joining the parts. Cut with a special knife, otherwise the material may be damaged.
Types of plastic corners
Before gluing a plastic corner, you need to understand its types in order to choose the right option. The product is available in a wide range of colors, including plain versions, as well as wood, marble, metal and other natural materials.
They are made in different shapes and sizes. The most popular two options are in the shape of the letter L with the same or asymmetrical width of the shelves (from 10 to 50 mm in width, from 2 m in length), and curved, which are used for similar openings (arches, etc.), from Why are they called arched corners? They are produced in two versions – for angles of 90° and 105°. Standard length – 3 m.
Plastic corners of different sizes
They are also manufactured in a T-shape, which hides the joints between the slope and the wall cladding. The most rarely used option due to the increased cost is removable. This corner is made with a latch, which allows you to carry out repair work without removing the profile. It bends easily, and at the end of the process it falls into place.
Corners are also classified by type of finish - external and internal. The latter are made with double-sided coloring.
Important! The wider the sides of the finishing material, the greater the load it can withstand, which is especially important on curved openings.
How to choose corners for window slopes
The quality of the final result is influenced by the correct choice of material that will be used during its immediate installation. There are a large number of products of various colors and patterns. Plain and imitating metal, marble, wooden materials.
Depending on the scope of application, several types are produced:
- standard – U-shaped, used for finishing openings on windows and doors at the beginning of installation;
- versatile - shaped like the letter L, flexible, angle 90 degrees, used for shaped, arched openings;
- T-shaped - fixed on different surfaces, forming an even border of joints, used when laying tiles;
- F-shaped - used for fastening to the ends of panels using a special jumper, which can be removed if necessary. Acts as a platband framing window or door openings;
- removable - plastic, with a latch, the edges are easily bent;
- self-adhesive - flexible, easy to install, available in rolls.
Designed not only for internal, but also external corners (90 and 105 degrees). The 90 degree angle is fixed so that one strip is on the outside as an edging, and the 105 degree angle is with the shelves facing up. The length of one strip of material is 2.6 - 3.0 meters.
The dimensions of the raw materials for finishing plastic windows can be 10x10 mm or 15x15 mm. For corner surfaces, in order to strengthen them, use material ranging in size from 20x20 mm to 50x50 mm. Before purchasing, you can look at photos with samples of plastic corners.
Types of adhesives
Before gluing the plastic corner, choose the right product for the procedure. Today, there are four items to choose from, familiarize yourself with the characteristics of them before work - how to apply, how long it takes to set, whether it is suitable for the material, etc.
Types of glue for plastic corners
- Liquid Nails.
They have good durability. This glue spreads easily over the surface of the plastic corner. Apply dotted or zigzag. Liquid nails are capable of connecting glued products for more than 20 years without losing their properties. The setting force after complete hardening is 40 kg/m2. It has anti-corrosion properties and does not damage or pollute plastic. When purchasing, give preference to a colorless composition, especially if you have to work with light-colored surfaces.
- Silicone sealant.
Used to connect corners with wallpaper, as well as tiled and ceramic walls if acrylic is present in the composition. It is characterized by the absence of toxic chemicals and high adhesive properties.
- Polyurethane glue. Durable, elastic and does not leave stains. Hardens quickly.
- Liquid plastic. Suitable for use only on plastic surfaces (for example, window slopes). Fast-acting, highly durable and reliable.
You need to apply glue from the inside of the part, closer to the middle. The spaces between dotted drops are 1-1.5 cm.
Example of glue application
There are also self-adhesive corners, which are glued immediately after measuring and creating the required size and shape. To do this, remove the protective tape and press the product against the protruding corner.
DIY installation of a decorative PVC corner
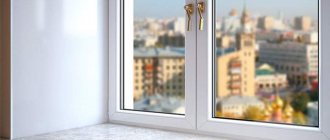
Plastic (PVC) corners
They are very widely used in interior decoration; they are installed on the slopes of plastic windows, they frame the outer corners of walls and the slopes of doorways. In this article we will take a detailed look at the process of installing a PVC corner on the slope of a plastic window, and also consider how to make a neat joint between two corners.
Step 1.
We make markings. We need to attach the PVC corner to the slope and make a mark along the edge of the vertical slope:
Minimum length
the applied corner (L) must be greater than the height of the slope (a), by the width of the corner (b), taking into account a small margin (c):
For example, if the height of the slope is a = 1500 mm, and the width of the corner b = 30 mm, then the length of the corner must be at least
a + b + c = 1500 + 30 + 15 = 1545 mm.
Step 2.
We make a cutout on the PVC corner, removing one edge, as shown in the photo below:
We apply the corner to the slope:
The corner fits perfectly, you can proceed to the next step.
Step 3.
The plastic corner is glued only to the slope, this is enough for fixation, so we apply glue only to one of the edges.
“How to glue the PVC corner?”
As glue you can use “Moment Montazh”, “QUELYD Masterfix” and their analogues. It is not recommended to use super glue, as it will be almost impossible to correct mistakes.
Glue is applied to the inner surface of the corner either pointwise or in a thin strip:
We fix the PVC corner with masking tape (while the glue dries):
Step 4.
Repeat step 1-3 for the right slope:
Step 5.
We mount the corner on a horizontal slope. The length of the corner is taken with the same margin as for the vertical one, but taking into account two sides. Markings are also made, and then cuts are made and the corner is glued to the slope:
Step 6.
Mark the cutting location. The corners will be joined at an angle of 45°:
Step 7
Carefully cut two corners at once. It is very important that the knife is sharp:
Step 8
Seal the joint between the corners with white acrylic sealant. After the glue has dried, remove the masking tape. The installation of the PVC corner is completed.
Preparatory work
Before you start finishing the walls with plastic corners, you should clean the working surface from dirt, dust and other construction debris. To apply glue, purchase a glue gun, and for installation, additionally the following tools:
- scissors or hacksaw for metal;
- square (preferably metal);
- stationery knife;
- roulette;
- masking tape.
You may also need a miter box, which can be used to make blanks with an angle of 45°. But if a tool is missing, you can cope without it using certain skills and our recommendations.
Tools
Degrease the place where the corner is attached and the part itself using a weak solvent or white spirit. The workpiece must be clean. Avoid exposure to moisture.
The main purpose
As noted above, the main reason for attaching a protective PVC corner for wallpaper, arches and tiles to the corners of walls is not only the decorative function, but also the protection it provides for certain construction or finishing materials in the interior of apartments and houses. With this design, you can protect various vulnerable areas from damage that can be caused by impacts from pieces of furniture of various sizes, careless handling of household appliances, and sometimes overly playful children and pets.
Attention! If you decide to stick on a decorative plastic corner, then be sure that this mounting element will not only provide safety for wallpaper, PVC panels and window slopes, but will also make the interior of the room more “complete” and attractive. So, let's look at the gluing process in more detail.
Types of plastic corner
It should be noted that in terms of its purpose, as well as in appearance, this fastener may be different. The following types can be distinguished: external, internal, perforated, colored, decorated “like wood”. In addition, some of its types can be used for work on the ceiling.
Advice! If you are not satisfied with the color of the PVC corner and want to paint it, then you should use the same rules and instructions as when painting other PVC surfaces.
As for which size is better to choose: look at the situation, guided by both aesthetic and practical considerations.
Related article: Photo wallpaper on the wall
Options for installing corners on walls
Before gluing the corners, decide on the installation method. There are two of them.
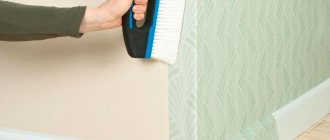
- To the wallpaper.
This option is suitable for wallpaper with shallow relief, but be careful when finishing slopes with deep embossing, as due to the loose fit of the corners, cracks may form in which dust collects.
- With cutting a strip on the wallpaper to apply the glue directly to the wall. To do this, follow this action plan:
- Attach a corner to the installation site, level it and press it to the wall surface;
- using a sharp knife, cut off the wallpaper on both sides of the overlay;
- Apply glue to the plastic corner and install it in the intended place;
- secure the corners with tape designed to set the adhesive;
- After 24 hours you can remove the tape.
If you are not sure of the accuracy of cutting the blanks, you can first try on the part for the finishing area, and mark the place of the cut with a pencil.
Marking
Types of plastic corners
Speaking about the characteristics and use of elements in the design of a slope, it is necessary to touch upon the issue of varieties. There is no strict classification; we are talking about part of the classification branch - plastic products.
What types of plastic products are there? There are plain ones, which allow you to decorate the window in one color, and textured ones - like marble or stone.
The standard part is L-shaped. The length of the shelves is asymmetrical. They are produced at angles of 90 and 105 degrees. There are for internal and external parts. Often painted on both sides, allowing elements to be used both inside and outside. However, it is undesirable due to the difference in texture between the “front” and “back” of the plastic part).
Dimensions
Plastic is more durable when the shelves are longer.
T-shaped ones are designed to mask the gap between the slope and the wall. Removable ones “close” with a click, allowing you to carry out minor repairs without removing the corner from the window/wall.
How to glue a plastic corner to a door and window slope
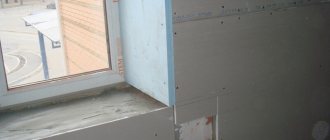
Before placing corners on the slopes of windows or doors, you need to check the quality of the surface finish. This is done using a level, bar or rigid ruler. If the surface of the slope is severely curved, and this cannot be corrected, then it is better to install flexible plastic corners here.
There are three types of slopes:
- plasterboard;
- covered with wallpaper;
- painted after plastering.
Regardless of the choice, the installation technology is the same in each case. The only important thing is the choice of adhesive composition so that it is suitable for both the plastic and the finishing surface.
- Measure the height to make the blanks. Leave a margin at the top. The cuts are made with metal scissors. You will get an angle of 90° from the inside, and 45° from the outside.
Example of a cut
- Place the part on the glue and wait for it to set.
Press the corner firmly
- Now measure the width and cut the required size with a margin to match the side strips.
- The face blank is cut at an angle of 45° from both ends.
- Test the corner against the side slopes to make marks in place with a cutting knife.
- Take a ruler, apply it to the glued part and cut off the excess.
- Now apply glue to the top strip and attach it to the corner. Secure all elements with tape for a day.
Example of securing corners with tape
If the slopes are decorated with wallpaper with a three-dimensional relief, then you first need to cut strips on them for plastic corners. Be careful that no drops of glue or liquid nails remain on their surface.
Kinds
The decorative corner is divided into types, depending on the material:
- Metal. Purpose – strengthening the corner structure. Can be found on plasterboard structures.
Metal
- Wood. Often used on installed timber windows to create a cohesive look. It is possible to select a wooden element to match the pasted wallpaper.
Wood
- Plastic. The most common type. The advantage is that you can choose the color of the fittings to match the interior. The laminated surface imitates other materials.
Plastic
Recommendations from professionals
Useful tips will help beginners with DIY installation.
- Be precise when marking so that there are no gaps between the joints. To prevent this, you can increase the length of the workpiece by 0.5-1 mm. They will still fall into place due to the elasticity of the material.
- It is not recommended to fill the joints with silicone, as over time it will darken and it will stand out against the background of the slope.
- To be on the safe side, do not glue the corners right away, but first attach them with tape and take the necessary measurements.
- To create the correct shape for the arch, use a hair dryer.
- When processing areas in openings where the angle is not 90°, but more or less, it is necessary to take measurements locally and cut them with a knife.
Plastic corners serve as reliable protection for slopes from damage, and also add aesthetic completeness to the entire interior. Among the wide range of shapes, sizes and colors, it is easy to choose the best option for a specific design. And it’s also easy to attach them yourself, having all the necessary tools and work skills. Reinforce your knowledge by watching the video.
How to form a dawn angle?
In order for the slopes to last a long time after the work is completed, it is necessary to use high-quality cement . To prepare it, you should take one share of cement to three shares of well-washed river sand. You should not reduce these proportions, otherwise the finishing surface will crack over time. To make the composition acceptable for work, you can add alabaster. But this only applies to internal work.
Often, difficulties arise at the stage of plastering uneven areas on the upper part. To make the work easier, plastering is done in two stages. The second is started only when the first layer of plaster has completely dried. To remove irregularities as completely as possible, a reinforcing mesh is used, and the second layer is placed on top of it.
The next step, according to the previously measured angle of dawn, is to apply the strip to the wall so that the plate slides freely along it. Then you need to hang the rule, securing it with nails. Plastering work should begin from the top. When the top part is plastered, the rules are hung vertically on the sides and only then they are plastered. While the solution has not hardened, it must be leveled using a wide spatula according to the established rule.
When the top slope is completed, repeat the process on the side slopes, adhering to the measured dawn angle. For indoor cladding, mixtures of cement, lime and cement, gypsum with polymers are used. When forming a slope, it is convenient to use gypsum mixtures, but it is better not to use them in large quantities.
How to cut
If you are faced with the question of how to glue corners onto slopes, then you should ask how to cut the products correctly. At the next stage, you will have to join the elements along the edges, which will affect the aesthetic appearance of the room. It is best to use a fine-toothed hacksaw for this.
First, measure the length of the opening by marking the corner. The segment must correspond to the parameters. Then the part that will be adjacent to the slope is measured. In this case, it is important to maintain an angle of 45 degrees.
Types and purpose of products
Plastic corners are finishing elements that can protect the outer corners of walls from damage. They also play a decorative role, giving the interior integrity and completeness.
Among the many types of corners, PVC products are considered popular. They are universal. They are finished with:
- door, window, arched openings;
- window sill niches;
- places where the walls meet the ceiling;
- external and internal corners of walls;
- gaps between the wall and the surface of the kitchen unit.
PVC panels come in white, colored (with various shades and textures) and double-sided painting. According to the form they are distinguished:
- standard version (equilateral corners for wall corners);
- T-profile;
- L-shaped (arched).
Why do experts advise gluing plastic corners to the wallpaper? Corner profiles made of polyvinyl chloride differ:
- Durability. The products retain their properties for more than 25 years.
- Durability. They have anti-corrosion properties. Resistant to cracking and abrasion. Not affected by humidity and ultraviolet radiation.
- Easy to install. They are easy to cut with a knife or scissors.
- Low price.
- Unpretentiousness in care.
- Light weight.
There are also negative aspects. PVC products lose color over time. If a fire occurs, they melt, releasing toxic substances. They should be protected from damage by sharp objects.
This finishing method protects the wallpaper well from damage.
Which glue to choose
Before gluing the corners to the slopes, you must select an adhesive composition. It is important to remember that if it is necessary to glue a narrow product, the composition may leak out and get on the walls. The result may be damage to the decorative material, which will negatively affect the appearance. Therefore, you should choose a composition whose excess can be removed from the surface.
Glue selection
There are several types of glue for gluing decorative corners to wallpaper corners, which differ in chemical composition, purpose, method of application, and setting time. The most common adhesives for such work are:
- liquid Nails;
- polyurethane glue;
- silicone sealant.
Liquid Nails
The main advantages of this type of glue are: a high degree of strength, quick adhesion and good adhesion properties to the surface, which allows you to reliably attach plastic profiles to any material: wallpaper with a convex pattern, concrete, wood. It is possible to choose either colorless glue, which can be used to glue white corners to the wallpaper, or different colors. The disadvantages of the white adhesive mass include the fact that over time it begins to turn yellow and becomes visible at the seams and joints of the plastic.
Liquid nails vary in purpose and composition. They are universal, suitable for working with any materials, and special, which are used for gluing the materials specified in the instructions on the packaging.
Liquid nails may contain synthetic rubber and solvent-based mineral components or water-based acrylic. The first type is characterized by fast setting, moisture resistance, frost resistance, and good adhesion. Allows you to glue not only light plastic slats and profiles in wet rooms to moisture-resistant wallpaper, but also heavier materials. The downside is the strong unpleasant odor, which takes up to 48 hours to dissipate.
The second type is environmentally friendly and does not emit a strong odor, but its use is permissible only at temperatures above 0°C in dry rooms.
Liquid nails are easily applied to the surface using a special syringe.
Polyurethane glue
Advantages: strength, elasticity, excellent adhesion to the surface, rapid hardening, no contamination. Disadvantages: pungent odor and higher cost compared to other adhesive mixtures.
Polyurethane adhesive for plastic corners can be one-component, ready-to-use, or two-component, which requires mixing the components in the required proportion immediately before use.
However, when choosing a polyurethane adhesive, you should pay attention that not all adhesives of this type are suitable for gluing decorative plastic products to wallpaper. This information is indicated on the packaging.
Silicone sealant
This glue can be used not only for attaching plastic products to wallpaper, but also to facing panels made of PVC, MDF, and ceramic tiles.
However, silicone sealant is not the best choice for attaching plastic slats, since in some places they may not adhere tightly to the wallpaper, which will shorten its service life. Silicone with the highest adhesion rates can be used in places with low traffic intensity, where the likelihood of damage and chips is low. For plastic corners in high traffic areas, it is recommended to choose acrylic sealant.
The main advantage of silicone sealant is a durable and elastic seam, which is suitable for places subject to vibration (doorways, light partitions). Thanks to this, this adhesive mixture does not chip.
Selecting corner material
When you are convinced that installing corners is necessary and not just a whim, you should study the construction market in order to make the right choice. Such products are made from different materials, it can be:
- MDF;
- wood;
- plastic.
Each of these types has its own advantages and disadvantages. Before gluing corners to slopes, you should consider in more detail the features of elements made of different materials. It could be plastic. Such products are made by hot bending of polyvinyl chloride fabric. Typically, the width of the shelves varies from 10 to 40 mm. There are asymmetrical options. If it is necessary to refine an arched opening, this can be done using a flexible profile.
The advantage of plastic corners is their low cost; in addition, the elements do not require painting, which distinguishes them from wood. Cork corners are also available for sale. Such elements are used for arched openings, but their use is not limited to this area. Cork corners can also be used to finish slopes of various shapes. Cork has a lot of advantages, among which are:
- fire resistance;
- strength;
- environmental friendliness;
- practicality.
This material has almost no disadvantages, but it can be vulnerable if your pet wants to sharpen its claws on it. The surface is easy to damage. Among others, bamboo and wooden products should be highlighted, which are a sign of excellent taste. Such corners will fit well into almost any interior. We must not forget about environmental friendliness, but such products are more expensive than analogs made from other materials, and in addition, they often require painting. MDF can also be compared to natural wood, but this material is cheaper, because it is wood dust.