Vinyl wallpaper in the interior
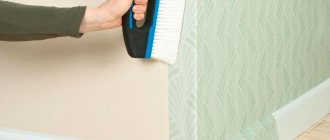
Glue in hard to reach places
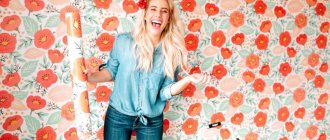
Vinyl wallpaper will help create a unique style in the room. With their help you can decorate any interior. This is possible due to the fact that there are a great many types and colors of these wallpapers.
For example, in order to give exclusivity and individuality to the atmosphere, you can use strict plain vinyl, which immediately captivates with its mystery. In the rooms, wallpaper with floral embossing is used to add luxury to the atmosphere. Vinyl materials can even be used in a nursery. The range allows you to choose materials for any room. At the same time, such wallpaper can always be cleaned. Therefore, they will last a long time if only they are glued well.
Types of vinyl wallpaper based on
Vinyl wallpaper consists of two layers: the top one is made of polyvinyl chloride film (hence vinyl), the bottom one can be made of plain paper or non-woven material. It is the substrate that shapes not only the general characteristics of the material, but also the gluing technology.
So, when working with vinyl on non-woven fabric :
- glue is applied to the wall, not the trellis sheets;
- easily mask small unevenness of walls (as the wallpaper dries, it stretches, hiding traces of fasteners and small cracks, sinks and chips);
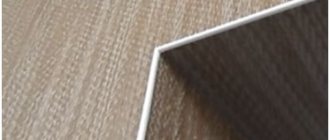
- it is difficult to adjust the joints - this is one of the disadvantages of this type of trellis;
- use specialized glue (for vinyl with a non-woven backing).
Attention: not only among consumers, but also among specialists, vinyl wallpaper on a non-woven basis is often called non-woven wallpaper. Such confusion would be harmless if not for one thing: glue for non-woven trellises does not hold vinyl wallpaper with a backing made of this material.
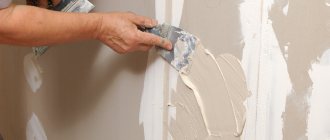
For the paper base of vinyl wallpaper you need:
- prepare the walls well if the trellises are thin;
- spread the adhesive mixture on both the walls and the trellises themselves, which leads to excess glue consumption.
The finishing material glides easily along the wall and stretches well, which allows you to quickly and efficiently cover corners and join joints. The disadvantage is low strength - they are easily damaged.
Features and types
Vinyl wallpaper is a finishing material that consists of two layers at once:
- The bottom layer is made of non-woven fabric, paper or fabric.
- The top layer consists of polyvinyl chloride, a stronger and more durable material. This layer is often decorated with patterns and textured embossing.
This type of wallpaper is divided into several subtypes:
- Textured, which can imitate embossed materials, such as plaster or textiles.
- Smooth or flat wallpaper. This type includes embossed and silk-screened.
- Compacted glossy wallpaper - with better protection from moisture and temperature changes.
When selecting wallpaper, the following features should be taken into account::
- If the texture of the material is very porous, then it will be difficult to remove dust and dirt from it, and in the case of the kitchen, grease (how to clean wallpaper from dirt?).
- Roll sizes can be different - from 50 centimeters to 1 meter. This should be taken into account when choosing, because the smaller the width, the more convenient the finishing process will be, especially in small rooms.
- The more defects and unevenness there are on the wall, the thicker the wallpaper material should be - this way it will hide all the imperfections (how to level the walls for wallpaper?). Thin wallpaper is only suitable for smooth walls.
- If the color of the material is monochromatic, then any dirt will stand out strongly on it. Therefore, wallpaper with a pattern is more suitable for the kitchen and similar rooms (how to choose the right wallpaper for the kitchen?).
- Before purchasing, you need to measure the dimensions of the room and buy extra material (read how to calculate wallpaper by area and perimeter of the room here).
Materials and tools
To hang vinyl wallpaper you will need:
- stepladder (strong table);
- vinyl trellis tubes;
- special (for vinyl) wallpaper glue;
- primer;
- a plumb line (you can use a laser level) to mark the starting vertical line on the wall;
- tape measure for cutting wallpaper;
- rule - used when cutting overlapping wallpaper sheets pasted on the wall and drawing a starting line;
- stationery knife for cutting wallpaper;
- construction pencil;
- container for diluting glue;
- roller or brush for applying glue;
- a screwdriver with a mixing attachment for stirring glue;
- primer cuvette;
- roller and small paint brush for applying primer;
- a few hand towels and wallpaper smoothing;
- a rubber or plastic roller for rolling sheets to the wall (you can additionally use a wallpaper “wing” - a special plastic spatula for wallpaper);
- container with clean water.
How to remove vinyl wallpaper
How to hang wallpaper is one concern. But how to peel them off correctly?
And here, first of all, you may need a label from an old roll: it will tell you how to remove vinyl wallpaper from the walls.
Figure 8 — Marking the method of removing vinyl wallpaper from the wall surface
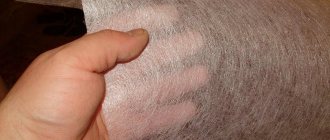
In most cases, it is easy to peel off the top film layer, and the paper backing will remain on the wall.
IMPORTANT! You cannot glue new wallpaper onto an old backing - the new wallpaper will quickly peel off!
The paper layer is generously sprayed with water from a spray bottle, since it is impossible to remove the substrate dry without damaging the plaster of the walls. You can wash off the moistened paper base with a sponge or, starting from the seams, tear it off using a hard wallpaper scraper.
IMPORTANT! Instead of water, special solutions for removing wallpaper can be used to moisten the substrate.
Which glue to choose
On the building materials market in Russia there is a huge selection of adhesives for each type of base (paper or non-woven fabric) and the weight of vinyl wallpaper (light or heavy). But there is one nuance here. An attentive buyer may notice that the adhesive for lightweight paper-based vinyl wallpaper does not differ from the composition for the same lightweight non-woven-based trellises.
In both cases, modified starch is mixed with methylcellulose. The composition also contains additives against mold and mildew. The only difference is the absence of a special additive in the glue for the non-woven base, which ensures good sliding of the trellis sheets along the wall.
Professional finishers claim that the presence or absence of such additives is practically unnoticed. The only difference: glue for a non-woven base when used under paper should be more liquid than stated in the instructions, and vice versa.
Important: it is strictly forbidden to use types of glue for light wallpaper on heavy vinyl - the more liquid structure of the composition does not hold the massive fabric of the trellis. Even if you dilute the adhesive composition to a jelly state, there will be no positive result.
Determining the number of packs is not difficult. The packaging indicates the number of tubes that can be glued with the diluted compound, but with a slight spread. For example, on a pack of Kleo there are numbers 7-9 rolls. It is necessary to take the average value. After this, the number of rolls required for pasting the walls is divided by the average figure and the number of packs of glue required for repair work is obtained.
It is advisable to purchase glue based on modified starch with minor additions of methylcellulose. It has good adhesive properties and a more affordable price compared to other types of glue.
However, there is an exception - Moment , produced in Russia by the German concern Henkel. In its composition, starch is added to methylcellulose, which makes it possible to increase the adhesive properties of the glue while maintaining the price at the level of starch products. Packaged in packs of 250 g (for an average of 5 rolls) and 500 g (for 10 tubes). Does not smell and does not leave marks after drying. When diluted, in a tightly closed container (can be wrapped in plastic cling film) it can be stored for up to 10 days. There is one drawback, but a relative one - it takes a long time to swell.
Among other brands of glue, consumers highlight “Kleo Smart”, “Metylan Vinyl”, “Axton Vinyl”, etc. More details about these and other brands of vinyl glue can be found in the work “How to choose wallpaper glue?”.
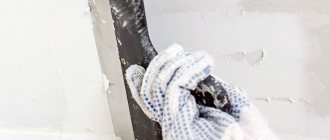
Preparing the walls
This stage of work begins with cleaning the surface of the old coating. Before hanging vinyl wallpaper, all hooks, nails, and awnings are removed from the walls. It is necessary to remove decorative covers from sockets and switches. Skirting boards and door frames do not need to be removed, but simply cut along the line after the sticker.
Further technology for preparing walls for gluing vinyl wallpaper depends on the thickness of the purchased material. For light and thin trellises, mandatory puttying of the surface is required, if it has not been done previously, followed by grinding and treatment with deep penetration primer.
Pay attention to the vertical angles and their correspondence to 90°. Any irregularities make it very difficult to accurately fit the joints. All protrusions, holes and cracks will become noticeable over time.
Under wallpaper with a foam layer of vinyl and hard grades, it is enough to do a rough local leveling, which will eliminate the most noticeable defects. Textured trellises made using silk-screen printing technology also hide uneven walls well, especially if there is a contrasting pattern.
Glue selection
Manufacturers offer several types of wallpaper paste, each of which is designed for a specific type of trellis. But, having carefully studied the composition, you can see that all domestic products are made on the basis of modified starch, to which methylcellulose is added, as well as antifungal additives. Non-woven vinyl wallpaper adhesive may contain additives to improve glide over the wall surface.
Having opted for domestic brands of wallpaper glue, you can be sure that they are all the same in terms of their basic composition. But for a polymer base, the finished adhesive should be more liquid than indicated in the instructions, since some of the moisture will be absorbed by the wall material . Among the recommended brands that have good characteristics and are sold at affordable prices are:
- Kleo Smart;
- Moment;
- Metylan Vinyl;
- Axton Vinyl.
The difference between European products usually lies in the replacement of modified starch with a high-quality natural component. This slightly increases the adhesion of the material and the glue preparation time, but does not give off any odor and reduces consumption.
The process of preparing glue consists of soaking it, keeping it in water for a given time, thoroughly mixing and a second soak until the mixture is completely dissolved. The required time intervals and amount of water are specified in the instructions for using the glue. The standard consumption is also indicated on the packaging and is always 10-15% more than actually required.
Cutting cloths
The main difficulty when cutting rolls into separate sheets is the need to match the pattern at the joints of adjacent strips. In addition, the ceiling height in most apartments in multi-storey buildings is in the range of 2800-3100 mm.
Therefore, when purchasing material, pay attention to the length of the roll to minimize trimmings. Please note that some of the short pieces can be used to finish areas above windows and doors.
Cutting should be done only after finishing the preparation of the walls and immediately after soaking the glue. By the time you cut the paper, it will already have time to swell. Cover the floor with old but clean newspapers. This will allow you to avoid staining the floor covering with glue and check the fit of the pattern in advance.
The height of the ceiling may vary in the room, so height measurements (lengths of wallpaper strips) need to be taken several times and simply write down this data on the wall. Paper cutting is done with a sharp stationery knife using a metal ruler or a plaster rule.
Features of gluing vinyl wallpaper depending on the base material
Vinyl-coated wallpaper can have a paper or non-woven base. Not only the characteristics of the coating, but also the principles of gluing depend on the substrate material.
What you need to know about non-woven vinyl wallpaper:
- The adhesive mixture is impregnated with the wall, not the canvas, which simplifies the work process.
- This backing is much stronger than paper, has high wear resistance, and can hide small irregularities and cracks on the walls.
- The disadvantages of non-woven wallpaper include the rigidity of the material. The low plasticity of the panels does not allow for quick and efficient finishing of convex areas.
The nuances of working with paper-based vinyl wallpaper:
- The glue is applied not only to the surface of the wall, but also to the canvases themselves.
- The material stretches well, and can be used to quickly cover protruding surfaces, such as niches, columns or corners.
- The disadvantages of vinyl wallpaper on a paper backing include the possibility of fibers breaking due to minor mechanical stress and increased glue consumption.
Stages of work
Plain colors
Wallpaper gluing technology
The first stage is preparatory. It is necessary to process the wall, and first of all, free it from old materials. If you plan to paste the ceiling, then its surface must be properly cleaned. After the wall is cleaned, it must be leveled. If there are cracks on the surface, they are repaired.- The second stage is gluing. And here the basis of the material is of great importance. It is impossible to choose the best adhesive for vinyl wallpaper, because different adhesive compositions are selected for paper-based and non-woven-based materials. Cutting the wallpaper is done, however, as standard. It is necessary to measure the height of the walls and cut the material, adding about 10 cm to the height.
- Sheets of wallpaper will have to be smeared first, and then wait until they “fit.” The preparation time for the sheet is usually indicated on the packaging. If the material is very dense, then its preparation time is long. For thin wallpaper it is less.
- Non-woven wallpaper is glued easily, without problems.
Tools and materials for work
To carry out high-quality finishing work, in addition to vinyl wallpaper and adhesive, you will need the following tools and materials:
- Paint brush or roller with soft bristles - for applying primer to the base and glue to the wallpaper or wall.
- Rubber rollers. A tool with a wide working surface is used for smoothing fabrics, a narrow one is used for high-quality joining of joints.
- Ruler, plumb line, building level, square and pencil - for marking.
- Masking tape – to protect individual elements from adhesive.
- Plastic spatula - for removing air bubbles and excess glue.
- A sharp stationery knife and scissors - for cutting strips.
- Wide metal spatula - for trimming canvases near the ceiling and floor.
- Container for glue mixture.
Advice! To speed up work, use glue with an indicator, which makes it easy to control the uniformity of application of the mixture to the surface of the walls or canvas.
Trimming excess
To ensure that the top and bottom edges of the wallpaper are even, trimming is done after gluing the strips. Moreover, if the vinyl wallpaper is thin enough, then trimming is best done at the very end, after drying. If the canvases are thick, then it is better to do this right away. Trimming should be done using a wide metal spatula and a knife. In corners it is better to use scissors.
Cutting sockets and switches should be done using sharp scissors. In this case, you need to focus on the switch frame, and not on the socket box.
To prevent fire hazards, it is important that vinyl wallpaper does not fall on the switch itself. Bending the corners inside the socket box is unacceptable.
Vinyl wallpaper - preparing the surface
Before gluing vinyl wallpaper, you must carry out the following operations:
- remove the housings of switches and sockets, having previously de-energized the room, seal the areas with masking tape;
- remove protruding fasteners (dowels, screws, nails);
- clean the surface of the old coating;
- repair uneven areas with plaster or putty;
- Apply a deep penetration primer to the base and wait for it to dry.
Wallpaper can only be glued to dry and clean walls. Checking the dryness of the base is quite simple. To do this, take a small piece of polyethylene film 50 × 50 centimeters and secure it with tape on the wall so that a sealed space is formed inside. After a day, the polyethylene is checked. The protruding drops indicate that the wall has not dried out.
Important! Surfaces under wide meter-long wallpaper must be leveled especially carefully; even with small differences, problems may arise with the joining of adjacent strips.
How to dilute glue correctly?
Dry granules are poured into water. The solution is constantly mixed manually or using a special attachment on a drill or screwdriver. Cooking instructions are on the packaging. The main thing is that you don’t need to knead the whole pack. Sufficient quantity for three or four stripes.
Surface preparation
You cannot glue vinyl wallpaper over paint, old wallpaper, or polystyrene foam. The canvas will not adhere to OSB, tiles and laminated panels. Concrete walls are suitable, but if they are uneven, the defects can be repaired with putty. Strips are glued to plasterboard structures without preliminary preparation, if the surface is clean. Before gluing, you need to remove any residue:
- old wallpaper;
- lime;
- paints or whitewashes;
- oil stains and dirt;
- everything is unnecessary.
You need to clean it as thoroughly as possible, right down to removing the plaster and applying a new layer. The surface must be coated with a primer.
Removing old wallpaper
The gloss of vinyl reveals all the unevenness of the wall, so the surface is prepared more carefully than for painting. The chalk is washed off the wall, the old wallpaper is scraped off with a spatula and a knife, after soaking it.
Sometimes you need a lot of water. An oilcloth is placed on the floor on the bars; the flowing water will be collected in an oilcloth ditch. Each time you roll a dampened roller over old wallpaper, it will peel off faster. The washed wall is allowed to dry.
To remove old wallpaper in one large layer, they resort to the following: newspapers are glued onto the old paper print. Let it dry and peel it off.
Wall leveling technology
Scrape off oil paint. Large sinks are sealed with plaster and impregnated with primer. Next is the application of the “Start” gypsum mixture. Afterwards the walls are sanded. Before the finishing layer, it is recommended to glue fiberglass canvas. Fiberglass will serve as a flavoring agent during gluing. It also reinforces the finishing layer. All fiberglass glue is the same. The final layer is “Finish” putty.
By applying a light source to the wall, the dried surfaces are checked for the presence of small cuts and protrusions. After straightening, the surfaces are primed again. The final stage is sizing. The glue prepared in advance is rolled with a roller.
Very old walls are easier (and cheaper) to level with plasterboard. In this case, transverse and longitudinal guides are attached to the wall with a pitch of 1200 mm, the slabs are hung, the screw entry points and the seams are puttied. Reinforcing mesh is not applied along the seam. It is not necessary to apply the final layer of putty mixtures to the drywall, but the slabs are primed and glued in the same way as in the previous case.
Marking
Surfaces are measured. Use a level and a pencil to mark the top edge. The highest canvas height in the entire room is set (it can vary). Usually it is 2 m 65 cm +. In the case where the design involves two tiers and a frieze, markings are made along the horizons.
The ceiling cornice is installed either before or after gluing. In the first case, the junction of the cornice and the canvas is covered with acrylic between two masking tapes. The top of the acrylic is tinted with water-based emulsion (it turns yellow over time). In the second case, the wallpaper protrudes 5 mm above the bottom edge of the plinth, and the top of the wallpaper is covered with polystyrene cornices, having previously been protected from contact with construction protective “painting”!
You need to mark out the entire composition in advance. Particular attention is paid to verticals. Using a level, a vertical is drawn for each canvas, otherwise a “slipped” section can initiate a crook for all subsequent ones.
Washable vinyl wallpaper: price
Depending on the degree of moisture resistance and the type of base, vinyl wallpaper can be purchased at a price from $4 to $10 (domestic, Ratin 032 or Fabric 119 (pictured)).
Figure 7 — Vinyl wallpaper on a paper base using pearlescent pigments ('White Wallpaper', Fabric 119)
Preparing vinyl wallpaper for hanging
Before carrying out the main work, rolled materials are cut into strips, the length of which corresponds to the height of the wall plus a margin of 5–10 centimeters. For greater accuracy, the height of the room is checked in different places. If the sizes match, several strips are cut, the total width of which allows you to cover the entire plane of the wall.
If the height of the ceiling in the room is not the same, each subsequent strip is cut off after gluing the previous one. Or, before cutting, carefully measure each section between the marking lines.
When preparing strips with a pattern, make sure that the pattern matches. To do this, you need to combine adjacent canvases so that the image elements are joined in the correct order. The finished strips are stacked on top of each other in the required sequence.
USEFUL INFORMATION: How to calculate the required amount of wallpaper per room: a simple formula
How to prepare walls for wallpapering ↑
First of all, remove any remnants of old wallpaper from the walls. Dilute the dry mixture for gluing vinyl wallpaper according to the instructions on the package. The walls must be primed. This can be done with glue, or you can use a deep penetration primer. It is also advisable, before starting work on covering the walls with vinyl wallpaper, to treat the walls with a special compound that prevents the appearance of mold under the wallpaper.
After the glue and composition have dried, it is necessary to draw a vertical line on the wall. It will serve as a guide for gluing the first panel. You can only focus on the angle if you are sure that the corners in the room are even. To draw the line correctly, use a plumb line.
After this, you need to turn off the electricity in the apartment and remove sockets and switches from the walls.
Gluing vinyl wallpaper: step-by-step instructions
Work on covering walls with vinyl wallpaper is carried out in the following sequence:
- We dilute the glue according to the instructions on the package. The finished solution should have a uniform consistency without clots or lumps.
- Close the windows in the room tightly, turn off the air conditioners and fans.
- We spread the glue on the paper-based wallpaper or on the wall if the material is glued to non-woven material. In the first case, we fold the canvas into an “envelope” - the edges are aligned with the middle of the strip, and wait 5-10 minutes until the paper layer is saturated with glue. We glue the non-woven vinyl immediately after coating a section of the wall slightly larger than the width of the wallpaper.
- We apply the prepared strips to the base along the drawn line, joining adjacent elements taking into account the pattern.
- Using a rubber roller, smooth the fabric from the middle to the edges, getting rid of bubbles and achieving a perfect fit of the material to the surface. Remove protruding glue residues with a piece of foam rubber or clean cloth.
- After drying, press the edges of the wallpaper with a wide metal spatula and trim with a sharp utility knife.
Preparing the web
The roll is rolled out, inspected for defects, and the length is cut off in accordance with the marking rectangles. You need to cut in one step, using a backing board, with a blade well secured in the handle. The transverse line for cutting must be strictly perpendicular.
How to apply glue
The cut is placed on the floor, pressing the corners with weights, preventing them from twisting. The glue is rolled with a roller without squeezing in a painting tray. The vinyl lining absorbs a lot, so after the first rolling, they immediately roll it again. It is advisable to lubricate the contours of the canvas with PVA in addition to CMC. The top and bottom are brought to the center. The formed envelope is soaked for 3 – 5 minutes. Unfold it, placing it against the wall. It is advisable to use two people to avoid tearing.
How to glue the finished canvas
Before gluing the finished piece of canvas, you need to pay the greatest attention to the top edge. Once it is fixed in accordance with the marking line, the canvas is finally unfolded and its center is fixed by hand. Holding the top edge, they pass over the canvas with a spatula-smoother. Subsequent movements are from the center to the edges. Excess glue is removed with a moistened rag swab, the canvas adheres perfectly. A shoe brush is used. Use it to level the canvas in a circular motion, check the side edge with the horizontal, and if necessary, move the edge back and slightly pull it up. The wet cut is elastic and stretches at a meter thickness of up to 1 cm. Do not touch the moistened wall with nails or sharp objects - it is very vulnerable.
From the center, use a small dry roller to roll out the cut until the sound of air expelled from under the substrate disappears. Excess glue is removed again.
Trimming edges
Vertical canvases cannot be trimmed on a wet wall. The groove from the knife will remain, moreover, it can provoke the destruction of the putty. But on a plasterboard board, the canvas can be trimmed - in those places where there are no nests, under self-tapping screws, away from the seams. After drying, the strips are cut close to the floor.
The tape material - friezes - after stretching along the wall, are pulled out. It is difficult to predict their final length. The tape is measured, cut to excess, laid, the border is marked with a pencil and carefully trimmed with scissors.
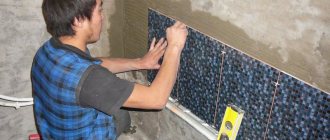
Pasting the walls
After completing the preparatory work, we proceed directly to wallpapering the walls.
Vinyl wallpaper is available in rolls of sufficiently wide width, which allows you to reduce the number of joints. The width of the sheet is one of the starting points in the calculations. This will determine how many sheets you need. The length of the sheet should be equal to the height of the wall with a couple of centimeters of reserve for the baseboard and similarly if you have an uneven ceiling.
By performing simple arithmetic calculations, you can calculate how many full sheets and pieces you will need (we recommend doing these calculations before purchasing wallpaper in order to purchase the required number of rolls and glue).
If you have the required number of panels ready, start preparing the glue. Dilute it as directed in the instructions on the package. Then look at the icon on the wallpaper to see how to apply the glue, on the walls or the canvas itself. If the wallpaper is self-adhesive (which you should be informed about at the time of purchase), remove the protective layer from the adhesive part immediately before gluing it to the wall.
Let's get to work. Using a paint roller, apply glue to the surface so that the first sheet is positioned clearly at the marking line. Place the panel on the wall, align it with the markings and carefully lay it on the wall using a wallpaper spatula (roller). It is better to apply the glue to the surface (wallpaper or wall) immediately before gluing.
We glue the next panel. Apply glue to the next section of the wall (or the wallpaper itself) and carefully attach the panel to the wall. Fit it to the first sheet joint to joint and carefully level it along the wall. Remove the air from under the wallpaper and wipe off any excess glue with a cloth. The wallpaper should be leveled on the wall with an even movement of the spatula or roller from top to bottom, and then with herringbone-shaped movements from the center of the canvas to its edges. Do not pull the wallpaper; air and excess glue can be easily removed without much effort.
In general, vinyl wallpaper is easier to glue than paper wallpaper. They hold their shape well, do not stretch or tear. And their joints are almost invisible. In general, it is recommended to glue vinyl wallpaper end to end, but some craftsmen use this trick. Two sheets are glued overlapping, with an overlap of 2-3 cm, then a cut is made along the vertical overlap, and the upper part is removed. Then the bottom strip is removed. The edges of the panels are glued. This creates a joint that is almost invisible to the eye.
If the technology requires coating the wallpaper panels themselves with glue, this is how it is done. Place the pre-prepared panel on the floor (lay a film underneath) and coat its back side with glue using a glue roller. Wait 5-6 minutes for the glue to absorb into the canvas. Then apply the wallpaper to the wall and glue it using the technology described above.
When applying glue to the wallpaper, do not overdo it. A small amount of adhesive mixture is enough. The main thing is to distribute the composition evenly over the cloth and give it time to soak in.
Once you have positioned and adjusted the canvas on the wall, do not stretch it. And promptly remove excess glue using a soft, lint-free cloth.
Particular attention should be paid to wallpaper with a self-adhesive surface. A strip of glue is already under the protective layer. Cut out the wallpaper, remove the protective layer and simply apply it to the wall, carefully smoothing it so that no bubbles remain. Remove the protection immediately before gluing the canvas. The technology for placing them on the wall is identical to other vinyl wallpapers. It is made easier by the fact that no glue is needed.
Pasting in problem areas
No water-based adhesive will withstand the temperature difference behind the batteries. You can’t even see behind them: the curtains camouflage you. But it is possible to choose a color and paint it over. Acrylic paint with glitter is suitable for mother-of-pearl wallpaper: silver, gold, bronze. These compounds are extremely stable. The edges of the vinyl of the batteries are painted on the back side with thick PVA glue and pressed. Hold it, for example, with a mop. Such work can only be carried out near cold radiators.
The preparation of corners for good materials is thorough. The corners are corrected with gypsum mixtures and rounded. The vinyl sheet will tear in a narrow place and move away from it. Therefore, having leveled, rounded and glued, the corner is sealed with canvas, folded lengthwise, accelerating the air left and right only after complete adhesion along the entire corner.
The housings of sockets and switches are removed before gluing. It goes without saying that the network must be turned off. Dried trellises on rosettes will reveal themselves in relief; they are easy to detect by touch. A cross-shaped hole is made in the center, and the unnecessary one is cut off.
Glue selection
Italian style
Before repairing, you need to choose an adhesive. The craftsman can purchase either a universal type composition or a special glue for paper or non-woven varieties of wallpaper. Other compositions will not be suitable, because vinyl materials have their own specifics.
It is better to purchase high-quality glue and not worry about the consequences. It is better to buy compounds in trusted stores to avoid counterfeits.
How to hang wallpaper near window and door openings?
The process of gluing wallpaper near openings causes difficulties for inexperienced craftsmen. The canvases must be joined so that their edges do not touch the corners of the window or door opening.
If the door is located in the corner of the room, the discrepancy between the patterns on the wallpaper will remain invisible. If the door structure is located in the center of the room, the pattern should be combined both before and after the opening.
- The last canvas is glued in such a way that it can cover the casing.
- Then the limiting decorative element is secured and the hanging part of the canvas is cut off with a sharp knife.
- Next, smooth out the wallpaper at the joints, as well as between the wall and the casing.
- A short piece is glued to the top of the door, observing the sequence of the pattern.
Procedure for gluing near window openings:
- The strip is glued so that it covers the slope.
- Several horizontal cuts are made at the edges, which will allow the wallpaper to be bent downhill.
- The edges of the canvases are trimmed along the border of the opening.
- After gluing one of the side strips, fix short sections of wallpaper on the top and bottom of the opening.
- After this, they begin finishing the other side of the opening.
Advice. Before wallpapering the second side of the window, apply an additional marking line. This makes it easier to achieve the correct vertical position of the canvas.
Gluing borders
Gluing the border or frame begins with inconspicuous areas, since at this point the elements will be combined. Typically, decorative items are fixed at the top along the entire perimeter of the room.
When combining two types of canvas horizontally, the border is glued at a certain height relative to the floor. In this case, markings are applied to the walls using a pencil and a building level: you cannot focus on the edges of the wallpaper being joined. The upper part of the decorative element is fixed along a pre-drawn line, after which the border is smoothed with a roller, and the remaining glue is removed with a soft cloth or sponge. In the places where the tape joins, an incision is made with a sharp knife and the fabric is smoothed.
The subtleties of gluing vinyl wallpaper, cutting rules and some useful tricks are clearly demonstrated in the video.
How to glue corners
Particularly difficult for wallpapering are the corners of the room. Two methods can be applied here. The first one is overlap. With this method, it is best to stock up on glue for the edges. However, if the canvases are thick enough, then it is best to glue them end-to-end and trim them. To do this, the strip is overlapped with another, after which, at a slight deviation from the edge, both strips are cut vertically with a knife using a ruler. Then the excess is removed from the walls, and the joint is rolled with a roller.
Wallpapering corners: butt and overlap
But most often the corners turn out to be uneven. And it happens that the very middle of the canvas falls on them. In this case, you can, of course, cut the wallpaper at this point and join it again, with a slight overlap. But you can do it a little differently: do not cut the strip, but stick it as evenly as possible. In this case, you need to make sure that all the wrinkles go into the corners. Next, the wallpaper in these places must be carefully cut with a sharp knife and glued together with an overlap. This way the design will be preserved, and the corners will look more aesthetically pleasing.
How long does it take for vinyl wallpaper to dry?
The premises must remain closed throughout the day. A draft leads to overdrying. Forced heating is also undesirable, and the use of air heaters is prohibited. Within a day it will be possible to open windows and doors. But if it’s cold outside and the room is not heated, you’ll have to wait 2-3 days.
Having done everything as described above, anyone can hang vinyl wallpaper with their own hands and save money.
Vinyl wallpaper: product characteristics
The composition of vinyl wallpaper is PVC applied to a non-woven base or sprayed on paper.
Silk-screen printing or the so-called “flat vinyl”, “hot stamping vinyl” are among the most expensive types of vinyl wallpaper. Thanks to specific manufacturing technology and additives, such wallpapers give the effect of silk fabric.
Vinyl wallpaper is moisture resistant , and therefore the weight of the vinyl sheet exceeds the weight of paper wallpaper. The size of wallpaper is often reduced to the standard: 10 m long and 0.53 m wide in one roll. However, there are varieties of 60 cm, 90 cm and meter wallpaper.
The shelf life of vinyl wallpaper on average does not exceed 10-15 years. With rare exceptions, the manufacturer can promise you 25 years of faithful service for this coating. But in this case, we will be talking about buying VIP wallpaper for a lot of money.
Useful tips
There are a few more recommendations and tricks that will allow you to achieve the most effective final result. Here they are:
- The temperature of the room in which the process of gluing vinyl wallpaper is carried out should not exceed 23 degrees Celsius.
- There should be no drafts in the room.
- If you are gluing wallpaper for the first time, make markings in such a way that the first wallpapers to be glued will subsequently be hidden by a closet or carpet.
- Before you start gluing, prepare all the tools, rags, and water for washing your hands. Try to have everything you need at hand.
- To dilute the glue, pour water into a container and slowly pour the glue into it, constantly stirring the solution with a stick, part of the profile or other tool.
Here are the basic tips on how to glue vinyl wallpaper with your own hands. There is nothing complicated in this process, and there are no fundamental differences from gluing other types of wallpaper. You will need to put in a little effort and patience to get an effective and long-lasting result.
Vinyl wallpaper: harmful or not?
When choosing wallpaper, the question of whether vinyl wallpaper is harmful to human health or not is asked by almost all buyers who have heard about the adverse effects of vinyl covering.
If we are talking about a quality product, then the answer is “no, they are not harmful.”
The big disadvantage of vinyl wallpaper is the result of the biggest advantage of this coating: such wallpaper can be washed, and therefore their air permeability is an order of magnitude less, and they are more susceptible to temperature changes.
The water-repellent properties of vinyl wallpaper are achieved thanks to a special additive: PVC (polyvinyl chloride) or, in common parlance, vinyl.
If the buyer has no individual intolerance to this additive, then there are no contraindications to purchasing and covering walls with such wallpaper. An allergy to PVC is the only thing that is harmful to high-quality vinyl wallpaper.
Preparation of the adhesive mass
The adhesive intended for vinyl-based wallpaper differs in composition from other adhesives. It contains impregnation that protects wall coverings from fungus.
Wallpaper glue in finished form can be stored for 10 days. During the drying process, a light transparent film forms on it. The glue does not harm human health. Has good adhesion.
When diluting the adhesive composition with water, pay attention to the instructions and proportions, mix well and let the glue swell. Apply the mixture evenly to the wallpaper and leave for 5 minutes to allow it to soak in better. When applying, special attention should be paid to the joints - if there is not enough glue, they may separate after drying.
Features of vinyl wallpaper finishing
Externally, vinyl wallpaper for walls is truly chic, but when wet, it tends to stretch in width, so you shouldn’t spread it heavily with glue. Although there is a second option, when only the wall is treated with glue, leaving the wallpaper dry. These points are indicated in the instructions from the manufacturer.
When gluing the strips, you need to carefully press them to the surface, removing bubbles and irregularities. They are glued end to end, overlap is not allowed. The wallpaper is too thick and the edges will be too obvious. You need specialized glue, designed specifically for vinyl wallpaper.