Preparing walls (removing old wallpaper, priming)
The first thing to do is prepare the walls. This is the most important requirement, the compliance with which determines the quality and durability of the finish. Wall preparation occurs in several stages:
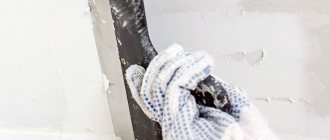
- Removing old coating. To make removing old wallpaper easier, you can use a metal spatula and soap solution. The walls need to be thoroughly moistened, then all material must be completely removed. Small pieces of wallpaper can be removed by applying a cloth to it and ironing it with a hot iron.
- Primer must be applied to clean walls. This is a mandatory step that affects the reliability of the wallpaper’s adhesion to the surface. Moreover, the primer strengthens the concrete itself, preventing its destruction and the appearance of fungus and mold. For these purposes, you can use primer glue, but there are also more successful compositions, such as acrylic primer.
- Puttying. This procedure is necessary only if there are cracks and other defects on the surface of the walls. Before applying the putty, the dried primer layer must be sanded with fine-grained sandpaper. Before wallpapering, only one layer of putty is needed.
The preparatory stage does not involve any difficulties, so anyone can cope with it. Proper preparation of the walls will ensure the durability and aesthetics of the final coating.
Preparing walls for gluing
How to hang wallpaper correctly so that the result does not disappoint? A good start is half the job: before gluing, you must carefully prepare the surface: it must be perfectly flat, white, free of debris and dust. The main rule is that you can’t glue wallpaper on crooked walls, and it’s better to invite specialists for leveling. Plaster is applied to uneven areas.
If the walls have oil or water-based paint or old wallpaper, you will have to work hard before gluing new ones.
Is it possible to glue new wallpaper onto old ones? Many experts advise against doing this. To remove the old paper covering, just use a wet roller or rag with a soapy solution. After 10-15 minutes, the paper will easily separate from the walls.
The process of removing old coating
As you can see in the photo, the old coating cannot always be completely removed. The residues are re-wetted and removed with a spatula.
If there is a waterproof film on the surface, it should be cut or scratched with a wire brush before wetting. When the surface swells, it’s time to clean it.
Removing old paint
Is it possible to glue wallpaper onto sanded and primed oil paint? Professionals do not advise doing this: there is a high probability of detachment. Oil paint can be removed mechanically or using special chemicals. The lagging paint is removed with a spatula, and then options are possible.
Removing paint with a hammer and chisel is a labor-intensive and time-consuming process, but relatively environmentally friendly. More often, a grinder with metal brushes or a hammer drill is used to remove old paint. The disadvantage of this method is a large amount of dust, which will settle for several days. Along with the paint, part of the concrete base is removed - as a result, the surface is littered with irregularities and has to be well puttyed.
Removers are used to remove only paint. Removing paint using special chemicals is carried out in two stages: the remover is applied to the surface, and then the softened paint is scraped off with a spatula.
It should be remembered that paint removers are very toxic, so work is carried out in a well-ventilated area, be sure to use a respirator and gloves.
To apply wallpaper to walls coated with water-based paint or whitewash, it will have to be carefully removed using water and a scraper. Hot water will make the task easier.
Wallpapering walls can begin only after complete removal of previous finishing materials, correction of uneven areas, finishing putty and sanding. The importance of these stages cannot be underestimated: proper preparation is the key to an excellent result.
When the walls are leveled, puttyed and sanded, all that remains is to apply a primer that will protect the coating from moisture, prevent sagging and reduce glue consumption. The primer is evenly distributed over the surface with a brush or roller about a day before wallpapering the wall.
Selection and preparation of glue
Properly selected and high-quality glue affects the result of wall finishing. Thanks to a good adhesive composition, the wallpaper will stick without air bubbles, the joints will be invisible, and the canvas will be clean.
You need to choose wallpaper glue depending on the type of base of the canvas. So, for paper wallpaper, universal adhesive ACM (Italy) is suitable (https://finewall.ru/oboinii-kley/kley-acm-texreco-10-kg/), . Textile, as well as paper, but rather dense and heavy wallpapers are glued with French Semin Sem-Murale glue (https://finewall.ru/oboinii-kley/kley-semin-sem-murale-10kg/). For non-woven fabrics, a special non-woven glue Kleo Extra is provided (https://finewall.ru/oboinii-kley/kley-kleo-extra-35m2-flizelinovyy/). For fiberglass and manufactured and environmentally friendly wallpaper materials, a specialized adhesive is required, for example, glue for glass wallpaper Nortex (https://finewall.ru/oboinii-kley/kley-dlya-steklooboev-nortex-sukhoy-300-g/). There is also a universal option suitable for almost all types of trellises - Kleo vinyl glue (https://finewall.ru/oboinii-kley/dlya-vinilovih/)
In order not to make a mistake in choosing an adhesive, you need to consider several important points:
- The adhesive composition is selected depending on the type of both.
- When choosing an adhesive, take into account the room in which it will be used. So, for the kitchen or bathroom you need a special moisture-resistant glue with bactericidal properties, while for other rooms the usual composition is suitable.
- When choosing an adhesive, you need to pay attention to the pH value - it should be at least 7.
- Be sure to read the composition of the product. If it contains carboxymethylcellulose, the glue will be reliable and durable.
- For heavy types of wallpaper, you should choose an adhesive containing at least 50% polyvinyl acetate in its composition.
You should also keep in mind a few tips for mixing and using wallpaper paste:
- In the process of diluting the composition, it is necessary to pour glue into water, but not vice versa. This is necessary to ensure that the glue is uniform and without lumps. Stir the mixture continuously until the dry powder is completely dissolved. If lumps do form, they should be removed by straining the glue.
- The consistency of the glue should depend on the wallpaper chosen: the lighter it is, the more liquid the composition can be, and vice versa.
- Water for glue should be taken cold.
- After the composition is mixed, it should be allowed to stand for half an hour.
- During the application of glue, it is important to ensure that its distribution is even and thorough.
The quality and durability of the coating itself will depend on how correctly the glue is selected and mixed.
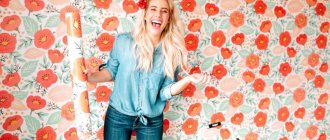
Nuances of choosing wallpaper
In order to choose the appropriate type of wallpaper, consider several important points, including:
- room area;
- its purpose;
- humidity level;
- the condition of the ceiling/walls.
You can create a bright accent in the room by decorating one wall with wallpaper that will stand out in color.
Based on everything listed above, we can conclude that you can buy wallpaper of any type for dry rooms with smooth walls. Only after choosing the appropriate option can you decide where exactly to start gluing. If the room has high traffic and high humidity, then it is better to give preference to vinyl wallpaper.
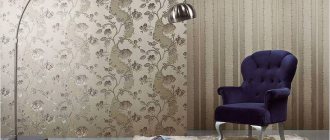
In dry rooms with smooth walls, it is permissible to use any type of wallpaper
A good option for the living room is silk-screen printing, its shiny surface will give the room respectability
Paper wallpaper is a “lifeline” for inexpensive cosmetic repairs
Let's get acquainted with the characteristics of various types of wallpaper present on the modern market.
- Paper . They are characterized by the fact that they fit well on any surface (even the most difficult to reach) and can be combined with any other wallpaper.
- Fabric . This is the most expensive variety, ideal for a living room or bedroom. Able to hide minor damage on walls.
- Non-woven . They are very popular because of their density, relief, texture; They also mask imperfections well. External coatings vary greatly.
- Liquid . More reminiscent of decorative plaster, they can be used in any room. Read more about liquid wallpaper here.
- Vinyl . Very durable and dense, used for walls that are subject to serious dirt and stress.
Non-woven wallpaper has earned popularity due to its texture, reliefs with a dense structure
In rooms with high humidity and high traffic, it is better to use vinyl products
For the kitchen, the most suitable wallpaper options are vinyl or special canvases for painting.
Video - Gluing non-woven wallpaper
There is another variety - photo wallpaper, which allows you to create a unique interior and visually enlarge the space. When gluing them you must:
- use special glue for photo wallpaper;
- first lay out the fragments on the floor so that you end up with a complete picture;
- glue them onto perfectly flat surfaces.
Table No3. Instructions for gluing photo wallpaper.
| Steps, photo | Description of actions |
| Step 1 | Apply glue to the first sheet and to the wall. Fold the sheet in half so that the mixture is well absorbed for a few minutes. Then expand. |
| Step 2 | Smooth out the wallpaper using a rubber spatula. Treat the joints with a rubber roller. The fabric is absolutely not suitable for this! |
| Step 3 | Attach a second sheet, try to very carefully match the pattern (literally down to the millimeter). Smooth with a rubber spatula. Remember that many wallpapers provide trimming between the joints. |
| Step 4 | After gluing the wallpaper, cut the joint and remove the unnecessary strip. |
| Step 5 | Re-inspect the joints, try to ensure that they fit as closely as possible. Apply glue and roll over it. |
| Step 6 | Prepare a set of multi-colored pencils. Choose a color that matches the design and chop the lead with a blade. |
| Step 7 | Using the crushed stylus, carefully cover all scratches and joints with your finger. |
You can learn more about gluing photo wallpaper from the thematic video below.
Video – Proper gluing of photo wallpaper
Choosing wallpaper depending on the room
Today, stores and construction markets offer a huge number of different types of wallpaper, so you can choose the most suitable covering for each room. So, for smooth concrete walls, wallpaper with a smooth pattern or without it at all is perfect. If there are any flaws on the surface, it is better to give preference to embossed (voluminous) wallpaper.
The color of the walls should be chosen depending on whether the room is located on the south or north side. In the first case, cool shades are suitable: blue, light green, metallic. Such wallpaper will not only add freshness to the room, but will also visually increase its area.
To decorate walls in rooms on the north side, it is better to use warm shades of wallpaper: beige, yellow, brown. The corridor and hallway can be covered with washable wallpaper in rich colors. The bedroom should be done in calm undertones. Both dark and light shades look good in the living room. The main thing is not to forget about the general interior style and color combination.
What to put first and where to start gluing wallpaper in the room
If the renovation is in full swing, and you still don’t know what to do first – lay the floor or glue the wallpaper? Professionals advise doing the things that leave the most waste first. Laying linoleum is unlikely, but laying laminate might be better first.
In the room where renovations are being carried out, all work is completed first, after which more garbage remains
If you first glue wallpaper and then lay laminate:
- Some types of laminate are very sensitive to wallpaper glue, so the coating can deteriorate, which means everything is correct, stick it first;
- Construction debris can also theoretically damage the laminate;
- If the laminate is already laid, protect it with a special film from the work being carried out.
In the case of linoleum, wallpaper is usually glued, and then the linoleum is directly laid. But still, do everything with an eye on the individual characteristics of the repair. And what is more pleasant and habitual for you to do. Adapt to yourself, there are no strict rules.
Wallpaper gluing technology
Not all owners can correctly re-paste the wallpaper in their own apartment. If in the case of single-layer paper wallpaper there are no particular difficulties during the gluing process, then gluing walls with heavy wallpaper is not the easiest task.
The following algorithm of actions is suitable for gluing almost all types of modern wallpaper:
- calculation of the required amount of wallpaper and glue;
- purchase of necessary materials, devices and tools;
- selection and preparation of the place where the work will be performed;
- determining the location of application of the first canvas;
- building a scheme according to which gluing will be carried out;
- cutting wallpaper into sheets of the required sizes;
- glue preparation;
- gluing wallpaper to the surface.
This algorithm is suitable for gluing any type of wallpaper. The exception is photo wallpaper, where it is necessary to stick a large canvas, as well as wallpaper that requires selection of a pattern.
How to start gluing wallpaper correctly (video)
Wallpapering is a more difficult process psychologically than physically. If you don't rush, if you follow all the rules, if you choose good material, then even beginners can do this job perfectly. That's what we wish for you!
Happy sticking!
The best posts
- How to make a greenhouse: 8 designs and a sea of ideas
- Do-it-yourself swing gates - diagram, manufacturing and installation, installation of automation
- How to transform the interior of the hall with your own hands?
- Knitting a women's jacket in the style of Coco Chanel from thick yarn: pattern with description
- Hygienic shower: features of selection and installation
- Do-it-yourself topiary from coins: how to make with master class, photos and videos
- How to quickly remove vinyl wallpaper from walls
- Do-it-yourself sliding wardrobe: sliding wardrobe door assembly diagram
Wallpaper materials and tools
In order for the work to be completed continuously and efficiently, it is necessary to take care in advance of the availability of the necessary materials, tools and devices.
List of required products:
- wallpaper;
- wallpaper glue;
- two plastic buckets or other containers (for water and glue);
- two spatulas - one metal, the other wooden;
- rubber roller for smoothing wallpaper;
- paint brush and roller for applying glue;
- sharp scissors or construction knife;
- Ruler and pencil;
- roulette;
- laser level;
- sponge or clean rag to remove excess glue;
- towel or hand wipes;
- screwdriver and electrical tape for working with sockets and switches;
- ladder.
This is the minimum set of materials and tools that may be required to decorate walls with wallpaper.
Other guidelines and tips
These tips will help you decide where to start:
- If there are a large number of large objects in the room - arches, windows, openings, then you need to start from the largest of them.
- If the wallpaper has a very pronounced print, then to avoid an uneven joint it is hidden in an inconspicuous place. That is, you need to start from where the discrepancy will not be visible. It's good if there is a tall piece of furniture, but consider whether rearrangement is planned.
- To make the joints invisible to the eye, they are made above windows or doorways, under radiators, behind the kitchen unit.
- Measure the walls, determine their maximum and minimum height: in some cases this helps to find a starting point. You should not immediately cut the roll into identical pieces, so that you do not have to correct the work by gluing the missing centimeters on top and bottom.
- Pay attention to the lighting of the room where the window is located, how the wall lamps shine. It is good if the joints are not placed in the most visible place.
- It is better to start from the far corner, then when entering the room the gaze will fall on a flat canvas, and not on the joint.
- Vinyl, non-woven and glass wallpaper cannot be glued overlapping, this must be taken into account. As a last resort, it is better to cut off a few centimeters than to make a convex joint that will spoil the appearance.
- If the distance between the exit to the balcony and the nearest corner is very small, then it is better to start from there.
- If the wallpaper is glued overlapping, then professionals recommend moving from left to right. Only thin paper wallpapers are glued this way.
- Tapestries in the corridor begin to be glued from the far inner corner.
- In the kitchen, you need to remember to leave room for a kitchen apron.
What else needs to be considered
When gluing, you need to take into account not only the location of doors and windows, but also other elements:
- look at how sockets and switches are located;
- where important pieces of furniture and other interior details are located;
- location of windows relative to each other;
- where is the balcony located?
- placement of batteries, pipes;
- how the door and neighboring corners relate;
- The width of the wallpaper sheet also plays a role.
These nuances will help you accurately determine the starting point for work.
Advice! Before starting work, turn off the power to the room, remove the covers from the sockets and glue the wallpaper on top. After drying, you just need to cut out the holes and install the sockets. This will turn out much neater than cutting the wallpaper along the line of the lids.
Buying wallpaper - where is the best place?
Before you go to the store for wallpaper, you need to calculate the required amount of material, decide on the color scheme and type of wallpaper.
To calculate the number of wallpaper tubes, you can use the following method:
- Measure the height of the walls, then divide the length of the roll (10 m) by this number. The resulting figure will correspond to the number of whole canvases in one roll.
- Measure the length of all walls, divide the resulting number by the width of the wallpaper and the number of sheets in the tube.
When making calculations, you need to subtract doors and windows, and always round the results obtained only up. It is advisable to purchase 1-2 tubes of wallpaper in reserve in case of damage during gluing or use.
It is also worth considering that if the report (picture height) is more than 0.6 cm, you need to include in the calculations one more roll of wallpaper for every 6 tubes.
You can go to a hardware store or market to buy wallpaper and the necessary tools. A convenient and profitable option would be to buy online.
For example, the online store FineWall, specializing in the sale of wallpaper and other repair products, offers customers the opportunity to purchase high-quality products at competitive prices with the possibility of home delivery to any city in Russia or the CIS.
The FineWall online store forms an assortment of products depending on new releases. Buyers can see in the catalog the latest lines of wallpaper from the world's leading manufacturers.
The site presents both classic wall covering options and the latest trends in the world of wallpaper fashion. Fans of original prints and exclusive solutions will be pleased with the variety of products offered. Ease of purchase and fair prices without surcharges will also please customers.
Wallpapering a room: preparatory work
If you decide to independently carry out repair work in a house or apartment, even if it is just cosmetic repairs, you need to clearly define the sequence of actions to be performed. First of all, you need to properly prepare the room. The preparation stage includes:
The preparation stage includes: purchasing wallpaper, selecting tools, covering floors, cleaning walls.
- purchase of materials (wallpaper, glue, primer, edging, tools);
- selection of the necessary tools (scissors, tape measure, construction knife, brushes, roller);
- covering floors with protective material;
- preparation of walls and communications.
You should take care of purchasing materials in advance. It is necessary not only to calculate the amount of decorative finishing and adhesive mixture, but also to take care of how to apply the adhesive to the walls when wallpapering. It is most convenient to cover the floor with plastic film; plain newspapers will also do. For safety reasons, it is better to turn off the electricity, and for convenience, you can remove the lamps and outer boxes from the outlets. The room should be as spacious as possible, so it is advisable to remove the furniture or move it in the center and cover it with film.
The surfaces to be glued require special careful preparation. Walls and ceilings must be cleaned of old coating. It is necessary to putty, level and prime the surfaces. Before starting work, the room must be thoroughly ventilated, and then the windows and doors must be tightly closed to prevent drafts.
It is necessary to allocate a special place on the floor for marking and cutting sheets, as well as for lubricating them with glue. The features of gluing wallpaper of various types and in different rooms will be discussed in this article.
Walls and ceilings must first be cleaned of old coating.
Buying glue – which one is better?
It’s better not to skimp on wallpaper glue. It should be selected depending on the type of wallpaper and the quantity calculated according to the instructions indicated on the package. It is worth choosing material from a trusted manufacturer and do not forget to check the expiration date.
Where to start gluing
Some craftsmen claim that it does not matter where you start wallpapering. However, this is not entirely true. Still, it is better to start gluing the trellises (especially paper ones) from the window, and in different directions, so that the seams are not noticeable.
Determining the gluing pattern
The wallpapering pattern depends on the type of material. Paper ones are glued from the window in different directions. In all other cases you can glue:
- from the window;
- from the corner (it is necessary to draw a vertical line using a plumb line to mark the place from which the gluing will take place);
- from the door (the reference point in this case is the vertical line of the box);
- from an arbitrary location, from a vertical line.
The main thing you need to pay attention to when constructing a wallpapering scheme is the designation of a vertical line. It must be carried out using a social level, since any inaccuracies in this case will affect the quality of the walls.
Where to start wallpapering the ceiling?
If the entire room, and the ceiling in particular, will be covered, then you should start there. There are 2 gluing methods that can be used for the ceiling:
- from the wall;
- from the center.
Finishing the ceiling has two methods of gluing wallpaper: from the wall and from the center.
In the first case, the work will be easier and faster, but the method is applicable only for wallpaper without a pattern (which is what is used in most cases for finishing ceilings).
But if there are patterns on the wallpaper, it is better to start gluing from the center in different directions - thanks to this, you will use the same number of solid strips. In this case, the design will also be symmetrical, which means it will be visually perceived correctly (the width of the stripes along the edges will be the same, which will ensure a harmonious and attractive appearance).
Ceiling pasting
When gluing, mark the entire ceiling from the center. To determine the central point, the entire area is divided into diagonals using a thread. The point where the threads intersect will be the center of the ceiling. Measure a distance from it that is equal to 1⁄2 the width of the roll (this is usually 53 cm: 2 = 26.5 cm). You need to lay the first strip between the markings, and the rest of the pattern will go from it.
On a note! If gluing is done from the wall, first draw a strip 50 cm wide (it is important that it is strictly perpendicular to the window). The first sheet is glued to this mark, and excess material near the wall is cut off using a construction knife.
Applying markings to a strip of wallpaper
Step-by-step instructions - what needs to be done?
To glue the walls, it is not at all necessary to turn to professionals. This can be done without outside help, following the appropriate instructions:
- Draw a vertical line using a plumb line and a pencil.
- Measure the height of the walls and cut the first piece. You can cut off 5-10 cm more in reserve.
- Cut the remaining strips taking into account the pattern, matching it on the floor, but in no case on the wall. If the wallpaper does not have a pattern, you just need to cut it.
- Prepare glue according to instructions.
- Apply the glue directly to the wallpaper. Walls should only be coated with non-woven wallpaper. First, one half of the canvas is lubricated and folded in half without fixing the seam. Then the second half is lubricated in the same way.
- When folded, the wallpaper should be left for about 5-10 minutes, depending on its density.
- Now you need to open the top half of the canvas and stick it on the wall, oriented vertically and not along the ceiling. The wallpaper should be smoothed well with a rubber roller from the center to the edges, from top to bottom.
- When one half is attached, you can straighten and stick the second.
- Excess wallpaper must be removed with a construction knife or scissors. The protruding layer must be wiped with a foam sponge or a clean rag.
- Using the same principle, glue the remaining canvases.
The instructions provided are suitable for most types of wallpaper and greatly simplify the task for beginners who have no experience in decorating walls.
Features of gluing for each type of wallpaper
Technologies do not stand still and the market is ready to offer a wide range to suit every taste and budget. A variety of textures, gluing methods, width of the canvas and a variety of colors and patterns. But in order not to make a mistake with your choice, you should know the disadvantages and advantages of each type of wallpaper. The most popular at the moment are four types.
Paper wallpaper
They are environmentally friendly and low cost. They are the ancestors of all wallpapers. Modern species are also based on them.
On a note! To cover a room with paper wallpaper, you need to perfectly align the walls. Even a small defect will show through.
You will also have to give up the idea of washing anything on them; after getting wet, the paper becomes deformed and tears.
Non-woven wallpaper
These are paper wallpapers with the use of special additives that turned them into a real find. They can be painted (repeatedly), they do not fade in the sun, they are very durable, waterproof and fire resistant. At the same time, covering a room with them will not be difficult; the glue is applied directly to the wall. The only disadvantage of this type is the high price.
Watch the video on how to glue non-woven wallpaper
Vinyl wallpapers
They are distinguished by reliability, wear resistance and durability. A special feature of the gluing is its two-layer nature. The base (the bottom layer, which is glued to the wall) can be paper or non-woven. The advantage of the first option is the ability to stretch. They are convenient for covering niches and complex openings. But at the same time, glue must be applied to the surface of the canvas itself and the wall. After applying the adhesive mass, extreme caution should be exercised, since the paper base can easily tear. The non-woven base is more durable and saves glue consumption (since the composition is applied only to the wall). It can easily hide minor defects, but due to its rigidity it creates problems when straightening folds and removing air.
Watch a detailed video on how to glue vinyl wallpaper
Photo wallpaper
The variety of themes and designs of this type of wallpaper is fascinating. You can find real works of art that can transform the interior beyond recognition. Based on the base material, photo wallpapers are divided into subtypes: paper, vinyl and fabric. The main difficulty in covering walls with such wallpaper is matching the pattern. At the preparatory stage, you need to make precise element-by-element markings on the wall, then remove the white edges from the fragments and only then apply glue.
Detailed video of gluing photo wallpaper
How to make joints invisible?
The main mistake that beginners make is noticeable joints. As a result, the entire appearance of the finish suffers significantly. Typically, seams become noticeable for one of the following reasons:
- The glue is too liquid, which causes the wallpaper to sag at the joints.
- Low-quality wallpaper that stretches when exposed to moisture, then dries and shrinks, leaving a gap between the sheets.
- Incorrect gluing technology - overlapping.
If a similar problem is discovered before the wallpaper dries, it can be solved by rolling the seam with a narrow roller. But if the coating has already dried, there is only one way to solve the problem - paint the gap with paint that matches the tone.
Wallpaper glued with an overlap must be cut in the middle of the seam with a construction knife a few hours after the work. Not completely dried glue allows you to remove unnecessary pieces of wallpaper.
How to properly glue wallpaper in corners?
In the outer corners you need to start gluing the wallpaper, bringing the first strip 1-2 cm beyond the corner. The first canvas is glued overlapping directly from the corner. If the double stripe is visible, you need to press the seam tightly with a spatula, make a cut with a construction knife and remove the remaining excess material, and then smooth the seam.
When working with outer corners, the technique is almost the same: the first strip needs to be placed a few cm around the corner, and the second one should be glued overlapping. After this, you need to apply a ruler to the corner and make a vertical cut using a stationery knife, cutting off the edges of 2 canvases and smoothing the seam between them with a rubber roller.
Rules for gluing
When wallpapering there are several rules that must be followed. The technique varies depending on the type of wallpaper, as does the glue, which is necessary for a quality result. the difference is mainly in when and where to apply the glue. You don't have to guess. Everything is on the insert, which is included on each roll of wallpaper. There it is graphically depicted, and in some it is written, which part should be coated with glue: only the wall or only the wallpaper, or maybe both at once.
These markings are on the insert.
But some things remain the same. For example, applying a starting strip.
Where to start
In reality, the starting location is not that important. It is important that the first strip is glued strictly vertically. Therefore, the choice is yours.
If the room has a perfectly designed corner: smooth and exactly vertical, you can start from there. You can start from a door with a perfectly aligned jamb. If there is nothing like that, draw a guideline for yourself. Take a building level, mark a point on the wall and draw an exact vertical line through it. Inexpensive household-grade building levels, which we usually use for repairs, sometimes give a significant error. And since it is important for us to stick the first strip strictly vertically, check the accuracy of the line using a plumb line. He never lies, pointing straight down. If everything is fine, you will align the edge of the strip along this line.
If you still haven’t decided where to start gluing wallpaper and this is your first experience in this area, start with the wall that is least visible. For example, the one along which there is a closet. The first couple of pages will be difficult for you, but then you will better understand what’s what and there will be fewer flaws.
How to glue wallpaper on a wall
If glue, at the request of the manufacturers, is applied to the cut fragment, the smeared strip is folded so that the coated side is inside. To do this, fold the edges towards the middle, then fold them several more times. The folds are not pressed. Let them remain round. This is necessary so that all layers are saturated and the canvas fits well on the wall and also sticks without bubbles.
How to fold paper wallpaper coated with glue
If you need to apply glue to the wall, coat an area slightly larger than the width of the wallpaper. The area under the ceiling, in the corner and near the floor is coated with a brush. Then the rules are general.
Take the cut strip and climb up the stepladder. Place the top edge a few centimeters on the ceiling, then align one of the edges along the drawn “start” line. Since wallpaper today is glued end-to-end, it doesn’t matter which edge.
Strictly attaching the side edge to the line, moving from this line to the other edge, glue the wallpaper in the ceiling area. Then, gradually moving down, you go down a little lower.
Extra centimeters on the ceiling are cut off. It is more convenient to do this with a paper knife and a large spatula. Press the paper well against the corner by running your hand. Then apply a spatula. Run a knife blade along its edge.
Trimming under the ceiling and near the baseboard
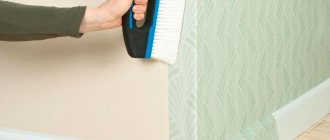
When gluing the canvases, movements are made from the center of the strip to the side and slightly downward, expelling the trapped air to the edges. Previously, this was done with a rag, but it works better and faster with a roller with an elastic attachment (it is usually yellow). There are practically no bubbles when working with it. But if the wallpaper is structural, with an embossed pattern, you can crumple it with a roller. Then take a wallpaper brush. It is wide and flat, with hard pile.
Wallpaper brush for quick pasting
Having reached the place where the strip is not yet glued, unroll the rest tightly and proceed according to the same pattern. First, you expose the edge, then use a roller or rag to expel the air, achieving a flat surface.
The second strip is glued in exactly the same way, with the only difference being that the canvas already on the wall will serve as a guide for gluing the edge. That’s why it’s important to glue it evenly, otherwise everyone else will also be mowed.
Features of choosing wallpaper for the bedroom are discussed here.
Secrets of pasting corners
The most difficult part to glue wallpaper correctly is in the corners. But this is only until you know the secret. You can try to do it simple at first. Wrap one of the parts onto the adjacent wall by 1-2 cm, and cut the second at the corner.
One of the ways to paste an internal corner
It’s not difficult to do, this method looks good. But on some wallpapers this stripe is very visible. For such a case, there is another way. Glue the canvases on both sides of the corner so that they wrap at least a little on the other side (2-3 cm is enough). Press well so that they fit exactly. to the walls and corner.
Cutting wallpaper in the corner
Then take a special cutter or large spatula. Press it in the corner, cut the wallpaper along its edge with a sharp knife. It is necessary to cut both sheets at the same time, so considerable effort may be required. To ensure a continuous cut, do not tear off the knife. Having stopped, move the spatula, which you rest against the blade and then continue the cut.
Having cut everything off, remove both cut strips and join the remaining strips in the corner. If the wallpaper was pressed well before trimming, the match is perfect, without any discrepancies.
How to properly glue wallpaper in corners
How to glue wallpaper on outside corners? Almost in the same ways. In the first case, one of the stripes is wrapped around the corner by one or two centimeters (for thicker wallpapers, 2 cm is better, for thin ones, 1 cm is enough). The second strip is glued strictly along the corner. If this overlap is visible (usually on non-woven wallpaper), you will need to cut along the entire strip. In this case, we wrap more and cut vertically using the same spatula and knife. We remove the cut and glue the joint.
Meter-long wallpaper in the corners is glued in the same way as narrower ones. It happens that a narrow strip is needed in a corner, and the rest is cut off. If the wallpaper is without a pattern, it can be used somewhere, at least in another corner. With patterned canvases, sometimes it is also possible to attach them somewhere, but this is more difficult to do. That’s why they take patterned ones with a decent supply: just for such cases.
How to glue vinyl wallpaper on paper, how to remove imperfect corners in this video.
Read what wallpaper is best for the kitchen here.
How to glue wallpaper near doors and windows
If the door or window is flush with the plane of the wall, problems usually do not arise. Wallpaper is cut along the door frame or along the edge of the trim. The canvas is cut at an angle of about 45° to the corner of the casing or frame. The cut parts are wrapped along the opening, bent and then cut off with scissors or a knife. It’s smoother and faster using a knife and spatula.
How to glue near the door
The option that causes more difficulties is when it is necessary to cover the slope of a door or window. When using paper wallpaper, the principle is again simple: glue the strip onto the slope, extending it 1 cm onto the wall. We glue a piece on top exactly along the cut of the window opening.
One of the ways to cover the slope of a door or window
But this method will not work with wallpaper on non-woven fabric: the “overlap” is too visible. In this case, the strip is cut along the window opening with a small margin. Another fragment is glued on top with an overlap, cutting them exactly along the cut of the window opening. The glued piece is wrapped inside, onto the slope. Then they join as before.
It's difficult to explain in words. It’s more accessible in video. By the way, it also contains a story about the design of wallpaper for arched openings.
How to glue on windows and doors
The most difficult place to glue wallpaper is in places where there are various obstacles, such as windows and doors. To hang wallpaper in door areas without any problems, you need to follow a certain algorithm:
- Paste wallpaper over the doorway.
- Join this canvas with the previous one and press the wallpaper tightly to the wall.
- Make a cut diagonally to the top corner of the doorway.
- Roll the wallpaper onto the top and side trim of the door using a rubber roller.
- Trim protruding parts of the material with scissors or a stationery knife.
- Place the remaining strip under the trim with a spatula. If the platband fits tightly to the wall, the wallpaper needs to be trimmed evenly.
It is not difficult to glue wallpaper near a window. Here you need to use the most common technology: when the material is completely dry, cut off the excess wallpaper along the edge.
Where to start wallpapering the walls?
In this case there are also several possible ways. The choice of one or another of them depends on the specific situation, while the type of wallpaper used must be taken into account. Almost all modern wallpaper needs to be glued end-to-end using one of the following methods:
- from the corner;
- from the door;
- from the window;
- from the center of the wall.
There are several options for wallpapering walls: from the middle of the wall, window, door, corner.
First, you need to make marks perpendicular to the floor surface, using a plumb line or level. Wallpaper can also be glued diagonally - in this case, a thread is stretched from the bottom corner to the diagonally opposite one, and a line is drawn along it. Wallpaper strips are glued obliquely, moving along the drawn line. It is better not to use this method for beginners - it is designed more for experienced craftsmen.
DIY wallpaper sticker on the wall
When using wallpaper with a pattern, difficulties may arise in any variant of perpendicular gluing. The most inconspicuous place is selected (for example, above the door) and gluing begins from there if there are difficulties in joining the patterns.
Gluing wallpaper from a window is quite simple. The height of the room is measured, another 10 cm of margin (for allowances) is added to the resulting figure, then the canvases are cut to match the pattern. The first strip is glued in accordance with the perpendicular guideline, and the rest - sequentially (in most cases - counterclockwise).
The method of finishing wallpaper from a window involves gluing counterclockwise
A few more important points
It is better to glue combined type wallpaper from the middle of the wall, the same applies to wall panels, when creating which you need to maintain a clear symmetry of the picture.
It is recommended to glue combined wallpaper from the middle of the wall
Chic wallpaper pattern
Note! You need to remove the covers from the sockets in advance, and then glue the wallpaper on top. The holes for them are cut out after the glue has dried. It is also better to trim off the excess after the glue has dried.
When gluing wallpaper from the corner, you should consider a few more important points. So, the corners are almost never perfectly straight. To check the evenness, use a building level or plumb line. You can draw a straight line perpendicular in the corner, and then start pasting from there.
In addition, you should not glue a whole strip in a corner, because when the glue dries, folds or distortions may appear on the material, which will cause the pattern to mismatch in the future. To correctly design a corner, follow the recommendations below.
- Choose the most inconspicuous corner and start gluing from there.
- Coat the corners thoroughly, as this is where the wallpaper comes off most often.
- Also treat the corners with a fungicide, because mold “loves” to grow in them.
It should be noted that there is no single algorithm for decorating walls with wallpaper in different rooms.
How to hang photo wallpaper?
Seamless photo wallpapers are made of paper or non-woven fabric, the top layer is usually made of textile. They have a width of 2.5 to 3 m, and the length can reach 50 m. Such wallpaper cannot be cut - it is glued to the wall as a whole. In this case, it is necessary to follow a special gluing technology:
- First you need to prepare the wall: remove the old coating, plaster and putty if necessary.
- Prepare the adhesive composition
- Start gluing the fabric. You should start from the section of the wall that will be covered with curtains or furniture.
- During the gluing process, you need to secure the photo wallpaper at the top and bottom using special fixing strips, and level the canvas with a rubber roller or spatula.
- Every 1.5-2 meters pasted, it is necessary to check the verticality with a level
- Cut holes for sockets and switches, as well as make door and window openings.
- Excess material can only be trimmed after the wallpaper is completely dry.
It is better to glue together a fabric that is too large. One person should gradually unwind the roll, holding it at a slight angle, and the other should coat and glue the wallpaper.
Preparatory stage
First, everything in the room that can be removed is removed, including door frames and baseboards, if possible. They also remove sockets and switches, closing the boxes with wires with plugs - plastic or wooden.
You also need to know how to glue wallpaper correctly
Turn off electrical outlets
When working with electricity, we de-energize the room and do not turn it on until we are finished. It is advisable to carry out all work, including wallpapering, with the power turned off. The work is “wet”, and water or glue can get on the wires and short out. If the wiring is done according to all the rules and there are protective circuit breakers, this is not a big deal. They'll just turn off the power and that's it.
If the wiring is still done in the old way, it can be dangerous. The worst part is that in this case there is often no way to turn off the power in a separate room. Only in the entire apartment or, at best, in half of it. Then the solution is to remove the power wires from the sockets and switches (with the power off, of course) and carefully insulate the ends, then hiding them under plugs. Then you will have to unwind them and put them back in place, but it will be safe.
Lighting during work is temporary - extension cords are pulled from other rooms and portable lamps are turned on. Once you have dealt with electricity, you can move on.
If the walls are just leveled and puttied, you don’t need to do anything other than primer. But if they have an old coating - wallpaper or paint - they will have to work. First, remove the previous finish.
Cleaning off old wallpaper
If wallpaper is pasted on the walls, pry it up in a random place with the corner of a spatula, then pull it by the bent corner, tearing it off. If you're lucky, entire strips come off, sometimes several meters long in a single strip. But more often it comes out in small fragments. First, they remove everything that comes out “dry”. If it’s really difficult and in small parts, take a bowl of water and a roller and wet the walls in this way. To make them come off easier, you can add dishwashing detergent to the water.
Things don't always go so well
If the wallpaper is paper, water is simply applied to the surface. If they are vinyl or with some other durable film, first they break through the film. This can be done using a spiked roller, or with a brush with metal bristles. The main thing is to break through the film so that water can be absorbed into the base - paper or non-woven fabric - and soak the glue. Sometimes you need to wet the wallpaper several times to make it come off easier.
Next, the steps are the same as with paper ones: pry them with a spatula and tear them off. Sometimes this technique of tearing off pieces is ineffective. It works faster if you scrape off the soaked finish with a spatula. Then scrape the blade along the wall at an acute angle. In general, it doesn’t matter how, but the old wallpaper must be completely removed.
Removing paint and whitewash
You also have to work with a spatula, scraping off centimeter by centimeter. The work is monotonous and rather tedious, and also dirty. There are several ways to speed things up.
Oil paint on concrete
There are actually two options: chemical and mechanical. Chemical - these are special paint removers. The composition most often looks like a gel. They are applied to the surface and, after some time, (indicated on the packaging) it rises with bubbles or begins to shrink. The paint has softened and can be removed with any spatula.
This is what the paint looks like after the “work” of washing
Everything happens quite simply, but there are two “buts”. First, the price of the wash is quite high. Secondly, the fumes are clearly not useful. You need to work in a ventilated area, but do not let the remover dry, otherwise there will be no effect. And still, even with ventilation, sometimes my head hurts. So a respirator won’t hurt, and gloves are a must.
The mechanical method is not just a spatula. This will take a very long time to scrape. Use a grinder or hammer drill. The grinder has brushes made of metal wire. You can try to remove it like this. The method works, but not always or it is too slow. Then you can take a hammer drill and a chisel, and holding the chisel perpendicular to the surface, move it along the wall without deepening it. The paint bounces off quickly. After such a “shock” treatment, all that remains is to clean off the residue with a spatula.
Water-based emulsion, whitewash or paint on gypsum plaster
Removing this type of paint on walls is no easier. You can scrape it off, just very, very slowly. The solution is very simple: again water and a special paint scraper. You can buy it at a hardware store. Immediately take several spare blades: for example, the kitchen needs three or four of them.
Coat the wall well with water. Brush or roller, several times possible. Then you leave it to soak. And then you start cleaning with a scraper. The paint just pops off. It is only important that the wall is well wet.
Read how to choose wallpaper for the corridor and hallway here.
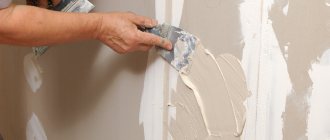
Sealing irregularities
Here you will first have to assess the condition of the walls. First you need to remove all the nails and screws, remove chips and repair cracks. Then examine the results. If the walls are more or less even, there are only small defects, you can get by with occasional leveling. Only cracks, dents and chips are repaired. They can be covered with finishing putty. Just before leveling, completely clean the wall of dust and pieces of wallpaper, and then cover it with a primer (with a wall roller and a brush in the corners).
If the wall has been “treated” with a hammer drill, you cannot do without full putty of the entire wall. Mostly today they use gypsum putty. First, apply a layer of primary or starting. It has a coarser grain and the layer can be up to 3-5 mm. This composition is used to level out the main unevenness, trying to achieve a smooth surface. After drying, they pass through a special mesh, removing any unevenness or sagging that may exist.
Afterwards finishing putty is used. It is very plastic and is applied in a thin layer - up to 1-2 mm. After this, the wall becomes smooth (after the irregularities have been smoothed out with a mesh, only with a smaller mesh).
Primer of walls
The second layer of primer is applied after puttying. It forms a film on the surface that reduces the absorption of the glue and also improves adhesion. For wallpapering, you can use a thinner wallpaper glue as a primer. Each pack has a table indicating the amount of water for gluing and priming. We dilute the glue in the required proportion, wait for it to be ready (also on the package) and cover the walls with the composition. The priming technique is the same: first go over the corners with a brush, then with a roller on smooth surfaces.
In the video, for some reason, the use of primary putty is called plaster, but otherwise the sequence of actions is presented correctly.
The rules and methods for combining wallpaper are described in this article.
How to hang composite photo wallpaper?
If the wallpaper consists of 4, 8 or 12 parts, they must first be laid out on the floor, inspected for defects, and then followed according to the algorithm developed by professionals:
- Draw a vertical line - this is where the edge of the canvas will go. If the picture consists of 4 parts, it should start from the center, and if it consists of 12, it should start from the edge.
- Next, you need to measure the height and width of one part of the picture and make markings on the wall so that everything falls into place. You should also take into account door and window openings, switches, sockets and other obstacles.
- Then fold all the fragments so that the canvas that needs to be glued first is on top. Fold all sheets pattern down.
- Spread one fragment with glue and attach it to the desired area of the wall, smooth and level it.
In the process of gluing such wallpaper, it is important to monitor the accuracy of combining the fragments into one pattern. You should also avoid the appearance of air bubbles, stains and other defects.
When can you open windows after wallpapering?
The time you need to wait before opening the window after the gluing process is no less than 12 hours. Sometimes you shouldn’t open the windows for a whole 48 hours. Wallpaper dries at a constant temperature, it should not be lower than +15. And the so-called wandering drafts can ruin all the work.
Related article: How to make wooden Euro-windows correctly with your own hands
After the wallpapering process, windows can be opened no earlier than 12 hours later
Also, for the first days after gluing, try not to drill, install or turn on the air conditioner. Stretch ceilings are also not installed the first five days after gluing. However, the installation of ceilings involves strong heating, which is unacceptable at the moment.
At what temperature should you glue wallpaper?
Previously, wallpaper manufacturers and professional craftsmen recommended gluing walls at an air temperature of 23-25°C. But since such temperature indicators can only be achieved in the summer, manufacturers have improved the wallpaper taking this feature into account.
Modern materials manufactured using the latest technologies can be glued at a temperature of 10-25°C. It is not recommended to allow temperatures that are too low or too high.
When can you open windows after pasting?
Many people make the grave mistake of opening windows immediately after wallpapering. This leads to uneven drying of the glue, and, as a result, to divergence of seams or peeling off of entire canvases.
Freshly hung wallpaper is not afraid of drafts only after it is completely dry. This usually takes 1-3 days. The exact drying time can be found in the instructions for using glue and wallpaper. In any case, it is better to play it safe and wait another day.
What to do if the wallpaper bubbles?
The formation of air bubbles under recently hung wallpaper is a fairly common problem. This happens due to non-compliance with gluing technology. Such a defect looks unaesthetic; moreover, air cavities are a potential place for the formation of mold and mildew. Therefore, it is important to eliminate the bubbles as early as possible.
If the bubbles are too large, it is useless to try to stick them without tearing the wallpaper off the wall. In this case, you will have to re-glue the entire canvas.
If the wallpaper has a rather motley pattern, you can cut the air pockets with a utility knife and eliminate the air. Using a thin brush, apply glue to dry areas and smooth the wallpaper. Under no circumstances should you do this procedure with plain wallpaper. Any manipulations with the knife will immediately be evident.
When cutting the wallpaper in places where there are air pockets, you need to remember that the paper material dries out, so you should make a slight overlap. This does not happen with non-woven wallpaper.
If the bubbles appear because glue has accumulated under the wallpaper, you can pierce them or slightly cut them, then smooth them out with a rag, squeezing out the excess glue. But you should understand that, again, this is only possible in the case of wallpaper that has a pattern.
If the bubbles are small, they can be removed using a regular syringe. The needle must be quite thick so that it can pass the glue. You need to pierce the bubble at an acute angle from the edges to the center. If there are large wrinkles left, it is better to smooth them out, and small ones will disappear on their own after drying.
What to do if the wallpaper is see-through?
The biggest trouble a decorator can encounter is translucent wallpaper. Unfortunately, it is not possible to correct this problem, so you need to take all necessary measures at the preparatory stage:
- Dark walls need to be lightened. To do this, you can use a special primer or water-based paint.
- Buy wallpaper made of dense material.
- Make sure that the wallpaper is not see-through by placing a small piece of material against the wall and assessing its density.
How long does it take for wallpaper to dry?
The time for complete drying of pasted walls depends on several factors: the type of glue, the density of the wallpaper, air humidity and room temperature. The drying interval is within 12-72 hours.
Paper-based non-woven wallpaper and duplex paper wallpaper take the longest to dry (about 3 days). Vinyl and non-woven wallpaper (not paper-based) dry in just 1-2 days.
You can find out whether the wallpaper is dry or not by pressing your palm against the wall. If you feel cool at the same time, the wallpaper has not yet dried, but if the wall is warm, then the walls are already completely dry.
It is also worth noting that under no circumstances should you artificially dry wallpaper using heating devices. This will inevitably lead to their deformation.
How to glue meter-long wallpaper alone?
Not long ago, meter-long wallpaper appeared (to be precise, the tube is usually 90 cm wide). This type of finishing material has several advantages:
- a small number of joints are obtained, as a result of which the finish looks more neat and of high quality;
- significantly saves time and effort on repairs;
- Buying such wallpaper is often more profitable than standard tubes.
- the surface for gluing must be perfectly flat and prepared;
- It may be difficult to calculate the required amount of material;
- It is quite difficult to glue such wallpaper alone.
However, meter-long wallpaper also has its downsides:
It is not easy to hang such wallpaper alone; most likely, you will need the help of a second person. But if it is not possible to involve someone else in the repair, you can do it yourself. In this case, you must follow the instructions provided for gluing ordinary wallpaper. Difficulties may arise directly at the stage of gluing the panels to the wall - here you will have to show a certain physical strength and dexterity. Otherwise, the process of decorating walls with meter-long wallpaper is no different from gluing classic wallpaper.
DIY wallpapering technology
The tool is prepared, the amount of wallpaper is counted and purchased with a reserve. The walls are leveled and primed, everything is ready to start work. But you need to know the order in which they are carried out in order to understand how to glue wallpaper for one person.
Fitting and marking
If the wallpaper is chosen with a large pattern, then it is necessary to adjust it and mark all the resulting elements. For this:
- lay out two canvases with a combined pattern on the floor;
- measure a length equal to the height of the flow + a margin of 10 cm on one of the sheets;
- make a mark with scissors on the second canvas and cut it off;
- mark the finished cut with a number in order indicating the top;
- We make twisted sheets against the prepared wall.
Getting started - choosing a starting location
In many instructions on how to hang wallpaper yourself, the window opening is the starting point for gluing. This is true for paper wallpaper. If you paste on different sides of the window, the joints will be less noticeable. For denser and heavier types, other pasting schemes are possible.
To carry them out you will need a vertical plumb line or level. You need to mark a vertical line on the wall and start pasting the room from there. It is also worth doing by starting work from the corner of the room. If you intend to glue from the doorway, you won’t need a plumb line, since the slopes will serve as a guide.
Wall marking
The more accurately this operation is carried out, the more accurate the final version will be. Among the tools, you can use a traditional plumb line or a laser or water level. You will also need a soft pencil. You should not use a pen or marker, as the mark will show through and spoil the overall appearance.
Using the selected equipment, a vertical line is marked. It will serve as a guide for sticking the first canvas. It is worth taking the advice and marking it with a small margin in width. For example, if the width of the sheet is 106 cm, it is worth measuring 107 cm. This will allow you not to lose sight of it and prevent curvature.
Glue application technique. Gluing the canvas
The sheets are cut and labeled, and markings are applied to the walls. You can start diluting the glue and begin the most difficult process - wallpapering. Let's look at how to put wallpaper on walls alone.
For each type of wallpaper, its own specialized glue is selected. It should be diluted in clean cool water, pouring in a thin stream, stirring continuously. According to the instructions, let the glue swell. You should not dilute with reserve, as the resulting mass will begin to thicken and form lumps. This will complicate the whole process.
If the choice is made of non-woven wallpaper, the glue should be applied directly to the wall. Vinyl and paper have their own impregnation procedure:
- the canvas is spread on the floor or a long table;
- apply the glue with a roller to the entire surface evenly, thoroughly covering the edges with a brush;
- The sheet is folded into a “book” for the time specified in the instructions for the wallpaper (from 5 to 10 minutes).
Following the mark indicating the top, wallpapering begins from the ceiling. In this case, you should navigate not by the ceiling curb, but by the previously applied vertical strip. Carefully straightening the canvas from the center to the edges, they go down. Air should be removed with a brush or spatula. But for the joints, you should arm yourself with a rubber roller and roll them without unnecessary pressure. You need to work with the edges carefully. If you press too hard, they will subsequently move away and become unnecessarily noticeable. Remove any released glue with a dry sponge or cloth.
Pasting places with sockets and switches
If you know how to handle electrical wiring, then the question of how to hang wallpaper in a room yourself will be resolved by itself. First you need to dismantle the sockets and switches, of course, turning off the power to the room. Insulate the wires well and hide them in the installation box.
This move will allow you to choose new fixtures to match the color of the wallpaper, and will also significantly simplify the gluing of the canvas. To make even cuts, you need to use a knife to cut a circle with a diameter smaller than that of the device. This should be done immediately after gluing the corresponding sheet. Otherwise, there is a risk of not finding the right place. Also, the wallpaper stretches when it dries, which will complicate the task.
Wallpapering behind a radiator
The answer to how to glue wallpaper yourself behind a radiator depends on the type of housing. In many new buildings, the heating radiator can simply be removed. In the secondary you will have to be patient. It is not possible to use spatulas and rollers, so smoothing is done with a rag. Pasting this area should be left for the final stage.
The canvas is measured according to the size of the opening under the window sill. Vertical cuts are made on the sheet at the junction points with the radiator mounts. Now the sheet, with glue previously applied to it, is placed behind the battery and carefully smoothed out. The junction with the wallpaper is cut with a cutter using a spatula.
Wallpapering corners
Prepare a sharp knife (cutter) and a metal ruler. If you follow a few rules, this procedure will not take much effort and time. The tips are similar for both internal and external corners.
- do not use a single sheet for gluing a corner;
- make an allowance of 2 cm on the adjacent wall, then glue the new canvas overlapping;
- should be cut exactly in the middle of the seam.
Pasting door and window openings
If there are usually no problems with the window, trimming is done with scissors of already dried cloth. You should be more careful with the door frame. Following the technique will help to avoid inconvenience and non-connections.
To begin, place the wallpaper sheet on top of the door and join it to the one already pasted. To glue the corners of the casing, make diagonal cuts in this place. Then roll the wallpaper tightly and remove the excess behind the casing with a metal spatula. If there are too many of them, first trim them with scissors.
Trimming excess
The presence of excess is inevitable, especially if you decide to paste it yourself. To perform this procedure as carefully as possible, prepare a flexible ruler and a wallpaper knife. Their feature is the ability of the ruler to press quite tightly to uneven surfaces. And the wallpaper knife has a blade with a break-off tip, which allows it to remain extremely sharp.
Now press the ruler in the cut area and draw the knife. Even damp wallpaper will have a smooth edge. Wipe the surface from which the excess was cut (floor or ceiling) with a sponge to remove the glue. If all the conditions are met, by this stage your room will already be wallpapered evenly and quickly.
How to hang wallpaper yourself video instructions
Some tips from the professionals
In order to properly hang wallpaper, you should listen to the advice of those who have been doing wall finishing work for a long time.
- Before you start gluing wallpaper, the room should be well ventilated. It is advisable to do this one day before the proposed work.
- The skirting boards in the room must be removed in advance and reattached after finishing. This will make wallpapering much faster and easier.
- It is advisable to cover the floors in the room with newspaper or cardboard so as not to stain them with glue.
- Instead of a table, chairs and other furniture, it is better to use a stepladder. Various furniture can scratch the floor or walls; moreover, it interferes with the wallpaper at the bottom of the wall.
- You should pay attention to the quality of not only the wallpaper, but also the glue. It must match the type of wallpaper chosen and have the appropriate consistency.
- There is no need to join the wallpaper in the corners. It is better to glue them with a slight overlap, then cut them vertically with a knife along the seam and remove excess materials.
- Keep your hands and tools clean. If this requirement is neglected, there may be traces of dirt on the wallpaper.
- If possible, do not cut the fabric at the top and bottom. It is advisable to hide inaccuracies using plinths or baguettes.
- When cutting wallpaper, the stationery knife must be held horizontally so as not to tear the paper.
- To prevent the glue from hardening on the knife, before cutting the wallpaper, you need to pour boiling water over it.
- It is not necessary to remove the battery at all. You can cut the wallpaper in the area where the pipes are attached, stick it on and smooth out any unevenness.
By gluing the wallpaper yourself according to the instructions given and taking into account all the recommendations of professionals, the result will certainly please both the master himself and the rest of the household.
Surface preparation
The first step after choosing the type of wallpaper, glue and purchasing everything you need is preparing the walls, which begins with removing the old coating.
- Before removing, paper-based wallpaper can be treated with a soapy solution with the addition of a small amount of glue.
- Dense and washable fabrics need to be cut, thereby allowing the solution to pass deeper to the base for quick softening. After soaking, the old coating can be easily removed with a metal spatula.
- If the wallpaper does not come off completely, it is better to wet it again. Areas that are still difficult to clean can be ironed through a wet cloth.
- Non-woven wallpaper should be removed as follows: make a horizontal cut and remove the first layer. The bottom one can be left: it will provide a solid base for gluing new ones.
- If the old coating is water-based or oil-based paint, you need to go over the surface with sandpaper and completely clean off the weak and swollen areas. This article describes when wallpaper can be glued directly to painted walls, and in what cases the old paint will have to be completely removed.
- Chalk whitewash or water-based emulsion is soaked in a soap solution and removed with a spatula. If the whitewash layer is small, it is easily washed off with warm water and a sponge. Lime is removed in the same way, but with proper surface treatment, you can glue the material directly onto the whitewashed wall.
Advice. When choosing light paper or non-woven wallpaper, it is recommended to paint the surface with white paint or use a white primer. This way the wall will not show through, and the tone of the paintings will be more saturated.
Next, each type of base is prepared in its own way:
- Concrete floors with cracks and potholes, as well as crooked corners, need to be plastered and puttied. Only after the surface has completely dried can you proceed to the next step.
- Drywall requires proper sealing of joints between sheets, priming and putty. Step-by-step instructions can be found here.
USEFUL INFORMATION: Where is the right place to start gluing wallpaper: from the window or from the door?
- Preparation for gluing OSB boards has its own specifics. They are first sanded, then primed, plastered or puttied, and finally coated with primer again. An important point is the correct sealing of the joints between the slabs. Plywood and chipboard are processed in a similar way. Details are here.
It is important to remember that wallpaper should only be applied to a flat, dry and clean surface. To remove dust from the base, you can coat it with a primer or mix a weak solution of liquid wallpaper glue or PVA.
The nuances of wall preparation are in the video below.