- Where to start gluing wallpaper in a room: tips and tricks
- Wallpapering a room: preparatory work
- Where to start gluing wallpaper on the ceiling in a room?
- Where should you start gluing wallpaper on the walls in a room?
- How to properly and where to start gluing wallpaper
- What wallpaper to choose: density, texture, color of material
- Room design with wallpaper: rules for choosing products for different rooms and combining them
- Combination of technology and design: wallpapering of different types
- Where to start gluing wallpaper in a children's room, bedroom or living room
- Where to start gluing wallpaper in the hallway: tips and nuances
- Where to start gluing wallpaper in the kitchen, taking into account the specifics of the room
- Features of using wallpaper in room design: designers' recommendations
- Video: how to glue wallpaper complete guide
Where to start gluing wallpaper in a room: tips and tricks
When starting the final stage of renovation - finishing the walls, you need to decide where to start gluing wallpaper in the room , including in the corridor, in the kitchen. Each of these rooms has its own characteristics, which are manifested in lighting, the presence of corners, openings, niches or recesses. The layout of the apartment plays an important role, as does the type of wallpaper. The process of gluing non-woven, vinyl or paper sheets has its own requirements. All the nuances will be discussed in this article.
If you decide to glue wallpaper yourself, you need to clearly know how to glue wallpaper in a room and the sequence of actions to be performed.
Wallpapering a room: preparatory work
If you decide to independently carry out repair work in a house or apartment, even if it is just cosmetic repairs, you need to clearly define the sequence of actions to be performed. First of all, you need to properly prepare the room. The preparation stage includes:
The preparation stage includes: purchasing wallpaper, selecting tools, covering floors, cleaning walls.
- purchase of materials (wallpaper, glue, primer, edging, tools);
- selection of the necessary tools (scissors, tape measure, construction knife, brushes, roller);
- covering floors with protective material;
- preparation of walls and communications.
You should take care of purchasing materials in advance. It is necessary not only to calculate the amount of decorative finishing and adhesive mixture, but also to take care of how to apply the adhesive to the walls when wallpapering. It is most convenient to cover the floor with plastic film; plain newspapers will also do. For safety reasons, it is better to turn off the electricity, and for convenience, you can remove the lamps and outer boxes from the outlets. The room should be as spacious as possible, so it is advisable to remove the furniture or move it in the center and cover it with film.
The surfaces to be glued require special careful preparation. Walls and ceilings must be cleaned of old coating. It is necessary to putty, level and prime the surfaces. Before starting work, the room must be thoroughly ventilated, and then the windows and doors must be tightly closed to prevent drafts.
It is necessary to allocate a special place on the floor for marking and cutting sheets, as well as for lubricating them with glue. The features of gluing wallpaper of various types and in different rooms will be discussed in this article.
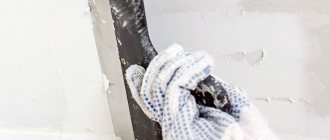
Walls and ceilings must first be cleaned of old coating.
Where to begin?
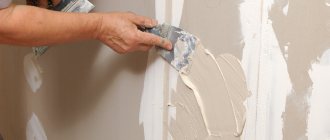
Before gluing wallpaper, you need to properly prepare the wall surface. The accuracy and durability of the repair will depend on pre-treatment.
- Cleaning walls from old coating
We recommend: Is it possible to repair a spring mattress at home?
If old wallpaper is completely or partially left on the walls, it must be removed. Otherwise, under the influence of moisture and glue, pieces of paper will swell and move away from the surface along with the new coating.
The work is carried out as follows. The wall is thoroughly moistened with a warm soapy solution, using a piece of cloth or a spray bottle. After the paper gets wet, it is cleaned off with a knife or spatula.
It is much more difficult to clean a painted wall. To do this, you can use a grinder or drill with a special attachment, but it is still better to treat the surface with chemical solvents.
- Leveling the surface
By removing the old wallpaper, you can see the condition of the treated surface. Cracks and irregularities are smoothed out with putty. If the walls are too crooked, you can level them with plaster or drywall.
After leveling, the wall surface should be cleaned with fine sandpaper. This will get rid of sand and plaster particles that may appear under the new coating layer.
- Primer
To fix the putty and improve adhesion, the surface of the wall is treated with a primer, for which you can use the selected wallpaper adhesive or purchase a composition created specifically for these purposes. After applying the primer, the walls must dry for at least 24 hours.
Where to start gluing wallpaper on the ceiling in a room?
First of all, you need to decide where exactly you plan to hang the wallpaper. If such finishing will be done throughout the entire room, including the ceiling, then you need to start there. In this case, two methods of wallpapering are used (photos show the sequence of work):
- from the wall;
- from the center of the ceiling.
The first method is considered simpler, but it is effective in the case when the wallpaper is without a pattern. These are the types of fabrics that are most often used to cover ceilings.
On a note! Before you start gluing, it is recommended to watch a special video on how to properly glue wallpaper, where to start work and how to match the pattern on the ceiling.
Ceiling decoration has two methods of wallpapering: from the wall and from the center.
If wallpapering requires the need to follow patterns, then it is recommended to start working from the center to the sides - in this case an equal number of solid strips will be used. After pasting from the center of the ceiling, the pattern will be located symmetrically, which will ensure its correct visual perception, since the outer strips will be the same width, which will create a natural and harmonious look.
In case of gluing from the center, it is necessary to mark the entire ceiling. To find the central point, just break the ceiling diagonally with a thread. The intersection of the threads clearly indicates the center. From this point it is necessary to mark a distance equal to half the width of the strip. Usually this is 26.5 cm - half of a standard strip measuring 53 cm. The first strip will lie between the markings, and the rest of the pattern will “dance” from it.
If wallpaper is glued from the wall, then you need to draw a strip 50 cm wide, which should be clearly perpendicular to the window. The first canvas is glued along this mark, and the remainder near the wall is removed with a construction knife.
Preparatory stage
First, everything in the room that can be removed is removed, including door frames and baseboards, if possible. They also remove sockets and switches, closing the boxes with wires with plugs - plastic or wooden.
You also need to know how to glue wallpaper correctly
Turn off electrical outlets
When working with electricity, we de-energize the room and do not turn it on until we are finished. It is advisable to carry out all work, including wallpapering, with the power turned off. The work is “wet”, and water or glue can get on the wires and short out. If the wiring is done according to all the rules and there are protective circuit breakers, this is not a big deal. They'll just turn off the power and that's it.
If the wiring is still done in the old way, it can be dangerous. The worst part is that in this case there is often no way to turn off the power in a separate room. Only in the entire apartment or, at best, in half of it. Then the solution is to remove the power wires from the sockets and switches (with the power off, of course) and carefully insulate the ends, then hiding them under plugs. Then you will have to unwind them and put them back in place, but it will be safe.
Lighting during work is temporary - extension cords are pulled from other rooms and portable lamps are turned on. Once you have dealt with electricity, you can move on.
If the walls are just leveled and puttied, you don’t need to do anything other than primer. But if they have an old coating - wallpaper or paint - they will have to work. First, remove the previous finish.
Cleaning off old wallpaper
If wallpaper is pasted on the walls, pry it up in a random place with the corner of a spatula, then pull it by the bent corner, tearing it off. If you're lucky, entire strips come off, sometimes several meters long in a single strip. But more often it comes out in small fragments. First, they remove everything that comes out “dry”. If it’s really difficult and in small parts, take a bowl of water and a roller and wet the walls in this way. To make them come off easier, you can add dishwashing detergent to the water.
Things don't always go so well
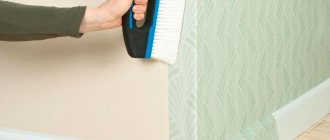
If the wallpaper is paper, water is simply applied to the surface. If they are vinyl or with some other durable film, first they break through the film. This can be done using a spiked roller, or with a brush with metal bristles. The main thing is to break through the film so that water can be absorbed into the base - paper or non-woven fabric - and soak the glue. Sometimes you need to wet the wallpaper several times to make it come off easier.
Next, the steps are the same as with paper ones: pry them with a spatula and tear them off. Sometimes this technique of tearing off pieces is ineffective. It works faster if you scrape off the soaked finish with a spatula. Then scrape the blade along the wall at an acute angle. In general, it doesn’t matter how, but the old wallpaper must be completely removed.
Removing paint and whitewash
You also have to work with a spatula, scraping off centimeter by centimeter. The work is monotonous and rather tedious, and also dirty. There are several ways to speed things up.
Oil paint on concrete
There are actually two options: chemical and mechanical. Chemical - these are special paint removers. The composition most often looks like a gel. They are applied to the surface and, after some time, (indicated on the packaging) it rises with bubbles or begins to shrink. The paint has softened and can be removed with any spatula.
This is what the paint looks like after the “work” of washing
Everything happens quite simply, but there are two “buts”. First, the price of the wash is quite high. Secondly, the fumes are clearly not useful. You need to work in a ventilated area, but do not let the remover dry, otherwise there will be no effect. And still, even with ventilation, sometimes my head hurts. So a respirator won’t hurt, and gloves are a must.
The mechanical method is not just a spatula. This will take a very long time to scrape. Use a grinder or hammer drill. The grinder has brushes made of metal wire. You can try to remove it like this. The method works, but not always or it is too slow. Then you can take a hammer drill and a chisel, and holding the chisel perpendicular to the surface, move it along the wall without deepening it. The paint bounces off quickly. After such a “shock” treatment, all that remains is to clean off the residue with a spatula.
Water-based emulsion, whitewash or paint on gypsum plaster
Removing this type of paint on walls is no easier. You can scrape it off, just very, very slowly. The solution is very simple: again water and a special paint scraper. You can buy it at a hardware store. Immediately take several spare blades: for example, the kitchen needs three or four of them.
Coat the wall well with water. Brush or roller, several times possible. Then you leave it to soak. And then you start cleaning with a scraper. The paint just pops off. It is only important that the wall is well wet.
Read how to choose wallpaper for the corridor and hallway here.
Sealing irregularities
Here you will first have to assess the condition of the walls. First you need to remove all the nails and screws, remove chips and repair cracks. Then examine the results. If the walls are more or less even, there are only small defects, you can get by with occasional leveling. Only cracks, dents and chips are repaired. They can be covered with finishing putty. Just before leveling, completely clean the wall of dust and pieces of wallpaper, and then cover it with a primer (with a wall roller and a brush in the corners).
If the wall has been “treated” with a hammer drill, you cannot do without full putty of the entire wall. Mostly today they use gypsum putty. First, apply a layer of primary or starting. It has a coarser grain and the layer can be up to 3-5 mm. This composition is used to level out the main unevenness, trying to achieve a smooth surface. After drying, they pass through a special mesh, removing any unevenness or sagging that may exist.
Afterwards finishing putty is used. It is very plastic and is applied in a thin layer - up to 1-2 mm. After this, the wall becomes smooth (after the irregularities have been smoothed out with a mesh, only with a smaller mesh).
Primer of walls
The second layer of primer is applied after puttying. It forms a film on the surface that reduces the absorption of the glue and also improves adhesion. For wallpapering, you can use a thinner wallpaper glue as a primer. Each pack has a table indicating the amount of water for gluing and priming. We dilute the glue in the required proportion, wait for it to be ready (also on the package) and cover the walls with the composition. The priming technique is the same: first go over the corners with a brush, then with a roller on smooth surfaces.
In the video, for some reason, the use of primary putty is called plaster, but otherwise the sequence of actions is presented correctly.
The rules and methods for combining wallpaper are described in this article.
Where should you start gluing wallpaper on the walls in a room?
When decorating walls with wallpaper, there are several options regarding where to start gluing. The specific situation will tell you how to do this correctly. Be sure to consider the type of wallpaper used. Modern coatings are usually glued end-to-end in one of the following ways:
There are several options for wallpapering walls: from the middle of the wall, window, door, corner.
- from the middle of the wall;
- from the window;
- from the door;
- from the corner.
Before starting work, make marks perpendicular to the floor, which are applied using a level or plumb line. There is another gluing method - diagonally. To do this, using a stretched thread, draw a line from the top corner to the diagonally opposite one. The wallpaper is glued obliquely, following the intended line. It is better not to use this method for novice craftsmen, since only experienced builders can do it.
In cases where wallpaper with a pattern is purchased, difficulties may arise in all options for perpendicular pasting. You need to choose the most inconspicuous place, for example, above a window or door - this is where to start gluing the wallpaper correctly if it is difficult to join the patterns.
The method of wallpapering a window is quite simple. It is necessary to measure the height of the room, add 10 cm to the resulting value for allowances for each strip. Next, the canvases are cut (with a comparison of the pattern). The first strip is glued according to the perpendicular guideline. Subsequent sheets are glued sequentially, usually counterclockwise. The owners themselves decide where to start gluing wallpaper in the room . Video tutorials, of which there are many on the Internet, will help you do this correctly.
The method of finishing wallpaper from a window involves gluing it counterclockwise.
How to properly and where to start gluing wallpaper
It is recommended to glue combined wallpaper from the middle of the wall. The same method should be used in the case of making a wall panel from wallpaper, when it is necessary to maintain clear symmetry in the design. This type of pasting will be discussed in detail later in the article.
Helpful advice! It is better to glue wallpaper over sockets from which the casings have been previously removed. Holes of the required size are cut after the glue under the wallpaper has dried. It is also recommended to trim excess parts of wallpaper near slopes, above windows and in other difficult places after the glue has dried.
The approach to the door should be symmetrical, so the strip should be cut vertically in half to the height of the doorway and glued on both sides. Then the wallpaper is adjusted from above the door.
If, when discussing the question of where to start gluing wallpaper , a decision is made to start working from the corner, then it is important to take into account a number of nuances. Firstly, perfectly straight corners are very rare. You can check the evenness using a plumb line or level. You need to draw a straight line along the perpendicular in the corner and start finishing the wall from there.
It is recommended to glue combined wallpaper from the middle of the wall.
Secondly, experts do not recommend gluing a single strip in the corner, since after drying, distortions or folds may form on the canvas, which will subsequently lead to inconsistencies in the design. In order for the wallpaper to fit correctly in the corner, you must adhere to the following recommendations regarding its finishing:
- You need to choose the most inconspicuous corner in the room from where you should start gluing the wallpaper.
- The corners should be carefully coated, since this is where wallpaper most often comes off.
- Corners are a favorable place for mold to grow, so before you start gluing the walls, they need to be treated with special agents - fungicides.
Useful tips
Recommendations to help simplify the gluing process:
- It is better to paste wallpaper behind radiators and vertical heating pipes right away, while you have fresh energy, so as not to suffer later.
- Before work, you need to turn off the power to the apartment, remove the covers from the sockets in order to glue the canvas directly onto them. After the wallpaper has dried, the holes are carefully cut out and the socket housings are put back in place.
- You can seal uneven joints near the ceiling using borders.
- When working with external corners, it is good to use a special plastic corner that matches the color of the trim.
USEFUL INFORMATION: Which wallpaper is best for a children's room?
Choosing the right “reference point” and strictly vertical orientation of the stripes are the key conditions for an accurate and high-quality finish.
What wallpaper to choose: density, texture, color of material
To decide on the choice of wallpaper for a particular room, you need to take into account a number of significant factors, among which are the following:
In dry rooms with smooth walls, it is permissible to use any type of wallpaper.
- purpose of the premises;
- condition of the wall or ceiling;
- room humidity;
- area of the room.
Based on the listed requirements, it is important to note that in dry rooms with smooth walls it is permissible to use any type of wallpaper. Only after the desired option has been selected can you decide where it is best to start gluing wallpaper. In rooms with high humidity and high traffic, it is better to use vinyl products.
There are different types of wallpaper on the modern construction market, and each of them has its own characteristics:
In rooms with high humidity and high traffic, it is better to use vinyl products.
- Paper, which, in turn, are divided into duplex and simplex. They fit perfectly even on the most complex and hard-to-reach surface, so they can be combined with other types of wallpaper.
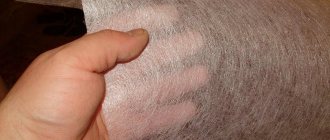
- Non-woven wallpaper has earned popularity due to its texture, reliefs with a dense structure, as they can perfectly hide unevenness on the surface. They have different external coatings.
- Vinyl wallpaper is a dense and very durable product, usually on a non-woven backing. They are glued to walls that are susceptible to all kinds of damage and contamination.
- Fabric or textile canvases are the most expensive type of wallpaper. They are perfect for a bedroom or living room, and will also help disguise minor mechanical damage on the wall.
- Liquid wallpaper in its structure and method of application is more similar to decorative plaster. They can be used in any room.
Non-woven wallpaper has earned popularity due to its texture and reliefs with a dense structure.
Features of preparing walls and ceilings for gluing
Non-professionals need to take into account that the surface to be pasted must be prepared. For this:
- Remove dirt and remnants of old decorative coating.
- They putty the surface, eliminating cavities, cracks, and other irregularities.
- Primed. It is easier to apply the primer with a soft roller.
- Wooden walls are treated with antiseptic disinfecting compounds.
The primed surface must dry completely. Only after this can you start gluing.
Nuances depending on the surface
The table shows the types of surfaces on which you can paste wallpaper, but you need to take into account a number of features:
| Surface type | How to glue, what needs to be done for this? |
| Painted walls | The paint is completely removed. The procedure differs depending on its type: water-based, oil-based, acrylic, latex, water-dispersion. |
| Drywall (GKL, GVL, GKLV) | The joints are puttied; it is not necessary to putty the surfaces. |
| OSB board | It is taken into account on which side the laminated coating is applied, on which the wallpaper does not stick. |
| Plaster | Primed. But if it is plaster or other decorative, textured, then it needs to be removed and the wall treated as described earlier. |
| putty | After impregnation of the putty walls with primer, you can begin gluing. Latex finishing putty is removed. |
| Whitewash | Whitewashed walls are washed off until no traces of lime remain on the surface. |
| Plywood | You can glue paper wallpaper and paper-based materials without a primer. |
| Fiberboard and hardboard | The material does not have sufficient strength, which does not allow covering it with wallpaper. |
| Fiberglass | It is removed because it is a suitable base. |
| Old wallpaper | It is better to remove and treat the wall as required by the gluing technology. Instructions for removing wallpaper. |
| Concrete walls | It is enough to prime it if we are talking about a flat surface. Sinks and joints are puttied. |
| Plastic panels | The frame is dismantled. Plastic does not have the ability to hold a load. |
| Betonkontakt | This polymer coating is specifically designed to provide adhesion. |
| Wooden surfaces | The lining or timber will have to be sewn under the plasterboard frame. |
| Glass | Smooth and cannot be used as a base to be wallpapered. |
| MDF panels | It is better to abandon the idea, since the material has weak adhesion. |
| Cork | The cork covering is removed because it is soft and cannot guarantee the safety of the wallpaper under mechanical stress. |
| Styrofoam | The material does not have sufficient strength and must be dismantled. |
| Penoplex | Glue does not provide sufficient adhesion. |
| Tiles (tiles) | Completely dismantled. |
| SIP panels | The surface, if necessary, is puttied at the joints and primed. |
| Clay walls | They are treated with special impregnations to impart the necessary strength. |
Room design with wallpaper: rules for choosing products for different rooms and combining them
When choosing wallpaper for a room, you must not only be guided by price and appearance, but also take into account their physical characteristics.
On a note! Finishing on a non-woven basis will not shrink after drying, and will also perfectly hide small unevenness. Another advantage of non-woven wallpaper is the ease of gluing, since according to the technology, the glue is applied only to the wall.
The walls of a bedroom or nursery should “breathe”, so the ideal option is paper wallpaper. Their main disadvantage is their short service life. An alternative to paper covering can be textile wallpaper, but they are much more expensive.
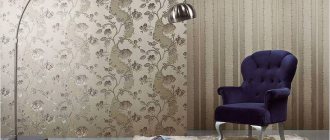
A good option for the living room is silk-screen printing. Its shiny surface will give the room respectability. The color should be chosen in accordance with the furniture; large patterns and bright colors are inappropriate here. It is better to choose calm shades.
A good option for the living room is silk-screen printing; its shiny surface will give the room respectability.
Vinyl wallpaper on a non-woven basis has increased strength and, as a rule, a water-repellent effect, so they are resistant to mechanical damage and all kinds of dirt. They can be cleaned and washed, making these products ideal for kitchens and hallways.
When creating a modern interior design, different wallpapers are often used in the room. Combining different coatings not only in color, but also in texture will help create a unique decor on the walls. By using different wallpapers, you can divide the room into different zones. Vertical or horizontal delimitation using companion wallpaper is also quite popular. The photos show the original version of their use in the form of inserts.
Combination of technology and design: wallpapering of different types
Different types of wallpaper are glued differently. For example, it is better to glue paper sheets overlapping and start working from the window. To visualize where to glue the wallpaper from, you just need to stand with your back to the window. The wallpaper should first be glued on the right side (towards the doors), and then, by analogy, on the left. The light from the window will hide the overlaps, so they will be invisible when entering the room. In a room without windows, it is better to glue from the doors; if there are several doors, then from any of them.
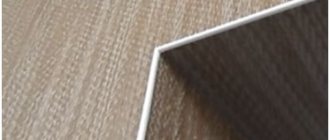
If the chosen wallpaper option is non-woven or non-woven based, then they must be glued end-to-end. Where it is better to start gluing wallpaper in this case practically does not matter. You can start working from a window, from a door, from a corner or from the center of the longest wall. As an exception, wallpaper can be placed horizontally. This is a rather bold decision that will help create an original interior.
You can start gluing non-woven wallpaper from the window, from the door, from the corner or from the center of the longest wall.
Another option is combined wallpaper, where the lower part is glued horizontally and the upper part vertically. Thus, a fantasy pattern will come out, but in this case it is necessary to carefully select the color and texture of products of both types. This design is not only original, but also practical. For example, in a hallway the lower part is more susceptible to contamination, but with this method of pasting it can simply be replaced, leaving the top unchanged.
Where to start gluing wallpaper in a children's room, bedroom or living room
Features of gluing concern not only the type of wallpaper, but also depend on where exactly they are glued. When deciding where to start gluing wallpaper in the room, you need to pay attention to the presence of any large landmark in the room and start finishing work from there. This could be a corner, window or door. It is important to determine the maximum and minimum height of the walls based on preliminary measurements in different places. The first strip must be glued taking into account the average indicator.
Helpful advice! The peculiarity of wallpaper on a non-woven basis is the thickness of the canvas, so gluing them overlapping is unacceptable - only end-to-end.
If the room has a balcony door, and the distance from its door frame is very small, then you can choose the most distant corner. Since there are practically no perfectly straight corners, wallpapering must begin after making vertical marks on all walls.
It should be noted that there is no single algorithm for decorating walls with wallpaper in different rooms.
It should be noted that there is no single algorithm for decorating walls with wallpaper in different rooms. A special approach in each individual room is important here. A particularly popular method among craftsmen is to start work from the entrance doors and glue the wallpaper in the room in two directions, or move clockwise and place the strips from left to right.
Thus, when gluing wallpaper in living rooms, it is necessary to follow the joining rules. Then the joints, even when exposed to direct rays of light, will not be noticeable, and the surface of the wall will take on the appearance of a solid canvas.
Glue preparation
Glue is often included with a specific type of wallpaper, but if it is not available, choosing the right one at a hardware store will not cause any problems. Instructions for its preparation are indicated on each package, and, as a rule, you need to dissolve the powder in a certain volume of water, stirring it all, and after some time stir again, after which the glue is ready. At the same time, some experts recommend adding a little PVA glue to the composition to increase the reliability of wallpaper gluing.
It is worth noting that a special glue is used for vinyl wallpaper; for non-woven and paper wallpaper, you can use glue for vinyl or non-woven wallpaper. But for vinyl, it is better not to use glue intended for gluing non-woven wallpaper. In this case, you can choose a glue option so that it also prevents the formation of mold and mildew.
Where to start gluing wallpaper in the hallway: tips and nuances
When deciding where to start gluing wallpaper in the hallway, you must take into account that this room has a number of significant differences from other rooms. The main one is the lack of windows. In addition, there are more doors, openings and corners here than in any other room - both internal and external. Often the corridor is decorated with arches. Therefore, it is better to start gluing wallpaper from the farthest inner corner.
When the angles are straight, the work will go quickly and easily. Otherwise (which happens quite often), the order of work will be as follows:
For wallpapering in the hallway, it is advisable to use a special composition with increased adhesiveness.
- On the wall opposite the entrance doors, you need to make a vertical mark using a building level or plumb line at a distance of 10 cm from the nearest corner and stick the first strip.
- The next strip should be glued so that its edge touches the adjacent wall, where a vertical line is also applied.
- If the room has complex geometry, then a vertical line must be drawn for each strip.
To apply wallpaper in the hallway, it is advisable to use a special compound with increased adhesiveness, and the walls should be thoroughly primed beforehand. The adhesive solution is not applied to the wallpaper; they are applied dry to the wall so that their edges exactly coincide with the vertical mark. The edge is pressed and the canvas is lightly ironed in the middle with a special spatula. Next, the surface is smoothed in the direction from the middle to the edges in a Christmas tree pattern.
Important! Applying an adhesive composition simultaneously to walls and canvas can lead to complications during work. Bubbles and wrinkles often appear on the surface, which do not always disappear even after complete drying. It is best to follow the manufacturer's instructions that come with the wallpaper.
Applying an adhesive composition simultaneously to walls and canvas can lead to complications during work.
Required tools and materials
In order not to be distracted while searching for tools while working, you should prepare everything in advance. So, for work you will need:
- ladder;
- tray;
- capacity;
- knife cutter and wallpaper scissors;
- narrow metal spatula;
- putty knife;
- plastic spatula / wide rubberized roller;
- small rubberized roller;
- brush;
- roulette;
- pencil;
- level.
The necessary materials are wallpaper and adhesive.
Glue is chosen that is suitable for the type of wallpaper. On the packaging, the manufacturer indicates the consumption of the composition in order to correctly calculate how much solution is needed.
In order not to be distracted while searching for tools while working, you should prepare everything in advance.
Where to start gluing wallpaper in the kitchen, taking into account the specifics of the room
The peculiarities of the kitchen space make the process of wallpapering a little more difficult. The following nuances should be taken into account:
- the need to equip the kitchen with household appliances;
- allocating space for a kitchen apron;
- taking into account the location of doors and windows;
- division of the room into working and dining areas.
For the kitchen, the most suitable wallpaper options are vinyl or special canvases for painting. The ability to change the color of wallpaper and the large width of the rolls are the main advantages of canvases for painting. By using different types of products, you can successfully zone your kitchen.
The procedure for carrying out the work is practically no different from the process of gluing canvases in other rooms. The wallpaper must be properly glued, since the walls in the kitchen are exposed to increased temperature and humidity.
For the kitchen, the most suitable wallpaper options are vinyl or special canvases for painting.
Certain gluing rules will help ensure reliable fixation. To do this, you need to apply glue to the wrong side of the wallpaper, then fold the edges into the middle and fold the strip again. Over the course of 10-15 minutes, the glue will be thoroughly absorbed into the surface, after which you can begin gluing. The first strip is applied to the vertical mark and smoothed using a roller or rubber spatula.
Features of using wallpaper in room design: designers' recommendations
Designers advise to be especially careful when choosing wallpaper, especially if they are intended to be combined in one room. When the wallpaper is chosen with taste, the house will acquire the necessary comfort and beauty. You can achieve the desired result by following the recommendations:
- Harmony in the design of a room can be achieved by combining light wallpaper with a coating of the same shade, but with a bright pattern.
- You can create a bright accent in the room by decorating one wall with wallpaper that will stand out in color, but not in texture.
- If you choose the option of horizontal zoning, then you must use separate borders, moldings or a wide edging.
- In a children's room, you can use a patchwork combination.
- Furniture upholstery, curtains and accessories must be chosen taking into account the color and texture of the wallpaper.
- It is better to buy wallpaper, materials and decorative elements in one place.
- Pasting corners with wallpaper in contrasting colors will help to visually even out uneven areas.
You can create a bright accent in the room by decorating one wall with wallpaper that will stand out in color.
If you decide to glue the walls yourself, then you need to take into account the following nuances:
- repairs should not be carried out in a hurry;
- calculations based on careful measurements will help reduce financial costs;
- proper organization of preparatory work will significantly reduce repair time;
- do not neglect the instructions that come with the wallpaper and adhesive mixtures;
- in northern rooms it is better to choose wallpaper in light and warm colors;
- It is not recommended to ventilate the room for 24 hours after wallpapering.
On a note! In the design of the walls, it is allowed to use no more than 5 colors, and in small rooms you should not glue wallpaper with a large pattern.
The design of a house or apartment must be approached with great responsibility. When starting to decorate the walls in any room, you need to carry out preparatory work, choose wallpaper and decide where to start gluing it. Following all the rules and instructions will help you avoid common mistakes and create comfort and coziness in your home with your own hands.