Glue wallpaper in the corners of the room - necessary materials and tools
Before you begin wallpapering, make sure you have all the necessary equipment on hand. Required tools include:
- Pressing spatula;
- Synthetic fiber roller;
- Roller for wallpaper seams, standard or conical (for vinyl);
- Stationery scissors for trimming wallpaper;
- Knife with a break-off blade;
- Plumb line for marking;
- Wallpaper brush;
- Painting spatula;
- Painting tray for preparing the adhesive mixture;
- Maklovitsa for applying glue;
- Measuring instrument – tape measure, stationery or folding ruler.
From what angle should you glue the wallpaper?
Gluing wallpaper in the corners of the room - when you first take on the task of wallpapering an apartment yourself, you may get confused already at the first steps, when there is only a bare wall in front of you. Beginners ask questions about which side to put the first roll on correctly and whether the direction in which you move during the gluing process plays a role. Experienced users confirm that first of all you need to complete wallpapering the ceiling if you do not intend to finish it using another method. Once you're done with the hardest-to-reach surface, it'll be easier to focus on the adjacent walls without worrying about accidentally touching the fresh wallpaper. At the same time, both the ceiling and the walls require individual approaches to the selection of areas and direction for starting gluing. Wrong decisions at this stage will seriously complicate further finishing work, especially if you have no experience. Recommendations for solving this issue with your own hands are as follows:
- On the wall. When it comes to lap adhesive, the only correct choice is to apply the first strip near the window. This is done so that in the light of the sun the seams between them are not visible. In the case of wallpapering end-to-end, in addition to the window, starting positions are allowed at door frames and corners. Also take into account if the design of your facing panels includes drawings or complex patterns, which must match those on adjacent strips.
- On the ceiling. With this surface the problem is easier to solve, because All experts unanimously point to the need to glue the first roll strictly in the center of the ceiling. This way, it will be possible to adjust the remaining canvases so that they go symmetrically to the walls on either side of the central one.
Features of trimming wallpaper in corners
In order to get a perfectly even seam in the corner, you need to properly trim the excess.
- After the wallpaper is pasted to the wall, a straight metal ruler is applied, it can also be a spatula or a rule. You can use a level to keep the cutting line straight.
- Using a sharp utility knife, cut off the excess along the edge of the ruler, after which the top layer of wallpaper will come off.
- Carefully pry up the bottom layer of wallpaper and remove it in the same way.
- The canvases are coated with glue and pressed tightly to the corner. As a result, the coating fits tightly against each other.
Gluing wallpaper in corners is not that difficult, but it requires special care and precision. Today there is a finishing method that allows you to do the job without any joints at all, namely liquid wallpaper. They are applied in an even layer and do not require such difficulties as adjusting the pattern, width, accuracy in rounded places and other nuances.
Gluing wallpaper in the corners of the room - nuances of preliminary preparation
Before you start gluing wallpaper in the corners of the room, there are very important steps to prepare the rough working surface. Read also: “Designations on wallpaper”
Regarding angles, it will be very important:
- when working above and below - provide for the installation of skirting boards last, after the wallpaper, then:
- the task of adjusting the joint simply disappears by itself, the edges will be covered with skirting boards, ensuring a perfect joint;
- in this situation, if we take into account the standard room height of 2.5 meters, the length of the wallpaper is 10, and the height of the baseboard along the wall is 5 cm, then the roll is cut into 4 pieces of 2.5, which is enough for four verticals, and without any waste ; otherwise, taking into account the allowances, you will have to cut in pieces of more than 2.5, which means that 3 pieces will be used and one shortened piece will remain neither for the village nor for the city;
- It is very useful to use removable skirting boards - this will solve the problem of joining if you want to change the wallpaper in the future;
- when working on internal corners, they must be reinforced with non-woven paper tape, which is glued directly to the putty, and also putty on top;
- on external corners - it is better to carry out more thorough reinforcement using metal or plastic corners, which are secured with screws; The corners are attached to putty, and the top is also puttied.
Helpful advice! If your angles are not right, we recommend using plastic corners; they are easier to select the required angle. There are quite a few options for reinforcing corners, but given that later we will slightly trim the wallpaper at the corners, it is better to use solid corners, without perforation.
- If we talk about the surface as a whole, then it should be:
- thoroughly dried
- aligned
- primed,
- puttied and
- sanded - at least with sandpaper by hand, but better with a machine.
The instructions for gluing wallpaper require a strict definition of the vertical, from which the first roll will go
How to properly prepare a corner for pasting
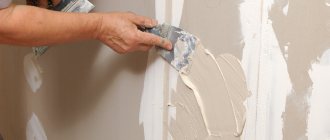
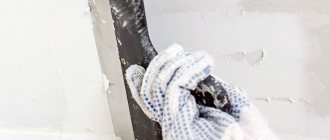
At the stage of preparatory work, the corner, like other surfaces, must be cleaned of dirt, dust and remnants of the previous finishing layer. The latter is removed entirely with a scraper, including old wallpaper, traces of whitewash, plaster or a layer of paint. If there are unevenness in the corner, such as chips, pits or cracks, surface treatment is required to level it. For this purpose, primer mixtures are used, which are evenly applied over its entire area to ensure high-quality adhesion to future wallpaper. The process will require professional tools in the form of an appropriate paint roller and a priming brush in order to reach those hard-to-reach narrow areas. After finishing the surface treatment, you need to let the primer dry, which will take from 1 to 12 hours, depending on the brand of the mixture used. The latter can be clarified by reading the manufacturer’s instructions on the packaging of the composition.
Method No. 1.
Using a rule or a metal profile and a plumb line, find the most protruding point of the adjacent wall. It is important that the profile fits closely to the wall and must be kept strictly vertical.
The corner spatula must be applied to the found point, and the profile must be attached to the spatula. Use a plumb line to check that the profile is strictly in a vertical position, then notches are made on the wall for the dowels.
Then use a hammer drill to drill holes in the wall, install dowels and secure the profile with self-tapping screws.
The next step is to apply putty to a corner that has been previously moistened with water. Using an angle spatula, putty is applied and an even angle is formed; excess gypsum must be removed. When the putty layer has dried, it is sanded using zero grade sandpaper.
Method No. 2.
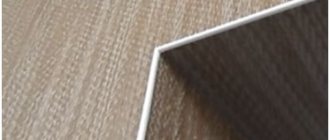
A special metal or plastic perforated corner is installed in the corner, with a mesh attached to the edges. The counter-shultz is mounted strictly vertically and fixed with putty applied to the mesh. When the putty dries, it must be sanded.
Using these leveling methods will help prepare a perfectly flat surface for wallpapering corners.
Preparing corners
When wallpapering corners, it is difficult to ensure that they fit tightly to adjacent walls without folds, air pockets and excessive tension. The joints of adjacent walls are to blame for this. They are either uneven, zigzag-shaped if the walls are plastered, or filled up if the house is panel.
Therefore, an important task is to align the corners before starting work on decorating the room with wallpaper. Professional builders have several methods for this. The most common ones are listed below.
Method No. 1. One of the walls is strictly vertical, control is carried out with a plumb line, a rule is applied closely, or even better - a metal profile. Thus, the most protruding point of the surface of the adjacent wall is located.
An angled spatula is applied closely to the point, and a profile is applied to the spatula. Again, using a plumb line, the profile is brought into a strictly vertical position, after which 3-4 marks are made on the wall for installing dowels. Holes for them are drilled using a hammer drill, after which the profile is attached to the wall with self-tapping screws.
The corner is wetted with water, after which gypsum putty is applied to it. Using an angle spatula, pressing against the profile, a perfectly even angle is formed. Excess plaster is removed and the procedure is repeated at the next corner.
After the putty has dried, it is treated with zero-grade sandpaper.
Method No. 2. For this method, you will need a counter-shultz (plaster corner), which is a metal or plastic corner with a mesh attached to the edges.
It is installed in a corner strictly vertically (a plumb bob or a laser level will help) and attached to the wall with putty applied over a mesh. After complete drying, the putty layer is sanded with a special mesh or sandpaper.
The above methods for leveling corners allow you to solve any violations of the geometry of the joints of adjacent walls.
How to glue wallpaper in corners
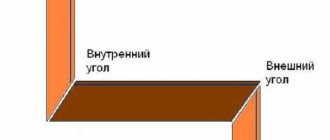
In order to properly cover corners, you first need to understand their types. The angles are:
- Internal - each room has at least several such corners (in the standard layout - four). A very important factor is the correctness of these areas. If the angle is uneven, has differences, or “sinks,” the wallpapering method will differ from the standard one.
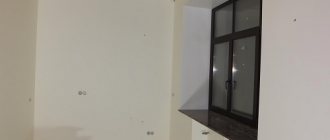
- External corners in apartments began to appear more often with the advent of drywall - these are a variety of niches, arches, columns and other decorative elements. This also includes door and window slopes, if, of course, it is planned to install wallpaper in these areas.
Easy way
The easiest place to wallpaper is in the corners of the room. Unfortunately, these are quite rare. These are either plasterboard structures or walls prepared for painting (plastered perfectly smooth and even).
In this case, the wallpaper is glued in the same way both in the inner and outer corners - they are simply wrapped in a single piece of wallpaper. The main thing is not to stretch the coating; after drying, it can return to its original size and shape. If there are small wrinkles on the wallpaper, you can make several horizontal cuts in the corner. This will help to even out the coating, and the cuts will not be noticeable after drying.
Important! No matter how smooth the corner is, it is better not to use the method of covering it with a solid canvas if it is connected to an external wall. In corners located near external walls, condensation appears more often - the wallpaper can peel off and become deformed.
Standard method for gluing corners
It is safer to glue wallpaper in the corners of the room using the “overlapping” method. Its essence is as follows:
- After pasting the adjacent wall, measure the distance to the corner at three points.
- Based on the largest of the three values obtained, the strip is cut off - its width is equal to the largest number plus 2-3 cm for overlap.
- The wall is coated well with glue, especially paying attention to the corner (it is better to use a brush).
- The prepared piece of wallpaper is applied to the corner, aligning the joint with the previous sheet.
- The overlap formed on the adjacent wall is carefully pressed, tucking the wallpaper into the corner with a plastic spatula.
- For a tighter fit, the edge of the wallpaper can be trimmed - make short horizontal cuts every 5 cm.
- Trim the bottom and top edges of the wallpaper using a metal spatula and a sharp knife.
- From the narrowest point of the overlap, retreat about one centimeter towards the corner and make a mark.
- Focusing on the mark, draw a vertical line in this place using a plumb line or level.
- Prepare the next strip (if necessary, select a pattern).
- A strip is applied to the wall coated with glue, aligning its edge with the previously drawn line in the corner.
- Level the strip, expelling air and excess glue. Cut under the ceiling and near the floor.
Corner processed! They move on to gluing a flat wall to the next corner - repeat the procedure. In this way you can glue wallpaper in the outer corners of a room with different types of wallpaper.
Advice! Considering the considerable thickness of non-woven wallpaper, the overlap may be too noticeable.
In this way, you can paste over those corners that will be hidden by furniture or curtains, and choose another method for finishing the rest. You can also try cutting off only the top layer of wallpaper.
It is not necessary to glue the slopes with wallpaper; the video shows how they can be beautifully trimmed at the corners:
Corner cutting method
If the walls are to be painted, there should be no overlaps on them. Paint will make the thickening of the wallpaper too noticeable; another method will be needed here. This method is suitable for both internal and external corners.
The work is performed in the following sequence:
- Repeat the first seven points from the previous instructions - glue the strip with an overlap onto the next wall. Only in this case the overlap is made larger - 5-7 cm.
- A distance equal to the width of the roll minus one centimeter is retreated from the corner.
- Using a plumb line or level, draw a vertical line at this point.
- Cut a strip from the roll and apply it to the wall coated with glue, aligning the edge with the drawn strip.
- The second edge is placed on the previous strip with an overlap, the wallpaper is pressed and leveled.
- Carefully push the wallpaper into the corner with a spatula, leveling everything again.
- In the middle of the overlap, apply a metal ruler vertically, take a very sharp knife and, without breaking it, draw a line along the edge of the ruler. It is very important that the line is drawn in one motion.
- Remove a piece of the upper fabric, bend the edge of the lower one and also remove the excess.
- Both edges are coated with glue and folded end to end. You can pull the canvas a little in the right direction so that there is no gap or overlap.
- Roll with a roller for joints.
This method helps to make the connection of the canvases invisible. It also works well on external corners, in niches and on slopes.
Advice! It is better to use a small metal spatula 10-15 cm instead of a ruler
Due to the unevenness of the corners, the ruler may not fit tightly to the wall, and the cut will turn out crooked. The spatula must be moved along with the knife, avoiding breaks in the cutting line. How to properly trim wallpaper in the corners can be seen in the video:
How to glue an external corner (external)?
The protruding corner must be pasted over in the same way as the internal one, however, there are small differences that also need to be taken into account when working.
- The distance remaining from the pasted wallpaper to the adjacent wall is measured. 20-25 millimeters are added to the resulting figure.
- The segment is cut off taking into account the added 20-25 millimeters.
- Before gluing, the surfaces are treated with an adhesive composition.
- The straight edge needs to be glued to the wallpaper already fixed on the wall, the cut side with your own hands “enters” the adjacent plane.
- If necessary, small cuts are made in the place where the wallpaper extends onto another wall, smoothed out and pressed against the wall.
- A vertical strip is drawn on the adjacent wall at a distance of the just pasted cut strip plus 6-10 millimeters.
- After applying the glue, the strip is applied to the wall with its flat side to the marked line, going to the edge of the already pasted strip.
- The joints are coated with glue and ironed with a roller. After which the top layer is cut off using a ruler and the two layers are joined together.
Corners above and below
Everything here is quite simple, even if you can’t hide the material under the baseboards:
- we cut the wallpaper with an allowance higher (or lower) than the baseboard by 6-8 cm;
- glue and bend the allowance along the line of the plinth , which is convenient to do with a wide spatula;
- then, using a spatula as a guide, use a knife to cut off the entire length of the allowance;
If you were unable to hide the wallpaper at the corners at the top and bottom behind the baseboards, you have to make an allowance and then very carefully trim it
- the work must be done while the glue has not yet set ; this will allow a small residue of 1-2 mm to be carefully inserted behind the plinth line with a knife.
Step-by-step instructions: how to glue corners with wallpaper, initial stage
It all starts with the installation of plastic corners. They are fixed taking into account the geometry and texture of the walls in the room. To ensure that each corner is held tightly, the walls are first coated with putty.
The main thing is to properly coat the corners with glue, because it is in these areas that the wallpaper most often peels off later
The more tightly they are fixed, the fewer problems will arise at the pasting stage. After this, the practical implementation phase begins.
If the wall is characterized by even slight unevenness, then the strip of wallpaper is slightly trimmed in the corner. Experienced builders do not recommend covering every corner at once.
Once a certain angle for work is selected, further gluing proceeds as follows:
- Trim the required section of wallpaper;
- Carefully coat the entire width of the wallpaper with glue;
- Apply glue to the plastic corner that will be fixed to the wall;
- Fix the wallpaper on the wall;
- If it is decided to paste the wallpaper from left to right, then it is the left side that is applied to the inside of the corner;
- Carefully level the wallpaper in the corners using a roller.
Related article: Repairing cracks in the ceiling after repairs yourself
During the preparatory stage, it is necessary to apply putty to the wall. The purpose of this procedure is to avoid uneven areas when fixing the wallpaper. After this, the plastic corners are fixed. The next step is to fix the left edge of the wallpaper on the inner edge of the wall corner. In order to reduce the likelihood of errors during work, it is recommended to start work in one specific corner.
Gluing internal corners
Remember, the main rule for pasting corners is not to do it with one piece, so that one part of the solid strip is on one wall, and the second on the other. In this case, the non-woven wallpaper may stretch, and the result will definitely not hit you. This rule applies to both internal and external corners. The correct solution would be to cover each wall with a separate piece, which simply fit together correctly.
To glue correctly, there are several ways that will undoubtedly lead you to the expected result.
Option 1. One of the simplest methods is to overlap the wallpaper in the corner. Thus, one sheet is glued with a spacing of 1-1.5 cm, and the second exactly along the corner line, i.e. There is no gap between the wallpaper, and the angle is neat and visually even.
Attention! Non-woven wallpaper is quite dense and thick, so the cut will still be visible.
Option 2. This method is most often used in rooms where the walls are not quite right and are a little overwhelmed. The first sheet is pasted with an allowance on the adjacent wall, so as to cover the entire corner. The width of the overlap depends on how uneven the walls in the room are. The second one is also glued with an overlap, so that the design is not distorted or displaced. After this, use a level or any other flat object to press a clear line, and use a sharp stationery knife to make a precise cut. Then easily remove the top excess strip.
The bottom part will be more difficult to remove, but just peel back the glued top part and you'll be good to go. After this, reapply glue to the edges and carefully attach them in place. The whole procedure should be carried out as quickly as possible, and then you will get the perfect angle even on such uneven walls.
Option 3. One strip is glued to the wall with an overlap of about 2 cm. Then, using a plastic spatula, it is carefully driven into the depths of the corner. All folds and irregularities can be eliminated quite simply: you need to make several cuts and overlaps, thus eliminating the unevenness of the canvas and the wall.
Next, take a long metal spatula, press it tightly to the corner and carefully cut off the excess material in one motion. The second strip is glued in the same way and cut. If everything is done correctly and carefully, you will get a monolithic seam that will be almost invisible to prying eyes.
Some options can be seen visually here:
Standard algorithm
When planning the final part of the renovation, namely wallpapering, you need to take into account several points:
- How even and smooth are the walls and corners of the room? If the geometry of the room is ideal, that is, the walls are strictly perpendicular to each other, to the ceiling and floor, corners will not cause problems. If the distortion is a few millimeters - for example, the wall from corner to corner is 3.08 m long at the top, and 3.02 m at the bottom - it is easy to correct such unevenness by minimally trimming the wallpaper. If the difference is centimeters or the corner is “blocked”, that is, the line of intersection of the walls deviates from the vertical, you will have to try to bring the panels together normally in the corner and you certainly cannot glue a whole strip there. It is better to determine the correctness of the geometry in advance, using a laser tape measure/level;
- what type of wallpaper is selected. It is permissible to glue thin paper overlapping, this allows you to hide possible distortions and compensate for uneven corners. Thick vinyl and textured wallpapers can only be glued end-to-end, which means trimming will have to be done;
- Is there a pattern on the wallpaper and if so, what kind. Some ornaments require alignment only in height, in others – in width, in others – in both dimensions. For rooms with noticeably irregular corners and uneven walls, it is better to choose the option “for painting” - here there is practically no need for alignment, which significantly simplifies trimming and reduces material consumption;
- the type of glue used. Most industrially produced adhesives are transparent or translucent and do not leave marks on the front surface of the wallpaper. However, for heavy varieties and some special types of wallpaper, special adhesives are used, which can leave untidy streaks on the panel or change the color/texture of the coating. For difficult cases, the most “invisible” glue is selected, and it is better to check in advance how the wallpaper stained on the front side with this glue will behave.
Important: if the corners are clearly uneven, do not choose wallpaper with a pattern! Even very careful alignment will not allow you to make the corner even; the asymmetry of the ornament will be visible!
If the design is still desired, but the corners leave much to be desired, you can combine the finishing material, as shown in the photo above.
External corners
In addition to internal corners, any room also has external ones. Often these are window slopes or niches and protrusions that cannot be ignored. They have their own characteristics of pasting. With the help of small secrets, gluing will become easy, and the corners will be neat and beautiful. The algorithm for pasting external corners is as follows:
- be sure to eliminate all irregularities and chips. Remember, you must glue the wallpaper at a perfectly even angle. Only in this case will the corner line look beautiful. To do this, use plaster and primer;
- the first strip should be glued with a slight overlap of 2-3 cm. If the wall is uneven and folds have formed on the wallpaper, you need to make horizontal cuts, thus eliminating the unevenness;
- the second strip is glued end-to-end to the corner. Be careful, only an evenly attached canvas guarantees a visually even angle. Otherwise, even a straight wall will touch a curve;
- In order for the edges to stick better and to avoid air pockets, you need to carefully roll both sheets with a special rubber roller. Otherwise, the wallpaper may soon peel off the wall.
You can watch the video for some more tips and interesting solutions for correctly gluing wallpaper, including non-woven wallpaper, on uneven walls:
In the end, I would like to say that non-woven wallpaper, even on a non-woven base, is a fairly dense and practical material that is very easy to glue. It cleans well and will please the eyes of its owners for a long time.
Recommendations for choosing the right wallpaper
Wallpapers differ in many ways. Most often, the choice is made taking into account the type of stripes, the number of their layers, as well as the pattern and color. When selecting strips that will be glued to an uneven surface, several important points should be taken into account. Let's take a closer look at them.
Recommendations for choosing wallpaper for uneven walls
It is not recommended to buy wallpaper that has a clearly defined pattern. In order to hide wall defects, blurry patterns are best suited. You can also purchase material whose surface has lines diverging in different directions.
Important! For curved walls, choose rolls painted in bright colors. You should also remember that striped wallpaper is not suitable if the walls in the room are not level enough.
Liquid wallpaper does not have to be applied over the entire wall area. If desired, you can apply this material to the most problematic areas. When choosing rolls, you should also focus on the thickness of the material. In this case, the following pattern can be traced: the greater the thickness, the better. However, it is worth remembering that the weight of the strip depends on the thickness, so for such wallpaper you will need to use much more adhesive.
Features of wallpapering from different materials
In addition to the location of the main strip, the material underlying your wallpaper makes its own changes to the procedure for pasting a room. If in the past the only similar facing products were paper rolls, then the modern assortment of construction stores is noticeably richer. Several varieties of wallpaper have appeared on sale, the differences between which are not only in appearance, but also in technical characteristics. This is also reflected in the technology of gluing them:
- Paper. This material provides products with a minimum thickness, which requires gluing them to the surface immediately after treatment with an adhesive composition. Otherwise, the canvases may have time to get wet, which will affect their appearance and structural integrity.
- Vinyl. Moisture-resistant analogues are available with a relief surface, which gives them aesthetic properties and masks uneven walls. Before gluing, both the rolls of wallpaper and the surface to be glued should be treated with glue, and then allowed to dry - wallpaper for 10 minutes, walls for 15 minutes.
- Glass wallpaper. They got their name due to their high strength and the use of reinforcing components in the composition at the manufacturing stage. This provided the glass wallpaper with a high weight, which requires the selection of a special adhesive mixture and its preliminary application to the wall.
- Photo wallpaper. Due to their appearance, they require careful planning before gluing. In order for photo fragments on different strips to look harmonious on the wall, the latter needs preliminary marking. The rolls of photo wallpaper themselves need to be laid out in front of you in the correct sequence so as not to confuse the stripes.
- Non-woven. Moisture-resistant products with mineral fibers in the structure and an adhesive mixture on the inside, which does not require treatment with an adhesive composition. It is enough to apply the latter to the wall or ceiling, leaving it to dry for 15 minutes before applying the main strip.
- Fabric. These expensive canvases, like glass ones, require the use of special glue used in conjunction with fabric materials. The mixture is applied to the inside of the wallpaper and absorbed for five minutes. Gluing the fabric rolls themselves involves not only laying them on the surface, but also passing over them with a soft roller wrapped in a rag or towel. Beware of the formation of wrinkles, which often occur in such wallpaper due to the softness of the material.
How to glue non-woven wallpaper on internal corners
The first thing that needs to be said about gluing non-woven wallpaper in corners (both external and internal) is that you should not try to paste a corner with a solid sheet of wallpaper . In other words, do not try to cover both walls adjacent to the corner with one canvas. Otherwise, there is a fairly high probability that the wallpaper will “lead” in the corner, and the resulting wrinkles will be almost impossible to smooth out without trimming, which will certainly ruin the appearance of the wallpaper. But even if this does not happen, the curvature of the corner (and unfortunately, most of the corners in our apartments are curved) will affect the position of the canvas, and since non-woven wallpaper is glued end-to-end, all subsequent canvases will also have to be glued out of level.
The correct technology for gluing non-woven wallpaper on internal corners is as follows:
- We measure the distance from the edge of the last glued canvas to the corner and add 5 centimeters to it. A panel of exactly this width will need to be prepared for sticking in the corner.
We measure the distance from the edge of the last glued canvas to the corner
Since the angle can be curved, it is better to measure the distance at three points: the bottom, middle and top of the wall. For calculations, of course, you need to take the largest of the resulting values.
- When the panel of the required width is ready, carefully coat the wall and corner with glue for non-woven wallpaper. Please note that when gluing non-woven wallpaper, the glue is applied only to the walls.
- After the canvas is pasted, you should very carefully smooth the wallpaper in the corner and on the next wall using a rubber roller or a dry cloth.
Using a rubber roller or dry cloth, smooth out the wallpaper in the corner and on the next wall.
If the wallpaper “wrinkles” in some places, you can make several horizontal cuts at a distance of 5-10 centimeters from each other.
It is necessary to find the narrowest area and make a mark in this place
Most likely, due to the curvature of the corner, the width of the wallpaper overlap around the corner will be unequal. It is necessary to find the narrowest area and make a mark exactly in this place, retreating 1 centimeter from the edge of the wallpaper towards the corner. From the resulting point, measure a distance equal to the width of the roll and draw a vertical line through this point using a plumb line. It is from this that you will need to start gluing the next canvas.
Please note that this canvas must be glued “overlapping” the previous canvas.
- When both canvases are pasted, all that remains is to use a wallpaper knife and a metal ruler of a paint spatula to “trim the seam.” You can learn more about the “corner trimming” technology by watching the following video.
Video about corner trimming of wallpaper
It is very important to cut both wallpaper sheets “in one step”, since otherwise discrepancies may appear in the cut line.
To ensure that the cut is even and the wallpaper does not “stretch” under the knife? You need to periodically break off the dull tip of the wallpaper knife according to the marks specially applied to the blade.
- After trimming, all that remains is to remove the excess wallpaper. The top layer can be removed without problems, and the bottom layer can be removed by slightly unscrewing a small part of the top panel.
If you did everything correctly, the panels will form an almost imperceptible joint between each other, which remains to be carefully smoothed using a rubber roller.
Wallpapering the inner corners
To paste the inner corner, follow the following procedure.
- We measure the distance from the edge of the strip that was last glued to the wall to the corner. Add 2 cm to the resulting value. Cut the canvas, bend it according to the added allowance and transfer it to a wall coated with glue. The excess should go to the adjacent side. The pasted sheet must be smoothed with a roller or rag so that all the air comes out from under it.
- We also bend the second sheet by 2 cm and glue it on the other side of the corner so that the allowance overlaps the previously glued sheet. The correctness of gluing of this canvas must be checked using a plumb line. When smoothing the sheet, we try not to press those same few centimeters of allowance.
- We don’t need two layers of wallpaper, they will stand out, so we apply a long ruler to the corner and cut the layers along it with a construction knife. Then remove the excess topcoat.
- Having lifted the top layer, remove the lower sections, coat its edge with glue again and press it firmly against the wall, squeezing out the air. This method allows you to get a very smooth joining seam.
USEFUL INFORMATION: Decorating a living room with wallpaper: interior design
How to work in uneven places?
Most of the corners in the rooms are unfortunately uneven.
Care should be taken to align them at the renovation planning stage, but people do not always think about this problem. There are several secrets to hide uneven corners :
- Choosing non-woven wallpaper is the most flexible option.
- Coverings with a neutral pattern that does not need to be joined.
When gluing wallpaper in the corners, you need to make at least two layers : for this, those same 5 cm overlaps are made. Sometimes experts advise first gluing the corner with a narrow strip, and only then gluing the wide overlapping sheets. To do this, use a painting mesh.
Advice Another trick is to make small herringbone-shaped cuts at a distance of 5-10 cm from each other on a spade.
Traditional cutting method
To cut material for wall cladding, you can use a knife with special blades divided into segments. This tool allows you to easily cut material in different directions.
Attention
To ensure cutting with maximum accuracy, a special level is required. The latter is produced on the basis of alcohol. It is used as a ruler. But it’s easier to use the usual rule.
To trim the edges of unused material, you can use a sharp, medium-length scissor blade.
- To start cutting the material, the surface is first prepared.
You need to stick a special film of a given thickness (from 80 microns) onto it. This will be the ideal surface for coating the material with adhesive elements. Initially, the number of stripes is calculated, which is important to maintain. If the width of the material is 500 mm, then before cutting the perimeter of the room is measured (read how to calculate the required wallpaper along the perimeter and area of the room here). Let's say it's 10 m. - Now this value is divided by the width of the material: 10:0.5=20. This means that for work you will need to use twenty solid strips of material. Then it is important to pay attention to the length of the bundle. Its indicator is divided by the height of the ceilings (in this case, it is two and a half meters).
Rapport is taken into account for combining the canvases. This way we can calculate the number of whole stripes in the convolution. The required number of strips is then divided by the number of whole sheets in the roll. The result will be an indicator equal to the number of rolls.The classic roll length is ten meters. This way you can get up to four strips per package. To calculate the number of rolls, the number of solid layers needed for one room is divided by the number of sheets in the roll. In the example under consideration it looks like this: 20:4=5.
- From this indicator you need to subtract the area that will not be used. This is the opening for the window and door. According to general rules, they take up half a roll. Accordingly, you will need to buy four bundles of material. You can buy a few extra rolls as a supply.
- After the calculations, you need to find out the height of the upper internal covering of the room.
The height is measured from the floor surface to the top point. It is important to take such measurements in all corners of the room. Suppose there is a traditional number of corners in a room that have different heights. For example, the minimum indicator is 220, and the maximum is 260. Here cutting is carried out according to the maximum indicator (260).
The material must be cut depending on its label:
- no ornament;
- with a selected pattern that does not move;
- with a selected pattern that moves;
- cutting without additional ornament or design.
This is the easiest and most traditional cutting method. At the maximum height of the upper interior covering of the room (in our example - 260 cm), the material can be cut 10 mm less, i.e. 259 cm. This is explained by the fact that the top is shortened by 10 mm, and the bottom by 50 mm, because the floor is supplemented with special wooden planks for decoration (plinths).
Important
Rolls without additional ornamentation are simply rolled out on the specified side and glued to prevent movement.
How to stick models with a pattern?
Wallpapering corners is a difficult job in itself, especially for a beginner.
Plain colored wallpaper is a great way out. But you can bring liveliness to the interior only with the help of drawing. Also, in some cases, such models can cover up unevenness. Do not forget that the canvas is glued overlapping, otherwise the pattern will add an awkward look to the interior, and all the imperfections will be visible.
You can use the method of selecting a pattern, not forgetting that the canvases are glued overlapping, and they need to be cut off. The drawing should be of medium size and strictly plumb. Large or too small drawings add a distorted effect.
By selecting different colors of canvas, you can divide the room into zones without resorting to additional costs (arches, partitions). It is important that the colors are in harmony with each other.
Wallpapering with a pattern in the corners
The vertical pattern of the wallpaper makes it difficult to paste in the corners, because distortion is especially noticeable in these places. A pattern with a horizontal position is no exception; for example, after gluing it can become completely skewed. To avoid such incidents, it is necessary to make a small overlap on the wall next door and hide the joint at the top of the corner.
Advice: the difficulty of wallpapering corners is to follow the rule - the edge should be plumb and lay flat, and the other should be trimmed along the edge of the corner.
A non-professional will not be able to hang wallpaper without shifting the pattern without experience. The main thing is to make it less noticeable, using the instructions provided above.
Repairing an apartment, house or office takes a lot of time and effort, as well as money if you decide to turn to hired workers for help. But thanks to the instructions given to you above and strict adherence to them, you can begin to decorate yourself, devoting attention and time to studying wallpapering in the corners. Pay attention to the presence of defects, whether your walls are even, and carry out preparatory work to eliminate unevenness. In addition, radiators and pipes often pass through the corners, interfering with the gluing process, making repairs a hassle.
If you approach this task responsibly, taking into account all the recommendations and rules, then you will find quite a wonderful result, no worse than if the gluing was carried out by a professional team of craftsmen. By doing the finishing work yourself, you will significantly save money. Good luck, and have a good completion of your home renovation!
Other features of gluing corners
Wallpapering corners will not be a difficult task if you take note of the tips from experts involved in finishing work.
- Carefully prime the corners. Instead of a special primer, you can use wallpaper glue applied a few hours before starting work.
- Apply glue in the corners only with a brush, this will help avoid unwanted gaps.
- Heavy and thick wallpaper is glued with a special transparent glue.
- Smooth the wallpaper in the corners until all air gaps disappear.
- Carefully move the edges of the sheets after cutting the seam and coat them with glue, because the adhesive mass will be removed along with the removed trimmings.
General recommendations
Many people who decide to do renovations in an apartment or house with their own hands believe that high-quality wallpapering will not be difficult for them. Yes, to some extent this finishing material is quite practical, but only on flat areas of the walls, which cannot be said about corners. How to glue wallpaper in corners? This is the question faced by people who start repairs without professional help.
It is in the corners that gluing is a labor-intensive process, which makes it difficult and calls into question the quick completion of the repair. So you should approach this issue with all seriousness and carefully study all the nuances of such an operation, because poor wallpapering in the corners can generally ruin the whole look.
How to glue wallpaper in corners
Wallpaper is and remains the most popular finishing material for any type of premises, be it a room in an apartment, an office, or a beauty salon. The quality of wallpaper varies, and can be found for absolutely every taste, color scheme and cost.
Sometimes cheap, nondescript wallpaper transforms a room so much that it seems almost as good as expensive wallpaper, that is, now on the construction market the range of wallpaper is different, and there is a high-quality and at the same time cheap material - two in one.
Today, to hang wallpaper you do not need to have professional skills, but you need to know the gluing system. The walls must first be leveled around the perimeter, in the corners, and this is where problems begin for non-professionals.
Wallpapering in the corner
Tips for work
Non-woven wallpaper is very practical; you don’t need any special skills to glue it. But there are a few tips that will undoubtedly be useful to owners who decide to do the repairs themselves.
- Don't let the meter-long wallpaper scare you. Gluing them is no more difficult than standard ones, but as a result, the repair will be much faster, and there will be fewer joints;
- should not be glued overlapping. Non-woven wallpaper does not stretch during gluing, therefore, there is no need to make a reserve. As a result, you will get beautiful, invisible joints;
- non-woven wallpaper does not need to be smeared with glue; it is enough to simply lubricate the walls and the material will stick better and more firmly;
- To prevent the canvas from peeling off from the walls, close the windows in the room, do not turn on the heaters and air conditioners. This regime must be observed until the material dries;
- use glue that is designed specifically for this type of wallpaper. They are heavy and universal glue simply cannot hold the material on the wall;
- Be sure to remove metal objects: nails and various types of fasteners. If it is impossible to completely remove them, paint over them with white oil paint. Otherwise, you risk getting rusty streaks on the new wallpaper, which will ruin the whole job.
You can clearly see how to glue non-woven wallpaper in the video:
Features of gluing meter wallpaper
Wide canvases are convenient because they allow finishing with fewer seams on the surface. Gluing them is more difficult, but the result is worth it.
- Most often, meter-long wallpapers are made with a non-woven base and vinyl coating; they are much easier to glue. However, wide paper products are also found.
- When working with non-woven meter-long products, glue is applied only to the wall.
- For wide wallpapers, preliminary surface preparation is required.
- To paste the corners, you need to cut the canvas into pieces and glue them overlapping. Then the excess top layer is trimmed off.
- After applying the strip to the wall, it remains possible for some time to level the coating by carefully moving it.
conclusions
The price of high-quality wallpaper treatment of corners is neither more nor less, but the quality of the entire work. Therefore, approach this task with the utmost care and with a cool head - precise calculation, trimming, control verticals, one side with an allowance, let it dry, the other, trim.
Of course, the matter requires training. This means that start with corners that are not yet so significant, which will still be almost closed. Be sure to watch the additional video in this article, it will help you with advice in difficult times.
Sources
- https://roomester.ru/dekor/steny/kak-kleit-oboi-v-uglah.html
- https://www.spets-stroy-portal.ru/doma-i-dachi/kak-kleit-flizelinovye-oboi-v-uglah-instrukcija-po-montazhu.html
- https://J.Etagi.com/ps/kak-kleit-oboi-v-uglah-komnaty/
- https://bouw.ru/article/kak-kleity-flizelinovie-oboi-v-uglah
- https://2proraba.com/steny/oboi/kak-kleit-ugly-oboyami-na-flizelinovoj-osnove.html
- https://prorab.guru/kvartira/uchimsya-kleit-flizelinovyie-oboi-v-uglah.html
- https://okcomfort.com/steny/oboi/kak-kleit-v-uglah.html
- https://dekoriko.ru/nastennye-pokrytiya/oboi/kak-kleit-v-uglah/
- https://diz-kitchen.ru/%F0%9F%A4%A6%E2%80%8D%E2%99%82remont/kak-kleit-oboi-v-uglax-komnaty.html
1 291