If you look with horror at your interior doors with peeling paint that no longer hides imperfections with adhesive film, chips and cracks, but your budget is down to the last penny, it’s time to start restoration. It is this measure that will allow you to quickly and efficiently restore the canvas without resorting to purchasing new doors.
DIY door restoration
Interior doors are usually made of plastic, glass, wood and its derivatives. And there are a lot of different restoration methods, but the most important stage is cleaning and preparing the canvas. It is important to carefully remove all traces of paint, grease, old seals, and level the door so that the door looks like new in the future.
Throw it away? No! Let's restore!
We are preparing a wooden door for restoration. Removing fittings and paint
The first thing to do is to carefully remove the door from its hinges and place it on the floor or four stools.
Removing the door from its hinges
Removing the door from its hinges
Hinges can be invisible, mortise, screw-in, card removable or non-removable. Since the entire door leaf will be restored, the hinges must be temporarily completely dismantled. To do this, unscrew all the bolts and caps, pry the door from below with a crowbar, lift it, remove it and set it aside.
Universal loop
In addition to the hinges, you should remove all other fittings that will interfere with further work.
Laying the door horizontally
Video - How to quickly remove a door from its hinges
How to remove paint. Method one - grinding
If the door is flat and there are a lot of layers of paint, you should take the canvas outside and try to clean it with a sanding machine. The work is quite dusty, the grinding wheels quickly become clogged, but the result will not be long in coming.
Removing paint with an angle grinder
The second method is the use of chemistry
You can find various solvents and old paint destroyers on sale. One of them is B52. Operating principle: wetting the surface, waiting, cleaning the peeled coatings with a spatula.
The solvent is applied to small areas of the surface; softened paint is removed with a scraper or spatula
In addition to the fact that this work is very difficult and harmful (solvent vapors are unsafe for health), it is worth noting that chemicals cannot cope with a large number of layers of old coating. Therefore, this method is only suitable for cleaning small areas of the door with a thin layer of old paint.
You can make your own paint remover mixture by mixing caustic soda, water and oatmeal to a thick consistency. This slurry should be distributed over the canvas, and after 30-50 minutes, cleaned off with a metal spatula along with the swollen paint layer.
It is important to use gloves and a respirator!
Method three - using a gas burner
Removing old paint with a torch
For fire safety reasons, work should only be carried out outdoors. Paint heated by a torch comes off easily, but at the same time it can smoke and emit pungent odors.
This method is applicable only if you know how to handle a burner, have prepared a sufficient supply of cylinders and are ready to warn your neighbors about the upcoming work.
Method four - using a hair dryer
Removing paint with a hair dryer
This method is the most productive and safe. Even if there are layers of paint on the door that were applied several decades ago, they will peel off easily, and there will be no burning or chemical smells during operation.
Heat the paint and scrape it off with a sharp spatula. Be careful not to damage the wood. Do not lean over the door, as the air temperature is about 600 degrees.
Method five - soft blasting
Soft blasting
The method involves gentle, careful removal of complex contaminants and old paint and varnish coatings from metal, glass, and wood. In this case, the door leaf will not be damaged. When working in conjunction with a jet of compressed air, Armex biodegradable cleaner will be applied to the surface of the door.
The main disadvantage of this seemingly ideal method is the inability to perform work at home, the need to deliver the door to a workshop and the associated costs.
Equipment for soft blasting
Method six - Using a drill and attachment
Drill with attachment
Stores sell special abrasive brush attachments that fit onto the drill. Metal fibers will remove old paint, but may damage the wood of the canvas. To process the entire door, you may need not one, but several replacement nozzles, the cost of which is 120-170 rubles per piece.
Video – Soft blasting
Renew old doors with wallpaper
The easiest and most affordable way to make old doors attractive is to use wallpaper. They do not necessarily have to be the same color as the walls, although this option is not excluded. First, prepare the canvas as described above, and then you can start finishing.
The procedure for wallpapering doors is as follows:
- dilute wallpaper glue according to the instructions on the pack;
- apply to the door leaf;
- glue the wallpaper, carefully taking care to remove bubbles (using a rubber roller or plastic spatula);
- We trim the edges using a wallpaper knife and a flat metal strip (it’s fashionable to use a large spatula);
- We wait for the wallpaper to dry.
Covering old doors with wallpaper is a good way to turn old ones into new ones.
Then you can continue decorating on top of the wallpaper or leave it as is. Below are some options on how you can update old doors using different types of wallpaper.
Photo wallpaper
Modern photo printing allows you to transfer three-dimensional images onto paper. It will turn out very beautiful. Moreover, you can print any image of your choice. In general, any. Photo printing is usually done by advertising agencies, sometimes by printing houses. Contact them, explaining what you need (have a flash drive with the selected design and the exact dimensions of the canvas on which you want to print the image). Having received the required image, we glue it on the door according to the method. described above.
Only three door options with photo wallpaper
Wallpaper with moldings
If you stick foam or polyurethane moldings and rosettes onto plain wallpaper, the style will completely change. This type of door is suitable for classic interiors or rooms; using a colorful background and a different form of moldings (with curves) can be decorated in Provence style.
The work is no different from the sequence described above. We take the prepared doors with a leveled surface, spread them with glue, and glue the wallpaper.
Renewing old doors with wallpaper
By leveling the panels with a rubber roller it is not difficult to achieve good results, but a certain number of small air bubbles remain. To remove them, take a special plastic spatula (any hardware store has them), and use it to finally remove the air from the center to the edges. Also, use this spatula to smooth the wallpaper joint, if there is one. It is quite possible to achieve that the joint will not be visible.
We expel the remaining air, after drying we glue decorative elements on the door
Trim the edges of the wallpaper with a wallpaper knife. This must be done before the wallpaper is softened by the glue, otherwise later it may “stretch” behind the blade and tear. Leave to dry. After 12 hours or a day - depending on the temperature and humidity in the room - you can continue decorating the old door.
Carefully apply the markings with a simple pencil. When everything is drawn, use a tape measure to measure the required length of the pieces of molding. We cut it off and file the edges at an angle of 45°. We take a suitable glue (PVA is possible) and carefully smear the back surface of the cut elements, glue them according to the markings, and leave them to dry.
Stylish new doors from old ones
Using the same principle, you can update old doors so that the style will be different. Several examples in the photo gallery.
You need to be able to play with contrasts
The edges of the wallpaper strips are trimmed with self-adhesive cord. It comes in silver or gold
Beautiful wallpaper with a matching pattern is the secret to the attractiveness of this door decor
These doors were first painted and then decorative elements were glued on
Nobody said that the entire surface of the door leaf should be covered with wallpaper.
Classic insert lines
Moldings were glued onto the painted doors, which were then painted with “gold” paint.
Plastering a wooden door
Wood putty
A clear example of how to putty wooden doors
. After all layers of old paint have been removed, you should take sandpaper, fix it on the holder and carefully sand the door, making movements along the grain line. This measure will allow you to remove paint from hard-to-reach areas, smooth out scratches and chips.
Wood color putty
After sanding, vacuum the door and wipe it with white spirit, degreasing it.
Open the can of primer, mix and apply a thin layer of the mixture to the door. The primer will extend the life of the wood and serve as the basis for a new paint coating. The average primer consumption is 100 grams per 1 square meter of canvas. The average price of a package weighing 2.5 kg is 280-350 rubles.
Sanding and priming
Using a narrow spatula, apply the mixed wood putty. Distribute it and leave to dry. After this, you will have to sand the entire door again with fine-grained sandpaper to eliminate all the smallest defects.
If there is a large, deep crack on the door, it can be eliminated by selecting a piece of wood that is suitable in size and color. We coat the sliver with wood glue and firmly drive it into the crack. After about a day, the glue will dry and the door will be ready for priming, puttying and painting.
Prices for popular types of putty
Putties
Transformation at home: decoupage
Decorative material is glued to a previously prepared surface. This means that the door leaf should be even, clean, and smooth. The drawing may show through a little already at the end of the event, so you will most likely still need paint to make the work aesthetically pleasing.
Sanding the door panels is a must: you can sand them with zero sandpaper. To organize good adhesion, as well as remove cracks, you need to take a special primer for wood - after it has dried, start painting. Decorative backgrounds are also important: decoupage patterns will look great on them.
Also consider the following points:
- If a modern door needs to be made with an aged effect, then white paint should be used as a base, and the desired shade should be used on top of it. After drying, sand over individual areas to remove part of the top of the coating.
- For the work itself, prepare the following materials: scissors, PVA glue, material with a pattern, brush.
Such original models can decorate the entrance to a room for children; they look appropriate in a kindergarten; you can also transform new doors, which, in the context of a fresh renovation, do not stylistically coincide with the overall picture. You can also add some element to the ensemble: for example, decorate a table using decoupage.
Strengthening the door
If your door has dried out from age and is no longer strong enough, it is recommended to strengthen the door leaf and frame. And this must be done immediately after the preparation, but before the staining process.
If the blade is deformed, a plane will help correct the geometry. We remove excess wood with a tool, simultaneously checking the accuracy of the corners with a carpenter's metal square.
Processing the canvas with a plane
If the door had dried out and closed very loosely, a large gap was visible between the door leaf and the frame, it is necessary to cut a thin strip from plywood or board and nail it to the end of the door being restored. Then we process the rail with a file or plane, precisely adjusting the dimensions.
Attaching the additional rail
You can strengthen the door leaf with metal corners. But so that the door does not lose its attractiveness, it is worth paying attention to the decorative carved corners and installing them (nail them with thin nails or fix them with self-tapping screws) after painting the canvas. Don’t forget to purchase a new door handle that stylistically matches the curly corners.
Decorative door corner
How to determine the amount of work?
The door restoration process consists of several stages:
- door condition assessment;
- dismantling the door leaf;
- removing the old paint layer;
- surface polishing;
- elimination of defects;
- painting;
- toning.
In order to be well prepared for updating the doors, the surface is carefully examined. The locations of defects and damage are transferred to paper - this will prevent possible omissions.
Note! To increase the service life of the door, you can install new hinges, locks and other fittings, even if this is not necessary.
Door condition assessment
Restoring doors often comes down to sanding and recoating. Such actions must be performed every few years to maintain the appearance of the canvas. Some defects cannot be restored - this is influenced by the intensity of damage to the material:
- Cracks. They appear as the door leaf dries out. They are eliminated only at the initial stage of development.
- Peeled coating. Panel cladding made of low-grade material leads to door deformation. During natural aging, paint or varnish is exposed to sunlight, moisture and temperature.
- Worn areas. Frame distortion, swelling of the structure or improper installation will lead to rubbing of the door ends.
- Rotting. Prolonged exposure to moisture on a wooden door suggests the development of fungus. Mold continuously grows and destroys the structure of the material. During restoration, all areas susceptible to decay are removed. Large-scale damage to the canvas excludes the possibility of renewal.
- Chips and dents. To eliminate deep damage, it is necessary to remove a significant layer of the door, which is not always possible.
Replacing cracked glass
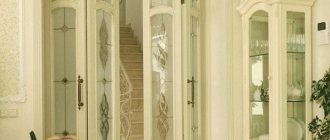
Cracked or simply outdated cloudy glass is not difficult to replace with your own hands. In its place, you can install a new one, for example, matte or transparent, tinted or with a sandblasted pattern, embossed or smooth, colored or plain.
Doors with glass inserts
Note! If the glass has a thickness of 10 mm (triplex), then replacing it is impractical. Firstly, it is very expensive, and secondly, it is almost impossible for an inexperienced person to cope with such a task on their own.
Door with Triplex glass
Case 1. Glass fixed with glazing beads
The glass is fixed with glazing beads.
The easiest way to replace glass is fixed with glazing beads. It is enough to dismantle them and then remove the glass by hand. We arm ourselves with pliers and a metal spatula. We pry up the glazing bead with a spatula, and use pliers to carefully pull out the nails.
Wooden glazing beads
Use a chisel or knife to clean the glass bed. We take measurements. If the opening is non-standard, we make a figured pattern from cardboard. At the same time, we take into account that the size of the glass should be slightly smaller than the opening. We wipe the glass with a soapy sponge, dry it with a clean rag, transfer the design from the pattern and cut it.
How to cut glass correctly
Attention! Wear gloves to avoid cutting your hands. Carry out work on a flat surface with a working glass cutter.
We treat the perimeter of the glass opening with sealant, after which we insert the cut piece, saw new glazing beads with a jigsaw and fasten them with thin nails.
Case 2. The glass has a hidden fixation
The glass has a hidden fixation
If the glass has a hidden fixation, you will have to disassemble the door, unscrewing the bolts, removing the old glass and inserting the new one. Silicone cannot be used in this case, since it will be impossible to replace it later. A significant disadvantage of replacing glass in such doors is that after assembly, the panel may lose its geometry and will require editing with a plane.
By the way, instead of glass, you can use an acrylic unbreakable mirror. It is quite light, durable, highly decorative and easy to cut.
Find out about the 10 best options for making door decor with your own hands from our new article.
Required tools and materials
Restoring entrance doors is impossible without special tools and materials.
Before starting work, you need to check the availability of the following equipment:
- antiseptic impregnation;
- varnish, paint or stain;
- coating remover;
- primer, sealant;
- spatulas, a hair dryer for removing old paint;
- screwdrivers for dismantling structural elements;
- sandpaper of various textures for sanding;
- nails, hammer, screwdriver for attaching patches;
- brushes for applying paint, varnish;
- door fittings, lock, hinges.
Painting the door
Painting a door A
door prepared according to all the rules can be painted. We carry out the work in two stages - applying a base layer of white paint and tinting.
We choose matte paint for wood, apply it with a spray gun or brush, moving the brush along the grain. Apply one layer, making sure that no smudges appear.
Important! If there is a glass insert, be sure to seal it with masking tape so as not to stain the surface with paint.
For tinting, choose glossy or matte paint of any color, for example, dark brown. We paint the canvas in the same way. If necessary, apply another layer, but only after the previous one has dried. The more layers of paint, the more saturated the shade will be. But don’t get carried away and create too thick a coating.
How to paint a wooden door
Important! Be sure to prepare and restore the door frame. Otherwise, the updated door will contrast unfavorably with the adjacent wooden surfaces.
When the paint has dried, you can apply a layer of glossy varnish or begin installing door handles.
Prices for construction paint
Construction paint
Video – Do-it-yourself door restoration
Video - Master class on restoration of an interior door with a glass insert. Glass replacement
Designer decoration of old doors
If you are interested in designer items, you can try turning it into an art object. The good news is that you don’t need to prepare it: the unevenness and sagging will be hidden under the design.
What kind of doors were there and how they can be made
The decorating process begins with the making of papier-mâché. Take egg trays, sprinkle them with water, knead them with your fist, trying to level the surface. They will tear during the process, this is normal and even good - we need small pieces. These almost flat fragments are glued onto the surface in any order using liquid nails or using a glue gun.
Creating decorative elements for the door
Next, we glue any junk with an interesting structure, unusual or regular shape. In our case, we found an old knitted string bag. It was cut into small pieces and also glued.
We glue decor on old doors
The items used are lids, rings, a small perfume bottle, a small non-working computer mouse, the remains of a mosaic, whatever comes to hand. You will need a lot of trash, you can collect it ahead of time.
The process of decorating an old door is in full swing
When most of the surface is “decorated”, take acrylic silver paint in cans (you need 2 pieces) and paint the decor well. When choosing paint, it is better to take an expensive one, in particular German, so that it does not crumble later.
Forging effect, an interesting option
Restoration of a metal door
You can restore not only wooden, but also metal entrance doors. Before work, it is advisable to remove the canvas and lay it horizontally. This will make the job easier.
How to paint a metal door correctly
Step 1. We dismantle or cover the door handle, peephole, and other fittings with masking tape.
Step 2. Use a wire brush or drill with an attachment to remove all traces of corrosion. Sand the surface with sandpaper (grit 80-150). We vacuum the canvas and treat it with a solvent.
Step 3. Treat the door with car polish. It is not recommended to use wood fillers as they do not adhere well to metal. Car polish will hide all dents and micro-scratches formed after cleaning the rust. Smooth out the applied polish with a spatula. The drying time of the composition is about 30-40 minutes.
Polish
Step 4. Polish the entire surface of the door with 400-grit sandpaper. Wipe the door with a clean damp cloth, and then degrease using a grease remover.
Step 5. Apply an anti-corrosion primer for metal to the door. It is convenient to use a roller and a narrow brush. After the primer layer has completely dried, we sand the canvas again with fine-grained sandpaper.
Anti-corrosion primer
Step 6. Paint the door with metal paint. There can be several layers, but each subsequent layer is applied only after the previous ones have dried. To apply paint we use a roller and brushes or a spray gun. Don't forget about gloves and a respirator.
Restoration of a metal door
Similarly, we clean and paint the door frame, then remove the masking tape, install the fittings and hang the door in its rightful place.
In this way, you can not restore the entire surface of the door, but only a small area, but it is important to choose tone-on-tone paint.
Possible problems and their causes
Restoration of the structure is not always carried out. It is necessary to take into account the factor that contributed to the deterioration of the appearance of the door. It happens that changes in the surface of the sash and the structure of the material are irreversible. Causes of defects:
- Cracks. They can appear for various reasons. For example, wood is prone to drying out. You can update old doors when destructive processes have just begun to develop.
- The coating is peeling off. The surface of the door leaf is deformed if it is sheathed with panels or sheets that are made of a different type of material. This happens due to low adhesion during fastening. Another reason is the natural aging of materials: they become deformed, dry out, which leads to peeling. In addition, varnish and paint coatings can also peel off. In this case, it is necessary to update the front door, since the absence of a protective layer will lead to an acceleration of destructive processes. Paint is removed first.
- Increasing technological gaps. This does not affect functionality, but drafts may occur. In addition, the tightness of the door leaf to the frame is reduced.
- Rubbing the end sections of the sash. This occurs as a result of wood swelling. Another factor is improper installation, which could cause the sash to become warped. Rubbing of the door also occurs due to the misalignment of the door frame, which is a consequence of the aging of the structure and the material from which it is made.
- Excessive loads on the frame. At the stage of choosing a door leaf, pay attention to its weight. Taking this parameter into account, loops are purchased. If the door was initially selected incorrectly, excess loads will be applied to the frame, which will lead to the loosening of this structure: the fastenings are weakened, as a result of which the sash ceases to function normally.
- Rotting processes. The reason is regular and prolonged contact with moisture. In such an environment, fungus develops, which leads to disruption of the structure of the material.
- Scratches, chips. Such defects are more pronounced in the lower part of the sash. They arise due to careless operation: accidental impacts occur, the door is opened with a foot.
Determining feasibility
In most cases, it is enough to refresh the structure: sand it, reapply the coating. Such manipulations are carried out regularly every few years, because any material needs care, as it tends to age. Sometimes it is not practical to restore the canvas due to significant damage. If irreversible processes develop, it is better not to undertake restoration of the door. These cases include:
- Rotting of the material, and attention is paid to the intensity of the destruction of the structure. If the fungus has covered the entire thickness of the canvas, it is better to immediately change it to another one. In case of superficial damage, you can renew the interior doors, but first remove all rot completely. This applies to a greater extent to wood products, since metal is affected by rust.
- Significant flaws: chips, unevenness, distortion of the structure. If there are visible cracks or depressions on the surface of the door, it is not advisable to carry out restoration, since a significant layer will have to be removed during grinding. If you try to restore such defects using leveling mixtures, the result may not live up to expectations, especially if you have no experience in such work.
- The base (door frame/frame) is used for a long period. Dilapidated structures cannot be restored, because the structure of the material from which they are made gradually deteriorates.
How to laminate an interior door with film
Self-adhesive film DC-FIX walnut
Self-adhesive film dc-fix black wood
For pasting doors, it is better not to use cheap PVC film, but to give preference to the durable “self-adhesive” DC-FIX. This film is guaranteed to last more than 10 years, will not fade in the sun and will not wear out.
The film is sold in rolls with a width of 45, 90 and 67.5 cm. The length of the roll is 15 m. The average retail price of this German film is 1,700 rubles. From a huge assortment, it’s not difficult to choose an option with imitation wood, stone, abstract or other patterns that suit a specific interior.
The film should be glued carefully, with someone's help. It is advisable to cut according to patterns, and immediately remove small bubbles with a wide plastic spatula. If the bubble does not go away, you can puncture it with a thin needle. For better plasticity, the film can be heated with a hairdryer.
Note! A wooden door can be restored using adhesive-based veneer. We press the material to the canvas and heat it with an iron. We cut off the excess. We leave the restored door leaf for a while, pressing the glued veneer with sandbags.
Veneering
Prices for self-adhesive film
Self-adhesive film
Video - Pasting MDF with veneer
Video - How to glue DC-FIX film
Video - The principle of gluing film
Finishing
Once you have covered up all the defects, you should choose a finishing method. The simplest thing is painting. There is a large selection of compositions on the market, among which you can choose the appropriate tone to suit the interior.
In the store you can buy overhead facades and decorate the canvas. They are fixed with PVA glue. If necessary, wooden decorative elements are used, fastened with staples or nails.
A solid wood door can be updated with special plaster, which allows you to obtain three-dimensional and relief patterns . In some cases, craftsmen use cracking compounds, which causes the surface to become covered with small cracks and become “outdated.” A similar effect can be obtained after treatment with fine sandpaper.
Painting
Not everyone knows how to repair an interior door with your own hands using painting. It is not necessary to use oil-based paint. Water-based or acrylic compositions that do not smell and dry quickly are more suitable. Painting should be done in the following sequence:
- Take a roller with a fine-pored nozzle and cover the canvas with paint;
- Paint hard-to-reach places and all corners with a brush;
- Leave the structure to dry;
- After drying, repeat the painting;
- You can decorate the surface of the door with stencils.
To paint a door, it is better to use water-based or acrylic compounds.
For painting, you can use different paints and varnishes (latex, semi-gloss or gloss), apply stains and varnish them. But such a finish is suitable for well-preserved products. It is better to apply two layers of paint (one white and the other tinted). Instead of a roller, you can use a brush or spray gun . Existing glass inserts are sealed with tape.
Finishing with MDF panels
Sometimes repairing doors using simple methods does not lead to the expected results, so drastic measures have to be taken. When a complete renewal of the canvas is required, overlay facades are suitable. They are made from different materials. It is rational to buy an MDF insert, which does not absorb moisture, retains its shape, has optimal strength and rigidity, is quickly fixed and is inexpensive. As a result, the restored door changes its appearance radically.
MDF panels can be used as door finishing
You need to purchase a canvas of the required size, apply the facade to the finished base, securing it with PVA or self-tapping screws.
Finishing with natural or artificial leather
Previously, doors were covered with dermantine, which was distinguished by its elasticity and high strength. This material is easy to clean, resistant to temperature changes and humidity, retains its color under the influence of UV and is environmentally friendly.
Vinyl leather, in addition to its decorative function, has thermal insulation properties
Such restoration increases the thermal insulation performance of the structure, the level of sound insulation, and makes it more attractive. But the finishing process is labor-intensive, and the material can be damaged.
Finishing with wooden slats
The door can be finished with fiberboard or clapboard. Wooden slats are strong, durable, and are not subject to physical or mechanical stress. The wood must first be prepared, dried and coated with antiseptic compounds. This will ensure optimal strength of the panels, and the treatments will protect against fire. The panels are attached to a leveled surface to a pre-mounted sheathing or sheet.
The door can be finished using lining
Before cladding, wooden panels must be polished, stained, impregnated or varnished . You can choose any direction of the slats (diagonal, horizontal, vertical or geometric pattern).
Film lamination
To properly laminate the door surface, it is better not to use budget PVC film, but to choose the self-adhesive DC-FIX option. This coating will last more than 10 years, will not fade or wear out. You can take a film coating that imitates wood, stone, abstraction or another pattern that is suitable for a specific design. You need to glue the film carefully, cutting it according to the patterns in advance.
It is important to remove all air bubbles using a flat board.
How to replace door hinges. Photo instructions
How to replace door hinges
How to replace door hinges
Bosch POF 1200 AE router. Good for cutting hinges
We measure 200 mm from the edge of the canvas to the edge of the loop
We apply a loop, use an awl to mark the pins for the drill, and use a blade to carefully cut through the veneer
Correct position of the loop
Fraser in position
Carefully position the cutter along the edge of the future loop
Loop slot
Loop in place
How to choose a successful design?
Doors must match the design of the room in color and structure. When the interior paintings are similar to each other, a feeling of integrity and completeness is created in the apartment. The door structure consists of more than just a leaf. The product is complemented by platbands, fittings, frames, and plinths. Each element must be harmoniously combined with the interior of the home.
The surface structure of the product emphasizes the taste of the owner of the house. The canvases are made of wood, veneer, laminate, glass, and metal. A wide choice of materials opens up great design possibilities.
Do-it-yourself door renovation
This process will not be anything complicated if you proceed step by step and equip yourself with the necessary tools and materials. Before restoring wooden interior doors, you need to remove the panel, unscrew the locks and fittings, and lay them horizontally so that it is convenient to work. And you can start finishing. The whole process consists of several stages .
Removing paintwork
As a rule, wooden doors are coated with varnish, which protects the material and prevents the surface from being exposed to various factors. This composition creates a transparent, shiny layer that many people really like. But it is often very difficult to remove it. Therefore, before restoring a varnished wooden door, you will need to buy a solvent. It is better to give preference to a composition that removes varnish from wood. Don't use a product that is too harsh, which could smudge the wood finish. Work in fragments, be very careful, do not overdo it with the amount of solvent.
Also, one of the most popular finishing materials for wooden panels is paint. Sometimes it is applied in several layers, and here you need to act carefully. The easiest way to remove the coating is with a solvent. Only, unlike the previous method, you need to buy the composition specifically for the paint, and take into account its type. When applying solvent, be sure to wear gloves and a protective mask.
Tools for getting the job done
You won’t be able to restore interior doors with your own hands using enthusiasm alone. Certain tools are required, a list of which is given below:
- plumbing tools (screwdrivers, hammer, knife and pliers);
- blowtorch or iron;
- sandpaper or sanding machine;
- brush or roller;
- putty knife.
Exactly what tools will be needed during the work process depends on the door material and the restoration method.
