Kinds
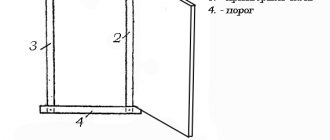
Sliding doors built into the wall are a structure assembled from a frame, a leaf, a cassette, a set of guides, rollers, and handles.
Door blocks differ in the design of the pencil case and the number of leaves. Single-leaf structures are usually installed in standard-sized openings. The cassette is mounted to the ceiling or wall, and no box is required. Two sashes are placed in wide openings, and each of them must have its own cassette. The canvases are fastened together with a guide.
Is it possible to make a pencil case yourself?
In order to make the interior door invisible when open, it can be hidden in the wall. There are two ways to solve this problem:
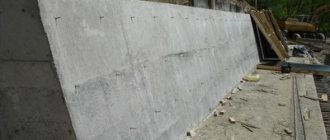
- The first is quite radical and requires special permission when it comes to load-bearing structures. A special void is made in the wall for the door leaf. This process is quite troublesome, you can make it easier by making an additional wall, but then it will take up space in the corridor.
- A simpler way is a pencil case for sliding doors, which is quite easy to create with your own hands. This compact solution is suitable for any room, does not require large material or physical costs, and has a fairly aesthetic appearance.
Tools and materials
To assemble the sliding mechanism, you will need to prepare the following:
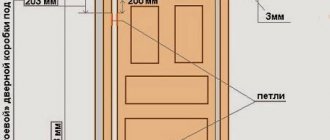
Interior door installation diagram.
- door leaf;
- aluminum profile - 2 m;
- wooden block;
- limiting brackets;
- guides with fastening elements for them;
- upper and lower rollers;
- fasteners (screws, screws, dowels);
- plugs for decoration;
- pencil;
- roulette.
Advantages of a pencil case
The sliding door cabinet performs several important functions:
- Improves the aesthetic space by hiding the open door leaf.
- Protects the door leaf from mechanical stress. This is especially true if you plan to install glass doors, and armored glass is not affordable.
- An open door slides along the wall, so nothing can be placed on it. The pencil case will take up a small space, but you can move furniture close to it, hang shelves, paintings, pots directly on it.
Methods for making doors that go into the wall
You can make hidden sliding interior doors yourself. The process is creative and not overly complicated. To create the design, you will need to purchase furniture fittings, parts for the pencil case and components for the door. The pencil case is a continuation of the wall, inside of which the door will be hidden.
An important component is special fittings for a sliding door: you will need a cassette specially created for such a project, and guides for the door leaf. In order to set the canvas in motion, rollers and rails are used, which can be located either in the upper or lower part of the structure, or in both. Don't forget about the limiter - stopper.
Most often, to create a niche for the canvas, part of the main wall is destroyed, then it is restored using a plasterboard sheet. The point is that sliding interior doors, the pencil case of which is made in this way, can completely disappear when opened, and the pencil case will not extend beyond the main wall, that is, its presence will not be visually noticeable.
The next important stage of work is the installation of guides. They must be positioned strictly horizontally, otherwise the door will be difficult to open or will warp, making it extremely difficult to open such a structure.
Interior sliding doors into the wall must be equipped with special handles. For this purpose, special recesses are made in the canvas. It is impossible to hang a standard handle on such a door, otherwise it will interfere with the opening of the door and will not allow the panel to hide completely in the pencil case.
Sliding door mechanism diagram.
Two options for installing sliding doors yourself
Do-it-yourself sliding interior doors can be made in different ways, or rather, for different rooms. Plus, the size of the budget plays a significant role; it’s one thing to assemble doors for a small summer house with seasonal living, and quite another to make sliding interior doors for a city apartment.
Option No. 1. A good door for an apartment
In this case, we will learn how to properly install sliding doors on rollers with our own hands.
You should immediately forget about homemade mechanisms; we are only talking about installing ready-made systems. Of course, such designs are sold with a description, but there are nuances that are not in the description.
To install sliding interior doors with your own hands, you need the following tool:
- Hammer or electric drill with impact function;
- Hydraulic level;
- Bubble level;
- Screwdriver;
- Roulette;
- Set of open-end wrenches (from No. 5 and above);
- Manual frezer;
- Wood hacksaw;
- Hacksaw for metal;
- Pencil;
- Hammer.
Home handyman's tool.
We assume that the door is made from ready-made components, that is, we have a door leaf, guides, rollers, stops and other door fittings. The only thing you will need to buy additionally is a wooden block 50x50 or 50x70 mm.
Even before assembling the sliding door and even before going to the store for components, you need to make sure of the following fundamental things:
- Check how smooth your opening is; if there is a skew, take a wide blade (with a margin);
- Make sure the wall can support the load. It is better for an amateur to work with a brick or concrete wall; leave foam concrete and plasterboard false walls to professionals;
- Absolutely all finishing must be completed. Door assembly is done at the very end.
How to make a compartment door with your own hands:
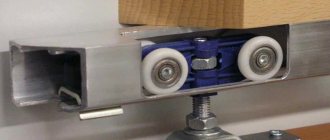
There are many models of rollers; we are interested in mechanisms on a supporting platform with the ability to adjust the gap between the blade and the guide profile.
Wide platforms are mounted on the edge of the door leaf, but if the door leaf is more than 80 cm, then you can step back from the corner by 1/6 of the door width.
Using a tape measure, we calculate the center and, attaching a roller platform to the end of the canvas, mark the entry points of the screws.
Marking for the roller platform.
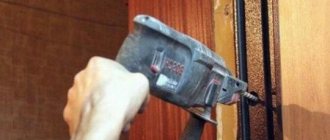
You shouldn’t immediately drive the screws according to the markings; you don’t know what quality the slab is; when screwing the screw in “live”, it may crack. Therefore, first drill holes, the drill diameter is about 2 mm. Next, apply the bar and screw in the screws.
Fastening the bar.
Now insert the carrier plate itself, equipped with a rod for the roller, into the grooves of the roller bar. In this case, the plate is fixed to the bar by screwing the rod a couple of turns (open-end wrenches will come in handy here).
Installing the plate with the rod.
As you can see in the photo, the rod is equipped with a thread; we need to screw the rollers onto this thread. Of course, there is a possibility of adjustment, but the thread must enter the roller by at least 3 - 4 turns. It’s better to count the revolutions so that they are approximately equal on all rollers.
Screw the roller onto the rod.
In order not to work in the dark later, it is better to embed handles and locks right away, especially when it comes to hidden handles, as in the photo. All such grooves in the canvas are cut with a hand router.
Installation of fittings.
We are done with the rollers and fittings, now we move on to installing the guide bar. The guide bar itself is metal; we will attach it to a wooden block. It is important here how to calculate the cross-section and length of the bar.
Don’t be alarmed, for the calculation we only need a tape measure and a pencil. If your doorway is simply plastered, without platbands, then you can take a 50x50 mm block. The platbands will take up at least 10 - 15 mm, so you need to take a 50x70 mm block for them.
As for the length of the bar, it is calculated as 2 times the width of the door leaf, plus another 50 mm for the stoppers.
Calculation of a wooden block.
Now we lay the guide on the block and fasten it with self-tapping screws in increments of about 200 mm. The holes in the guide are drilled subtly, that is, so that the screw head does not protrude from above, otherwise the roller will begin to cling to it when moving.
Fastening the guide.
Next we hang the structure. A professional only needs to take one measurement, after which the craftsmen attach the timber separately, and then attach the doors to it. It is better for an amateur to try on assembled doors; to do this, we insert the rollers into the guide.
We insert the rollers into the guide.
To make the measurement more accurate, you need to insert a wedge, preferably more than one, between the door and the guide bar.
Wedging the gap
You need to put a mark on the wall above the block and move upward from this mark by at least 7 mm, plus the thickness of the carpets, if any are planned.
Holes in the block must be drilled immediately. The step depends on what exactly you will hang the structure on. For anchor bolts with a cross-section of 6–8 mm, a pitch of 50–70 cm is sufficient, and for long self-tapping screws with plastic dowels, holes are drilled at a distance of no more than 25 cm.
We make markings on the wall through a block. The photo below shows how craftsmen drill a wall without removing the door; we do not advise you to do this. We have the markings, now we can remove the door, attach the block to the wall, level it and mark the future holes with a drill. Then you remove the block and drill it out.
Holes for anchors.
To prevent the rollers from jumping out, you need to install stoppers along the edges of the guide, but they are installed after the doors are hung. The stopper is inserted into the groove and the clamping screw is tightened. The installation point is determined experimentally by the position of the rollers.
We install stoppers under the rollers.
Our doors hang on a guide, but to prevent them from dangling, they need to be somehow fixed from below. To do this, a groove is cut from the bottom end along the entire length with a router; if the door is factory, then the groove should already be there.
The blade will control the flag pressure roller, which is attached to the floor directly next to the door jamb.
Flag pressure roller.
In order for the door to rub against the roller less, it must be set strictly plumb. The technology for installing the flag is shown in the photo below.
Control flag installation technology.
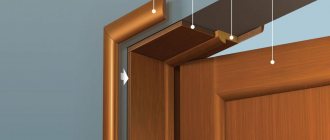
In principle, the retractable door was installed with your own hands, it will work, but you still need to make it beautiful. To do this, buy a platband to match the door leaf and nail or screw it to a supporting wooden block. Such a bar will hide both the block itself and the hanging mechanism.
Decorative strip.
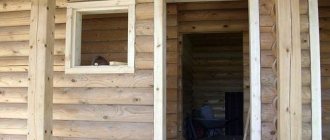
Option number 2. Homemade for the garden
Sliding doors are a good thing and they have a lot of advantages, but all these advantages fade into the background when a person finds out the price of such fittings. Don’t be upset; if you use a creative approach, you can solve this problem. The design is not the most beautiful, but it is quite suitable for a summer house.
So, let's take a step-by-step look at how to make sliding doors for your dacha yourself without spending a lot of money.
The door leaf will cost the most. Although there are options here, for example, you can restore an old door and hang it.
Old doors can be put to new uses.
Next, we go to a store with furniture accessories and buy the simplest furniture wheels there. Do not use swivel mechanisms on a hinge; it will only make things worse. Such wheels are attached to the doors with a pair of self-tapping screws. There are 2 reference points for each canvas.
Using furniture wheels.
At the top end of the canvas, above the wheels, we screw steel rings. The thickness of the metal in such rings must be at least 3–4 mm, otherwise they will quickly fray.
Fixing steel rings.
We will use a three-quarter-inch steel pipe as a guide, although this is not important; you can take any pipe, as long as the rings fit into it properly. We calculate the length in the same way as in the case of a wooden block.
We install, as shown in the photo below, the elbow and fastening “penny” can be found on any construction market, as well as the pipe itself.
Fastening the pipe to the wall.
In principle, that's all, you can then paint and admire. If you take an old door leaf, the fittings will cost you a maximum of 500 rubles, and the tools you can get by with are a drill, a screwdriver and a hacksaw.
Single door design.
Features of hidden sliding structures
Interior sliding doors hidden in the wall have special design characteristics that allow them to be mounted in the same plane with the wall surface.
Platbands are not installed on the opening, making the structure hidden. By painting the cabinet door in the same shade as the wall, giving it a similar texture, the canvas will completely merge with it. Sliding hidden structures have cassettes and several doors, which, when opened, go into a pencil case. Doors can be equipped with all-glass or wooden doors of non-standard and regular dimensions. The first models reach a height of 197-270. All hidden systems are made only to individual order, according to your dimensions.
The photo shows many finished products at an affordable price. All doors are durable and reliable. From us, you can order secret systems that will decorate your home or apartment. They will delight you with ease of maintenance and practical use. Managers will offer a wide variety of stylistic solutions.
Standard and non-standard door leaf sizes
Standard interior doors
Different countries have their own standards regarding the size of door leaves. In Russia, for example, the generally accepted height of doors is 2 meters, and the width of single-leaf models varies from 60 to 90 cm.
Manufacturing companies produce sliding interior doors in this particular size range, so choosing a design for standard openings will not be difficult. In addition, finished products have a lower cost compared to custom-made non-standard options.
Wide custom doors
Such models are made to individual orders. The most popular materials for door panels are glass or mirrors. The glass structure gives the room weightlessness and grace, and also helps to increase natural light in the space. A mirrored door visually doubles the volume of the room.
When ordering sliding doors of non-standard width, it is necessary to ensure that there is sufficient space for normal opening of the door leaf. The width of the side wall should be at least equal to the width of the canvas.
Tall custom doors
Non-standard height structures are also manufactured individually, for example, arched doors, models with transoms, etc.
It should be noted that the cost of any non-standard door will be higher than the cost of products provided by the manufacturer’s warehouse program.
Application of a door built into a niche
Built-in doors are suitable for arranging the entrance to rooms and other living spaces that require saving space. In families with active children, there is a need to open and close doors frequently. For such purposes, sliding mechanisms will be more practical.
Thanks to the original design, hidden doors fit harmoniously into any modern interior. They are considered the best option for narrow corridors. If there is a niche in the hall or bedroom, doors hide built-in wardrobes and separate dressing rooms. By experimenting with a variety of materials, the door leaf can be made multifunctional, for example, used as a mirror.
In large rooms, warehouses, accordion-type systems are installed in a wide doorway. It is used as a partition to divide space into several zones. If you need to decorate both a wall and a passage, you will need several sliding panels. With this solution, all panels are moved one at a time using a cascade principle.
Sliding structures are used for glazing terraces and special seating areas. With their help, the room can easily be transformed into an open space in the warm season.
PROS AND CONS OF SLIDING SYSTEMS
Sliding systems compare favorably with traditional swing doors both aesthetically and in their functionality. But behind many advantages they hide a number of disadvantages. Of course, they cannot be called significant, but they are still worth taking into account when choosing a particular door system.
The main advantages of sliding door systems include:
- Significant space savings. These are their most important advantages. Such doors do not require additional space to open; when open, they do not interfere with free passage. The location of the door mechanisms, as well as the movement of the leaves, is parallel to the wall, which makes such doors the optimal solution for small rooms;
- Safety and ease of use. Such a door will not slam shut due to a sudden draft or careless movement. For me, this significantly reduces the likelihood of being left on the street without my keys in my pocket;
- Versatility. Such structures can be used as entrance and interior structures, or even as mobile partitions necessary for temporary delimitation of space.
In practice, literally any door can be made sliding - rather traditional hinges can be replaced with a mechanism of slides and rollers, and a standard lock can be replaced with a special locking mechanism for sliding doors. Accordingly, canvases from any material can be used as a base: for example, I used OSB boards already known to you from my previous articles.
The main disadvantages of such door designs usually include:
- High cost compared to the price of traditional swing doors. A very controversial statement, especially if you do everything yourself and from scrap materials.
- Difficulty of installation work. I didn't notice anything too difficult to do. No special or rare tools or equipment are required, and you don’t need an assistant either—you can do the work yourself.
- Low level of heat and noise insulation of doors. This is due to the gaps both between two opposite panels and between the panels and the doorway. But this problem is easily solved - below I will tell you how I slightly modernized the design, avoiding the penetration of cold air and dust through the doors.
- Noise when moving along the guides. When using expensive, high-quality mechanisms equipped with silicone inserts and special lubricants, the noise during operation of sliding doors is minimal. There are also ways to make the operation of a self-made sliding door mechanism silent. I plan to use them in the future.
- The need for skid maintenance: cleaning and lubrication. However, the hinges of traditional swing doors also need to be lubricated periodically.
Having carefully weighed all the advantages and disadvantages of sliding systems, I finally decided to focus on them. In addition, I had at hand everything necessary to make the sliding mechanism.
Characteristics of invisible designs
Basically, doors are an aesthetic detail of the interior, and when some nuances are eliminated, the functionality of the systems expands. Sliding doors hidden in the wall have a number of characteristics that may interest you:
- Due to the “absence” of component elements and the location of the sashes flush with the wall surface, they are invisible;
- The material from which the frame is made is anodized aluminum, due to which the structure does not deform, is reliable, durable;
- The doors open smoothly, without unnecessary noise;
- Hidden canvases look modern and stylish.
Pencil doors from Revecon - functionality, high quality and long service life. All products and work performed on the installation of hidden sliding doors are provided with guarantees and affordable prices.
Complete set of interior invisible systems
The main feature of such products is that they are part of a partition or wall. They were given the name “pencil case” due to the fact that they go inside the wall. Hidden structures cannot be installed in existing partitions; they are installed only at the stage of their construction. The second option is to rebuild the wall.
The set of “invisible” doors includes the following elements:
- Box frame for finishing with plasterboard or other materials;
- The upper track along which the sash moves;
- Roller carriages necessary for fastening the door leaf;
- Flags limiting the movement of the valves in extreme positions;
- Bottom rail for structural stability;
- Insulation to close gaps and improve sound insulation;
- Decorative strip for the opening.
Some manufacturers may include various elements in the kit, depending on the material from which the doors are made. Door leaf systems are also different. Standard size – designed for partitions 125 mm. Load-bearing characteristics are selected depending on the sashes in the range of 50-120 kg. Its excess means additional costs.
Types of guides
Metal guides for rails
For sliding interior doors, the guide is important. It is a U-shaped profile with limiters. Its standard width is 7 cm, height – no more than 3 cm. The rail is made from the following metals:
- Aluminum is a lightweight, corrosion-resistant metal. This profile wears out little, does not require maintenance or protection, and has its own pleasant color and shine. However, its mechanical strength is relatively low. Aluminum rails are only suitable for lightweight sashes.
- Steel is stronger and more durable. They serve up to 50 years. Steel hardly wears out. However, it is prone to corrosion; in order to protect the profile from rust, the steel is coated with a layer of zinc, chrome, varnish, and polymer paint. The integrity of the coating must be monitored.
Other factors are also taken into account:
- type of roller system and opening method;
- the number of parallel moving canvases - this is how the number of guides is calculated;
- the nature of the support of the sashes - if it is a single-strip system, then the upper rail must be strengthened, as it is subjected to double load.
The bottom rail, even if it is “sunk” into the floor, remains visible. Therefore, when choosing, you need to evaluate its design.
What doors and how are they installed in the door cassette?
Most doors from our catalog are installed in the door cassette. For each door, possible installation methods for that door are indicated. Doors with a rebate (the edge of the door leaf with a protruding quarter) and doors with a baguette or other protruding elements on the leaf are not suitable as a sliding door.
The door leaf itself can also be installed in the cassette in different ways. There are two options for installing doors in a cassette:
1. The door leaf is not completely hidden in the cassette niche and protrudes 70 mm from it.
The disadvantage of this method is that the doorway narrows. For example, if you install doors with a width of 800 mm, then the free doorway will be 730 mm. But this protruding part of the door is needed to maintain access to the handle.
2. The door leaf is completely hidden in a wall niche
. This installation method is used when it is important that the door leaf is completely hidden in the niche and does not block the opening. In order to pull the door out of the niche, a round handle-hook is cut into the end of the leaf. To get the canvas out of the niche, you need to grab this handle with one finger. This is not easy to do, especially with long nails, because... the blade is fixed in the extreme open position.
You also need to take into account that not all door leaves are suitable for the second installation method. Molded doors have open glass or thin panels at the ends. For this reason, rollers can be attached to the canvas only along the edges of the canvas in thick drawers. Full retraction of the door leaf into a wall niche is achieved by attaching one of the rollers closer to the center of the leaf. This is not possible for all door models.
Instructions: assembling the sliding mechanism
So, the sliding door is already available (purchased or made by hand). Let us describe how the assembly process occurs step by step using the example of installing a sliding door with 2 guides.
Assembling the sliding door mechanism.
- First, you need to dismantle the old swing door, or rather, the leaf and the frame in which it was attached. The end parts are painted in the color of the installed product. Remove dust and dirt from work surfaces.
- Markings are applied under the block on top, which is immediately attached above the opening.
- Mark areas for guides. To do this, measure the door leaf with an increase in the distance between the floor surface and the leaf.
- Start installing the guides from the bottom. The length of the guide should be 2 times greater than the width of the door opening. The evenness of all work is checked using a level. If even a slight slope is detected, the canvas will move on its own. The guides can be attached to the upper beam or directly to the ceiling surface using dowels and brackets.
- When the guides are installed, proceed to assembling the roller carriages. They are placed in the lower area of the structure, on the guide from below.
- The wall is marked for mounting the guide on top, which is then mounted on the designated area.
- When installing a sliding door mechanism, do not forget about installing limiters. Otherwise, you can get such a “surprise” as a door sliding apart on its own due to any draft. The best option is to buy plastic limiters. They will facilitate silent opening and closing of the door.
- After assembling the entire mechanism and installing it, the guides should be masked using decorative panels and trims. Such elements are fastened with self-tapping screws, which are subsequently sealed with special plugs.
- Finally, the door is raised so that it has a visible slope at the top. First, the upper part is installed, then the canvas is lowered onto the guides below. If the canvas is heavy, you simply cannot do without the help of a partner.
Related article: Decor ideas for country verandas and terraces and what can be arranged there (31 photos)
Upon completion of installation of the sliding mechanism, it is mandatory to check the functionality of the door. They analyze how softly it opens/closes and whether any part is stuck. If the door is difficult to move, then there is no need to despair. Over time, the mechanism will develop and the problem will resolve itself.
Installing a sliding mechanism with your own efforts is not so difficult. Of course, it is never too late to seek the help of specialists. However, such services cost a lot.
It is much more pleasant to make sliding doors yourself.
The best posts
- Vinegar will clean your microwave in 5 minutes.
- Hidden hatch under tiles: secret basement and invisible with your own hands, revision installation of the observation floor
- DIY necklace on a ribbon made of fabric and beads with photos and videos
- How to decorate a children's room? 34 interior design photos
- DIY New Year's topiary
- DIY snowman made of threads step by step with photos and videos
- Use of 3D wallpaper in the hall, features of the material
- Crocheted napkins. Selection of schemes
How to decorate the doorway of a pencil case?
We are talking about the fact that you can install any doors in a cassette. But what about refining the opening of such doors? The frame, trim, and extensions are made for a swing door, and almost none of the manufacturers make components specifically for pencil case doors. In such cases, you have to work with what you have and use a simple box or extras to make a box for the pencil case doors.
Our craftsmen have long developed the technology for manufacturing components for cabinet door cassettes. When purchasing doors and cassettes from us, we can do this for you by sending a ready-made installation kit along with the cassette.
How to save money on pencil case doors?
You can make pencil case doors yourself. If you are doing the repairs yourself, you can try to save money and make a pencil case. There are two options:
1. Build a false plasterboard wall along the main wall
, and between them build a cassette from the profile, installing a mechanism for the sliding door. The cost of such work may not differ much from the cost of a cassette. In addition, instead of freeing up space, we capture it by increasing the thickness of the wall.
2. Build a wooden cassette from plywood
. One of the well-known door manufacturers makes just such cassettes, offering them for its doors. But walling up wood in a wall, especially in plaster, is at least not practical. Wood can dry out and become deformed over time.
You can make a cassette yourself or entrust it to master finishers using the same logic that you can make doors yourself. For example, the difference will be the same as between a purchased stool and a homemade one.
Sliding door in the wall
If the partition is non-load-bearing, then it is necessary to destroy part of the wall to form a false wall with a niche. The dimensions of the niche must correspond to the parameters of the door leaf. Such designs allow you to build both single-leaf sliding doors into the wall and double-leaf ones. This installation method allows you to leave the thickness of the partition unchanged, preserving the primary area of the room.
Pros and cons of using sliding doors
Sliding mechanisms are very popular. Designs with an internal niche for a door have the following advantages compared to hinged doors:
- Sliding curtains save space in rooms of any purpose.
- Minimal risk of injury if doors are suddenly opened from the opposite side or through negligence in the dark.
- Mobile systems last longer than standard hinged mounts. The weight of the sash is evenly distributed on the rollers, ensuring a more stable and stable position of the entire frame.
- The absence of unnecessary details creates the impression of free space.
- A variety of decorative methods make it possible to experiment with style and complement the overall design of the room.
Among the disadvantages, one can highlight the considerable cost of the structure. Good quality parts and mechanisms are expensive. The main cost is buying a ready-made one or assembling it yourself, which is difficult to install without outside help. Therefore, you should add to the total amount the costs of paying specialists performing installation.
The disadvantage of mobile door systems is considered to be low sound insulation characteristics. Doors cannot function properly without gaps at the top and bottom of the door leaf. This nuance must be taken into account at the planning stage of specific zones separated by a partition. As a solution to help eliminate odors from the kitchen, a more powerful hood is used. Soundproofing brushes hide the cracks of doorways and get rid of extraneous sounds in the room.
Unique cases of using the sliding mechanism
Considering the advantages and disadvantages of sliding doors, it should be noted that in certain conditions there is simply nothing to replace the panels moving along the wall with. First of all, this statement concerns the area of creating interiors and zoning premises. Without the use of sliding partitions, this method of landscaping would be of little functionality: dividing a living room or studio using only screens, curtains or furniture is extremely difficult. Two or three-floor partitions or doors look much more harmonious.
Using a sliding structure, it is convenient to separate: a bathroom from a toilet, an office corner from a spacious reception area, a children's bedroom from a playroom - the interior partition creates two functional zones in the room.
It is possible to create a room with a semicircular or oval configuration (pictured) from glazed partitions or solid walls only with the help of sliding doors: their leaves can slide along the walls along a curved path.
Another class of premises where sliding doors are rarely used are foyers and halls. In modern VIP-class offices, glass sliding planes are a common attribute. An important feature of sliding doors is their suitability for automation: combining the opening mechanism with a motion sensor in swing doors can lead to increased injuries.
Sliding doors are indispensable in walk-through rooms. Two or more swing structures located in the kitchen or hall can absorb the free space necessary for the safe movement of people. Using sliding doors in a room like this provides security. Free space in kitchens is especially important: creating minimal obstacles for moving heavy and hot containers prevents injuries.
Sliding systems with pencil case
The design of hidden sliding doors with a pencil case looks like a box integrated into the wall. The rails with a roller mechanism are located in a cassette that protects the door leaf from possible mechanical damage and contamination during operation. In the open position, the sash does not take up space, which increases the usable space for arranging the room.
The thickness of the partition must correspond to the parameters of the pencil case so that the boundaries of the structure on the surface of the interior partition are not visually visible. To do this, it is necessary to take into account in advance the dimensions of the door, the thickness of the cassette racks, and provide indentations to ensure free movement of the door in the pencil case. After installation, half of the cassette is disguised under drywall.
The method of constructing the niche in which the canvas will be placed will depend on the characteristics of the wall with the opening for the door. Violating the load-bearing partitions of the building is unacceptable. In such cases, the niche needs to be completed parallel to the interior partition made of a metal or wooden frame. At the final stage, the structure is covered with sheets of plasterboard and prepared for further finishing. Wallpaper is glued to the new wall or paint is applied to match the main part of the room.
How to make a sliding door in the wall with your own hands
Using the step-by-step guide, you can make your own interior door in the wall. First you need to make the necessary calculations and display them on the drawing. Using the finished diagram, the sections of the wall to be dismantled are marked.
To correctly calculate the parameters of the pencil case, you need to select the width of the sash. The rail measurements will be equal to twice the width of the door panel. The length of the rack is determined by summing the measurements of the lintels, guides and an additional 10 cm for gaps on both sides of the sash. Standard dimensions of a pencil case: width is 2 cm larger than the panel, depth - within 8 cm.
Then they begin to prepare the profile for the false wall. If you plan to install a cassette with the removal of part of the wall, you will need a double row of supports. For fastening along the partition line, a single profile support is sufficient.
The jumpers with guides for the rails are attached first. Placing special rubber bands under the rollers helps absorb noise when the panel moves.
When all the fittings are installed, you can place the panel on the rails, attach the sash stops and check the operation of the system. The door leaf should move smoothly into and out of the pencil case. If everything is in order, the installation work is completed by finishing the exterior and closing the box.
Hidden door mechanisms are a multifunctional solution for any interior. For long-term and comfortable use, you should choose high-quality blocks. It is most convenient to order a one-piece design from a direct distributor of the factory. Self-assembly and installation requires skills in carrying out such work.
Manual and automatic sliding doors
Opening and closing of interior sliding doors can be done manually or using a special automatic system. With manual models, everything is clear: by holding the handle, a person moves the door in the desired direction.
As for automatic door structures, they are activated by a special sensor with infrared radiation that reacts to the approach of a person. Automated doors are easy to use, practical and easy to adjust, but their cost is significantly higher than manual options.
Automation of an already installed manual interior door is quite possible, but for this you will have to purchase the appropriate set of equipment, the price of which is around $700. The high cost of automated doors explains the unpopularity of their use at home.
At what stage of the renovation is a pencil door installed?
The decision to install a pencil case door should be made before starting repairs. It is especially important if you do not have a suitable doorway and need to prepare it - widen the standard opening or build a false wall. You should also buy a cassette for pencil case doors and install it at the beginning of repairs during rough work at the stage of leveling the walls.
Thus, the pencil case doors are installed in two stages. At the beginning of the repair, a door cassette is installed, and only at the end of the repair, after the final finishing is completed, the door leaf is installed and the doorway is refined.
Assembling and installing the cassette is very simple, no more difficult than furniture from Ikea. Detailed instructions and the simplicity of the cassette design will allow anyone to do this. The main thing is to install the cassette evenly. A more complex process is installing the door leaf and decorating the opening.
Recommendations for installing a cabinet door
If the frame is made of an inexpensive thin profile with a thickness of up to 0.5 mm, it should be strengthened using bars. Otherwise, the partition will begin to vibrate due to the movement of the blade, which can cause the guide to sag.
To prevent skewing and disruption of the vertical position of the jambs, during the installation process you will need to temporarily secure the doorway with a spacer tie.
To make it yourself, a steel profile or timber is used. Installation of the door structure requires precise determination of the width of the pencil case.
If a fairly narrow door is installed in a niche, the door leaf will begin to cling to the frame, and the presence of too wide gaps can worsen the appearance of the product and reduce its heat-insulating properties. The open canvas should not go completely into the niche, otherwise it will be difficult to close it, which will require the use of additional devices.
Determining the extreme position is very important. Installation of the cabinet door is carried out on a finished, perfectly flat floor surface. It is necessary to take into account all the nuances of the technology for installing the pencil case before covering it. After all the work is completed, it will be impossible to change anything, otherwise you will have to disassemble the frame wall again.
Step-by-step instruction
Let's get straight to the point. Check the complete set of the sliding door so that you can not be distracted from installation during trips to the hardware store or hardware store. Make sure that the length of the additional beam is sufficient (it should be enough for two side and one upper part of the opening). The same applies to platbands, only their number needs to be multiplied by 2 (since they are installed on both sides).
Sliding doors are fastened to the wall using plastic anchors and self-tapping screws. When drilling, it is recommended to use attachments with a countersink, which will help avoid cracks in the wood.
Preparation
Assemble the additional timber:
- measure the height and width of the opening;
- measure the required length;
- cut to the marked size;
- assemble all 3 parts, securing them together with self-tapping screws (at least 3 pieces on each side);
- check the correct installation using a hydraulic level (drive in wedges if necessary);
- Carefully fill the cracks with polyurethane foam, but so that its excess does not extend beyond the wood.
The additional timber will help to hide the unevenness left after dismantling the old structure and do without the complex procedure of leveling the opening. If necessary, it can be screwed to the wall using anchors and screws, providing additional strength.
Next, you should install the side (first) and vertical (between them) trims. The left and right bars should rise a distance equal to their width. In this case, they will fit perfectly with the top trim. For aesthetic purposes, you can cut the planks at a 45-degree angle and align them at the joints, creating a seamless transition.
Installation of timber
Now let’s answer a very important question: how is a sliding interior door attached? For this, a wooden block with a section of 50x50 is used. It is located strictly in a horizontal position (checked with a level), and on one side it extends beyond the opening by about 10 cm (this is the necessary margin in which the first stopper will be placed), and on the other it is shifted by the width of the door leaf (so that it completely goes to wall).
The thrust beam is screwed using anchors. It is located immediately above the upper casing. A distance equal to the width of the strip will be occupied by the aluminum guide and rollers.
Before further work, make sure that the timber fits snugly against the wall. It should not move away from it even a millimeter, since in this case it will sag over time under the weight of the canvas, which is why the door will hang unevenly and creak when closing.
Guide installation
Next, the top rail is installed in the center. It is an aluminum U-shaped bar with curved inner sides along which rollers move.
Mounting it is not very difficult. Using a thin drill, you need to make holes in increments of at least 20 cm and attach everything to the thrust beam using self-tapping screws. Make sure the fastener caps are fully recessed and do not protrude, otherwise they will interfere with movement.
How to assemble sliding models
To do this, you need to unpack the canvas (usually it is delivered in a cardboard box) and set it on its side. You can use special racks with slots, or secure the structure with heavy objects (you need to make sure that they do not damage the surface of the wood). Next, the transport strips are removed
How to install sliding door hardware
Mounts for rollers are screwed into the upper part. They are installed at an equal distance from both edges (you can use a small ruler and measure the same intervals). Metal elements are fixed using self-tapping screws at two or more points.
After this you need:
- insert the rollers into the aluminum guide;
- hang the door on them and secure with screws;
- install stoppers (limiters), measuring the blade in the closed and fully open positions, and fix them with a hexagon.
Please note that in the closed position it should protrude beyond the opening by 3-5 cm. This is necessary so that the structure does not extend beyond the flag even in the extreme position.
After gluing paper tape to the floor, you need to measure the location of the plastic flag. After this, the extreme stopper is removed and the door is removed. At the marked location, 2 holes are drilled for attaching the guide sill. It is fixed at the corners and secured with 2 more screws. Of course, before placing the flag you will have to remove a strip of paper tape (it is used to avoid marking with a pencil or marker directly on the floor covering).
Finishing the opening
You should make sure that all elements fit snugly against each other and that there is no gap between them that would lead to play. Please also note that the platbands and additional beams are fastened freely, without unnecessary effort. If they are fixed under pressure, then over time they will bend outward, which will inevitably lead to deformation of the entire structure. This cannot be allowed.
Decorative design of sliding doors
This is the final stage, however, it deserves no less attention. Having checked the box and carefully inserted the canvas into it, you need to check the movement and make sure it is smooth. An alarming indicator may be any extraneous sounds or squeaks (there should not be any).
Next, you need to put the previously removed limiter back in its original place and secure it. Now technically the structure is completely ready for use, but one more nuance remains: an open wooden beam with an aluminum rail, which spoils the appearance of the sliding door. This problem can be solved thanks to a special screen.
Do-it-yourself cassette door installation
We can safely say, and this will be the honest truth, that the process of installing a sliding door into a wall is very complicated. The technology also includes some nuances. You can handle this with your own hands, but you should understand, and most importantly, confidently know the technological process.
The first step is to prepare the opening. At this stage, part of the wall should be disassembled or broken. Even if you have to break it, it should be done as carefully as possible, and the process should be controlled by a measuring tool.
Then the length and width are removed from the pencil case cassette. Using these dimensions, the contours for the new doorway are then drawn and cut out with maximum precision. It is very important that the level of both the side parts and the top is maintained - accuracy is very important here. Precise opening – easier installation of the cassette case. Also, we should not forget about the gap that is provided between the door opening and the cassette. Ideally, leave 2 centimeters on one side and on the other. These gaps will then help level the entire structure.
Next, the cassette is mounted in the resulting opening.
The better all levels are met, the easier and quieter the door and mechanism will operate.
Also, the service life depends on how well the cassette-case is leveled. The cassette can be secured using special products, or the structure is simply shrinked using polyurethane foam. Two methods of fastening are used at once.
Next, a false wall is installed for the sliding door. Here the whole subtlety lies in choosing the right method of fastening, as well as in the technology for installing gypsum. For the most part, the technology depends on the thickness of the wall in which the cassette with the canvas is installed. If the thickness is sufficient, then a frame is made using a profile; if the thickness does not allow it, then the drywall can be built directly onto the cassette. Do not use long self-tapping screws for fastening - this can damage the door leaf. It will be enough if their length is 16 mm.
That's all that can be said about these cassette doors. For most people, installation technology may seem overly complicated, but in fact it is not. Having certain skills, you can easily build this structure. But you shouldn’t think that the process is very simple - this is also not true.
Efforts always pay off and this is expressed not only in the beauty of the door or ease of use. This is also moral satisfaction from quality work done, and the cassette door is completely worth the effort. The design has many advantages, it does not allow noise and odors to pass through, door closers make operation even more comfortable, and residents of compact city apartments will be able to 100% appreciate this solution.
Self-installation of sliding interior sliding doors
Installing interior sliding doors with your own hands requires a lot of effort and a responsible approach. However, it is quite possible to cope with this task if you follow the instructions step by step.
Sliding door installation instructions
Sliding door installation diagram
However, before you start, make sure you have everything you need at hand:
- Doors, frame, cash;
- Accessories (lock, handle, runners, rollers);
- Beam 0.5x0.3m;
- Fastening;
- Tools: drill, chisel, level, fine-toothed hacksaw, tape measure.
If the weight of the product is over 27 kg, then the structure will need four rollers. Also think about hidden options for locks and handles. When using the sliding system, they will not damage your wallpaper or wall.
Armed with everything you need, proceed to the first stage.
Preparation
The first step is to decide on the installation location and the number of sashes. Think about how they will open and interact with each other. Decide how the product will be attached: hang the sliding products on the top rail or hide them inside the pencil case.
Dismantle the old door structure and ensure that the opening is in the correct condition. The door frame is mounted in such a way that the gap between the door leaf and the floor in living rooms is 1 cm.
Interior doorway
- Measure the width and height of the opening . For greater accuracy, experts advise taking measurements in three places: top, middle and bottom. In addition, it is important to determine the height of the canvas when closed and open. This will allow for possible floor curvature to be taken into account.
- Attach a wooden beam . To do this, measure the width of the rail from the top of the box, draw a straight line at the level of which the timber will be installed. Its middle should be above the part of the box towards which the canvas will move. The width of the pole should be such that after finishing the device can be closed without any hindrance.
- Install the top guides. The rails are attached to the timber with hardware. Using rollers you can check how correctly everything is installed. If they slide freely, move on to the next step. Otherwise, everything will have to be redone again.
Rails are installed using hardware - Install the bottom skids using one of the following methods::
- The guide along which the rollers will ride is inserted into the subfloor.
- The rails are installed on the finished floor and an additional threshold is made to protect them from destruction.
- Installation of a batch knife, the function of which is to regulate the movement of the blade in a given direction.
The good thing about installing a threshold-free sliding model is that it does not require destruction of the finished floor. The mechanism is based on carriages with rollers on ball bearings that ride on runners. The rails above the opening are disguised under a decorative strip.
Assembly of sliding doors
At this stage, the roller mechanism is placed on the upper end of the door. Then we go down to the bottom end. We drill holes on both sides at a distance of 1.5 cm from the edges, and then make a groove between them 2 mm wide and about 10-18 mm deep (the height of the knife).
The areas at the end free from the groove will serve as a travel limiter for the blades.
Installation of fittings for sliding doors
This is a rather labor-intensive process, so if possible, trust the master. If you decide to do the work yourself, then be extremely careful and careful and follow the attached instructions. Otherwise, due to inexperience or carelessness, you can damage the product.
Installation of a sliding interior door
The sashes are placed on runners and checked how they move. If no problems arise, rubber shock absorbers are installed in the guides, which act as limiters. They do not allow products to derail during movement, and also make their stop soft and silent.
Decorative design of sliding doors
To make the opening look aesthetically pleasing, it is necessary to hide all structural elements. Use overhead strips for this. Install decorative elements on the box and top rails.
However, there are cases where finishing is not necessary. Sometimes design elements are part of the design solution. This is typical for modern or high-tech interiors.
Having gone through all the stages in order, you can enjoy the fruits of your labor. Ideally, sliding doors should look like in section as in the drawing:
Installing a sliding system is only half the battle; the other half is its correct operation. Therefore, observe the following rules:
- Remove debris from the guides, otherwise this will cause the device to stop working.
- Close and open the doors with smooth movements. Careless operation will lead to rapid wear of the roller mechanism or the stopper falling out.
- Check the condition of the fittings regularly. Replace worn rollers in a timely manner to prevent the rails from becoming deformed.
- When caring for canvases, glass and other components, buy special products.
By choosing sliding products, you get double benefits: practicality and beauty.
Calculation of the cost of a hidden structure
The price of a pencil case door is determined individually, depending on many factors. So the following parameters can affect the cost of a hidden system:
- Door leaf dimensions;
- Complexity of design;
- Number of door leaves;
- The material from which the doors are made;
- Selected decorative finishes;
- Installation of additional elements.
All these factors are taken into account when calculating the final cost of the interior secret structure. The final price will be announced after measurements and drawing up a design for the future product.
Sources
- https://o-dveryah.ru/razdvizhnye/mezhkomnatnaya-penal/
- https://sdelalremont.ru/skrytye-v-stene-dveri-krasivo-neobychno-udobno.html
- https://revecon.ru/category/doors/razdvizhnye-dveri-kupe/skrytye-razdvizhnye-dveri/
- https://VseoDveri.ru/mezhkomnatnye-dveri/razdvizhnye-mezhkomnatnye-dveri-skrytye-v-stene/
- https://Dver1.ru/pro-dveri/sposoby-otkryvaniya/dveri-penal-7-originalnykh-sposobov-ustanovit-razdvizhnye-mezhkomnatnye-dveri-penal-video/
- https://zen.yandex.ru/media/id/5b504f904cfa8b00ab54d3e2/5b6d582f79b39e00a9ced25f
- https://o-dveryah.ru/razdvizhnye/v-stenu/
[collapse]