Purpose of ebb tides, need for installation
Water falling on the surface of the base gradually destroys the concrete surface. These deformations are especially noticeable when the temperature fluctuates: at low temperatures, the moisture absorbed into the concrete hardens, and in the summer deep cracks begin to appear on such a structure, the plaster peels off and falls off in layers, and sometimes even entire bricks fall out.
Thus, the structure quickly collapses and falls into disrepair. To prevent the building from becoming unusable, flashings were introduced for the foundation plinth, which today are the most optimal solution to this problem.
The negative impact of moisture manifests itself in the form of cracks and chips
Base ebb: what is it?
In appearance, products of this type may resemble plates. The ebb tides differ from each other not only in characteristics, but also in design. Elements are often added that can not only increase functionality, but also make installation work easier.
Shelves are available in various sizes. Manufacturers offer base moldings of different sizes so that you can choose a product that suits your needs. The color range is also quite diverse, so you can easily choose products for different facades.
Why you need to install ebb tides: their purpose
Moisture and various kinds of precipitation that will fall on the surface of the foundation will eventually lead to the destruction of the concrete surface. Most often, deformation becomes noticeable if the temperature constantly fluctuates.
Due to the lack of protection, the base will gradually collapse, which can cause the entire building to fall into disrepair. In order to avoid the building being unsuitable, it is necessary to install special flashings for the base. This will solve the problem and protect the house from destruction.
Design Features
Externally, base ebbs resemble plates. The designs of plinth ebbs are distinguished by the presence of well-thought-out elements that increase their functionality and facilitate installation work. The most important components are the folds and shelves. The structures are fixed to the surface of the walls with special fasteners, while the shelves are mounted at a certain angle relative to the foundation to ensure water drainage.
The sizes of the shelves vary; you can find options from five to forty centimeters in width. The color range is so varied that there is always a choice for any façade.
Base drip device
Design and purpose of basement flashings
In a protruding type of base, the upper edge is very vulnerable to moisture generated from precipitation. The liquid accumulates at the joints between the foundation and the walls and gradually destroys the structure of the concrete. This is especially noticeable during temperature changes: in winter, accumulated moisture freezes inside the foundation and expands; in warm periods, it thaws, forming cracks in the walls. In addition to damaged finishing, such destruction can lead to the loss of entire bricks, leading to the formation of mold and mildew indoors. In addition, dampness gets inside the basement and under the protective finishing of the basement walls. All these factors reduce the service life of the structure, so there is a need for low tide.
The need for basement flashings is determined by their protective functions
External flashings for protecting the basement of the walls look like plates. The design is distinguished by the presence of elements that simplify installation and increase the functionality of the ebbs - these are shelves and bends. The latter serve to fix the ebb to the wall, and the shelves bear the main load: they are attached at an angle to the base and provide moisture removal. The width of the shelves varies from 50 to 400 mm. The color spectrum is very diverse, which makes it possible to choose a model to suit any exterior.
Design of ebb and flow for the ground part of the foundation
The main purpose of the base ebb is to protect the basement part of the foundation from the destructive influence of the environment.
Based on this, their scope extends to:
- residential buildings;
- warehouses;
- administrative buildings;
- buildings for technical purposes;
- fencing.
In addition to the protective function, the ebb for the base is used as decoration
In addition to the details of their design, castings are classified by size, color and material of manufacture.
Where is it installed?
Another name for ebb tides is parapets. In their standard form they consist of a shelf and drips on the sides. Fastening is carried out using bends that are perpendicular to the shelf.
Depending on the design, they are fixed on top of the fence sections or base.
On the foundation
The product resembles a plinth canopy, which is laid close to the wall with one of the cuts, and covers the base with the other curved edge.
If the fence will be faced with tiles or stone, then the ebbs for the foundation must be installed with hidden screws with an O-ring.
And cladding should be carried out upon completion of finishing work.
On top of a brick fence
They are mounted together with caps, giving the structure a neat appearance. In color, both types of elements should be the same or contrastingly complement each other.
But the main function is to protect the masonry from moisture getting inside.
If you do not immediately attach the ebbs to the brick fence, then over time microcracks will appear on the material and it will begin to crumble.
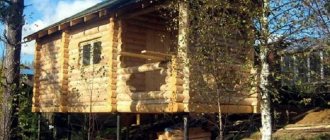
How to install flashings on the base of a wooden building
If you need to install flashings on the base of a wooden house, then you can begin installation work immediately after completing the construction of the walls.
It is also worth following clear instructions to do everything correctly.
- Calculate how long the tides will be needed. To do this, you need to measure the perimeter of the house and add approximately 10% of the total length to the result. This is necessary to ensure that there is enough material for overlaps when joining or trimming corners.
- Next comes the determination of the width of the ebb tides for the base. If you take into account the fact that the product needs to be fastened at an angle of 10-15 degrees, then it is worth applying a ruler from the wall to the edge of the base. The point of application should be marked with a marker. During the calculation, you can add 2-3 centimeters if you plan to release over the edge. If the shelf width is less than 7 centimeters, then installation of the drip sill is possible without the use of a substrate. If the width is more than 7 centimeters, then it is best to add a solid base along the edges of the base.
- From the height of the marked point you need to draw a line along the entire perimeter of the building. To do this, you can use a length of rail or pull the cord.
- Next, you need to apply a small amount of sealant to the top shelf of the product and attach it to the wall using self-tapping screws. Straight sections need to be overlapped, leaving a small margin, about 3 cm. At the corners, the connection is made from two ebbs, which are pre-cut at an angle of 45 degrees. It is important that the edge of the second ebb must be cut with an allowance of at least 1.5 cm so that the rivets can then be secured.
Mounting options
Kinds
Ready-made base sills are divided into several types depending on the material from which they are made:
- PVC or plastic;
- metal – steel, aluminum, copper;
- clinker (ceramics);
- concrete.
Before making a choice, it is worth studying the properties and advantages of each type of protective shelf for the plinth.
Plastic
Plastic moldings made for foundation plinths are in great demand due to their undeniable advantages. First of all, these are high performance characteristics - resistance to external influences, low cost, service life, variety of sizes and colors. PVC products will look great in combination with vinyl siding.
The disadvantage of this material is that if its integrity is damaged, the product cannot be repaired. And because of its fragility, it is quite easy to damage the surface.
Clinker
Flashings made with clinker tiles are more expensive than their plastic and metal counterparts. This material is usually used in conjunction with finishing the foundation and the entire structure with clinker tiles. It will reliably protect the base from external factors and mechanical damage. But the installation of such a product should be planned even before construction begins, and experienced craftsmen are involved in its installation.
Flashings can be made from various materials
Metal
Metal castings are also popular. They are reliable, strong and durable. But the cost of such a protective element is much higher than that of PVC products. Copper shelves are especially expensive. In addition, they require constant care, so aluminum products are most in demand. This metal is very light and will allow you to easily install the plank on a foundation or ventilated façade.
Metal flashings coated with a polymer coating are much more expensive than unpainted ones, but their appearance and durability are much superior to ordinary strips that are not coated with anything.
Important! When installing metal ebbs, you should avoid cutting the metal, as this can damage the coating and cause corrosion.
Steel castings
Steel products are affordable and have sufficient durability. There are options made of galvanized alloy and having an additional polymer coating. They have one color or another and high weather resistance. If you use metal tiles or corrugated sheets on the roof, you can choose a similar shade for finishing the base of the house’s foundation.
Steel ebbs
Steel elements are quite widespread and can be purchased at any construction base or in a specialized store. In addition, it is easy to install such flashings on the foundation of a house with your own hands without the use of hired labor, which allows you to reduce the overall costs of this type of work.
Aluminum ebbs
Aluminum castings
This type has the same advantages as the previous one. In addition, aluminum has higher weather resistance and significantly lower weight, which ultimately allows reducing the load on the foundation of the house. These products also differ in price, which is slightly higher than the cost of steel castings.
Copper tides
Copper tides
Another type of metal ebb is made from copper sheets, which gives the base protection a noble appearance. When used with the appropriate finish, these products retain their reddish hue without the green copper oxide deposit. The limiting factor in the distribution of copper castings is the maximum price of the entire group of metal castings.
Galvanized
As already mentioned, galvanized steel ebbs are the most budget-friendly options for metal products. In addition to cost, the advantages of such structures are: versatility, durability and ease of installation.
In the modern construction market there are many color variations - if desired, you can even find wood finishes. In addition, there are products with a polymer coating that protects the cast from impacts and scratches. The most common options for such coverage are:
- polyester (service life 10 years);
- matte polyester (service life 15 years);
- polyurethane (service life 50 years);
- plastisol (service life 30 years).
Classification of species
Installation of ebb and flow sills on the base of the foundation, if you have everything you need, is possible with your own hands. To do this, you can use different types of plastic, steel, copper or aluminum material.
PVC
Such ebb tides have a large number of advantages, which makes them popular among consumers. The material is primarily characterized by a long service life, resistance to aggressive environments, a wide variety of shapes and a wide range of colors. To this list of positive qualities should be added excellent waterproofing qualities and reasonable cost, guaranteed reliability during operation.
There are also negative aspects. They are mainly associated with the fragility of the material itself and the impossibility of performing repair work if a breakdown occurs.
As a rule, plastic flashings for the foundation base are installed when finishing objects with siding or vinyl.
Installation diagram for drip linings when covering the facade of a house with siding
Concrete
The optimal solution, which has proven itself over time. Best suited for structures finished with stone. Concrete elements are made from the M450 mixture, which includes crushed stone, sand, cement and plasticizer additives, which give the tides the ability to withstand temperature changes and increase their service life.
The products are durable and perfectly resistant to cracks and other deformations. The advantages of concrete castings for the foundation plinth can be continued with a wide color palette and the availability of various sizes, which can vary taking into account the dimensions of the plinth.
There is also one significant drawback - the ebb tide option is cumbersome, and its installation should be provided for in advance in the design decision for the construction of the facility.
Concrete casting for foundation plinth
Clinker tiles
Today builders use this material quite often. This is due to the high aesthetic level of the tiles, strength indicator, long service life, and the quality of protective properties, with the help of which it is possible to reliably preserve the foundation from getting wet.
Here it is fair to note that the cost of such material for drip tides is quite high, and installation work is associated with certain difficulties, which require the availability of appropriate skills.
Clinker ebb on the foundation plinth
Metal
Metal ebbs for foundation plinths are distinguished by a variety of options, while having similarities in certain elements in appearance. Each shelf has two folds. With the help of this, the ebb tide is secured, and water flows down the second one.
The model range is distinguished by color schemes depending on customer preferences. In addition, to produce metal castings for the foundation plinth, manufacturers can use inexpensive galvanized steel or, when fulfilling an exclusive order, apply a special protective coating of a polymer composition over the metal surface, which provides additional durability.
The main advantages of such ebbs include a long service life, resistance to temperature changes and mechanical impacts, a laconic appearance, and the ability to select elements taking into account your own needs and financial capabilities.
Galvanized ebb for the base
Color spectrum
Metal and plastic models of ebb tides have a wide selection of colors, which allows them to be used in combination with other finishes from the same materials, forming a unique set. For example, a base molding made of steel coated with a protective polymer layer and blue paint will look harmonious on a house where the roof is finished with blue corrugated sheets or metal tiles of the same color. In this case, the facade itself can be finished in any way: plaster, siding or composite panels.
An example of finishing a house with harmoniously selected protective elements
Aluminum and copper shimmers are produced in the same natural color. Concrete structures can be adapted to any exterior by painting. Protective elements made of natural stone have the colors of the rock from which they were made.
Low tide for a plinth made of natural granite in the exterior of a house
PVC flashings
The advantage of PVC models is that they are more economical in price than metal products. They also have excellent technological characteristics:
- Waterproof.
- Easy to install.
- They have a long service life.
- Quite resistant to mechanical stress.
- Due to their low weight, they do not place additional load on the foundation.
The manufacturing material allows you to create products of a wide variety of shades and textures. PVC flashings will look great on houses covered with siding.
When choosing PVC flashings, you should pay attention to their characteristics given by the manufacturer. Products must be resistant to low temperatures. A price that is too low usually indicates low quality. There is a risk that such ebb will crack in the cold.
Criterias of choice
The casting for the foundation plinth is the final stage of façade finishing. With its help, the boundary separating the ground part of the foundation from the load-bearing walls is conditionally determined. It follows that it is necessary to choose ebb tides according to the following conditions:
- protective function;
- aesthetic appearance.
The ebb is chosen to match the tone of the façade finishing, and the material used to finish the walls and base must be taken into account.
For structures built from timber, it is recommended to use ebbs from any metal; for buildings made of brick or block, it is allowed to install ebbs from any materials.
You should pay attention to the thickness, weight, uniformity of structure and shades, the quality of the coating (if any), and the specifics of the installation work. Low-cost products have a short service life, so saving in this case is not recommended.
Correctly selected ebbs must completely coincide with the base forms, corner areas, niches, rounded areas, and bay windows. When laying strips, a mandatory overlap is provided, which should be taken into account when performing calculations on the requirements for materials and all necessary components.
There is one more factor that must be taken into account when choosing ebbs - the possibility of their coloring and suitability for repair in case of damage.
Base features
There is a restriction for owners of private houses and developers: the height of a private residential building should not exceed 2 full floors. This is the reason for the wide popularity of semi-basements: they allow you to completely legally circumvent the ban and expand your living space. Essentially, the ground floor is a type of basement. The only difference is that it has windows and partially rises above the ground level.
Types of building plinth
Structural types of socles:
- Sinking. The walls of the house are wider than the ground part of the base, and the basement part appears to be recessed in appearance. The advantage of the design is that practically no precipitation falls on the semi-basement walls. All water from the roof flows down the walls without getting to the base. Such walls do not require a drainage device.
- Parallel (in the same plane). In this case, the load-bearing walls of the house are in the same vertical line with the base.
- Speakers. The walls of the semi-basement floor are wider than the facade ones and provide significant thermal protection. This type of base is necessary for buildings with a heated basement, but requires a drainage system.
As a rule, a “recessed” base does not require additional waterproofing
What to consider when designing
Base ebbs acquire decorative value when they are correlated with other decorative elements.
The protective surface should be in harmony with the texture of the house walls, metal elements of the building (platbands and drainpipes) or form a single stylistic whole with the cladding of the facade or foundation.
The decorative component should not be at the expense of service life, and you should choose a durable material that can last quite a long time.
When choosing a long service life, ease of installation and the allocated budget are of considerable importance.
To avoid hassle with installation, you can order finishing from the manufacturer
Beauty can be achieved by using polymer materials selected according to style and the remains of tiles or stone from wall cladding. If the building is being erected with your own hands, then, when considering how to make ebbs for the foundation, you need to take care not only of the availability of building material, but also of reliable fastening elements.
Sometimes the main criterion is the skills acquired while working with certain forms of protective shelves or profile elements.
Of particular importance is how durable and functional the external and internal corners can be assembled from the selected raw materials. This is one of the most vulnerable places due to the presence of complex joints.
A convenient and simple solution can be a protective shelf from the manufacturer, custom-made taking into account the required parameters, shape, width, corner joints and with fasteners included.
How to finish the basement of a house
Making casting for the foundation
The flashings are installed upon completion of the plinth cladding before the façade cladding. Horizontal markings are made with a water level. The dimensions of the foundation ebbs are determined using a tapping cord. Next, you need to cut blanks of the required width from a metal sheet plus a bend on both sides.
The width of the working shelf is usually 40-50 cm, about 5 centimeters more than the width of the ledge itself. The width of the vertical shelves is 2 cm.
At the bottom, an additional bend of 1 cm is made towards the wall, horizontally.
To drain water from the facade, the angle of the canopy should be 15 degrees:
- Check with a level that the protrusion plane is horizontal.
- A slope is made on the ledge using cement-sand mortar.
- Waiting for it to harden.
- The edges of the metal parts are bent in opposite directions at an angle of 105 degrees.
- Place it on the ledge and adjust the bend so that the edge fits tightly to the wall at the top and falls vertically down at the bottom.
Next, check the integrity of the facade wall. Chips and cracks in concrete are filled with sealants, putty or plaster. Further:
1. Make mounting holes in the upper flange of the low tide at the same level in increments of 30-40 centimeters.
2. Place the canopy against the wall.
3. Make holes in the façade with a drill or hammer drill and secure the ebb with dowels.
4. Upon completion of installation, the gaps between the wall and the sill are filled with sealant.
Sometimes the planks are not placed directly on the wall, but on pre-installed guides. In this case, fastening is carried out to the guides with self-tapping screws.
Installation of flashings on pre-installed guides
In any case, the overlap of adjacent planks should be at least 3 centimeters. The seam is coated with frost-resistant sealant.
Joining of two low tide strips
There is a nuance in installing flashings on the foundation of a wooden house: a groove is selected in the facade wall and the edge of the canopy is inserted into it, installing a wooden board underneath for rigidity.
If the facade is ventilated, the ebb is attached directly to the wooden frame with self-tapping screws. In this case, the top edge will overlap the siding panel.
Installation of ebb and flow on a foundation with a ventilated facade
When installing plastic moldings, you need to be careful: if you hit them with a hammer, the material may collapse. When you need to bend a workpiece, place a rubber or felt pad under it.
If the ledge is wide, it is recommended to attach the planks to brackets, otherwise they will flap in the wind.
Installation of ebb tides
Depending on the material from which the additional element is made, fastening is done with hardware or the ebb is glued and installed on the surface of the base using mortar. Individual developers usually install drip sills from sheet materials, so this particular technology will be considered. First of all, you need to consider:
- the dimensions of the plank are limited by the length of the bending machine; the additional element will not be enough for the entire wall;
- first of all, the corners and façade elements protruding outward (pilasters, figured masonry) are designed;
- then the planks are laid overlapping on the straight sections of the base.
Important! The foundation of a house most often has a flat surface at the top; the ebb should be located at an angle. The supporting plane for the middle shelf of the additional element is created with a solution or the voids are filled with polyurethane foam at the time of installation.
Average prices for creating a product by region
Depending on the region and the material used to create the tide, prices for products can vary significantly; average prices in various major cities are presented in the table:
| City | Stone | Metal | Galvanization | Plastic | Concrete | Clinker brick | Tree |
| Price rubles per m | |||||||
| Moscow | 400 | 130 | 140 | 85 | 300 | 250 | 280 |
| Saint Petersburg | 410 | 135 | 120 | 90 | 310 | 265 | 250 |
| Kaliningrad | 420 | 130 | 140 | 82 | 310 | 240 | 260 |
| Novosibirsk | 395 | 140 | 150 | 89 | 305 | 245 | 270 |
| Vladivostok | 500 | 160 | 170 | 95 | 330 | 280 | 300 |
Everything you need to know about building a basement can be found in this section.
Fasteners for installing ebb tides
Before starting installation work, you should check the horizontalness of the surface. If there are deviations or distortions, the surface must be leveled with cement mortar. To ensure that the mixture adheres well, the surface layer is shaped like a slope. At the corner of the walls, a painting cord is attached in a horizontal position, which will serve as a guide for constructing the slope. Proportions of working solution: 1 part cement to 3 parts sand. Water is added in such proportions that the finished mixture does not drain from the painting tool. In order for the moisture to evaporate properly and the solution to consolidate, it should be kept for two days. The ebb tides are attached to the plinth to the wall surface or to the guide elements.
Clinker castings
Clinker has recently become increasingly popular in the finishing industry. This is a reliable modern material, characterized by excellent properties, environmental friendliness, wear resistance and high decorative qualities.
Clinker:
- Hygroscopic.
- Resistant to low temperatures and temperature fluctuations.
- The products are quite lightweight, which significantly lightens the load on the concrete base.
- Long service life.
- The ability to maintain an attractive appearance for many years.
Installation of ebb tides on the base is carried out using a special frost-resistant adhesive composition. The flashings are laid directly on concrete, brick or stone.
For all its positive qualities, clinker ebbs have a couple of nuances:
- They are quite expensive.
- Installing the drip sill on the plinth is quite difficult. It is best to entrust this work to professional builders. Before laying, the surface will need to be carefully leveled.
When and how to attach the ebb
The ebb is attached to the wall after finishing the plinth, before cladding or insulating the walls of the house. Before installing the drip tides, check the level of the horizontal edge of the base and make a slope along it from a cement-sand mortar. To obtain an even line along the facade, secure with dowels a tape stretched from corner to corner, verified by the building level.
Using a prepared cement-sand mortar with a composition of 1:3, a slope with an angle of 15% is formed with a trowel on a tape. Next, wait for the solution to set. As an option, it is possible to make a slope from frost-resistant polyurethane foam. The joint between the fastening bend and the wall is sealed with silicone.
If the plinth is one line with the wall, the thickness of the insulation on the plinth will be greater; the installation of ebb and flow on the plinth is carried out in the same sequence.
The castings for the base of the foundation of a wooden house are performed in a similar sequence. In this case, there is no need to bend the bend - just cut a groove in the log for the ebb strip.
The plinth ebbs are attached to the wall or cladding guide profiles; in this case, it is necessary to pre-mount the curtain wall frame.
Flashings on the base of a pile-type foundation lined with siding are also installed before cladding the house, so that the finishing protects the junction of the wall and the fastening bend.
The ebb is attached to the wall surface with self-tapping screws to the wood, the dowel - with nails to the brick, and the dowel - with screws to blocks of lightweight concrete, every 300 mm. The planks are laid on top of each other with a 30 mm overlap, all joints are sealed with frost-resistant materials.
IMPORTANT: Large width ebbs are mounted on a plinth using a T-shaped spike to reduce windage.
Installing parapets in a simple way
The metal apron is installed using self-tapping screws or dowel nails. The mounting connection is screwed into the overhang of the U-shaped ebb. If the protection is installed on a fence made of facing bricks, which is hollow inside, screws are screwed into the seam. This is done to ensure that the connection is tight. A span of more than 2 m is fixed by 4 pieces. self-tapping screws on each side.
Example of U-shaped plank placement
Installation using fasteners
The second method is to install ebb tides using strips, which come in two types: straight and T-shaped. The planks are attached to the upper part of the foundation with self-tapping screws or dowels. Install them at a distance of 50 cm from each other. Then the parapet is put on the slats. This method is used for structural rigidity or when it is not possible to screw screws into the side of the fence.
Only after fixing the strips do they begin to place the caps
Installation of concrete parapets
Installation of concrete parapets begins with preparing the top of the fence. The surface for installing the ebb tide is cleared of construction debris. If the surface is too uneven, make a screed to level it. Then they are treated with a special primer for better adhesion.
Parapet location rules
Check the plane with a level. For accuracy, pull the thread in the place where the bottom of the parapet will lie. This will allow you to lay the slabs on the same level without differences. Then measure the distance between the pillars and try on the slabs. If the slab does not become complete, it is cut with a grinder with a concrete disc. The gaps are sealed with sealant.
Installation work
Once you have decided on the choice of material, you can proceed directly to installing the ebb tides. It must be taken into account that installation may vary depending on the design of the house and the tides themselves. For example, flashings for a wooden house should be selected taking into account the characteristics of wood: weak adhesion, fear of dampness. In this case, it is better to purchase materials that are attached to self-tapping screws and other fasteners.
For brick and stone buildings, you can use elements fastened with various mortars. These include clinker and concrete products.
Required materials and tools:
- Construction foam.
- Additional elements of ebb tides.
- Sealant and putty.
- Grinder, tile cutter, hacksaw, metal scissors.
- Pliers and hammer.
- Level.
- Hammer or drill.
- Self-tapping screws and dowels for concrete.
- Screwdriver.
- Mounting brackets.
Preparations before installation
Before you begin installing the drip linings, it is necessary to seal the joints between the walls of the house and the base. Cracks and crevices should be sealed with either water-repellent mastic or construction sealant. Wooden walls are treated with antiseptics.
The next step will be to mark the wall horizontally. It is best to use a laser level for this. Using a laser, you need to find the highest point of the plinth, draw a line above it or stretch the twine along the wall of the building.
Fastening elements
The sills need to be attached from the corner of the building - corner elements are used for this. First of all, you need to install sills on the protruding parts of the wall - columns, pilasters, etc.
When using plastic or metal products, holes are made in their upper part using a drill. Next, each element must be attached to a pre-designated line on the wall of the building and attached using dowel-nails and self-tapping screws.
The next step will be to seal the joint between the material and the wall with putty or silicone compound. We also attach the lower part of the ebbs to the concrete base using self-tapping screws. You can fasten every 40-50 centimeters.
After installing the corners and protruding parts of the building, you can begin installing additional elements on straight sections. They should be attached from one of the corners. Adjacent elements must be overlapped by approximately 30-40 mm, and the joints must be sealed.
Concrete slabs and clinker tiles are best installed together with the cladding of the house and basement walls. Otherwise, installation difficulties may arise. Such ebbs look better with similar facing materials that are used to finish the base: porcelain stoneware, natural stone, facing brick.
To attach such materials, it is necessary to use adhesives for ceramics and stone. They can be purchased at a hardware store. You can also make this composition yourself from sand and cement. The ratio of cement to sand should be 1:3. The solution should be quite thick. Installation of concrete or clinker products, as well as metal castings, must begin from the corner.
You need to fasten the drip tides by applying the solution to the back side exactly according to the previously outlined drawing.
Then, as the solution sets, it is important to seal the joints with putty or sealant. After the solution has completely hardened, further cladding of the building can begin.
Installation diagrams
The width of the ebb is determined after the design of the base, because the trim may bring the front of the base forward. The angle of inclination of the frontal plane is assumed to be 10 - 15°, so the tape measure is applied to the wall at the appropriate height and measured to the edge of the horizontal surface, taking into account the offset.
The length is calculated along the perimeter of the fastening, while the measurement is taken along the outer edge of the intended ebb. The resulting length is multiplied by a factor of 1.1 to take into account trimming corner joints and overlapping joints.
Installation procedure:
- installation begins from the first corner of the building;
- the second is to install the profile at the next corner;
- then the elements are connected using a straight section;
- then the ebb is attached to the third corner, connected to the second by installing the ebb on a straight section, and so on.
The tides are connected by soldering into a lock. The second method is used for metal drains that are bent at the installation site. Soldering is rarely used, because violates the outer protective layer of the profile.
Outside corner
Outside corner
The external joint of the turn is made from the main strip, the connection line is coated with sealant. A support element is placed under them so that the corner joints do not move vertically.
Methods for making an outer corner:
- There are two straight stripes. Straight sections are selected, the end of one is cut at an angle of 45°. For marking, a miter box is used or a special template is made. The end of the second piece is cut off in the same way, but an allowance of 20 mm is made along the length. The allowance remains inside the joint, and the strips at the corner are fixed with rivets to each other.
- From one straight profile. On a straight section, an angle of 90° is marked so that its apex is on the bottom shelf, and an allowance of 20 mm is given on the plane. The drain is cut according to the markings without entering the bottom shelf. The casting profile is bent so that the parts form a right angle, and the tolerance is at the bottom of the joint. The parts are connected by soldering or rivets.
The joint does not always turn out beautifully, so a decorative strip made from a profile is used. The width of the element ranges from 4 to 8 cm and is fixed with self-tapping screws or rivets.
Internal corner
Internal corner
The principle of joining the flashings at the corners inside the protective trim is similar to the connection of the outer corner, but has some differences. Each line in such a place is finished individually and before the profiles are placed on straight plots.
Making an internal joint:
- From two straight sections. The ends of the straight strips are shaped at an angle of 45°, as when making an external corner, but in the opposite direction. The second piece is cut 20 mm longer than the required size; when joining, this outlet passes from the bottom of the joint.
- From one profile. A 90° angle is marked on a straight piece, but the top of the angle is located not on the bottom, but on the top shelf. Further, the technology for manufacturing internal and external corners is no different.
To support the wide internal joint, support bars are used, on which the profile is placed. On wooden purlins, an internal joint is also formed so that the ebb is firmly attached to them without gaps.
Straight joint
Straight joint
The profiles are overlapped or a lock is made. In the first method, rivets are placed for strength. Such a connection has the advantage that during thermal expansion there will be no deformation of the castings due to shear. The sealant between the connecting areas acts as a thermal seam. The overlap connection method is simple and is used in the case of installing basement drainage systems with a large scope of work.
The lock option requires a lot of labor, but is reliable and durable. This connection does not allow water to pass through, even if the joint is not treated with silicone.
Types of gearing used:
- single recumbent;
- single standing;
- double recumbent;
- double standing.
The decorative strip is installed when joining with an overlap; when joining with a lock, it is rarely used. Such inserts increase the cost of installing the base.
How to make a corner at low tide?
Some difficulty comes from processing the corners of the house: the joints must be airtight and look neat.
The ready-made set of PVC flashings already includes the corresponding additional elements. This is a solid cast corner; after installing it, all you have to do is seal the joints with the walls and straight sections.
The corners of metal castings can be processed in different ways:
- cut the edges at 45 degrees and lay with an overlap at the joint;
- close the joint with a separately cut rectangular strip and secure it with screws;
The joint of the ebb corner with a separately cut rectangular strip
- cut both abutting ebbs at 45 degrees with allowances and connect them with a standing seam.
Connecting the corner of two ebbs with a standing seam
When processing an internal corner, you can simply place one of the joining planks under the other and secure it with screws or make an overlay.
Do-it-yourself foundation ebbs: how to install correctly
Flashings for the foundation base are installed to protect the base part of the protruding load-bearing building structure of a private house. Quite often, installation of ebb tides is carried out with your own hands, taking into account the decorative features of the structure. Protective canopies can be plastic for siding, galvanized metal, steel, stainless steel or concrete, depending on the design of the building.
Each foundation receives a large load from the building itself and the soil. But such loads can be calculated and predicted. There are a number of impacts that are difficult to predict, but the results of the impact on the foundation can lead to slow, but irreversible, destruction of the structure.
Low tide example
We are talking about rainwater, spontaneous surface groundwater, as well as snow and ice. If water is absorbed into the foundation and then freezes there, then due to the internal expansion of the ice, deformation of the internal space of the foundation will occur and the ice will squeeze out the concrete.
As a result, internal destruction of the foundation will begin. To prevent this from happening, it is necessary to make castings for the foundation at the level of the ground floor. You can do the installation of drip linings yourself from various materials, while protecting the base from the effects of harmful external aggressive environments.
Installation technology
You can independently attach the sill to a brick wall without much difficulty, but you need to follow certain steps. Protective drainage systems are installed after finishing the base, but before decorating the façade.
Before the device, check the horizontality of the joint line between the protruding foundation and the wall. Use a construction or laser level. The line should be straight, not protruding or sinking in certain areas, so that the ebbs on the foundation are firmly adjacent to the vertical plane. If this happens, the distortions are leveled out in various ways.
The lace is tensioned along the installation line. The sills are attached directly to the wall or a guide element is first mounted. The drainage system is fixed to the plank with self-tapping screws and nailed to the wall with metal dowels. The strips are placed with an overlap of 3 centimeters, the joints are filled with sealant for external use.
For drains of large width (from 8 - 10 cm), supporting brackets are made to reduce the movement of spillways during strong winds. Sometimes a longitudinal block of wood is placed or the drain is supported by polyurethane foam.
Material for ebb tides
The flashing material must match the materials of the rear façade
Metal base flashings are made of stainless steel, galvanized. Options are used that during manufacturing receive a protective layer of powder or polymer coating. Such products have the necessary qualities and are inexpensive, which is why ordinary developers use them more often than other types.
PVC material is durable and silent. Coloring components are introduced into colored plastic during the production process, so it does not fade in the sun.
Aluminum resists frost and can be used for a long time in regions with high humidity. The material is a pure type and when heated by the sun does not release harmful components into the air.
Copper plums work ideally as protection, but owners are put off by their high cost.
Concrete protection of the base is cheap and reliable, but technology with intermediate impregnations is required in order for the M450 grade material to firmly adhere to the surface.
Wooden ebbs for the foundation are placed on the bases of frame structures and houses made of timber, they are treated with water-repellent agents.
Natural stone or tiles are installed with an imitation of the texture of a natural analogue. Granite, travertine, marble, syenite are used. Casting from such material is expensive and is used for expensive façade finishing. The material withstands moisture, changes in high and low temperatures, and is not destroyed by impacts. Natural stone has a large mass, which should be taken into account when choosing the type of drain.
Artificial tiles have a reasonable price and are lighter in weight, which is why they are used more often. Clinker tiles can be mounted on cement-sand mortar or special adhesive mixtures can be used for this. Manufacturers produce corner and connecting elements made of artificial stone, which makes it easier to install such drainage in the installation position.
What are tides for?
They can be found on almost any type of foundation where there is a specially built and equipped base.
It may differ in design, size and material, and its main purpose is to minimize the impact of rainwater. There are factory castings produced on an industrial scale, they consist of prefabricated structures. Or you can make them directly on the construction site with your own hands using scrap materials.
Low tides not only protect the base from rainwater. This is a decorative element, as well as a special design that protects the base from premature destruction. Therefore, any foundation needs low tide, regardless of its depth and type.