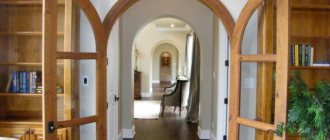
Hello readers of my blog! Today we will talk about step-by-step installation of interior doors with your own hands. It would seem that this is not a tricky matter, but when you are faced with this problem, you have to think about how to do it correctly, what preparation to do, what materials to choose. Thus, I decided that this article would be useful to someone, and I am devoting my efforts to this topic. In it I will answer a number of questions that will arise immediately before the step-by-step installation of interior doors with your own hands, and some even after that. This topic is quite broad, because before work, thorough preparation is necessary, but how to do this? And this is a separate topic. You can learn about all this in great detail in the article below.
Do-it-yourself interior door installation
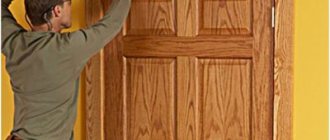
Installing a new door yourself is not at all difficult - if only you had the right tools at hand.
And it’s better to start the experiment with the most inconspicuous doors - for example, to the pantry. We bring to your attention detailed instructions for installing an interior door.
Preparatory work. Before you go to a construction hypermarket or market, determine the budget for the door replacement event. Please note that if you decide to change the doors in the entire apartment, you need to buy them at the same time.
Later, the desired model may be discontinued or there may be no doors of the required shade in stock.
Keep in mind also that an interior door is not just a door leaf!
You will also need a box, accessories, a threshold, platbands, and sometimes handles. The total cost of all this stuff is close to the cost of the canvas itself. If the width of the doorways in your apartment exceeds 110 cm, you will have to either buy a double door (which is more expensive than a single door) or reduce the opening.
In general, carefully calculate the upcoming expenses in order to decide which doors you will buy: solid, veneered or plastic.
Installing the door yourself: step-by-step instructions. Let us immediately note that if you bought expensive solid wood doors, then it is better to install them with the help of specialists.
After all, the cost of possible installation errors is too high. Although if you act carefully, slowly and in strict accordance with our instructions, the risk is small. Remove the old door.
First, use a chisel and hammer to remove the trim. Then use a nail puller or crowbar to lift the door and remove it from its hinges. After that, all that remains is to remove the door fastenings (screws or nails) and remove the frame from the doorway.
Prepare the doorway for installing the new frame.
If there are wooden blocks left in the wall on which the old box was held, then the new one will be attached to them with screws. Otherwise, it is secured with dowels.
Install the new frame into the doorway. Before fixing it in place, check the verticals using plumb lines.
If necessary, drive several wedges between the frame and the wall. Do not forget that the vertical line is set in two planes using a plumb line or level: the door should not go either “forward” or “sideways”.
Secure the box. Drill holes for screws opposite the bars or pre-hammered dowels.
In this case, the through holes should be of the same diameter (the diameter of the screws), and additional holes should be made to a depth of 1 cm with a thicker drill to hide the screw heads and hide these places with plugs. It is enough to secure the side parts with three screws each, and the top with one more.
Hang the door leaf on the hinges. If the box is installed correctly, the door will close tightly and will not open by itself.
Pay attention to the gaps between the box and the canvas: on the left, right and top they should be 2 mm, on the bottom - 4 mm.
Fill the holes between the door frame and the wall with foam. After it dries, install the trim. Do not drive the nails all the way in so that you can bite off the heads.
Install all the necessary fittings: handles, locks, latches, door opening limiters. That's all! Now you know for sure that installing an interior door on your own is not difficult.
Installation of interior doors
Replacing interior doors is not as labor-intensive and complicated a process as it seems. You can fill a double or single opening yourself without the help of a specialist.
Of course, you won’t save time, but you will save money and acquire new skills when renovating an apartment or house.
How to install an interior door: in this article we will tell you how to choose a good door leaf, what the block for filling the opening is made of and how to install it.
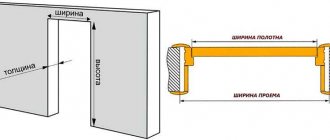
Opening measurement
Making a mistake at the stage of measuring the doorway is unacceptable: if you purchase a system of large dimensions, you will not be able to insert it, and if you purchase a smaller one, you will not be able to fix it well.
It is better to measure the doorway after dismantling the old door, when access to the bare wall has appeared.
This way you can assess the situation and make the right measurements. Removing them is simple: take a tape measure and determine the height and width of the entrance along the wall in the narrowest place (relevant for buildings where the vertical structure of the structures is poorly maintained). With this data, go to the store for a new door.
There is no need to make the product according to individual dimensions: in houses with apartments, builders initially lay standard openings, and the fillings for them are always available for open sale.
Interior doors in a private wooden house may differ from the standard ones, then you will have to order new ones and wait for them to be manufactured.
What else is important to know?
Not every person will be able to install a door frame efficiently the first time. But don't despair. Because many flaws can be eliminated.
- If there is an unsightly seam, you can close the joint between the laminate and the door frame with a plinth or a special flexible threshold.
- If the box does not fit into the opening, then the posts and crossbars can be trimmed a little.
- Platbands allow you to beautifully seal the gap between the door frame and the wall. If their width is not enough, you will have to plaster and decorate the gap.
- To install an interior door frame in a concrete or brick wall, it is impossible to do without a hammer drill. If you are installing an MDF door frame first on slats, use a drill to make holes and only then use a hammer drill.
- Attaching a door frame to a wooden wall is much easier than to other materials. In this case, a hammer drill for drilling holes is not useful. You just need to screw the door frame to the wall using anchors. The main thing to consider is that over time, wooden buildings can shrink significantly.
- To facilitate the installation process, special installation systems for door frames were created. Thanks to them, the structure can be placed in walls made of any material without using wedges and spacers. This kit includes hidden mounting fasteners, detailed step-by-step instructions and diagrams. Using the system, even a beginner can insert a door frame.
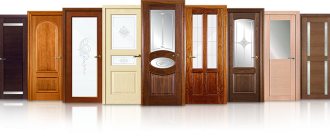
Door selection
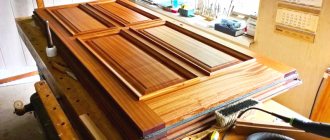
The first thing you should pay attention to when choosing canvas and boxes is the material they are made of.
Fiberboard is used to produce budget doors and frames. The material does not protect the room from extraneous sounds, absorbs moisture, and filling will lead to damage during the first off-season.
It is strictly not recommended to choose a frame made of fiberboard; it quickly deforms even under the weight of the door.
MDF is a more reliable material with increased density, average in price-quality ratio.
It is strong enough to withstand mechanical loads, does not absorb moisture, muffles sounds and lasts a long time.
Solid wood is ideal for making and installing a box. It will not be affected by humidity, it will withstand the weight of any door. Laminated wood is additionally lined; untreated timber is not inferior to laminated timber in performance, but it will have to be painted or decorated.
The ideal option is to purchase a box and canvas made of the same material. You should not give preference to wood fiber board; doors made from it are short-lived; they are installed on construction sites so that new owners can replace them with permanent ones made of more durable materials.
Ideally, it is worth acquiring a solid solid material as a door filling; to reduce the cost, the canvas can be replaced with MDF, which is also a durable raw material for the manufacture of cheaper door frames.
Additional strips and trims can be made of fiberboard, wood or MDF. They do not carry a load, they only decorate the gaps and disguise the connections.
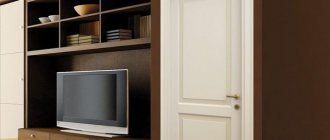
Double doors are often chosen for large rooms and halls; single-leaf blocks are installed in bedrooms and kitchens. In any case, the size of the box and the number of panels are determined by the size of the opening.
Installation of external door blocks
Sections of door block parts.
As an example, consider the algorithm for installing an outdoor unit made of wood and consisting of a box and a single-floor panel. It should be noted that when choosing wooden blocks for their manufacture and installation, you should choose fairly dry wood (humidity from 8% to 14% according to GOST).
In the case of the manufacture of wooden door frames, blanks of the following sizes are mainly used: thickness from 50 to 60 mm, width - 100 mm.
In general, the installation process of outdoor units includes the following steps:
- box assembly;
- adjusting the fabric to the edges;
- installation of hinges;
- box installation;
- threshold setting;
- installation of platbands;
- insertion of devices (lock, handles, etc.).
Door frame assembly
The component parts (or quarters) of the structure usually have a tenon connection between them. It must be glued and have a very tight fit. However, it is necessary to control the joints of the assembled box using a building level and a plumb line.
Related article: Making a wall lamp with your own hands
Fitting the door leaf to the frame. To fit the canvas, its edges are touched to the edges of the box with a jointer, starting from the edge that will be attached to the hinges. When fitted correctly, the door leaf fits snugly to the edges of the frame without visible gaps or recesses.
Installation of hinges
Door hinge installation diagram.
The canvas is hung using loops measuring 125-175 mm. Often such loops are also called card loops. The hinges are mounted to the door leaf with self-tapping screws on the hanging side, at a distance of 150-300 mm from the edges of the door leaf (top and bottom). Sockets for loops are made using a chisel. Their depth should correspond to the thickness of the loop card, but not more, in order to avoid the loops being torn off during operation of the block. During installation, the bouts (protruding parts of the hinges) must be positioned so that the axis of the lower and upper installed hinges coincide. In this case, the canvas will not warp and open spontaneously. After attaching the loops to the canvas, mark their locations on the box itself. Then the canvas is dismantled from the hinges and the hinges are installed separately on the box in the marked places. Door panels are removed until plastering and other finishing work is completed.
Door frame installation
It is preferable to install the outer frame before finishing work is completed and before the floor covering is completed. This will allow you to accurately complete the above work. Before installing the structure in a wall opening (provided that the walls are made of stone or brick), the edges of the quarters of the box in contact with the walls are treated with resin in order to protect them from rotting; these places are covered with roofing felt or other waterproofing material.
Door block installation diagram.
The box prepared in this way is inserted into the doorway, the ends of which are aligned and prepared for installing the block. The ends of the box are mounted into the floor to a depth determined by the structure of the floor, and they are connected with nails to the mounting (spacer) board. This board should be located below floor level, but also treated with resin and waterproofed. The box itself is mounted into the wall opening using wooden wedges driven between the box and the wall. Then you need to additionally fix the box in the wall opening. This can be done by using steel brushes (a type of nail) or anchor bolts, which are driven into pre-prepared wooden sockets in the masonry itself (a hammer drill should be used to insert these sockets into the masonry). After this, the cracks and gaps between the wall and the frame are filled with polyurethane foam.
When using construction foam, special wooden spacers are installed in the box, an average of 12 hours is allowed for the foam to dry completely, then the excess foam is cut off.
Each vertical quarter of the box is mounted to the opening with steel pipettes or anchor bolts in at least two places. The fastenings should be located no more than 1.5 m from each other.
Related article: Calculation of the amount of drywall on the walls
After installing the door frame, final finishing plastering work is carried out.
Installing the threshold yourself.
We attach the lower quarter of the box to the installed and prepared mounting board and to the vertical quarters. The threshold is ready. The door leaf can be hung on the mounted frame.
Installation of platbands
Installation diagram of an aluminum threshold with an additional adapter.
After completing the installation of the box, platbands are installed along its perimeter (except for the bottom, of course) on the outside and inside, provided that the size (thickness) of the wall opening allows us to carry out this operation. Place the platbands at a distance of 8-15 mm from the edge of the box and connect them at the corners at 45° (at the angle). The correct installation of the platbands is checked using construction tools (level, plumb line). They are mounted on a plinth near the floor. The platbands are attached to the box with self-tapping screws, nails or construction adhesive. Visible gaps when installing platbands are unacceptable.
Installation of door devices (mortise lock, handles)
This is the final stage of installing the block. The handles are placed at a height of 0.8-1.1 m from the floor level and placed in such a way that when the door is operating, the handle does not touch the frame.
Mortise locks are usually located at a distance of 0.9-0.95 m from the floor level. Here you need to make sure that the relative position of the lock and the door handle is ergonomic and comfortable. The socket for a mortise lock is drilled with a drill (perforator), using a drill bit equal in diameter to the thickness of the socket. After this, clean out the nest with a chisel under the lock. A lock is installed in the prepared socket and secured with screws or self-tapping screws.
Then they mark and drill out a place for the locking plate in the box itself. The selected location for the lock plate must correspond to the position of the built-in lock. It should be noted that the lock strip must be embedded flush with the edge of the frame, and the lock must be flush with the edge of the door itself.
The main requirement when installing various types of door devices is to carry out the work without gaps, chips and deformations of the wood.
Step-by-step instructions for installing from scratch
Installing interior doors with your own hands will not take much time, just stock up on the necessary tools, purchase the necessary materials and you can get to work. Follow the detailed step-by-step instructions and you are guaranteed success.
This plan is valid for installing swing doors; sliding doors are mounted slightly differently, but in a similar way.
How to install interior doors with your own hands
It is impossible to imagine any home without interior doors. They perform several functions at once.
Installing interior doors is quite simple and will not cause any particular difficulties even if you do the work yourself. Of course, if you wish, you can use the services of specialists.
Problem of choice
Before installing an interior door, you must first select it. When choosing, there are 2 main criteria - the size of the structure and the material from which the doors and the frame to them are actually made.
Material selection
It is not so important to install an interior door in a wooden house or in a room in a city high-rise building; the design must not only be beautiful, but also reliable, and this primarily depends on the material.
Fiberboard is perhaps the most common option. The structure is a hollow box covered on both sides with thin fiberboard sheets and based on a frame made of wooden blocks.
There is no need to rush to install such a door; it is, of course, light and cheap, and it may look quite decent, but the reliability is not all right; such a structure can even be broken with your fist, plus there is a high probability that in a couple of years it will begin to delaminate.
MDF is the golden mean between cheap fiberboard and good wooden construction. The array is dense, durable, and most importantly completely environmentally friendly. Self-installation of interior laminated MDF panels at home is an excellent solution if you don’t have the funds for installers, but want a beautiful door.
The MDF canvas must be laminated with high quality, then it will not be visually different from wood.
Natural wood - it is traditionally believed that installing wooden doors is the best option, but this is wrong, here you need to look at the quality and company of the manufacturer. Believe me, sometimes it is better to install interior doors made of good MDF laminate than to take damp pine, which will wear out in six months.
When purchasing wooden panels, you need to carefully evaluate the quality of the wood.
If you decide to change interior doors and you have a high-quality wooden panel, then you don’t have to touch it, you can only replace the panel. In this case, the technology for installing interior doors will be much simpler.
GOSTs, tolerances and unclear issues
The size of the doorway for installation is perhaps the most important of the initial parameters. To this day, all such designs are made according to Soviet GOST standards; by the way, the Chinese also focus on these dimensions, but in Europe, despite the supposedly uniform standard, many countries do it their own way.
So if our minimum blade width starts from 600 mm and then in increments of 100 mm, it reaches 900 mm, then France produces blades starting from 690 mm, but the graduation also occurs in increments of 100 mm.
Germany, Spain and Italy, as well as all countries of the former socialist camp, in this regard are guided by almost the same standards as our manufacturers.
Interior doors have clear standards that need to be checked before installing an interior door yourself.
As for tolerances, a gap of 3 mm is left on the sides and top between the box and the canvas itself. According to the rules, there must be at least 20 mm between the floor and the canvas. This gap is needed for normal ventilation in the apartment.
Along the perimeter of the frame in block buildings, you can leave any gap, up to several millimeters, the main thing is that the frame is level, but if we cut doors in a wooden house with our own hands, then we set the tolerance to at least 15 mm, it is needed in case the house fails shrinkage
When choosing an interior door, installation is the last stage, before this you need to read the description in detail, because the price can be indicated depending on the configuration, there are 3 options:
- Only the door leaf is sold - this option is good if the door is planned to be installed on an old frame;
- The canvas is sold together with the box, but the box comes disassembled; here, even before installing the interior door with your own hands, you will have to cut it to size and assemble the box, which in most cases is even good;
- Fully assembled blocks with a finished frame, canvas, locks and hinges are installed only if preparation of the opening is not required. There it is enough to cut the racks to the height and install the interior door yourself.
Do not forget that it is not enough just to install interior doors into the opening; the complete installation of an interior door involves the arrangement of trim, extensions (if necessary) and fittings, so it is also advisable to take them right away, otherwise the shade may not be suitable later.
Installation of interior doors will not be complete without platbands and fittings.
There is another important question - when to install interior doors during renovation? So, the instructions for installing interior doors say that such structures are installed at the very end of the renovation, after finishing the walls, floor and ceiling, but before installing the floor skirting boards.
Choosing an interior door
In principle, this does not affect the technology of installation work in any way. But their cost depends on the type of door, and the service life of different types of doors differs significantly.
paneled interior doors. If they are made of hardwood, then they can be considered almost a luxury item.
In addition to their main function, they decorate the room. The only disadvantages include high cost and heavy weight. For interior doors, paneled doors are more often used, but made of soft wood;
As for the installation technology, to make the work easier, it is recommended to purchase the door complete with a door frame.
A price that is too low is suspicious. Most likely, in this case, the door is sold without a frame; in the end, this will greatly complicate the installation of the interior door.
Installation of interior door blocks
As in the case of an external door block, in general the process of installing interior blocks made of wood and having a single-leaf leaf consists of the following steps:
- box assembly;
- adjusting the canvas to the edge of the box;
- installation of hinges;
- box installation;
- installation of platbands;
- insertion of door devices (lock, handles, bolts, etc.).
Door handle assembly diagram.
It should be noted that the installation of interior door blocks is usually carried out in the same way as the installation of external blocks, but after installing the floor covering and bypassing the stage of installing the threshold, because its installation is advisable only when moving from an indoor to an outdoor space. Accordingly, the box in this case will be three-sided.
When installing door blocks in bathrooms, all cavities and sockets cut out for devices should be opened with varnish to prevent rotting processes in conditions of high humidity. In this case, it is advisable to use fasteners that are resistant to corrosion.
How to properly install an interior door - step by step
Before installing the door itself, the door frame is installed. If it was purchased together with the door, then most likely its ends are already sawn at an angle of 45°. In this case, all that remains is to assemble the box into a U-shaped structure.
Depending on the configuration, the set may also include an additional strip. It will be used to securely fix the door frame until final installation.
The door frame elements can be connected using either self-tapping screws or plastic dovetail keys. They usually come with a box.
When assembling the box, special attention must be paid to ensure that no element moves relative to the other. Otherwise, all the work will go to waste.
Before installing the door frame, it is advisable to select all the necessary grooves in the wood for awnings, installation of door handles, and a lock. It is much more convenient to do this while the box is not yet installed.
Also, before installing the frame, you need to shorten the side posts along the length of the door. It is important to ensure a gap of 10-15 mm between the door and the floor of the room.
To ensure that the door frame does not deform at the bottom when performing work, an additional strip is placed on the screws.
It needs to be attached to that part of the box that will be hidden after final finishing. The screws are screwed in obliquely so as not to split the wood.
There must be a gap between the frame and the doorway; wooden wedges will be driven into it for temporary fixation, then the free space will simply be filled with foam. But this will happen after the final fitting of the door.
First, the door frame is attached to the wall with a self-tapping screw or dowel only in the upper part. Moreover, the mounting location should be in the groove for the canopy. Then the canopy will play the role of a decorative overlay.
After fixing the top of the box, its bottom is carefully controlled, then, using the same principle, fixation is performed from below. Additionally, the box is secured using wedges, which are driven in at the top at the level of the crossbar and at the bottom at the level of the temporary spacer.
This is followed by fitting of the door; the frame is not yet fully secured.
The door is hung and the smoothness of movement and the verticality of the door itself are checked. Sometimes, even with careful adherence to technology, the door itself opens or closes, which indicates a slight vertical deviation. In this case, additional adjustment of the position of the door frame will be required.
If everything is in order, then you can fill the voids between the door frame and the wall with foam.
Before doing this, it is better to insulate with masking tape all wooden surfaces that may come into contact with the foam. It will be very difficult to remove it later without damaging the tree.
To ensure maximum adhesion, concrete must be cleaned of dust and dirt.
After foaming the voids, you must take a break for 12 hours. Then the excess foam is cut off with a knife and installation of the trim and trim begins.
The additional strip should cover the distance from the edge of the wall to the door frame. It can be attached to the box with self-tapping screws, and the planks are connected to each other (if you need to use several panels in width) using a tongue-and-groove pattern. Existing voids also need to be filled with polyurethane foam.
After this, all that remains is to attach the platbands. At the joints they are sawed at an angle of 45°.
Platbands can be attached either with glue or with ordinary nails without a head. Platbands with a special protrusion are also produced, which are simply inserted into the corresponding groove on the door frame. In this case, you can do without nails and use only glue.
At this point, the installation of interior doors with your own hands can be considered complete. If the described technology is followed, the quality of the installation will be comparable to the work of professionals.
Installation of interior doors
The instructions for installing interior doors allow you to install such structures yourself without much difficulty. You just need to strictly follow its points.
Acceptance of the product by the customer.
Check the integrity of the shipping packaging.
If there is damage to the packaging, check for mechanical damage to the paintwork, finishing panels, mirrors, glass and fittings on the door block ATTENTION!!! Opening of the door block packaging must be done strictly in the presence of the customer.
Check the door block for compliance with the placed order: - door model - dimensions - opening side (right or left) - color of the metal parts coating - MDF finishing panels (color and design) - locking system - fittings - platband (depending on the supplied model) - check for quality and integrity
Do-it-yourself door installation - let's evaluate the scope of upcoming work
Door structures between rooms in an apartment or private house cannot be called very complex technical systems. However, their assembly and installation require knowledge of a number of nuances.
- Firstly, a door installed by yourself should not open spontaneously.
- Secondly, it must close without excessive effort.
- Thirdly, door structures must have a certain strength and not fall apart in cases where they are installed in the homes of “lovers” of slamming doors.
A regular door block consists of two elements – the leaf and the frame.
The latter is made of loop and false beams, as well as a lintel. If you install doors with a threshold, the frame is supplemented with a special bottom bar. In most cases, the door leaf is hung on two hinges.
There are systems with three loops, but they are used extremely rarely. The set of door blocks, as a rule, includes platbands. If the manufacturer does not provide these, you will need to purchase them separately.
In situations where the door frame is smaller in width than the door opening, you need to purchase additional panels or trim the walls with strips or more elegant slopes from a design point of view. Here you need to know that professionals do not recommend plastering slopes if you are installing structures made from wood materials (for example, MDF) with your own hands. Such doors simply become deformed after applying the plaster composition to them.
An excessively wide opening is often reduced with the help of wooden beams. Its dimensions must correspond to the “extra” width.
Such a beam is installed on the side of the door post, where its hinges are located. The beam is attached to the rack with small cross-section universal screws, and it is connected to the wall with anchors. It is recommended to do the installation of interior structures with your own hands after the pre-finishing of the room (it is assumed that you have leveled the walls, carefully and carefully puttyed them, and then plastered them).
Reducing a doorway using a wooden beam
In other words, the assembly and installation of doors is carried out after completion of all “wet” finishing work without exception.
Otherwise, there is a high probability that the system may “float” due to high humidity.
You definitely need to arrange the subfloor, as well as decide on the thickness and type of finishing floor that you will make. Without this, you will not be able to accurately mount the door frame to the height of the threshold. If you simply decide to change the interior doors in a room where no repair work is being carried out, the latest recommendations do not matter.
Recommendations for operation and maintenance
Caring for hinges.
It is necessary to lubricate the bearings of the hinged hinges with LITOL-24 grease (other similar lubricants). At least once every 4 months. In cases of unfavorable operating conditions, the use of a door block as an entrance from the street at the “street-house” border or in places with high traffic intensity, it is recommended to increase the lubrication frequency. To perform this procedure, you need to raise the canvas relative to the box by no more than 10 mm, having first opened it 90°. The blade is lifted using a rigid lever (for example, a wooden hammer handle) installed between the hard surface of the floor and the outer part of the blade.
ATTENTION!!!
The surface of the canvas must be protected from the influence of the lever, which leads to damage to the paintwork. To do this, cover the contact area with a rag. The lubricant is applied with a spatula directly to the hinge axis and bearing. After lowering the blade to its original position, excess lubricant is removed with a rag. To avoid household injuries, this operation must be performed by two people.
Maintenance of locking mechanisms.
It is necessary to lubricate all accessible rubbing surfaces of locking mechanisms, both lever and cylinder, with spindle or machine (industrial) oil at least once every 4 months. The oil is applied using a flexible plastic tube included in the grease can or directly (repeatedly) onto the surface of the key. The presence of a tube makes it easier to access the lock mechanisms that need lubrication. In cases of unfavorable operating conditions, the use of a door block as an entrance from the street at the “street-house” border, it is recommended to increase the frequency of lubrication.
Door handle care
During operation of the rotary handle of the lock latch drive, it is possible to gradually unscrew the handle fixing screw. If there are signs of weakening of the handle fixing screw (handle play, swaying when pressed), it is necessary to tighten the locking screw with the supplied hex key. The screw is located on the underside of the handle.
ATTENTION!!!
Operating the handle with the locking screw loose may cause it to break.
Caring for the rubber seal
To increase the service life of the rubber seal, it must be maintained with neutral lubricants to prevent drying and cracking. It is recommended to treat with glycerin-based lubricant at least once every 6 months. It is possible to use silicone grease, but it should be taken into account that it is absorbed less easily, evaporates faster, and it is more difficult to get rid of traces of excess grease on the mating parts. First, before applying the lubricant, it is necessary to remove external contamination from the surface of the seal with a damp rag. Lubricant is applied around the entire perimeter of the seal. This operation is best performed using a plastic tube included in the grease canister. Its use localizes the contact patch and allows the lubricant to be applied more efficiently, preventing splashing on the surface that is not subject to lubrication.
ATTENTION!!!
The use of lubricants based on oil-containing products is unacceptable, because
will lead to a change in the structure of the seal and its further destruction. Caring for polymer powder coating, laminated and PVC coating.
If necessary, the surfaces of products with laminated and PVC coatings should be wiped with a cloth moistened with ordinary detergents (weak soap solution) that do not contain aggressive components (solvents, acids, etc.) and abrasive materials. You can use a sponge or a special microfiber cloth that does not leave streaks. Do not use hard sponges or try to remove dirt with sharp objects. At the end of wet wiping, the product should be wiped dry, since excess moisture remaining after cleaning penetrates the components and mechanisms of the door block, worsening its consumer properties. It is allowed to use wax-containing polishes after wiping. To increase the service life and improve the appearance of laminated panels and PVC-coated panels, it is recommended to wipe them with furniture polishes. To care for polymer powder coating, it is recommended to use a mild soap solution. The use of polishes is undesirable, because stains may appear that are difficult to remove later.
Installation of racks and hinges - step-by-step instructions
It is very important to install the racks correctly.
The door frame is attached to them. If you install it on crooked racks, the operational functionality of such a door will be minimal. The racks are prepared as follows:
The upper parts of the racks must be cut using a hacksaw (it is better to take a saw with small teeth) and a miter box. This operation is easier to do if you have a miter saw. Measure the required length along the inside of the post (it consists of the bottom gap, the height of the door leaf and the top gap).
The bottom gap is usually taken to be about 1 cm, the top - no more than 0.4 cm. Prepare the second rack in the same way.
Now you start processing the lintel. Measure the desired length along the inside.
The required length will include the width of the door leaf, a small (about 0.4 cm) gap on the side where you will put the lock on the door, and another gap on the hinge side. You get the length (internal) of the lintel. Note - absolutely accurate.
Installation of interior door posts
Now you can saw off the ends of the lintel with your own hands (again, with a miter saw or miter box). This procedure is done at an angle of 45°. Next we work on the door hinges.
Their installation should be done as carefully as possible. It is important to determine the exact depth of their depth and the distance between the lower and upper edges of the door leaf.
You have completed a difficult task on your own. Now you can work on the box and trim.
Product installation
Remove the door leaf from the frame;
Remove the two support bearings from the hinges; Place the frame in the doorway on pads 4-5 mm thick, ensuring approximately the same distance between the door frame and the opening on both sides. Before installing the box, it is recommended to fill the entire perimeter of its internal cavity with heat and noise insulation (mineral board, cement-sand mortar or polyurethane foam). Wedge the door frame in the doorway to fix the gaps using wooden wedges. It is preferable to install wedges between the door frame and the wall of the opening at the top and bottom, so as not to deform the middle part of the door frame. (See Fig. 2) Fig. 2
Align the door frame on the hinge side to the building level. To check the verticality, the building level is applied to the inner, wide shelf of the box; to check the tilt, the level is applied to the front casing of the box; to check the horizontal - to the threshold. (see figure 3)
| Fig.3 | Fig.4 |
ATTENTION!!!
In cases of vertical deviation of the wall or geometric deviations of the opening, the door frame is set strictly according to the building level.
In this case, it is imperative to notify the customer about the presence of inevitable gaps between the wall and the door frame, which can be eliminated by leveling the wall using cement-sand mortar or building mixtures. Through the upper mounting hole on the hinge side of the frame, drill a hole with a diameter of 10 mm and a length of 120 mm using a hammer drill. 130. (see figure 5)
Fig.5
ATTENTION!!!
When carrying out drilling or drilling operations, it is necessary to take into account the characteristics of the wall materials.
And select the tool, as well as the method of fastening the door frame, according to the recommendations of the manufacturers of the materials from which the doorway is made. Remove chips and sand from the hole. It is recommended to lubricate the surface of the anchor with a cement-sand or adhesive solution before installation. Install the frame anchor using a hammer and impact screwdriver; do not tighten the anchor. (see figure 6)
Fig.6
Check the vertical of the loop and horizontal of the threshold part of the box with a building level. (see Fig. 7, 
| Fig.7 | Fig.8 |
Screw the frame anchor all the way. (see figure 9)
| Fig.9 | Fig.10 |
Install the bottom frame anchor on the hinge side and repeat the procedure. Install the support bearings on the hinges. (see Fig. 10) Apply grease like “Litol-24” to the hinge axis (see Fig. 11)
Rice. eleven
Install the door leaf and align the locking part of the frame along the vestibule. Check the uniformity of the gap between the top of the canvas and the top profile of the box. If the gap is uneven, adjust it by installing wooden blocks under the threshold of the box on the side of the smaller gap. (see Fig. 12,13).
| Fig.12 | Fig.13 |
Secure the box on the lock side with two frame anchors. Check the canvas along the narthex. Secure the box on the lock and hinge sides with two frame anchors.
ATTENTION!!!
Deformation of the box profile when tightening the anchor bolts is not allowed (Fig. 14).
Fig.14
Check the uniformity of the side gaps between the leaf and the door frame. If necessary, adjust the gaps without mechanical damage to the door block in accordance with the Instructions for using the key for adjusting gaps and hinges (Appendix No. 1)
ATTENTION!!!
Uneven gaps between the canvas and the box can occur due to displacement of the canvas relative to the box during careless transportation, loading and unloading and other work.
Install plastic plugs in each of the six mounting holes of the box.
Do-it-yourself door frame assembly and installation
Installing the box yourself will be quite simple if you adhere to the following order of work.
Attach (strictly perpendicular) the rack to the ceiling using universal self-tapping screws.
If you are installing an interior product made of MDF, in order to avoid cracking, you first need to make holes with a drill and only then install the screws.
Important! The holes are made with a smaller cross-section than the diameter of the hardware used.
Place the box in the opening, and then securely fix it using spacers and wedges.
Take a building level and level it along the horizontal and vertical planes of the structure. After that, feel free to use self-tapping screws. Hang the door on its hinges.
It can be inconvenient to perform this procedure on your own, so call an assistant. After hanging, check the quality of installation, eliminate any installation defects, if any.
Close the interior door, install spacers of suitable sizes between the posts and the door leaf. They will protect the box from being squeezed out when blowing out the foam.
The last step is foaming the gap between the wall and the door frame.
Once the foam has hardened, the spacers will need to be removed. All you have to do is install the trim yourself. Everything is simple here - you cut a 45° angle and mount the elements in their place.
It is recommended to fasten the installed platbands: with self-tapping screws; special nails (they are called finishing nails); on glue.
It is advisable to cover the tops of the screws with decorative plastic plugs. And the heads of the nails are usually rubbed down. Congratulations, you have installed interior doors yourself, saving a lot of money on the services of specialists!
DIY installation of interior doors
Installing interior doors with your own hands is easy on the one hand, but not very easy on the other, it all depends on how you approach this issue.
If you are thoughtful and deliberate, then everything will go easily; if you try to take it forcefully, then most likely you will not succeed.
Let's face it - it is more important to know the theoretical basis here than practice, although it also has a significant influence.
List of materials and tools required for installation of door blocks
To install the blocks yourself, you will need the following materials and tools:
- polyurethane foam;
- chisel;
- drill or hammer drill;
- waterproofing materials (roofing felt);
- resin for wood processing;
- jointer;
- hammer;
- building level and plumb line;
- wooden wedges;
- wooden plugs for wall masonry;
- additional fasteners (anchor bolts, screws, nails, steel brushes, turboprops, etc.);
- construction adhesive of the “liquid nails” type;
- pencil or marker for marking;
- construction tape.
Do-it-yourself installation of interior doors: preparatory work
Before you begin directly studying the technology for installing interior doors, you first need to understand the preparatory work. If you ignore this stage, then the elementary and simple installation of doors will turn into a nightmare for you. There are two points to consider here.
Doorway. It is better to immediately check it for full compliance with the door block.
It will be good if, when installing the block in the opening, a two to three centimeter gap remains on all sides. It will allow you to position the block as it should without any difficulty - that is, level and in plane with the wall. Everything is simple here - if the opening is small, then it needs to be expanded using a hammer drill.
If it is large, then it can be framed with a wooden beam. For example, if we are talking about five-centimeter gaps around the perimeter of the block, then this is normal - if more, then you need to narrow it.
The door block itself. There is one trick here, thanks to which the independent installation of interior doors goes, as they say, without a hitch - you will need to make a simple device.
Namely, sew two even slats across the door frame (top and bottom), which will allow you to install the block clearly in the plane with the wall. In order not to damage the frame itself, to fix these jumpers, you can screw wooden plates into the end of the door frame, to which you attach the jumpers.
By the way, their length must be calculated so that after installing the block in the opening they will rest on the wall.
There are a couple more nuances here that you can’t do without: firstly, these jumpers need to be sewn on the opening side of the doors and, secondly, they need to be sewn on only when the gaps between the door leaf and the frame have been set.
The gaps can be fixed with thick cardboard folded in half. Without these two points, it is not worth proceeding with the direct installation of doors, since the probability of the block being misaligned during the installation process is close to 100%.
Only after all these manipulations have been completed can you safely proceed to installing interior doors yourself.
Preparatory work.
List of tools and materials required to install a steel door: -3 meter tape measure;
- construction level GOST 9416-93; -hammer, hammer drill; -drill with a diameter of 10 mm and a working length of 200 mm with a Pobedit tip; - Phillips screwdriver; - impact screwdriver; -screwdriver, -spray gun; - frame anchor 10x112 - 6 pieces, - Litol-24 or WD-44 lubricant, - anaerobic thread locker or PVA glue; - mounting foam; -painting tape; -minslab with a density of 40-70 kg/m3; - wooden linings 4-5 mm; -wooden wedges Using a tape measure, determine the size of the opening in several places in terms of width and height. The recommended size of the door opening around the entire perimeter should be no more than 20 mm larger than the installation size of the door frame per side. Prepare for work the necessary materials, plumbing, electrical tools, personal safety and protection equipment, as well as a workplace and fire safety equipment. Install a protective curtain or partition against dust. Prepare the doorway, level it if necessary using a hammer and hammer, and clear the installation area of debris. Cover the front surfaces of the door frame with masking tape (to prevent damage to the polymer-powder coating by the mounting foam and mechanical damage to the door frame)
Fig.1
Installing interior doors with your own hands: step-by-step instructions
After all the preparatory work has been completed and the tools for installing interior doors have been prepared, you can begin installation. As for the tools, you will need a few of them: a hammer with a wooden handle, a short rack level (up to half a meter), a crowbar and a container of polyurethane foam with low polymerization pressure (for example, Macroflex 65) and wooden wedges. Once you have all this at your fingertips, you can act.
Now let's look at the process point by point.
We install the door block in the opening. To begin with, pay attention only to which side you are installing it on - that is, on the side in which the doors will open.
Center the block in the opening. By moving it to the left or right, we achieve uniform gaps between the frame and the opening on the left and right.
Place a level under the top jumper and see how it is positioned. If necessary, we achieve its clear horizontal position by using a crowbar to lift one of the door frame pillars and place a wedge under it.
In principle, if the preparation of the door block was carried out correctly, then the verticality of the racks does not need to be checked - everything should be in order anyway. But just in case, you need to check.
We attach the block to the wall. Through the protruding parts of the lintels that rest against the wall, we drill holes with a diameter of 6 mm and hammer dowels into them.
During the fastening process, you need to periodically (after installing each dowel) check whether the position of the door block has been disturbed.
We wet the frame and the end of the doorway with water - this step is necessary in order to improve the polymerization of the polyurethane foam and its adhesion to the opening.
Last check. We make sure that the doors are still in place as they should be. This is done with a rack level.
Also check the presence of all cardboard spacers between the canvas and the box - if necessary, replace those that fell out during operation.
Blow out the gap with foam. I think you can figure this out for yourself. If you purchased the right foam, then you don’t have to worry about it squeezing the box.
Now wait a few hours until the polyurethane foam completely hardens (usually 6-10 hours) and remove the now unnecessary auxiliary devices. We take a screwdriver, first unscrew the dowels, then the self-tapping screws that secure the jumpers to the door frame, then remove the slats themselves or the profile (or whatever you used) and open the doors, enjoying their flawless work.
The gaskets will fall out when you first open the doors, so all you have to do is pick them up and throw them in the trash.
As you can see, everything is simple - the correct installation of interior doors eliminates a lot of questions, and most importantly, allows you to complete this process with minimal effort and nerve tension. And in conclusion, a few words about other technologies by which you can install interior doors yourself.
It’s hard to say that they are complex - this is where initial experience most likely comes into play. Initially, a person learned to do this work exactly this way, and in no other way, and all other methods seem more difficult to him. One of the craftsmen can say the same thing about the installation method described above.
Why such difficulties? Why all these devices and unnecessary body movements, if everything works out just fine without them? I won’t argue - do as you wish, but personally, I made my choice in favor of this option through trial and error, having tried other options.
Checking the functionality of the locking systems and the door leaf
Adjustment of the rebate adjustment mechanism, eccentric and modification of the mounting protrusions:
Depending on the model, the door block is equipped with a rebate adjustment mechanism (hereinafter referred to as MRP) or an eccentric, with the help of which, when installing the door block or during operation, it is possible to adjust the closing density of the door leaf. The MRP or eccentric is located opposite the latch in the hole on the box and is designed for proper sealing and operation of the locks.
1.1.Tool:
| Screwdriver | Anaerobic thread locker | Hex bit 3mm | Flat file for metal |
1.2.Description
| MRP - “Cam” + Bracket | Screw M5x25 DIN 7991 | Applying anaerobic fixative to screw threads | Friction tightening stage | Mounting tabs on door frame |
1.2.1.When replacing a faulty screw, use a similar one (strength class 10.9). 1.3. Assembly and adjustment of MRP
. 1.3.1. Loosen the screw, remove the MRP, make sure that the bracket is not deformed, if it is damaged (faulty), replace it. 1.3.2. Apply an anaerobic fixative to the screw thread, install the MRP in the required position relative to the door frame. 1.3.3. Tighten with a screwdriver (tightening torque from 10 to 14, check the operation of the locking system). 1.3.4.If necessary, we modify the mounting protrusions on the door frame.
ATTENTION!!!
When installing the MRP, be sure to use an anaerobic thread lock or its equivalent (PVA glue).
Otherwise, during operation of the product, the fixation may weaken and, as a result, the rebate adjustment mechanism may shift 2.
Instructions for adjusting the eccentric
2.1.
Tool.
2.1.1. Phillips screwdriver.
2.2. Eccentric adjustment.
2.2.1. Loosen the eccentric fastenings by loosening the fixing screw. 2.2.2. Consistently shift the eccentric around its axis. 2.2.3.Close the door, achieving the required tightness of the rebate.
3.Instructions for modifying the mounting lip on the door frame. 3.1.Tool. 3.1.1.Flat file for metal. 3.2.Description.
Refinement of the mounting lip on the door frame.
3.2.1. Modification of the mounting protrusions on the door frame must be done to adjust the tightness of the door leaf. 3.2.2.The mounting protrusion is an adjusting element in the design of the door block. 3.2.3.The operation to modify the protrusion is carried out to ensure the correct operation of the locking systems and is not a defect of the product.
ATTENTION!!!
Modification of the mounting lug for the lock latch is not a drawback of the product. The mounting ledge is an adjusting element in the design of the door block.
Interior doors can be divided into several types
Manufacturers of door structures on the market offer a fairly wide range of models. Ready-made interior doors can be made of different materials. The most common types of materials are: fiberboard, MDF, natural wood.
1.Fibreboard – door: the frame is made of wood and covered with laminated fibreboard sheets. The advantages of such doors include: low cost compared to other types, light weight, which makes it possible to deliver them from the point of sale to the house on your own, and ease of installation. Considering these points, they are popular among customers, thanks to which their wide range is most often presented in stores.
Among the disadvantages, we can note the low strength of the fiberboard itself, which is why the door breaks and becomes unusable quite easily, poor resistance to humidity, the door can twist. Therefore, we do not recommend installing it in bathrooms with weak exhaust; this material loves dry rooms.
Below, we will consider the step-by-step installation of interior doors with our own hands.
2. MDF - doors that are made from this type of material are the most suitable option when choosing the ratio of quality and price. Clear advantages over doors made of fiberboard are high strength and resistance to moisture, and a higher level of sound insulation. The cost of such a door is several times higher than doors made of fiberboard.
3. Natural wood – interior doors made from this material are the most durable.
Their price directly depends on what type of wood was used for their production. Doors made of valuable wood species are used for installation in rooms with an original design; they will fit perfectly into a classic interior. The width of interior doors is adjusted to the size of your opening.
The list of interior doors by type can be supplemented with all-glass doors, metal-plastic, steel, but these types are not very popular among the general public, so they are not included in the article for a detailed description.
Features of installation of some types of door blocks
The material of the block sometimes has certain specifics, which makes appropriate adjustments to the standard installation algorithm. For example, MDF door blocks have the following installation features:
- The installation of such blocks should be carried out after finishing work, because High humidity during this work negatively affects the condition of MDF.
- Installation of an MDF door frame to a wall opening should be carried out using special fasteners (long nails, self-tapping screws, turbo screws) and construction foam.
- MDF blocks are mainly used as interior blocks. However, it is not recommended to use them in rooms with high humidity due to the characteristics of this type of material.
- These blocks are usually delivered in a completely finished form, and the process of their assembly and installation, naturally, excludes the fitting of the canvas to the box.
- To disguise the fasteners, the delivery package of the door block usually also includes decorative elements (panels, plugs, etc.).
Related article: Is it worth replacing a bathtub with a shower stall?
The easiest to install are metal blocks, of course, provided they are manufactured and assembled with high quality. Their installation algorithm has the following features:
- there is no fitting of the canvas to the box and no preparatory manipulations such as treatment with anti-rot preparations;
- for silent operation of metal doors, it is necessary to install rubber seals around the perimeter of the door;
- installation of this kind of doors can be carried out before finishing work;
- the metal box should be secured to the wall opening with anchor bolts and polyurethane foam should be used.
It should be noted that doors and door blocks made of metal are mainly used as exterior doors.
It is also worth focusing on the quality of the purchased door blocks, namely: the best option for external door blocks, for example, in an apartment or house, is to install two door blocks - the first metal and the second solid wood. It is optimal to use entirely wooden structures as interior blocks. They can be adjusted and adjusted. And natural wood itself provides the widest scope when, given a certain financial opportunity, you can use different types of wood, including valuable ones, use carvings, stained glass windows, etc.
MDF doors are significantly inferior to wooden ones in terms of moisture and wear resistance, but this door option is quite simple, inexpensive and provides ample opportunities to choose options for the finished door leaf, for example, with decorative inserts, stained glass windows, etc. Naturally, the final choice regarding which door unit to purchase and install depends on the requirements placed on it, the financial capabilities and preferences of the customer.
Types of door frames for interior doors
The correct interior door should be placed in a reliable door frame, because its quality will determine how long the door will last, as well as the design of the doorway of your room. Door frames can be divided into three main types.
1. Fiberboard box. It looks pretty decent, but when choosing a box made of this material, the strength of the entire structure will be in question.
The middle of the frame bar sag from its own weight, not to mention possible deflections from the weight of the door leaf itself. Since the main components of fiberboard, to put it simply, are glue and paper, it must be taken into account that they are very fragile and not durable. It is not recommended to hang doors made of wood and MDF on them due to their heavy weight.
2. Box made of untreated wood.
The cost is at the same level as boxes made of fiberboard, but unlike the latter, boxes made from dry profiled timber have higher strength. Therefore, when choosing between boxes made of fiberboard and boxes made of untreated wood, we recommend choosing the latter.
It is also necessary to take into account that you will need additional materials to finalize the box.
3. Laminated wood box. Does not require final finishing, as it is already laminated with paper.
And here there is one important point: when choosing such a box, the quality of lamination is very important. If thin paper was used for this, there is a high probability of scuffs, scratches, cracks, and the coating loses its appearance.
Perhaps a better option would be a box made of untreated wood with independent finishing and painting.
Also, the entire interior doorway may require additional processing after the doors are installed. Everything depends on your opening, its size, the location of the door in it, and the interior of the room.
For such processing, you can use additional strips and platbands.
The necessary kits can be purchased at the store. We recommend that you determine whether they are necessary after the final installation of the door in order to understand what kind of final finishing you need. After all, purchasing additional materials is an additional expense that may ultimately turn out to be unnecessary.
Well, now it's time to finish the article. All the material I wanted to share has been reviewed. I hope it will be useful to you, and you will use it if you need a step-by-step installation of interior doors with your own hands. Improve your own practical skills and gain new knowledge, they say: “It’s never too late to learn!” That's all, thank you for your attention, successful and easy repair!
How to assemble a door frame?
The assembly diagram will help you make a door frame from blanks correctly.
- Lay out the elements on a flat surface at the same level.
- Mark the door frame correctly.
- The ends of the bars are cut at an angle of 45 or 90 degrees.
- Determine the position of the loops and mark them on the vertical stand. Measure 200 mm from the bottom and top. Which side depends on the right or left opening of the door.
- If the hinges are mortise, use a chisel to make a notch and secure them. The overhead loops are simply screwed into place.
- The bars are tightened with self-tapping screws. The procedure is carried out carefully, because if you overdo it a little, you can damage the elements.
- Finally, the door leaf is inserted, aligned and checked to see if there is the required gap between it and the structure.
The box must be enlarged with the help of extensions if the width of the wall is more than 70 mm, and platbands are installed on both sides.
If a door frame is being assembled from MDF, all fastening work must be carried out with preliminary drilling to avoid cracks and chips in the product.
How to file a door frame at 45 degrees?
Elements with a round cross-section are sawn at an angle of 45◦. In order to make the correct cut, use a miter box or miter saw with a rotating table.
Door frames can be assembled with your own hands without the use of special tools. In such cases, you can saw off the desired angle without a miter box, using a ruler and a protractor for marking.
During installation, the structure is secured using self-tapping screws, which are screwed in at an angle.
Assembling the box at an angle of 90 degrees
With this option, assembling the door frame is easy and quick.
- It is necessary to saw off the required size of the racks and the horizontal crossbar at a right angle.
- Select the extra part of the vestibule.
- Place the box elements on the floor, level them and secure them at the ends with self-tapping screws (2 each).
In order for all sides to remain parallel to the door frame, you can attach the door and check how it will stand in the opening. Connecting the door frame at 90 degrees is considered by specialists to be a fast installation technology.
Assembling a box with a threshold
There is no significant difference between installing door frames with and without a threshold. Thresholds have recently lost their relevance. But despite this, such a system has many fans. This is explained by the fact that it is stronger and more reliable than a structure without a lower transverse bar. Such systems can withstand significant loads and are suitable for installing solid wooden doors. Thresholds are considered a prerequisite for bathrooms. Regardless of what type of design is chosen, anyone can assemble an interior door frame.
- Vertical and horizontal planks are prepared in advance.
- Cut at 45 or 90 degrees.
- The prepared elements are placed on a flat surface.
- The racks and crossbars are alternately fastened using self-tapping screws.