Decorative plaster is very beautiful, much more convenient than wallpaper, and also hides the imperfections of the walls. It is easy to work with even complete beginners in the construction business. You can also cook it yourself! We learned the 8 best ways to make decorative plaster with your own hands!
Decorative plaster with PVA glue
By the way, PVA glue can be replaced with grout mixture in the same quantity - the recipe will not change.
You will need:
6 kg of putty, 2 liters of water, 200 ml of PVA.
Preparation and application:
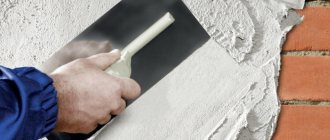
Pour dry putty into a large container, dilute with water and knead the mixture. Add PVA and mix again until smooth. To apply, use a textured roller with a suitable pattern.
Preparation of finishing material
Before use, dry mixtures must be diluted with water and stirred thoroughly until smooth. To do this you will need a container, clean water and a construction mixer. If the volume is small, you can stir the solution with a trowel. Dry ingredients are added to water, and not vice versa.
Manufacturers carefully develop recipes, so the proportions of materials must be strictly observed. To obtain a thicker solution, reduce the amount of liquid slightly, and then bring the mass to the required consistency.
The prepared mixture sets quickly enough. The viability of a solution containing mineral components is no more than 3 hours; a portion must be used before this time has expired.
Some craftsmen make decorative plaster with their own hands from ordinary gypsum putty, mixing “start” and “finish”. For dilution, you can use a primer - the solution retains its elasticity longer, adheres better, and after hardening, the strength of the coating increases.
Video on how to make decorative plaster from putty.
Decorative plaster with primer
Thanks to the primer, the adhesion of the plaster increases and it acquires antiseptic and fungicidal properties.
You will need:
6 kg of putty, primer, 200 g of grout.
Preparation and application:
Mix a homogeneous mass of dry putty with a primer until it acquires the consistency of thick sour cream. Use only white primer and add a little grout at the end. Apply with brushes, roller or embossed spatula.
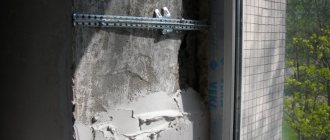
Advantages of textured plaster
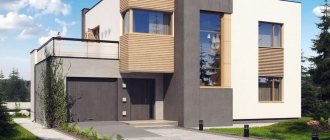
If you decide to choose ordinary putty as a façade finish to create an intricate decor, you will have to work hard and practice applying the finish to get a really high-quality finish. But the result is worth it.
Decorative plaster is, first of all, a play of textures. And the color scheme plays the second part. It is important to understand when starting work that it is through texture and relief that you will achieve a complex texture on the wall.
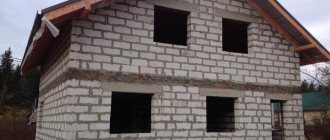
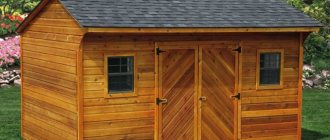
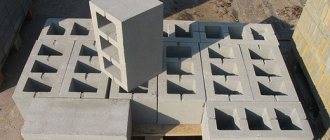
Stone-like facade plaster
Textured plaster has the following qualities:
- easy to apply;
- is highly resistant to moisture and UV rays;
- can be applied to any surface (foam concrete, brick, etc.);
- allows you to give the wall an original style;
- does not require perfect leveling before application;
- it is possible to choose any color scheme;
- goes well with other finishing materials;
- has a long service life;
- environmentally friendly material;
- increases the thermal insulation and sound insulation properties of the room;
- you can create a complex texture.
The possibilities of decorative plaster are not limited to creating an original texture. Decorative plaster can be used to create intricate patterns and paintings.
Decorative plaster at home
It is best to use silicone putty mixtures as a base. They are more elastic, allow you to achieve perfect texture and the necessary relief, and also have high resistance to mechanical damage. Despite the intricacy of the texture, this material is quite easy to care for. Dust and dirt can be easily removed with ordinary detergents.
Decorative gypsum plaster
A very simple and common option with good adhesion and high covering ability.
You will need:
6 kg of gypsum mixture, 2 liters of water, 200 ml of PVA, color.
Preparation and application:
Mix gypsum with water at room temperature and add PVA. In this case, the glue provides a convenient consistency and acts as an additional binder. At the end you can tint the decorative plaster with color.
Preparing the walls
Decorative plaster can be applied to any prepared surface:
- finishing putty or leveling plaster (cement, gypsum, etc.);
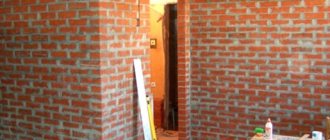
- brick and concrete;
- aerated concrete;
- GKL or chipboard;
- (using mesh or shingle reinforcement).
When starting the work process, you need to carefully prepare the walls. The surface must be clean, dry, dust-free. All traces of the previous finishing are removed, cracks and irregularities must be puttied.
Before plastering, the walls are primed. The primer will ensure good adhesion of the decorative material to the walls. It is worth choosing alkyd or acrylic compositions of deep penetration. For wet rooms, an antiseptic primer is selected to protect the walls from the formation of fungi and mold.
To prepare walls made of smooth materials such as chipboard and plasterboard, adhesive compounds with quartz sand are needed. Sand will add roughness and improve the adhesion of the coating and the base. Adhesive quartz primer can be selected from the following brands: Bayramix Astar, DALI-Decor Quartz Primer, Alpina Expert, Betonokontakt.
If decorative plaster has already been applied to the walls, you can apply a new layer of material to update the interior. To do this, it is not necessary to get rid of the previous finish. It is enough to treat the surface with an adhesive primer, which ensures reliable and strong adhesion of the materials.
Reinforcement with fiberglass mesh. Some bases require reinforcement before decorative work. For example, when creating a wet facade, mineral wool or expanded polystyrene is covered with a layer of plaster with a fiberglass mesh. This is the base leveling layer. When finishing plastering, the mixture is applied in a thin layer of 2-5 mm; at this stage, fiberglass is not needed.
Decorative plaster with marble chips
The result is a very beautiful surface with a pronounced texture reminiscent of a bark beetle.
You will need:
4 kg of finishing putty, 1 kg of stone chips, water.
Preparation and application:
Mix dry putty with marble chips and dilute with water at room temperature. The mass should be homogeneous and viscous. Then it can be tinted and applied with a regular spatula.
What tools will you need?
In order to carry out work on applying decorative plaster, you will need to prepare the necessary tools, the range of which is largely determined by the chosen technique. The obligatory ones will be useful:
- trowels;
- graters and graters;
- applicators,
- brushes;
- sandpaper;
- foam sponges;
- rollers for decorative plaster;
- brushes of two types: for decoration and ordinary;
- stamps for forming a pattern;
- stencils (if necessary);
- To apply flock coating you will need a sprayer.
Plastering tools
You should definitely purchase a set of spatulas of different sizes and two types: stainless steel and rubber .
Minimum set
To make decorative plaster yourself, you will need special tools. A worker cannot do without a spatula and a roller - this is the minimum set; a bucket will come in handy. You will also need:
- Ironing iron.
- Trowel.
- Grater.
- Brush.
There are also a number of tools for various types of decorative plaster finishing.
Different types of spatulas
Attention! You can do it yourself at home, then you can save money and create a product with the required structure, without worrying about possible misunderstandings.
Rollers
To create decorative plaster, structural rollers made of silicone or rubber are used. They already have three-dimensional patterns, thanks to such rollers it is much easier to apply a pattern to the wall. Application will be easier and more symmetrical.
Rollers with different patterns
This does not mean that without a roller you cannot achieve a beautiful and unique result. You should not necessarily purchase such solutions, since an unusual ornament can be created using a rag, mitten and other improvised means, for example, if you apply shells or stones to the surface.
In this video, watch how to properly apply decorative plaster with a roller.
Metallized decorative plaster
The coating shines and has a metallic shimmer when light is refracted.
You will need:
2 kg of finishing and starting putty, 2 kg of aluminum powder, 2 kg of acrylic paint, color, water.
Preparation and application:
Mix putty and paint in equal proportions and dilute with water to a uniform consistency. Let the mixture sit for 5-7 minutes, stir again and add aluminum powder with color. Apply the plaster with a roller or spatula.
How to cover walls with your own hands?
No special skills are required to apply decorative plaster; of course, practical experience will not hurt, and understanding the process will help save effort and time. It is best to first read an article about it or watch a training video.
The preliminary preparation of the wall plays an important role; the better it is leveled and the finer the grain, the easier it is to apply the plaster.
The smoother the wall, the easier it is to apply plaster.
Read our separate article on how to choose decorative plaster for interior wall decoration.
Imitation from putty
It is not necessary to prepare a special mixture if you need a textured surface. It can also be imitated from ordinary materials.
You will need:
Ready-made acrylic putty, colorless water-dispersion acrylic varnish, glue for non-woven wallpaper, color.
Preparation and application:
Apply a 2 mm layer of putty with a spatula and give it a texture with a trowel before it dries. After 15 minutes, lightly smooth the surface, and after 10 hours, walk over it with fine-grained sandpaper. Mix glue for non-woven wallpaper with color and apply it to the wall moistened with a sponge with a spatula and trowel, and after drying, cover with varnish.
Application to ceilings
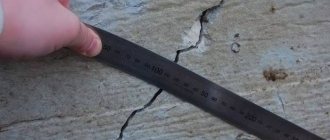
When renovating your home, you need to take care of more than just the walls. Carrying out work on the ceiling is more labor intensive. Here you will have to constantly raise your head, which can be very tiring. The general principle is practically no different from the technology for walls.
The thickness of the plaster layer on the ceiling is 5 mm
There is only one difference. If on the wall the maximum layer thickness for a structural and textured mixture is 20 mm, then on the ceiling it is reduced to 5 mm. To level the base, it is recommended to use drywall rather than special compounds.
Imitation from tile adhesive
The coating will be more textured and deliberately rough - as if created for a loft.
You will need:
Tile adhesive, varnish, spatula, enamel or paint.
Preparation and application:
Apply a layer of glue 5 mm thick and work with a spatula in successive circular movements. You can use a hard, wide brush to create texture. When the surface dries, lightly rub it with fine sandpaper, prime it and cover it with paint or enamel, and then with varnish.
Venetian
This type of decorative plaster for interior work allows you to create an imitation of marble. The texture turns out very beautiful. The material is perfect for almost any room.
Imitation marble
The composition is sold in ready-made liquid form. The weight of a can or bucket usually ranges from 7 to 25 kg. The plaster contains marble flour and slaked lime. An aqueous emulsion is used, which avoids unpleasant odor during application.
Before plastering brick walls, you will need to level them. Decorative plaster can be applied to the walls only after the base is perfect. This type of material does not tolerate shortcomings. This is the difficulty of working with Venetian plaster .
If necessary, the solution can be painted in any color. With this plaster you can create amazing mosaics or entire paintings with your own hands. The advantages also include environmental friendliness and safety. The composition is suitable even for the bedroom. The surface is fireproof and wear-resistant. After application, the layer dries quite quickly.
Venetian plaster allows you to finish the walls like marble
Training in decorative techniques may look like this:
- First you should prepare the materials and tools for applying decorative plaster. Here you will need a medium-sized spatula and sandpaper with very small particles.
- After cleaning the surface, begin leveling the base. It must be perfect. First of all, get rid of chips. After this, you need to smooth out the cracks and depressions using cement-sand mortar or putty. To eliminate defects as much as possible, apply a leveling layer of Portland cement-based plaster. The thickness of the layer is determined depending on the severity of base defects. On average, 20 mm will be enough. Evenness is controlled using the beacon rule. To do this, before starting work, special strips with a certain pitch are installed on the wall. Another option for leveling is drywall sheets.
- The leveling layer must be allowed to dry. After this, you can apply the primer. This will allow the finishing material to better adhere to the wall.
- Venetian plaster is tinted before application. After this, take a spatula and begin to apply the mass to the base with thin strokes. The entire surface must be treated. If necessary, the solution is applied in several layers. The maximum thickness per application cannot exceed 12 mm.
- After application, allow time to dry. It is important to control the temperature and humidity conditions. It is recommended to close doors and windows to prevent drafts. Violating this rule will result in cracks appearing on the surface when drying.
- When the surface is dry, begin cleaning. To do this you will need sandpaper. The work is performed in a circular motion. Everything should be done very carefully.
- The last stage is protection. The finished layer must be coated with special white wax in one layer.
The Venetian plaster finishing technique involves applying the mass in small strokes
Imitation with marble texture
This technique allows you to imitate expensive Venetian plaster, but 2-3 times cheaper.
You will need:
Acrylic putty, grinder with sandpaper, spatula.
Preparation and application:
To make veins, spot-apply white and black putty on the wall and mix them with a spatula in smooth transitions. It’s better to put images of real marble in front of you to understand what kind of result you need. White and black layers can be overlapped with each other until you get it just right.
Dry the putty and lightly sand with fine sandpaper to smooth out rough veins and transitions. Make corrections in the form of thin veins using a narrow spatula. Polish the wall with a grinder with a 1200-1500 wheel, and then cover it with special wax.
Effects and ways to achieve them
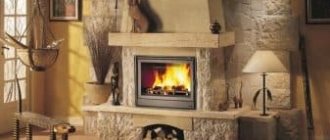
Rock
This effect is considered the easiest to create. Indeed, it is unlikely that you will find anything simpler. To create an imitation, you will need finishing putty on any base. If you are going to decorate the walls of a bathroom (or other rooms with a high level of humidity) like rock, it is better to take cement; in the rest, you can choose gypsum. It is best to take the mixture in buckets, that is, in finished form. True, it is more expensive, but you don’t have to bother with preparation. By the way, it is not recommended to take Vetonit, since it is too soft and friable. Other analogues with such shortcomings are also not worth buying.
The work order is as follows:
- The wall is cleaned and primed. In addition, it is advisable to putty it in one layer;
- material is applied to the wall. To do this, the surface is divided into small areas (for example, 0.5 sq.m.). The optimal layer thickness is 2-3 mm. The higher this number, the rougher the texture will be. Therefore, the putty must be smoothed as evenly as possible;
- a structure is created. To do this, you need to completely clean the trowel from putty. Then the tool is lightly pressed against the uncured layer, the lower edge is raised, and a movement is made over a short distance. The direction can be any, just like the movement itself. This is what creates a unique pattern;
- after treating the area, the trowel is smoothly removed (so that no marks remain) and cleaned;
- a new area is selected and the actions are repeated. The trowel must be applied overlapping so that there are no gaps;
- When the wall is treated, you need to leave it for about a day to dry completely. Then you can start painting (we’ll tell you how this is done separately).
Advice! You may not get the desired drawing right away. There is nothing wrong with this: the area can be smoothed over and processed again. You don’t need to apply the trowel over the entire surface, as it will simply get stuck in the layer and it will be difficult to peel it off.
Rain
This imitation is more complex to create than the previous one; Moreover, it requires time and patience. But the result is more effective.
Here's how it's done:
- After preparing the wall, markings in the form of inclined lines are applied to it. The distance between them should be slightly less than three strokers. For example, if its width is 12 cm, then you need to retreat from the line by about 30. You need to draw at one angle;
- masking tape is glued to the surface so that its edge lies on the line;
- putty is applied. Work should be started from the top corner: this reduces the risk of the putty falling onto the pattern. The width of the strip should approximately correspond to the width of the trowel, the length should be approximately 1 m. The thickness of the layer is approximately the same as in the previous case (3 mm);
- To create the necessary structure, you need to press the trowel a little and pull it along the line, lifting it a little. As a result, the drawing turns out to look more like a hedgehog;
- the trowel is cleaned of putty residues. Now you need to lightly press it onto the applied solution and smooth it in one direction. In this case, you need to lift one edge of the tool;
- When one area is covered, a strip of masking tape comes off. This results in a smooth edge. The next portion should be applied with a slight overlap;
- It is advisable to continue work until the wall is ready. Otherwise, the difference between the layers will be noticeable;
- after drying, you need to sand the surface (for example, with sandpaper) to remove irregularities;
- priming work is being carried out. After this you can paint the wall
Sand or sand dune effect on walls
The composition of sand-effect paint includes binders, solvents, antiseptics, and crystal dispersions. When applied, we get shimmer, and after drying the texture appears. With different application techniques we get different looks - dunes, dunes, sandy overflows.
The effect of sand and sand dunes is created using special decorative wall paint
The paint is easy to apply and no special techniques are required. Due to the pronounced texture, minor wall defects are hidden. So the requirements for the surface are not so stringent.
Application and operation
The paint is easy to apply; no complicated techniques are required. Unless you want to have not just “sand”, but dunes. But to create such an effect, special compounds are required.
It is not possible to wash sand effect paint with a brush. Gentle cleaning with soft attachments on the vacuum cleaner. And keep in mind that if you touch a wall painted with sand effect paint, the relief will crumble. But this is invisible and does not affect the appearance. The surface is initially heterogeneous, the relief simply changes slightly. The view does not suffer from this. The service life is up to 10 years, which is not bad at all for paint.
Please note the availability of hygiene certificates for this type of paint. The binder is not always harmless. So having certification and a certificate from the sanitary inspectorate about the amount of substances released is simply necessary.
Decorative paint for walls with the effect of silk and silk threads
Many manufacturers have wall paint that looks like silk. If there are at least several decorative or interior paints, then one of them is silk. The look is very sophisticated and delicate. Suitable for living rooms, bedrooms. In terms of performance (acrylic can be washed with a brush), it can also be used in the hallway, but if you are satisfied with such a “refined” look of your hallway.
When choosing, pay attention to the base. Security is important for housing. The best option is silk-effect paint based on aqueous acrylic dispersion. It is relatively inexpensive (when compared with silicone, for example), washable, does not fade and can be painted in all colors. Many decorative paints are made on this basis. To obtain paint with a silk effect, a special type of mother-of-pearl and pigment are added to it.
This is what interior silk paint looks like on a wall
Paint consumption is average, you will have to paint in at least two layers. This is for low absorbency or pre-priming. The absorbent surface will require three coats exactly. And paint is not cheap, so it’s better to prime it. If the paint is based on acrylic dispersion, then we use acrylic primer. But it's better from the same company as the paint. There will be no problems with product compatibility.
The disadvantage is that the surface to be painted must be flat. Almost perfectly flat. The second point is that if you want to get “exclusive”, you need to master the application technique. You can, of course, just roll it out with a roller. It will work out well too. But it could be more interesting.
You can wash it with detergent (not abrasive), a rag or a brush. This cleaning does not affect the appearance. In the sense that it is not getting worse. Where the walls are frequently touched, “glossy” areas may remain. If you want this type of finish in your hallway, consider a varnish finish. But this type of paint “breathes”, so if you varnish it, you will lose this effect.
Each company that produces silk-effect decorative paint has a slightly different appearance. Some have multiple options. And not colors, but textures
If you think that silk effect paint looks the same from all manufacturers, you are mistaken. They use different additives, resulting in slightly different surfaces. This type of decorative paint is popular, so some have several paints that give different textures. There are also different application techniques. With their help, you can get different types of surfaces: classic, wet and crushed silk.
Stone effect paint
Another decorative paint, in appearance very similar to decorative plaster. This is a stone effect paint. It is safe as it is made on the basis of acrylic emulsion. Decorative elements are added to it, which create the required appearance and relief. For example, Rust Oleum Multispec Stone Accents, Siberia Rock`n`Wall. This paint has 10 shades - from very light to quite bright. Can even be used in kitchens on work aprons.
Both natural stone effect paints look about the same
A very good specimen in terms of performance properties. Has very good adhesion. Very smooth surfaces - such as plastic - require a primer. The rest can be painted immediately. It is applied from a spray gun or using a special roller (from the same company). Appearance depends on the method of application. After the roller, a surface with clearly defined flakes of “stone” remains. After the spray gun the surface is smoother.
This stone-imitating paint is easy to use and durable. It can even be washed with a brush. For Rust Oleum, application of additional protection (in the form of varnish) is not required, but in areas of heavy pollution it is better to coat Siberia with varnish. The paint is repairable. If you get a bald spot or a chip somewhere, you need to moisten a piece of sponge with water, squeeze it out and dip it in the paint, apply it to the desired place and wait until it dries.
There are also stone paints in cans. But you are unlikely to use them to paint walls. Perhaps for a panel or some kind of decoration. It's too expensive.
This is what the stone paint “Alatyr stone” looks like
Another type of surface is provided by paint with the effect of burnt stone Alatyr-stone. It is also called “liquid granite”. Apply by spraying through a spray gun. There are single-color and multi-color options. Less shiny than the ones described above. Positioned as resistant to cracks and ultraviolet radiation. After drying it must be varnished.