Plastic as a material
Wall decoration with plastic panels has its advantages and disadvantages. They must be taken into account when making the final decision. The finishing material has the following advantages:
- Absolutely harmless. Many people are afraid of plastic because it is an unnatural material. Modern technologies that make it possible to produce harmless products are simpler and cheaper than old ones. For this reason, it is extremely difficult to find dangerous material even among fakes.
- The wall panels for interior decoration are very beautiful. There are many options for colors and textures. In addition, manufacturers are releasing new seamless options that are very different from the usual office panels. You can choose a wood finish, plain or colored. Photo printing is also applied to the coating.
- Possibility of use in cramped conditions. Plastic panels for interior decoration are perfect for various niches and other corners of an apartment or house where it is inconvenient to work with other materials.
- The panels are easily mounted together with ventilation grilles and sockets. In any color, these elements look natural and are not noticeable.
- Plastic is perfect for finishing bathrooms and other wet rooms. The finishing of walls and ceilings is durable, does not require complex maintenance, and can be used at low temperatures (for example, on an uninsulated balcony).
PVC panels look pretty good for their price.
The disadvantages include the following negative points:
- Flammability. The material is difficult to set on fire, but when exposed to fire it maintains combustion and releases a large amount of gases dangerous to humans.
- The panels don't breathe. They completely block the movement of air through the walls, which is necessary to ensure normal ventilation. Because of this property, the type of finish is not recommended for use in the bedroom and children's room.
- Insects can live in the voids of the panels. This problem is especially relevant for the southern regions.
- The need to use special tools for cutting and certain skills during installation.
- Decorating walls with PVC panels with your own hands requires careful preparation of the base.
The finishing can look very non-trivial!
Having considered all the advantages and disadvantages of the material, you should calmly make an informed decision about the possibility of using this type of finish.
Methods for attaching lamellas
How to attach PVC lining to walls
There are three ways to attach the panels to the wall:
- using glue,
- self-tapping screws
- and kleimers.
The first method is suitable for very even and smooth walls; glue is used special for PVC, universal “Moment-installation” or “liquid nails”.
Installation of panels with glue
The use of this method simplifies and reduces the cost of the installation process, since there is no need to attach the sheathing. Disadvantages: it is impossible to replace a damaged panel; during subsequent repairs it is difficult to remove the covering from the wall.
Methods for installing PVC panels on walls
Do-it-yourself installation of PVC panels
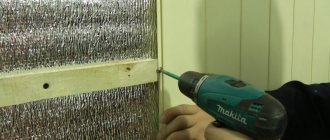
Fastening with self-tapping screws is a reliable and convenient option that does not require a perfectly flat surface. To screw in the screws, you definitely need a screwdriver, otherwise the installation process will take a long time. Disadvantages of this method: a wooden frame is better suited for self-tapping screws, so additional time is spent cutting the timber and treating it with an antiseptic.
How to attach plastic panels
The third option is the most optimal.
The clamps are conveniently and quickly attached to the sheathing and securely fix the panels to the wall. The lathing is mounted from a metal profile, assembly of the covering is carried out effortlessly. A damaged lamella can be easily replaced with a new one; dismantling the finish also does not take much time.
Installation of PVC panels
What tools will you need?
It is worth preparing to work with PVC panels. First of all, you will need to find a special tool:
- Circular Saw. If you can’t find it, you can use a jigsaw. The file or disk must have fine teeth (“clean cut”). It is preferable to use a saw. The jigsaw file is highly flexible, so the cut can turn out wavy.
- Jigsaw cutter with angles of 45 and 90 degrees.
- Construction stapler for cladding on wooden sheathing.
- Rubber mallet with a hook rule. The same tool is used for installing laminate flooring. Needed to “rip out” jammed panels. Doing this with your hands can easily damage the panel or sheathing.
- A plaster spatula used to bend the finishing profile when installing the last plank. Spatula length 80-120 cm.
Also when performing work you will need:
- pencil and tape measure;
- building level;
- square;
- fastening elements (self-tapping screws, dowel-nails, clamps);
- screwdriver;
- perforator;
- sealant;
- antiseptic.
What are PVC panels
Plastic panels (lining) have another name - PVC. This is an abbreviated name for the main ingredient of the material - polyvinyl chloride. The production is quite simple and involves passing the molten substance through special molds. This creates a strip that is cooled and cut to the desired size. The result is an excellent finishing material that can withstand almost any temperature (within residential premises).
Wall panels vary in size:
- There are two types of thickness - five and ten (eight) millimeters. The second indicator is combined into one; there are identical additional elements for it.
- The width varies, ranging from twenty to thirty-seven centimeters.
- There are three main sizes in terms of height – 2.6 m; 2.7 m; 3m.
Of course, there are many more sizes. Thus, the width of the plastic lining reaches 120 cm. You can also make any desired non-standard to order.
Installation of plastic panels for wall decoration
Plastic can perfectly replace wooden decorative elements and other finishing options. But it must be fastened in strict accordance with technology. Decorative wall panels will help make your home cozy and beautiful.
3 ways to attach panels to the wall
The walls in the bathroom and other rooms, as well as the ceiling, are decorated with plastic panels in the following order:
- preparation of the base;
- marking;
- lathing device;
- installation of start and finish profiles;
- installation of all other planks;
- facing of slopes;
- fixing skirting boards.
Installation instructions for PVC panels
Preparing the base
Work with plastic begins with removing the old coating. In order for the finishing coating to have an attractive appearance without distortions and other troubles, you will need to carefully seal all the cracks in the walls and ceilings and eliminate any unevenness.
Cleaning the surface of the walls is necessary to prevent the appearance of dust, mildew and mold
Next, the base is covered with a layer of antiseptic composition. It will help prevent mold and mildew from appearing under the panels.
Marking
Before finishing the room, it is necessary to determine the location of the frame racks . Finishing ceilings and walls with plastic panels involves marking in the following order:
- Mark a point at a distance of 1-2 cm from the level of the floor or walls. A line is drawn along the perimeter through this point. For marking accuracy, use a building level.
- When marking walls, the same line must be drawn under the ceiling.
- From the bottom line, in increments of 40-50 cm, parallel lines are drawn to the entire height.
This marking is suitable for attaching panels vertically. The cladding is always attached perpendicular to the frame, so if it is necessary to arrange the cladding elements horizontally, vertical markings are made.
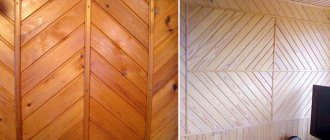
Horizontal and vertical installation types
Sheathing device
Most often, wood is used as lathing for panels for interior wall decoration. In this case, the slats must be treated in advance with an antiseptic composition to protect them from destruction. Using a puncher, holes are made along the marking lines for fasteners with a distance of 50 cm. The frame slats are secured to the wall. If it is necessary to lay wiring under the trim, this must be taken into account at this stage:
- provide fastenings for wires;
- check that they do not protrude beyond the plane of the sheathing.
Be sure to check the horizontality of the sheathing.
When using a metal C-profile as a sheath, you will need to additionally purchase elements for fasteners. They are usually sold as a set. The metal is fixed to the base with self-tapping screws in dowels. All work must be performed in accordance with the manufacturer's instructions.
To increase the thermal insulation or sound insulation of walls, special mats can be laid between the frame slats. They are fixed depending on the type of material used. For different types, both fastening with dowels and with an adhesive composition can be used.
Fastening the slats
The first plastic strip needs to be secured in the most illuminated and visible corner. Most often, this is the one located opposite the entrance to the room. Measurements are taken using a tape measure. The panel is cut to the required length with a special tool (usually a circular saw).
One edge of the strip is inserted into a special side molding. This element is designed to ensure mutual fastening of the panels, which are located on opposite sides of the corner. The element with the molding is applied to the corner and secured to the sheathing on the back side.
Next you need to connect the first panel to the second. To do this, a tongue-and-groove system is again used. The joint is pressed tightly and the plank is fixed to a wooden or metal frame. All subsequent elements are mounted using the same technology. To ensure maximum tightness of the joints, it is recommended to lubricate the side edges with silicone before installing the panel. When installing the last part, it is worth checking whether it is the right width. If necessary, the element is cut to width. The last panel is not secured to the sheathing. It must be snapped onto the finishing element. If necessary, all joints are treated with silicone (sealant).
Installation of panels on the frame using clamps and clips
Accessories must be installed to complete the installation. Such elements include baseboards and their caps, corner elements. The latter are purchased together with the panels and heated on top of them.
Accessories for panels will give your decoration a neat, finished look
To make holes for switches and sockets, use a sharp knife. They cut out holes of the required size.
Installation of panels with glue
If necessary, finishing elements can be fixed directly to the wall without the use of lathing. In this case, increased requirements are placed on the foundation. It will take more time to prepare it, since the surface must be perfectly flat.
Before starting work, purchase special glue. It is allowed to use liquid nails for installation. It is important to check the composition of the substance in the store. It should not contain solvents that destroy plastic elements.
Installation of lamellas with glue
The work is performed in the following order:
- cleaning the base from old cladding;
- treatment with antibacterial putty or a layer of primer that contains components that can protect against mold and mildew;
- drying the base;
- preparation of the adhesive composition in strict accordance with the manufacturer’s instructions on the packaging;
- the choice of working tool is carried out depending on the consistency of the glue: roller, brush, spatula;
- work begins with corner elements;
- the glue is applied to a small area at a time (equal to approximately 1 panel) so that it does not have time to dry;
- a corner piece is secured to which an ordinary element is mounted using grooves;
- the panels are pressed against the wall with your hands for a short time, during which the adhesive solution has time to set;
- install all other panels;
- install decorative elements, coat the seams with silicone sealant.
Advantages of wall panels
It is not for nothing that the installation of wall panels is often carried out in the kitchen or similar rooms. The materials have many advantages. Here is their list:
- Easy to install. One of the device options does not require ideal surface leveling. The structures are fastened to walls with paint or other finishing material. It is enough to have instructions and the desire to work.
- The products are universal. They are used for any room in the house, for offices, administrative and educational institutions. They have excellent sound insulation characteristics, an optimal level of heat absorption and are not harmful to health. And if the wall panels are fastened to the wall through a frame, then you can hide wiring, pipes and even lay insulation in it.
- Easy to care for. The surface is easy to clean and is not afraid of moisture. It is enough to wipe the area with a damp cloth or cloth. All detergents can be used. An exception is cleaners with abrasive components.
- Availability. This is a democratic material, so the cost of repairs will not be exorbitant. In addition, there is a huge selection of wall panels of different prices.
- A wide range of. Products are sold in any size, shape, color, with or without patterns. This allows you to bring any design solutions to life.
- Maintainability. In case of breakage or damage, dismantling wall panels with defects will not be difficult. It is replaced with a new one.
- Durability and strength.
This is why users love wall panels for the bathroom or kitchen so much. But what complicates the choice of materials is the fact that there are many varieties of them. Therefore, to figure out which option is best, it’s worth considering these types.
General recommendations
In addition to installation with glue and lathing, there are several other methods that professional workers use. But they have not become widespread. In conclusion, we can give some general advice:
- The panels are recommended for finishing balconies, loggias, bathrooms, hallways and living rooms. For bedrooms and children's rooms, you should pay attention to more breathable materials.
- It is best to use seamless plastic in rooms with air conditioning or a forced ventilation system.
- In a bedroom for adults, it is permissible to use the material for certain sections of the walls.
- It is not acceptable to use the elements in the kitchen. In this case, grease and other substances will settle on the surface of the panels, which will become an excellent breeding ground for bacteria.
Types of wall panels
The first thing you should pay attention to is the shape. They are produced in the form of slabs, sheets or slats. The latter can often be seen in bathrooms and hallways. For the kitchen choose slabs or sheets. As always, it all depends on the wishes of the owner. The material is another matter. In this regard, the diversity is simply enormous. Popular options are below.
Metal
Features: high cost, heavy weight. Not everyone can afford to use such products in the kitchen. True, aesthetically the option is not very attractive. Stainless steel is difficult to clean and can tarnish over time. Whether it makes sense to use them for the home, everyone decides for themselves. But their main advantage is strength and durability.
Tempered glass
Many people consider this the ideal solution. Installing a wall panel in a kitchen won't be cheap, but glass surfaces are resistant to temperature fluctuations, strong and durable. They are not afraid of moisture, and all dirt is quickly cleaned. You just have to wipe the walls regularly so that smudges are not visible.
Glass is a stylish and modern material. To improve the decorative properties, drawings and ornaments are applied to the glass. A matte pattern on a glossy glass surface will highlight the taste of the owners.
MDF
A good option that is dense and durable. No special care required. The material is made of wood fiber, so it will not cause harm to those living in the house. MDF panels for wall coverings can have images and drawings; there are laminated options. Fungus and mold will not form on the surface.
Plastic products
One of the most popular options. PVC is a cheap and practical material. Yes, it does not have the same strength as metal, glass or MDF, but this is not necessary. The walls are rarely subjected to mechanical stress; nothing falls on them, as is the case with the floor. But installing plastic panels is a simple solution. Even a beginner can handle this job. The work is done quickly, and the result will not disappoint.
Materials are sold in a wide range of colors, sizes, textures, etc. The panels are light in weight, they are not afraid of moisture, and can be easily cleaned. With good care, the material will last for decades.
We recommend: How to glue PVC panels.
Choice of textures and colors
Glossy plastic panels
Modern technologies provide private developers with a wide choice of cladding, differing in the variety of external surfaces. Conventionally, the design of the material can be divided into several categories.
Texture:
- flat;
- grooved;
- uniform;
- matte;
- glossy.
Colors:
- plain color;
- color transitions;
- imitation of stone, brick, wood;
- ornaments and patterns;
- divorces and transitions;
- drawings and panels.
In order to make the surface of the slabs original and unusual, glitter, sand, stone and glass chips, varnish and pigment are added. Having spent time searching, the buyer is guaranteed to find the products he needs.
Required tools and materials
Despite the ease of installation of plastic panels, you will still need minimal tool skills:
- Electric drill, screwdriver, electric jigsaw. They will cut the panels to the required size, and use an electric drill and screwdriver to attach the panels to the sheathing or walls.
- Miter box for jigsaw. This “auxiliary” tool will allow you to cut all panels to the same length and chamfer.
- Construction level, stapler. The level will measure the equality of the panels, and the stapler will attach the layers of heat, hydro and vapor barrier.
- The panels themselves are the right color.
- Consumables: fasteners, corners, screws, brackets, insulation, waterproofing, vapor barrier film.
- Profiles: starting and finishing (necessary for fixing plastic siding)
- Decorative corners, components.
Preliminary calculations of the amount of material needed
In order to avoid purchasing surplus and repeated visits to the store, the first thing you should do is determine the optimal number of linings needed for finishing. The material can be mounted in a vertical or horizontal position depending on personal wishes.
In the first case, calculations are carried out as follows: the elongation of the room along the perimeter is measured, from which the width of the openings is subtracted, and the resulting indicators are divided by the width of one plastic panel. To the resulting number you should add 2-3 products as spare ones.
When performing a horizontal installation, the area of the room is measured with the openings of windows and doors taken away. The resulting number must be divided by the area of 1 panel. In this case, at least 10% of spare products should be purchased, since the amount of scraps increases. In addition, it is necessary to count the number of slats that will be used for arranging the sheathing and as fasteners. First of all, the height of the walls must be divided by the pitch of the frame. Basically, this figure reaches 50 cm, after which it needs to be multiplied by the perimeter of the room. The resulting value indicates the length of the slats in linear meters. By measuring the height of the corners and multiplying the resulting number by their number, the full footage of the corner profiles will be obtained. To this indicator you should also add the perimeter of the openings of windows and doors.
