It is difficult to find a more common finishing material than lining, which people love largely because of its versatility and low price. Meanwhile, it has another noticeable advantage that cannot be ignored - it is easy to attach. Almost every person, armed with the necessary tools and materials, can independently attach it to the wall. However, in order to be absolutely sure of the result, especially if you are doing it for the first time, it would be useful to learn about the main intricacies of this simple operation. Today's step-by-step instructions are devoted to how to properly attach the lining to the wall.
- Characteristics of the material. All the pros and cons
- 4 tips for making the right choice
- Preparatory moment. Marking and counting
- Preparation of tools and materials
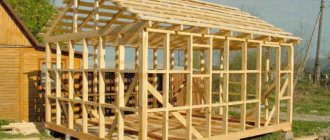
- Frame installation
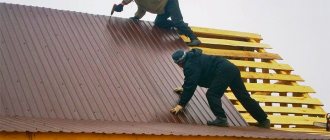
- Installation of lining. 2 ways. Photo and video
- Recommendations for successful installation
- Conclusion
Preparatory moment. Marking and counting
It is present in every type of installation work.
- take all necessary measurements in the room;
- calculate the required amount of finishing material;
- decide how many consumables you need to purchase for the frame structure;
- equip your work area, getting rid of everything unnecessary; if there is any large furniture nearby, it is better to cover it with film to avoid contamination.
Processing and coating
Before you start covering the room, the material needs to be prepared.
- Cover the panels with bio-protective agents that prevent the formation of mold, harmful insects and rotting.
- Dry the material.
- Leave it for several days in the room where it is planned to be installed. This will give the panels time to get used to temperature and humidity, which, in turn, will ensure high-quality installation without subsequent shrinkage.
Stains, oils or other wood tinting compounds are applied before installation. This is due to the fact that low humidity leads to drying out (the width can decrease by up to 1 mm). If you plan to varnish or paint it, this can be done after completing the installation work.
So, the panels can be coated with colorless compounds, varnished, tinted, special oils will help give them the appearance of valuable species, or painted.
Evgeniy Filimonov
Ask a Question
The use of glossy varnishes and other synthetic-based decoration compounds is prohibited, especially for interior work. When covering a steam room with wood, you should not cover it with anything.
Preparation of tools and materials
Here, even a beginner who has never taken on any kind of home installation is difficult to surprise with anything. The same classic set of tools:
- perforator;
- screwdriver;
- level;
- cord plumb line;
- meter;
- pencil.
And here are the necessary materials
:
- bars for sheathing;
- dowels;
- self-tapping screws;
- nails;
- clampers.
And, in fact, the lining itself. Nothing will work without her!
Differences between lining and eurolining
- Eurolining has the best quality wood
- Has a more complex profile
- Eurolining has a deeper tongue-and-groove fastening
- Has ventilation channels
- More expensive than regular lining
The process of attaching eurolining does not differ from covering it with ordinary lining, even though eurolining has higher requirements for board moisture and the quality of surface treatment, so pay special attention to this.
Based on materials from the site: samoremont.com, svoimi-rykami.ru, kubvagonki.ru
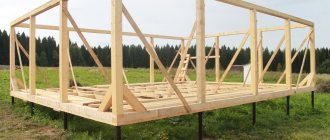
Frame installation
The main thing you have to face at this stage is the choice of the location of the sheathing
.
- horizontally;
- vertically.
To do this, you need to proceed from how you will attach the material to the wall:
- if the lining is located vertically, then the sheathing must be fixed in a horizontal position;
- if the lining is placed horizontally, then, accordingly, the frame must be mounted vertically.
- prepare wooden blocks with a thickness of 1 centimeter and drill holes in them with a minimum pitch of 50 centimeters, they should be approximately 1.5 mm smaller than the diameter of the screws;
- attach the bars to the wall and mark points through the holes for subsequent drilling;
- drill holes in the wall according to the marks and insert the prepared dowels;
- fix the bars to the dowels, controlling the accuracy of fastening using a level; you can also make a plywood spacer under the batten for convenient work, or buy wedges for leveling in the store and install the sheathing in this way with minimal effort.
Vertical finishing method
Do-it-yourself lining and its installation are shown in numerous videos on our website; watching such videos will make installation much easier, and you should not neglect the advice of the masters in such a video.
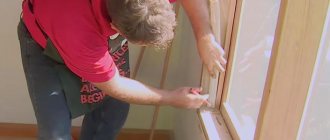
When installing panels vertically, you should start installing them from the corner. The head panel of the lining is fixed with nails in the corner, but do not worry about the aesthetic beauty, since the caps will be hidden by the decorative corner. If you decide not to use such corners, then you should bite off the fastening caps with wire cutters. Subsequent profile boards should be secured using clamps. A clamp, previously attached to the frame rail, must be inserted onto the back wall of the groove. For convenience, any other fastening is allowed.
Fix the trim panels until the entire required surface is covered. The work is practically no different from horizontal finishing; each subsequent element is inserted with a tenon into the groove of the previous one, after which it is fixed with fasteners. As with horizontal trim, the final profile is cut to size and nailed to the sheathing.
After the installation of the lining is completed, all that remains is to decorate the covering with skirting boards, special decorative panels and profile corners. These elements will perfectly disguise the joints and allow you to beautifully design the corners.
Installation of lining
We have already noted above that clapboard boards can be mounted on the wall both horizontally and vertically. Each option has its own nuances, determined by the specifics of use in a particular room.
Vertical arrangement
- visually increases the height of the room;
- expands its upper and lower boundaries;
- recommended for use in bath rooms, as it promotes optimal air circulation.
Fixation method
:
finishing nails, clamps, decorative screws
.
Installation nuances:
- fixation should begin from the corner;
- after the board is level, it is nailed, and the head is bitten off with a side cutter; if clamps are used, then they are nailed to the frame, and the other part into the groove of the board;
- when fixing the lining on the wall, check every 5-10 boards to ensure that the levelness is maintained; a corded plumb line is ideal for this;
- the last lining is adjusted to the desired size using a hacksaw.
Horizontal arrangement
- increases the width of the room;
- suitable for high rooms;
- emphasizes the visual volume of the room.
Fixation method:
finishing nails, clamps, self-tapping screws
.
Installation nuances:
- Fixation should begin from the ceiling and gradually go down;
- check the evenness of the landing every ten boards;
- the last board is cut to the required size using a hacksaw;
- all fragments are knocked close to each other with a hammer;
- the joint between the wall and the floor can be covered with a beautiful plinth.
An informative video on the features of installing lining:
Vapor barrier and insulation in the lining of the lining
Regarding the place and method of installing vapor barrier and insulation in the lining of the lining, different opinions are expressed and often opposite to each other.
Vapor barrier is a protective material, the purpose of which is to create a barrier to the penetration of moisture that has already arisen to certain areas of the building structure. In our case, the area that we want to protect is a wooden paneling that is not resistant to moisture. The name of the material, vapor barrier, is a little confusing, because it does not actually insulate vapor. Steam can form in any part of the wall pie, during the interaction of cold and warm air, where it is converted into condensation. The place where condensation forms is called the dew point. Where the dew point occurs depends on many factors. Learn more about dew point formation.
vapor barrier finishing
That is, before installing a vapor barrier material, it is necessary to find out in which part of the wall a dew point can form. And install the vapor barrier in such a way that it protects the wooden paneling from the resulting moisture.
For example, if the dew point is formed in the structure of the rough wall of the house, then the vapor barrier should be installed directly on the wall, the reflective side should be pressed directly against the wall with the sheathing, and insulation should be installed on top of the vapor barrier.
If a dew point forms in the internal wall frame and insulation, which is an extremely unfavorable case, and if you cannot fix it in any way, then a vapor barrier should be installed on top of the insulation to protect the lining from moisture and mold formation in the future. In this case, if the insulation is installed after a vapor barrier and a dew point appears in it, then it will absorb the resulting condensate like a sponge. Without the ability to release the absorbed moisture through the rough wall, the insulation and lining will rot, with the formation of fungus.
o dew point is indicated
vapor barrier over insulation
Installation of a vapor barrier to a wall is carried out using ordinary dowels and nails with plugs when installing a frame, on a stone wall, and with wood screws when working with a plaster or wooden wall.
There are currently a large variety of insulating materials for walls. Read more about types of insulation. The most common wall insulation is mineral wool. The choice of material for insulation should be selected based on the technical characteristics of the room, the material and the thickness of the sheets.
The insulation is laid into the frame quite quickly. Holds securely without additional fasteners. To cut the insulation to size you will need a construction knife.
insulation - mineral wool in wooden lathing
Recommendations for successful installation
Of course, having carefully studied the proposed step-by-step instructions, you are unlikely to become a pro, but you will definitely be prepared for your first “acquaintance” with the material. Here's a couple more good tips to help you avoid common mistakes among beginners when attaching popular materials to the wall:
- lining purchased in a store should be unpacked and placed face down on any flat surface - it is advisable to let it sit for a couple of days and only then proceed with installation;
- the minimum permissible temperature in the room during direct installation is 5 degrees Celsius, if lower, any operations with the material should be postponed until “better times”;
- after the lining is already fixed to the sheathing, it is recommended to coat it with varnish - this way you can achieve different types of texture on the surface: glossy, matte, with the effect of wet asphalt, stone, etc.;
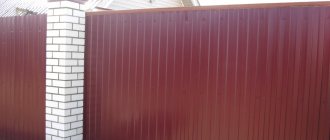
- You should not attach hardwood paneling to the wall if we are talking about outdoor work - only coniferous wood is used for this purpose;
- if you plan to use the lining in the bathroom, toilet, balcony or kitchen, then it is best to use an alternative option made of plastic or aluminum - it will last much longer;
- but for a bedroom, living room, hallway, classic wooden lining is an ideal option;
- Do not use plastic elements in the steam room - high temperatures provoke the release of chemicals that can negatively affect the health of you, your guests and loved ones.
Preparatory work
First step
Prepare the lining for the upcoming installation. Soak the material with antiseptic and fire retardant. If desired, you can additionally treat the panels with stain or paint them in the desired color.
Let the treated lining dry and bring the material into the room to be finished. Leave it for a day. The wood adapts to environmental conditions, which eliminates the risk of further deformation.
Second step
Mount the sheathing on the surface to be finished. Buy slats or make them yourself from inch boards or 5x5 cm timber. Attach the sheathing elements in increments 10-20 mm smaller than the width of the future insulation. Fix it using screws or self-tapping screws. The fastening spacing is half a meter.
Third step
Cover the sheathing with waterproofing material (polyethylene film, fastened with a construction stapler), lay insulation in the cells (if required, the optimal material is mineral wool, lay tightly, without gaps), and then cover the heat-insulating layer with a vapor barrier material (attach to the sheathing with a construction stapler).
Fourth step
Attach a second lathing to the wooden sheathing for insulation, intended directly for fixing the lining. Attach beams or boards perpendicular to the future sheathing and at the same time perpendicular to the frame for insulating materials. That is, the method of attaching the sheathing (horizontally or vertically) needs to be determined for yourself even before attaching the first sheathing. Treat the sheathing elements with an antiseptic.
Stage 1: preparing materials
In addition to the lining itself, the following materials will be needed for its installation:
- Slats 20x30;
- Clamps for fastening finishing boards (you can do without them by using small nails, but in this case dismantling the lining will be difficult);
- Small self-tapping screws 2.5x20 mm for fastening clamps;
To fasten the lining in a hidden way, it is advisable to use clamps
- Dowel nails or screws for fastening slats;
- Wooden decorative corners.
The price of one clamp is about 50 kopecks, so trying to save on them makes no sense.
In addition, you will need a paint coating for finishing. For these purposes, you can use varnish, wax or protective and decorative impregnation.
It is more convenient to cut the lining with a jigsaw
You will also need a simple set of tools:
- Tape measure and pencil;
- Building level;
- Jigsaw (can be replaced with a hacksaw);
- Electric drill;
- Hammer.
Fastening with finishing nails
Finishing nails are special nails of small thickness. They easily enter the material without causing cracking. Their distinctive feature is a reduced cap, which is easily recessed into the thickness of the part. Unlike construction nails, finishing nails cannot withstand increased loads and are used only for hidden fastening of finishing materials in structures that will not be subject to shrinkage, tearing and bending. This installation method is not suitable for installing temporary coverings, since it is almost impossible to remove a thin nail from the panel.
Insulation and waterproofing
If necessary, before installing the lining, you can additionally insulate the wall using mineral wool, for example. Before laying, the wool is cut into plates of the required size, loosely laid between the sheathing beams or under them (depending on the frame design). Sometimes, for reliability, insulation plates are fixed to the sheathing slats using special brackets or simply glued to the surface to be finished.
Upon completion of laying the insulation elements, the joints formed between them are filled with polyurethane foam.
Important! It is not recommended to use “extra” type foam for these purposes, which can cause deformation of the insulating material.
Upon completion of the insulation procedures, in order to prevent the formation of condensation on its surfaces, a layer of waterproofing made of a special film that is good at retaining moisture fumes should be laid on top of the plates. This protective coating is secured to the sheathing using the same stapler.
Please note: The film must be laid with the protective rough surface facing inward.
Features of fixing lining to the ceiling
We looked at what clapboard-lined walls look like, but how to sheathe ceilings correctly? Attaching the planks to the ceiling follows the same pattern as for vertical surfaces. Self-tapping screws and a screwdriver are very helpful here; sometimes small nails are used.
If the sheathing for the panels is made of wood, it is mounted in the same way as for the wall. However, it is better to leave the distance between the bars large. When a metal frame is planned, special hangers are installed, and the guide profile is fixed to them.
Advice! To finish the ceiling, get a second person to help. The work is not difficult, but it is quite difficult to hold the panels correctly and fasten them yourself.
Horizontal cladding
Horizontal cladding
First step
Proceed to attaching the lining. Start sheathing the walls from the ceiling to the floor. At the same time, try to direct the grooves downward - thanks to this, various debris will not get into them in the future, which will help to significantly increase the service life of the skin.
Horizontal cladding
Second step
Fix the clapboard sheet onto the sheathing bars. Use convenient fasteners. Insert the tenon of the next sheathing element into the groove of the fixed board. Secure it. Cover the entire planned space in this order.
Every 5-10 sheathing elements, be sure to check the evenness of the surface using a plumb line or level.
Cladding
Third step
Having reached the last board of the lining, adjust it to the width with a regular hacksaw or other suitable tool. Nail the board and hide the gap under the decorative baseboard.
Fourth step
Clean the finishing surface from dust using a damp sponge. If you wish, you can finish painting the lining, but this is not necessary - the wood already has an attractive appearance and a beautiful shade.
If a special lining will be used for the cladding, which outwardly imitates a rounded log, start finishing with the groove facing up - this way you will hide the joints.
Horizontal cladding
Additionally, the panels can be adjusted using a hammer, placing a piece of board under it - this way the finish will be fixed without gaps.
To fasten the “rounded” lining, use self-tapping screws. Twist the fasteners at 45 degrees. Place treated timber between the panels of such sheathing. This will create a beautiful finish without gaps.
Installing the first ceiling strip
How to properly attach the lining? – Some useful advice from Professor Opilkin
Lyshchitsky Valery Ivanovich head of construction and installation works
Wood is my favorite finishing material, created by nature itself, decorated with a scattering of knots or a uniquely beautiful texture. Durable, reliable, beautiful, environmentally friendly. Having a country house, being the owner of your own piece of land is everyone’s dream.
Wooden panels for installation on walls and ceilings today can be selected from various types of wood, different shapes, sizes, and thicknesses. No plastic can compare with natural wood.
What will you learn about in the article?
- How to calculate how much lining I need for mounting on a wall or ceiling
- What is sheathing for lining
- Insulation and vapor barrier
- How to nail euro-lining and stihl lining to the wall?
- How to attach Eurolining and Shtil lining to the ceiling and walls in a hidden way?
- How to use screws to carry out the installation procedure in a hidden way?
We will look at the installation of such wooden panels today in our article. This is a lining that can be used for various purposes. It is suitable for cladding the interior of a room: walls, ceilings and even floors. But some types of lining are suitable for exterior decoration of a building.
When you resort to the help of professional teams, questions about the methods of laying the lining disappear. But sometimes, in order to save money or out of interest, the owner decides to install the boards himself. I really hope this article will help you in your work.
How to calculate how much lining I need for mounting on a wall or ceiling
Calculation of the squaring of the lining on walls and ceilings is carried out using a simple formula: the working (without tenon and groove) width of the panel is multiplied by the length (we get the area of one board). Next, take the area of the wall and divide by the area of one board. We add ten percent to the cut and find out the required number of boards.
Photo 1. Installation of lining on the sheathing
What is sheathing for lining
First, you have to lay out the sheathing. Lathing is wooden blocks onto which panels are subsequently attached. If the panels are laid vertically, then the sheathing is mounted horizontally and vice versa. The bars, usually taken 50x50 if we are insulating and 40x30 if without insulation, are screwed evenly to the wall using a screwdriver and ordinary wood screws (it is better to use not black fragile ones, but yellow, galvanized ones). Markings and a building level will help you make it level.
Insulation and vapor barrier
If you decide that you need soundproofing or insulation, you can put insulation between the bars. The pitch of the sheathing will be fifty centimeters.
If we install insulation, then it must be protected from human waste products, in other words, from moisture. To do this, we stretch a vapor barrier over the insulation and seal its joints with special vapor barrier tape.
Next, a control sheathing is made from a thin wooden lath, which creates a gap between the vapor barrier and the lining and presses the membrane.
So, ways to attach the lining:
- self-tapping screws into the front face of the board;
- finishing nails;
- self-tapping screws into a tenon or groove;
- kleimer (hidden fastener).
How to nail euro-lining and stihl lining to the wall?
High-quality installation requires accuracy, a good eye and, of course, a tool. If you use screws, you will need a screwdriver, and if you use nails, then it is better to choose them for pneumatic tools rather than using a hammer. It is better to choose special finishing nails without large heads, otherwise the visible part of the board will resemble a wooden barn in the village.
Photo 2. Installation of lining in the face
When we use a pneumatic tool and a screwdriver, we make markings so that the nails or screws are at the same level. Laying the lining in an open way will look quite beautiful if you choose nails without heads and screws with a decorative bead head.
Personally, I don't like working with air tools. Nails often damage panels and cause wood to splinter. The percentage of waste turns out to be higher, which is generally unacceptable when working with expensive breeds.
But I like a screwdriver and special screws with a cutter that doesn’t split the wood and doesn’t require pre-drilling a hole. For example, Essve lining screws are an excellent option with a decorative bead head and a structure designed specifically for wood. With such an arsenal, it’s very easy to correctly attach the lining – see for yourself.
Photo 3. Essve self-tapping screws for lining
Important!
When installing into a layer, it is IMPORTANT to hammer in two nails or two self-tapping screws, so that the boards will be securely pressed and will not twist (bend) them.
How to attach Eurolining and Shtil lining to the ceiling and walls in a hidden way?
It’s very simple - use a galvanized plate: a clamp. We put the plate on the rear tenon of the panel and, using a screwdriver, screw it to the joist (sheathing) with the frequency of spaced bars. The approximate consumption of clamps is 100 pieces per five square meters, if you attach the lining to the sheathing installed after fifty centimeters.
The durability of this method of fastening the lining will be ensured by the use of reinforced clamps if the planks are made of larch or other heavy wood species. You can use the method of alternating clamps, reinforced-regular. Now you know how to properly attach eurolining and stilts to the wall and ceiling using clamps.
Photo 4. Fastening the lining to clamps
How to use screws to carry out the installation procedure in a hidden way?
This method is quite popular. The screw is screwed into the tenon, or less often (if you are working with eurolining) into the rear groove at an angle and overlapped with the next plank. Here it is important to choose a self-tapping screw design so that the thin wood does not split. Otherwise, there will again be a lot of waste.
Photo 5. Tenon mounting method
There should be a cutter at the tip of the screw, the head should be cone-shaped so that when laying the lining it (the head) can be “drowned” into the wood.
Photo 6. Method of mounting in a groove
So, we have addressed the main question in this article. Online store LesoBirzha
is ready to provide you with not only high-quality lumber and related products. Our consultants will tell you how to fasten lining and eurolining, and offer the services of professional teams of carpenters. Contact us. We are happy to help you.
See how we can
January 28, 2020851
Interior decoration of a wooden house made of logs. Photos for ideas
We entered this house when it was shrinking, and left having given the keys to the owners upon their arrival. Completed work:
installation of electrical outlets, connection of electrical appliances, distribution of plumbing pipes, connection of plumbing fixtures, insulation of floors, installation of floor boards, installation of lining on the ceiling, insulation of ceilings, installation of door frames, frames, installation of slopes and platbands, production and installation of stairs
Interior decoration of a wooden house made of logs .
Photos for ideas January 28, 2020
851
May 14, 2019814
The natural charm of Angarsk pine in home decoration
A customer from KP “Zaokskie Prostori” contacted us with a request to install a ceiling with lining clapboard made of Angarsk pine in the Extra grade
.
Unique ceiling decoration, with harmoniously selected colors, for this special thanks to the workers of the brushes and paints of the paint shop. The natural charm of Angara pine in home decoration
May 14, 2019
814
April 25, 2019809
Low grade is not a defect! All house finishing is grade C
Welcomes you
with new work, unique and very interesting in appearance finishing in the Rustic style.
The customer approached us with the desire to give his house a suitable interior decoration, that is, to “dress up” the premises in accordance with the building itself, its Rustic style, while preserving all the originality. Low grade is not a defect!
All home decoration is C grade April 25, 2019
809
March 27, 2019772
Ceiling panels made of cedar lining treated with natural oils
Today we’ll talk about an unusual material for decorating ceilings - this is cedar cladding lining in AB grade
.
We are transported to the Erin Island residential complex. A great variety of materials are produced for the decoration of premises, taste preferences are also varied, but we dare to assure you that nothing can be better than natural wood! Ceiling panels made of cedar lining treated with natural oils
March 27, 2019
772
February 19, 20193183
Various options for white color in the interior of the house
LesoBirzha company is with you again
with new ideas and your completed projects.
Today we are putting on display the interior decoration
of a two-story cottage in the Tula region of SNT “Romanovskie Dachas” in light colors made of expensive, unique
Angarsk pine
.
Various options for white color in the interior of the house
February 19, 2019
3183
December 05, 20181064
Lining made of Angarsk pine in the interior of a country cottage
Continuing the topic of natural wood materials for interior decoration, it is impossible without mentioning another frequently used representative - this is lining
.
The scope of its application is so extensive that if it were listed it would take a lot of time and space. Lining made of Angarsk pine in the interior of a country cottage
December 05, 2018
1064
View other works