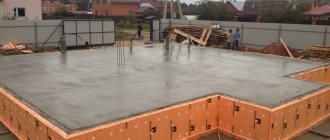
Carrying out installation work
Since panels that imitate timber are lightweight and quite easy to install, the exterior decoration of a house with panels can be done by hand. Anyone with basic skills in using a screwdriver, level, saw and other household construction tools can perform this work.
House insulation and sheathing
The work of finishing panels for timber is divided into several stages. Let's take a step-by-step look at how to sheathe a house yourself:
- The preliminary stage involves preparing the surface for finishing. To do this, you need to remove dirt and dust. The wall covering must be clean. You can do this using a vacuum cleaner. For a wooden house, the process of caulking the walls and treating the surface with antiseptics is performed.
- Sheathing with imitation timber on the outside requires the presence of sheathing. For this, bars measuring 25x50 mm are used. They are mounted at a distance of 0.5–0.6 m. The slats are attached using self-tapping screws. If the surface is brick, then dowels must be used.
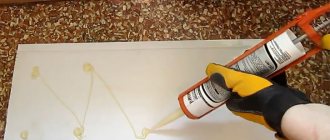
- We provide vapor barrier to walls. To do this, we attach a special film to the sheathing, which performs the function of retaining moisture. The film should be laid with an overlap, which is about 15 cm. The connections must be glued with tape.
- We carry out thermal insulation. This is one of the important points for any wall decoration. You can use any type of insulation, both rolled glass wool and foam panels. It is necessary to lay the insulation on the vapor barrier between the battens of the sheathing. Additionally, we secure the insulation with the same tape.
- Next, we proceed to the installation of panels imitation timber finishing, which is additional thermal insulation. You need to start from the bottom. Each subsequent panel is inserted into the lock of the previous strip and snaps into place. For additional fastening, each panel is carefully attached to the sheathing using wood screws. The cap must be slightly recessed into the panel so that it does not interfere with the installation of the next panel. After installation, visible areas of fastening must be covered with a mixture of sawdust and varnish, and after drying, sanded with fine sandpaper.
- The work is completed by coating the panels with special protective compounds and paints.
As you can see, this is not a complicated process at all, and it’s quite possible to do it yourself. You just need to be patient and make accurate calculations.
Installation of lining
Nuances of installing imitation timber
Imitation timber panels are purchased hermetically sealed. After the material is delivered to the work site, the packaged panels must be opened and then laid out for some time in the air. It is also necessary to ensure that they are not exposed to direct sunlight. They need to be kept in this form for a couple of days. This procedure is performed because during production the material is dried and immediately sealed. When the panels are removed, under natural conditions they begin to strongly absorb moisture and expand by several millimeters. If you start installation right away, then later the panels will fail, and the appearance will be irrevocably damaged.
Always start attaching panels from the bottom up. Moreover, it is placed so that the groove is located at the bottom and the tenon at the top. This layout prevents dust and dirt from getting into the panel groove
Particular attention is paid to the installation of the first panel, which is mounted at a distance of about 10 cm from the lower level. Before attaching the first panel, the level of its installation is carefully checked.
The quality of further finishing depends on the quality of fastening of the first panel. A house lined with panels should not have distortions.
It is best to use special brackets to attach the panels to the sheathing. Of course, you can use screws, self-tapping screws, and nails. But all this simply replaces staples if it is impossible to purchase them. When using fasteners, it is necessary to screw them in at an angle of 45 when installing into the locking surface, and at an angle of 90 when installing through the panel.
Work must be carried out in certain climatic conditions. The weather should be dry. The temperature may be sub-zero. According to the rules, the minimum temperature can reach minus 15. But it is not recommended to carry out work on painting panels with paints and varnishes under such conditions.
How to install imitation timber on the facade of a building
Installation of false beams is carried out in several stages.
Video - How to install imitation timber
Preparing the base
Regardless of what material is used for the construction of the building, the foundation is prepared according to the same scheme:
- Remove the remaining solution from the working surface and clean it from dust.
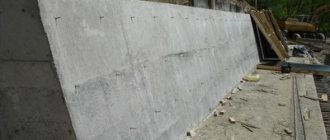
- Make a waterproofing layer. The materials used must match the building material of the wall. For brick and concrete, coatings or impregnations are used, for wood - films. The canvases are secured from below. When changing the canvas, make an overlap of at least 15 cm wide. Glue the individual canvases with tape.
Walls are protected with waterproofing agents
The preparatory process is now complete. If coating and impregnating materials are used at this stage, the work will have to be postponed for some time. This is necessary for the solutions to act or set. The exact drying time and penetration into the building material are indicated in the manufacturer's instructions.
Lathing
This is the frame to which the false beam will be attached. The lathing consists of individual bars with a side of at least 5 cm. It is recommended to select lumber depending on the thickness of the heat insulator.
If the wall is originally brick or concrete, frame dowels will be required for fastening; for a wood base, nails and screws will be required. Craftsmen do not recommend using fasteners with plastic dowels.
On a flat wall, the sheathing beams are attached closely to it. If there are irregularities and gaps form, the voids are filled with linings.
Attention! Linings should be made of synthetic materials, not wood. This material tends to dry out. There is a possibility that during the operation of the finish, a backlash will form and its quality will decrease.
Next, perform the work in the following sequence:
- The guide bars are positioned and secured in the corners, strictly observing the vertical, for which a level is used.
- Stretch the cord from one corner to another and secure it to the corner bars.
- The remaining beams are fastened and maintained at a distance of 50-80 cm, which depends on the width of the sheet of heat-insulating material.
- Lay thermal insulation.
- A moisture-proof film is laid over the sheathing.
Often slats up to 3 cm thick are attached to the sheathing. This is necessary so that an air gap is formed between the heat-insulating layer and the false beam. This measure enhances ventilation and extends the life of the wood finish.
Fastening false beams
Before installation, the wood for cladding is removed from the packaging. They do not take the material to work immediately, but wait several days. This way the timber will absorb moisture from the air, so no distortions will form after installation.
Different types of fasteners and methods of their use
Install the panels from bottom to top. One of the fasteners is used:
- Using a self-tapping screw, the board is attached to the sheathing through the ridge. Sometimes the screw goes directly through the board. Then it is inserted so that the head is flush with the face of the beam. The recess is then hidden with putty or wooden plugs, sawdust and varnish.
- A galvanized nail is driven into the ridge. When installing vertically, it is also passed through the groove, hammering in at an angle of about 45° until the head is hidden.
- Claymer is a reliable and convenient fastening clip consisting of a bracket. One end is located on the sheathing, the other holds the panel by the groove. The gluers themselves are nailed to the base with galvanized nails.
The false beams are fastened in the following order:
- Place the starting board with the ridge up using a horizontal level and attach it using the selected fasteners. The tenon cannot be directed upwards - this will cause water to collect in the groove. This causes cracks to appear on the board, mold to form, and the wood to rot.
- Place the tongue of the second board in the groove of the first. Using a hammer, plant the second board, but not closely, but with a gap of 5 mm. This distance is necessary to avoid deformation of the elements due to temperature fluctuations.
- Repeat steps 1, 2 until you reach the top.
After installing all panels, the surface is coated with the selected product.
Attention! In the corners of the beams, cuts are made at an angle of 45° for an aesthetic connection of parts. Decorative strips can also be applied. They not only hide the joints, but are also a decorative detail in the cladding.
Installation of imitation timber indoors
The installation of timber indoors is almost the same as on the façade of a building. If the panels are laid vertically, then work begins from window to door. Interior panels are too thin. Therefore, the fastening method, in which a self-tapping screw is screwed into the tenon at an angle of 45°, is considered too rough. For such work it is recommended to use furniture nails.
Pros and cons of imitation timber
Perhaps the most difficult thing is installing panels on the ceiling. Since a large load on the hands is created, for such work it is recommended to take materials with the smallest width. In addition, too wide a beam will visually reduce the ceiling area. The length is chosen so that there are fewer joints.
In stone buildings, the insulation is placed on a vapor barrier material. This material should not be used in wooden houses, as this will only provoke the formation of excess moisture and lead to rotting of the wood.
Decorative overlay for the corner of the building
The procedure for installing timber to the ceiling
Some houses already have wooden beams on the ceiling. In this case, there is no need to do the lathing. It is enough to use a vapor barrier layer.
But sheathing will still be required if the beams have an uneven surface. In other cases, first base bars 2-3 cm thick are nailed to the ceiling. Next, communications must be protected if they pass along the ceiling. Then the ceiling is insulated if there is a need. Next, work is carried out as when installing external finishing. The beam is mounted from the window.
False beam on the ceiling
Finishing the bath with warm plaster
An alternative option for finishing the facade of a bathhouse is warm plaster, which is a solution based on cement, expanded clay chips, perlite sand, powdered pumice and granulated foam.
Facade plaster has many advantages:
- high sound and heat insulation characteristics;
- good adhesion to any type of base;
- installation without the use of reinforcing mesh. Exceptions include deformed areas of the façade;
- resistance to rotting, burning, mold formation, infestation by insects and other pests;
- does not require preliminary leveling of the surface.
The disadvantages of the material include the following:
- impressive weight;
- high price;
- limitation on the thickness of the decorative layer - permissible thickness no more than 5 cm;
- the need for finishing primer and painting;
- the need to strengthen the foundation of the building.
The plaster is applied to the cleaned surface manually or by machine. Each subsequent layer is applied after the previous one has completely dried.
Features of timber installation
When building a frame, you often have to decide how to attach the timber sheathing to the concrete. To do this, you need to choose the right fasteners.
When making flooring, the following are used as fastenings for joists:
- Metal anchors. Holes are drilled in timber and concrete - the required number. Moreover, the hole in the joist is widened from above to hide the bolt head. Then the anchor sleeve is inserted into the hole and driven into the concrete base. The height of the logs is adjusted using wooden wedges or fiberboard linings. Having aligned the logs, tighten the bolt.
- Self-tapping screws. A hole is prepared in the concrete for a plastic dowel. Make a hole in the joist for the self-tapping screw. Drive a dowel into the concrete floor and screw the joist with a self-tapping screw.
- Corners. Special corners are used if you need to raise the floor by more than 10 cm. They are attached to the concrete with dowel nails, and to the joists with self-tapping screws.
If you need to fasten the sheathing beams to concrete, the following are suitable:
- metal anchors;
- dowel-nails.
Imitation timber is a high-quality and durable material from which you can make exterior and interior decoration of your home. If you choose the right type of fastening and installation method, the cladding will last for several decades.
In which rooms can it be used?
Imitation timber is used for finishing walls and ceilings. This is a textured living material that has a number of advantages. It allows you to create the feeling of a wooden house in the interior of one or all rooms. Wood allows the coating to breathe; some varieties even purify the air.
False timber is used to decorate the interior space of apartments, country estates, and private cottages. It will perfectly complement the corridor, living room, bedroom, nursery, office. Some breeds can be used in the bathroom, kitchen, balcony, loggia. In general, the material is universal and compatible with absolutely any room.
In the kitchen, using imitation timber, you can cover both the walls and the kitchen apron, but additional wood processing will be required. Different colors will highlight the severity or warmth of the space.
Advantages
Cleimers are more expensive than nails and self-tapping screws. Experts recommend using clamps. Installation using this fastener has a number of advantages:
- quick and convenient installation of imitation timber without the risk of damage
- easy and reliable fixation
- clamps do not rust
- large selection of sizes
When choosing clamps in a store, pay attention to the presence of a galvanized coating, the dimensions of the products should be the same, and the bracket should not be bent.
What it is?
Imitation timber is also called false timber. This is a material that can be used for cladding both outside and indoors.
Today, there is an artificial imitation of timber made from wood waste with the addition of plastic, as well as a solid wood option, which is especially popular among consumers. It is worth considering in more detail.
It is a planed board, processed on 4 sides, and made in the form of a processed wooden beam. The thickness of this material is up to 35 millimeters, and the width can reach 260 millimeters. The manufacturing material is coniferous and deciduous wood. The profile in this case is a trapezoid, and due to this, the smoothness and evenness of the base is achieved.
For the best joining, the edges are processed in a special way, this allows you to reliably protect the insulation from the effects of negative climatic conditions and humidity. The fact of what material the product is made of determines its density and characteristics.
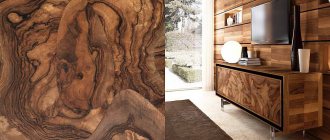
Calm lining or imitation timber, which is better?
When choosing boards, you need to focus on the grade, type of wood and thickness of the blade and your own preference, which appearance suits you best. Their main difference lies in the appearance of the outer layer.
If you want to see smooth and evenly passing lines that create a wave-like appearance, choose calm.
When you want to create the image of a real beam, use false beams.
Regardless of the external surface of the product, you will get a wooden covering that will perfectly decorate the interior of any room.
Lining standard
Imitation timber lining
Calm pine lining
Features of facing with siding (or metal block house)
Before starting work on insulation and siding, the walls of the house are strengthened and the resulting cracks and cracks are sealed. The design of such a facade depends on the quality and external characteristics of the material.
Modern manufacturers offer a huge selection of panel types, various colors and textures to suit any taste. Many people wonder what is better: block house or siding?
Modern blockhouse cladding material is made from galvanized steel with a special coating; it imitates construction from wooden logs.
These panels differ from ordinary siding precisely in that they are an exact imitation of a wooden frame.
Blockhouse is a good material that is ideal for interior and exterior decoration.
Manufacturers offer a wide selection of colors and shades of panels, which in turn allows you to create a unique home exterior.
If the question is siding or corrugated sheeting when choosing a material for facade cladding, it is most rational to give preference to the first option.
Siding for exterior decoration of house walls has the following set of advantages:
- excellent soundproofing and thermal insulation properties;
- the design of the frame for installing the panels ensures natural air movement, thereby allowing the walls to “breathe”;
- fire safety;
- simplicity and high speed of installation of panels;
- For cladding using this method, no preparatory work is required;
- no need for maintenance;
- resistance to weather and seasonal changes.
To summarize, it is worth noting that both finishing options have the right to occupy the first positions in the list of high-quality and effective facade materials for arranging the facades of private houses.
Convex or rectangular outer surface is an individual choice that meets your taste and aesthetic expectations.
What is definitely encouraging is that the cost of finishing with siding or a metal block house is the same. Same quality of façade construction and long service life.
Why you should choose imitation timber for finishing the inside of a country house
The main advantage of interior decoration of a house using imitation timber is the environmental friendliness and naturalness of the material. A favorable microclimate is created in the room. Often this material is used to decorate walls made of blocks or bricks. It also has the following advantages:
- strength, durability (with proper installation and processing, the finish will last more than 20 years);
- hypoallergenic;
- minimum consumption of panels with correct calculation;
- thermal and noise insulation;
- ease of installation;
- resistance to external negative influences;
- low thermal conductivity;
- variety of shades.
The interior decoration of a house made of this material is characterized by a fire hazard, like other wooden products. Before installing the imitation in wet rooms, it must be treated with antiseptics and protective compounds.
Varieties
All wood products are divided into grades according to quality, depending on the number of knots, the presence and size of cracks, resin pockets, growths and wane.
The main varieties are, in decreasing order of material quality:
- Extra;
- ;
- B;
- C.
There are also mixed varieties:
- Prima (between Extra and A);
- (between A and B);
- BC (between B and C).
Comparison table for imitation timber varieties
| Name of wood defects and processing defects | Front surface | |||
| Variety "Extra" | Variety "Prima" | Grade "A" | Variety "AB" | |
| Healthy, dark fused knots | Not allowed | Tolerance Ø up to 1/3 of the width not ≥ 1 pc. by 1mpg | Allowed | Allowed |
| Partially fused healthy knots, incl. with cracks, eyes | Not allowed | Tolerance Ø up to 1/5 of the width not ≥ 1 pc. by 1mpg | Tolerance Ø up to 1/4 width not ≥ 2 pcs. by 1 mpg | Allowed |
| Unmerged knots | Not allowed | Tolerance Ø up to 10mm not ≥ 2 pcs. on the product (if there are no other knots) | Tolerance Ø up to 1/5 of the width not ≥ 1 pc. at 2mpg | Allowed |
| Holes from fallen knots, rotten, decayed, tobacco knots | Allowed on the edge of the tenon - during assembly they are covered with another part | Allowed on the edge of the tenon - during assembly they are covered with another part | Allowed on the edge of the tenon if it is covered with another part during assembly | Not allowed. holes from fallen knots, the rest is tolerance. |
| Sprout, core, blue, wane, fringe, rot, cancer, stepson | Not allowed | Germination tolerance. up to 2x20mm not ≥ 1 pc. on the product, the rest is not permitted. | Germination tolerance. up to 5x50mm not ≥ 2 pcs. on the product, the core is not allowed. on the floor board, approval. | Germination tolerance. up to 8x70mm not ≥ 2 pcs. for the product, approval. blue is 30% of the product, the core is acceptable, the rest is not acceptable. |
| Resin pockets | Not allowed | Tolerance up to 3x50 mm not ≥ 1 pc. by 1 mpg | Tolerance up to 5x70 mm not ≥ 1 pc. by 1 mpg | Allowed |
| Fungal heart stains, browning, sapwood, false heartwood | Not allowed | Tolerance in the form of spots and stripes up to 30% of the product area | Tolerance up to 30% of the product area | Allowed |
| Non-through cracks | Not allowed | Allowed up to 1x100mm | Allowed width up to 1mm, total length up to 1/3 of product length | Allowed |
| Mechanical damage (tear, snatch, gash, dent, chip, scuff, gouge) | Small tears up to 1mm or chips 5x7mm deep are not allowed. up to 3mm, quantity 1 piece per product | Small tears up to 2mm or chips 5x15mm deep are allowed. up to 3mm, quantity 2 pcs per product | Tolerance sizes up to 5x10mm and depth. up to 3mm, no more than 1 piece. by 1 mpg | Tolerance sizes up to 10x20mm and depth. up to 3mm, no more than 3 pcs. at 2 mpg |
| Neprostrog | Allowed on the edge of a tenon with a width not ≥ 3mm and a total total length of 25% of the length of the product | Allowed on the edge of a tenon with a width not ≥ 3mm and a total total length of 25% of the length of the product | Allowed on the edge of a tenon with a width not ≥ 3mm and a total total length of 25% of the length of the product | Up to 10% of the product area is allowed |
Also, with any imitation timber, regardless of the type, the following is not allowed:
- Through holes in the lamellas resulting from fallen knots;
- Wane in places where it will be visible after installation;
- Mechanical damage (chips, dents) on the front side of the product;
- Resin pockets larger than 7mm;
- Fringe around the edges, noticeable after finishing;
- The humidity of the boards is more than 13%.
Assortment - characteristics of different classes of imitation timber
Even at the production stage, the imitation is sorted and divided into several classes (grades), the lower the class, the cheaper the material, but such a board also looks accordingly. Minor surface flaws do not affect the technical and operational parameters, and the gradation into classes occurs precisely according to the appearance of the boards. The main criteria for division are considered to be defects and surface defects (quantity) and the presence of mechanical damage caused during production. Imitation timber comes in several classes.
- Extra class is the highest grade, but due to the lack of production in the country capable of producing imitation that fully corresponds to the varietal characteristics, class A is often sold under its guise. Extra class boards are characterized by an ideal degree of processing, ideal geometry, ideal surface, without knots and even the slightest damage. The cost of the material elevates it to the premium cladding segment, inaccessible to most comers.
- Class A - with excellent geometry and a high degree of processing, without cracks and without mechanical damage, but up to two knots per linear meter are acceptable. Also acceptable are resinous areas (from the back) and even fragments of wane, again, from the inside.
- Class AB - in addition to “pure” classes, mixed ones are also common in imitation; in this case, the quality of the board is slightly inferior to the previous category, but there are still errors. These include resin pockets with knots, up to three per shoulder strap, microcracks, and traces of pest activity (back side). Uneven color and individual growths are also possible. The stitching can only be on the back side or along the knots.
- Class B - minor deviations in shape, roughness or abrasions on the surface resulting from omissions during grinding are acceptable. There are more than three knots and they are on the front side (up to 10 mm), in tandem with knots and resin pockets, in any quantity, and resinous areas on the front side. Minor chips and shallow cracks (up to 0.5 mm), and other mechanical damage are also possible. The coloring can be not only uneven, but also with obvious transitions to blue-red, and fused growths are not uncommon.
- Class BC - there is already mechanical damage, and knots with pockets in abundance, including those that have fallen out, and uneven ones with different colors, and traces of borer larvae on any side. Plus defects on the tenons and grooves and cracks deeper than 0.5 mm.
- Class C - everything listed for class BC, but in even greater quantities, often the proportion of defects reaches 70% and before installation the boards will have to be sanded again, the resin pockets opened and knots sealed. But the price of the issue is the most affordable, and with due diligence, the finished cladding will look quite presentable.
In general, as always, think for yourself, decide for yourself. Is it worth overpaying the quite noticeable difference and closing the façade without additional manipulations, or can you tinker and save money.
Types of waterproofing materials
Waterproofing materials can be liquid, in the form of a film (membrane made of polymer or mineral filler) or rolled.
Each material differs in its properties.
For external wall cladding, sealants are chosen, but only if the area is not large.
The anti-corrosion mixture contains a resinous product (bitumen), and is applied to the walls only if metal structures will be installed.
For walls in the bathroom or kitchen, coating waterproofing is used.
Compositions of coating waterproofing for walls:
- Cement mortar.
- Acrylic solution.
- Silicon solution.
- Crystal-forming liquid.
As for the film membrane, it protects the walls from dampness. Made from synthetic rubber, PVC, polypropylene. The membrane film is corrugated.
Installation of sheathing
To make the sheathing, you will need wooden blocks, the cross-section of which will correspond to the thickness of the insulation layer. Each panel must be treated with a special antiseptic.
Installation of the sheathing begins from the corner of the house. The pitch of the sheathing is selected taking into account the width of the beam and the size of the insulation. To attach the sheathing to a brick wall, you need to attach a beam to the wall, drill a through hole, drive in a dowel and screw the sheathing. Working with wooden walls is much easier. The sheathing on such walls is usually secured with self-tapping screws, which are selected depending on the thickness of the timber.
The sheathing must be mounted strictly vertically with a given pitch, which must be calculated so that all the outermost elements of the beam are located at the corners of the wall. The insulation is laid between the sheathing elements. It can be fastened in various ways: with dowel nails, nylon twine or knitting wire.
Sheathing a house with imitation timber - step-by-step instructions
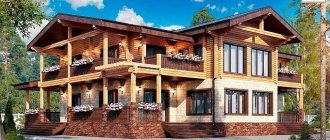
Wood panels that imitate timber, used for both external and internal cladding of a house, are one of the highest quality and environmentally friendly finishing materials. With their help, you can radically transform your home beyond recognition, inside and out, while avoiding large material costs.
A building lined in this way can be quite difficult to distinguish from solid wood, and the installation work is not particularly complicated.
Main stages of fastening
The entire work process for installing panels can be divided into several main stages, performed according to certain rules:
Step 1. Acclimatization. The cladding of the house with imitation timber begins with its preliminary adaptation to the environment for 2-3 days; for internal cladding, this period is usually doubled. If this stage is ignored, this is fraught with warping of the material and even the appearance of cracks on it.
Step 2. Insulation of the building facade. The process of preparing an external wall for cladding usually consists of eliminating existing deficiencies, attaching the sheathing and applying vapor and heat insulation layers. This stage can take place in parallel with the previous one to save time.
Step 3. Processing of wooden panels. The boards should be thoroughly impregnated with special protective compounds that quickly and deeply penetrate the wood.
Particular attention is paid to the connecting elements - grooves and tenons
Step 4. Surface finishing. Attaching the imitation timber to the wall usually begins from the ground in a horizontal direction, with the tenon located at the top and the groove at the bottom.
The material can be attached to the sheathing in different ways: using small nails, self-tapping screws or clamps - special connecting brackets.
Experienced builders advise using nails. The fact is that the density may change slightly under the influence of temperature changes, and nails, unlike self-tapping screws, do not impede some movement of the board.
However, when using them, you should strictly monitor the perfectly even direction of laying, because if gaps form, it will no longer be possible to disassemble the structure.
Step 5. Finish coating. Despite the fact that each panel has already been treated with protective agents, the procedure should be repeated upon completion of the work process. During further operation of the building, it is recommended to repeat such work every 5 years.
Technological secrets of installation
Professional builders do not hide the fact that the technology of covering a house with imitation timber has its own secrets, on which the final result often depends:
- For the external cladding of the building it will be much more practical to use wider panels. In this way, the overall amount of work will be significantly reduced, and the appearance will most accurately convey the imitation of real solid timber.
- To ensure ventilation of the entire structure, a small free space of approximately 50 mm should be set aside from the start of installation work.
- When finishing tinting the material, the seams and junctions of the panels should be treated especially carefully. Otherwise, when climatic conditions change, the wood can dry out, and all the flaws will be clearly visible.
- When doing interior work, the walls of the house should be prepared for installation more carefully, and the process itself must be treated much more carefully, because there are many complex planes here.
- External cladding is made with materials from coniferous wood, while for the internal cladding boards from deciduous trees are more often used.
- Wide wooden panels can visually reduce the interior space of a room.
Approximate cost of finishing work
Imitation timber is considered one of the most inexpensive finishing materials, especially when compared with solid log houses. However, the final cost of covering a house with imitation timber will depend on indicators such as:
- Type of wood (coniferous or deciduous);
- Total area of work carried out;
- The original dimensions of each panel (narrow or wide);
- Material grade (A, AB, B, C);
- Profile geometry.
Approximately from 250 - 500 rubles. per square meter:
Of the listed items, the tree species will have the greatest impact on the total cost, on which the service life largely depends. For example, oak is considered the most expensive material due to its high strength and reliability.
By choosing to clad your house with imitation timber, you will end up with a beautiful, presentable, and most importantly, environmentally friendly and safe building.
DIY installation of imitation timber on the wall
Here, laying in three options is possible, but you should pay attention to the fact that in order for the imitation timber in the interior to look natural, it should only be laid horizontally. But if you want to diversify the appearance, any method to your taste is possible.
Also read: Wallpaper for the kitchen; which ones are better to choose and how to decorate the interior
The length of wooden lining comes in standard parameters; if the length does not correspond to the dimensions of the wall, you can use the staggered laying method.
Material of non-standard sizes can be ordered from manufacturers; in this case, the technology of joining boards is used, increasing the length to 6 m.
- Diagonally.
- Vertical.
- Horizontally.
Let us give an example of the most common method of cladding with horizontal cladding.
On the wall to be sewn, a sheathing of wooden slats is assembled vertically along the wall. The pitch between the slats varies from 40 to 60 cm. The slats are fixed with dowels. The structure is checked with a level for any deviation; if there is any unevenness, we correct it by placing trim or pieces of plywood under the rail. Consistently, the wall and the assembled frame are treated with primer or protective compounds with an antiseptic effect.
You can lay insulation in the sheathing to create better heat and sound insulation, and apply a vapor barrier film. In baths and saunas, foil film is installed for better heat transfer.
We start laying from the bottom to the ceiling, the board can be fixed with staples or small special nails, insert the second panel with a tenon into the groove of the first, and sequentially lay all subsequent boards, securing them with clamps.
In areas of doorways and windows, we additionally enclose them with slats and lintels. We do the installation in the same way. Wooden lining is easy to use, it is easy to cut and adjust to the required size.
In the case of vertical application of the canvas, the lathing is installed horizontally, with the same pitch of the slats, the technology is no different. The boards are laid from the corner towards the door and window openings, inserted one after the other, secured with clamps, nails or staples.
The diagonal method is more often used in finishing ceilings, or in separate fragments on the wall as a decoration method, creating a different interior. Installation is carried out using the same technology, the application starts from the bottom corner, the boards are cut at the ends according to size. A more complex process and with increased material consumption, since you have to cut the board at both ends. The sheathing is lined up in any direction, taking into account the joint with the lining.
Coating Treatment
If you purchased unprocessed lumber, it is advisable to coat it with special compounds, which will increase their performance characteristics.
- Impregnation with antiseptic or oil. Moisture resistance will increase, eliminating the unwanted appearance of fungus and mold, as well as insect damage.
- Stain. Allows you to change the color, lighten or darken the texture, to create an individual interior and increase aesthetic possibilities.
- Dye. With it you can completely change the color and update the texture.
- Wax. Protects from the harmful effects of water, enhances color, creates a thin protective film that protects from mechanical damage.
- Varnish. It will create protection and add shine to the surface, highlighting the texture of the wood.
Protective compounds are applied with a brush or roller and applied in several layers. Manufacturers offer different types of compositions and varnish, special for internal and external treatments, for saunas and baths. It is considered an essential element for improving the quality and longevity of the coating.
Interior styles
- French country. This style is filled with freshness and lightness and the use of light shades, creating a cozy atmosphere for relaxation. Rustic style, sharply different from the strict outlines of the classics.
- Loft. A style that combines modernity and the image of a factory setting, here imitation timber will add unique chic, decorating the walls with decorative inserts and combining them with other coatings.
- Ethno. Ethnic style involves the use of natural materials, emphasizing the individuality of the cultures of certain countries; in its modern form, this style has begun to combine various images. An unusual style is created by imitation timber, painted in bright colors, emphasizing a special individuality.
- Marine style is decorated in blue, white and brown cool colors making the space airy and free, with the addition of certain marine-themed details. A lining painted in suitable colors will work well here.
- Modern style. Involves the use of a combination of materials with different colors and materials. Modern style is both minimalism and brightly colored walls.
Also read: Decorative plaster in the kitchen; which one to choose, the practicality of the material and tips for application
Creating a varied style using a similar pattern, a modern and affordable way to update the interior, a variety of color and texture variations will provide the opportunity to individually decorate your home.
The article shows only some popular options for stylistic ideas when decorating rooms.
Interior finishing with imitation timber, photo
Houses sheathed with imitation timber, photo
When finishing facades, the lining used is the thickest in width; in addition to giving a beautiful appearance, the material also serves as additional insulation, protecting the walls and insulation underneath.
Here you can apply either modern trends or strict classics. The image of a wooden house is easily created with false timber, and installation is also done on the assembled frame.
You can use any color palette. By painting the boards, from dark to light tones, or leaving the natural color, highlighting it with the shine of varnish.
The material on the facade requires periodic maintenance; it is advisable to monitor the texture of the outer layer annually and, if necessary, renew the coating.
Selection of materials
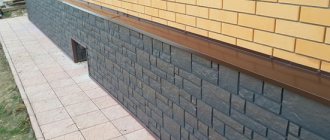
How to decorate the facade of a house made of timber? It is more convenient to cover a wooden body with materials that are easily attached. Therefore, they choose lining, block house, imitation timber, thermal panels, etc. The main condition for cladding is the presence of ventilation in the walls, which is created due to the gap between the wall and the finishing material. When using facing materials (brick, tile, plaster), they try to create ventilation holes so that the wood does not end up in thermal insulation. If the walls do not breathe, fungus and mold will form inside.
The building materials market is always ready to offer suitable material for the exterior decoration of a wooden house. Options are chosen based on your capabilities and needs. Any building material has its advantages and disadvantages:
- Imitation timber is an environmentally friendly material that allows you to decorate and insulate a house after curing; has unique wood characteristics, since it is made from coniferous trees; resistant to external factors due to its resin content. The disadvantages are that there are too dense knots and an increased fire hazard;
- Wooden lining is a wood material that retains all its natural properties; has high wear resistance with proper surface treatment; increases the steam exchange functions of the timber. Disadvantages: requires periodic processing and coating;
- Block house is one of the types of lining with imitation of the rounded surface of a log; easy to install; Often ready-made structures are made from such material. Disadvantages: like other natural materials, it is susceptible to moisture;
- Vinyl siding is a lightweight, practical material that is resistant to weather conditions; Available in different colors; budget option compared to natural wood. Disadvantages: does not always withstand loads, gaps may appear between elements at high and low temperatures;
- Metal siding - imitates wooden materials, while remaining a fire-resistant material; There are different colors and shapes; surface care is minimal; Easy to install and does not require a foundation. Disadvantages: does not allow the escape of steam formed in the walls;
- Thermal panels - made from high-quality concrete with virtually no water; the product does not crack, withstands low temperatures and retains heat; have a unique design solution, imitating brick, tile, stone, etc. Disadvantages: can be destroyed by moisture;
- Decorative brick – provides a high level of thermal insulation; durable and reliable material in a variety of shades. Disadvantages: requires a reliable foundation and sufficient roof overhang;
- Facade stone - used more often for laying paths; made of natural stone, so it is expensive; laid on walls according to the principle of tiles; withstands any temperature changes, is moisture resistant, but allows the house to “breathe”. Disadvantages: expensive, requires professional skill when installing;
- Facing tiles - made from baked clay; for outdoor work, choose a frost-resistant product with a moisture-repellent coating; Comes in different configurations and colors. Disadvantages: for laying on timber it requires preliminary leveling of the walls;
- Fiber cement panels - made using the latest technologies from cement, reinforcing fibers, mineral fillers; resistant to loads and temperature changes; come in different colors or are painted after installation. Disadvantages: in the absence of ventilation, they retain escaping moisture, exposing the wood to rot;
- Plaster is a simple and affordable material that allows you to level any walls; gives the house a modern look; you can choose any color that is added to the finished mixture; Acrylic paints are considered the most durable. Disadvantages: tightly covers the wooden wall, making the room unventilated.
Having decided on the appropriate type of material for cladding the house from timber on the outside, they prepare everything necessary for finishing work. If you plan to do everything yourself, make sure to purchase a sufficient amount of materials and also have the necessary tools and equipment on hand. Finishing walls in a house made of timber will require work at height, so you must adhere to safety rules to prevent work-related injuries.
What is imitation timber and what are the advantages?
Imitation of timber is a technique for finishing buildings outside and inside. The material used in it is called false timber, or timber simulator. These are facing panels made of natural wood, a type of lining.
The material is used for cladding walls inside and outside the building, as well as for decorating the ceiling. Panels are also used in frame construction.
False beam
The material differs from eurolining:
- lack of recess on the front side (the so-called shelf);
- large width and thickness;
- maximum resemblance to a wall made of timber, which is why it received its name.
Eurolining
Prices for various types of lining
Lining
Facing with false timber has many advantages:
- after finishing, the building looks as if it was made of natural wood, and even a specialist will distinguish the imitation from the original only upon close examination;
- during interior decoration, it hides uneven walls, allows you to hide wiring and other communications;
- protects the walls of old buildings from atmospheric influences;
- has heat-saving and noise-reducing properties;
- creates a comfortable microclimate because it is made from natural materials;
- It is simply mounted on the walls, so its installation does not require special knowledge.
Wood must be well impregnated with insecticides to protect it from pests
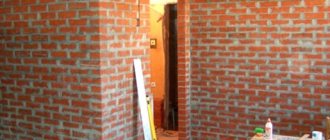
Thanks to these properties, false beams are often used for cladding old houses. In this case, the original material of the walls does not matter. These can be foam, gas, cinder blocks, bricks and even rounded logs that need restoration.
But imitation timber also has disadvantages that should also not be overlooked. It is necessary that the material is well impregnated with antiseptics and insecticides. Otherwise, moisture will quickly destroy it, and insect pests can spoil the lining. Treatment should be carried out regularly when the previous layer expires. Detailed data on the validity period of the composition are indicated in the instructions for the drug. Fire protection will also be required, since natural wood burns well.
Features of choice
Options for siding that imitate timber are presented in a wide variety on the market. The price of materials can vary significantly. To save money, experts recommend buying panels directly from the manufacturer to avoid markups from hardware stores. But first of all, you need to choose high quality material. To do this, certain points should be taken into account.
The humidity level should not be higher than 15 percent, otherwise it may cause the facade to warp during operation. The groove on the panel serves to ventilate the facade and helps extend the appearance of the panels.
The width of the siding is also important to the appearance of the building. To make it look like natural timber, the width should be about 100 millimeters. Very narrow panels look cheap, while wide ones look sloppy
In addition, you need to pay attention to the quality of the locking connection. What is important is its evenness and smoothness, as well as the absence of defects and damage.
And it is also necessary to choose the right decorative elements. They increase the wear resistance of the surface and are also responsible for the attractiveness of its appearance. Therefore, you need to choose quality products.
Before performing work, it is necessary to calculate the material and its components. To do this, you need to measure walls, window and door openings. The area of the openings will not be covered with false beams, so it must be subtracted from the total so as not to purchase unnecessary finishing materials.
How to choose?
When choosing imitation timber for interior decoration, you should first of all focus on the color and type of wood, because these criteria directly affect the result. Mostly coniferous wood is used for the production of false beams, less often deciduous or exotic.
Advice! The thickness of the lamellas used for interior decoration should not exceed 21 mm so that the usable area of the room does not decrease.
In a small room, finishing with light imitation timber is recommended.
Manufacturers offer two types of imitation timber:
- Unpainted panels, which after installation can be coated with a colorless antiseptic, varnish, tinting compound or paint.
- Tinted panels eliminate the need for subsequent painting. Their cost is slightly higher, but the same applies to decorative qualities.
Stylish contrasting hallway interior with painted imitation timber on the ceiling
Basic materials
Each type of wood has its own properties, structure and shade, so if subsequent painting of the surface is not planned, it is important to take them into account:
- Pine is a universal option for decorating common rooms (living room, dining room, kitchen, corridor). It has a neutral texture and can have a sandy, pink or yellow tint.
Spacious living room in a private house decorated with imitation pine timber
- Cedar is used for spectacular finishing of living rooms, offices, and dining rooms. This wood looks very noble, has a beautiful pronounced texture and a dark shade. In addition, cedar has antibacterial properties and smells pleasant, but it is not recommended to use it when decorating bedrooms, as it can cause headaches or insomnia.
An original idea for using cedar imitation timber
- Larch is recommended for finishing rooms with high levels of humidity (bathroom, toilet, kitchen, hallway, veranda). This wood is resistant to moisture, is not afraid of condensation, has high thermal insulation properties, so it can be freely used even when decorating a sauna or bathhouse. The shades of larch are very light (beige or yellowish), helping to visually expand the space.
Harmonious wooden interior with imitation timber trim
- Spruce is suitable for finishing living rooms with low humidity levels (bedrooms, children's rooms, living rooms). Imitation spruce timber looks beautiful (especially long-fiber versions), but requires regular treatment with antiseptics to prevent wood rotting.
Using imitation timber, you can create a cozy, warm atmosphere in your home
Among hardwoods used to produce imitation timber:
- Oak is strong, durable, has a beautiful texture and many shades. The cost of such material is high, but it pays off with its noble appearance and service life.
- Linden is a light-colored wood with a smooth texture that is perfect for wet rooms, even saunas.
- Alder is a reddish-colored wood that is resistant to abrasion, cracking, and impact. Suitable for finishing high traffic areas or children's rooms.
Eco-friendly and durable material for creating a unique interior design
High-quality imitation timber, regardless of the type of wood, must be well dried. When purchasing, you should also pay attention to the absence of damage to the surface of the lamellas, cracks, falling knots, or wormholes. The locking connection must be smooth so that there are no gaps left during installation, and moisture or dust does not get under the casing.
Imitation of linden timber looks perfect in a spacious living room
Imitation timber or block house?
Among the main materials used for interior finishing of a wooden house, imitation timber and block house are at approximately the same level in popularity. In fact, both of these options differ only in appearance, but they help achieve a similar result. But this is only at first glance; in fact, the difference is much more significant, which affects the final appearance and finishing style:
- Imitation of timber forms a clear, rather strict geometry of space, characteristic of the Scandinavian style. While the block house smooths out the lines, it creates a soft, bright atmosphere characteristic of the traditional Russian style or chalet.
The union of wood and stone creates a unique chalet style
- Raised timber, unlike a block house, has a flat front surface, which is important if the room is small and any terrain “eats up” the usable space.
Relaxation room with raised timber trim
- The flat surface of the false beam is much more convenient for the subsequent installation of lighting fixtures, hanging structures, and furniture installation.
- Imitation timber is much cheaper than a block house, making it possible to decorate the interior on a small budget.
Bright living room with false beam ceiling
Advice! To prevent joints from being visible when finishing with imitation timber, the lamellas should be placed in a checkerboard pattern.
Interior finishing with false beams
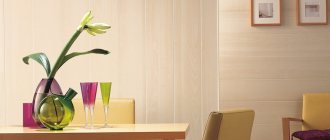
Imitation of timber in the interior is a popular decoration material. It fits well into traditional styles as well as modern ones. Imitation timber for interior decoration is used in two versions:
- monolithic. In this case, all the walls in the room are covered with false timber. The result is a monolithic solid panel. This coating is characterized by high strength and reliability;
- combined. Combined wall cladding is a combination of imitation timber as in the photo with other finishing materials: wallpaper, fabric, tiles.
Combined finishing is an opportunity to let your imagination run wild and come up with stylish solutions for the interior of your premises. She is more popular.
Current design styles with imitation timber
False beams are used in the following design directions:
- Art Deco. The main emphasis of the style is on multi-level ceilings made of imitation timber, geometric patterns, expensive fabrics, and an abundance of light;
- minimalism. The interior features simplicity, conciseness, multi-level lighting;
- country. Country is wood, comfort, homely atmosphere. The main elements of the interior are rural flavor, old furniture, and discreet shades.
Decorating different rooms with imitation timber
For each room, designers advise choosing your own false timber:
- living room. The living room is a spacious and bright room, for which the color and texture of the chosen material are important. Its mechanical characteristics in this case play a second role. For the living room, you can use boards of both light and dark shades. It is better to decorate small rooms with light timber with a monosyllabic pattern, spacious ones with dark materials with pronounced patterns;
- kitchen. Meals are prepared regularly in the kitchen, causing the room to fill with fumes. Therefore, for its cladding it is necessary to choose durable blocks that will not deform under the influence of fat, moisture, or steam. Designers advise choosing a plain, light-colored timber with a subtle pattern to make the kitchen more harmonious;
- bedroom. Here you can use various options for false beams in colors, strength and patterns. In the bedroom, almost all solutions look restrained and impressive.
- corridor. For cladding passage rooms, it is better to choose a light-colored material without a complex pattern.
It is worth carefully studying the photo of interior decoration with imitation timber in order to choose the best option for decorating your home.
Fasteners
Since panels with a thickness of 16-21 cm are used indoors, they can be fastened using clamps or self-tapping screws.
Reinforced clamper
These are special metal elements in the form of brackets that allow you to securely fasten the panels to the sheathing, while remaining invisible; the size of the clamps (number) is chosen taking into account the thickness of the rear groove of the panels.
The reinforced clamp is suitable for fastening imitation timber both indoors and for façade cladding.
Self-tapping screws
In addition, the imitation timber can be fastened with galvanized screws or self-tapping screws, as well as construction, screw or finishing nails.
Basic qualities
Imitation timber is a material that has recently entered the construction market. Previously, this function was performed by lining made of wood or plastic, which could imitate natural material. But if we compare modern material with its predecessors, it should immediately be noted that it is produced in certain sizes, which are: 0.65–2 m in width, 2–4 m in length. This size is considered optimal for performing external cladding work houses with non-standard shapes and a large number of corners.
So, the positive parameters include:
- It is a fairly environmentally friendly material. For its production, wood is used, which has a breathable effect.
- It has a special type of lock, weighs little, and is therefore easy to install.
- Can be used for finishing walls made of any material.
- Relatively low price and large palette of colors.
- Quite durable. If installed correctly and subsequently used, it can last up to thirty years.
- Acts as additional thermal insulation for the home.
Along with the positive characteristics, the main disadvantages should also be noted:
- A house finished with imitation timber has a high degree of flammability. Despite the fact that manufacturers are quite serious about treating the material with special anti-burning compounds, imitation timber is easily subject to fire. In this case, it is necessary to treat it annually with special solutions, otherwise the material will burn, blacken and crack.
- The need to periodically apply varnish or paints and varnishes.
- Compared to the price of the imitation timber itself, components, corners and other decorative elements are quite expensive.
Methods for attaching imitation timber
The entire list of fasteners for simulating a bursa is here. And in this section we will talk about the mounting features of each of them. The imitation timber is attached to the sheathing using:
- fasteners Nails DUET fasade, DUET 70, WAVE
- clasps;
- self-tapping screws
Self-tapping installation
1. On one or more boards on the back side we apply markings corresponding to the center of the log
2. Place a corner element on the first board and fix it with self-tapping screws. Next, we place the standard element and also fix it with screws
3. Place the board on the ragas and secure the corner and regular element with screws
4. On all subsequent boards we apply a couple of ordinary elements, placing them to the left and to the right of the applied markings
5. We place the board along the joists under the tenon of the previous one, tapping if necessary. We fix the board with two self-tapping screws
6. Installation of all subsequent boards is similar. The last board is fixed in the same way as the first with a corner element