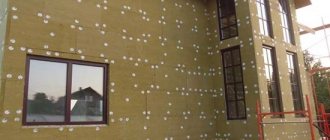
Wall decoration with decorative plaster has gained popularity over the past 5 years. At the same time, applying decorative plaster is considered a complex process that cannot be done independently, and hiring a professional is expensive because the cost varies from 700 to 1,500 rubles. for 1m2. In fact, this is not so, all the work can be done without hiring hired specialists, and the result obtained will be no worse.
By choosing a decorative coating as a finishing material, you will give your home a unique design that will compare favorably with traditional renovation methods. Remember that, despite the beauty, this finish has its pros and cons.
The advantages include:
- Easy to clean;
- The design will be very impressive and 100% individual;
- The coating is durable;
- Requires minimal care;
- Not afraid of strong temperature changes;
- Some types of structural mortars act as an additional layer of insulation;
- Most materials are environmentally friendly;
- Some types of finishing will help hide the imperfections of the walls.
The disadvantages of using are:
- High cost (applies only to some mixtures);
- Some compositions require good preliminary preparation of the walls;
- Complexity of application compared to traditional repair methods;
- Lengthy and labor-intensive replacement process.
If these disadvantages are not critical, such repairs will be an excellent choice for both an apartment and a private house.
If you have no experience working with decorative materials yourself, it is recommended to practice beforehand. This can be done on pieces of drywall or plywood.
Types and methods of applying decorative plaster with your own hands.
Today, many types of decorative plaster are produced for wall decoration. Each of them has its own special options for applying plaster. But the surface preparation technology, the main part of the tool and the painting technology are the same.
To tell the reader how the technique of applying decorative coatings differs, let’s look at their main varieties.
Textured.
These decorative compositions include mixtures that give a unique relief on the wall when using a special tool (for example, structural rollers), the relief can also be obtained using special installation techniques (for example, decorative plaster world map). The movements of the master's hand in combination with the use of a special tool will create the desired patterns.
Structural.
For structural mixtures it is not necessary to use a special tool or special technique. An extraordinary relief is obtained due to the fillers included in the composition. Granite and marble chips, mineral inclusions, fibers of various fabrics and more are used as filler. Using a spatula and trowel, apply one layer to the surface, after the first layer has dried, use the trowel again to create a pattern. There are also marble plasters that create a stone shell of walls entirely consisting of particles of this noble stone.
Venetian.
This type of decorative plaster will give the house the real luxury of a Roman mansion. This wall covering imitates natural stone, most often marble, granite, malachite, etc. Before applying the composition, be sure to practice on sheets of drywall. The application process will be described separately because... is complex and a brief description will not be helpful.
Bas-relief
In the article, by bas-relief we will understand all types of sculptural images made using gypsum or other types of plaster and receding from the plane of the base to a short distance. Such work is carried out with subsequent decoration. If you feel the strength and talent to choose a bas-relief as a decoration, the efforts spent will be returned a hundredfold.
Choosing one of the listed types is difficult, but necessary, because the future method of application will depend on this choice.
Advantages and disadvantages of decorative plaster
Decorative plaster is a finishing material for walls and ceilings, used at the final stage of repair work. With its help, unique wall surfaces are created that imitate natural stone, textiles, tree bark, raindrops, the surface of ancient Venetian buildings and much more.
There are various types of decorative coatings that allow you to experiment with application techniques and the depth of the pattern. For its diversity and functionality, this material is valued among interior designers and allows you to refresh renovations without much difficulty. The advantages of such decorative coatings are:
- Minimum surface preparation time. To begin applying plaster, you do not need to level the walls with putty or treat them. It is enough to apply a deep penetration primer for good adhesion of the material to the working area.
- Can be applied to any type of surface. Plaster can be used not only on prepared walls; for example, it fits well on stone, concrete, and decorative elements. The viscosity of the composition ensures high-quality processing of non-standard objects - cornices, niches, arches, semicircular walls.
- No joints after drying. The technology for applying the decorative mixture involves its uniform distribution over the entire wall during operation. This creates the appearance of a single surface without joints, seams and unnecessary transitions.
- Great tinting possibilities. Textured plaster is most often supplied in white or transparent form. This allows you to tint the mixture in any shade you like.
- Different types of decorative coatings. To perfectly fit the wall covering into the style and theme of the home’s interior, you need to stylize it. Plaster provides this opportunity; it is produced on the basis of different bases, and can also be textured or smooth.
- Environmental friendliness. The wall covering allows air to pass through well, and there is no unpleasant odor when working with it or after drying.
- Availability of protective functions. This material is produced for interior work, as well as for facade decoration. It contains compositions that provide reliable protection of wall and ceiling coverings from mold, fungi and aggressive environmental influences. In addition, decorative or Venetian plaster is a fairly durable material that can withstand significant loads.
Also, the advantages of decorative coating include a highly aesthetic appearance, which is difficult to achieve using ordinary wallpaper or paint, and the style of Venetian plaster in the interior is almost impossible to imitate by other means.
Despite all the positive qualities, this coating has several disadvantages. For example, certain types of plaster require additional preparation of the walls. In addition, there are special series of mixtures that do not have sufficient strength for use in the exterior.
It is worth carefully studying the characteristics of the plaster before purchasing, since some coatings do not tolerate high humidity. Under such conditions, the material can quickly lose its attractive appearance. Also, decorative compositions are not recommended for use in houses located in an area of high seismological activity.
Technology of applying decorative plaster to walls.
Now you know that application methods greatly depend on the choice of decorative plaster, but the general principles will be the same for all coatings. This part describes a simple procedure for applying all types of coatings to walls with your own hands.
The mixtures can be ready-made, dry or prepared independently. Depending on your desire, you can choose any of the above, the main thing is to strictly follow the manufacturer’s instructions when preparing and maintain all specified time intervals.
General technology step by step:
- Preparation. An important stage of work, regardless of the chosen mixture. Decorative finishing serves only to decorate the walls and is not intended to align them. Before proceeding to the main stage, level the wall using a cement-sand mixture. To ensure good adhesion, prime the surface. The only thing that requires perfect alignment of the walls is Venetian plaster.
- Application of material. The same stage that depends on the type of mixture. We will write in detail about the technology of laying the material in the following sections of the article.
- Preparing for coloring. Often, after finishing work, additional processing is required, such processing can be sanding, smoothing, etc. You need to sand, moving from coarse-grained to fine-grained sandpaper.
- Coloring . There are several ways to paint decorative plaster. Either this will be painting the mass of the material, or painting the surface. The choice of coloring method will depend on the desired effect. The material in bulk is colored by adding color.
- Finishing. Some coatings do not require such a stage, but types such as “Venetian” cannot do without additional treatment with wax or varnish. Wax is applied to add depth and shine to the stone's design. After application, do not forget about polishing.
From the above it is clearly seen that the volume and technology of work on applying decorative plaster are approximately the same, and will differ greatly only in relation to the coating formation process itself.
When carrying out repairs, do not neglect the safety rules! Use PPE (gloves, respirator, goggles, etc.). Use scaffolding or stepladders to work at heights.
Step-by-step finishing instructions
Before starting work, you should cover with masking tape all surfaces that are in the immediate vicinity of the area to be treated. You need to start applying from one corner to the opposite - from top to bottom.
Technique for applying decorative plaster:
- First layer. The strength and service life of the entire coating depends on its correct application. To do this, the material is picked up on a spatula and stretched into a thin layer. Typically, plasters of this kind dry out very quickly, so it is recommended to visually divide the wall into zones and process them one by one. After application, wait approximately 5 hours for the surface to dry.
Applying the first layer of plaster - Second layer. It is applied with a trowel in arc-shaped movements or chaotic in different directions. It is important to stretch the solution over the entire surface so that there are no gaps left. After completing the work, you need to leave the surface to dry for about a day.
- Finishing layer. It is applied in small strokes on a section of the wall with an area of no more than 1 square meter. After processing and leveling the surface, you need to take a trowel and “walk” the tool along the entire wall, pressing it tightly. This must be done until a metallic sheen appears.
Creating a texture
After the composition has completely dried, you need to treat the wall with wax or varnish to increase the performance of the coating. See also other options for decorative wall decoration.
It is important to know! During finishing work, it is necessary to ensure the cleanliness of the tool and rinse it with water as often as possible. It is also not recommended to prepare a large amount of solution at a time (especially for gypsum plasters), since it can dry out while still in the container.
DIY VIDEO TUTORIAL on applying decorative plaster with your own hands
Preparing the wall surface.
Let us briefly dwell on this stage of work as preparing walls for decorative plaster. Beginning craftsmen often wonder whether it is necessary to level the surface to perfection?
Like wallpaper, decorative plaster can be applied to uneven walls, but with some restrictions. For example, coatings requiring gloss should be applied to perfectly flat areas. Otherwise, after glossing, all irregularities (depressions, protrusions, differences) will become visible. Most of the solutions do not require special preparation, and on the contrary, textured and structural ones will help hide minor imperfections.
If you do not have the desire or ability to level the walls to an ideal state, in any case, the main thing is to properly prepare the surface before application.
For any finish the algorithm will be the same:
- Remove old plaster (especially if it is peeling).
- Repair cracks and scratches;
- Perform a rough finish - just plaster with a cement-sand mixture until strong visible defects are eliminated;
- Cleaning and dust removal are mandatory;
- Application of deep penetration primer.
As you can see from the above, the process described above is not complicated, and anyone can do it.
Advantages of modern mixtures
Decorative plaster is a worthy alternative to wallpaper and paint. The material is distinguished not only by its attractive appearance, but also by its high performance characteristics. Mixtures for wall finishing include plasticizers and various fillers that improve the quality of the coating.
Advantages of the material:
- ease of application;
- no seams;
- masking the imperfections of the original coating;
- environmental Safety;
- durability and resistance to UV rays;
- external attractiveness;
- easy restoration;
- moisture resistance.
Creating original interiors was previously available only to wealthy people. Decorative types of plasters are inexpensive, cheaper than some types of wallpaper. Modern mixtures for wall finishing and the hands of a craftsman create an imitation of almost any surface for a reasonable price.
The material is available to the mass consumer. Today on the market there is a wide variety of types of finishing for any interior - from classicism to high-tech style. Applying decorative plaster to a wall is a creative and not complicated process. The main thing is to follow the technology and not forget about the sequence of all stages of finishing work.
What you need to apply decorative plaster yourself.
In addition to the mixture itself, plastering requires a tool, and it will differ from the standard one. Like the technology, the equipment will change depending on the type of wall covering chosen.
Ordinary spatulas will not work, firstly, they have sharp edges, and secondly, they metalize the surface.
Let's list the required tool:
- Spatulas for decorative plaster have rounded edges and are made of high-quality metal.
- Trowels. Often special trowels are even called Venetian.
- Sponges for creating textures.
- Brushes for creating custom designs
- Special structural rollers
- How to paint the plaster is up to you. You can paint by adding a regular color to the base mass, or you can paint the already applied layer; for this, a sponge or brush will be enough.
Special tools are not cheap, but you will need them.
Accessories:
- Cotton gloves;
- Respirator;
- Fabric to protect floors and walls from dust and construction debris;
- Buckets;
- Stepladder for working at height;
Having learned the general principles, you can move on to discussing detailed application technology.
How to apply textured plaster.
Correctly applying decorative plaster to walls is not difficult, especially when it comes to textured mixtures. Let us remind you that textured or embossed mixtures are called mixtures whose pattern is created using special tools. To create an original relief, improvised materials are often used, such as: cellophane bags, wrapping paper, newspapers and much more.
Application steps:
- Preparation . Textured plasters are precisely those mixtures that do not require very careful leveling of the walls. It is enough to remove severe surface defects.
- Application. Using the textured mixture is very simple. As a rule, it is applied in a thicker layer compared to other types of coatings. Use a spatula and trowel to apply.
- Relief creation . Patterns are created with different tools.
Here are examples of such patterns obtained with different tools:
Canvas drawing - created with a hard brush, drawing first vertical and then horizontal lines, you will get a real artistic canvas.
Circular pattern - created by the same brush by rotating around an axis; waves or circles of different diameters also look good
Patterns with a roller – various patterns can be obtained using special structural rollers. You need to choose a roller with a pattern you like in the store and simply roll it along the wall. This way you can even get the texture of natural reptile skin.
Spraying is the simplest method. The first layer is applied evenly. The second step is to take a broom and dip it into the plaster, at this time you should have a stick in your other hand. By hitting a broom with a stick, we get a relief of various splashes on the wall. You can paint the first layer in any color, and spray it with another or even several colors.
- Leveling the formed coating. Often, after processing with a tool, parts of the relief that are too protruding remain; to remove such marks, use a trowel to smooth the slightly dried coating.
- Coloring. You can paint in one or two stages. You need to paint with a roller or sponge, this way the tops of the relief are made lighter, giving visual depth.
As you can see, do-it-yourself decorative plaster on walls is applied in just 5 simple steps.
Compliance with the correct sequence and accuracy in work guarantees a good result.
Versailles plaster
Even a novice master can create the luxurious grandeur of Parisian palaces at home. The technology for applying “Versailles” is quite simple. You will need gypsum putty, and the finishing and starting marks are mixed in equal quantities. The composition is applied after the primer has dried, the sequence of actions looks like this:
- The solution is applied to the walls in chaotic short strokes. The plaster layer is about 3 mm. It is better to start from the joints and corners of the wall.
- Next, using a trowel or a large trowel, the relief is applied in wave-like movements. When moving and tearing off the trowel, chaotic streaks are obtained.
- When moving to the next section, an overlap is made; for the continuity of the pattern, the solution is slightly stretched onto the previous layer.
- It will take about two days to dry the wall.
- Then the surface is polished with a metal spatula to remove sharp parts of the relief, making the texture more even. Then polishing is carried out with sandpaper.
- All generated dust is removed, the wall is primed with a composition that is suitable for acrylic paints.
- The surface is painted with a roller and dried for a couple of hours.
- Powder for silvering or gilding (also sold in hardware stores) is diluted in primer or acrylic varnish. Apply with a foam roller. Gilding is usually applied only to the protruding parts. Then a layer of varnish is applied with the addition of glitter, which will give the surface a special shine and protect it from moisture.
A wall decorated in this way can be easily washed with damp cloths.
The Versailles technique has another variation : imitation of limestone slabs. After applying the base, you need to force the wet plaster to form numerous peaks. To do this, the trowel is pressed with its entire plane against the mass, then it is torn off perpendicular to the wall. The peaks are smoothed out, leaving a texture in the depths in the form of recesses and depressions.
Unsuccessful areas can be redone: just smooth out the ugly piece, create new peaks and process their tops. The dried wall is painted by hand, using a sponge to rub in the acrylic paint. To enhance the effect, you can apply a lighter shade of paint only to the convex parts.
How to apply structural decorative plaster to walls with your own hands.
Decorating the outside of a house with various decorative plasters that have a structure is very common. The most famous of the mixtures of this type are “bark beetle” and sand plaster. Structural plaster is a composition with a mineral filler. Which are chips of marble, granite and much more. It is thanks to this filler that the structure is formed. Let's figure out step by step how to work with such coatings.
Application steps:
- Preparation. As with textured plaster, no special preparation is required; it is enough to remove significant damage and differences. Decorative bark beetle coating looks great as an exterior decoration for private houses. Don't forget to clean the walls of old coating, dust and dirt. Before plastering, the surface must be primed.
- Application. Apply the composition in an even layer on the walls, using a spatula and trowel for application.
- Second stage of application. Wait until the first layer dries and use a plastic spatula to begin smoothing the plaster using top-to-bottom movements. An individual pattern in the form of traces of a bark beetle will begin to appear on the surface. This pattern appears precisely due to the presence of large mineral granules in the composition.
- Coloring. The coloring of the structural mixture occurs by adding tint (color pigment). You can take the most common color scheme; in the store, the seller will definitely advise which option is right for you. No separate painting is required.
- Finishing. Some manufacturers recommend using additional wax to impart water-repellent properties.
Apply the plaster in sections. Start applying the next section strictly before the previous one has dried.
Varieties of structural compositions
Let's consider spraying a “fur coat”. We have determined what is suitable for the plaster base for decoration, but now it is important to determine what finishing technology we will use. As for structural coatings, they are quite easier to apply than others. It's worth starting with them.
Fur coat
“Fur coat” is one of the types of decorative coatings. It is quite popular and is based on cement-sand mortar. We mix everything 1 to 3. That is, for 1 part of cement we put about 3 parts of sand. Now we apply everything to the walls using sprays.
Fur coat
There is a special plastering machine that facilitates the process of applying plaster. After all, its work is based on the fact that the resulting pressure begins to eject the solution. In this case, the mixture adheres to the walls and the necessary relief appears on them.
What to do when you don’t have a typewriter and there’s nowhere to get one? Then a simple broom will do. To do this, take it with your right hand and begin to lower it into the solution. Take the amount you need, but not much. When the broom is brought closer to the surface, it must hit the stick (it was held in the other hand). Also read how to make a dry floor screed with your own hands here.
Brush
Another technique is also interesting. Using a brush. To do this, you need to take it with long pile. Place some solution on it. Now run the board over it. Show some effort and move it towards you. When the bristles straighten, the solution will reach the surface in the required small amount.
Brush
Another thing that can be used is a metal mesh placed on a wooden frame. To do this, the structure is placed against the wall and leveled. Pressed down with bricks. Now, using a trowel, the solution is applied to the surface. Remove the mesh and then eliminate any defects.
Use a brush to smooth the wall.
Application of Venetian plaster.
Venetian decorative plaster is most often used for interior wall decoration. Walls with such a coating look simply gorgeous, but applying such a finish is the most difficult and time-consuming.
It will not be possible to describe the entire process in detail in this article. Therefore, we will focus on the most important points. So, “Venetian” is a mixture that imitates natural marble. To make the coating look natural, decorative plaster is applied in several layers.
Application order:
- Preparation. The surface must be leveled very carefully, this will help to avoid the appearance of defects after finishing. Don't forget about applying primer.
- Preparation of the composition. You can prepare a mixture for Venetian plaster yourself, but in this review we will only talk about ready-made compositions sold in stores. To imitate marble, it is necessary to prepare a composition of several shades. Depending on the chosen marble color. We take the finished composition, mix thoroughly, and pour into 3-5 containers.
- We select different colors depending on what kind of marble we want to get.
- Add the color to the prepared containers and mix thoroughly until the desired shades are obtained.
It is important to correctly calculate the required amount of color to obtain the required shades. To avoid mistakes in color selection, add color gradually while mixing.
- First and second layer. Venetian plaster should be applied to the wall carefully and slowly. Using a spatula, we apply various shades to the Venetian trowel. There is more of the base color, the remaining colors are in the proportion in which they will be in the intended drawing. Apply the resulting mixture to the surface. We apply the first two layers without trying to draw the pattern perfectly. We make chaotic movements during the application process, unless a directed pattern is planned.
- Third layer . The third layer is applied in the same way as the previous ones, but we pay much more attention to the formation of the stone pattern. To apply the final layer, you need to take a smaller spatula. Such a tool will allow you to form small details of the stone pattern.
- Sanding and ironing. We treat the resulting surface with fine sandpaper, and then go over the surface with a spatula, lightly pressing it. This is necessary to compact the surface and give it its original shine.
- We draw the veins. Using the same color that was added earlier, using a brush we draw veins on the surface of the marble.
- Finish coating. It is produced by applying a layer of wax, which is then polished using a grinder with a polishing wheel.
Decorative plaster applied in this way in the living room or other rooms will be an excellent decoration for the house.
DIY bas-relief.
There are unusual ways of applying gypsum and decorative plaster. One of these methods can be considered the creation of relief panels and bas-reliefs. Such works of art will look great in any room giving your home a luxurious look.
The bas-relief does not have to be made from special plasters; ordinary plaster will suffice. The sequence of work for making the bas-relief will be as follows:
- Surface preparation. Often, separate niches are prepared in the walls, or the outline of the future work is highlighted using a frame. The place where the relief image is applied is prepared in accordance with the plan. The surface can be either smooth or textured.
- Drawing an image. Using a stencil or dimensional grid, transfer the relief design to the wall.
- Creating a bas-relief. Using palette knives (special sculptural spatulas of various sizes), a sculptural image is formed. The gypsum mixture is prepared in small portions because it hardens quickly. The consistency should most closely resemble soft plasticine.
- Grinding. The resulting relief is sanded using sandpapers of different grain sizes. Then they pass over the surface with a mixture having the consistency of sour cream, removing the shells that appeared during the grinding process.
- Coloring. Paint the surface with acrylic paints using a spray bottle. If necessary, varnish is used as a finishing touch.
It is convenient to use half a children's rubber ball as a container for preparing portions of gypsum plaster. Such containers are easy to clean from frozen residues.