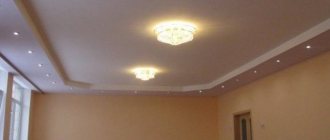
Issues of redevelopment of your own home do not arise out of nowhere. They appear among apartment owners along with the desire to divide the living space with the help of partitions and internal walls. An incentive to adapt diverse premises to the tasks of comfortable living can be children of different sexes, the profession and even hobbies of family members, as well as the housing itself, purchased in the form of a single concrete box.
It is clear that in one article you cannot talk about all the ways to divide space - there are a lot of them. But it would be a shame not to talk about one of them, if only because detailed instructions on how to build a partition from plasterboard will help everyone who wants to master the skills of constructing lightweight, durable and reliable structures.
- 1 - Main stages
- 2 - Materials and tools
- 3 — Partition marking
- 3.1 — Marking a perpendicular (angle 90°)
- 3.2 — Transferring marks from the floor to the ceiling
- 4 — Marking a plasterboard partition using a laser level
- 5 — Installation of the guide profile (PN)
- 6 — Installation of rack profile (PS)
- 7 — Ways to strengthen the frame
- 8 — Making a doorway, installing crossbars
- 9 — Fasteners for the construction of a plasterboard partition
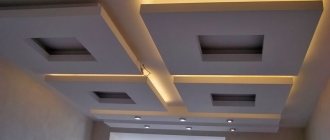
- 10 — Frame covering
- 11 — Soundproofing partition
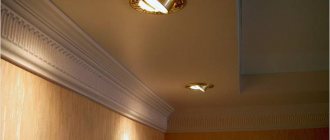
- 12 — Finishing the partition
Main stages
Depending on the operating conditions of the partitions and the type of networks laid in them (engineering), their cladding, like the frame diagram, can be single or double. The work on installing partitions (carried out by 2 installers) is divided into several main stages:
- Preparation for work;
- Marking the floor, walls and ceiling;
- Installation of guide profiles - PN (UW);
- Installation of vertical racks from a rack profile - PS (CW);
- Installation of lintels (door and window openings);
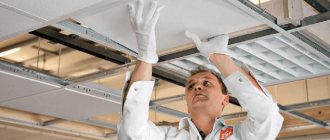
- Covering the frame with gypsum board sheets on one side;
- Laying the necessary communications: electrical cable, pipelines;
- Laying (in the interstitial space) and fastening of thermal insulation;
- Sheathing of the frame on the reverse side;
- Finishing work.
Before starting work, try to leave behind all wet processes associated with the preparation and use of mortars, and clean the installation area of the future partition from debris, mortar buildup, foreign objects and protect it from sudden temperature changes.
If you have a smooth screed and well-plastered and puttied walls, consider yourself lucky - this is an ideal base for installing a metal frame.
Secrets and nuances of working with drywall
To make high-quality repairs with your own hands, you need to know the basics of working with materials such as drywall. No one will have any difficulty in attaching a sheet of plasterboard to the frame and securing it there with self-tapping screws. But in order to prevent cracks, distortions or other surface defects from appearing later, you need to observe some features of working with drywall, which are known only to specialists.
Diagram of the correct cutting of drywall.
- It is recommended to avoid sudden and prolonged temperature changes in the room where work with gypsum boards takes place.
- The “wet work” cycle must be completed to ensure that there is no excess moisture.
- Before you start covering the frame, you should take into account that the drywall must adapt to the temperature environment of the room for at least two days.
- GCR is cut quite simply, using an ordinary sharp stationery knife. To do this, just cut through the cardboard and make a small depression in the plaster. You should not press the sheet with great force: it will crack in the right place even with a little pressure.
- You should not join drywall end to end, tightly fitting sheet to sheet. It is necessary to leave a small gap, which will subsequently prevent swelling of the surface and its deformation.
- If the edges of sheets are joined that do not have a factory edge, but are pieces cut off by hand, then at the joints it is imperative to cut the chamfer at an angle of 45 *.
- Drywall should be attached to the frame in such a way as to avoid tension in it. To do this, two methods are used: screws are placed from the middle to the edges or immediately from both sides of one right corner of the gypsum board sheet.
- Stores selling building materials will offer three types of reinforcing tape for sealing joints: mesh (serpyanka), fiberglass and paper. The last one should be selected.
- Before starting work on puttying the surface, it is primed with the obligatory entry into the gaps between the gypsum board sheets.
Materials and tools
In order not to be distracted by shopping trips during the work process, we stock up on the following materials:
- Guide profile (for fastening the structure to the floor and ceiling);
- Rack profile (for vertical installation as the main load-bearing element);
- Wall plasterboard 12.5 mm (for single-layer sheathing of the frame);
- Insulation;
- Dowel-nails (for attaching the frame to a concrete and brick base);
- Wood screws (for fixing the profile to a wooden base);
- “Bugs” or “seeds” (for attaching frame elements);
- Reinforcing tape - serpyanka;
- Wooden beams (to strengthen the frame in places where door frames are installed);
- Sealing tape;
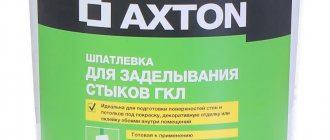
- Gypsum-based putty;
- Acrylic primer.
Types of profiles for plasterboard partitions:
For material consumption, please refer to the online calculator. Data to be entered: the length of the partition, its width and the number of cladding layers.
We acquire the following tools
:
- Level (bubble or laser);
- Roulette;
- Plumb line (for transferring marks from the floor to the ceiling);
- Marker or pencil;
- Chalk;
- Rope;
- Screwdriver;
- Hammer with a drill (if there are reinforced concrete walls or ceilings);
- Metal scissors;
- Hammer (for driving expansion nails);
- Construction knife.
DIY installation of plasterboard structures
With your own hands, you can make everything you need to improve your home from drywall, quickly and efficiently. In order to understand as accurately as possible how structures made from this material are installed, you need to know what products are used to construct the frame onto which drywall is sewn.
Types of fastenings for drywall.
Partition marking
You will need two types of profile: PN
and
PS
. The first is cut with metal scissors and attached to the floor and ceiling. Before cutting and installing it, mark the floor. It is marked on it: the design thickness of the wall (based on the pieces of cardboard attached to the profile), the binding of the racks, window and door openings. A gap in the guide profile is provided between the pillars of the doorway.
Methods for marking the partition are given below:
3.1 Perpendicular marking (90° angle)
Most often, a plasterboard partition is built perpendicular to the existing wall, so it becomes necessary to draw a line at an angle of 90°.
This task can be accomplished in several ways, which we will discuss in detail below.
a) Egyptian triangle method
Egyptian triangle
is a triangle with an aspect ratio of 3:4:5. It is very important that the Egyptian triangle always has a right angle. For example, a triangle with sides 15 cm, 20 cm and 25 cm is Egyptian and, accordingly, rectangular.
In order to set aside a perpendicular, we need to build an Egyptian triangle, one of the legs of which will lie on the load-bearing wall. An example of the construction is given below:
The figure above uses a triangle with sides of 1.5, 2.0 and 2.5 m. You may find it more convenient to construct a larger or smaller triangle. The main thing is to grasp the essence: we take a certain conditional length of the segment, for example, 0.5 m, then multiply this number by 3, 4 and 5, and thus get the lengths of the sides of our triangle: 1.5 m, 2.0 m and 2.5 m.
We carry out the construction: we put point “A” - the base of our perpendicular, then after 1.5 m along the tape measure we put point “B”. From point “B” we draw an arc with a radius of 2.5 m, for this you can use a nylon rope and a pencil, and from point “A” we similarly draw an arc with a radius of 2.0 m.
The intersection point of the arcs - “C” will be the third vertex of the Egyptian triangle. Segment AC will be perpendicular to segment AB, and accordingly to the load-bearing wall. Then, using a metal profile or a nylon cord, you can extend the speaker line to the opposite wall. Accordingly, straight line AD will be perpendicular to the load-bearing wall, which is what we need.
b) Perpendicular using a square
This method is less accurate than the first. This is due to the fact that the square is small in size and any unevenness of the wall can affect the final result.
To mark, we apply the square with the short side to the load-bearing wall, and draw a line along the long side, then this line is extended to the opposite wall.
This method is suitable for smooth walls and small marking areas.
c) Perpendicular using a tape measure
We set aside equal sections from the existing wall, as shown in the figure above. This method is also not completely accurate, since existing walls may have flaws and may not be perpendicular to each other. However, you can combine the methods and check the perpendicular obtained using a tape measure with a square.
3.2 Transferring marks from the floor to the ceiling
After marking the base of the partition, you need to transfer these marks to the ceiling. There are also several ways to do this.
a) Using a plumb line
This method is clearly demonstrated in the figure below. The more points you transfer from the floor to the ceiling, the more accurate the final result will be. We draw a line through the transferred points using a profile; it is also very convenient to use a dyeing (tapping) cord.
b) Using a bubble level:
Using a bubble level, you can only transfer the extreme points located near the walls. The method is less accurate than using a plumb line.
Installation of partitions
The construction of partitions is associated with somewhat greater difficulties, since it takes much more time and money.
Markup process
First of all, it is necessary to outline the location of the partition, using a regular building level or plumb line. The process is quite simple if you proceed as follows. First, the location of the partition is determined, after which marks are made on opposite walls. Using a level, vertical lines are drawn on the walls, after which they are connected on the floor and ceiling with the corresponding marks. You can do it more accurately using a plumb line. As a rule, craftsmen always have only high-quality construction tools, and they do the job efficiently using simple tools. If you take amateurs, they manage to screw up with the coolest instruments.
Marking a partition using a level and plumb line
Frame installation
Since galvanized metal profiles are mainly used, a partition made of metal profiles can be taken as an example. Since this is a partition, it is necessary to use special UW profiles, which have different widths - 50 mm, 75 mm and 100 mm, with a wall height of about 40 mm. Fastening is carried out using dowels if the fastening surface is made of brick or concrete. If the base is wooden, then dowels are not required. The distance between the attachment points is no more than 40 cm. As a rule, this profile is considered a guide and is attached along the perimeter of the partition.
General structure of the frame for the partition
After this, they begin to install CW profiles, which act as load-bearing posts. As a rule, its ends are inserted into the UW profile, leveled and fixed using PSh self-tapping screws with wide flat heads. These profiles are installed at a distance of 60 cm from each other. If the height of the partition is greater than the length of the plasterboard sheets, then you will have to install an additional horizontal lintel from the CW profile. The fastening of the jumpers is carried out in the same way as the fastening of the CW profile to the UW profile.
Connection point between guide and supporting profiles
If the distance from the CW profile to the UW profile is more than 60 cm, which is relevant where the plasterboard joins the walls or ceiling, then an additional CW profile is still installed, dividing the gap into 2 equal parts.
Distance between frame posts
If it is planned to install a door in the partition (that is, the partition is not solid), then the profiles forming the doorway are best strengthened by wooden beams inserted into the profiles and secured with self-tapping screws through the profile.
For greater reliability, you can install additional horizontal jumpers. Jumpers are made from CW profiles using one of the methods shown in the image below.
How to make jumpers from a profile for a frame
The larger the partition, the more reliable it will be if additional reinforcements are made. The same can be said about partitions with doors, since the doorway weakens the entire structure. As a rule, large partitions are made with two layers of drywall on each side.
Communications
The use of plasterboard systems allows you to hide various communications, as well as electrical wiring, in the gap between the plasterboard and the base. In this case, safety requirements should be taken into account, as well as fire safety requirements, especially if elements made of flammable materials, that is, wood, are used.
Heat and sound insulation elements
After all communications have been laid, installation of drywall sheets begins. If a partition is being mounted, then after installing the frame, sheets of drywall are fastened on one side, after which a layer of insulation or a soundproofing layer is laid in between. As a rule, modern building materials have a whole set of technical characteristics, so thermal insulation materials have good sound insulation properties. After laying this material, the partition is sutured on the other side.
The following are used as insulation:
- Mineral wool. As a rule, modern building materials are aimed at not having a negative impact on the environment. In addition, mineral wool does not require special protective equipment like glass wool. Moreover, it is easy to process (cut), and its dimensions correspond to the parameters of plasterboard systems. The cheapest option is slag wool. Stone wool is considered the most expensive, but it is better to use materials made without the use of formaldehyde.
Basalt mineral wool slabs are easy to install - Styrofoam . It has excellent heat and sound insulation properties. In addition, this is a fairly cheap material available to any client. Unfortunately, rodents simply adore polystyrene foam, and when burned it releases toxic substances, and it supports combustion very actively.
- Polystyrene . It differs from polystyrene foam in that it has slightly better performance in all respects. It is more durable, rodents do not like it and it does not support combustion, which is very important. Its only drawback is that polystyrene is much more expensive than polystyrene foam.
The modern market is simply saturated with various thermal and insulating materials designed for a wide range of consumers.
Marking a plasterboard partition using a laser level
Above we looked at ways to mark a gypsum plasterboard partition using the most accessible tools. However, if you have a laser level in your arsenal, then it can replace the plumb line, the bubble level and the Egyptian triangle method.
Laser levels come in various modifications, but as a rule, they are capable of constructing three mutually perpendicular planes. The projections of these planes in the form of a beam are reflected on the walls, floor and ceiling.
Marking and further installation of the profile are carried out along these rays. An example of marking a partition using a laser level is presented in the video:
After marking the partition, they begin to install the guide profile.
Step-by-step instructions for preparatory work
Before making a plasterboard wall, you need to prepare your workspace:
- Level adjacent surfaces, preparing them for finishing.
- Mark the floor. It should be borne in mind that the angles in apartments are rarely 90 °, because of this, the markings must be created taking into account parallel walls. If you plan to simultaneously build a wall and sheath the existing ones, then you first need to do the sheathing and then install the frame for the new one.
- The marking line will serve as a guide for installing the profile. In the future, its thickness will be supplemented by the thickness of the gypsum board.
- Mark the location of the doors, if provided.
- The main markings on the floor are transferred to the walls using plumb lines and levels.
Installation of the guide profile (PN)
Before installing the guide profile, a sealing tape is glued to its back surface. It is designed to soften vibrations of a metal structure, dampen sound vibrations, and increase the noise-absorbing properties of the frame:
Mon profile
with a glued seal, it is aligned along the marking line and fixed to a wooden (or concrete) base using self-tapping screws (or dowel nails) with a pitch of 500 mm. Holes in the floor and ceiling are drilled directly through the profile.
The profile is cut using metal scissors:
Over time, 3 finishing layers will appear along the edges of the frame: gypsum board sheathing (12.5 mm thick), as well as a layer of putty and finishing, which will increase the overall thickness of the wall. This feature of the construction of a single-layer partition must be taken into account when marking and linking the wall to the floor plan.
Criterias of choice
You should not skimp on quality, as this is a factor that determines the service life and comfort of use. You should also choose a model that matches the characteristics of the room. The base is made of gypsum, covered on both sides with multilayer cardboard. When classifying the finished material, the features of the components included in the structure are taken into account:
- GKL - ordinary, used for work in rooms with normal humidity levels. One of its main advantages is its low cost. It does not have fire-resistant properties.
- GKLO, unlike the previous type, is fire resistant. This property is provided by reinforcing glass fiber in the gypsum layer. To increase the fire-resistant properties, fiberglass is impregnated with fire retardants, this helps prevent the spread of fire.
- GKLV - waterproof. Excellent for interior partitions and leveling in bathrooms, kitchens, and loggias. Its cardboard level is impregnated with a hydrophobic substance that can reduce the ability to absorb moisture to a minimum.
- KGLVO - has fireproof and moisture-resistant properties, so it costs more.
Also, when choosing, you should pay attention to the thickness:
- wall cladding - 12.5 mm;
- ceiling - 9.5 mm;
- plasterboard structures - 7.5 - 8 mm.
Be sure to inspect the gypsum board for damage: scratches, chips, swelling and other defects. The cardboard layer must be intact, the gypsum layer must not crumble.
Installation of rack profile (PS)
The racks are made from PS profile
length 3000 or 4000 mm. Thanks to the ribbed surface and curved edges, it has greater bending rigidity. Its width in the partition design depends on the height of the room being repaired, the weight of wall objects and gypsum plasterboard slabs.
In kitchens, corridors and hallways (in areas with high traffic), a stronger profile with a width of 75 or 100 mm is installed. A pair of such racks (PS-100) can support a door weighing up to 30 kg. When installing more massive structures, use the UA profile - a reinforced version of the rack profile with a thicker wall. When installing a UA profile, the maximum permissible weight of the door leaf increases to 70 kg.
Vertical posts are fixed along the edges of the guide profile. They are cut so that a damping gap of 10 mm is formed between the tops of the supports and the ceiling profile, designed for shrinkage of the building.
Be prepared for the fact that the profile may bend at the cut points. If the support posts are deformed, take pliers in your hands and straighten their edges.
After cutting, each of the racks is attached to the lower profile, and then, like a support on a hinge, its free end is tucked into the upper guide, aligned vertically and screwed to the PN profile using self-tapping screws.
The row posts and posts that form the base of the doorway are installed in the same way. The difference in their installation is as follows: the first, as a rule, follow a standard step of 400 or 600 mm (since the width of the plasterboard sheet is 1200 mm), and the second are installed directly on site and are tied to the width of the doorway.
Marking the axes of ordinary racks begins from the edge of the wall. From it to the center of the first rack (when aligning and installing them, the tail of the tape measure can be hooked onto the edge of the guide profile) and the central axes of other supports are set aside 600 mm. When the bevel of the outer sheet is cut, the distance to the first rack is reduced to 550 mm.
In case of increased load on the frame (when tiling a wall, hanging heavy cabinets, boilers, heating radiators on it), the distance between the racks is reduced to 400 mm, remaining a multiple of 1200 mm.
With the above steps of the frame racks, the plasterboard sheets are joined in the middle of the profile.
Door (window) opening
If the partition has a door, then a gap of the appropriate length is made in the lower guide. Then they proceed according to the following scheme:
- The racks adjacent to the doorway are aligned vertically using a level. They are attached with self-tapping screws to the frame guides and then reinforced with wooden beams.
Note! The distance between the posts forming the doorway should be 2 cm greater than the width of the frame.
- The upper jumper from the guide profile is installed. It should be located 1–1.5 cm above the future door structure.
- An additional vertical post, cut to size, is attached to the gypsum board joining line above the door.
The window opening in the partition is made in a similar way, only another horizontal lintel is added at the bottom.
USEFUL INFORMATION: Socket boxes for drywall: dimensions and installation
Ways to strengthen the frame
To strengthen the door frame, wooden blocks are placed inside the PS profile (with its front side facing the inside of the opening) or, as mentioned above, a UA profile is installed. The cross-section of the bars is selected according to the size of the profile to be strengthened.
To strengthen the structure of the partition, they resort to the following techniques: reduce the pitch between the racks (up to 400 mm), use wooden embedded bars (to strengthen the rack profile), and use a paired PS profile.
An additional profile installed inside or next to the rack also strengthens the partition structure. In places where attachments are attached, the frame is reinforced with embedded elements in the form of wooden blocks or pieces of plywood 2-3 cm thick, which are secured between the posts using crabs or half-crabs.
Pros and cons of plasterboard walls
The material is light in weight, flexible, elastic, and easy to handle during work. These properties allow you to create complex designs and transform the interior of a room beyond recognition, making it a unique feature of a private house or apartment. It can be used to build interior partitions of unusual shapes, make plasterboard walls separating one room from another, and create unique decorative designs.
A plasterboard wall usually has the following structure:
- Frame. For its installation, metal profiles or wood are used. Metal profiles, which are durable, can withstand high humidity, and resist mechanical damage, are becoming increasingly popular. To install drywall, a specially shaped metal profile is produced.
- Double-sided lining. Drywall sheets are attached on both sides. Since they are available in various modifications, when choosing, you should take into account the characteristics of the indoor climate. You can choose waterproof, fireproof or regular samples.
- Filling. To provide thermal insulation and noise protection, mineral or glass wool is placed between the sheets.
Advantages of installation
- Simple construction technology.
- Possibility of giving a complex shape (the material bends well if it is wetted with water).
- No expensive equipment required.
- Air ducts, electrical cables, and telephone wires can be located between the plasterboard sheets.
- The resulting surface does not require leveling.
- The surface can be covered with different types of materials: paint, wallpaper, tiles.
Among the disadvantages are
- With prolonged exposure to moisture, the material swells and the appearance deteriorates.
- Low resistance to mechanical stress. In the place where lighting equipment, shelves, etc. are fastened. additional reinforcement is needed.
- They do not withstand the installation of very heavy elements.
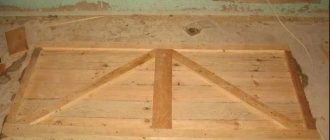
Making a doorway, installing crossbars
The upper part of the doorway is formed using a guide profile (PN). It is cut so that its design length is 30 cm greater than the width of the opening. Two marks are made on the outside of the resulting workpiece at a distance of 150 mm from the edge of the cross member.
Both marks should be visible on the sidewalls of the profile: it is along them that it is cut in the direction from the edges of the sidewalls to the mark on the bend of the profile. After which both edges of the profile are bent at right angles. The result is a U-shaped crossbar, which easily moves along the racks and is also easily screwed to them using self-tapping screws - “bugs”. See photo below:
Below are diagrams for installing the profile and sheathing with plasterboard sheets in the area of the doorway:
The joint of the drywall sheets should not touch the post to which the door frame is attached.
Horizontal cross members are made in the same way. They are used both to strengthen the frame and to join plasterboard sheets with a significant partition height. Therefore, for high walls it is recommended to make 2-3 rows of horizontal crossbars.
Please note that according to all the rules for fixing jumpers, the shanks of adjacent planks are bent in different directions (up/down), and the crossbars themselves are arranged in a checkerboard pattern (with a seam spacing of at least 40 mm). This is done so that the horizontal joints of adjacent sheets do not have overlaps or cross-shaped seams.
Drywall installation options
Drywall can be attached to the surface in three ways, depending on the evenness of the walls:
- On a frame made of standard galvanized profiles, which are an integral part of plasterboard systems. This option is different in that you can get a fairly smooth surface without any effort. A set of profiles, as well as fasteners for them, allows you to solve any problem by leveling walls of any curvature. As a rule, the use of plasterboard systems allows you to create a gap between the surface to be sewn and the plasterboard. Various communications and electrical wiring are located in this gap. In addition, insulation and sound insulation are installed in such a gap. If you do not fill this gap, then drywall conducts sounds perfectly. As a rule, they try to solve several problems at once, including problems with sound insulation due to the material used.
Frame made of profiles for plasterboard - On a frame made of wooden slats. The installation of such a frame is not much different from the installation of a frame made of metal profiles, and fasteners can be used from plasterboard systems or the slats can be attached directly to the wall. By using wooden slats, it is possible to minimize the loss of part of the living space, since wood, if necessary, can be cut down, which cannot be done with metal profiles. The main disadvantage is a fire hazard, so it is better to treat the frame with special fire-resistant compounds. In addition, it is necessary to use high-quality, dry material.
Frame for plasterboard made of timber - Installation of drywall without frame. This method is applicable if you need to get rid of minor irregularities. As a rule, installation is carried out using various adhesive mixtures or “liquid nails”. In this case, the glue is applied both to the surface of the drywall and to the surface of the wall, and not completely, but in the form of strips or fragments in a checkerboard pattern. If necessary, wide beacons are placed and drywall is attached to these beacons. This is the most effective option for leveling walls using plasterboard, as it allows you to maximize the area of living premises, although it is not always applicable.
We cover the walls with plasterboard: glue it with a special compound
Each installation method has its own advantages and disadvantages. The latter method allows you to solve the problem with minimal costs, especially usable space, which is very important. Unfortunately, this method is unacceptable if the curvature of the walls is large enough, which is found everywhere, especially in Soviet buildings. In this case, you have to mount the frame, taking away part of the usable area, despite the fact that every square centimeter counts.
After watching the video, you can learn how to glue drywall to walls.
Dot and Dab Plasterboard Drylining Plastering by Namis Development Ltd
Fasteners for the construction of plasterboard partitions
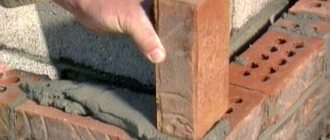
1) To fix the profile to concrete slabs and brick walls, quick installation dowels measuring 6x40-80 mm are used. They are screwed along the edges and placed at a distance of 40-50 mm from each other. Shorter analogues measuring 6x40 mm are used for fixing the profile to hollow slabs.
The same fastener, but with L = 60 mm, just as reliably attaches it to brick, and with L = 80 mm - to hollow brick and plastered walls. Nylon dowels of both are inserted into drilled holes (through the profile). Expansion nails are driven in using a hammer or hammer drill.
2) To assemble the frame, metal screws with a drill size of 13x3.5 mm (seeds) are suitable. It takes an average of 4 of these self-tapping screws to install one rack. If you want to save on fasteners, then choose short screws with a sharp rather than a drill tip.
Also, profiles can be connected using a cutter:
3) Larger hardware 3.5x25 mm with flat heads and fine thread pitch are suitable for fastening drywall to a finished metal frame. They are wrapped in the center of the panel and along its perimeter (at a distance of 10-12 mm from the edge). The caps are recessed into the sheet so that they do not break through the cardboard. An average of 60 to 70 screws are required per sheet.
Assembling a frame for a flat wall
Along the existing four lines you need to attach guide profiles. You can drill holes with a regular drill, but if you come across concrete, it will be difficult to do this without a hammer drill. Holes are made not only in the surface to which the guides will be attached, but also on the profiles themselves in this place.
The frame for a plasterboard wall consists of metal guides and parallel posts
After attaching the guides with dowels, we get a box into which the posts will be inserted. The interval between the attachment points is 60 cm. By analogy with the guides, the rack profile is pre-cut to the required length. The stand is inserted into the guide vertically, first the bottom, and then the top. In order for a self-created plasterboard wall to come out smooth, at each stage you need to carefully double-check everything using a level. The same applies to vertical racks.
The racks fit neatly into the guide due to the fact that the profiles are correctly sized. However, in order to achieve greater reliability, the profiles at the joints can be additionally secured using self-tapping screws.
Rack profiles are usually installed in increments of approximately 40-60 cm. When choosing a distance, it is worth considering the fact that the drywall should be laid with its edge on the center of the rack. So that the sheets do not need to be trimmed, you should select the optimal distance in advance. Installing plasterboard walls with your own hands is a troublesome task, so there is no need to complicate it with the additional need to trim sheets.
The width of a standard sheet of plasterboard is 1200 cm. They are installed vertically, which means the distance between the racks should be 40 or 60 cm. Then the sheets will be laid next to each other so that their edges do not hang in the air, but fall on the profile.
Sometimes the sheets are laid horizontally to reduce the load on the frame. In this case, it is better to install the racks in increments of 50 cm, because the length of the sheet will be 2.5 or 3 meters (the edge of the sheet will again fall on the rack).
The distance can be measured starting from the outermost guide profile, because it is quite securely attached to the wall. It is clear that the rack profile is installed with the back side facing out, because it is to it that the gypsum board will be attached. Just keep in mind that the entire sheet will lie on the outer profile, and not just to the middle.
Frame covering
For covering the frame, plasterboard sheets with a thickness of at least 12.5 mm with a side chamfer are suitable. The latter makes it possible to reinforce joints with self-adhesive sickle and fill them with high-strength putty.
By the presence of a bevel, as if by a marker, the front side of the sheet is determined. Each of them is screwed to three support posts: two at the edges and one in the center. In this case, the joints of the sheets pass in the middle of the profile. In wet rooms, moisture-resistant plasterboard (GKLV) is used instead of conventional panels.
You can learn more about the types and choice of drywall from another article.
If there is no factory chamfer, for example, when using drywall scraps, you must make the chamfer yourself using a construction knife and a special grater (plane):
When sheathing a partition with two layers of plasterboard, the sheets of the second row are shifted horizontally by a stud spacing, and vertically by at least 400 mm; a similar shift of sheets is also made when installing the first row of plasterboard, but on the reverse side of the structure.
Layout of plasterboard sheets for a two-layer partition sheathing
When installing a partition with a height of 3.0 m or less, as a rule, there are no horizontal joints of the sheets.
To create a gap at the floor, the sheets are supported on a temporary spacer 10 mm thick and secured with self-tapping screws.
By trimming the top edge, a gap is obtained at the ceiling (10 mm wide). Both gaps help protect the structure from premature destruction.
It is important to ensure that the beveled edges of the mounted sheets are located in the center of the racks, the shorter edges are located along the axis of the crossbars, and the sheathing seams do not meet at the corners of the door frame.
When fastening sheets of drywall with self-tapping screws, you should adhere to the following rules:
- The distance between the screws should not exceed 250 mm (but with two-layer sheathing for the first row, this value can be increased to 750 mm);
- The self-tapping screw must be screwed into the profile at a right angle;
- The screw head should be recessed into the gypsum board sheet by 1 mm and not tear the cardboard;
- The body of the self-tapping screw must enter the metal structure by at least 10 mm;
- The vertical displacement of screws on adjacent sheets must be at least 10 mm;
- When installing self-tapping screws, it is necessary to deviate at least 15 mm from the longitudinal edge of the sheet, and 10 mm from the end edge.
The photo above shows that the distance between the screws should be no more than 250 mm, and the offset of the screws on adjacent sheets should be no less than 10 mm
On the left is the correct position of the screw in the sheet of drywall, on the right is the incorrect position of the screw: a) the screw is twisted at an angle b) the screw is set too deep c) the screw is not set deep enough
The chamfers of the sheets are joined in the center of the racks, and the short edges of the panels are joined along the axis of the lintels. If the joints of the latter coincide, then the longitudinal line of the cross-shaped seam will become a source of crack formation. And no amount of finishing, even the highest quality, will help here. Therefore, they are joined with a seam spacing (with shifting) of at least 40 cm.
To cut a sheet of drywall, you need to lay it on a flat surface and use a pencil to mark it. A construction knife with replaceable blades is used to cut the top layer of cardboard. Then the sheet must be turned over and carefully broken along the cut line. Then the cardboard is cut through the second side of the sheet (photo below):
Immediately after covering the frame on one side, you can start drilling holes (Ø35 mm) in the profile posts. They will be useful for those who lay electrical cables inside the wall. To prevent the sharp edges of the slots from damaging the braid, they are bent, and the wiring itself is laid in a corrugation.
Also on the building materials market there is a profile with ready-made holes for laying communications.
Holes for sockets and switches are cut using round crowns. You can read more about this here.
Latest nuances
Finally, I would like to go over some points that can simplify the repair work.
If the chamfer from the sheet of drywall was not removed in advance, then this can be done locally. It can be easily removed with a wallpaper knife at an angle of 45 degrees.
You can save a lot if you purchase screws 25 mm long rather than 35 mm. According to the rules, after screwing, the self-tapping screw should protrude 1 cm from the reverse side, so many try to take 35 mm ones with a reserve, but this is not always justified. If the sheet thickness is 12.5 mm, then adding another 10 mm, by which the screw should protrude, we get 22.5 mm. The thickness of the profile is insignificant, so it can be ignored in the calculations.
The minimum thickness of a plasterboard wall is 4 centimeters. It is necessary to add the width of the guides (27 mm) to the thickness of the drywall (12.5 mm). If we are talking about a partition in a room, then you need to add another thickness of plasterboard, with which the wall is sheathed on both sides. The result will be 52 mm. When creating a frame near the wall, it is customary to retreat from it about 5 cm, so that it is convenient to work with the profiles. Otherwise, it will be difficult to even drill holes.
Soundproofing partition
Thermal insulation is placed in the space between the posts. Polystyrene foam, mineral wool, isover, and, in a humid environment, polystyrene foam act as filler and artificial barrier to acoustic waves.
They don’t forget about the metal frame, which is known to be a good conductor of sound. When connecting its parts, special polymer gaskets are used, and a sealing tape is glued under the guide profiles.
The filler is cut and tightly packed between the racks (this is done after covering the frame on one side, laying all communications, installing sockets and switches).
The thickness of the insulation is selected so that its surface does not protrude beyond the boundaries of the frame. Otherwise, you will definitely encounter violations of the geometry of the sheathing when the drywall bulges.
After laying the insulation, the second side of the partition is sewn.