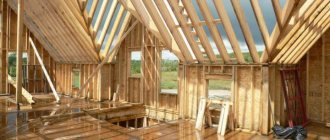
Front of work inside a timber house
The interior decoration of a timber house begins with drawing up a working plan and a diagram for installing finishing materials in the room. Depending on various factors and features of the house itself, the sequence of actions, the method of laying the cladding, and fastening methods may change, but there are a number of general rules that should be followed.
First of all, installation work begins with the floors. Most of the communication systems, insulation, sound insulation and similar installations take place in this place. During work, you also need to provide comfortable and convenient conditions. Having made the floor, the owners will be able to work comfortably throughout the entire room without worrying about where to put their foot so as not to twist it.
You can make a temporary covering if you have not yet installed insulation. In this case, it is important that the floor beam does not wobble or sag. You can secure it with nails in several places so that later it is convenient to dismantle the boards.
You should not attach the baseboard around the perimeter of the room if you have not yet finished laying the floors. Before the main installation work, interior doors are installed on the mills.
After the wooden floor is laid, it will be possible to treat the timber with special antiseptics, fire-resistant impregnations, and seal the joints and cracks. After the floor, the wall cladding is laid. Before attaching to the sheathing, you need to carefully measure all the dimensions of the parts so that there are no large gaps between the joints. At the final stage, the ceiling is installed.
Related article: What goes with purple color in the interior
If you have never done such work yourself before and want everything done quickly, then it is better to immediately turn to professionals. Of course, this is not a cheap service, but you can be sure that everything will be done correctly, in accordance with all technical standards.
If you want to do everything yourself, prepare the necessary tools and the appropriate amount of building material for your space. You need to choose the future design of the room in advance and think through all the interior details.
Cladding inside the house
Lining is a leader among finishing materials. It is used both inside and outside the house, only with different treatments (impregnations and paints are used for external or internal work). It comes in different types. It's not just about different types of wood or different board widths. There are also different profiles: smooth, wavy, imitating timber or log house. There are several options in the photo below.
The most popular types of lining for interior decoration of a wooden house inside
The interior decoration of a wooden house can also be made from lining with a non-standard profile
To decorate the inside of the house, use thin lining: 1.5-2 cm is enough. It costs less and will perform its functions. The slats can be placed horizontally, vertically, or at an angle. From combinations of all these directions you can get amazingly beautiful panels, but this is a labor-intensive task.
When nailing the sheathing or planks, you need to remember about the shrinkage of the log house and the ability of the wood to swell and shrink. Near the floor and ceiling, do not nail the trim and sheathing tightly; leave 2-4 cm to compensate for these expansions.
Both the walls and the ceiling are finished with lining. In both cases it looks more than decent, and such finishing is relatively inexpensive. It’s cheaper (and easier to do) to just cover it with plywood and stick wallpaper. This, by the way, is a popular option for decorating a country house inside an economy class home. With a sufficient level of execution, this method can be used to decorate premises not only in the dacha version. The only objection is the glue that is used to make plywood. But if you take it in emission class I (approved for use in children's institutions), then probably nothing terrible will happen.
Read how and with what to paint lining indoors here.
Mounting methods
Previously, they were not particularly worried and nailed the lining into the face (into the front surface) right through. At best, they used nails without heads or finishing nails (their heads are very small). Sometimes the caps were covered with wood putty and sanded, sometimes the screw holes were covered with pins. This is for the most fastidious and demanding of quality finishes.
Ways to fasten the lining
Today, even this method is considered not the most aesthetic: the traces can still be seen. To make sure nothing is visible, secret methods are used:
- nails or screws are driven at an angle into a tenon or groove;
- using clamps (clasps).
Both of these methods require patience and accuracy: thin, small nails are used, and they must be nailed in such a way as not to damage the front surface. To make it easier, you can hit not with nails, but with staples from a construction stapler. Staples are taken with a narrow back and long legs, made of stainless steel with sharpening. Although there are models of staplers that “shoot” nails with a very small head. For fastening the lining - just right. Self-tapping screws are also used. A comparison of the two methods is made in the video.
There is one caveat. If you bought the lining that was not chamber dried (its humidity is 7-8%), it will gradually dry out. Gaps will appear between the planks and you will either have to put up with them or re-nail all the planks. Sometimes two or three times. There is no way to avoid this. You can only choose a profile in which the cracks will be invisible (the “Softline” and “Standard” profiles in the figure in the previous section). In this regard, you need to think carefully about how best to secure the lining for the first time: it will have to be removed. Therefore, it is advisable to make it so that it is not difficult and so that it does not collapse. Here everyone decides for themselves: for some it is more convenient to work with self-tapping screws, for others with nails. Both methods are not ideal (it is difficult to pull out nails, and you need to drill a hole under the head of the screw), but both are acceptable.
Sometimes it becomes necessary to connect the lining to a wall made of logs. Difficulty may arise due to the fact that the wall has a non-linear shape. You can outline it using a small piece of lining, to which a simple pencil is attached. Having placed the plank and moving it along the wall with a piece of clapboard with a pencil, transfer the shape of the log onto the plank. By carefully cutting along the intended line, you can achieve an almost perfect match.
You might be interested in reading about how to lay laminate flooring.
Finishing features
The interior finishing of a timber house is made using the same materials as in other buildings. The work requires a careful approach from the owners if they want to do everything themselves.
There are some features that you need to know about in advance.
The most important factor is that after building a house made of wood, you must wait a certain time for shrinkage to take place. The initial shrinkage of profiled timber can take place in a month. For wooden structures, shrinkage is a very important factor, since for stone or brick buildings the coefficient is not so critical for further finishing work from the inside.
The degree of shrinkage depends on the climate in your region, humidity level, average temperature during the season, type of wood, its thickness and many other parameters. Depending on this, the time for the process can vary significantly - from 2 months to 3 years.
Secondary shrinkage is not critical, since this will have a slight effect on the height of the floor - up to 1% of the total height.
Required tools and materials
The selection of tools depends on the finishing material used. The standard list includes the following devices:
- jigsaw;
- drill with impact function or hammer drill (for brick and concrete walls);
- hammer, pliers;
- various screwdrivers;
- measuring tape, marker, leveling cord, plumb line;
- building level;
- square;
- stapler and staples;
- devices for smoothing wallpaper;
- spatulas, trowel and grater (if plaster or putty will be used);
- mallet (for laying laminate flooring).
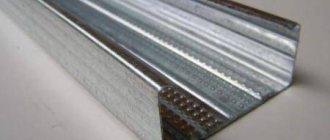
The required materials include insulation, vapor barrier film, and waterproofing. To fix wallpaper, laminate, parquet boards, a suitable glue is required. When preparing the base, a primer mixture and antiseptic compositions for wood are used. The sheathing is constructed from slats or aluminum profiles. Self-tapping screws and dowels are used as fasteners.
Selection of materials
For interior decoration, you can use quite a lot of different materials, which differ not only in cost, but also in ease of installation, appearance, thermal conductivity and other parameters.
Most often, lining and wall panels are used for interior decoration and cladding of a wooden house. This material is relatively inexpensive, easy to use, and lightweight. In addition, in specialized stores you can choose the shape, relief and even color scheme.
Related article: Paintings made from putty with your own hands - creating your own interior
Natural wood is much more expensive, but with proper processing and care it will last longer.
Wall panels for interior decoration
Decorating the inside of a wooden house with wall panels gives a completely different stylistic result. This finishing material is made from different materials with different textures:
- wood;
- bamboo;
- MDF (laminated and veneered);
- glass (smooth with photo printing, embossed, colored, transparent, matte);
- plastics and plastics;
- skin.
They come in typesetting or panel form. Stacked - long thin elements connected to each other according to the tongue-and-groove principle. Lining is essentially also wall panels. It’s just that it has long been used as an independent category of finishing materials. Panel wall panels differ in geometry - they have comparable length and width.
Everything is usually assembled onto a sheathing (like lining), the bars of which are filled taking into account the dimensions of the chosen finish. This material is loved by designers: the materials, texture and color solutions allow you to realize a variety of ideas. Such interior decoration of a wooden house can be very expensive - made of leather - or cheap - MDF panels. But the appearance is quite decent.
If, according to the technology, wall panels must be laid with glue (gypsum, for example), then backing boards - plywood, gypsum fiber board, etc. - are attached to the sheathing (you remember that in a wooden house it needs to be made floating). The slabs are installed on this substrate with glue. An example is shown in the video.
Read about the interior design features of a wooden house here.
Floor construction
To lay wood flooring on the floor, you need to make blanks and markings. Before starting installation work, you need to make sure that the subfloor is level and that heat and waterproofing do not interfere with the future flooring. All unnecessary elements are removed or hidden under wooden logs to avoid damage when attaching wooden boards.
Thermal insulation is a very important stage in the work. Until the installation of this element is completed, it is not advisable to secure the boards.
Laminate, parquet or planed tongue-and-groove lumber is usually used to finish the floor. Choose a material in accordance with the color scheme that will harmonize well with the walls and ceiling. When purchasing, pay attention to the markings (degree of thermal conductivity), which may indicate the special purpose of the boards for heated floors.
Popular materials
Finishing wall coverings are installed after installation of communication networks, as well as after insulation of the surface. You should choose a specific material only taking into account the following characteristics:
- available budget;
- building type;
- purpose of the room.
Such factors should be taken into account before you start decorating the walls.
You can decorate the walls in a private house with several materials. There are many popular options, each of which has many advantages. Most often, the following is used to decorate the walls of a building:
- tree;
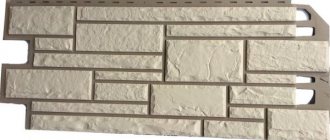
- PVC panels;
- wallpaper - you can save a lot of money on this material;
- ceramic tile;
- decorative plaster.
It is worth considering each material in more detail.
Wall decoration
If you decide to use natural wood boards for wall decoration, then you can use a special beam cutting machine to obtain blanks. You can decorate the inside of the house not only with timber, but also choose another material that will be in harmony with the floor and other elements in the room. For work, wood wall panels, lining, plaster, drywall and even paint are often used.
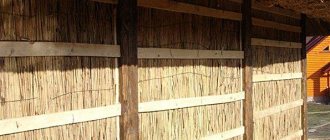
Typically, the walls are finished using a special wooden sheathing, to which the facing elements will be attached. This is a special supporting frame mounted on the wall. Drywall, lining or other materials are screwed to it. Calculate the power of the fastenings based on the weight of the finish.
Once you've finished laying the floor and walls, you can cut the baseboard to an angle and measure it before fixing it. It is important to do this after the walls are already ready. Otherwise, additional wall thickness will need to be cut off from the workpieces.
Related article: Comfortable do-it-yourself sofa back
Paint and varnish finishing materials
Paints and varnishes are one of the most popular building materials used to decorate the inside of a house. In addition to their decorative function, they protect external and internal structural elements from aggressive environmental influences. Depending on the composition, the material is used for both external and internal coatings.
Regardless of the type, the composition of the paint includes:
- Matrix binding component
– provides adhesion (adhesion) to the surface being treated. - Filler
– gives the paint the necessary consistency to form a layer. - Pigment
is a coloring element of natural (iron lead, ocher, umber) or synthetic (zinc white, chromium oxide) origin. - Additional additives
(plasticizers, solvents) - individual for each type, are responsible for the technical and operational characteristics of the paint.
The main criterion for choosing paint or varnish is the binding component. Each type of binder forms its own group of paints and varnishes, determining its purpose and popularity.
- Water-based paint
is the most popular and widely used in construction. It is odorless, environmentally friendly, dries quickly enough, ideal for interior decoration. - Water-dispersion paint.
The main binding element is synthetic polymers. Working with this group will not bring any inconvenience, since the paint is odorless and can be brought to the required consistency with ordinary water. After hardening, it forms a waterproof and fireproof coating. - Oil paint.
The binder is drying oil. The chemical reaction of drying oil hardening occurs due to the oxidation of the substance with oxygen from the atmospheric air. To speed up the process, drier catalysts are added to the oil paint. The same drying oil is used as a thinner to give the required consistency. - Enamel paint
is a mixture of varnish and dry pigments. For repair work, alkyd and nitro-enamel paints are used. They are brought to the required concentration with white spirit or turpentine, so they have a persistent, pungent odor. A day or two after applying the paint, the surface is ready for further use. Nitroenamel dries within an hour, forming a smooth, mirror-like surface effect. But this advantage is annulled by certain disadvantages - toxicity and fire hazard. They are rarely used in the interior finishing process. - Varnish.
Varnishes contain synthetic or natural resins and organic solvents. After complete drying, the varnish gives a fairly wear-resistant transparent or matte film on the surface. The presence of an organic solvent in the composition makes the varnish a toxic and fire-hazardous building material. Work with varnish at enterprises takes place in special chambers with good exhaust ventilation. At home, in the absence of large amounts of work, it is advisable to apply varnish outdoors. If surface varnishing takes place inside the house, it is necessary to ensure ventilation of the room. Under no circumstances should explosive solvent vapors be allowed to accumulate in a small area.
Note! The interior decoration of a private house involves the use of environmentally friendly water-based paints - water-based and water-dispersed.
Water-dispersion paint
Working with water-based paints is not difficult, since they adhere well to almost any material, but the quality of painting depends on the degree of preparation of the surface.
- We carefully clean the base from dust and, of course, from traces of oil or soot.
- We treat the surface with a primer. The primer not only increases adhesion, it prevents paint from being absorbed into the pores of the base material, making it possible to achieve full-quality painting using fewer layers.
- Apply paint with a roller or brush, distributing it evenly over the surface of the base. Depending on the composition and consistency of the paint, 2-3 layers are required. Each subsequent layer is applied after the previous one has completely dried.
Ceiling finishing
It is advisable to stylize the ceiling as a beam, rather than attach it to its natural size. Nowadays it is very popular to decorate the ceiling with beams made of wood, polyurethane or polystyrene, especially if the home is decorated in Provence, country and loft styles. There are also natural beam floors, and not their imitation, which can be successfully used when finishing a house made of timber with your own hands. If these stylistic options do not suit you, and you want to hide the floor supports, and the house has not undergone final shrinkage, it is better to give preference to a tension or plasterboard structure that does not interfere with the shrinkage process and does not deform during this period.
In the bathroom or kitchen, air humidity is high, and the wood of the floors needs additional protection. PVC film suspended ceilings can best cope with this task.
The selection of texture and color is determined by the overall design style of this room. The choice of films for ceilings is huge and allows you to harmoniously fit them into almost any interior.
Types and composition of plaster: choosing the material
In addition to leveling the surface, plaster, as a building material, performs protective and decorative functions. In work processes, there is often a need to maintain cleanliness, and the flat and smooth surface of a plastered wall with minimal dust formation fits well with sanitary requirements and standards.
Plastering has a long history. In the southern regions, in desert and semi-desert climatic zones, where there is almost no forest area, houses were built from clay and plastered with clay. Clay plaster - a mixture of clay, sand and fine straw - held the masonry together and served as protection from external factors. For interior decoration, horse manure was added to this plaster for reinforcement and insulation. Now this finishing method has been forgotten, although, in fact, it is the most environmentally friendly plaster, consisting of natural ingredients.
According to the technology of execution, plaster is divided into two types:
- monolithic (wet) plaster – plastering with a mixture of various water-based components;
- dry plaster – installation of ready-made sheets or slabs.
Wet (monolithic) plaster
The main advantage of wet plaster is its versatility, since it is used to level almost any surface. Regardless of the type of wet plaster, the principle of its application is practically the same. Another significant “plus” is time-tested durability. The disadvantage of working with types of plaster is the length of the process, increased humidity in the room during work, and an increase in the weight of the structure being leveled.
Water-based plaster mixture has two varieties - ordinary plaster and decorative.
- Ordinary plaster
is used to provide a smooth and even base for applying the finishing layer - painting, wallpapering, laying tiles or installing decorative plaster. Depending on the type of the main binding element, the leveling mixture can be cement, gypsum or lime. - Decorative plaster
is used to give a surface a decorative appearance and is considered a finishing coating. The composition of the material and the technology of the work suggest many options for textures and colors, which are limited only by your imagination.
Application of decorative plaster
In addition to the common types - colored, stone, terrazite, Venetian and artistic (sgraffito) - decorative plasters include liquid wallpaper. Liquid wallpaper is a mixture consisting of natural, environmentally friendly components: silk, cotton fibers and cellulose. The mixture is applied in a thin layer of 1-2 mm and is ready for use in at least a day.
To better understand the plastering process, let's look at all the stages:
- Surface preparation. The base for plaster must be cleaned of dust and primed to improve adhesion (adhesion of materials).
- To facilitate and speed up the work, we place plaster beacons in the same plane and level (maintain a strict vertical) - these can be either metal or wooden guides. Beacons are not installed under decorative plaster. The base is pre-leveled with ordinary cement or gypsum plaster.
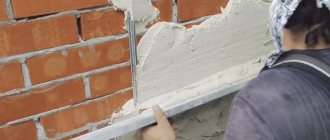
- Using a construction ladle or trowel, apply cement mortar to the wall and level it using a flat aluminum or wooden lath. Gypsum putty is more viscous, so it is applied to the wall with a spatula.
- As the plaster dries, it is advisable to remove the beacons, and seal the grooves formed during removal with a solution of identical composition.
Note! Before plastering with cement mortar, it is enough to wet the wall with water. It cannot be treated with a primer - cement, not having adhesive properties, will settle on the film created by the primer. Over time, the plaster may peel off from the base.
When decorating the interior of a wooden house, cement plaster is almost never used. Lime and gypsum plaster are applied to the wall only after special preparation, which consists of constructing a mesh frame of thin wooden strips - shingles. Modern materials have replaced this technology from the finishing process, leaving it to lovers of antiquity and fans of environmentally friendly construction.
Wall alignment
Dry plaster: advantages and disadvantages
Already in the middle of the last century, the use of dry plaster was practiced on construction sites in the USSR. The interior finishing technology of that time involved the use of two types of material - uncoated molded gypsum fiber and gypsum covered with cardboard. Today, a second version of dry plaster – plasterboard – has become widespread in construction work.
Drywall consists of two layers of thick paper and one layer of gypsum (paper + gypsum + paper). To give the material certain qualities - fire resistance and moisture resistance - special polymer additives are introduced into the gypsum mixture.
The name “dry plaster” implies an alternative to the classic “wet” plaster. The properties of the material make it possible to use drywall where the use of the wet method is impractical in terms of time and costs or is structurally undesirable (interior decoration of a wooden house).
Drywall or dry sheet plaster, like most building materials, has more positive qualities than negative ones.
- Versatility.
Indoors, plasterboard can be used as you like and anywhere: regular - in living rooms; fire-resistant - in kitchens, in fireplace linings; moisture resistant – in showers and bathrooms. - Easy installation.
Almost anyone can assemble the structure or level the walls and ceiling if desired. - Economical.
A wall or plasterboard structure is already a plastered surface. After a little preliminary preparation (sealing seams, priming), the drywall is ready for finishing, wallpapering, painting, etc. This saves money and working time. - Environmental friendliness.
The bulk of drywall consists of natural components - paper and gypsum. The structure of the material allows the walls to “breathe”.
Let's add a fly in the ointment to the barrel of positive qualities of dry plaster. Drywall is not resistant to moisture, but this can be combated by simply covering the surface with a waterproof material, such as tiles. In bathroom decoration, this technical solution is used quite often.
Drywall in the bathroom
Video "Appearance"
In the video you will see what the interior decoration looks like.
The best posts
- Plastic drainage trays: with steel, cast iron grating, price
- How to heat cast iron cookware and prepare it for use
- How to stick photo wallpaper on a wall with wallpaper: materials, tools, sequence of work
- Attaching a profile for drywall - methods and their nuances
- How to make the ceiling of the first (1) floor with your own hands
- Drip irrigation systems: manufacturers, equipment, reviews
- Wire weaving for beginners: working with bead patterns for children
- Kitchen wall panels for apron: PVC, photo, plastic, decorative, MDF, how to attach, video
Rolled finishing materials
Roll materials are one of the most common types of building materials for interior decoration. The lion's share of all rolled materials offered on the construction market is occupied by wallpaper. A large selection of textures and colors can satisfy the most sophisticated requirements.
- Paper wallpaper
is widely used in the decoration of residential premises. Environmentally friendly, do not disturb the heat and air exchange in the room. Can be used almost anywhere, except in rooms with high humidity and the possibility of contamination. Thin single-layer paper wallpaper has been replaced by multi-layer wallpaper on a non-woven basis. Possessing all the positive qualities of its predecessors, non-woven wallpaper, due to its thickness, hides minor defects in the surface of a wall or ceiling and does not require careful preparation or an additional intermediate layer. The interior decoration of a frame house involves gluing thick wallpaper directly onto a wall made of OSB boards or plywood (only joints and seams are processed). - Washable (moisture-resistant) wallpaper
differs from paper wallpaper in its outer coating, which is easy to clean. It is not recommended for use in bedrooms due to fire hazard and poor ventilation, but for decorating a hallway, kitchen or bathroom it is just what you need. - Cork wallpaper.
The basis of cork wallpaper is paper onto which a thin (no more than 1 mm) cork veneer is glued. The extraordinary appearance, good sound insulation, environmental friendliness (only natural materials are used), and ease of maintenance make us turn a blind eye to the relatively high price. - Natural wallpaper
is made from plant material - bamboo, reed and grass. The high cost of wallpaper is fully compensated by its original appearance, environmental friendliness and all the advantages of natural materials.
In addition to wallpaper, polyvinyl chloride decorative finishing films (self-adhesive) are used in interior design. The material is of fairly high quality, is not afraid of moisture, is easy to clean, although it itself is resistant to pollution, it is completely breathable. Recommended for use in technical rooms (bathroom, pantry). In living rooms, PVC film should be used in fragments, as a decorative element.
Varieties of PVC film include roll coatings with a voluminous texture - vinisten and foam film. This material is obtained by applying PVC mass to a base of thick paper, followed by foaming. During the foaming process, a texture is set - it can be a simple geometric pattern made up of three-dimensional figures, or it can be an imitation of brick or stone masonry. The peak of popularity of foam film occurred in the 80s of the last century. At that time, almost half of the hallways and corridors in the USSR were covered with it.
Wallpapering
Possible material options
Let's look at a few.
Wooden lining
The most popular material for finishing the interior of a summer house.
Advantages : environmental friendliness, ease of installation, thermal insulation, aesthetic appearance.
Disadvantages : high cost, fire hazard.
Wooden lining, OSB panels, Block house
The price depends on the tree, variety and size. The cheapest option: spruce-pine, calm - 170-230 rubles/m².
OSB boards
More budget-friendly, from waste from the woodworking industry.
Advantages : good vapor permeability, moisture resistance, resists wall shrinkage, easy to install.
Disadvantages : contains formaldehyde, when cut it forms fine dust, so it must be installed in a respirator, it burns.
The average price is 150 rubles/m².
Block house
Suitable for use in unheated rooms.
Advantages : environmental friendliness, aesthetic appearance, average cost.
Disadvantages : difficult installation.
Plastic lining
Budget replacement of wooden lining.
Advantages : moisture resistance, practicality, ease of installation, does not require additional finishing, low cost.
Disadvantages : cheap materials do not look beautiful.
Until now, they are used only for finishing bathroom units. The price range is wide. Depends on the class, size, manufacturer, decorative coating and a number of other parameters.
Domestic and Chinese manufacturers of economy class PVC panels will cost up to 150 rubles per piece. Imported premium class - from 220 rubles and above.
Plastic lining, Drywall, Plywood
Drywall
This material will allow you to properly trim the walls and install thermal insulation.
Advantages : speed and ease of installation, masking of wiring and various communications, the ability to implement various design solutions.
Disadvantages : reduces usable area, unstable to mechanical stress, need for putty, low vapor permeability.
The cost of the material depends on the manufacturer, size, fire and moisture resistant properties. Thus, simple sheets of domestically produced drywall can be bought for 150 rubles. But if you take into account the quality, the price is cheaper than 300 rubles, should alert you. In addition, profiles and finishing must be included in the price.
Plywood
Budget option for summer cottages.
Advantages : water resistance, environmental friendliness, aesthetic appearance; easy installation.
The average cost of moisture resistant is 150 rubles/m².
