- How to build a utility block with your own hands from different materials
- How to build a utility block: choosing a place to build a shed on a summer cottage
- How to build a utility block: material for building a shed
- Do-it-yourself wooden utility block: step-by-step construction instructions
- How to build a utility block with your own hands: necessary materials and tools
- How to make a foundation for a utility block with your own hands
- Do-it-yourself utility block: laying logs and installing floorboards
- How to make a frame for a change house with your own hands
- What material to choose for the roof of a household shed
- How to sheathe the structure of a utility block
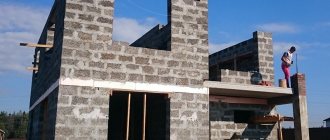
- How to build a capital utility block from foam blocks
- Foundation for a shed made of foam blocks
- Constructing walls from foam blocks with your own hands
- How to make a roof for a cabin out of foam block
- Insulation and finishing of a utility block made of foam blocks
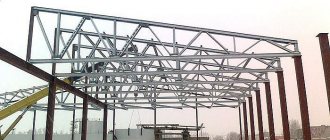
- How to build a shed from corrugated sheets: structural features
- Ready-made outbuildings for a summer residence: advantages and disadvantages
- Drawings of utility units for self-construction
- Video: how to make a utility block with your own hands
How to build a utility block with your own hands from different materials
The presence of various outbuildings on the site provides convenient storage of firewood, gardening and gardening equipment, and various tools. It is quite possible to build a high-quality and reliable shed with your own hands if you decide step by step what materials it will be built from and what requirements it must meet. Using detailed descriptions of different types of raw materials, and knowing their characteristics, you can easily select the optimal building materials for the job. In this article we will talk in detail about how to build a utility block with your own hands. What materials are more profitable to build from, and what requirements should it meet? In the text you will find step-by-step instructions telling you how to build a shed from wood, foam block, or metal. We recommend paying special attention to the interior and arrangement of the utility unit according to its purpose.
How to build a utility block with your own hands.
Stage 3: choosing a location
Layout of a summer cottage
Definitely, to build a utility unit on your own, you will not need any special cash deposits. But be prepared for the fact that the construction process will take up your time and effort. To get the job done faster, ask your household or neighbors for help. However, just before construction, you need to choose where to place the shed so that it is convenient and meets the requirements. Construction norms and rules (SNiP) in paragraph 02.30.97 state that:
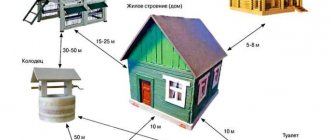
- if the utility block will contain pets, birds, or will serve as a latrine, it must be placed at a distance of 12 m from the walls of a residential building and 4 m from the border of the neighbors’ property;
- if it will be used as a shower stall, it must be placed at a distance of 8 m from a residential building and 1 m from the border of the neighbors' property.
If you neglect these requirements, you may have serious problems when you want to sell your land. In this case, the state will refuse to formalize a sale transaction with buildings until their placement complies with the standards that apply on the territory of the Russian Federation.
Having chosen the optimal location, we smoothly moved on to the main question of how to build a utility block in the country. Let's find out.
How to build a utility block: choosing a place to build a shed on a summer cottage
Determining the location of the utility unit must take into account sanitary and construction standards. Therefore, it is simply impossible to do without taking into account the plan of the land plot and drawing up an accurate drawing.
Before building a shed, you need to consider the following requirements:
- The distance from a residential building to a poultry house or livestock facility must be more than 12 m.
- But at the same time, if the owner. If the building has an adjacent (adjacent) wall to the house, the distance between their entrance doors should be at least 7 m.
- The distance from the fence to the barn with equipment should be more than 1 m, from the fence to the poultry house, pigsty - at least 4 meters.
- Water drainage from the roof should be directed onto the owner's property, and not onto a neighbor's property or onto a walkway (path) between neighboring properties.
On a note! Be sure to make a path from the house to the barn, which will ensure ease of movement. It would also be useful to have good lighting for the barn, regardless of the specifics of its operation.
Multifunctional wooden shed - choosing a location and purpose
The standard direction when choosing a location for a shed is a shaded area where nothing grows. However, we will not give such advice - there are different types of sheds. In a shaded corner away from the main entrance and prying eyes, you can build a utility room with your own hands to store gardening tools, building materials and other things that may be needed once a season, or even every few years.
Shaded area for construction
However, running to the farthest corner of the site in winter for firewood is not the best idea. Therefore, it is better to build a shed made of timber for storing firewood closer to the house. In this case, you will have to take serious care of its appearance, but the costs are justified - together with the woodpile, you can build a small summer house or a modest gazebo made of wood. In addition, in such a building you can safely store expensive machinery and equipment for which there is no place in the house - it will be easier to protect them next to the main entrance.
Timber shed for storing firewood
The barn can and should be built on the sunny side, in a well-lit place if you plan to use the building as a greenhouse. Of course, this requires some changes in the standard frame structure - windows on the south side, racks for pots with seedlings, a stove for heating. In such a room you can start your own greenhouse, grow garden seedlings, store equipment and even vegetables. So with a place for a shed, not everything is so simple - it all depends on your intentions!
How to build a utility block: material for building a shed
The selection of materials for the construction of a shed should be based on their practicality, durability, thermal conductivity and cost. The most popular solutions include:
- brick;
- cinder block.
They guarantee the reliability and durability of the building, but require large expenditures and the construction of a solid foundation.
Wooden frames are easy to construct and, if properly treated, can last for many years. At the same time, a wooden frame can be sheathed not only with wood, but also with metal.
Foam block, unlike brick, is easy to transport and use (which significantly reduces costs). Allows you to build a warm utility unit, but requires proper protection from moisture.
Metal structures guarantee quick assembly of the shed, are easy to maintain, and durable. True, they need additional insulation.
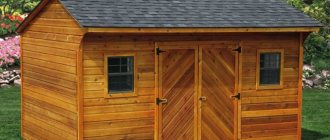
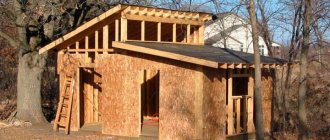
Do-it-yourself wooden utility block: step-by-step construction instructions
Since the most common type of shed is a structure with a wooden frame, it can be considered one of the best. The availability of materials makes it easy to build a reliable structure with your own hands. In addition, a wooden shed (even with metal cladding) does not require a solid foundation. This feature allows you to save both time and money on the construction of the facility.
On a note! To guarantee the long service life of the structure, it is necessary to initially prepare the wood and treat it with an antiseptic. Additionally, it is recommended to treat with fire-resistant impregnation. Such compositions will eliminate the danger of the wooden frame burning in a force majeure situation.
You can build a utility block at your dacha with your own hands from all available and inexpensive materials.
It is also worth taking care of proper ventilation. This will ensure good preservation of the tree. Below we will look at all the stages of constructing such a shed for storing tools and gardening equipment.
How to build a utility block with your own hands: necessary materials and tools
Mandatory materials for creating a reliable foundation for any building are crushed stone, sand and cement. Additionally, asbestos pipes and reinforcement or brick are used for the foundation. To build the harness and erect the frame, you will need a beam with a cross-section of at least 10x10 cm (for a solid construction, it is recommended to choose a beam with a cross-section of 15x15 or 20x20 cm).
A floor or terrace board with a thickness of about 2-3 cm is suitable as a floor covering. The frame can be covered with a profiled sheet or wood materials: boards, slabs. Sheathing can also be done with clapboard. To work, you will need a chainsaw or circular saw (for fitting materials), a screwdriver and wood screws. To process wood, antiseptic and fireproof impregnation is necessary.
Which antiseptic is better: (read more)
Construction of a frame shed
The most profitable in terms of financial and time costs is a frame shed. This building is suitable for storing solid fuel and garden tools. Such a shed is extremely easy to build; if you do everything correctly and use high-quality materials, it will last at least 10-20 years.
The frame of the building itself can be made of timber or square metal pipes. Suitable wall cladding:
- Board;
- OSB (oriented strand board);
- Wall or universal profiled sheet.
An important stage in the construction of a frame shed is design. It is necessary to determine in advance where the windows and doors will be located, and what size openings to make for them.
The floor and ceiling of the barn can be made of boards or OSB. Any roofing materials are suitable for the roof. But since the structure is light, it is better to give preference to the same lightweight options: roofing felt, ondulin or corrugated sheets.
Foundation preparation
Even such a simple structure requires a reliable foundation. Otherwise, ground movement will quickly lead to disruption of the geometry of the structure and distortion. The best option is a columnar foundation. You can make it tape or from the same foam blocks.
If there is no time to prepare the foundation, you can replace it with pillars dug to a depth of 60-80 cm.
The principle of laying the foundation is similar to that described above.
Strapping and erection of frame
It is more convenient to start construction by arranging a site that will serve as a floor and foundation for the construction of walls. The lower trim should be made of 150x150 mm timber, treated with an antiseptic. The foundation must first be covered with roofing felt to protect the structure from moisture.
The strapping bars can be joined end-to-end and secured with metal corners, or in half a tree. In the second case, the joints must be secured with nails or studs.
The floor joists are attached to the frame with special brackets or corners. To do this, 50-60 mm boards are placed on edge and fixed with self-tapping screws onto the beams in increments of no more than 60 cm. The location of the joists must be aligned along the upper edge of the trim so that when laying the floor the surface is level.
The next stage is installation of the floor. It can be fixed with self-tapping screws or nails. It is important to ensure that there are no gaps, and that the outer contours of the floorboard or OSB coincide with the bottom trim.
Then the racks are mounted at the corners of the base and secured with the top trim. To make your work easier when building a pitched roof, the racks can be immediately adjusted to size, two of them should be 50-80 cm higher. For a gable roof, all racks must be made the same. Next, additional supports are installed along the perimeter of the walls every 50 cm and openings are formed for windows and doors.
Roof construction
It is advisable to erect a shed roof for a barn - it is quick and economical. Moreover, the attic in such small buildings is rarely used.
If the top frame is at an angle, then the rafters from the boards can be laid directly on it, turning them on the edge. The distance between them should be no more than 50 cm so that the roof can withstand a large snow load.
Plank sheathing is laid on the rafter system. The pitch depends on the roofing material. Under roofing felt, the sheathing must be continuous; under ondulin, boards can be laid at a distance of no more than 40 cm; under corrugated sheeting, a step of 60 cm is acceptable.
Wall cladding and installation of doors and windows
You can cover the walls with OSB or boards (edged and unedged). The slabs and edged boards are laid end-to-end and secured with self-tapping screws or nails. Unedged lumber is mounted with an overlap so that there are no gaps between the boards.
It is better to use ready-made windows, since their manufacture requires the skills of a carpenter. The door can also be custom made from wood, metal or plastic, or cut from OSB board and reinforced with bars.
All stages of the construction of a frame shed can be clearly studied in the presented video.
How to make a foundation for a utility block with your own hands
The most suitable type of foundation for a frame shed will be a columnar one. Its elements should be located at every corner of the building. Also, auxiliary pillars are located at a distance of 0.5 m from each other under the future walls of the building.
Note! A small frame-type wood shed is lightweight, so it can actually be built without a solid foundation. But at the same time, the distance from the ground to the object itself should be about 20-40 cm. This requirement is based on the need to prevent contact of the tree with the ground and increase the shelf life of the wood.
You can build a columnar foundation using one of the following technologies:
Columnar foundation made of brick. Holes are dug about 90 cm deep. A cushion of crushed stone and sand is laid at the bottom. Columns are built on top of bricks using concrete mortar. If the central part of the pillars remains hollow (with special brick laying), then it is filled with concrete.
Columnar foundation made of asbestos pipes. A hole 1 m deep is dug under each pipe.
A cushion of crushed stone and sand is laid. Fittings are installed inside the pipes and concrete is poured. The outer part of the pipe, rising above the ground, is covered with mastic or bitumen.
Exterior finishing options
Exterior finishing can be done in several ways. To choose the appropriate option, it is worth considering all possible options.
Siding
Do-it-yourself exterior siding has pitfalls when you start covering a door with this material (this applies to the one that opens outward). We should not forget that the fastening itself on which the siding is mounted and the thickness (so that the door opens normally) are taken into account.
When installing siding, you need to take into account the following factors:
- Installation must be carried out in a certain sequence. First, the installation of the initial strip, platbands for openings, and installation of corners is carried out. Then the finishing strips are installed.
- The siding is fastened to the lathing in increments of 30-50 cm, which ensures air flow to the facade.
- Installation of this finishing material is carried out from the bottom to the top. The starting bar begins and the installation is carried out to the final one.
During installation, the change in siding dimensions when the ambient temperature changes is also taken into account. The panels will expand and contract by approximately 6mm.
Profiled sheet
To build a utility block with your own hands, you do not need to spend money on bricks or blocks. There is no need to build a foundation if such structures are made from profile sheets.
Condensation may accumulate on the ceiling of such a structure and drip onto your head. To prevent this from happening, it is necessary to lay a layer of waterproofing material that will drain condensation.
How to do it yourself? The film for waterproofing is attached with double-sided tape. Start laying the material from the bottom and move upward. The overlap between the strips is 10 cm.
After this, the profiled sheets are mounted on the walls. Upon completion of the installation work, the inside of the shed is covered with insulation, which is used as mineral wool. Internal cladding is carried out using lining made of wood or plastic.
When sheathing the walls, you need to levelly install the first sheet, which will guide the rest, installing them in a wave and screwing them to the base with self-tapping screws. The number of screws per sheet averages 20 pieces.
Tree
The outer part of the shed can be sheathed with wood boards similar to brickwork. To avoid gaps, another board is placed in place of the gap. The sheathing is done end-to-end. You can do this with an overlap, but with this method the material consumption increases.
When covering a shed with slate, the installation is carried out in the same way as when closing the roof. There is an option to cover the shed with boards, starting from the bottom. Slate is attached in the upper part, lumber is attached in the lower part.
A lining is made on the ceiling, which is filled with the same material. A sheathing of boards is made over the rafters, roofing felt is laid on it, it is nailed down using wooden slats at intervals of 0.5 m. The lower part of the structure can be lined with slate, which will protect against rodents and small predators.
Soil is poured onto the lower part of the barn as insulation, the layer of which should be 10 cm less than the main floor. Then a clay solution is laid and it is compacted.
The door is made using a board, knocking it down diagonally. Between the boards, a layer of material is made, for which roofing felt is used, this way they retain heat. Knowing how to properly build a utility block yourself, you can build a good-quality shed with your own hands.
Post Views: View statistics 173
Do-it-yourself utility block: laying logs and installing floorboards
The construction of a reliable and durable wooden frame begins with the impregnation of all wood building materials with antiseptic and fire-retardant impregnations.
Columnar foundation for a country house.
Afterwards you can proceed to the actual assembly of the wooden floor:
- The foundation pillars are covered with roofing felt. Timber is laid around the perimeter of the future barn. In the corners, elements can be connected with staples, bolts, or in a groove (additionally fixed with nails).
- Logs are installed inside the lower trim - transverse boards placed edge up. They are attached to the harness with staples and additionally secured with nails. The step between the lags will be 20-30 cm.
- An OSB board or plywood is nailed on top of the joists (this step can be skipped for woodburners). The task of auxiliary materials is to achieve maximum reliability of the floor.
- A floor board about 2 cm thick is nailed on top of the “rough” floor.
We are building a frame - what materials are needed?
Building a good shed with your own hands begins with the purchase of building materials. In order for the frame to be strong and reliable, you need a good 100*100 mm timber - dried, without rot or cracks. In any case, all material must be impregnated with an antiseptic and fire retardant - the first protects against fungus, the second composition prevents fire. If the manufacturer did not do this, then do it yourself. It is advisable that the length of the beam corresponds to the long side of the shed - in this case, you will not have to make the lower frame from pieces, and the room will be stronger.
By the way, if the timber will be stored at a construction site for some time, provide reliable protection from getting wet. At the same time, it is important to ensure good ventilation - if you cover the material with a thick film on all sides, moisture from the wood and soil will serve as an excellent base for fungus. Wood darkened by dampness will have to be urgently saved with a special bleach - it not only returns the material to its original appearance, but also destroys the pathogen.
Special bleach for wood
The beams of the lower trim are laid on posts, having first made an L-shaped cut with your own hands. For fastening, they also use reinforcement rods protruding from the posts - holes are made in the beams with a drill at the desired point and they are driven onto the pins. Thanks to the cut, the beams from different sides are securely joined to each other, and are additionally secured with self-tapping screws and metal corners. If the width of the barn exceeds 2 meters, then another beam is laid in the center of the floor, the ends of which stand on posts and are joined thanks to an L-shaped cut.
Logs are laid on the bottom frame - 100*50 mm boards on which the floor will be supported. The logs are laid on edge; it is desirable that they be installed on the beams, although some builders deliberately make them shorter with their own hands and fasten them with corners and self-tapping screws, installing them between the beams. This way the floor will be slightly lower.
Laying joists on the bottom frame
Next, the corner posts are installed - for convenience, they are secured with temporary jibs made from ordinary boards and slats that are on hand. The racks are aligned with a plumb line or level - it is very important that they stand to the bars of the lower frame strictly at an angle of 90°. The racks can also be strengthened from below with metal corners and self-tapping screws, although professionals recommend using strictly wooden pins - dowels. In truth, self-tapping screws and angles are no worse, especially in the hands of novice builders and you can find them in any store. With their help, you can even adjust the angle of the beam and secure it so that it does not move even from a strong wind. But you need to know how to handle the dowel, and you won’t find ready-made fasteners in every store.
The intermediate posts are installed using the same principle - we adjust the angle, adjust and secure. Don’t skimp on temporary cuts - they will be removed later. The distance between the posts is about one and a half meters. For the convenience of further work, you can lay out the boards for the subfloor on the joists - there is no need to fasten them, and it will become much easier to move.
How to make a frame for a change house with your own hands
The frame for each wall is made separately, taking into account the location of the windows and doors. Vertical supports at a distance of 60 cm are nailed perpendicularly to a separate board (bottom frame). At the top, the vertical supports are cut at an angle to secure the top frame under the pitched roof.
To construct a window, a pair of horizontal boards are nailed between adjacent vertical supports. The window frame will be located between them. After assembling each wall, the blanks are placed strictly along the edge of the previously assembled floor and nailed to it. Additionally, adjacent walls are fastened using staples.
On a note! For vertical supports and “limiters” of the window, you can use a board with dimensions of 10x5 cm. But for arranging a doorway and trim, it is better to use boards 15x5 cm.
We build a barn with a pitched roof with our own hands
You can calculate the amount of material needed for the frame and pitched roof. To build a 3x6 shed, six-meter boards are used:
- For the frame, material with a cross section of 50x150mm - 14 pcs., 25x100 - 23 pcs., 50x100 - 19 pcs.;
- For the floor, boards measuring 25x100 mm - 27 pcs.;
- For the sheathing and roof supports, 43 boards with a section of 25x100 mm are required.
All joints and connections are made with black carpentry screws 50 mm, 70 mm and 110 mm. To reduce the cost of construction, you can use ordinary nails and construction angles, but such savings are not always justified.
Making a foundation for a 3x6 shed
After choosing a site for building a shed, you will need to plan and remove soil on an area of at least 3x6 m in size. It makes no sense to make a larger building area. To prevent vegetation from pestering you, the cleared space can be covered with salt and sand.
After marking the location of the supports, at the installation points of the pillars we dig 12 holes, 15 cm deep and the size of a standard cinder block. At the bottom of the mini-pits we pour a 5 cm layer of a mixture of crushed stone and sand, after which we lay out columnar supports from cinder blocks using masonry mortar with the addition of PVA.
Before laying out, you will need to pull horizontal cords, along which you can control the height of each support, so that the entire supporting surface of the pillars is in the same horizontal plane.
After a day, you can install the strapping beam. All corner joints and T-shaped mortises are made with the ends “half-timbered”, each connection is reinforced with self-tapping screws screwed into the beam at different angles.
Assembling the frame and pitched roof
At the next stage, you will need to install load-bearing vertical posts; they are highlighted in orange in the drawing. Next, we sew up the floor and lay the rafters of the pitched roof.
We make the central load-bearing racks from 50x100 boards, for the rear wall you will need to cut three 220 mm racks, for the front wall - four 250 mm racks. We first fix each support on the lower frame with one self-tapping screw, then set the exact horizontal position according to the building level and additionally fasten it with small half-meter struts, as in the photo.
After all the racks are installed, we strengthen them with additional temporary struts and tie the upper tier of the frame under the future pitched roof. To give the entire structure of the barn additional rigidity, before assembling the elements of the pitched roof, it is necessary to cover the floor with a tongue-and-groove board.
Next, all installed elements, floor boards, rafters, sheathing material, side posts, lower and upper trim must be treated with an antiseptic and preservative. During the time it takes to assemble the rafters and roof of the pitched roof, the procedure must be repeated twice.
For the upper overhang of a pitched roof, installation of rafters and sheathing, you will need to secure an additional horizontal beam of the mauerlat, as in the diagram.
The cutting of the seat on the rafter beam is carried out according to the markings or according to a prepared template. After installing and leveling the position of each beam, it is recommended to fill the space between the beams with short boards; they will fix the rafter from horizontal displacement and at the same time strengthen the base of the pitched roof.
Roofing and finishing works
At the final stage, we sew up the rafters of the pitched roof with a sheathing board. If bituminous materials - flexible tiles and roofing felt - are used for the roof of the barn, additional OSB sheets will need to be laid on the boards or the sheathing will need to be completely hammered in with wooden clapboard.
The easiest way to cover a pitched roof is with corrugated sheeting. The metal surface will withstand any disasters that may occur in a summer cottage, and laying and fastening roofing material is much easier and faster than euro-slate or roofing felt. A polyethylene film is laid as waterproofing, the edges of which will be released from under the awnings and nailed to the top edge of the wooden walls of the barn.
Laying the roof on a pitched roof begins with the bottom left sheet, as in the diagram. Each element is joined to the previous one in a row in an overlap of two waves, an overlap of 15-20 cm is made on the bottom sheet. The overlap areas, the lower and upper edges must be pierced with roofing nails with a silicone washer.
Wind strips are nailed to the sides of the roofing pie, protecting the pitched roof from water flow and gusts of wind. We nail a similar strip for installing a drainage gutter under the lower overhang. We protect the upper overhang of a pitched roof with a screen made of two wooden planks.
The assembled frame of a shed, as a rule, is not insulated for the winter, so lining, ordinary edged boards or OSB sheet panels can be used as a material for lining the walls. To install the cladding, you will need to install additional vertical slats and struts on the walls. The joints and cracks between the OSB boards and the edged boards must be blown out with polyurethane foam, excess polyurethane foam must be cut off and painted over with weather-resistant paint.
What material to choose for the roof of a household shed
A shed roof does not require much material. That is why owners can not limit themselves to only budget roofing. Suitable options for finishing the roof of a utility block include:
Corrugated sheeting is widely used in the installation of roofs and cladding of facades, both domestic (residential buildings, country houses, garages, gazebos, etc.) and industrial buildings (hangars, warehouses, workshops, trade pavilions).
Metal tiles are a good and fairly inexpensive option that allows you to get a beautiful and practical structure. Long service life is one of the main advantages of this material.
Bituminous shingles , an expensive building material with a distinctive design, are ideal for the roof of a barn. It will help not only protect it from precipitation for many years, but also eliminate the occurrence of loud noise during rain (very important for poultry houses and pigsties). True, under bitumen shingles you will definitely need to install plywood or OSB boards.
Slate allows for quick and easy roofing work and is one of the cheapest roofing materials. True, it is short-lived and, moreover, will not be able to complement the beautiful exterior of the building.
How to sheathe the structure of a utility block
Initially, you need to determine the conditions in which the shed will be used. In regions with high humidity and harsh winters, it is necessary to cover utility blocks with wear-resistant metal sidings or clapboards and slabs. In warm regions, to provide a rustic design design (that will remain after many years), slabs (the sides of a log) or old wooden sleepers will do.
A cheap and practical way to cover a shed is with ordinary boards, which the owners can later paint to their liking. You can also simply coat a regular board with stain and varnish. In any case, you first need to put plywood or OSB boards on top of the frame.
On a note! Before covering the shed with wood materials, they must be treated with an antiseptic. Re-treatment will have to be carried out after 2-5 years
How to build a capital utility block from foam blocks
Working with the construction of a shed from foam blocks does not require any special skills from the performer, so every owner can build such an object.
The advantage of the finished utility block will be its rather low thermal conductivity: it will not freeze very much due to the special structure of the foam block. The presence of air pockets inside this building material guarantees the maintenance of high temperatures inside the building.
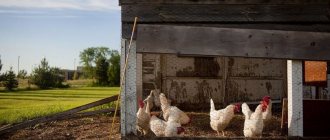
Household blocks made of foam blocks are ideal for keeping poultry and small livestock, and become an excellent workshop. But in order to guarantee the safety of the structure, it is imperative to take care of reliable protection of foam blocks from moisture. Direct contact with rainwater and snow will lead to very rapid destruction of the building material. Owners should also think carefully about the drainage system. The presence of a mini-canopy around the walls, as well as drainage of water 0.5 or more meters from the building will guarantee its long service life.
Foundation for a shed made of foam blocks
Despite the relative lightness of foam blocks, there must be a reliable foundation under a structure made of this building material. The best option would be a strip foundation.
Strip foundation: design, types of application (read more)
Step-by-step instructions on how to make a foundation for a utility block:
- Marking the site (the location of the building), preparing trenches with a depth of 50 to 100 cm (preferably about 70).
- Filling the bottom of the trench with a layer of sand, gravel and crushed stone. The total thickness of the cushion should be about 15 cm. Installation of wooden formwork inside the trench.
- Tying reinforcement and installing it inside the formwork. The distance from the cushion, as well as from the formwork to the reinforcement, should be at least one cm.
- Pouring concrete solution. Periodically water the poured concrete (1-2 times a day) with a small amount of water to prevent it from drying out and cracking.
Constructing walls from foam blocks with your own hands
It is imperative to lay waterproofing between the manufactured foundation and the walls of the building themselves. An excellent solution would be to lay rolled roofing felt in 2 layers. After this, you can begin the actual construction of the walls.
The laying of foam blocks is carried out similarly to the laying of ordinary bricks. But at the same time, to create the most reliable structure, it is recommended to use a special cement-sand mortar (the ratio of cement to sand is 1 to 4). Slaked lime and a plasticizing additive are added as additives (additives should be no more than 5% of the volume of cement). To dilute the mixture you will also need water. During the process of forcing walls, you should take care of the presence of window and door openings.
Step-by-step instructions for constructing a wooden outbuilding
Now many companies offer ready-made buildings, but it is much more interesting to create and equip a utility room for a summer residence with your own hands. Let's take a building measuring 6m x 3m x 3m as a sample.
The finished utility unit consists of two separate rooms, each of which has a separate entrance. Windows are on three walls, excluding the back
Before the construction process, it is necessary to purchase the following materials:
Recent Entries
5 working ways to use tar in the garden 7 indoor plants that help you get married even in adulthood Indoor plants that can bloom in trouble
- timber of various sections (15cm x 15 cm, 10cm x 15cm, 10cm x 10cm, 5cm x 10cm);
- edged board;
- roofing felt (or equivalent);
- plywood;
- sand, gravel, cement for making concrete;
- asbestos cement pipe (15 cm in diameter).
Step #1 – installing the foundation
The first stage is marking the perimeter for the future foundation. The posts will be located at the corners and in the center of the long, 6-meter walls. First you need to prepare the soil - remove a layer of turf and fertile soil to a depth of 20 cm, fill in a 10-centimeter sand cushion and compact it thoroughly. For each post you will need a hole about 1 m 20 cm deep - a foundation post of the appropriate length should be placed in it.
The dimensions of the utility unit can be different and depend on its purpose, so it is not necessary to focus on the specified parameters - the length or width can be changed
The bottom of each hole also needs to be prepared: covered with a thick layer of fine gravel or sand and compacted. After installing the pipes in the finished holes, their strictly vertical position is checked (it is better to use a building level), and the free space is filled with sand. The inside of the pipes should be filled with cement mortar to about one third, and then the pipe section should be raised. As a result of this action, concrete produces a solid base for the foundation pillars.
A foundation on asbestos-cement piles is a guarantee of the stability and durability of the structure; you can build a utility block without a foundation, but it will be less reliable and will serve for a shorter period of time
Then the pipe cavities should be completely filled with cement mortar. To strengthen the subsequent fixation of the timber base, many people install pieces of reinforcement in four corner posts, fixed in the mortar and protruding upward by about 20 cm. Instead of reinforcement, you can use anchors, also fixed to the foundation: the timber frame is attached to them using nuts. Pipes should be poured carefully so that no air pockets are formed. Final hardening will occur only after a couple of weeks; during this time, the solution should be moistened with water and protected from direct sunlight.
Step #2 - forming the base frame
While the foundation is “ripening”, you can start assembling the frame. The most powerful beam (15cm x 15cm) is fixed in the shape of a rectangle, the long side of which is 6 m, and the short side is 3 m. At the corners, a “half-tree” fastening is used, the grooves are connected with self-tapping screws (2 pieces are enough for an anchor, 4 pieces for reinforcement) . Between the foundation pillars and the wooden frame it is necessary to make a layer of roofing felt, the ends of which should be bent down (to prevent rainwater from accumulating). To protect against insects, mold and moisture, the timber is treated with an antiseptic. One of the traditional options is two layers of drying oil. The frame is then reinforced with three transverse joists located at equal intervals, using 10cm x 10cm timber.
The main qualities of the frame are stability and reliability, so the main attention should be paid to the joints of the timber and the treatment of wood with protective agents
Step #3 - construction of the frame
To build the frame, you should use timber with a smaller diameter than for installing the foundation. First, you need to assemble the frame parts from the ends, taking into account the fact that there will be window openings on both sides. Vertical posts are fixed to the frame using steel angles and self-tapping screws. In order to “plant” the rack on the foundation reinforcement, it is necessary to drill a hole with a diameter of 1 cm (in this way 4 corner posts will be secured). Additional elements and struts are fixed between them using bolted connections. The opposite sides should look identical after assembly.
To strengthen the fixation, struts should be installed between the first and second, as well as the third and fourth posts - small bars of smaller cross-section, located diagonally
Then the front facade is assembled. The middle posts are fixed in increments of 1 m 80 cm. To prevent them from moving while fixing other elements, they can be temporarily connected to each other with a board mounted on self-tapping screws. It is planned that the utility block consists of 2 sections, so you will need to create 2 doorways and additionally install a partition. The dimensions of the doorways are 2 m in height and 85 cm in width. There will also be a window opening on the front side, its location is between 2 and 3 racks.
During assembly, the window crossbars should be set: the distance from the frame to the bottom horizontal is 80 cm, the distance between both horizontals is 1 m
The rear facade is assembled in the same way as the front one, but the process is simplified due to the absence of window and door openings. Two middle posts should be placed at intervals of 1 m 80 cm, and braces should be secured between pairs of posts. The final touch is the upper junction at a height of 2 m, for which a 5cm x 10cm beam is used. It is formed from elements fastened together end-to-end and fixed with galvanized corners.
Step #4 – assembly of rafters and roofing
It is better to assemble the rafters on the ground, and then install them ready-made on the outbuildings. It is important to assemble the sheathing correctly - continuous or at intervals, depending on the roofing material. The roof slope is approximately 10 degrees. During installation, the rafters are fastened with self-tapping screws, and the overhangs and cornices are sheathed with edged boards. To avoid cracks, holes for self-tapping screws are pre-drilled.
The roof structure is installed as follows: placed on the logs behind the building, then lifted upward using stops or rods and inserted into the grooves
Step #5 - external and internal cladding
The final stage is clapboard cladding on the outside and interior decoration of the premises. The roofing covering (tiles, slate, sheet metal) is laid on the roof, doors are hung, windows are inserted. If necessary, internal frame-type partitions are installed, which can be sheathed with plywood. To insulate external walls, you can use mineral wool or polystyrene foam.
If you have at least a little experience in carpentry, the construction of a country house block will not seem complicated and intricate. In the future, instead of the first, trial option, a more reliable and strong structure can be erected.
If a utility room is being built after the construction of a house, it can be made in the form of an extension to the main building by making an additional internal entrance
How to make a roof for a cabin out of foam block
After the walls have been built and the mortar has hardened, you can begin building the roof. A layer of roofing material is laid on top of the walls to create proper waterproofing. Next, the mauerlat is laid out - timber, which is the basis of the future roof. For the Mauerlat, a beam with a cross-section of 15x15 cm is usually used. The step between adjacent elements is about 30 cm. The Mauerlat is fixed using bolts.
When starting the roofing, choose the appropriate material and create a single-pitch or gable roof.
Next, the rafter legs are assembled. Each pair of rafter legs represents a corner, each assembled corner is fixed on a transverse strip. The step between the rafter legs should be 30 cm. The finished structure is installed on the Mauerlat. In the upper part, a ridge board is additionally attached to the rafter legs to create a strong and reliable structure. Next, the rafter legs are sheathed and plywood is installed (as a leveling base for the roof) or the selected roofing material.
Construction works
Once the site has been selected and the drawing is ready, you can begin work directly.
Set of tools
No specific types of tools are required. The set is quite simple, and we also use it quite often in the household:
- Chainsaw;
- Drill;
- Screwdriver;
- Plane;
- Wood hacksaw;
- The chisel is wide;
- Axe;
- The hammer is large;
- The hammer is medium;
- Roulette 10m;
- Level;
- Bayonet shovel.
Foundation
It is enough to make the foundation for a frame-type barn with a pitched roof columnar.
To install it, it is advisable to follow the following sequence:
1️⃣ First of all, you need to remove the axes (create markings).
For this:
- take a tape measure, mark the outline by hammering sharpened wooden pegs or steel rods into the ground in the corners with a hammer. And for better tension of the rope, drive another one between them;
- Pull the rope over these pegs;
- Check the diagonals of the resulting rectangle with a tape measure. They must be equal and the angles must be right;
2️⃣ Dig holes near each peg measuring 400*400*500mm ; 3️⃣ Apply bitumen mastic for waterproofing to the side surfaces (pokes and spoons) of each brick. This must be done before laying in the ground, in order to avoid the inconvenience of application during further work when the posts are ready ; 4️⃣ Fill each hole with a sand-gravel mixture of approximately 150-200 mm, which must be compacted; 5️⃣ Now you can start laying brick pillars. It is enough to make it in 1 brick, fastening the bricks together with cement mortar. The posts should protrude above the ground to approximately the height of 2 bricks ; 6️⃣ Check the evenness in height of all the columns with each other using a building level. And evenness along the axes can be achieved using a cord .
Frame assembly
Before starting to make the frame, all lumber must be treated with an antiseptic, as well as a fire retardant.
After impregnation, you can proceed as follows:
- Place 2 layers of roofing felt on brick pillars coated with bitumen mastic on top;
- Install a timber base along the perimeter, including intermediate supports. You should end up with a grid;
- Install pins with a diameter of 12mm into the joints. To do this, drill a hole of the same diameter in the center to the foundation;
- Now you need to drill similar holes in the beams that will become the racks;
- Next, you need to install them on the pins, attaching them to the base with self-tapping screws through steel equal angle angles;
- Level the verticality of the posts on all sides and temporarily fix them using a board 15–20 mm thick, which will serve as a strut;
- Now you need to combine the supports along the long sides at the top. For this purpose, place the beam-beam on top of the racks, strengthening it with self-tapping screws along with the other corners;
- Then you need to connect the supports along the width. Before you begin, it is advisable to attach the corner to the rack on the high side in advance. Thus, the connecting beam will only have to be placed on this corner and tightened with self-tapping screws. Drive a nail 200 - 250 mm long through the stand into the end of the connecting beam.
- The frame is ready.
To continue building the building, it is better to first install the floor:
⭕️ Prepare a treated floorboard of the required size, and then cut holes in them for the racks in the right places; ⭕️ Lay each board lengthwise on the lower base, attaching it to it with nails or screws; ⭕️ Nail a 100*40mm board around the perimeter from the end of the bottom trim to close it, and also to set the evenness of the walls for further cladding.
Roof
The roof was designed to be pitched, so the frame posts were already installed based on this: shorter on one side than on the other.
Slope of a pitched roof
The slope of the roof depends on the type of roofing. Usually for outbuildings it is selected from various types of corrugated materials: asbestos-cement - slate, bitumen - ondulin, metal - profiled sheet. For all of them, the average tilt angle is 20° or 36%.
To find out how much higher to make one side - this is the height of the ridge - you need to use a simple formula.
Namely: divide the width (span) in half and multiply by the value of the tangent of the angle of inclination, which is taken from the Bradis table or calculated with a calculator.
Calculation of materials for a pitched roof
All materials depend on the dimensions of the utility unit:
- Rafters. They are usually made from 100*40mm boards. Their length is calculated as the ratio of the width of the barn to the cosine of the angle of inclination (or you can use the Pythagorean theorem to calculate the hypotenuse of a right triangle) plus the overhang (500mm on the main facade/300mm on the rear). The pitch of the rafters is 500–700mm. Thus, the total quantity in cubes is obtained by multiplying the length by the size and by the pitch;
- Lathing. According to the standards, for it, an unedged board of 100*25mm is taken. Its length is the length of the barn plus an overhang of about 300mm. The sheathing pitch depends on the roofing material, so it is better to follow the manufacturer's recommendations. For example, for ondulin, with an inclination angle of 20°, the pitch is 610 mm. But on the ridge, ribs and overhangs, the sheathing should be continuous, 250 - 300 mm wide;
- Additional racks to strengthen the roof. You can use the boards that were used for the rafters. Their quantity is 2 pcs. One on each side. They will become a kind of continuation of the intermediate supports, approximately 2/3 the height of the ridge;
- Overhang trim. It can also be made from 100*40mm boards. Their number: 1. The length of the barn plus the overhang on one side; 2. The width of the shed plus the overhang on one side.
Roof installation
Installation is carried out as follows:
- Install the rafter boards on edge, connecting them to the beams of the upper trim with self-tapping screws obliquely. Additionally, drive a nail 250mm long from above into the leg from the other rib perpendicular to the beam;
- Lay the sheathing flat on top of the rafters, starting from the overhangs where it is solid. Attach to the rafters with 2 nails or self-tapping screws;
- Next, you need to strengthen the roof structure. For this purpose, place a board 2/3 of the height of the ridge in the place where the intermediate support ends, fastening it obliquely with a self-tapping screw to the beam on one side and the rafter leg on the other;
- Now you need to hem the overhang from below, and also cover the rafters from the end with a board. Fasten each board to the rafters with 2 nails or self-tapping screws in the same way as was done with the sheathing boards;
- The final stage is to cover the roof with the selected roofing material.
Insulation and finishing of a utility block made of foam blocks
Insulation of buildings made of foam blocks is carried out to additionally protect the structure from the cold. Prolonged exposure to low temperatures can lead to destruction of the material.
You can insulate the floor, plaster the walls and decorate the room to your taste.
To make high-quality insulation of foam block structures, you need to take into account the following requirements:
- Insulation should be carried out inside and outside (preferably under the ceiling).
- The insulation must additionally be protected from moisture.
- The insulation must be safe and reliable, ensure normal air exchange and be vapor permeable.
The best option is polystyrene foam or polystyrene foam, which are easily attached to the foam block. Penofol (foamed polystyrene foam) or mineral wool are also suitable for work. The latter, however, is better used for outdoor work. The interior can be finished using different materials: wood boards, clapboard, boards. Exterior finishing is best done using lining or siding.
The purpose of this utility room
The utility block is a small building, but universal, therefore it is absolutely not limited by any limits in its use. Its purpose depends entirely on the priorities put forward by the owners of the country residence. Initially, outbuildings were used to store construction and gardening tools, some materials, and garden tools. Long-term work in the garden beds or at a construction site led to the fact that summer residents turned part of the premises into a kind of summer kitchen, so that they could drink tea and relax a little.
Some outbuildings are more reminiscent of a country house than a utility room: they are finished with siding, covered with flexible tiles and decorated with decorative elements
Long work takes its toll, especially in the hot season, so summer residents who are especially concerned about their health have allocated a small corner for a shower; Accordingly, a toilet can fit behind the partition, requiring a very small area. If the footage of the building allows, then part of it can be set aside as a rest room, and if you install a bed in it, you can safely spend the night as long as the air temperature allows. It is clear that with the appearance of a house in a suburban area, the utility block will lose some of its functions, however, it will always remain useful and in demand.
Outbuildings can be completely different in appearance and resemble any structure, from an ordinary simple barn to a fairy-tale house decorated with openwork carvings.
Many summer residents attach great importance to the style of each object located on the site. Such a compact building in a minimalist style is suitable for owners who keep up with the times
You can purchase a ready-made structure in assembled or disassembled form, which resembles a block frame-modular container. It is formed from a corner and a channel, and then covered with wood board. Advantages of this type of structure:
- fast construction speed;
- lack of foundation;
- mobility;
- possibility of repeated assembly and disassembly;
- democratic price.
You can build a utility unit with your own hands by first preparing tools and purchasing materials.
The most popular are outbuildings made of wood - a plastic, easy-to-work, durable material, ready to serve for decades if properly treated.
The easiest way is to build a wooden shed, cover its outside with clapboard or corrugated sheets, and cover the roof with inexpensive rubber tiles or sheet iron. A couple of walls are equipped with windows to allow sunlight to penetrate inside. It is better to divide the room, using partitions or cabinets, into several zones that differ in purpose. To feel comfortable in the utility room in winter, its walls, floor and roof should be reinforced with thermal insulation - glass wool mats, membrane or polyurethane foam.
How to build a shed from corrugated sheets: structural features
The construction of a shed from corrugated sheets is carried out quite quickly and at the same time allows you to get a reliable utility unit.
Construction work is carried out as follows:
- Determining the optimal size of the shed, preparing the site for it.
- Digging a pit 5 cm larger on each side than the size of the shed. Digging holes in the corners of the pit with a depth of 70 cm.
- Filling with sand, crushed stone, installing metal racks or square pipes. Filling the corner parts with concrete (ratio of sand and cement 3 to 1).
- Pouring the foundation (the remaining unfilled area, which will be both the foundation and the floor).
- Installation of a frame under a pitched roof: appropriate cutting at an angle of a pair of racks, welding them with auxiliary profiles.
- Fastening corrugated sheets to the frame as walls and ceilings + separate production of a wall with a doorway and installation of a gate made of corrugated sheets and a profile frame.
Top trim and roof - a difficult stage
If the barn has a pitched roof, then on the front side we install the racks higher, about 50 centimeters. Construction of a shed with a pitched roof is much simpler, but an auxiliary structure with a gable roof looks nicer, and if necessary, you can build an attic with your own hands. In any case, before you take on the rafters, you need to arrange the upper frame - horizontal beams, which are attached in the same way as the lower ones, only at the top of the racks.
Construction of a shed with a pitched roof
It will be extremely difficult to do this work alone; you will need an assistant who will pull the beams up with you and hold them while you secure them with metal corners or dowels. There are no other features at this stage - the same timber, the same fastenings.
Since it is very easy to make a pitched roof, we will look in detail at how to make a gable roof. For rafters you can use a 100*50 mm board. The boards will need to be trimmed - so that the cut comes out at the same angle on all boards, simply measure half the width of the board, draw a straight line, and in the resulting rectangle draw a diagonal along which the cut will be made. It’s even easier to do this with a miter box, but this tool is not always at hand.
Rafter boards
On the ground, attach a pair of rafters using metal plates, screws or nails, and a cross board. The structure will be stable enough to be lifted up and secured. For this task you will need a partner and a stable ladder. In any case, assemble all the rafters on the ground, guided by the template - this will go much faster. By the way, if you also want to build an attic, then you will also need to install logs on the top sheathing, on which the attic floor boards will subsequently lie.
Ready-made outbuildings for a summer residence: advantages and disadvantages
In addition to those built with your own hands, there are also mobile models of cabins made of metal and plastic. Their advantage is that they can be used immediately after installation.
Note! Such cabins are suitable exclusively for organizing a warehouse for firewood, storing equipment and tools.
Each of these types of objects has its own characteristics:
Metal cabins include a channel frame and corrugated sheeting. Additionally, they can be insulated with foam plastic. The advantage of such buildings is reliability and durability. If desired, a two-story utility block can be built from such objects. The disadvantages of such cabins are the high cost and difficulty of transportation.
Plastic utility blocks are a prefabricated structure reminiscent of plastic playground houses. They have an average price, but are lightweight, which eliminates the need to make a foundation for them. True, such models cannot be called environmentally friendly. In addition, in harsh regions (with frosty winters or very hot summers), plastic sheds will not last long.
Where to place a shed on the site
The construction of such buildings is usually done with your own hands and planning is usually neglected.
However, it is worth taking into account the recommendations of the SNiP 2.07.01-89 standard on distances to other objects on the site:
- it should not be brought too close to the neighboring residential building, the minimum distance to it should be 6 m;
- if it is planned to keep poultry or livestock in the barn, then this distance increases to 15 m;
- by agreement with neighbors, it is allowed to combine outbuildings into one complex with neighboring ones;
Guidelines for choosing the location of the shed
- In addition, it is worth considering just common sense. Outbuildings are usually not elegant, which is why they are placed so that they are not visible from the street. If a workshop will be located in the barn, then the noise level must also be taken into account, which means that the building must be kept as far away from the house as possible, while considering the laying of the necessary communications.
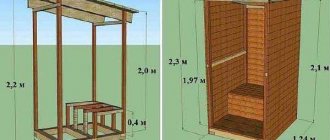
Drawings of utility units for self-construction
The drawings are applied to paper with the required dimensions corresponding to your choice. If the dacha plot has a large agricultural area, it is quite possible to build a utility block on it for storing equipment and garden supplies. In this case, you will need a utility unit combined with a pantry (photo 1). To build a utility block with a toilet and shower, you should use this drawing (photo 2).
Photo 2. Click to enlarge.
Photo 1. Click to enlarge.
For an outbuilding with only a toilet, take note of the project below.
Drawing of a utility block with a toilet.
As you can see, you can build modern cabins on your summer cottage or near a residential cottage from different materials. Wood, brick, metal, foam blocks are suitable for work. Depending on the selected type of building materials, the optimal type of foundation is determined. It will ensure the reliability of the building and eliminate problems with freezing of the floor or its gradual destruction due to contact with the ground.
On a note! Even the smallest utility unit must comply with accepted construction standards. Before starting the actual construction of the facility, it is recommended to draw up a site plan and select the optimal location for the location of the utility unit.
With special arrangement of the internal space, you can create the right conditions for keeping birds and livestock.
Which type of shed to choose for your summer cottage?
Depending on the plans for the future development of the suburban area, the availability of free time and money, the problem of utility room on a suburban area can be solved in several ways:
- Hire a team and build a permanent shed from brick or foam block, with a pitched roof and a basement;
- Pour a concrete foundation for the future building with your own hands, buy a five-ton railway container and install it on your summer cottage instead of a barn;
- Build an ordinary barn with a pitched roof, 3x6 in size, from timber and boards, as in the photo.
Of course, experienced summer residents with experience will without hesitation cast their votes in favor of the last option; this is the most balanced and thoughtful decision.
Advice! To immediately build a shed from foam blocks on a “clean” site is not correct from a planning point of view; often outbuildings of this type have to be demolished or moved in favor of a summer house or garage.
In addition, the construction of stone, prefabricated, panel sheds, as well as the purchase of a container, will require an order of magnitude greater investment and time than is necessary for a wooden building with a pitched roof and a simple foundation. The main thing is that, at considerable expense, there are no tangible advantages over a lean-to wooden shed measuring 3x6.
Optimal design of a 3x6 wooden shed
The most difficult element of a homemade shed is its roof. Choose a pitched roof for your shed, you can’t go wrong. Even experienced craftsmen prefer to install pitched roofs on barns; they are not as beautiful, but easier to build and more reliable in operation. Moreover, you can make a shed roof with your own hands step by step even with minimal construction experience.
The only mandatory condition is the correct orientation of the pitched roof and the entire shed building relative to the wind rose in order to reduce the risk of rainwater flowing under the upper overhang and gables of the roof:
- The design of the barn, dimensions 3x6 m, with a pitched roof is shown in the drawing;
- The construction is carried out on a simple columnar foundation of 12 supports. A standard cinder block is used as the material for the pillars, but it is better to cast the supports from concrete in the formwork;
- The basis of a lean-to barn is a frame made of boards and timber, the dimensions of the structure are 3x6 meters, with a ceiling height of 2 m and the highest point of the rafters of 2.7 m;
- The shed roof is made according to the classical scheme, on hanging rafters with stuffed sheathing boards and a flat roof. As a roofing covering, you can use corrugated sheeting, ondulin, or make a two-layer version from rolled material, for example, roofing felt.
The construction will be very simple and easy; if you assemble the foundation correctly, the wooden frame box with a pitched roof can easily withstand winds of 18-25 m/s. If there are no strong winds in the area in which the shed is planned to be installed, then when building walls you can limit yourself to vertical drains from boards and timber, as in the drawing. For open areas, it is recommended to strengthen the vertical load-bearing supports with side struts, as in the photo.
The same applies to the design of a pitched roof. For a quiet area, you can build a pitched roof without using ceiling beams, but in this case, the upper frame of the walls and the mauerlat will need to be supported with additional vertical supports made of timber. For windy areas, a pitched roof must be reinforced with floor beams and supports in the middle of the rafters.