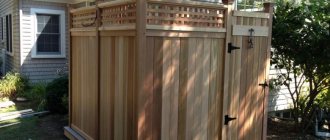
A frame barn is an outbuilding that no private household can do without. Household equipment is stored here so that it does not take up space in the house. To build a shed, you can hire a team of professional craftsmen, however, it is possible to build the structure yourself, even for people without special skills in construction. The main thing is to choose the right materials and know the construction technology.
Pros and cons of a barn
A frame shed, like any structure, has advantages and disadvantages. Advantages of a frame structure:
- High speed of construction - construction takes several days, while a do-it-yourself frame shed has a long service life.
- Reasonable cost, especially if you do all the work yourself.
- Light weight, making the structure easy to erect and does not require a strong foundation.
- The structure does not shrink, which is why defects do not appear on the building material.
Frame barn.
The structure, for all its advantages, also has a disadvantage. Materials require pre-treatment to protect them from the negative influence of the environment, mold and mildew, which increases the period of construction of the structure and entails the need for additional capital investments.
Despite the disadvantages, the design is in high demand, since the advantages of the structure outweigh the disadvantages.
Peculiarities
Buildings erected using the Post & Beam technology are a frame in the form of vertical pillars, which are connected to each other by tying beams, for the manufacture of which both timber and logs are used. The frame of the building is connected to the roof layers.
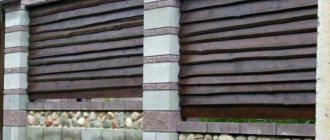
When constructing frame houses from logs, it is typical to use large-diameter logs - from 400 millimeters. The material for the load-bearing elements is cedar. It is popular because of its bactericidal properties, as well as its aesthetic appearance. Fences are erected between the vertical posts, the filling of which may vary. A log, timber, stone or glass can be used for this.
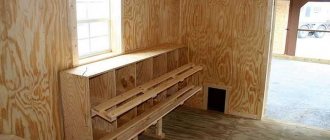
Frame barn
Before you start building a shed, you must first choose a site for the building. It is recommended to erect a building where there are no plans to develop beds for planting agricultural crops. At the same time, the distance of the barn from the house is not important and you can be guided by personal preferences. A wooden shed is suitable for construction both near the house and at a distance from it.
Place for a shed near the fence.
Wooden barn frame
The frame of the barn is erected with your own hands without the use of special equipment. It is easy to assemble using construction tools.
To build a shed frame from a board, you will need material whose size is 100x50 mm. Construction begins only after the foundation has completely hardened, if the structure is placed on a support. The first thing they do is assemble the bottom frame of the barn from 100x100 mm timber. with your own hands. Next, the boards are used to make floor logs. The pitch between the material should be 500-600 mm. Then the vertical posts are fixed.
On a note
The boards are fixed around the entire perimeter at a distance of 500-600 mm. between themselves. To strengthen the structure, jibs are attached to the corners. After this, the top trim of the barn is performed.
Wood house construction technology
The construction of the foundation and basement of a wood-burning house is no different from similar structures, for example, a wooden house made from construction timber.
An example of laying logs on a mortar
Laying a wood-burning wall begins with laying two strips of mortar 60 - 70 mm wide on the base waterproofing layer. The distance between the outer edges of the strips is equal to the length of the log (wall thickness). The height of the solution is about 30 mm.
The gap between the mortar strips is filled with an insulating mixture of sawdust and lime.
Then the logs of the first row are placed on the solution, slightly rocking and pressing. A gap of about 30 mm is left between adjacent logs.
The next rows of logs are laid in the same way.
Until the mortar has set, the seams of the masonry outside and inside the house are unstitched, and the mortar is leveled and compacted in the spaces between the logs. The mortar in the joints is leveled so that the depth of the joints is about 5 mm.
To support the attic floor beams and roof rafters, a frame made of timber - a mauerlat - is laid along the top of the walls. The mauerlat bars are fastened to the wall using wire ties. One end of the wire is twisted around a log in the thickness of the upper part of the wall, and the other end is secured to the roof rafter.
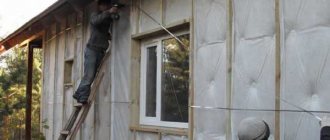
The walls of a wood-burning house can be sheathed both outside and inside. The design, materials and technology of cladding the walls of a house made of wood are no different from cladding wooden houses made of other materials, for example, timber.
| The logs are laid in two layers on the wall. The air gap between the layers is filled with insulation - preferably ecowool. |
When building modern houses in cold climates, it is recommended to lay logs in the wall as shown in the figure - in two layers, with an air gap between the layers. The air gap is filled with insulation - ecowool. Layers of masonry are connected to each other by laying long logs over the entire thickness of the wall.
Barn frame made of timber
Most often, the frame of a barn is made of timber. To construct the structure, you will need dry material that is free from defects, mold and mildew. The recommended timber size is 100x100 mm. Before erecting the structure, it is recommended to treat the material with an antiseptic agent to protect it from the harmful effects of an aggressive biological environment, as well as a fire retardant, which will prevent the structure from catching fire.
Timber frame shed.
To build a barn frame from timber, professionals advise taking material whose length corresponds to the size of the large wall of the structure. This will allow you to make the strapping from one piece of material, rather than assembling it from parts.
Buy Electric and chainsaws in your city
Electric and chainsaws
⇆
Watch the video - how to lay walls from logs
Next article:
Insulation of wooden houses, walls, log houses made of timber or logs
Previous article:
Finishing, wall covering with basement siding
⇆
More articles on this topic
- Internal insulation from inside the walls of a house, apartment, loggia, balcony
- Groundwater, perched water and foundation
- Finishing, covering the walls of the house with vinyl siding
- Ventilation in a private house - natural or forced?
- How to make a beautiful spring in the garden
- Wooden floor on joists on the first floor of a private house
- Solar collector - water heater for home, pool
- Sound insulation - sound insulation of a house, apartment
Log barn frame
The log shed frame is the least popular. This is explained by the fact that the material is very heavy, and it will not be possible to build a structure from it alone. Helpers will be needed in this matter. Another disadvantage of logs is their high price. For this reason, experts recommend choosing boards or timber. However, logs make a more durable shed frame. To erect such a structure, it is recommended to hire a team of professional craftsmen.
Before constructing any outbuilding, it is recommended to draw up a drawing of the shed frame. It is recommended to order the project from professionals. There are standard drawings with standard dimensions, from which you can choose the most suitable option. Wooden shed designs are affordable.
Power frame of the barn.
However, the diagram of a frame for a barn with your own hands is not as complicated as, for example, a drawing of a house, so you can do it yourself. To do this, it is recommended to use drawings from the Internet as an example. At the same time, when making a shed frame diagram, you should take into account the dimensions of the structure.
Technology development
The history of the development of the construction of log houses shows how connected they are and how many common features are borrowed from one technology to another.
Thus, the traditional Russian technology of chopping into a bowl with the remainder, “in the fat tail” (or similar to it “in the butt with a cut”), with minor changes, took root among the Finns. The open longitudinal groove in the lower part of the rims was replaced with a closed one. Thus, the need to re-caulk the joint of the crowns was eliminated.
Then the construction method from the Finns moved to Norway and there it already acquired the form of cutting from a gun carriage . In order to save wood, the Norwegians cut the logs on both sides, thereby obtaining a double-edged beam (carriage) and two slabs, which were then used for laying floors and ceilings. Therefore, the connecting bowls were transformed from semicircular into oval, self-sealing ones.
Having moved overseas, the technology took on the form of the so-called Canadian felling , which in essence is a complete analogue of the Norwegian technology, but applied to a round log.
It is quite possible that this type of construction, such as felling “in the fence” (“in the rack”, “in the post”, “in the dam”), has traveled a similar path. But in Rus' it was used, as a rule, for the construction of outbuildings. The space between the pillars was filled with thin tree trunks, which were not practiced in the construction of residential huts.
Useful: Frame attic
In Norway you can still see with your own eyes the surviving churches built using frame technology (the most famous is the stave church in Borgunn) with the gaps between the wooden pillars filled with a gun carriage.
A similar technique used in Canada differs in that logs were placed in the space between the posts. At the same time, the diameter of the pillars themselves and the logs between them increased significantly, which made it possible to erect in this way not only commercial buildings, but also permanent residential buildings.
The technology of frame-log construction acquired its modern form approximately 20 years ago and has found its application in the construction of houses in countries with sharp temperature changes and a cold, harsh climate. Over time, Post & Beam technology came to Russia from Canada, and today it is rapidly gaining popularity.
Foundation
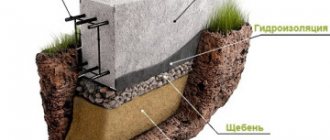
The frame for the shed is light in weight, as is the entire structure itself. For this reason, it is recommended to use a columnar foundation as a support for the structure. Even a non-professional can arrange it on his own.
Support columns are installed in the corners of the structure and where the partitions will be bridged. The distance between the posts should not exceed 2 meters. Supports are also erected in the center of a small wall if its length exceeds 2.5 m. This will protect the floor from sagging during walking.
Foundation for a frame shed.
Step-by-step instructions for constructing a columnar foundation:
- Dig holes 800 mm deep.
- Fill the holes with sand, crushed stone or gravel to 150 mm. and compact the materials.
- Carry out the masonry using cinder blocks or red bricks, as well as concrete mortar.
Once the foundation is dry, you can begin building the shed frame.
Let's weigh the pros and cons
The advantages of frame houses based on Post ® Beam technology are as follows. At a permanent location, they are erected at a much higher speed (assembly lasts 1-2 weeks) than buildings based on logs, and you can begin filling the openings between the logs and final finishing of the walls immediately after the installation of the frame is completed (the structure is not subject to shrinkage). In addition, frame houses made of logs are much lighter than their log-based counterparts, which allows the use of lightweight types of foundation, which means you can save on this. It is also important that wood consumption is reduced (if you use a log with a diameter of 35 cm, then the frame will require at least 50% less wood than a log house). As a result, the total savings during construction can reach 15-25%. In addition, Post ® Beam technologies open up wide scope for architects and designers to implement a variety of ideas for planning interior space, designing facades and interiors of a home.
But behind this many advantages there is one big disadvantage - the construction (the frame parts are too heavy!) should be trusted exclusively to professionals. However, where can we get them if Russian specialists have just begun to master the new method?
But, you must admit, how tempting it would be to finally give everyone the opportunity to build on their own plot a not very expensive, but at the same time original chopped wooden house, the very appearance of which already evokes both a feeling of harmony with nature and complete security. A house that does not and will not have a double.
It was interesting? See also...
Pool made of polypropylene: advantages
Multi-frequency vibration damper GVU-0.6-0.8: features
How to choose the right wallpaper for the bedroom: vinyl, paper, paintable, photo wallpaper
Features of landscape design
barn frame
The frame of the barn is shown in the video tutorials and this moment is clearly visible as they begin to build it from the bottom frame. It is important that the materials for this part of the structure are of high quality, since it will support the entire structure.
The frame of a wooden shed is erected as follows:
- Fix sheets of roofing material onto the support posts to waterproof the structure;
- Make the bottom trim from beams, size 100x100 mm;
- Attach the logs to the base, the distance between them should be 500-600 mm;
- When installing boards, keep in mind that you need to leave room for window and door openings. For their arrangement, smaller material is used. To fix the openings, a vertical beam is installed. The window and door sashes will be attached to them;
- Secure the posts to the frame using nails or metal plates. The recommended distance is 600 mm. However, the step can be increased, but make it no more than 1.5 m. - this is the maximum plant between the posts;
- Carry out the top binding in the same way as the bottom;
- Reinforce the frame of the lean-to shed with jibs. Fix them at the bottom of the side posts, and secure additional jibs around the entire perimeter, which will help to sheath the building.
If the frame of a shed with a pitched roof is being built, then after the construction of the structure the roof should be made. For this you will need boards measuring 50x100 mm. To make a roof, boards that are left for rafters are fixed on edge.
The length of the material must be greater than the width of the shed so that the roof extends beyond the structure. The roof can be covered with ondulin. To do this, the lathing is fixed in increments of 400 mm. and the flooring is laid. After this, the barn is sheathed with OSB or other material, windows and a door are installed, and the structure is decorated.
General requirements for roof repairs
When repairing roofs, it is necessary to install slots, ventilation ducts and other devices for ventilation of attic spaces. Work on replacing wooden roof structures is carried out in compliance with the following instructions:
- Before dismantling the roof, remove radio and television antennas, telephone masts and other devices installed on them
- dismantling of roof structures should be carried out after removing the roof in this place, and taking the necessary precautions against possible collapse of roofs and people falling
- All wood affected by rot should be immediately removed from the attic, removed or destroyed, and suitable elements should be selected for further use.
- wooden rafter structures should be isolated from stone and concrete surfaces; the surfaces of the supporting pads facing the masonry should be tarred by placing two layers of roofing felt under them
- The cross-sectional dimensions of the rafter elements should be taken in accordance with standard solutions or the project (it is not allowed to take the dimensions of previously installed rafters without checking by calculation)
- after installation, attach the rafters to the masonry walls by driving ruffs into it below the support nodes and tying the ends of the rafters to these ruffs with wire
- Blind embedding of parts of wooden structures into stone walls is not allowed.
- Separate elements of the rafters are fastened together with bolts or staples
- the type of rafter sheathing, as well as roof slopes, depend on the roofing material
- the location of the dormer windows should ensure ventilation of the attic spaces
Work on repairing or replacing roof structures in an occupied house is carried out in separate sections from pre-prepared elements using the necessary measures to prevent the floors from getting wet.
Gable roof
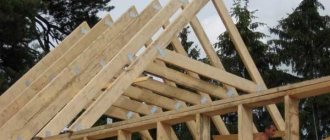
How to make a frame for a barn with a gable roof. It is performed in the same way as a building with a pitched roof. The only difference is the roof design. At the top of the frame made of boards, two triangles are fixed on the side of the small walls of the barn. They must be larger than the width of the structure.
Shed with a gable roof.
A board is attached in the middle of the triangles to strengthen the gable roof. To strengthen the roof, it is also recommended to nail metal plates onto the triangle. After this, the rafters are fixed. For this, boards 150x50 mm are used.
A sheathing under the roofing material is installed on such a barn roof frame. It is recommended to use metal tiles. After this, the sheathing is done, the doors are installed with your own hands and the barn is decorated. The structure is ready for use.
Knowing how to build a plank shed, you can build the structure yourself in a short time. The main thing is to choose quality material and adhere to construction rules.
Installation of hanging rafters
Hanging rafters consist of two rafter legs and a support beam; they are assembled in the same plane with the support beam (lower chord) of the rafters. The nodes of the hanging truss truss system are performed on spans of 6-8 meters.
When installing hanging rafters from round timber, the structures are assembled in separate elements. First, the rafter legs made on the ground are lifted (each separately) to the top of the house, and then, after performing preparatory work on the manufacture of roof parts and marking the surface of the covering for arranging and fastening the load-bearing structures of the roof along the axes of the walls of the house, the roof is assembled.
First, the purlins are laid (at level) along load-bearing walls made of logs or beams. These purlins can serve as the wooden floor of the house. Then the mauerlats made of logs are laid (by level) and fastened with staples along the laid purlins.
After installation of the girders around the perimeter of the house, the outer gable rafter trusses are installed with temporary fastening of the rafter legs to the mauerlats and girders. Then install the middle rafter structure with temporary fastening, etc.
The ends of the rafters are secured to the chopped walls with metal brackets. To stone walls - with twists of steel wire with a twist on ruffs. Metal brushes are driven into the masonry no higher than 30 cm from the last row of brickwork.
Note: In wooden racks, before installation, marks should be made for placing crossbars, purlins, struts, ties, panels and other structures.
Removing braces and mounting struts is permitted only after securing and aligning the position of the trusses, installing and securing vertical and horizontal ties in the rafters, in ranks - spacers along the upper and lower chords of the trusses, and in the absence of ties - after fastening the flooring.
And then, as in layered systems, the upper ends of the rafter legs are connected to each other into a rafter system by a ridge purlin and then by a rafter sheathing under the roof. The lower ends of the rafter legs are attached to the external walls using purlins. For greater stability, the rafter system is strengthened with racks, struts and braces.
Cobblestone and log walls should be assembled with allowance for settlement caused by drying out of the wood and shrinkage of the material used to seal the joints. The margin should be 3-5% of the design height of the walls.
