Brickwork - the surface is not smooth, often far from perfectly flat. And if the brick wall is also old, it has chips and chipped seams. Plastering brick walls will help to monolith and level the “pockmarked” surface.
The owner of a brick house being built or renovated requires various information about plastering. They are presented in this article. Let's start with the question of what is better to plaster a brick wall. Therefore, we will consider the types of plaster compositions for a brick wall.
Preparing a brick wall for plastering
Plastering work on site begins with preparing the base, since it is necessary to ensure strong adhesion of the finish to the wall. In addition, by covering the wall with a monolithic covering, you hide the wall structure from view. Therefore, the wall is repaired before plastering.
Inspection and assessment of the evenness of the wall allows you to:
- correctly outline the vertical plane of the future wall surface (often walls, partitions, ceilings need adjustment),
- calculate the consumption of finishing materials.
The preparation of brick surfaces for new and old brick walls differs in a number of nuances.
New wall
Even a new brick wall, built in accordance with building codes, needs to be prepared for plastering.
The main concerns of the plasterer are to ensure strong adhesion and “healthy” conditions for the brickwork:
- embroider the masonry seams (deepen by a centimeter);
- scratch the surface of the bricks with a wire brush;
- treat with bioprotection agents;
- remove traces of fat and grease from the surface.
Cleaning bricks from dirt
old wall
“Veterans” usually carry multiple “wounds” and “sores” on their bodies.
Masonry mortars, especially carelessly executed and used without coating protection, often:
- partially crumbled;
- individual bricks become loose;
- there are chips and cracks on the wall;
- the walls inside the house may have nails, screws, or other metal fasteners;
- full of oil, salt, rust, and fungal stains.
In addition, the old walls in the room are covered with plaster and other types of finishes. Old walls are more likely than new ones to be crooked or slanted. All this is a front of preparatory work.
Therefore, the old masonry:
- cleaned of unusable finishing coating;
- the weak mortar is removed from the seams, the masonry is crumbled (embroidered where necessary), large gaps are filled with DSP;
- loose bricks are either replaced or removed, put back after cleaning the brick and nest on the central heating center;
- cracks and large chips, after cleaning from dust, are sealed with a solution using reinforcing mesh;
- the stains are washed and treated with special products;
- foreign objects are removed, the remaining metal parts are painted with oil-based paint.
Cleaning the wall from unusable finishing coating
Replacing bricks in masonry
Sealing cracks in brickwork
After this, both types of walls are cleaned of dust, primed, and dried. Preparatory work is completed by measuring, installing beacons, and attaching reinforcing mesh (if necessary).
Tool
To apply plaster to a brick wall, prepare:
- Master OK;
- ladle;
- steel spatulas (wide, narrow);
- grater;
- rule;
- trowel (for decorative work);
- level, plumb line or construction laser;
- roulette;
- pencil;
- mixer;
- containers;
- rags;
- masking tape;
- devices or tools for removing old coating;
- individual protection means.
How to plaster a brick wall with your own hands
Next we will talk about how leveling plaster of a brick wall is performed using cement-sand mortar. Information on plastering the ceiling can be found separately.
Brief step-by-step instructions include the following steps:
- Preparing the surface of the walls.
- We take measurements, calculate consumption, and determine the location of future surfaces.
- We select and purchase materials.
- We install beacons.
- We reinforce.
- Prepare the solution (mix the solution for each layer separately before application).
- We apply spray, primer, and cover in sequence.
- Rub the top layer.
- We remove the beacons, cover the grooves, and rub them.
- Dry the coating.
Work is carried out at humidity up to 65%, positive temperature range 5-35°C. Before starting work, the electrical wiring is de-energized, the recesses for sockets and switches are sealed with masking tape. Protect window and door frames with tape.
How to prepare a mortar for plastering a brick wall
The second factor on which the quality of the plaster coating depends is the correct preparation of the solution. To properly prepare a solution for plaster from a dry mixture, it is enough to strictly follow the manufacturer’s instructions.
If you mix a solution you made yourself, you need to do this:
- clean, sifted sand is poured into a dry container;
- spread the required volume of cement evenly over the top;
- mix dry ingredients;
- cold water, to which a plasticizer has been added (liquid soap or PVA), is not completely poured into the container - some of the water is left to adjust the thickness of the dough;
- mix the components, adding water if the mixture needs to be thinned;
- let it brew for 10-15 minutes, then stir again.
The second step-by-step scenario for filling the components for preparing a plaster mixture using a mortar mixer. Water is poured into the rotating bulb, plasticizers are added, then sand is poured in, and cement is added last. The viscosity of the dough is adjusted by gradually adding water. The prepared mass is used until setting begins.
Primer
Is it necessary to prime brickwork and why? Brick is a porous material, so when applying plaster mortar it immediately begins to draw water out of it. As a result, the cement paste is dehydrated, and the remaining moisture becomes insufficient to ensure the chemical reactions of crystallization of the binder. The solution partially sets, and the components that have not reacted simply dry out.
The strength of the cement coating is reduced by half or more. Therefore, the brickwork is coated with a primer that fills the pores and forms a waterproof film on the surface of the wall. The second purpose of the primer is to increase adhesion.
The primer for bricks under plaster is selected depending on:
- type of brick (for silicate bricks use primers that provide increased adhesion);
- surface condition (for old walls you need a deep-acting strengthening agent);
- conditions of the foundation site (for facades and damp rooms, use antiseptic, moisture-proof primers).
The best choice is universal water-soluble compounds based on acrylic or silicone, which are suitable for any type of brick.
Prime the surface of the walls twice. For work use a brush or spray gun. Make two passes, drying each layer for at least a day.
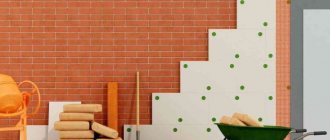
Reinforcement
To increase the strength of the plaster coating, reinforcement is used.
To do this, the mesh is selected according to the location of the reinforced structure and the base material:
- Fiberglass mesh is attached to a concrete or brick base under a cement plaster mixture indoors.
- Metal mesh is used for facade work on bricks under cement mortar, as well as for large areas of plastering.
PVC mesh is not suitable for cement plaster (corrodes).
In new buildings where shrinkage of the building occurs, the entire wall area is reinforced with mesh. And in buildings that have already “calmed down” there are individual problem areas, for example, joints of structures made of different materials, protruding corners, slopes. It is better to completely reinforce plaster coatings with a large layer thickness, old brick walls, as well as the base.
Reinforcement is performed on a primed, dry wall. The mesh should be completely covered with solution on both sides. Therefore, when attaching the mesh to the wall, a gap is left between the wall and the mesh for filling with mortar. The mesh panel is stretched, then attached to the wall with nails or self-tapping screws, fixed in the joints of the masonry. The panels are overlapped. The mesh is tensioned without excessive force. The main thing here is the absence of mesh bubbles or sagging.
Marking and installation of beacons
If so, how can I level brick walls that were laid incorrectly by the builders? Plaster leveling is one solution to the problem. Improved plaster of brick walls is one in which, according to SNIP, the errors per square meter are no more than 2 mm at a right angle from the plane of the wall. Moreover, on an area of 4 m2 there should be no more than 2 deviations. To achieve this quality right away or to improve old walls, beacons are used for plastering - strips that act as guides. The materials for beacons are wood, plastic, metal (profiles are sold) and plaster mortar.
Installing a laser level
First, using a laser level or tension cords, determine the maximum protruding point of the wall. Marked with a cross. This will be a guideline for the subsequent construction of the future vertical surface plane. The installation of beacons is carried out taking into account the fact that the minimum permissible thickness of plaster on brick is 5 mm. This means that without the use of reinforcing mesh, the top of the plank should rise above this point by at least half a centimeter. The top of the beacon strips sets the position of the future plaster surface.
Fastening a self-tapping screw with thread
A vertical line is drawn on the wall passing through the marked plus sign. A self-tapping screw is screwed in along the line at the top of the wall, and a nylon cord with a plumb line is attached to it. Adjust the position of the cord so that the thread recedes above the plus from the wall to the required distance (the minimum height of the metal beacon is 6 mm).
At the bottom of the wall, focusing on the lace, screw in the second self-tapping screw (the head should touch the lace). Next, focusing on this vertical, the outer beacons are installed on the wall (at a distance of 30 cm from the corners). The remaining beacons are mounted in increments of 100-150 cm. For beginners, it is more rational to choose a spacing of 1 m. Beacons are attached to the wall with mortar or self-tapping screws. You can watch videos on how to install beacon strips.
The solution is applied to the wall between the beacons in sections. When the solution begins to protrude above the slats, it is leveled using the rule. The rule bar is applied to the beacons, pressed lightly, thus drawing the rule along the bars from bottom to top. Excess mortar that collects on the rule is removed with a spatula and the plaster mixture is added where there is little of it, or dumped into a container. Having carried out the rule 2-4 times from bottom to top, make one reverse pass. After this, the solution will not slide down the wall.
Beacon installation
The solution is applied in sections. For beginners, 1-1.2 m long is enough. Having leveled one area, plaster the area next to it. After finishing plastering the wall, when the solution has set, the beacons are removed. The recesses left behind are sealed with the mixture.
First layer
The spraying is done so that the main solution forming the coating adheres well to the wall. This is a layer of almost liquid mixture. The wall is wetted, then the spray mixture is thrown onto the base with a trowel or ladle. Cover the wall with this solution, leaving no gaps. There is no need to level the layer.
Second layer
The base layer - the soil - is made from thicker dough. Apply with a trowel or spatula, making sure that the solution fills the gap under the beacons. They are leveled according to the beacons as a rule. The layer thickness is no more than 1 cm. If a larger coating thickness is required, several layers of the plaster mixture are applied.
Third layer
For regular plastering (not improved), the third layer is not necessary. The covering is made to form a surface suitable for wallpapering or painting. The covering mixture is similar in thickness to spray, but fine sand (up to 1.5 mm) is used as a filler. The covering is applied with a spatula to the soil, which has not yet dried (the dried soil is moistened). The thickness of the covering is 1.2-2 mm. After application, level with a rule, removing excess.
Final grout
Final alignment is necessary to eliminate minor errors. This is done using a grater as soon as the covering begins to dry out. The grouting is first carried out “in a circle”, using a trowel applied flat to the wall with slight pressure in a circular motion. On convex places, the pressure is increased, over depressions - reduced. The excess is cleaned off the instrument. Where necessary, add a little solution.
After completing the “circular” grouting, grouting is performed “in acceleration” - smoothing straight-line vertical movements. On the second pass, the movements are horizontal. If the walls are going to be painted, they must be grouted “during hardening” so that the circles from the previous grout do not show through.
To finish with wallpaper or paint, after drying, the leveled wall is sanded with sandpaper.
Fixing beacons
Guide beacons are an effective means of ensuring a flat surface. Products are supplied in standard sizes. In order to save time, they need to be cut to the size of the room using metal scissors or a grinder. Remember, if you plan to wallpaper or paint walls, use smaller beacons that can be easily removed from the walls after the job is completed. Install and fix the guides in the following sequence:
- prepare a building level, attach it to a long bar, which will allow you to take measurements along the entire height;
- ensure that the surface is clean from debris and moisten it generously;
- mark vertical marks from the corners of the room at a distance of 0.2 m from the edge of the room and places for installing beacons between them with an interval of 0.3 m;
- knead at low speed, using a mixer or drill, a homogeneous porridge-like solution;
- lay portions of the mortar on the walls in accordance with the markings, attach the beacons, pressing each one in turn;
- align the guides, controlling their position with a spirit level;
- remove excess mixture, fix the guides with self-tapping screws at two points, pull the thread horizontally between the outer corner beacons, fix the middle profile;
- check the position with a level applied in the horizontal and vertical plane, as well as diagonally.
Differences between plastering walls outside and inside
We have already partially answered the question of what is the best way to plaster brick walls. Now we need to consider and bring together the nuances regarding the location of the work.
What is the best way to plaster brick walls inside a house?
The choice of compositions for interior walls and partitions is wider than for facade surfaces.
Here for ordinary plastering the following is used:
- cement;
- limestone;
- clay-lime;
- cement-lime;
- gypsum solutions.
For wet rooms, gypsum compositions are almost never used. Only those specially designed for wet rooms, for example, are produced by Knauf. However, they are expensive for leveling brickwork. For decorative work, dry and ready-made mixtures are produced on various bases.
How to plaster the facade of a brick house
External plastering of walls for the purpose of leveling brickwork is most often performed with cement compounds. However, cement-lime mixtures can also be used. Where salts begin to emerge, sanitizing compounds are used. Gypsum solutions are not used for plastering the outside of buildings.
Facade surfaces are finally decorated using decorative plaster solutions (facade and universal), selecting those suitable for a particular effect.
Plastering of plinths is carried out by DSP, composition proportions 1:3 or 1:4.
Differences in technology
Plastering the brick walls of a house outside according to the standards has the following features:
- It is necessary to reinforce the plaster layer with a metal mesh over the entire surface of the wall.
- Plastic perforated corners with mesh must be installed on husks (internal corners), usenki (external corners) and slopes.
- The thickness of the plaster layer is no more than 1.5 cm. The total thickness is up to 3 cm.
- After drying, the primer (base layer) is subjected to priming in 2 passes before coating.
- When plastering the base, the plaster coating is buried 5-6 cm below the surface of the sidewalk or ground. After grouting, the surface is smoothed with a trowel. The base husks are rounded or chamfered.
- All measures are taken to protect the brick wall from atmospheric or soil moisture.
The remaining differences lie in the creation of hardening conditions (listed below).
What mixture is best to do the work: the better
Plaster compositions can be divided into cement, gypsum and lime, but in fact the choice is between gypsum and cement mixtures, since lime ones are used quite rarely.
| Lime is used as a plastic additive in cement mortars. Lime plaster in its pure form is not used in modern renovations. Once applied, the lime must react with carbon dioxide to become limestone. The main problem is that this type of plaster takes a long time to gain strength. In ancient buildings this process could take centuries. In addition, lime is washed off with water before it turns into limestone. |
- Gypsum solutions have recently become widespread, as they are easy to work with, flexible and dry quickly. After drying, the gypsum solution does not shrink, which reduces the likelihood of cracks. Gypsum plasters have a small fraction of filler, so they can be used to obtain a smooth surface for subsequent painting. Gypsum plasters also have problems: lower strength (M3 - M10) compared to cement compositions and poor resistance to moisture.
- Cement plasters used to completely dominate the market, but now they are increasingly being replaced by gypsum mixtures. Cement plasters have high compressive strength, which can reach grade M300; cement compositions also absorb less water and do not lose their strength from contact with moisture. The disadvantages of cement mixtures include the presence of shrinkage, low plasticity and a large filler fraction.
From this we can conclude that in rooms with normal humidity and normal temperature conditions it is easier to use gypsum plaster; for bathrooms, balconies, basements and facades it is better to give preference to cement mixtures.
Decorative plaster on a brick wall
For decoration, first select the desired effect, then select a suitable mixture. For example, textured mixtures are not suitable for bark beetle, but “bark beetle” and “pebble” mixtures are not suitable for Venetian.
Popular finishing finishes include:
- for the facade - travertine, bark beetle, lamb, rain, fur coat, mosaic, sgraffito or pebble, or rusticate;
- for indoors - wet silk, Venetian, craquelure, imitation brickwork, wood, etc.
You can get acquainted with the types of effects and implementation technology in the “Decorative plaster” section.
Preliminary stage
The set of preparatory activities consists of the following types of work:
- Cleaning the surface, which involves removing dirt, fasteners, and old plaster down to the base.
- Visual inspection, during which cracks and crevices that increase heat loss and reduce the level of sound insulation are eliminated. The use of antiseptics helps to avoid the spread of insects and the appearance of mold.
In finishing, brickwork has its own characteristics. If you plan to do all the interior finishing yourself, then knowing them is critical
- Coating with deep penetration primer that prevents moisture absorption. It also ensures reliable adhesion of the plaster mixture to the brick.
- Strengthening an uneven surface by reinforcing it with a special plastic mesh attached to hooks.
- Preparation of a binder solution for plaster in accordance with the recipe of the adopted version. A dense initial batch allows you to fix the beacons, and then prepare a more fluid solution.