The difference between the attic and the second floor - comparative characteristics
If you try to compare which is better, the attic or the second floor, you will get something like the following picture.
| Parameter | Attic | Second floor |
| Price | Below. The amount of savings depends on the type of attic | Higher |
| Duration of work | Lower compared to building a floor | High |
| Height of vertical walls | Up to 1.5 m.p. | Over 1.5 m.p. |
| Load on foundation and load-bearing walls | Below | Higher |
| Air volume | Lower due to sloping walls | Higher |
| Square | The usable area is smaller due to the “dead” zones where the roof meets the wall | Higher |
| Room layout | The layout of the attic floor is carried out taking into account the presence of blind areas | Free |
| Land area | Doesn't change | Doesn't change |
| Illumination | Better, more light penetrates due to sloping windows | Depends on the number and location of windows. In addition, the deep slope of the window blocks 2/3 of sunlight |
| Glazing area | 25% less than when using vertical windows | Minimum 1:8 to the surface area of the walls (depending on location) |
| Window | Sloping attic | Vertical |
| Temperature | If all stages of work are carried out correctly, the result is almost the same | If all stages of work are carried out correctly, the result is almost the same |
| Heat loss | Higher | Below |
| The need for thermal insulation material | Below | Higher. The ceiling above the floor needs to be insulated |
| Aesthetics of the structure | A house with an attic floor looks more elegant and unusual | Typical design |
However, it is worth noting that there are cases when it is impossible to build an attic floor. For example:
- load-bearing walls and foundation may not withstand additional load;
- the walls are made of porous materials that can collapse.
- small house dimensions. With a mandatory height of 2.3 m (according to sanitary standards, SNiP is limited to 1.5 m), it is difficult to equip a full-fledged living space with a small surface area. If the width of the house is less than 5 m.p. There is no point in building an attic. The resulting area will be insignificant, but the costs for it will be high.
What is an attic in construction and design
The legal definition of an attic floor (attic) is contained in SP 118.13330.2012 - this is a floor in the attic space, the facade of which is completely or partially formed by the roof surface. The line of intersection of the roof plane and the facade should be at a height of no more than 1.5 m from the floor level of the attic floor. This is far from the only requirement and limitation that must be taken into account when constructing an attic or attaching part of the attic to the premises of the top floor of a building.
You can design and approve an attic for residential and non-residential premises of an apartment building, non-residential building or structure. The goals of such work could be:
Dear Clients!
The information in this article contains general information, but each case is unique. You can get a free consultation from our engineers using one of our telephone numbers - call:
8 Moscow (our address)
8 St. Petersburg (our address)
All consultations are free.
- increasing the living space of the apartment on the top floor, increasing the level of comfort and amenities;
- expanding the usable area of office and other non-residential premises, increasing the commercial value of the property;
- refurbishment of premises to suit the needs of commercial real estate tenants.
Additional residential or non-residential space always increases the market price of the property. In most buildings, attics are rarely used for any purpose, so they can be attached to the rooms below. If the owner plans to build an additional attic floor, he needs to design and approve the reconstruction, since the main characteristics of the building will be changed.
Regulatory acts
The list of regulations is determined by the type of building and the types of work to be done. For reconstruction with the construction of a new attic floor, the Town Planning Code of the Russian Federation, Decree of the Government of the Russian Federation No. 87 is applied. If the attic is created by adding attic space, the redevelopment must be agreed upon in accordance with the following documents:
- Housing Code of the Russian Federation ();
- Federal Law No. 384-FZ ();
- Federal Law No. 123-FZ ();
- SP 118.13330.2012 Public buildings and structures ();
- SP 54.13330.2016 Residential multi-apartment buildings ();
- Moscow Government Decree No. 508-PP ();
- Moscow Government Decree No. 432-PP ().
When approving an attic in an apartment building, a general meeting of owners must be convened, since the attic belongs to the common property of the house. If the owners refuse, it will be impossible to complete the work.
In simple terms
In a non-residential building, the decision to build an additional attic floor or to add an attic into an attic is made by the owner himself. In this case, it is necessary to take into account the restrictions on the parameters of permitted construction established in relation to the site. For example, if according to the GPZU the maximum permissible number of storeys has already been exhausted, it is impossible to build higher. It is also necessary to comply with the general safety requirements specified in SP, GOST and other regulations.
Is the attic considered the second floor?
According to urban planning standards, the addition of an attic does not affect the number of storeys of the building. That is, a private house with an attic second floor is considered (is) a one-story house.
Documentation regulating the calculation and construction of the second floor of the attic type.
The superstructure of the attic floor is regulated by the provisions of the following regulatory documents:
- SNiP 2.08.01-89 “Residential buildings”;
- SNiP II-3-79 “Construction Heat Engineering” (standardizes the arrangement of enclosing structures, including roofs);
- SNiP 23-05-95 “Natural and artificial lighting”;
- SNiP 21-01-97 “Fire safety of buildings and structures”;
- SNiP 2.01.07-85 “Loads and impacts”;
- sanitary and hygienic standards.
Stages of approval of an attic extension
Below we will talk about options for coordinating reconstruction and redevelopment if their goal is to add an attic or a new floor. In most cases, you will have to contact the municipal authorities with the project.
Dear Clients!
The information in this article contains general information, but each case is unique. You can get a free consultation from our engineers using one of our telephone numbers - call:
8 Moscow (our address)
8 St. Petersburg (our address)
All consultations are free.
Coordination of reconstruction with the addition of the attic floor
The appearance of a new floor in a building changes the entire scheme of load-bearing structures and loads. Therefore, reconstruction for the attic floor includes the following approvals:
- examination of project documentation, obtaining a positive conclusion;
- applying to Gosstroynadzor for a construction permit;
- signing a work completion certificate with the contractor;
- applying to Gosstroynadzor for permission to commission;
- obtaining a technical plan, passing cadastral registration in Rosreestr.
During the period of work, the building will be completely or partially taken out of use. Current control over reconstruction work is carried out by Gosstroynadzor.
Coordination of redevelopment for the attic in non-residential buildings
In a private non-residential building, the redevelopment project is approved by the owner himself. If the attic will be equipped at the expense of the attic of a municipal property, the project must be approved by the City Property Department (DGI). To change the facades, the project must be submitted for approval to MosKomArchitecture. If the DGI does not agree to the redevelopment, the work cannot be carried out.
Construction work on the arrangement of the attic can only begin after approval
Coordination of redevelopment for an attic in an apartment building
Since the attic spaces belong to the common property of the apartment building, the approval process will take place in the following stages:
- holding a general meeting, obtaining 100% or 2/3 of the votes (depending on the purpose of the work);
- drawing up a protocol with voting results;
- sending documents to MosZhilInspektsiya and MosKomArchitecture for approval;
- After completion of the work, you need to contact the specified authorities again and receive an acceptance certificate from the acceptance committee.
During the approval process, mandatory checks of documents and work are carried out by specialists from the Ministry of Emergency Situations and the SES. At the final stage, you need to order a technical plan for the updated premises and undergo cadastral registration.
Expert commentary. To comply with all building regulations and avoid refusal of approvals, contact trusted and qualified designers. When concluding an agreement with Smart Way, you can immediately evaluate the quality of the design based on previously completed work. This will allow you to make the right choice and not overpay to dubious organizations.
Types and types of attic floors - dimensions and dimensions of the attic
The height of the attic floor determines its type (type):
- full floor. Vertical wall higher than 1.5 m;
- attic. The height of the smaller wall ranges from 0.8 to 1.5 m;
- semi-attic. The height of the wall is less than 0.8 m.
Depending on the needs of the residents, rooms on the attic floors can be arranged for various functional purposes.
But most often there are bedrooms and lounges.
If the requirement for a building height of 2.3 m is met, then according to the standards prescribed in SNiP, the area of the attic floor cannot be less than 16 sq. m. In this case, the bedroom must be at least 7 square meters.
If the height of the walls of the attic floor exceeds 2.3 m, then the construction of a bedroom of a smaller area is allowed. The justification for reducing the area is the large total cubic capacity (volume) of the room.
Armed with this theory, you can begin to build an attic floor with your own hands. Construction is not a troublesome task if you have detailed step-by-step instructions.
Main load-bearing elements
The design includes the following components:
- Rafter legs that transfer the load from the weight of the roofing and the wall to the walls of the house. The section is selected depending on the angle of inclination, span, pitch and design load. A professional can perform detailed calculations correctly. For private construction, you can use approximate values, but it is best to provide a small margin.
- Spreaders are rafter legs that rest on mowers on one or both sides. The cross section is calculated in the same way as for rafters.
- Sloping legs are a design that is used in a hip roof. This element serves as a support for the narodniks. The cross-section is taken depending on the load and span; in any case, it should be larger than that of the rafter legs.
- Mauerlat is an element that serves as a support for the footrails and transfers the load from the roof to the walls, distributing it evenly. It would be correct to choose a section with dimensions of 100 by 100 or 150 by 150, depending on the complexity of the object. Installation of the Mauerlat is not carried out during the construction of frame and wooden houses, since in this case its role is played by the upper crown of the walls or trim.
- The crossbar is a beam that also serves as a support for the rafters, but in the upper part. The crossbar is installed at the ridge of the roof or at a break in the slope, in the case of a broken structure. The cross-section should be taken depending on the conditions; the recommended value is 200 by 200 mm.
- Struts, racks, grips are additional elements for securing elements. They are used to reduce the cross-section of load-bearing structures. Their cross section is most often chosen constructively. It is important to consider the convenience of making connections.
A do-it-yourself attic roof must be erected starting with the selection of sections of all elements of the roof frame. The material for manufacturing is selected taking into account the following conditions:
- the wood must be coniferous (pine, spruce, larch);
- material grade – first or second;
- humidity no more than 15%.
Be sure to treat all boards and bars with antiseptic compounds before starting construction.
Construction of the attic floor (attic)
How the usable area of the attic depends on the angle of the roof Before starting construction, you need to create a project for the attic floor. You can do the project yourself or turn to professionals.
Note that building an attic with your own hands is within the capabilities of anyone. But it is quite difficult to take into account all the determining factors and calculate loads without special knowledge.
First, let's find out what affects the attic project.
Choosing the appearance of the attic roof is quite difficult, because... This is influenced by a number of factors:
- visual effect. First of all, subjective sensations are taken into account. The final choice may fall on another model, but the starting point is here;
- living space. The rafter system of a gable roof “steals” the area and creates “dead” zones, but the hip roof allows you to use almost the entire space of the attic superstructure;
- financial opportunities. A pitched roof is the cheapest option;
- roofing material. Some types of roofing material can be used if a certain roof slope is maintained. For example, for tiles the angle should be at least 25°, and for PK-100 corrugated sheeting (wave height 100 mm) 3-4° is sufficient;
- general architecture of the building;
- wind and snow load. The snow should slide off the roof;
- condition of load-bearing walls and foundation. The condition of load-bearing walls can be judged after a visual inspection. The presence of cracks indicates a problem. The use of porous material in the construction of a house reduces the ability of the wall to withstand the load created by the attic. It is difficult to judge the foundation. But knowing its type and what materials and technology were used in its construction, you can calculate what load it can withstand;
- arrangement of internal communications and ease of connection to them;
- choice of windows. Installation of special roof windows (sloping windows - sliding, turning, sliding) is carried out directly into the rafter part. They are more expensive, but provide better ventilation. To install vertical windows you need to build walls or gables. The surface area of light-transmitting structures must be at least 12.5%;
- selection of materials for construction. The cheapest and most popular option for performing the work is to use wood. The technology of frame construction is quite simple. It is a mistake to think that erecting a wooden attic floor is unacceptable. According to SNiP 21-01-97, the use of wooden structures in the construction of an attic floor is allowed if the wood is properly processed and the building height is up to 75 m.
- complexity of calculations. When constructing a pitched roof, the loads on the load-bearing walls are distributed unevenly. Ignoring this fact will lead to subsidence of the walls and destruction of the foundation.
The main shapes of roofs are shown in the figure.
What types of roofs exist (types, types)
Nuance. The smaller the angle where the roof meets the wall, the more usable area you will get.
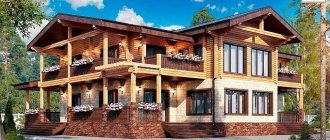
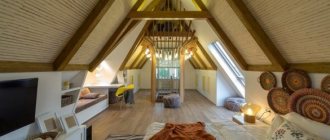
Some projects of houses with an attic floor are presented in the photo.
Design options for the attic floor
Before starting work, you must have a drawing, sketch, diagram or drawing with all dimensions.
The drawings of houses with an attic presented below will give you an idea of what needs to be put on the diagrams.
Drawings of houses with an attic - diagram 1
Drawings of houses with an attic - diagram 2
Drawings of houses with an attic - diagram 3
Types of materials for finishing the attic
Any interior decoration begins with the choice of finishing material. The photo shows the most popular building materials used to decorate the attic.
Lining
Finishing the attic with clapboard is considered one of the simplest and most economical design options. Various shades and unique texture of plastic finishing material allow you to create different interior styles and luxurious attic design. Thanks to the ease of installation, even a beginner can decorate a wall with his own hands.
The disadvantages of the material include the fragility of the material and poor resistance to external influences.
Wooden lining has a unique pattern and beautiful natural texture. The finishing material will fit perfectly into any interior of the room and help create an atmosphere of home comfort. The material is absolutely harmless, but at the same time it can be subject to rotting processes. Troubles can be avoided if you treat the natural wood with special impregnations.
MDF panels
If you plan to set up a home gym or personal office in the attic, MDF panels are used to decorate the walls. If this finishing material is used to decorate a bedroom or children’s room, the interior will turn out to be quite austere and boring. It is best to combine MDF panels with other finishing materials, such as wallpaper, plaster or painting. See the photo for interesting examples of combining materials.
MDF panels have a number of advantages:
- have excellent sound and heat insulation properties;
- their installation does not require preliminary leveling of the surface;
- relatively low cost;
- There are many types of material, differing in texture and color. Panels can imitate brickwork, natural stone, and so on;
- ease of installation.
Drywall
Due to its excellent quality characteristics and low cost, the finishing material is often used for interior decoration. Finishing the attic with plasterboard allows you to implement original design solutions. All communications that spoil the interior are conveniently located under the structure. The finishing material easily absorbs moisture, but if you use a special moisture-resistant type, then finishing the attic with plasterboard will last for decades.
The main advantages of the material include:
- environmental friendliness;
- ease of installation;
- the ability to hide all communications wiring behind such a structure;
- excellent sound and thermal insulation qualities.
As for the disadvantages, they also exist:
- installation of complex structures requires special skills;
- the material does not withstand heavy loads;
- sheets are easily deformed if stored incorrectly.
Just like OSB, it is used to divide a room into several separate rooms. Creating an exclusive design using plasterboard partitions is shown in the photo.
PVC panels
Plastic wall panels are particularly durable, reliable and able to withstand various mechanical loads. Quick and simple installation of the material allows you to finish the attic yourself. If the wall to be decorated has a perfectly flat and smooth surface, then the plastic is glued to it with glue. PVC panels, in addition to the traditional white color, have a wide range of colors, which allows you to create a unique interior in the attic.
The advantages of this material are as follows:
- wide range of use;
- large assortment of colors;
- strength and dimensional stability;
- ease of installation;
- ease of care.
Among the main disadvantages, poor UV tolerance and low impact resistance should be noted.
Block house
Lumber is a type of eurolining. Finishing the attic with wood allows you to decorate the room in a popular eco style or recreate a traditional Russian interior. Modern cladding perfectly imitates log walls. In the photo you can see options for decorating a country house. To significantly extend the life of the internal coating, it is better to treat the wood with a special compound.
The block house has a number of undeniable advantages:
- excellent resistance to dampness and mold;
- helps create an original and interesting design;
- has a positive effect on health;
- helps create a cozy atmosphere.
Imitation of timber
Imitation timber is a wooden board of small thickness processed on both sides. There are grooves and tongues at the ends for firmly attaching the boards to each other. To create false timber, solid pieces of natural wood are used.
The qualitative characteristics of wooden finishing material are in many ways similar to lining. These are, first of all, the environmental friendliness of the material, ease of installation and long service life. By using false timber or OSB to decorate the interior, you can create a beautiful interior, level the walls and hide flaws in the work.
Calculation of the area of the attic floor
The ability to use the attic for living space is calculated using the formula
АхВ + 0.7хС
Where,
A – total area of premises whose height exceeds 2.5 m;
B – total area of premises, the height of which ranges from 1.1 to 2.5 m;
C – total area of premises, the height of which ranges from 0.8 m to 1.1 m.
0,7 - correction factor. It says that theoretically this area can be used, but with significant restrictions.
You can reduce the amount of unused square meters by raising the walls to a height of more than a meter. This is achieved through the construction of attic walls. The attic walls of the attic floor are a superstructure above the load-bearing walls.
Attic walls of the attic floor
Material prepared for the website www.moydomik.net
Construction of an attic rafter system using the example of a gable roof
The design of the attic roof rafter system depends on the type of roof chosen for the house project. The simplest, and at the same time reliable and effective, can be considered the classic gable roof. Of course, it looks simple compared to complex, broken roofs, but at the same time it contains many basic elements and parts characteristic of all types of mansard roof truss systems.
The rafter system of a gable mansard roof consists of several main parts and elements. In general this is:
- Linear parts and elements - beams, columns, rod systems;
- Planar parts and elements - slabs, panels, floorings;
- Spatial parts and elements - shells, vaults, volumetric elements.
In practice, not all parts and elements of the mansard roof rafter system are used. In particular, for a gable roof, rafters, crossbars, ties, struts and struts are used. Their dimensions and relative position are determined during design. When assembled, all these elements form the truss of the mansard roof truss system.
Six examples of roof truss design, indicating the height of the ridge and the location of the rafters
The truss is the most important part of the rafter system of the attic roof. The number of trusses depends on the length of the facade and the selected installation step. The type of truss and the installation pitch are interrelated quantities; the more complex and durable the spatial structure of the element, the larger the step can be used during installation. In turn, an important element of the farm are the rafters for the attic, or, as they are also called, rafter legs.
Rafter legs are the most important element of the truss, the distance between which determines the stability of the roof
The video attached to the article talks in sufficient detail about the rafter system of the mansard roof. From it you will learn about all the intricacies of constructing a rafter system and performing installation work. Options for roofing systems from a simple gable to a more complex - broken one - are considered. By following the instructions and recommendations in the video instructions, even a novice master can understand the features of this work and perform it independently.
Construction of the attic floor (attic)
Next, we move directly to construction work or reconstruction (conversion of the attic into an attic floor). For those who want to convert the attic into an attic, they need to dismantle the old covering.
Then the rafter system is installed, for which you will need:
- log (diameter at least 180 mm) or timber (preferably laminated veneer lumber, dimensions 80x80 or 100x100);
- board (40x1500) for sheathing;
- hardware, burnt wire, anchors or fittings. In order to securely fasten all elements;
- floor beams. The finishing floor will be laid over them;
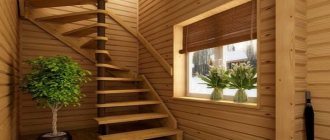
- finished staircase to the attic floor. It can be located outside the attic or inside. Outdoor placement creates inconvenience when using it in the cold season and in the rain. The interior steals the usable space of the lower floor. A spiral staircase can be a compromise. Even the smallest room can be equipped with a compact folding or retractable staircase.
- roofing material;
- protective films;
- thermal insulation material;
- material for finishing walls and ceilings.
Stairs to the attic floor
Rafter system of the attic floor - device technology
The construction of the rafter system begins with the installation of the Mauerlat, then the rafter legs are assembled and installed. It is easier to collect them on the ground. Installation begins with two opposite legs. Then a rope is stretched between them. It regulates the accuracy of installation.
Rafter system of the attic floor
After installing the frame of the rafter system, the legs are fastened together. That is, the sheathing is filled. The sheathing pitch depends on the type of roofing material.
We recommend : a step-by-step description of the technology for installing the attic roof of a private house
The process of building an attic floor - video
The frame is ready. A correctly executed roofing cake has the appearance shown in the figure.
Windows on the attic floor
Dormer windows are installed between the rafters. To make the fastening more reliable, horizontal beams made of timber are installed at the location of the window (at the top and bottom of the rafter system).
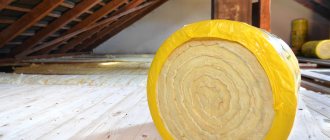
Insulation of the attic floor
It is necessary to take care of energy saving. The lack of air space created by the attic increases heat loss through the attic roof.
Insulation of the attic floor, steam and water protection are important stages in the arrangement of the 2nd floor of the attic type. This is due to the fact that the attic is a living space with its own microclimate.
Professionals recommend using basalt wool as insulation - it takes any shape and completely fills the space. The thickness of the insulation is at least 200 mm. On both sides, the cotton wool must be protected - from moisture coming from the external environment - with a hydrobarrier film. From the inside from the steam - a vapor barrier film. Film installation also has its own nuances. They are largely determined by the parameters of the film itself and the type of roofing material.
Installation of the roof of the attic floor
After insulation, the installation of roofing material begins. For these purposes, metal tiles, corrugated sheets, bitumen shingles, natural and polymer sand tiles, ondulin, slate and even such unusual materials as turf and reeds are used.
Finishing the attic floor
The final stage of creating a practical and beautiful attic is the interior decoration and decorative design of the room.
The overall design depends on individual preferences. However, some factors directly affect the interior of the attic floor. They cannot be ignored if you want the spaces you create to be comfortable and functional.
The first factor is the material from which the attic walls are built.
If a dacha, cottage, country house or building that is used periodically is equipped with an attic, you need to use plywood, OSB. They are then covered with decorative trim.
In a residential building, walls can be built from plasterboard with subsequent finishing or directly from wooden lining.
The second factor is the height of the wall.
To be able to move freely, it is recommended to arrange furniture around the perimeter of the room, taking into account the height of the attic wall.
For example,
- with a wall height of up to 0.5 m, blind areas are usually created. You can use them profitably if you install bedside tables, shelves, and built-in wardrobes in them.
- at a height of up to 0.8 m, a bed is placed under the wall. It’s comfortable to sleep on, sit on, and when you get up, you move away from the wall and don’t risk hurting your head on the ceiling;
- at a height of 1.3 m - a work area with a table can be equipped under the wall;
- if the wall is the height of a person, you can walk freely around the entire perimeter of the room.
Organization of space on the attic floor
The arrangement of a bathroom in the attic floor also has its own nuances. The diagram of a bathroom in the attic below contains recommendations regarding the placement of necessary items in the room.
Bathroom diagram in the attic - 1
Bathroom diagram in the attic - 2
Construction technology
The attic walls are drawn as close as possible to the walls of the main building, so achieving comfortable heat exchange is extremely difficult. It is very important to choose the right materials for insulation, make ventilation, the entire structure must be erected in accordance with the drawings and calculations, and the wooden parts must be treated with a fire-fighting compound.
Do-it-yourself attic installation, how to properly attach the components
Rules for the installation of the attic floor
In order for a do-it-yourself attic to serve for many years, it is necessary to fulfill the conditions specified in SNiP standards:
- The rafters should be 250 mm or more; it is better to use laminated veneer lumber. This thickness is due to the possibility of laying insulation between the rafters with a thickness of at least 200 mm.
- Insulation materials should not lose their properties at high humidity; it is best to use foamed polystyrene, which is lightweight and has a low heat transfer coefficient. Mineral wool absorbs moisture and breaks down.
- There must be adequate ventilation between the thermal insulation and the roof, with hoods and vents, so that air can circulate freely under the entire surface of the roof of the attic floor.
- It is imperative to install a vapor barrier layer inside.
- A waterproofing layer is laid on the outside of the rafters; it is recommended to additionally lay a layer of sound insulation.
Step-by-step instructions on how to make an attic with your own hands
Building an attic with your own hands is fraught with some difficulties, since the elements of the superstructure are at an angle, the installation of broken slopes and dormer windows requires compliance with SNiP standards in the part “Loads and impacts”.
When making a drawing of the installation floor yourself, you need to accurately calculate the loads, angles of inclination, permissible weight of the structure, and, in accordance with preliminary calculations, select the appropriate type of attic and materials for construction.
Do-it-yourself attic construction begins with the installation of mooring strips around the perimeter of the house, usually timber with a cross-section of 100*100 mm is used for this.
Next we build the frame for the room. The racks can be made of timber with a cross-section equal to the longitudinal beams, possibly from foam concrete or metal. We fix the vertical posts at the corners of the post structure, and then install the beams between them, with a step of no more than 2 meters, equal to the location of the attic rafters. All parts are attached to metal corners, nail plates or self-tapping screws.
We build the frame of the internal attic space; instead of vertical wooden posts there may be a wall made of foam concrete blocks or a metal frame
We tighten the jumper over the rack and secure the structure. Use a construction cord to monitor the geometry of the building.
We attach the lower rafters to the resulting frame. The beam is cut to the calculated length, a groove is made at the base for reliable fastening to the Mauerlat, the top of the beam is cut off according to the calculated angle of inclination. The installation of the lower rafters is carried out in place and securely fixed.
Do-it-yourself attic installation, photo of fastening the lower rafters, instead of vertical wooden posts there can be a wall made of foam concrete blocks or a metal frame
The next step is to install the upper rafters. The difficulty lies in maintaining the angle and centering of the structure as a whole.
Do-it-yourself frame attic, installation of the upper rafter structure
Next, we cover the rafters with a vapor barrier material and nail the sheathing; for this you can use boards or plywood. The material for the sheathing is determined by the type of roofing material.
Construction of an attic, construction of sheathing for roofing material
The next step is creating an insulating layer. It is recommended to use non-toxic and non-flammable materials, this is especially true if a nursery or bedroom is located on the attic floor. We lay a vapor barrier on the inside of the rafter frame and secure it with staples. Then a layer of insulation is installed, it is important that it fits tightly to the rafters, without gaps. We install lathing on the heat-insulating layer with a pitch of 500 mm, which will fix the insulation.
We build an attic with our own hands, installation of roofing material
We lay a waterproofing layer on the sheathing, which will protect the wooden elements from moisture. The roof is laid on the waterproofing.
Do-it-yourself attic construction, video materials clearly demonstrate how to correctly install rafters in practice.[su_youtube url=»https://www.youtube.com/watch?v=PsUEWWVXNd4"]
This video shows typical mistakes made when installing an attic floor.[s[su_youtube url=»https://www.youtube.com/watch?v=y4R8mFZdy9M»]p>
Attic floor - photo
House with attic floor
Cottage with attic floor
Attic floor - interior design (view from the kitchen area)
Attic floor - interior design (view from the living room and entrance)
Living space of the attic floor - design elements
billiard room on the attic floor of a private house
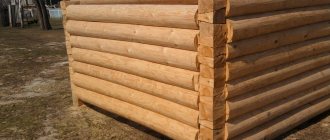
Country house with a timber attic
Timber is popular in small construction. This environmentally friendly material does not lose its position in the building materials market. Despite the fact that all finished buildings made of timber are lighter in weight than brick ones, it is necessary to take care of a strong and reliable foundation, taking into account the load exerted by the attic.
An excellent choice would be profiled timber, which allows you to assemble houses like a children's construction set, thanks to special grooves at the ends of each element.
It is recommended to purchase the material to order, taking into account the peculiarities of the construction of an attic with a sloping roof. In this case, the manufacturer will prepare the material according to the provided house design.
Do-it-yourself mansard roof: drawings and construction stages
A house with an attic is not only an additional living space, but also a respectable appearance for the entire building. Even if the room under the roof is made unheated and is used only in the summer, it still creates a powerful “air cushion” that helps retain heat inside the entire building.
DIY mansard roof
In principle, a mansard roof can be built with your own hands, but only with the help of an experienced, knowledgeable craftsman, since it is a rather complex and massive structure.
The attic space can be arranged under different types of roofs, but the most popular are gable or broken structures. According to their structure, they differ somewhat from each other.
To decide which design is more suitable for a particular home and will be easier to install, you need to take a closer look at both of these most commonly used options.
In addition, the master who will build the attic must figure out which of the two existing types of rafter system structures to choose.
Types of rafter systems
Any roof belongs to one of two types of rafter systems - hanging and layered structures. Each of them has its own characteristics, and which one to choose will depend on how the load-bearing walls of the building are located.
Hanging structure
A hanging structure is a rafter system that rests only on the outer main walls. This happens when in the building itself, except for the external walls of the house, there are no more capital partitions.
Diagram of a hanging rafter system
This design can only be used if the distance between the two main walls is no more than 8 meters, since this system puts a large load on the foundation of the load-bearing walls.
To ease this load, various elements are used in the hanging system, such as headstocks and tie rods, crossbars and struts.
For example, struts, as it were, pull the floor beams to the rafter legs, and the headstock hangs the tie to the ridge connection.
In the hanging system, fairly thick bars or hewn logs are used for floor beams, mounted on an edge. Their cross-section must be at least 100 × 200 mm. In order not to make mistakes in the parameters, since the floor in the attic room must be very reliable, it is recommended to entrust the calculations to a specialist.
Are you building a mansard roof with your own hands?
We recommend that you familiarize yourself with the material about how to make rafters with your own hands; in addition, you need to read how rafters are calculated.
In addition, we recommend reading the article about how to calculate the angle of roof inclination.
Layered system
Unlike a hanging system, a layered system is supported not only on two external load-bearing walls, but also on permanent partitions that are installed on the foundation. Therefore, when planning the construction of an attic, you need to think through the design of the foundation in advance if you are installing a strip version on which permanent partitions will be built. The layered system is ideal for constructing an attic underneath, as it can withstand significantly greater loads than the hanging version. It provides a reliable basis for the floor beams, and therefore for the attic floor.
The layered system has additional support on capital partitions
If you build a broken version of the attic roof, then a combined roofing system can be used, i.e. ridge rafters are arranged in the form of a hanging system, and side rafters are arranged in a layered type.
Types of roofs with attic space
When building a house made of brick or blocks with an attic, very often its front side is immediately built from the same material. This is very convenient because you don’t have to calculate the parameters of these roof elements and assemble them from bars, and then lift them onto the wall. However, one must remember that the walls of the building must stand on a reliable foundation and have the proper thickness, since such a pediment puts a very large load on the main structure.
House with a gable mansard roof
If the attic will serve as another floor of the house all year round, then a gable wall made of brick or foam blocks is an ideal option for creating a living space under the roof.
In order for attic rooms with a gable roof to have a normal height and spacious rooms, the angle of the roof slopes should be approximately 45-50 degrees, depending on the width of the end part of the building. If you take a smaller angle, the usable volume of the room will significantly decrease. Increasing the steepness of the slopes will lead to an unreasonably high roof, its weight, greater windage under strong wind loads, and waste of materials.
Dependence of the dimensions of the attic on the angle of the gable roof
Installation of a gable roof is certainly simpler than a broken structure, since smooth rafters are used from the edge of the walls to the ridge, without any kinks or additional connections. However, the broken structure makes it possible to make the rooms in this part of the house more spacious and the ceilings higher.
Broken roof truss system
The broken rafter system is much more complex in calculations, execution, and roofing, but it not only creates a more spacious space under the roof, but also gives the entire structure solidity.
The complexity of a broken system lies in the large number of rather complex connecting nodes. All connections must be made in accordance with existing rules - only in this case will the roof be built stable and reliable.
With a broken system - a large number of complex connections of parts
If the walls are built of stone or brick, then, as in the first version of the attic, the front parts can be laid out in advance, during the general laying process. In this case, in order to create a rafter system, all that remains is to align the finished gables with installing intermediate rafters and supporting fastenings to them.
Video: rafter system for an attic sloping roof
Before purchasing and preparing material for any of the presented systems, it is necessary to draw up a design project with dimensions - it will become the main guiding document for the preparation and assembly of all elements during the installation process.
Attaching the rafters to the mauerlat
In order for the article about the gable roof to remain a multiple of step-by-step instructions, we have included step-by-step information on attaching rafters to the Mauerlat into a separate step-by-step technology - a link to the material.
Read about how to cover a roof with corrugated sheeting on our portal.
Attic project
When drawing up a diagram for the construction of an attic, it is best to do this in different projections in order to see and understand the placement of all elements of the rafter system. It is very important to correctly calculate the height of the roof ridge, since the size of the area under it will directly depend on it.
The height of the racks and the length of the ties will determine the height and width of the residential attic space
When drawing up a design diagram for the construction of an attic roof, you need to calculate the height of the ridge, ceiling and total area of the room.
The minimum height from the floor to the ridge should be 2.5-2.7 m, but if this distance is less, then the room is not an attic, it can only be called an attic. This parameter is established by SNIP standards.
Possible dimensions for a gable mansard roof
In order for all the elements to be drawn accurately and have the desired location in the overall system, you need to start from a figure with right angles, that is, a rectangle or square - a section of the attic room being created. Based on the sides (the height and width of the future room), it will be almost impossible to make a mistake with the angles at which the roof slopes are located, with the location of the ridge, rafters and all supporting elements. When determining these parameters, they must immediately be entered into the drawing.
First you need to find the middle of the width of the front wall. Starting from this point, the parameters of the height of the ridge, the future ceiling of the attic, the location of the wall studs and the size of the eaves overhang are determined.
Due to the fact that each of the structures has a certain number of connecting nodes, which have different configurations, it would be a good idea to draw each of these connections separately in order to understand their features of interconnecting all the elements connecting at this point.
The main elements of the attic roof rafter system
Any rafter system consists of basic elements and additional ones, which may not be present in every structure. The main components of an attic roof include:
- Floor beams, which are the basis for the remaining elements of the rafter system. They are laid on the main walls of the building.
- A rafter leg, straight in a gable roof system or consisting of two sections - in a broken pattern. In this case, the top rafter is called the ridge rafter, since it forms the highest point of the roof - the ridge, and the rafters that form the walls of the attic are called side rafters.
- A ridge board or beam is a mandatory element for a gable roof, but is not always used when installing a broken roof model.
- Mauerlat is a powerful beam attached to the main side walls of the building. Rafter legs are installed on this element.
- Racks are the supporting elements necessary to strengthen a gable and broken structure. In the latter case, the ridge and side rafters are attached to it, and in the first, the stand is a reliable support for a long rafter. In addition, the racks serve as a frame for insulating and covering the walls of the attic.
- Diagonal bracing members or bevels additionally secure posts or longitudinal beams and rafters, making the structure more durable.
- Attic floor beams are used in all versions of the attic - they connect the racks, and they also serve as the frame for the ceiling.
- Inter-rafter purlins are installed in a broken roof for structural rigidity.
To be sure that the prepared project has been developed correctly, you need to show it to a specialist. Only he will be able to determine whether the attic parameters are correctly selected for the width and length of the walls of the building.
Video: professional calculation of a mansard roof using special software
Material parameters for the construction of an attic roof
If the graphic design is ready, then, based on the dimensions marked on it, you can calculate the amount of materials required for the construction of the attic roof. Materials must be selected according to their characteristics, which must meet fire and environmental safety requirements. For wood, it is necessary to provide special treatment with fire retardants, which will reduce the flammability of the material. So, for construction you will need:
- Boards for rafter legs. Their cross section is selected based on the results of special calculations - this will be discussed in more detail below.
- A beam having a cross-section of 100×150 or 150×200 mm is for floor beams, depending on the chosen rafter system and the width between the load-bearing walls, as well as for purlins, diagonal legs or valleys - if they are provided for in the design.
- Beam with a cross section of 100×150 mm or 150×150 mm for laying the Mauerlat.
- For racks, timber 100 × 100 or 150 × 150 mm is usually used.
- Unedged board for laying the subfloor and some fasteners.
- Annealed steel wire with a diameter of 3-4 mm - for fastening some parts together.
- Nails, bolts, staples of various sizes, angles of various configurations and other fasteners.
- A metal sheet with a thickness of at least 1 mm is for cutting out overlays.
- Lumber for sheathing and counter-lattens for roofing material - depending on the type of roof chosen.
- Insulation materials – for thermal insulation of the roof.
- Waterproofing and vapor barrier membranes.
- Roofing material and fastening elements for it.
What section of rafters are required?
Rafters are roofing elements that will bear the main external loads, so the requirements for their cross-section are quite special.
The size of the required lumber will depend on many parameters - on the step between the rafter legs, on the length of these legs between the support points, on the snow and wind load that falls on them.
The geometric parameters of the rafter system design are easy to determine in the drawing. But with the remaining parameters, you will have to refer to the reference material and make some calculations.
Snow load
Snow load is not the same for different regions of our country. The figure below shows a map on which the entire territory of Russia is divided into zones according to the intensity of the snow load.
Map of calculated snow loads on the territory of the Russian Federation
There are eight such zones in total (the last, eighth, is rather extreme and cannot be considered for the construction of an attic roof).
| Zoning by snow load | Value in kPa | Value in kg/m² |
| I | 0.8 kPa | 80 kg/m² |
| II | 1.2 kPa | 120 kg/m² |
| III | 1.8 kPa | 180 kg/m² |
| IV | 2.4 kPa | 240 kg/m² |
| V | 3.2 kPa | 320 kg/m² |
| VI | 4.0 kPa | 400 kg/m² |
| VII | 4.8 kPa | 480 kg/m² |
Now you can accurately determine the snow load, which will depend on the angle of the roof slope. For this there is the following formula:
S = Sg × μ
Sg – table value - see the map and the table attached to it
μ is a correction factor depending on the steepness of the roof slope.
- If the slope angle is less than 25°, then μ=1.0
- With a slope from 25 to 60° - μ=0.7
- If the roof is steeper than 60°, then it is considered that snow does not linger on it, and the snow load is not taken into account at all.
It is typical that if the attic roof has a broken structure, then for different sections of it the load can have different values.
The slope angle of the roof can be easily estimated from the ratio of the height of the ridge and the width of the span
The slope angle of the roof can always be determined either with a protractor - according to the drawing, or by a simple ratio of the height and base of the triangle (usually half the width of the span):
| Ratio of slope height to projected width (H/L) | Approximate slope angle (α) |
| 0.27 | 15° |
| 0.36 | 20° |
| 0.47 | 25° |
| 0.58 | 30° |
| 0.7 | 35° |
| 0.84 | 40° |
| 1 | 45° |
| 1.2 | 50° |
| 1.4 | 55° |
| 1.73 | 60° |
| 2.14 | 65° |
Wind load
Wind load also mainly depends on the region in which the building was built and on the characteristics of its surroundings and the height of the roof.
Zoning of the territory of the Russian Federation according to the average level of wind load
And again, for the calculation, the initial data on the map and the table attached to it are first determined:
| Zoning of wind load in Russia | 1a | 1 | 2 | 3 | 4 | 5 | 6 | 7 |
| Table value of wind pressure, kg/m² (W) | 24 | 32 | 42 | 53 | 67 | 84 | 100 | 120 |
The calculation for a specific building will be carried out according to the formula:
Wp = W × k × c
W – table value, depending on the region
k – coefficient taking into account the height of the building and its location (see table)
| Building height (z) | Zone A | Zone B | Zone B |
| no more than 5 m | 0.75 | 0.5 | 0.4 |
| from 5 to 10 m | 1 | 0.65 | 0.4 |
| from 10 to 20 m | 1.25 | 0.85 | 0.55 |
The following zones are indicated by letters in the table:
- zone A - open areas, steppes, forest-steppes, deserts, tundra or forest-tundra, wind-exposed sea coasts, large lakes and reservoirs.
- zone B – urban areas, wooded areas, areas with frequent wind obstacles, relief or artificial, at least 10 meters high.
- zone B – dense urban development with an average building height above 25 meters.
с – coefficient depending on the predominant wind direction (wind rose of the region) and on the angle of inclination of the roof slopes.
With this coefficient the situation is somewhat more complicated, since the wind can have a dual effect on the roof slopes. So, it has a direct, overturning effect directly on the roof slopes. But at small angles, the aerodynamic effect of the wind takes on special importance - it tries to raise the slope plane due to the resulting lift forces.
Diagrams and tables of wind load distribution by roof sections
The drawings, diagrams and accompanying tables indicate areas of the roof exposed to maximum wind loads and indicate the corresponding coefficients for calculation.
It is characteristic that at slope angles of up to 30 degrees (and this is quite possible in the area of ridge rafters), the coefficients are indicated both with a plus sign and negative, that is, directed upward. They somewhat dampen the frontal wind load (this is taken into account in the calculations), and in order to neutralize the effect of lifting forces, it will be necessary to very carefully secure the rafter system and roofing material in this area, using additional connections, for example, using annealed steel wire.
Once the wind and snow loads have been calculated, they can be summed up and, taking into account the design features of the system being created, the cross-section of the rafter boards can be determined.
Please note that the data is given for the most commonly used coniferous material (pine, spruce, cedar or larch). The table shows the maximum length of the rafters between the support points, the section of the board depending on the grade of the material, and on the pitch between the rafters.
The value of the total load is indicated in kPa (Kilopascals). Converting this value into more familiar kilograms per square meter is not difficult. With quite acceptable rounding, we can accept: 1 kPa ≈ 100 kg/m² .
The dimensions of the board along its cross-section are rounded up to standard lumber sizes.
| rafter section (mm) | Distance between adjacent rafters (mm) | ||||||
| 300 | 600 | 900 | 300 | 600 | 900 | ||
| total snow and wind load | 1.0 kPa | 1.5 kPa | |||||
| higher | 40×89 | 3.22 | 2.92 | 2.55 | 2.81 | 2.55 | 2.23 |
| 40×140 | 5.06 | 4.60 | 4.02 | 4.42 | 4.02 | 3.54 | |
| 50×184 | 6.65 | 6.05 | 5.28 | 5.81 | 5.28 | 4.61 | |
| 50×235 | 8.50 | 7.72 | 6.74 | 7.42 | 6.74 | 5.89 | |
| 50×286 | 10.34 | 9.40 | 8.21 | 9.03 | 8.21 | 7.17 | |
| 1 or 2 | 40×89 | 3.11 | 2.83 | 2.47 | 2.72 | 2.47 | 2.16 |
| 40×140 | 4.90 | 4.45 | 3.89 | 4.28 | 3.89 | 3.40 | |
| 50×184 | 6.44 | 5.85 | 5.11 | 5.62 | 5.11 | 4.41 | |
| 50×235 | 8.22 | 7.47 | 6.50 | 7.18 | 6.52 | 5.39 | |
| 50×286 | 10.00 | 9.06 | 7.40 | 8.74 | 7.66 | 6.25 | |
| 3 | 40×89 | 3.06 | 2.78 | 2.31 | 2.67 | 2.39 | 1.95 |
| 40×140 | 4.67 | 4.04 | 3.30 | 3.95 | 3.42 | 2.79 | |
| 50×184 | 5.68 | 4.92 | 4.02 | 4.80 | 4.16 | 3.40 | |
| 50×235 | 6.95 | 6.02 | 4.91 | 5.87 | 5.08 | 4.15 | |
| 50×286 | 8.06 | 6.98 | 6.70 | 6.81 | 5.90 | 4.82 | |
| total snow and wind load | 2.0 kPa | 2.5 kPa | |||||
| higher | 40×89 | 4.02 | 3.65 | 3.19 | 3.73 | 3.39 | 2.96 |
| 40×140 | 5.28 | 4.80 | 4.19 | 4.90 | 4.45 | 3.89 | |
| 50×184 | 6.74 | 6.13 | 5.35 | 6.26 | 5.69 | 4.97 | |
| 50×235 | 8.21 | 7.46 | 6.52 | 7.62 | 6.92 | 5.90 | |
| 50×286 | 2.47 | 2.24 | 1.96 | 2.29 | 2.08 | 1.82 | |
| 1 or 2 | 40×89 | 3.89 | 3.53 | 3.08 | 3.61 | 3.28 | 2.86 |
| 40×140 | 5.11 | 4.64 | 3.89 | 4.74 | 4.31 | 3.52 | |
| 50×184 | 6.52 | 5.82 | 4.75 | 6.06 | 5.27 | 4.30 | |
| 50×235 | 7.80 | 6.76 | 5.52 | 7.06 | 6.11 | 4.99 | |
| 50×286 | 2.43 | 2.11 | 1.72 | 2.21 | 1.91 | 1.56 | |
| 3 | 40×89 | 3.48 | 3.01 | 2.46 | 3.15 | 2.73 | 2.23 |
| 40×140 | 4.23 | 3.67 | 2.99 | 3.83 | 3.32 | 2.71 | |
| 50×184 | 5.18 | 4.48 | 3.66 | 4.68 | 4.06 | 3.31 | |
| 50×235 | 6.01 | 5.20 | 4.25 | 5.43 | 4.71 | 3.84 | |
| 50×286 | 6.52 | 5.82 | 4.75 | 6.06 | 5.27 | 4.30 | |
Tools
Naturally, during work you cannot do without tools, the list of which includes:
- Electric drill, screwdriver.
- Building level and plumb line, tape measure, square.
- Axe, chisel, chisel, hammer
- Circular saw, jigsaw, hacksaw.
- Carpenter's knife.
Installation will be accelerated if the tools for the work are of high quality, and the work will be carried out with competent mentors and assistants, carefully and step by step.
Installation stages
It is necessary to strictly follow the sequence of work - only under this condition the structure will be reliable and durable.
Mounting the Mauerlat
The installation of any rafter system begins with attaching a powerful support beam - a mauerlat - to the end of the side walls of the structure, on which it will be convenient to install the rafter legs. The Mauerlat is made from high-quality timber with a cross-section of at least 100 × 150 mm. It must be laid on roofing felt waterproofing laid along the upper end of the wall (regardless of the material).
Due to the Mauerlat, the load will be evenly distributed over the walls and transferred to the foundation of the building.
One of the options for attaching the Mauerlat to the walls of the house
The Mauerlat is secured to the wall using metal pins, which are pre-embedded in a concrete belt or crown running along the upper edge of the wall, or with anchor bolts with a diameter of 12 mm. They must go into the wall at least 150 - 170 mm. If the Mauerlat is installed on a wooden wall, then the beams are attached to it using wooden dowels.
Installation of truss structure
- Installation of the rafter system begins with the installation of floor beams. They can be mounted on the Mauerlat from above if the beams are planned to be moved outside the perimeter of the building and thereby increase the area of the attic. In this design, the rafter legs are fixed to the floor beams.
Floor beams fixed on top of the Mauerlat (Fig. A)
- In another case, they can be laid on waterproofed walls and attached using corners or brackets to the inner edge of the Mauerlat. This option is used when the rafter legs are planned to be attached directly to the mauerlat.
Another option is that only the rafter legs are attached to the Mauerlat
- Next, you need to find the middle of the floor beam, since this mark will become a guideline for determining the location of the support posts and the ridge.
- The posts should be located at the same distance from the marked center of the floor beam. They will subsequently determine the location of the walls of the attic room, that is, its width.
- The bars for the racks must have a cross-section equal to the size of the floor beams. The constructions are attached to the beams using special corners and wooden overlays. However, to begin with, they are first nailed, then carefully leveled using a building level and a plumb line, and only then are they permanently secured, taking into account future loads.
Installation of racks and ties connecting them
- When the first pair of racks is installed, they are fastened together from above with a bar, which is called a tie. This tightening is also connected to the racks using special metal corners.
Shaped metal corners for reliable fastening of rafter system parts
- After securing the tie, you will get a U-shaped structure. Layered rafters are installed on its sides, the second end of which is attached to the floor beam or placed on the mauerlat.
- A special recess (groove) is cut into the installed supports for the timber or in the rafters. With its use, the rafters are tightly installed on the mauerlat beam, and secured with metal brackets.
Fastening the rafter leg to the mauerlat with a bracket
- To provide rigidity to the structure, additional struts can be installed from the base of the rack to the middle of the installed side rafters. If this does not seem enough, and saving material is not in the foreground, then you can strengthen the overall structure with additional racks and contractions (they are indicated in the drawing, Fig. A, with translucent lines).
- Next, while tightening, the middle is calculated - the headstock will be attached to this place, supporting the ridge connection of the upper hanging subsystem of the rafters.
- The next step is to install the ridge rafters, which can be fastened together with various connections - this can be a metal plate or powerful bolts with metal plates or washers.
Interconnection of rafter legs in the ridge area
- After installing them, the headstock is attached to the ridge and the middle of the tightening.
- Having completed work on one part of the rafter system, you need to make all the rest according to the same principle. The distance between adjacent rafters in such a system should be no more than 900 - 950 mm, but the optimal interval would probably still be 600 mm - this will provide the necessary rigidity and stability of the structure, and will be convenient for insulation using standard mineral wool mats . True, this makes the structure heavier and will require more materials.
Installation is carried out gradually, with the installation and tying of rafter pairs.
- First, the side parts of the system assembly are installed, and then the intermediate parts. They are connected to each other by purlins, which are installed between the upper ends of the racks and act as spacers. Thus, you will get a rigid structure of the attic rafters, in which the frame for wall cladding will already be ready.
Prices for various types of fasteners for rafters
Rafter fasteners
Waterproofing attic roof
When the rafter system is built, you can proceed to finishing it with insulation and related materials.
- The first coating that should be fixed directly on top of the rafters will be a waterproofing and windproof film. it is attached to the rafters using staples and a stapler, starting from the cornice. The canvases are overlapped by 150 - 200 mm, and then the joints are glued together with waterproof tape.
- On top of the waterproofing, a counter-lattice is placed on the rafters, which will more reliably fix the film on the surface and create the necessary ventilation distance between the windproof and roofing material. The counter-lattice is usually made of boards 100 - 150 mm wide and 50 - 70 mm thick.
Waterproofing and windproof film, lathing and counter lathing on the roof surface
- The sheathing is fixed perpendicular to the counter-lattice, on which the roofing material will then be laid. The pitch between the slats must be calculated depending on the type and size of the sheet roofing material, taking into account the overlap required for it
- If a soft roof is chosen, then plywood sheets are most often fixed to the counter-lattice.
Roofing installation
The roofing material is attached to the prepared sheathing or plywood. Its installation usually starts from the roof eaves and proceeds in rows, from one of the edges - depending on the type of roof. Roofing sheets are mounted with an overlap. If a metal profile or metal tile is used for the coating, then such material is secured with special self-tapping screws with elastic gaskets. Fastening elements are usually matched in color to the roofing material.
The creation of a mansard roof is completed by laying roofing material
The most difficult thing in covering an attic sloping roof is the transition from layered side rafters to hanging ridge rafters. There may be certain difficulties if the roof has projections for installing roofs over balconies or windows.
In addition, if a chimney pipe goes onto the roof, it requires a separate design of the hole inside the rafter system and an insulating layer, and on the roof - reliable waterproofing around the pipe.
You can find out in detail how and what is the best way to cover a roof on our portal; there is a whole section “roof and roofing” , in which you can find answers to many questions, including recommendations for reliable insulation of an attic room.
Prices for popular types of corrugated sheets
Corrugated sheet
Video: detailed video tutorial on building a mansard roof
It should be noted that the work of constructing any roof, and especially one as complex as an attic roof, is not only responsible, but also quite dangerous and requires special, increased safety measures. If you have no experience in carrying out such construction processes, then it is better to entrust their implementation to professionals or perform all actions under the supervision of an experienced craftsman, and with the utmost care and precision.
Features of the room
The attic floor is a room whose walls and ceiling are the roof of the building. Lighting is provided through windows on the pediment or on the roof.
The extension has the following features:
- The finishing of the attic space should be done with materials with low thermal conductivity. A well-insulated room protects the lower levels from cold and heat.
- Rational planning allows you to get additional space at your disposal. New construction is much more expensive.
- Aesthetic component. Thoughtful and beautiful external decoration of the attic gives the building a representative appearance, visually increasing its size.
- Suitability for habitation. If the room is intended to accommodate people, it needs to be equipped with electricity, water supply and sewerage.
To make the best decision on how to decorate the attic from the inside, you need to decide on its design options and the choice of building materials.