Very often, when renovating premises, it is necessary to replace old wires with new ones. After all, new modern wiring can withstand all the requirements of the Nth number of household appliances in the house, while maintaining excellent fire safety. Often, owners also want to install additional sockets. This is much more convenient than carrying a few extra meters of extension cords with you everywhere.
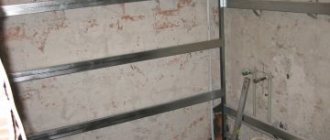
It is best to hide new wiring in the walls - it is both safe and pleasing to the eye. To do this, it is necessary to make grooves - cutting out recessed channels of standard sizes in the ceiling or walls, into which the cable is then placed. At the end of the work, the recesses are sealed with mortar or putty. This technology is used not only for major home repairs, but also for cosmetic ones, and even in the construction of new houses with the installation of a pipeline.
So where should we start? How to groove walls for wiring?
Standards and restrictions when tapping walls for wiring
Before you take the tool to the wall, you need to properly prepare for the process. Initially, you need to calculate the wiring plan on a piece of paper. Mark the locations of future sockets, switches and lighting points throughout the house. There shouldn't be too many of them. Each element must be defended by a vital necessity. You also need to take into account the materials of the walls and decide on the best method of gating this material.
Regulatory documents on the distribution of wires are collected in SNiP 3.05.06-85. It is best to study them in detail once, so as not to have to redo everything again later. Here are the main points to focus on when performing work:
- The groove (deepening) must be carried out strictly horizontally or vertically. There should be no oblique lines. The only exception is when the wiring needs to be installed on walls with a slope, for example, in the attic. Then the line can run parallel to the slope of the wall.
- Between two electrical points, the groove can only be turned once. Each turn is a bend in the cable, which will heat up more in these places. Such conditions can lead to dangerous situations.
- The grooves have size restrictions. The maximum permissible groove width is 30 mm, and the depth is 26 mm. The total length of the route from the distribution box to a specific point should not exceed 3 meters.
- It is imperative to maintain indentations: from the battery and gas pipes - at least 40 cm, from the door - 10 cm, and from the ceiling and floor at least 5 cm, although it is advisable to still adhere to 10 cm.
- It is prohibited to do grooves on internal load-bearing walls. The thickness of the external walls will not be affected by a shallow ditch, but for load-bearing partitions you need to obtain permission from the municipal authority. This is especially true for panel houses. Grooving walls for wiring on the first floors must be done with special care - the lower walls support not only the roof, but the entire building.
- It is forbidden to touch a reinforced concrete structure when cutting. This may lead to a violation of the integrity of the structure and, as a result, loss of its reliability. In case of urgent need, the grooves in reinforced concrete should be shallow and the reinforcing mesh should not be affected.
- When making grooves in the ceiling, it is necessary to calculate the shortest path to the lighting point.
- It is prohibited to make grooves in the floor slab. If you need to conduct wiring along the floor, then the best solution would be to do it in a concrete screed. It needs to be filled with the grooves for the wires in mind.
- Brick walls are easier to chip than concrete walls. This must be taken into account when choosing a tool and having the appropriate skills.
- When gating, it is necessary to protect the respiratory tract from dust with a mask or respirator.
Important! Grooving always occurs with increased noise effects. The whole house will hear your work, thanks to the inevitable vibration of the walls. Therefore, such work should be carried out on weekdays from 10 to 17 hours. Then mutual understanding between the residents will save your nerves during neighbor renovations.
Is it possible to ditch load-bearing walls?
In theory, when repairing electrical wiring in an apartment, it is necessary to order a project. When developing it, the presence and location of load-bearing walls, and the possibility of laying grooves in them are taken into account. As a result, a plan is issued that shows exactly where and what needs to be laid, what width and depth each groove should be. All that remains is to do everything exactly.
If you are worried about damaging the load-bearing walls during work, submit a request for permission to the Criminal Code. They should pull up the paperwork and see how much safety margin there is in your home. Most likely, permission will be given.
According to the finished project, it is safe to do wall grooves for wiring
But few people do this. Basically, they draw a plan (if they do), then they transfer it to the walls, and work begins. If gating walls for wiring is carried out in this order, do not make grooves more than 20 mm deep and wide in the load-bearing walls and simply hope that they will not damage anything.
Scoring methods
There are four main methods for making grooves. Their main difference lies in the use of the tool and the resulting application technologies.
- Hammer and chisel. The disadvantage of this method is the inconvenience of working with “old-fashioned” tools. Even with good skill, it takes a long time and with crooked highways. A huge plus is the cost - definitely cheap.
- Impact drill (hammer). The downside is that the grooves have uneven edges. Pros: speed of the process and relative cleanliness of the work.
- Bulgarian. Cons: a large amount of dust, which is difficult to collect even with a construction vacuum cleaner. Plus – even grooves in a short period of time.
- Wall chaser. The downside is the high cost of the tool. It's too expensive for one-time use. Pros - fast, not so noisy, smooth edges of the grooves, no dust.
Preparation and marking of the working surface
First of all, you need to check the walls for old wiring. For this, there are special testers and indicators, the principle of which is based on the general electrical circuit. It looks like this - from the general switch to the electrical point, for example, the socket has two wires - phase and neutral. According to the phase current, current flows from the switch to the point constantly, regardless of whether something is connected there or not. The neutral wire is energized only when the device is turned on. And only then does the current return back to the switch. The indicators catch the phase wire. Many indicators have a special light on top that lights up when a target is found. This preparation stage is necessary to protect yourself from electric shocks.
After checking, you need to draw the future route on the wall - from the junction box to each connection point.
Before starting work, be sure to curtain the doorways with a damp cloth or construction film. Don’t rely on a tightly closed door - small particles of dust will still find a loophole.
Tools for wall chiselling
When doing home renovations, many are faced with the question of how to tap a concrete wall for wiring with their own hands. There are various tools for this, which will be specifically discussed below.
Hammer and chisel - ideal partners
This work is carried out in separate stages. First you need to use a chisel one or two times the width of the spire to mark the edges of the groove. Then, placing the point across the groove, you need to knock out a small piece of the wall in depth. Then you can proceed in two ways - first remove the entire top layer of the intended recess and only then knock out the depth of the groove, or “dig” deeper to the end after every centimeter of the top layer removed.
Important! Using a hammer and chisel to make a groove in concrete is almost impossible.
Hammer. He's a hammer drill
To perform gating with this tool, you need three attachments - two drills of different lengths and a spatula. First you need to drill holes 2.5 cm deep along the entire length of the intended line. They should be evenly spaced at a distance of 1-1.5 cm from each other. Then, replacing the drill with a blade, walk along the furrow from point to point, forming a continuous groove. You can work with a hammer drill quickly and cleanly. And after the work is completed, you will get a highway of the given depth and width. And the unattractive appearance can later be masked with putty.
Important! Do not place the hammer drill blade across the furrow. Otherwise, an unplanned piece of the wall may break off.
Universal grinder
In order to use an angle grinder for slitting, it needs a diamond disc. High-quality cutting with such a disc is particularly precise and in the process does not leave any chips or cracks on the working material. An important factor is also the reduction of noise levels.
First you need to make parallel cuts, which will be clear boundaries of the future groove. The width between them must correspond to the standard dimensions necessary for laying the cable. Then, using a chisel or hammer drill, deepen the furrow to the desired size. The differences between the previous methods are essentially minimal. However, the edges of the grooves are smooth. This is very important when damage to the wall material needs to be reduced to “zero”. But, it should be taken into account that the grinder produces a lot of dust, which in a short time can cover the entire room. To avoid this, you can involve a person with a construction (not household!) vacuum cleaner, who will hold the suction pipe close to the source of dust.
Wall chaser, or how to groove a wall for wiring without dust
The wall chaser is a tool that has absorbed and modified all the advantages of the angle grinder necessary for cutting grooves in the wall. It has two diamond wheels, the distances of which can be adjusted, depending on the required furrow dimensions. A special powerful casing covers both circles from above by more than half. And when the circles enter the wall, this casing, completely adjacent to the wall, isolates the cutting space. And the resulting dust is drawn out through the provided outlet for the vacuum cleaner. After cutting the edges, you still have to remove the excess material with a puncher. However, the edges will be perfectly smooth and without excess dust. The main disadvantage is the price of the tool, which will be too high for home use.
Useful advice from professionals
- Once the grooves are ready, they are cleaned and coated with primer. It is most convenient to use a brush to apply the composition in the most difficult to reach places. This procedure can also be carried out after laying the wiring.
- The cable after installation should not protrude above the surface. It should be completely drowned. If this fails, the groove must be deepened using an electric tool. To ensure perfect evenness, run a spatula across the surface.
- If you want to use a hammer and chisel in your work, you should first try these tools on a small area to make sure the feasibility of this process and estimate how long it will take you to work along the entire length of the future groove.
- Sometimes a chisel and a drill are used in the work. Although this method is more effective than the one described above, it is still considered inconvenient by most masters. Every meter you will have to drill a hole. Once the track is ready, you will need to knock out the jumpers with a chisel, which takes a lot of time, and the furrow turns out to be uneven.
- You should retreat 15 cm from the ceiling.
- The brick at the base of the walls can be anything, for example, ceramic or silicate. White is the most fragile, so special treatment is required when gating. If the walls are based on porous or hollow blocks, the master must have certain skills. The wall can be easily damaged if you are careless.
- If you need to lay a thin wire, you can use a hammer drill. With its help, although the groove turns out to be uneven, it is completely closed at the finishing stage. For this you can use a cement-sand mixture.
- It is better to remove the old finish from the walls to make it easier to find the place where the wires are located. Be sure to save the resulting wiring diagram so that after decorative finishing of the walls you can drive fasteners into the wall without affecting the communications.
- The least labor-intensive method when working with a brick wall is to work along the seam. It will be possible to remove the cement mortar without difficulty, and there will be almost no dust.
- For a vertical channel, it is best to use a hammer drill, but different attachments are purchased for it in advance. When choosing this tool for gating, it is important to inquire about the power, which should start from 600 Watts. Reverse rotation and impact option are a must in the tool. Ask about the speed controller, especially if you rent a tool.
- If gating will be carried out using the technology of making holes and subsequent removal of jumpers, then it is necessary to determine the diameter of the holes. If this value is 15 mm, then the 4 and 6 mm drills are used first.
If an electric tool is used, it is necessary to operate it without overheating the engine. This can happen if you put pressure on the equipment or work continuously for several hours. This is especially true for consumer-grade devices. But professional analogues are ready to function without respite for up to several hours.
Specific features of gating
Sometimes you have to deal with non-standard situations in which general knowledge and a little more advice are needed. Among the most common ones, those presented below were selected.
Grilling walls for air conditioning
For a household-type air conditioner with two standard units - internal and external, special dimensions for the groove are required. The minimum width should be 60 mm and depth 50 mm. These dimensions will allow you to place the entire “filling”, consisting of two copper tubes with insulation, two wires and corrugations for draining condensate without damage.
Grilling wooden walls
When carrying out electrical wiring in a wooden house, incl. bathhouse, wall chipping is prohibited by fire safety rules. At its core, physically this would be simply cutting out a groove, which would be an impractical process. For such cases, there is external wiring hidden by special cable ducts disguised as wood.
Drywall cutting
Grooving in plasterboard sheets is impossible due to its thin and fragile structure. The cable is laid behind the sheet. The only possible option is to make holes for the socket using a special crown attachment for a hammer drill.
Installing sockets in drywall
Strobe in tiled floor
The bathroom and kitchen are two rooms where you may need a groove in the wall. There shouldn't be any problems with this process. The only caveat is to install the appropriate diamond discs on the angle grinder or wall chaser. It is not recommended to use a hammer drill to avoid cracks in the tiles.
How to make aerated concrete or foam blocks
Aerated concrete is a type of cellular material, an artificial stone used during construction work. In its production, quartz sand, cement, special gas generators and additional mixtures are used.
The material has good qualities and is convenient in construction. It has a soft structure, so there are no difficulties with gating.
To tap walls in aerated concrete or foam blocks, you can use the following tool:
- A wall chaser that allows you to create an even groove and reduce the loss of time for completing the work.
- Hammer.
- Angle pin machine.
- Drill.
Can be used:
- Pobedite crown 68 mm.
- Screwdriver.
- 8 mm straight groove cutter for wood. Because soft aerated concrete will be an excellent solution. Or you can use a drill of the same diameter.
- Profile for drywall - so that the groove is even.
POPULAR WITH READERS: How to connect a 380V electric motor to 220V
Alternatively, you can use a chisel with a hammer or a homemade chisel device. In the latter case, a pipe 30-40 cm long with a pointed edge on one side is used (we mentioned this above).
How to seal the groove
Finally, the groove is done, all the cables are laid in place. All that remains is to seal the recess well and efficiently, so that we can then begin the final painting. So, what does the whole process consist of:
- First, the furrow must be cleaned thoroughly. For these purposes, both a construction vacuum cleaner and a dust broom are suitable.
- Then it is necessary to properly prime the furrow. To do this, you should generously moisten the brush with primer and fill the recesses without sparing the material.
- Wait for the primer to dry completely.
- Before the final stage of embedding, it is necessary to moisten the furrow with water.
- Immediately begin sealing with one of the materials - either plaster mortar for cables (option - building gypsum), or polyurethane foam for pipes.
By following these simple tips, you can tackle the walls yourself. The main thing is desires and a little patience!
How to disguise grooves with wiring
Decoration is usually carried out with the following materials:
- gypsum plaster;
- plaster cement mixture;
- gypsum glue;
- ready-made compositions.
Gypsum plaster is suitable for rooms with high humidity. The laid layer will dry within a day. Plaster with a traditional recipe composition based on sand and cement is excellent for work. If you don’t want to prepare the composition yourself, you can purchase “Rotband” or “Stop.” It's even easier to work with gypsum glue.