9673
From this article you will learn:
- What are the features of cladding houses made of timber?
- How to prepare a timber façade for cladding
- What material is used for finishing the façade made of timber?
- How to cladding timber buildings depending on the material
- What are the pros and cons of lining timber with various materials?
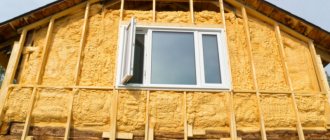
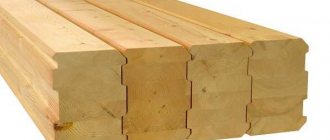
Wooden houses made of timber are especially popular. This material has a rectangular cross-section, which greatly simplifies the installation of walls. The ease of construction operations is one of the main points that allow timber to maintain a leading position in the market of materials for low-rise construction. In the northern regions and temperate climatic zones, the facades of timber houses are insulated and covered. We will talk about which options for finishing a timber facade are most often used in this article.
Ways to protect wooden walls
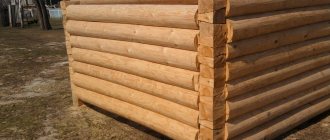
Any type of wood does not allow one to expect that a wooden house will last a long time without additional protective technologies. After all, wood deteriorates over time under the influence of moisture and sun: it dries out, becomes covered with fungus and mold, and rots. This is a natural process that can only be prevented by additional processing technologies. If we talk about laminated veneer lumber, this material is also short-lived: with prolonged use it cracks and cracks form. As a result, not only the appearance of the walls deteriorates, but the house itself becomes unusable.
Fig. 2. Fastening the beams (additional protection is needed)
It is also dangerous for water to get into the inter-crown gap. This causes the wood to rot and collapse. Only the external finishing of a wooden house will preserve it, ensure reliable and long-term operation, as well as a good appearance for many years.
Selection of finishing materials
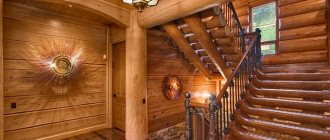
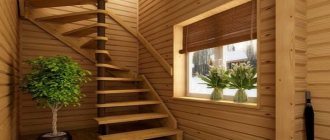
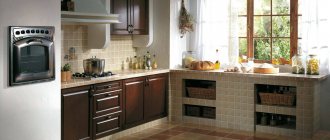
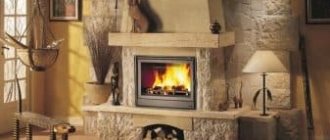
Imitation of timber in the interior looks advantageous, because wood never goes out of fashion. But each room in the house has a certain microclimate, and this factor must be taken into account when choosing a material in the first place. So, for rooms or houses without heating, pine timber is more suitable. This is due to the fact that coniferous wood tolerates temperature changes well. Due to the high resin content, pine timber is resistant to high humidity, which makes it possible to sheathe summer cottages, verandas, and terraces with it.
Heated rooms can be sheathed with imitation wood of any type. For example, oak is optimal for a bedroom or children's rooms - it is durable and not afraid of moisture. Hardwoods are also used: aspen, linden, maple.
Rooms in a house with a high moisture content are sheathed with larch, pine or spruce. These breeds are resistant to temperature changes and high humidity, which means they are optimally suited for interior decoration of bathrooms, baths and kitchens. In addition, by decorating a bathtub or bathhouse with imitation coniferous timber, you can get a natural flavor.
Each type of wood is unique in itself. Different woods have unique patterns and textures, so the interior design of your home or cottage will be original. By using some tricks (for example, treating the surface of the cladding with stain), you can create a completely unusual atmosphere. In terms of beauty and originality, this will be a one-of-a-kind design.
Timely cladding of a timber house
Experts recommend that all finishing work be carried out in a timely manner and in strict accordance with technology. Before studying all the details of the cladding work, first some preliminary information. It is important to understand that the shrinkage of structures made from laminated veneer lumber is negligible. This is explained by the fact that a house made of timber has relatively little weight compared to similar buildings made of brick. The shrinkage percentage is usually within two percent. Based on this data, there is no need to start decorating the house immediately after its construction. It is better to give time for shrinkage, even if only slightly. As a rule, this will take approximately 5-6 years. What will happen during such a period to the walls of a wooden house made of timber? They can deteriorate, become damp and rotten, and become covered with fungus. To avoid such consequences, you should sand the timber in the first years after construction and carefully treat it with varnish, which is used for facade finishing work. As a result, the walls of the house will, of course, be more protected from moisture than without treatment at all. However, you should not expect this method to last long. It is imperative to renew the varnish coating of the outside walls, and literally after 2 years begin cladding the house made of timber with the selected finishing materials.
Finishing materials: getting to know each other and choosing
In this section you will learn what materials exist for the exterior decoration of a house made of timber. In addition, you will be able to evaluate the advantages and disadvantages of each option.
To cladding the wooden walls of a house, the building materials market offers various possibilities, including the use of:
- vinyl siding;
- metal siding;
- block house;
- thermal panels;
- linings;
- fiber cement panels;
- brickwork.
Let's take a closer look at each finishing material.
1. Vinyl siding is a good and very popular cladding method, practical because it is factory painted. Its other attractive properties are its resistance to ultraviolet rays and does not fade in the sun.
Figure 3. Vinyl siding
In addition, plastic finishing does not require complex maintenance, is easy to install, tolerates our climatic conditions well and is quite durable. Thanks to this set of properties, vinyl siding is loved by many developers as cladding for wooden buildings.
2. Metal siding is very similar to the previous option: it is practical, reliable, easy to install and maintain, and durable. The significant difference is more weight and higher cost. Individual buildings are rarely faced in this way, since the owners prefer the vinyl analogue.
Fig 4. Metal siding
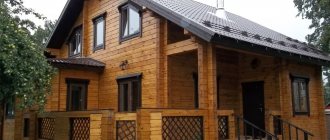
3. The original finishing option is a block house . This decorative material imitates the appearance of wood well and is made from lumber (waste from the production of timber). As a result, the appearance of a house lined with a block house is practically indistinguishable from the natural appearance of rounded logs.
Figure 5. Fastening the block house panels
If we consider the installation design, it is similar to lining: fastening occurs according to the tongue-and-groove pattern. However, the external relief of a block house very accurately conveys the relief of natural logs. In low-rise construction, such finishing material is extremely attractive from an aesthetic point of view. At the same time, a block house has all the typical disadvantages of wood, and in order to improve its characteristics in terms of resistance to negative external factors, it is necessary to coat the panels with varnish, antiseptics and other special means. This way you can avoid the processes of rotting and drying out.
4. Thermal panels are a popular material for cladding a house made of timber, capable of reliably protecting the wood and making the operation of the house more economical and reliable.
Figure 6. Thermal panels
Thermal panels are a finishing material made from polyurethane foam. Thanks to this, thermal panels have excellent sound and heat insulation characteristics. Another important feature of this material is its relatively light weight and ease of installation. The disadvantages include the fact that finishing a house with thermal panels is far from a budget option.
5. Lining (vinyl or wood) is an advantageous and practical material for finishing the facade of a building. By choosing this finishing method, you will not only protect your walls from adverse natural factors, but you will also do it at a reasonable price. The material belongs to the average cost category and is easy to install.
Fig 7. Wooden lining
6. Fiber cement panels are a fairly new finishing material on the domestic construction market. It is widely known in Europe, but is just beginning to be in demand among Russian consumers.
Figure 8. Fiber cement panels (colors)
An important advantage of this finishing option is the possibility of a wide choice of colors. In addition, such panels are lightweight, have good thermal and sound insulation properties, and reliably protect the wooden walls of the building from moisture, fungus and destruction. The ability to attach fiber cement panels directly to the wall, without first installing the sheathing, is a serious argument in favor of choosing this finishing material.
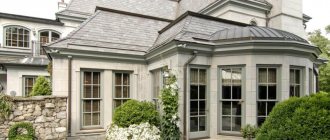
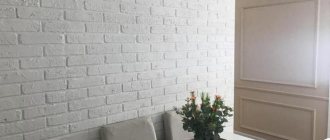
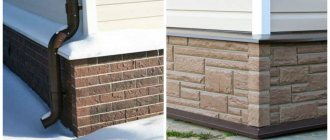
7. Decorative brickwork is one of the most common options for finishing a house made of timber. This facing material perfectly protects wood from destruction and makes the appearance of a wooden house elegant and reliable. But, unfortunately, it is almost impossible to do such cladding yourself, without the participation of an experienced specialist.
Fig 9. Decorative brickwork
Installation of Block House
In this section you will learn how to perform the external cladding of a timber house using one of the most famous and popular finishing materials - a block house. The stages of installing a block house on the facade of a house include:
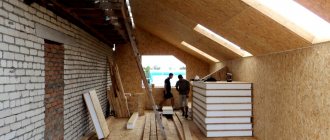
- thorough preparation of the walls outside the house;
- preliminary insulation of all walls and installation of load-bearing sheathing;
- preparing panels for the installation process;
- actually, the installation of the panels itself.
Before installing the panels, it is necessary to carefully level and dry all the walls of the building thoroughly. It is extremely important to check all wooden surfaces to ensure that there are no damaged areas where mold or mildew has settled. If such places are found, the entire damaged area should be well treated with a special antiseptic primer and sanded. In addition, the walls should be waterproofed to make the wood resistant to moisture. For this purpose, a water-repellent composition is applied to the walls, which will make the walls hydrophobic. As a result, the building will be reliably protected from fungus and mold throughout its entire operation, including on the surface of the walls under the panels.
Fig10. Lathing on timber walls
First, the surface of the walls is sheathed with lathing, and only then the panels are installed on it. The material for the sheathing can be different - both wooden beams and metal profiles are suitable. The work technique requires that the surface of the sheathing be at the same vertical level. Achieving this is not so easy, but it is necessary. Then, after installing the sheathing, you should apply a protective layer of varnish (drying oil) to it. Before you begin installing the sheathing, be sure to place the material for 2 days in natural operating conditions - outside. This way the sheathing will be equalized in temperature and moisture with the environment. An important nuance: to prevent water from penetrating into the grooves, the block house is mounted with the tenon facing upward.
During installation, you can use different fastening materials, including: - nails (an economical, but unreliable option, will not withstand loads for a long time); — galvanized self-tapping screws (the most popular fastening option); — special staples (clasps).
Figure 11. Block house laying diagram
When using self-tapping screws or nails during the installation process, you need to leave a hole under the head of the nail (screw). Then the tenon on the next panel can easily fit into the groove.
Finishing the facade of a wooden house
There are many options for finishing the external walls of a wooden house, but most of them require special knowledge and skills. Therefore, when it comes to finishing a log house with your own hands, most often home craftsmen settle on cladding the house with clapboard or siding.
Preparing the walls
Before covering a log house with finishing materials, it is necessary to caulk the external and internal seams of the logs and treat the wood with an antiseptic to prevent putrefactive processes and a fire retardant to protect it from fire. The products are applied layer by layer with a paint roller or brush.
After the impregnations have completely dried, a vapor barrier membrane is attached to the wall using a stapler. The vapor barrier allows perspiration to escape outside and prevents moisture from entering.
Installation of the main sheathing
You can make a metal or wooden crate. In the first case, metal profiles are used, in the second - wooden blocks 40-50 mm thick. For a log house, it is best to make a frame made of wood.
- The sheathing is installed at the corners of the house. First, two outer vertical bars are attached to the wall using long self-tapping screws. Between them, from above and below, two fishing lines are stretched, along which the rest of the guides are set.
- The vertical bars are connected by two horizontal slats at the top and bottom of the house.
- The distance between the slats should not exceed 60 mm. The basic rule when choosing a pitch is that the thicker the finish, the greater the distance you can leave. Typically, the bars are installed in increments of 40-50 cm.
- The lower edge of the sheathing should lie on the foundation, and the upper edge should be 25 mm below the eaves. This installation compensates for the displacement of the cladding when the house settles.
- When installing sheathing around door or window openings, you need to leave an allowance to turn the ebbs and slopes
Please note that siding is usually installed on a vertical frame, and the siding should always be installed perpendicular to the sheathing strips.
Laying insulation and installing counter-lattice
To insulate a log house, mineral wool slabs 10 mm thick are usually used. In order for the insulation to fit tightly between the lathing strips, its width should be 20-30 mm greater than the distance between the bars.
Laying insulation and installing counter-lattice
Another layer of vapor barrier is attached on top of the mineral wool. The insulation is fixed to the planks using a counter-lattice, which provides a ventilation gap between the cladding and the wooden wall.
The facing material is attached to the counter-lattice. If the cladding is made of siding or a block house, the counter-lattice is made of a 50x50 mm wooden block; 30x40 mm bars will be sufficient for fastening the lining.
Siding installation
Installing siding panels is a simple process, the main thing is to strictly follow the work technology. Below we will focus on how to properly cover a house with siding.
Siding installation
To work, in addition to the panels themselves, you will need a starting and finishing strip, internal and external corners, platbands and a decorative strip.
- Installation begins with installing the starting strip. It is fixed in the lower part of the house and fixed with self-tapping screws to the sheathing. Before attaching the guide, you need to make horizontal marks using a level.
- Corner strips are installed in the corners of the house, and special window strips are also installed around window openings.
- After installing all the auxiliary parts, the installation of the panels begins. The rule for installing siding is as follows: the panel is inserted into the guide until it snaps into place, the uniformity of the gaps along the edges and the alignment of adjacent horizontal rows are checked.
- The siding is screwed with self-tapping screws, first to the central strips of the sheathing, then to all the others. Self-tapping screws are inserted into the center of the mounting hole. When screwing, they do not need to be tightened all the way; it is necessary to leave a small distance so that the siding sag freely under its own weight.
When installing between panels, it is necessary to provide temperature gaps. If installation is carried out in summer, the distance between the panels should be 5-7 mm, in winter it is required to leave at least 1 cm.