Shower cabins are becoming increasingly popular among bathroom products. Convenience and functionality come first for the consumer, so large, uncomfortable cast-iron bathtubs of standard sizes are becoming a thing of the past; also, in many new buildings, bathroom space is very limited. This is where a shower stall will come in very handy, whether you have a large or small bathroom.
Purchasing and installing a shower cabin will allow you to increase the usable space in your bathroom, especially if your bathroom is not large. You can easily place a washing machine, bath furniture and much more there.
Choosing and purchasing a shower cabin is only half the battle; you still need to assemble and install it.
I would like to say that a shower cabin is a product in which 70 percent service life and reliability
This is a kind of construction set that you must assemble correctly, with high quality, and then it will serve you for many years.
Please note that the shower cabin is assembled in a finished, clean room; all finishing work must already be completed.
Using these instructions, you can assemble most shower cabins with a glass back wall, either 90 by 90 centimeters, 80 by 80 centimeters, or 100 by 100 centimeters.
We also note that assembling a shower cabin with a high tray is no different from assembling a shower cabin with a low tray . The only difference will be in preparing the space for the shower stall.
Assembling the shower cabin is best done with two people; the approximate assembly time is about 3 hours.
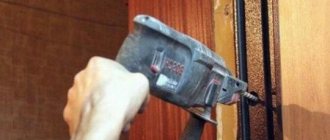
To assemble the shower cabin you will need the following tools
The shower cabin is not included in the package!
- Sealant (with application gun)
- Screwdriver
- Drill Ø1-3mm
- Phillips screwdriver
- Pencil
- Pliers or wrenches
- Level
According to the manufacturer, some shower cabins are assembled without sealant. But even for these types of showers, you will still need a sealant . They need to process the shower drain hole, install water traps and magnetic seals, and other small options if available, such as processing the hole for the radio and nozzles.
In all other shower stalls, sealant is required.
With its help, all fixed elements are processed. The joints of the rear wall between the central panel and the pan, the joints of the front frame and the pan, fastening the drain and nozzles, installing seals and water shut-offs.
Glass shower cabins are supplied unassembled, in cardboard boxes. The number of boxes per shower cabin is from 3 to 5 (depending on the manufacturer)
Assembling the frame for installing shower doors:
Option #2:
- The arrow indicates the upper semicircular profile or there is a sticker with the word “ UP
”
- The main difference between this option is the method of fastening the profiles together.
- They are held together with such cunning Chinese clamps - you can see it here in the photo.
- It is necessary to loosen it three turns, for this we find a hexagon, which the caring Chinese included in the kit. We twist, as always, counterclockwise.
- We connect them as shown in the photo.
Important:
- Do not overtighten and align the edges
. If these damn things are broken, there will be a lot of sadness.
- The assembly algorithm for such a frame, like the first option, is quite simple.
- If you are embarrassed by the instability of the structure, then you should not pull the bolts. The structure will become rigid when everything is in place.
- Next, take the rubber door movement limiters, as shown in the photo. They may be different, but this is not important, the main thing is to understand the principle that I will outline in the following information.
- Others “by appearance” must be placed with a semicircular recess to meet the vector of movement of the cabin doors, but in a simple way - they look towards the door.
- On the one hand, they limit the door so that it does not crash or fly off the guides, and on the other hand, so that the doors close. First we thread short screws into them so that they stick out from the stopper to a length of no more than 3 mm.
- If you insert the wrong screws, you can seriously screw up and damage the front profile in the most visible place. The solution is to look for screws of suitable length.
- We screw them into the holes that are located on the semicircular profiles in the recess where the door rollers will slide.
- By the way, about sliding. Here's my mega advice - lubricate the rollers with grease or other thick, high-quality lubricant. There is always lubrication in luxury cabins. Your doors will always open with effortless ease.
Pfft, how important:
- The holes must be located synchronously on both profiles. This can be checked even with a regular tape measure.
- If the Chinese drilled differently, don’t do anything about it for now. Then, when it comes to installing the doors, I will guide you. The screwdriver can be set to “one” or it is generally better to tighten them with a screwdriver.
- Because of this jamb, which an inexperienced installer misses, the doors fly off the shower stall.
- And the clients are told the following: “You bought a crappy cabin, I don’t know what’s wrong!”
Assembling the walls of the shower stall is not difficult, the main thing is patience and accuracy... .
- We begin to complete the walls and enclosures of the shower stall. Usually there is a watering can, holder, mirror, shelf, etc.
- The most important rule for a beginner is try it on, think about it, twist it, don’t overtighten it
. This rule always helps me out when I come across an unfamiliar shower stall configuration.
Universal scheme for preparing communications
This assembly scheme is suitable for almost all shower cabins, for example, using this scheme you can assemble a shower cabin measuring 80 by 80 centimeters, 90 by 90 centimeters, 100 by 100 centimeters.
General diagram of the shower cabin assembly
Features of cabin types
All modern variations of shower cabins can be divided into open and closed according to the type of design. Open ones are almost always cheaper than closed ones. On top of that, open models require high-quality waterproofing in the bathroom. It is worth considering each type in more detail - this will help you make your choice.
Open
Open showers are integrated into the bathroom layout. Such designs are also called shower enclosures, since they can only be installed in a corner. Sometimes they consist of almost nothing but transparent doors; not all models have a tray (if there is no tray, you will also have to install a so-called drain ladder).
During the operation of such a cabin, steam from hot water comes out in large quantities; accordingly, the humidity in the room will be high, and this necessitates high-quality waterproofing. In bathrooms with such a cabin, you should place only moisture-resistant furniture.
Closed
Closed cabins are completely self-contained boxes; in addition to doors and a tray, they also have side and rear walls, as well as a top cover. This design can even be installed in the center of the bathroom if there is enough space. Closed cabins can be of different sizes - from 0.7x0.7 meters to 2x2.1 meters. It is convenient to place the smallest ones in small apartments.
Closed oval or square cabins, unlike corner ones, are isolated from the general microclimate of the bathroom, and this can be considered a plus.
Some models have one or more additional options, and this attracts a certain category of buyers. We are talking about options such as:
- aromatherapy;
- hydromassage;
- Turkish bath;
- Charcot's shower.
Sometimes the factory equipment of enclosed shower cabins even includes a radio. They are equipped with top and side lighting, a mirror, shelves and other useful devices.
Stage one
First of all, before assembling the shower cabin, unpack all the boxes and take out all the components and components.
Lay them out and check that all components are in place.
A standard shower enclosure with a glass back wall consists of the following assembly units
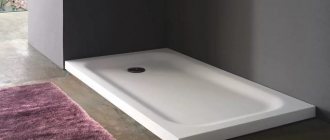
Pallet (some manufacturers supply the pallet assembled; if your pallet is not assembled, then you will have the following spare parts in the box with the pallet)
- Pallet
- Roof
- Front decorative screen
- Horizontal profiles - 2 pieces (upper and lower)
- Frame
- Components for assembling the frame and attaching the decorative panel (studs, bolts, legs)
Very often, all of the above components are contained in one box. This is the biggest box. Also, inside there may be a box with all the components, where you can find everything to assemble the shower cabin.
If you can't find the threaded rods for the legs and frame, shake the frame itself; some manufacturers put the studs inside the frame.
Back wall
- Two glasses of the same size
They can be immediately framed with aluminum profiles, or just two glasses if the back wall is assembled at the corners.
These two walls differ from each other in the presence of holes already drilled in them for components. Such as a shelf, mirror, foot massage, hand shower and others.
To understand which glass is right or left, look at the product image on the instructions or on the Internet. There you will see the configuration of your shower cabin, and on which side the options are located
Front windows
- Fixed glass - 2 pcs.
- Doors - 2 pieces (curved glass with holes for rollers and handles)
- Horizontal profiles - 2 pcs.
- U-shaped seals (2 or more pieces)
- Magnetic seals on the door - 2 pcs (may already be attached to the doors)
- L-shaped cutters (2 or 4 pcs)
Central pillar
It may come with options already screwed on, such as a faucet or lighting. Also, very often, inside, on the back side, various seals and other small spare parts are placed directly into the panel .
- Video instructions for assembling shower cabins
Accessories
Mandatory components that all shower cabins have
- Rollers for doors
- Pens
- Mixer
- Hand shower
- Hand shower holder
- Siphon drain
- Side window holder corners
- Fastening elements (Screws, bolts, washers, clamps)
Components that depend on the configuration of the shower cabin
- Injectors
- Rain shower
- Options control panel
- Radio speaker
- Backlight bulbs
- power unit
- Foot massager
- Steam generator
- Seat
- And so on
That is, at this stage, knowing the complete set of your shower cabin, you can visually inspect before assembly and understand what is screwed where, or suddenly something is missing.
Components of high-quality installation
Cabin installation involves the following:
- Connection to water supply;
- Power supply (if required by the design);
- Connection to sewerage;
- Cabin sealing;
- Functionality check.
Before proceeding with installation, it is necessary to check the completeness and integrity of the glass, walls and fittings. It is better, of course, to do this directly from the seller, but if this was not possible, then carefully and carefully check your purchase at home.
If you bought a cheap copy of expensive equipment, you should be careful to check that all the necessary additional parts are present. Unfortunately, it is not uncommon for some mechanism to be found to be missing during the installation process.
Included with the plumbing product, you will probably find assembly instructions and recommendations for its further use. You should not be lazy to read these books if you want to produce high-quality installation without making gross mistakes.
Stage two.
Before assembling, place the remaining cardboard boxes on the floor . This way, you will assemble the pallet and, most importantly, the glass without damage.
Never place glass on a bare floor, especially tile or concrete.
In general, handle shower glass very carefully during assembly. Although tempered safety glass used in shower enclosures is very strong, it does have weak points, especially at the corners. Never place glass on a corner. Do not drill holes in the glass, it will simply crumble into small fragments.
All the necessary holes are already there and were made at the factory. If, in your opinion, a hole is missing, it means this is a manufacturing defect, or the manufacturer has replaced the equipment.
Additional items
Many modern shower cabins have various kinds of electronic add-ons - radio, hydromassage, etc. To operate them, and they require a voltage of 12 volts, a special converter is required. Usually it is included in the shower set, and you do not have to buy it separately. Following the instructions, assemble and install the converter, carefully checking the correctness of the work.
Installation work can be considered completed after the first check of the equipment for functionality. Some shower models have their own characteristics and, as a result, slightly different assembly and installation methods. But standard booths are installed this way.
Attention. Before starting operation, it is necessary to check the tightness of the cabin. This can be done by turning on various functions of your shower one by one. If water leaks anywhere, the seams will need to be treated with sealant again.
From a safety point of view, it is believed that installing a shower cabin in a private house yourself is easier and safer, because there is absolutely no chance of flooding your neighbors! Therefore, it is better to “get your teeth into” in a separate home and boldly move on to working in an apartment building.
Stage three
Assembling the pallet
If your shower cabin comes with a tray already assembled, then you can skip this step, except for the level adjustment item.
1. Turn the pallet upside down and place it on the floor, previously covered with cardboard from the packaging, or lay down a cloth.
2. We screw the legs and studs onto the frame and try the frame on the pallet.
We try on the frame, taking into account that all its holes for fastening, both at the bottom of the pallet and at the corners of the pallet, fall on the embedded parts (these are those parts on the back side of the pallet that stick out and are intended specifically for attaching the frame there)
Attention! Some manufacturers may have a frame without holes, then after trying on the frame on an inverted pallet, you must make such holes yourself. Also, for some manufacturers the holes may not match or be in a completely different place, in which case you need to make new holes based on the correct installation of the frame.
After you have tried on the frame, secure it to the pallet with self-tapping screws.
Attention! Be sure to check the length of the screws so that you do not accidentally screw in longer screws. Otherwise, they will come out inside the pallet and damage the pallet!
3. Screw on the drain siphon
Be sure to coat the places where the drain is attached to the pan with silicone sealant.
4.Install the front decorative panel
Most often, such a panel is attached using self-tapping screws and closed with decorative plugs.
5.Remove the protective film from the tray and front decorative panel
6.Move the tray into place and use the feet and level to adjust it to the correct position. Tighten all nuts with a wrench and check the level again.
How to assemble a shower stall - corner
Most often, it is a corner with a pallet that is purchased. Without a tray, you have to deal with the floor and drain for a long time. It’s easier to install a ready-made trough. Therefore, first of all, we will describe the installation procedure for such a shower stall.
Let’s say right away that models with a tray require a headroom of at least 15 cm: at the bottom there is a siphon and water drainage hoses. So to install a cabin 215 cm high, the ceiling height must be at least 230 cm, and then it will be difficult to work. If your ceilings are low, you will have to install a booth without a tray - just the walls, and make the drain in the floor.
Pallet installation
The tray in modern shower cabins is made of plastic. It is reinforced with several layers of fiberglass, which increases its strength, but it is still impossible to stand on it normally without support. The kit includes several square metal pipes that are assembled into a structure that supports the bottom.
Pallet support structure
But not everyone decides to install a shower stall on several pieces of iron. Some people prefer to make the base from brick or wooden beams.
Assembly of a shower cabin on a metal frame
On some models, the first step is to attach a decorative protective cover to the pallet. It is simply inserted into the groove and screwed with metal plates. Then the installation process continues. What's wrong with this method? How to change or repair a drain if necessary? The casing cannot be removed - it is attached from the inside. The only way is to first make the door yourself, and then put the modified panel in place.
The procedure for assembling the shower tray is as follows:
- The studs are screwed into the existing sockets. Some designs have fewer nests than support beams. Then the kit includes short studs. They are simply inserted and held on by bolts, redistributing part of the load.
- Nuts are screwed onto the installed studs, which will lock the metal support frame, preventing it from resting on the pan. Starting to assemble the shower tray
- A frame is put on the studs with nuts, and holes are drilled in it for this purpose.
- More nuts are screwed onto the protruding ends of the studs, only now they are on the other side of the pipe.
There are lock nuts on both sides
- There are holes in the supporting structure; we tighten the bolts that are included in the kit. In theory, they should fall into the corresponding holes on the pallet. There is reinforcement under these holes, otherwise the screw will simply pierce the plastic. We attach the metal frame to the pallet
- After checking how level the frame is and adjusting if necessary, tighten all the double bolts on the studs. The result will be a fairly rigid fixation (everything was wobbly before).
- Let's start assembling the legs. We install stops. They are also placed on two nuts. Installing stops
- Having adjusted the shape of the front surface of the decorative casing, we screw in the stops. There are screws and washers for this. Decorative overlays are put on the washers. Screw the stops to the casing
- We twist the legs. All that remains is to straighten the legs. There are two ways. If the tray is small and shallow, it is easier to turn it over, put it in place and, controlling the plane and level, adjust it by twisting the legs. If the tray is massive and deep, and there is also a decorative casing, it is impossible to reach all the legs. In this case, twist the legs so that they are at the same height. You can check how evenly they are set using a regular building level - laying it in pairs on different legs, or using a laser plane builder. Installing the feet
The assembly of the shower corner is already half done. All that remains is to assemble the doors.
Assembling a pallet based on brick or foam blocks
Here everything is incomparably simpler, although it largely depends on the shape of the pallet. Most often, the base is made of brick or foam blocks. It is more convenient to work with high-density foam blocks. They have sufficient load-bearing capacity to support the required weight, but at the same time they are easy to cut with a saw and can be easily given the required shape.
First, the entire structure is folded dry, without mortar or glue for foam blocks. Just remember that the solution/glue will lift the structure a little. And this is the second advantage of foam blocks: for their installation, a layer of glue of a couple of millimeters is enough, and for bricks at least 6-8 mm is required.
Example of a shower tray installed on bricks
You can first try on how the shower tray will look like using glue or mortar: in case you didn’t put enough somewhere. To do this, spread the solution, more or less level it with a trowel, cover it with film, and place a tray on the film. By removing it, you will absolutely see whether there is enough glue everywhere.
After adding the solution if necessary, we put the tray in place. Leveling it is a matter of technique: we take a building level, and, focusing on its readings, tap in different places. Note! You can install the shower tray on the film without removing it from the solution. In this option, dismantling without destruction is possible.
The brick base is covered with film
When laying down the brick base, do not forget that you need space to install the drain and pipes from it. It is also necessary to provide for the possibility of replacing the siphon. To do this, a window is made on one side to provide access to the necessary parts. It can then be closed with a decorative door or lid.
Before final installation of the pan, the drain is connected. For those who have ever installed a sink or bathtub, this is not a problem. More details about this in the next video. One point: when installing the siphon, do not forget to coat the drain hole with sealant. Of course, there is an elastic band there, but it will be more reliable with sealant.
Pan sealing
After the pallet is put in place, the joint must be sealed. A transparent sealant is usually used. Just note that acrylic sealants turn yellow after a while (after a couple of months), so it’s better to look for silicone.
The tray must be well sealed
Fill all the cracks and spaces well, maybe twice. In order not to work by eye, you can place a tray, draw a line with a marker, then move it away and apply one or two continuous strips of sealant a couple of millimeters below the mark. Push the tray into place and press well. Fill the voids at the top.
There is a second way. It's more aesthetic. Close the joint with a plumbing corner. It itself has a rubber seal, but you can also coat it with sealant. With this corner you can close a small gap that appears if the angle in the bathroom is not exactly 90°.
Installing door guides
Next, the assembly of the shower cabin continues with the installation of door guides. Even if the cabin does not have side panels, you first need to assemble the guide frame for the doors, install it on the pallet, and then mark the installation locations for the fasteners. Assembling the frame means fastening the side posts and two rounded guides together. To add rigidity to the structure, fixed glass sides can be installed.
Why can't you immediately attach the door posts to the wall? Because the walls in the bathroom are rarely perfectly smooth. By attaching the racks this way, you will get skewed doors that will close/open poorly. To understand the difference, you can mark it strictly vertically, setting the side guides vertically as expected. Then assemble the supporting frame, put it in place and look at any deviations. In 99% of cases they are present, and significant ones at that.
One of the design of rollers for shower cabin
There can be no discrepancies when assembling the shower cabin frame. There are two arcs, there are two posts. Align the grooves and holes, tighten with screws. Then install the glass sides. They are fixed with clamps. After this, do not forget to install the rollers for the shower stall. They can have different designs, but most often, to install them you need to remove the side stoppers from the guides, drive two rollers into the profile on both sides, and put the stopper in place.
In some models you have to not only install the rollers, but also hang the glass, otherwise you won’t be able to move it. But then it’s better to work together. It's difficult for one.
Having placed the assembled frame on the pallet and checked whether it is positioned correctly, mark the location of the fasteners with a marker. Having removed the cabin, drill holes and install dowels.
Coat the junction of the frame with the walls with sealant. You need to apply the strip generously - it’s better to wipe off the excess later. Then put the guides in place and screw them on. The remaining cracks are re-filled with sealant. The installation of the shower enclosure is almost complete: all that remains is to hang the doors and install the seals.
Assembling a shower cabin: hanging the doors
If the doors have not been installed, they are hung. They start from the top. Most models have holes in the door leaf: top and bottom. These are the places where the rollers are attached. Some shower stalls have two holes, some have four. Their number depends on the design of the rollers.
Take a screw and put a plastic spacer (from the kit) on it. After inserting the screw into the hole, put on the second gasket. Next: there is a thread inside the roller, you need to get a screw into it, then support the roller from the outside with your fingers and screw the screw inside. This acrobatic element is repeated with all rollers. There is no need to tighten them until all the screws are installed. Just tighten it so that the door holds and doesn’t fall.
After the doors are hung, tighten all fasteners. There is one last thing left: installing seals on the doors. They simply snap into place (press with your finger) on the side edges of the two joining halves of the door. They are attached in the same way on the other side - on racks near the walls.
For details on hanging shower doors in one of the models, see the video.
Stage five
Rear wall assembly
This stage is best done together with an assistant.
We carefully look at where our right and left walls are.
Option for assembling rear walls framed with profiles
We place the glass and the central panel on a pallet, and using self-tapping screws or bolts (depending on the manufacturer) we fasten the side walls with the central panel together.
Seal the joint between the central panel and the side walls with silicone sealant.
Option for assembling rear walls at corners
1. Place the right and left glass on the pallet and secure it with self-tapping screws, installing the side corners at the top and bottom
2.Install the center post between the rear walls
3.According to the guide holes on the sides of the rear walls, connect the central post to the walls with self-tapping screws, securing the side corners at the top and bottom.
Progress
The pallet is equipped with a frame made of pipes with a square cross-section, a screen, a siphon and various fittings. The installation of the box begins with the installation of the pallet.
Installation of pallet (with and without frame) and communications
Pallets differ in size and shape, material, design, and the presence or absence of a frame, which increases the strength of the structure and is used as support. Supports can be made not only from metal, but plastic, PCB and wood.
Instructions for assembling a reinforced acrylic tray:
- The frame is attached to the bottom of the pallet with special fasteners - studs.
The studs are screwed at one end into the prepared holes along the upper edge of the pallet, and the support bases are screwed onto the other end. - Under the bottom there are metal frame elements, adjustable in height.
- The reinforced structure is placed in the prepared place.
- The placement accuracy is controlled by the level.
- Decorative panels are hung.
When installing a pan without a frame, install a tubular pump in the same way. To do this, all the ring elements are disconnected, the connection point is treated with sealant, after which the clamp with the hose is returned to its place. It is important to attach a rubber seal treated with silicone to the end of the hose to ensure a good connection between the outlet hose and the sewer outlet.
Pallet with frame or without frame:
- installed at the location;
- leveled;
- loaded with heavy objects;
- fixed with polyurethane foam;
- ready in a day.
Installation of walls and doors
The studs are screwed at one end into the prepared holes along the upper edge of the pallet, and the support bases are screwed onto the other end.
Procedure:
- Start installation from the back wall, where the electrics are installed and the water is connected.
- Place the wall near the center panel and connect them with screws.
- Connect the structure to the pallet using self-tapping screws, making sure that the slots on the pallet and panels match.
- Treat the joints between the walls and the pallet with sealant.
- Install all side walls in a similar manner.
- The installation of the upper dome is carried out in the same way as the pallet, only in the opposite order - mirrored. Only the device for sound reproduction - the speaker - is treated with a sealed compound.
- Attach the strips.
- Insert the glass into the slats.
- Place a rubber seal in the narrow gap between the glass and the panels, pre-treating it with sealant.
- Insert the rollers into the special holes in the glass so that they are in the slot of the bar.
- Adjust the height of the door using the screw located in the lower rollers.
- Screw the handles onto the doors from the outside and inside.
- Check that the fastening is secure.
Roof installation
Before the roof is attached, all elements must be installed in the shower stall, including lighting, hood and shower. The dome is assembled according to the instructions and attached to the walls using screws inserted into special grooves.
Connection to sewerage and water supply
Once the cabin is completely assembled, it must be connected to the water supply system:
- The water supply to the bathroom is shut off.
- Pipes are installed and taps are connected to supply cold and hot water to the cabin.
- Water is supplied in test mode to check for leakage.
Design verification
Open sufficient water pressure for 10 minutes and close the cabin doors. The water should go into the drain, there should be no leaks outside.
After installation and installation, you need to tighten the nuts again using a wrench and apply sealant at the joints. It is better to stand on the pallet and test it under your own weight, making sure that it is stable and reliable.
Stage six
Front frame assembly
- Connect transverse (arched) and longitudinal (straight) aluminum profiles using self-tapping screws
- Install the front side fixed windows into the groove of the longitudinal profile, having first placed a silicone U-shaped rubber seal on the glass.
If the glass is difficult to insert, do not try to knock on it, do not hammer it in. Try to spread a little silicone sealant on the U-shaped seal and carefully, with pressure, without bending or deforming the glass, try to insert it into the groove.
3.Press the free edge of the glass with the corners of the front walls using self-tapping screws.
Sewage connection
High-quality instructions for the correct assembly of a shower cabin usually contain information on how to equip a drain and install a siphon. So how is this done?
First, the protective film is removed from the drain pipe. Then a pipe with a diameter of 4 cm with a special adapter is supplied to the installation site of the pallet. The adapter must have sufficient rigidity - this will increase the functionality of the sewer system and there will be no stagnation in the corrugation area.
Next, you need to lift the back of the shower tray and lay the shower hose on the shower drain elbow from below. The other end of this hose should be secured to the drain. Its edge, reinforced with fiber, must be attached to the side nipple on the drain elbow.
Now all that remains is to place the tray on the place prepared for the shower stall and check whether the hose or connections are leaking anywhere. The test is simple - open the taps completely and let the water flow. In this case, no puddles should form on the floor, and the drainage should be fast and of high quality.
Stage seven
1.Place the front frame on the pallet
2. Connect the front frame and the back wall together using self-tapping screws or bolts (depending on the manufacturer). First check that they stand level and do not protrude anywhere.
3.Secure the back wall to the pallet using self-tapping screws or bolts. (depending on the manufacturer).
Attention! If you do not have holes for bolts, you will need to make them yourself using a drill, which may not be included in the kit.
Pallet selection
You can make a shower tray yourself or purchase it in a store. What to do depends only on time and financial capabilities.
Purchased pallets always look impeccable, have an ergonomic shape, and are easy to install and maintain. They are made of water-resistant materials - acrylic, enamel, ceramics. Their main disadvantage is that they have a slippery surface, which increases the likelihood of injury. In addition, store-bought trays have fixed dimensions and are not suitable for non-standard shaped showers.
It’s not difficult to make a pallet with your own hands, but it requires at least basic construction skills. So you can make it yourself from bricks and concrete only if you plan to make a shower of an unusual shape or atypical size.
Stage eight
Door assembly
1.Attach the upper and lower rollers to the doors, with the wheels facing outward
2.Attach the door handles to the holes on the sides of the doors.
3.Using sealant, install the shutters and magnetic seals on the door
4.Install the door stops on the upper and lower cross sections
5.Hang the doors on the upper rollers, placing the wheels in the groove of the cross profile.
6.Snap the lower rollers into the lower roller slot by lowering the wheel.
7.Adjust the rollers so that the shower doors close tightly and move effortlessly along the guides.
Assembly order
How to install a shower cabin? Experts recommend pre-assembly. To do this, you need to choose a free space in the apartment and install all the elements without using sealant. The procedure will help you better visualize the entire structure, once again ensure the integrity of the parts and check the presence of the necessary technological holes. After this, you can proceed with the final installation. We will divide the installation into several stages.
- Installation of a deep tray. It is better to install this element on a flat surface, although small deviations can be leveled out with adjustable legs. Ideally, the drain hole will be located above the sewer. If this does not happen, you can use a pipe and flexible hose to connect the cabin drain to the sewer system. Please note that sealant must be used for all butt joints.
USEFUL INFORMATION: Heated towel rails in the bathroom interior (photo)
- Walls. Please note that glass partitions are difficult to install yourself, given that bathrooms typically have limited room to maneuver. Therefore, we recommend involving a friend in the installation or using the help of your family. First, we assemble the aluminum frame. The side racks must be perfectly level; in addition, in some models they are attached directly to the bathroom wall. To do this, drill holes, hammer in dowels and secure the structure with screws. Note that before thoroughly tightening the fasteners, sealant is applied between the wall and the stud. When the frame is firmly fixed, the side panels are installed.
- Doors. This part of the structure is movable, so rollers are required. Please note that the rollers should slide freely in the grooves without any effort. To achieve this, we carry out the necessary adjustments. Typically, instructions for installing and adjusting rollers contain instructions. Then we secure the handles and insulate all existing seams. To do this, we again use sealant.
Please note that installation and connection of different models of shower cabins may differ.
Stage nine
Roof assembly
Remove the protective film from the roof and attach a speaker, hood light, and rain shower (if included) to the roof.
Secure the roof to the shower stall using self-tapping screws or bolts (depending on the manufacturer)
The roof is usually attached only to the rear wall
Installing a rain shower in the shower ceiling:
- The nut must be screwed onto the thread and tightened lightly; on the reverse side, check the symmetry of the location; if you need to move the rain shower, then first loosen the nut a little, and then tighten it again.
Stage eleven
Connection to communications
1. Connect the hoses coming from the mixer to the hand shower, rain shower and to the nozzles (if any)
2.If you have an electrician, connect the wires going to the lighting, hood, and radio.
Choosing an installation location
Installation of a shower cabin cannot be carried out without a preliminary and balanced selection of a location for it. There must be an electrical network, water supply and drainage nearby. The distant location of these important communications can result in additional hassle and expense.
It is advisable that there is also a ventilation hole (exhaust) next to the cabin - this will reduce or reduce to almost zero the accumulation of condensation on the walls.
Before securing the booth, you should pay attention to the surface of the floor - the smoother it is, the better. If the condition of the floor leaves much to be desired, you will have to start leveling it or adjusting the height of the cabin legs. The walls near which the cabin is supposed to be placed must also be level. If the angle between the walls is not 90 degrees, the installer will definitely encounter a problem such as a gap between the walls and the cabin. In most cases, such a gap can be sealed with sealant.
Choosing a shower enclosure with a tray
Shower enclosures differ in shape, size and material from which it is made. Also decide in which corner of the bathroom it will be installed. It is not necessary to buy a cabin and a pallet as a set; as a rule, construction stores should have a large selection of both pallets and cabins that can be easily combined.
It is worth considering the fact that when buying two parts from different manufacturers, certain difficulties may arise due to the difference in size. Therefore, we select only those parts that fit each other perfectly.
Advice! Buy the corner and tray from the same store, this will make it easier for you to select and combine the two parts together.
Manufacturers produce the following types of pallets:
- steel;
- cast iron;
- ceramics;
- marble;
- acrylic.
The latter version of pallets is very popular, and all because it has many advantages, such as: average weight, durability and relatively low price.
Such a platform can be rectangular, round or square. Particular attention should be paid to the doors, because if they come into contact with the wall when opening, they may become damaged or even break. Therefore, take accurate measurements before purchasing.
In appearance, glass doors also have slight differences, since they can be not only matte or transparent, but also with quite different and at the same time attractive texture and coloring. Even the handles on shower enclosure doors can be very different from each other.
Connection to water supply
As a rule, the shower cabin comes with two flexible hoses (for hot and cold water), and it is with their help that you need to make the connection. In general, the procedure is quite simple. First you need to turn off the water supply risers and open all the taps fully, due to this the pressure in the water supply decreases.
Next, you need to remove the old mixer and shower, that is, using pliers, you need to loosen its fastenings and unscrew the coupling. Then you need to put the pre-purchased compression fittings on the taps.
Advice! If the diameters do not match, experts advise using the appropriate adapter.
It is necessary to apply lubricant and sealant (FUM) to the threads of the installed fitting. After this, the flexible hoses should be connected to the water pipes (hot and cold) and secured with an adjustable wrench. Now there is only one more action left - turn on the water and check if the system is tight.