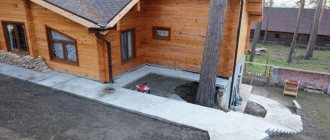
General markup rules
The first step in building a foundation is marking the foundation, special accuracy is required here, otherwise the house may end up moving or collapsing, so you need to be extremely careful at this stage, take into account the characteristics of the soil on which the house will stand, what kind of house you want to build and what kind you have the means.
Depending on these parameters, you can choose a suitable foundation from several possible ones, namely:
- Columnar.
- Tape.
- Pile.
- Slab.
In addition, there are several ways to mark the foundation:
- Spider web method.
- Golden Triangle.
- Worn out.
Each of these methods has its own characteristics, but they all have common markup rules. In order to correctly mark the foundation, one of the main sides of the foundation must be tied to some object on the site, for example, it could be a fence.
Thus, the distance from the fence should be the same throughout the entire wall. Also, to mark the foundation in any way, you must have certain items and tools.
So, what is needed for markup:
- Calculator.
- Twine.
As strong as possible, because for proper marking it will need to be pulled quite tightly. - Roulette.
It is desirable that its length be at least equal to the length of the main wall. - Stakes
, about a meter long. - Cutting tools.
Beginning of work
According to the general scheme, we mark the strip foundation. We place it on the support area. Simply by marking the corners and sides of the future slab, you will mark the area for the slab foundation.
Taking any corner of the building as a basis, you can begin preparing the site directly for construction. For other types of foundations, the outside of the corner is needed.
Once you have determined where the 1st point will be, start building a right angle. First, mark a smaller angle with short sides with a construction angle. After this, mark the length in one direction, which is divided by at least three meters, and in the other by at least 4, in order to reduce measurement errors.
Methods for marking a rectangular foundation
The rectangular shape of the foundation is the easiest to build. To mark it, you can use the following methods:
- Spider web method.
- Golden triangle (t. Piagora).
- Cast-off (more often used for complex shapes).
Golden Triangle
A very simple and reliable way to mark the foundation. In order to make markup using this method you need:
- Drive a peg into the corner of the main wall.
- Measure 4 meters along the main wall and drive a peg
- Connect 2 existing pegs with rope
- Measure 3 meters from the first peg along the adjacent wall and drive the peg.
- Connect the 1st and third peg with a rope.
- Stretch a rope from a peg located on the main wall to a peg located on the adjacent wall. The length of the rope should be 5 meters.
- If the rope does not reach the peg on the adjacent wall, move it closer, but if the rope is not tight, move it further.
This way you will get an even 90 degree angle. Next, you will need to extend the walls to the required length. To get the remaining ones into the walls, measure 2 pieces of rope of the required length and stretch from the corner pegs of the existing walls until tension is reached. Then secure. That's all - the rectangular marking is ready.
Marking depending on the type of foundation
Each foundation has its own characteristics in connection with which there are its own characteristics in the marking.
Strip foundation
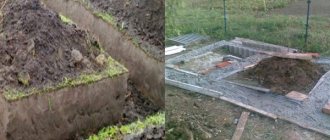
Pegs are placed at the corners of the foundation, between which it is necessary to stretch twine or colored tape. Pegs are driven into the corners of the outer edges, while the trench is dripped from the inside of the marking. It is difficult to find a perfectly level area, so the depth of the trench is usually measured at the lowest point of the foundation marking.
For a small building, a trench half a meter deep will be enough. It is extremely important that the bottom of the trench is as level as possible. Also, the trench must have strictly vertical walls.
Columnar foundation
Marking a columnar, pile or slab foundation is very similar to conventional marking, but the process is somewhat more complicated. On the edges of the foundation markings, it is necessary to mark the points for placing supports. The distance between them should be no more than 2 meters.
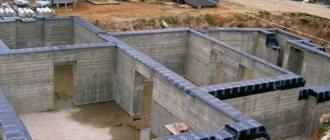
How to level to zero when concreting?
The first step is to set the zero point correctly. To do this, a mark is made from the inner area of the formwork, preferably in one of the corners, which will be the alignment boundary. Next, we use the hydraulic level to determine the remaining three points. If such a tool is not available, an ordinary transparent hose will do as an alternative. To mark the corresponding boundaries, the latter is stretched from the marked area to opposite corners, after which water is released. The zero level is fixed at the primary point; in the process of balancing the liquid, a second point is selected and a mark is placed in this place. The remaining points are located according to a similar principle; no difficulties arise at these stages:
In the finished formwork, it is necessary to make holes for the hose in the middle section of the planned walls. A cord or twine is threaded through the holes, after which the structure is fixed until tension appears. The zero level is measured and the concrete solution is poured. The construction rule is to level the mixture; it is important to distribute it evenly over all areas of the surface.
After the concrete solution has completely hardened, the ideally flat area of the foundation is completely ready for further construction of a basement or possible basement. In this case, do not forget about regularly checking the compliance of the horizontal and vertical levels of each brick row or building block.
Let's consider the structure of each type of foundation separately
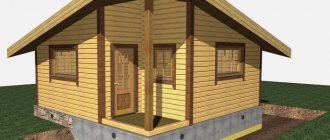
Strip foundation
Marking the foundation for a 3x3 m house
Strip foundations are trenches filled with reinforced concrete, rubble concrete, brick or reinforced concrete foundation blocks. Trenches are dug directly under the walls.
The material used for the foundation depends on the type of soil:
- Brick foundation.
It is used extremely rarely, mainly for the outer part of the foundation. This type can be used on clay soil. Under no circumstances should it be used at elevated groundwater levels. - Rubble concrete.
Used on rocky or sandy soils. - Concrete slabs and cast reinforced concrete
are used on clay soils.
The advantages of this foundation are as follows:
- Suitable for construction on any soil.
- Possibility of placing a basement under construction.
- Cheaper and simpler than slab.
The strip foundation can be:
- Shallow.
Used on stable, stable soils and for the construction of lightweight buildings. The depth of the trench for such soil does not exceed 70 cm, that is, it does not go deeper than the freezing level of the soil. - Recessed foundation.
Used only for heavy buildings. The depth of the trench for such soil extends beyond the freezing level of the ground. This type of foundation is good because it is resistant to soil shifts. However, only on condition that the building standing on it is heavy enough. - Monolith.
The internal space of the faces is filled with concrete. - Collection tape.
This type of foundation is not filled with mortar, but is assembled from separate reinforced concrete.
Marking the external contour of the foundation
Pile foundation
If the soil on which the house is being built is too weak to support the structure, or too uneven, a reasonable solution would be.
Due to the fact that the piles penetrate quite deeply, it becomes possible to bypass weak layers and place support on stronger ones. Beams and walls are installed on top of the piles, thus creating a stable foundation.
Piles are of the following types:
- Hammers.
Massive, long, reinforced concrete piles with a pointed end. It is driven deep into the ground by driving it using special equipment. It is usually not used in the private construction of small houses, since the use of equipment is quite expensive. - Bored.
Instead of driving ready-made piles, holes are drilled in the ground and filled with concrete, the height of the tops of which is adjusted depending on the construction plan. Can be reinforced or unreinforced. - Screw.
Metal, pointed piles with screws at the end. This makes it possible to deepen them to the required depth in a simpler way. This type of foundation is more often used in oversized private buildings.
Slab foundation
Universal, reliable and most expensive type of foundation. A monolithic reinforced concrete slab is cast on a “cushion” to the size of the house or slightly larger. When the ground moves, the cushion can float, which gives the structure stability.
may be of the following types:
- Shallow slab foundation.
Installed on the ground surface. The disadvantage of such a foundation is that it eliminates the possibility of building a basement. - Recessed slab foundation.
During its construction, a hole with smooth walls the size of the house is dug, and a slab is poured along the bottom. Using this foundation, it is possible to build a basement.
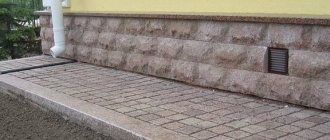
Foundation marking scheme taking into account the established norms of distance to the neighboring site
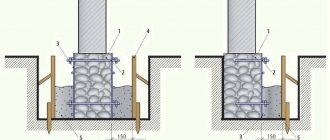
Columnar foundation
It is the simplest and cheapest, however, and the most unreliable foundation. Its essence lies in the fact that low pillars made of brick, stones or rubble are installed along the perimeter of the wall contours. They are installed in the most critical places, the distance between them is from 1.2 to 2.5 meters.
A connecting beam is installed on top, which forms the basis for the future structure. There is also a deepening type of columnar foundation. Wells are drilled in the main support areas, which are filled with concrete and reinforced.
From below, for greater stability, such pillars are expanded. A columnar foundation is installed only on stable foundations, and is only suitable for low-rise, light buildings. In addition, the construction of a basement is excluded.
Marking the foundation for a house with your own hands is done when constructing residential or other buildings yourself. This foundation must withstand all types of upcoming loads and ensure a long service life of the building, its strength and reliability.
The stability of the foundation and its ability to withstand the load of walls, ceilings, and furniture structures is ensured not only by the design and material used, but also by precise markings made in accordance with all existing requirements and rules.
First, remove the topsoil
When deciding how to make markings for the foundation with your own hands, you should first prepare a site on which further work on the construction of the foundation will be carried out.
On the site where it is planned to build a house, it is necessary to remove the fertile layer of soil, creating a flat surface.
The first structure is a cast-off - stakes connected by a board and forming a right angle at the point of contact.
The strength of the entire structure depends on how correctly the right angles were determined, so at this stage the foundation is marked using a laser level.
First of all, a right angle between the sides is laid
One of the basic rules is to maintain the established distance from the control cord to the anchor point or fence line (house wall). This distance must be at least 6 m.
Before marking the foundation for the house, it is necessary to accurately design the right angle between the sides. The rule of the golden “Egyptian” triangle applies here.
To simplify the problem, it is worth using such values of the lengths of the sides that when deriving the root from the sum of their squares, an integer is obtained. So, if one segment is 3 m long and the second is 4 m, the hypotenuse of this triangle will be equal to 5 m. By constructing such a triangle, you can be sure of the accuracy of the resulting right angle.
Using a cast-off “bench”, strictly parallel (under the control of the golden triangle rule), mark the remaining two sides of the rectangle. You can check the dimensional accuracy as follows:
- On a cord stretched parallel to the anchor line, you must make a mark at a distance of 3 m from the corner.
- On a perpendicularly stretched cord, mark a point located at a distance of 4 m from this corner.
- In accordance with the calculations performed using the Pythagorean theorem, it is necessary to fix the tape measure at this point and stretch it to the second point.
- On the tape measure you should get a distance of 5 m. This will confirm that the right angle has been correctly created.
Thus, the correctness of all 4 corners of the future foundation is created and checked. You can confirm the correctness of the calculations and work performed using a laser level to mark the foundation.
Features and nuances of foundation markings
Due to the fact that future homeowners try to perform many construction operations with their own hands in order to reduce the overall cost of work, we should dwell in more detail on how to plan the foundation for a house.
After determining the location of the future house in relation to existing buildings on this and neighboring sites, as well as in relation to the fence, you can begin marking the foundation. It begins with the installation of the first peg, which determines one of the corners of the future foundation.
A cord is tied to the first installed rod. Having measured a segment of the required length equal to one of the sides of the future foundation, install the second peg. The direction of the first cord is chosen either according to the cardinal points, guided by a compass, or in the direction of the boundaries of the site. The latter option is preferable in a small area.
The next stage is the installation of the third support. In most cases, it should be located so that the sides of the foundation form a right angle. To correctly mark it on a construction site, it is necessary to remember the basis of geometry - the Pythagorean theorem, according to which the square of the larger side of a right triangle is equal to the sum of the squares of its remaining sides.
In our case, the longest will be the diagonal (the segment connecting opposite corners) of our foundation, and the shorter segments will be its sides. Using simple calculations, we found that the lengths of the sides of a triangle with a right angle are related to each other as 3:4:5. In practice this is used as follows:
- on the first cord from the corner peg, set a distance of three meters and tie a knot or tie a bright ribbon;
- on the second segment, 4 meters are laid off and a mark is made in the same way;
- stretch the second segment of the length required for the project and, using a tape measure, controlling the distance between the marks, which should be 5 meters, drive in the third peg.
- The last fourth peg is placed equidistant from the previously installed first and third. The distance to it is determined by the length of the sides of the future foundation.
It is much easier to mark the foundation using a laser level. This tool allows you to produce two mutually perpendicular light beams on a horizontal plane. Use a laser level to build a foundation as follows:
- similarly to the first option, drive in the first peg;
- a level is installed on a tripod above it and adjusted to the projection of perpendicular rays;
- using a tape measure or laser rangefinder, set aside the required lengths of the sides of the foundation and install supports for the cord;
- from any of them, mark the following sides in the same way.
It should be noted that most laser levels do not produce beams that are clearly visible in bright light. This makes certain adjustments to the work. It is better to perform this stage at dusk, since it is practically impossible to correctly mark the strip foundation for a house with a laser level during the day.
After installing all the pegs and cords around the perimeter, you need to check that the markings are correct. To do this, you can beat off the diagonal of the foundation. For a regular rectangle they should be equal. Once you are convinced of this, you can begin further work on the site.
Thus, as part of the review, we not only looked at how to make markings for the foundation in one way or another, but also found out a number of basic nuances when performing this type of work. Remember that mistakes made at the very beginning of construction will be almost impossible to correct.
External marking and casting
The distance from the house to the street must be at least 5 m
Having installed the pegs in certain places, they are left without changing their location until the end of the work. The casting guarantees the exact restoration of all certain points, even if the cord intended to mark the boundaries of the pit or formwork suddenly breaks.
Marking for the foundation begins with binding. The anchor points are existing buildings on the site (shed, technical structure), fence or lighting pole. In accordance with the approved rules, the distance from the house to the street should not be less than 5 m, and to the passage of personal vehicles - 3 m.
To complete the markup you will need:
- lace (non-stretch twine);
- stakes;
- roulette.
Continuing the manipulations, tighten the remaining laces and check the diagonals. After completing all the steps, you can mark the foundation from the outside, but the work must continue, starting to mark the inside for the foundation. Detailed marking instructions in this useful video:
This is done quite simply, but each movement requires attentiveness and caution, accuracy and correctness of calculations. The foundation for a house has not only external but also internal markings. To carry it out, you will need to choose which type of foundation is most suitable for a given area, and carry out the markings in accordance with it.
Ribbon
The accuracy of the marks is checked with a level
The peculiarity of the strip base is that such a base can be built in a pit or trench, when marking which it is necessary to set points for tensioning the second row of laces. The distance between the first and second rows should correspond to the width of the ditch.
Using a level you need to check the accuracy of the marks. We place pegs in certain areas, controlling not only the distance between them, but also the correctness of the right angle. The perimeter marked in this way determines the boundaries of the base tape.
Exactly following the designation, the foundation is marked for the internal walls and partitions, which will bear the main load.
Marking continues after the diagonal of the foundation (the created rectangle) has been marked and the horizon has been checked with a laser level.
Step-by-step instructions will help you correctly mark the foundation with your own hands.
Thus, marking a columnar foundation for a house with your own hands does not take much time if all the work is carried out in accordance with the planned plan and rules.
When working on marking a columnar foundation, the constructed cast-off marks not only the height of the foundation itself, but also the height of the grillage.
To ensure that the exposed pillars are positioned correctly, the markings are carried out by pulling the string along the axes of the supporting structures. The distance between the cords should correspond to the length between the foundation supports. Having measured the distance to the next drilling point or pit arrangement, use a plumb line and mark the found point. For more information on how to handle the markup yourself, watch this video:
The main thing is to create a perfectly right angle
It is easier to mark a slab foundation; it fully corresponds to the progress of work on creating the markings of a strip foundation and does not always require internal markings.
The main thing is to accurately create a right angle and check the equality of the diagonals. Otherwise, the foundation slab will not become a strong and durable structure that guarantees high-quality support for the future building.
The rules for carrying out work on the construction of foundations require marking both the internal and external sides of any foundation.
Any building must have a foundation. This is a support that takes on all the acting loads. Therefore, it is very important that the markings for the foundation are done correctly. You can mark the foundation for a house with your own hands without special precision, but if you mark a tile or strip base. When marking the foundation for a house of this type, it is very important to have a properly constructed formwork frame. Marking specifically for a columnar foundation for a house requires high precision. Only minimal error is allowed. The base column is mounted point by point, so the marked area must have all dimensions correctly aligned. If you take this work with special care, you can mark the foundation yourself, without turning to professionals. Therefore, marking the foundation for a house is a simple procedure; the main thing is to follow all the recommendations and requirements.
Technology for marking foundations of various types
Technologically, the marking operation for any type of material involves drawing lines that limit the future part and its elements. Regarding construction work, the main “canvas” for this is the surface of the earth. It is necessary to somehow draw lines on it that limit the outer and inner boundaries of the foundation under the outer walls and load-bearing partitions.
The main method used to solve this problem is to install several strong wooden or steel pegs at the construction site, connected in a certain way with a strong cord of sufficient thickness. The last aspect is important not only for ease of work, but also for the purpose of complying with safety rules when performing ground work.
Marking a columnar foundation
When constructing small one-story buildings, as well as some building elements, for example, terraces and verandas, a columnar foundation is used, which consists of free-standing supports, the heads of which (upper ends) are aligned in a horizontal plane at a certain height from the ground. Marking this type of foundation consists of drawing one line of cord on pegs along the entire perimeter of the building. Additionally, along the future walls at a certain pitch, using a bayonet shovel, you can dig shallow holes in the places where the supports will be installed.
Marking the columnar foundation
When marking any type of foundation of a house or building, it is important to correctly make a right angle for the foundation. To perform this task, they use both a specialized construction tool, for example, a laser level, and apply knowledge of the basics of geometry
We will discuss in more detail below how to correctly calculate, set and check the angles and diagonal of the foundation in one way or another.
Marking strip foundation
Much more often, builders are faced with the problem of marking strip foundations as the most common type. Unlike the previous type, in this case only single-circuit marking is not enough. It is performed with two parallel cords located along the outer and inner boundaries of the tape.
The internal partitions of the house are marked in a similar way. Sometimes additional markings are made with two more parallel cords, which determine the height of installation of the formwork under the tape. Thus, the process requires high precision and responsibility.
Marking the slab base
Often, the most expensive slab foundation from a technological and financial point of view is chosen as the foundation of a house. It is indispensable on “turbulent” heaving soils and allows the erection of fairly high massive structures on them. As a pit for the slab, a small recess is made under the entire area of the foundation.
Marking the slab foundation
The marking of this type of base is similar to the marking of the columnar type. In contrast, similarly to the layout of a strip foundation, the cord can be pulled directly at the soil level along the perimeter of the pit and at a certain height that determines the height of the slab. After trimming the soil, the lower contour of the marking can be removed.
Self-marking
When starting to build a house, the first question that always arises is how to properly mark the foundation? Usually such work is not very difficult even for beginners. The DIY house marking technique described below is suitable for any foundation, regardless of its shape and scale. Do-it-yourself foundation markings are done using several parts:
- wooden blocks;
- cords;
- square
The latter is assembled from bars that are rigidly fastened together. The optimal side of the square is one and a half meters long. That's all you need to know about how to properly mark the foundation.
Sequence of operations
Having installed the first rod, you need to correctly align and determine the direction of the longest wall of the building. According to these projects, it is necessary to calculate its length and then note the location of the next bar. The second rod is driven in at this point. A thin cord is stretched between them. Then special “benches” are installed. Their “crossbars” must be installed strictly maintaining 90 degrees relative to the line of the leveled foundation. This work is easily done using a square, so you can accurately align the lines at a right angle.
The designation and direction of adjacent walls can be deduced from the “seat” of the benches. How to make markings for the foundation so that you don’t have to redo anything in the future depends on the correct technology. In order to correctly calculate where the corners of the house will be located, it is necessary to maintain all the overall dimensions laid down in the project. After all the columns have been installed and the diagonal of the foundation has been measured, we can talk about completing the markings. To determine whether the markings for the house have been done correctly with your own hands, you need to use a simple method. The diagonals of the foundation must have the same dimensions. This is one of the main rules.
How to do it?
Markings are made for different types of foundations. It is necessary to bind the markup to the type, since it may have its own characteristics in each specific case. All of them must be taken into account. However, first it is necessary to consider the general specific features.
Two methods for constructing a rectangular foundation
In fact, anyone who studied geometry at school can construct a right angle. This does not require any special knowledge. So, in one of the cases you can apply the Pythagorean theorem:
C=√ (A²+B²)
Without delving into the jungle of geometry, it is worth considering the use of the Pythagorean theorem using an example. If there are two sides already built. One is located along the fence. There are no plans to change it. The second one was built nearby, but I am not sure that it is located at a right angle and I want to check it. Then you need to measure a segment from the corner on each side. For example, many take the entire length for a segment.
For example, let’s take sides of 9 and 12 m. Then √ (9²+12²) =√ (81+144) = 15 m. This means that the diagonal between them should be 15 m.
The second method is called the “web”
Here it is important to prepare a string that does not stretch
You definitely need to pay attention to this fact, otherwise nothing will work. First you need to cut the twine exactly to fit the dimensions of the future foundation
Let's take the same 9 and 12 m. It is necessary to cut off a piece in order to measure the diagonals in the future. You will need two sections of 9, 12 and 15 m, as well as a small amount for fastening.
Now you need to fasten the twine at the corners, and also attach the diagonals. After this you can start stretching. First, you should tighten one side, preferably a long one or located along the fence. After this, you need to tighten one of the short sides.
Under a columnar foundation
The cast-off should be made in two tiers. In this case, the lower tier should be located at the same level as the pillars. After this, you can tighten the string. You should check that the strings intersect at right angles. Where the twine intersects, use a plumb line to mark the places for the piles and secure the wedges. The strings should be removed so as not to interfere.
Now you need to drill holes for the pillars and install the pillars. Re-tighten the strings. Now you need to bring all the pillars out of the ground equally so that they touch the twine.
Under strip foundation
In this case, you will need to make double markings, since the strip foundation is a strip. First you need to position the cast-off, then you need to pull the string at right angles. First, the outer contour is made. It should be remembered that the height of the string must be equal to the upper level of the foundation. After this, you need to make an internal contour. To do this, a piece equal to the width of the tape is laid on a cast-off piece of existing twine, after which an internal contour is made.
Later, using a plumb line, the corner locations are determined. Pegs are fixed to the ground at the corners. A string is stretched between them, marking the boundaries of the trench for the strip foundation. After this they dig a trench. When forming the sheathing, it is not necessary to re-tension the top strings if the height of the foundation will be determined by the sheathing.
Under a slab foundation
In this case, marking is much easier than for a columnar or strip foundation. All you need to do is build a rectangle using string
Particular attention should be paid to drawing right angles. Basically, that's where it all ends
In the future, in the same way as in previous cases, using plumb lines you need to find corner places on the ground and mark them with pegs.
Complex markup
When you need to mark an unusual rectangular foundation, or a structure with many protruding corners, you will have to work hard. However, it is still possible.
The step-by-step instructions are as follows:
- To begin with, the general outline of the future structure is outlined. The plan should indicate the distances from the extreme protruding points to each other. Based on this data, a large rectangle is built into which the house will be inscribed;
- after this, it is necessary to correct all angles, re-measure the diagonals and lengths of the sides;
- Next, they move on to the most difficult thing - marking the breaks in the walls. It's worth keeping in mind that in almost a hundred percent of cases, each of these breaks is another rectangle, so all you need to do is build a few rectangles inside. In the future, it is necessary to set and recheck the angles;
- Using plumb lines, it is necessary to calculate the intersections that are also on the plan and form the general outline of the house.
Columnar foundation
How to mark this type of foundation? We are talking about a pile foundation, the simplest type. Marking the corners of the foundation for a columnar look is carried out according to the developed technology. Supports are installed at the ends of the axles. They are usually made from a round pipe. Installation of supports must be done strictly vertically. They are installed according to the markings for the foundation, made with your own hands, in the most loaded places of the building under construction. The pillars are installed in increments of 1.5–2 m. They are connected to each other by wooden beams. The free space between the supports is filled with crushed stone mixed with sand. Do-it-yourself markings for the house are done after the construction of the cast-off.
The height of the base regulates the size of the cast-off parts. They are usually made from ordinary wooden boards. Each pair made is installed opposite the other. The installation is limited by a tensioned cord. The result is a rectangular figure with right 90 degree angles. The location of the pillars must be at the same level. Control cords are installed along the marks, the location of which is located at the construction hydraulic level. Pegs are installed in places where the cord intersects. The soil is being drilled here to install supports. After this, the cords are removed. Piles are inserted into the recesses made. The pit is filled with concrete. At the next stage, the main surface of the columnar foundation is marked.
Types of foundation
Previously, they used one main type of foundation - concrete; a good half of Soviet buildings were laid with it. Now there are houses with no foundation at all. Basically, foundationless buildings are built for outbuildings. You can build a house without a foundation in one of the simplest ways. The method consists of constructing a foundation from pillars-supports; these supports will support the building.
Fencing a construction site
There are the following types of structures:
- Tape. This is a fundamental ribbon-shaped structure embedded in the base of the building. A strip foundation is laid in order to reach a difficult-to-compress area of land. The width depends on the weight of the house; the wider the foundation, the less pressure on the ground. Clay soil or soil with groundwater is not problematic for installing a strip foundation. Such a “sole” is not recommended if the soil structure is particularly uneven.
- The foundation slab is a paved area. The load with this design is minimal, but at the same time it is most susceptible to destruction of all types of structures.
- Column and pile foundation. These two types are similar, but not the same. They are designed for the most difficult soils (for swampy areas). Such foundations are laid by driving and screwing piles into the ground.
- Combined types - foundation with a basement. To do this, a pit is dug, the walls of the basement are mounted in it, and then the floor is poured.
- Columnar. This is done by placing pillars in corners and areas where walls intersect. With such a foundation it is impossible to build a basement.
- Monolithic foundations are used in the construction of lightweight wooden structures.
- Tiled foundation is one of the monolithic foundations; a monolith is often used as a floor.
- A floating foundation is used on bulk soils and areas with abundant groundwater.
- Screw foundation. Consists of screw piles, designed for soils with groundwater and landslides.
Preparing the ground for the foundation
Rectangular design
One of the sides of the rectangular foundation for the house is tied to any object on the site. Neighboring buildings can serve as a reference point. When marking, you must not forget about the location of the sun and take this factor into account.
The first cord is pulled according to the guideline. The first two pegs are installed. Sometimes, when a trench is dug, the stakes begin to fall through. To prevent this from happening, their installation is done a little further from the corner of the foundation. The point where the cords intersect shows the location of the corner. This method makes it possible to save the markings made while excavating the soil.
How to mark the outer contour
For example, let's take the construction of a house with dimensions of 6x8 meters. First mark the longest side, then all the remaining ones. An additional peg is driven in. A cord is attached to it. It should be pulled at 90 degrees relative to the first cord. The intersection of the cords is securely fastened. The resulting point shows the angle of support of the house. It is necessary to measure 6 meters and make a mark on the second cord. To find the exact angle, calculations are performed using the Pythagorean theorem.
Two segments are taken, one equal to three meters, the other to four. The first corresponds to the length of the foundation. You should measure 4 meters from the corner and put a mark. Then measure three meters and put a mark on another cord. Then both marks are connected so that the tape measure shows 5 meters. If you deviate from this size, you need to move the second cord until the tape measure shows the required distance. The cords must be aligned, otherwise the markings for the foundation will be incorrectly installed. So that in the future it will greatly aggravate the process of building a house.
Properties
Knowing the height and diagonal of the cylinder, finding the diameter of the circle at its base is not difficult. To do this, it is necessary to draw a diagonal in such a way as to obtain a right triangle with the above parameters, and then calculate the unknown link using the Pythagorean theorem. (Fig.25.1) D=√(d^2-h^2)
Knowing the diameter, you can substitute the resulting expression in the following formulas to find the radius and perimeter of the circle at the base through the diagonal and height of the cylinder. r=D/2=√(d^2-h^2 )/2 P=πD=π√(d^2-h^2 )
The lateral and total surface areas are calculated with the direct participation of the radius of the cylinder or its corresponding expression. Therefore, to find the area of a cylinder through height and diagonal, you need to make the following transformations. S_(b.p.)=hP=2πrh=2π √(d^2-h^2 )/2 h=πh√(d^2-h^2 ) S_(b.p.)=S_(b.p.) p.)+2S_(basic)=πh√(d^2-h^2 )+π(d^2-h^2 )
The volume of a cylinder is calculated as the product of the area of its base and its height. To find the volume of a cylinder through the height and diagonal of the cylinder, instead of the area of the base, you need to substitute the product of the number π by the difference between the squares of the diagonal and height. V=πh(d^2-h^2 )
When pursuing the goal of calculating the radius of the inscribed or circumscribed circle of a cylinder through the diagonal and height, it is necessary to remember that a circle can be inscribed into a cylinder only if the radius of the cylinder is equal to its height. Therefore, the radius of the inscribed circle will be equal to half the height, and the radius of the circumscribed circle will be equal to half the diagonal. (Fig. 25.2,25.3) r_1=h/2 R=d/2
Source
How to mark a strip foundation
The foundation got its name “ribbon” because of its shape. It is laid in the form of a continuous tape across the entire perimeter of the building. It is used for light buildings, for example, frame houses or one-story timber buildings. The direction of the load-bearing wall is determined by the first peg. The required distance is measured and the second peg is installed. To obtain the second axis, the second cord is pulled at a right angle relative to the first axis. The corners of the foundation are marked with special devices:
- goniometer;
- level;
- theodolite.
If they are absent, use the so-called “golden triangle” method. One side is taken 3.4 m, the other 5 meters. The corner peg will be the vertex of the triangle. From it it is necessary to calculate, along the laid axis, exactly 3 meters. The hypotenuse of the triangle will reach 5 meters. The column on which the main axis is fixed moves in any direction until the distance separating the axes reaches the required value.
Then a stake is driven into this point on the site. The result is two found points. The required length is measured from them to the location of the third peg. Other angles are set in the same way. After marking the external axes is completed, the location of the diagonals of the foundation for the house is determined. The resulting length of the diagonal connecting the corners located in opposite directions is measured. The resulting value should have the same indicators. Starting from the obtained angles, in each direction, strictly along the axes, it is necessary to measure the width of the base. Pegs are hammered into each resulting point. After every two marks, cast-off boards are installed. To maintain dimensional accuracy, axial threads are fixed to the cast-offs. They must be at a height equal to the top mark of the foundation surface. Anyone can mark the foundation with their own hands, regardless of its type. You just need to approach this work with full responsibility and follow all the rules. Accuracy in such work will always lead to a positive result.
- Tools required for work
- Preparatory activities
- Marking the outer contour
- Marking the internal contour and load-bearing walls
Before starting construction work, be sure to figure out how to properly mark the foundation. Preliminarily draw up a plan for the future foundation on paper or electronically.
The quality, durability and reliability of the finished foundation directly depend on the correctness of the preliminary marking, so approach this work with full responsibility. The corners of the foundation must be absolutely straight, and the dimensions of the walls must be kept to almost a centimeter.
What tools will you need?
You can mark the foundation yourself using the following tools:
- Roulettes;
- Cord;
- Hydraulic level and plumb line;
- In addition, you will need wooden pegs.
Where to start marking?
So, how to mark the foundation? First, you need to determine two starting points by driving pegs into the corners of the future building, located on the same straight line from the side of its longest wall. Next, you will need to draw perpendiculars from them, thus marking the outer contour of the adjacent walls.
"Egyptian Triangle". The simplest method
Marking the foundation with your own hands can most quickly be done using the “golden” triangle method, which has a side length ratio of 5 * 3 * 4. The event is carried out in several stages:
1. First you need to find a long rope and tie four knots on it. The first is at the end, the second is at a distance of 3 m, the third is four meters from the second and the last is five meters from the third; 2. After this, the very first and very last nodes are connected with a nail. A nail should be driven into each of the intermediate nodes; 3. In this case, the long side of the resulting triangle must be positioned along the line between two already driven pegs; 4. The required perpendicular is drawn along the short side; 5. On the resulting straight line, drive in the third peg at a distance equal to the width of the building.
Important: All measurements must be checked for accuracy. To do this, two cords are pulled diagonally between the driven stakes and tied at the intersection
Two arc method
Marking the foundation yourself using this method is also done using a rope. First, equal distances are measured from one of the pegs in both directions along an existing straight line and the found places are marked. Next, a rope with a nail tied at the opposite end is attached to one of the resulting points. Having pulled it, draw an arc opposite the peg from which the distances were measured. Then the rope is attached to the second marked place and another arc is drawn. From the point where the arcs intersect, draw a line to the peg. The result is a right angle between it and the existing line.
At the final stage, a cord is tied to the stakes at the height of the future foundation, checking the horizontal position of its position on all four sides, using the building level. For a strip foundation, draw an internal contour parallel to the found external one and also pull the cord.
Advice: If you plan to dig a trench using equipment, it is better not to use cords. They may break during operation. In this case, the lines between the found points should be drawn with sand. To find the centers of the columns of a columnar foundation, the necessary distances are measured from the found corners along the drawn lines and marks are placed. Next, check the squareness of the corners obtained at the intersection of the lines (connecting the obtained points on opposite sides and the perimeter line on which the marks are located).
Marking the foundation with your own hands, as you might have noticed, the procedure is not that complicated. The most important thing is to do everything carefully, pull the rope well and be sure to check the result using the diagonal method.
Video on the topic:
https://youtube.com/watch?v=66CDCNNuep8
Tools required for work
Before you start marking the foundation yourself, prepare the necessary supplies for this. No hard-to-reach or difficult-to-handle tools are required. You will need:
- tape measure for measurements (it is more convenient if its length is no less than the longest wall);
- reinforcing bars or other suitable pegs;
- visible and durable rope;
- suitable clips (clothes pegs are usually suitable);
- building level;
- large square;
- level.
Return to contents
Preparatory activities
Before figuring out how to mark the foundation, complete the preparation of the building design, indicating the features of its placement on the site. The project must necessarily indicate the characteristics of the soil and landscape on the site, as well as comply with basic construction standards.
Choose a place to lay the foundation. It is better for the construction site to be as level as possible: this will make it easier and more convenient for you to install the necessary utilities.
In accordance with current building regulations, the house must be located at least 500 cm from the front fence. The minimum permissible distance between the house and neighboring areas is 300 cm. Take these requirements into account when carrying out marking work.
Before marking, clear the area of debris, bushes, grass and anything that may interfere with the work.
The most difficult is marking the tape type base. Laying out the markings for slab and column foundations can be done without any problems. In general, the marking of bases of all existing types is carried out according to a similar scheme.
Return to contents
Marking the outer contour
Proceed to marking the outer contour of the future foundation. Start marking from the corner least distant from the boundaries of the land plot. Thus, the likelihood of violating the previously stated regulatory requirements will be minimized.
Drive in the first peg in the found place. From the starting peg, set aside the length of the perpendicular section of the base deep into the construction site. Make sure the set angle is perpendicular. A laser level will help you with this.
If you don’t have a level, use a square with sides at least 100 cm long.
If there is no square, use the following method, based on the Pythagorean theorem, known to every schoolchild. Among builders, this method is known as the Egyptian triangle rule.
According to the mentioned rule, in a triangular figure with sides 3, 4 and 5, the angle formed by the smaller sides will be 90°.
In practice it looks like this: you cut 12 m of rope and mark it. The first mark should be at a distance of 300 cm from the beginning of the cord, the second - at a distance of 400 cm from the starting mark. Secure the first mark with a peg. Secure the beginning of the rope to the marking line, and the second mark to the second line, perpendicular to the first.
As a result, the free part of the rope must be accurately connected to its beginning. If the connection is not accurate, the angle being tested is not 90°. Therefore, the position of the pegs needs to be corrected.
The marking of the remaining sides of the foundation is carried out in a similar sequence.
To check the correctness of the marking, which looks like a rectangular figure, you can measure the length of the diagonals. If the diagonals are of equal length, the angles tested are 90°.
In the case of checking foundations of complex shapes, for example, structures with niches or foundations in the shape of the letter “L”, the structure will have to be mentally divided into several squares or rectangles, and then the diagonals of each such figure will be checked.
The durability of the building will depend on the correctness of the markings. Making markings does not require much effort or the availability of various tools. All work can be done by two people with a minimum set of tools:
- construction cord;
- roulette;
- square;
- pegs;
- hydraulic level
Marking is carried out after leveling the construction site. The better the site is prepared, the easier and more convenient it will be to transfer design diagrams from paper to the site itself. The process itself can be divided into marking the external perimeter and marking the foundation itself, including internal partitions and extensions to the future building.
Marking the foundation for a house with right angles
Let's start with, perhaps, the simplest thing - marking a rectangular house. Moreover, even houses with a complex layout, but with right angles, are based on this method.
The marking of any house shape begins with determining its location on the construction site.
If you start building, then you should already have a construction permit and related documents in your hands, which specify the minimum setback from all boundaries of the site.
Let's start with the simplest example, when the plot, like the house, has a rectangular shape (see diagram above). Without special, expensive tools at hand, in my opinion, the easiest way to mark the foundation is as follows:
- We determine the location of the future house on the site, in our case it is the lower right corner.
- We select the two closest boundaries of the site (in our case, these are the boundaries indicated in the diagram above - in black).
- We set the first 4 pegs, marked with numbers 1-4, in accordance with the offsets from the boundaries of the site and stretch the cords between them, as shown in the black dotted line. Thus we found one corner of our house.
- Then from peg No. 2 we measure a length equal to the length of the BD wall, and set peg No. 6. We set peg No. 8 in the same way.
- From peg No. 3, along the lower border of the site, measure the length of the wall CD, and set up peg No. 7. We set peg No. 5 in the same way.
- We stretch the cords, as shown in the diagram with a black dotted line, the resulting corners will be the corners of the house.
- We check how correct our rectangle is using the method described below.
It is worth noting that it very often happens that the area is not rectangular in shape, then it is necessary to start not from two sides of the area, but only from one, pulling only one cord parallel to it. The remaining cords are pulled “by eye”, then correcting errors, as described below.
Checking diagonals and correcting foundation marking errors
If you did everything correctly, then the distance from point A to point D should be equal to the distance from point B to point C. In other words, the diagonals of the rectangle should be equal (less than 1 cm is an acceptable difference).
If you have both diagonals of equal length, congratulations, the main part of the marking has been completed and you can begin marking the internal walls. But, unfortunately, in most cases when measuring diagonals, there are minor discrepancies. There may be several reasons - a plot that is not quite rectangular, tall grass that interferes with measurements, and, in general, the human factor.
What to do in this case, start all over again?
No way! If the discrepancies are not in meters, there is no need to start over. You just need to “correct” the corners, now I’ll tell you how to do it.
Let's say that your diagonal CB is 20 cm longer than the diagonal AD, then your house perimeter looks like in the diagram.
The procedure for further actions with marking the foundation for the house :
- We shift corners A and B to the left by about 10 cm (half the difference in the sizes of the diagonals).
- We measure all sides and diagonals again. The sides shouldn't change in size, but it's better to be on the safe side.
- If the difference has decreased, but they are still not equal (let’s say the difference has become 5 cm), then we repeat points 1 and 2, but shifting them by 2.5 cm.
- If now the diagonal AD has become larger, then we also repeat steps 1 and 2, but shifting the corners in the opposite direction (in our case to the right).
Rectangular foundation
The first side of the foundation is tied to some object on the site. The reference point for reference can be the fence of the site or neighboring buildings. The location of the sun should also be taken into account.
According to the chosen guideline, pull the first cord to the required distance and hammer in two pegs. To prevent the pegs from falling through while digging a trench, they are installed further than the corner of the foundation. The places where the cords intersect will indicate the corners. This method of placing the cords will allow you to maintain the original markings when excavating.
Marking the external contour and forming the corner of the foundation
For example, a 6 x 8 house will be built. After marking the side that will serve as its length, mark the second side. To do this, hammer in another peg, tie a cord to it and pull it perpendicular to the first one. The intersection point of the cords is fastened. This will be the corner of the foundation. On the second cord you need to make a mark, which should be equal to the width of 6 m.
The Pythagorean theorem is used to form the angle. In order not to engage in deep geometric calculations, take two segments of 3 m and 4 m. On the first cord, which indicates the length of the foundation, measure 4 m from the corner and put a mark.
A mark is placed on the second cord at a distance of 3 m. Then, using a tape measure, connect one mark to another so that 5 m are separated on the tape measure. If the distance between the marks is 5 m, everything is fine. If not, then the end of the second cord with the 3 m mark is moved until the tape measure is set to the desired distance.