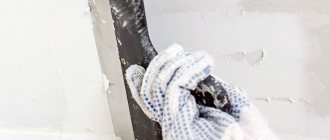
When finishing corner areas and installing floor plinths, people are faced with great difficulty. They will have to cut the plinth strips into individual elements depending on the perimeter of the room. According to the recommendations of experts, it is necessary to first sketch out all the details of the room on paper, indicating where the floor plinth will be located. Having such a hint, your work will be much more fruitful and faster.
Features of ceiling skirting boards
Ceiling skirting boards perform not a practical, but a decorative function, which is to mask the gaps between the walls and the ceiling. However, in the case of suspended ceilings, this function is a necessity - the distance between the canvas and the walls is initially quite large, so it has to be hidden somehow.
In addition to their masking capabilities, skirting boards can also be used for decorative lighting. This idea is very simple to implement, and the effect is extremely pleasant. Small LED bulbs are installed under the baguette, which create a soft light around the entire perimeter of the room or in a certain area, illuminating the stretched fabric. Of course, to install such a structure you need to know how to properly join the ceiling plinth.
Most often, polyurethane or polystyrene products are used for ceilings, but elements made of gypsum or natural wood can also be found on sale. Conventional skirting boards are produced in two-meter lengths, but various deviations from this standard are also possible. The surface of such products can be either smooth or with a certain volumetric texture. The color of the baseboard is usually matched to a specific interior - and the most popular option is white, which often matches the tone of the stretch fabric and light walls.
An important positive quality of skirting boards is the ability to combine with most materials used for finishing. Skirting boards look great together with, for example, plastic panels or wallpaper. You can also combine elaborate-looking ceiling plinths with stucco elements - this will complement the visual style of the room.
Types of skirting boards
Profiles are available in various designs and are varied in design:
- regular - a simple option without any options;
- with a cable channel - for laying communications;
- fluted - for installing linoleum or carpet on a vertical surface;
- plinth tapes are flexible self-adhesive elements for decorating complex-shaped rooms, columns, and curved joints.
Skirting boards are made from materials:
- polymers;
- wood;
- laminated MDF, LDF;
- metal;
- ceramics;
- marble.
Important! If the room has high humidity, you need to choose polymer or ceramic profiles. In dry conditions, decorative strips made of any materials are used.
PVC skirting boards for floors
Polyvinyl chloride moldings are plastic, inexpensive, hygienic, and are available in a wide range of colors and textures. For their manufacture, PVC is used - a safe, environmentally friendly polymer from the group of thermoplastics.
PVC skirting boards are produced by the extrusion method - squeezing a heated substance through molds. Coloring is carried out in bulk. To obtain a textured surface or pattern, acrylic film or decorative printing is applied.
PVC is not afraid of moisture, which makes it possible to use it in bathrooms, bathrooms, and kitchens. Finishing strips are used in combination with linoleum, polymer tiles, carpet, laminate and other coatings. Profile height from 20 to 230 mm, thickness 12-30 mm, length 2000-2500 mm.
Cutting PVC products is done with a metal hacksaw with fine teeth. The elements can be bent by slightly heating them with a hair dryer.
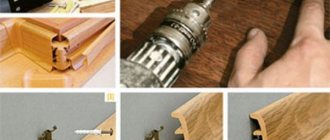
When installing plastic skirting boards, dowel-nails and fittings are used - connectors, plugs, external and internal corners. The color of the products is selected according to the design of the molding so that they are less noticeable.
Video - installation of plastic plinth
Wooden plinth for floor
The scope of application of wooden planks is limited to dry rooms, since wood is very sensitive to moisture. Decorative slats go well with parquet, parquet boards, and laminate.
For the manufacture of skirting boards, 2 technologies are used:
- Made from solid trees. High quality moldings are made from hard wood - oak, beech, walnut, exotics. For budget profiles, conifers are used - spruce, pine. They are inexpensive, but inferior in wear resistance and durability.
- Veneering. A thin layer of valuable wood is glued to a base made of cheaper wood raw materials - pine, spruce, plywood, MDF. Externally, the products are very similar to elite types, but much cheaper.
When processed, the skirting boards are given a profile:
- smooth;
- Euro;
- classical;
- versatile.
The height of the moldings is from 40 to 120 mm, thickness is 10-80 mm. In some models, longitudinal channels are cut to lay the cable, which are closed on top with a protective strip.
To add decorativeness and moisture resistance, the surface is finished in the factory - painting, varnishing, coating with oils or wax. Economy class skirting boards are not further processed; they are finished after installation.
Wooden moldings are mounted using metal clips attached to the wall near the floor, star fasteners, and adhesives.
The need to install skirting boards
Installing ceiling plinths is not the last stage of arranging a room. Typically, skirting boards are installed before the ceiling is finished and wallpaper is hung on the walls. However, maintaining the installation sequence is not a problem - it is very easy to figure out. It is much more difficult to understand how to join the ceiling plinth, and to understand the technology for connecting individual moldings.
On sale you can find products of different lengths and widths. The width is selected individually, depending on the dimensions of the room itself and the finishing features. To determine the length of the skirting boards, you need to measure the room - but you need to understand that during the installation process the ceiling skirting boards will still be adjusted, so you can buy the longest products possible. The material of manufacture does not affect the choice at all.
When choosing, you can also use the opposite principle. In this case, you need to buy parts whose corners are already prepared for joining. You won’t have to cut the corners of such fillets yourself - you will need to cut the straight parts of the skirting boards, and the cut, accordingly, will be straight. Joining the ceiling plinth in the corners in this case will be easier, but they will also be more expensive.
Before joining the ceiling plinth in the corners, and even before installing it, you need to thoroughly prepare the surfaces to which the product will be attached. The surface must be dried, brought to a smooth state and cleaned of various contaminants. In addition, if necessary, it is necessary to carry out work on leveling, puttying and priming the surface. When installing a plinth over plaster, it is recommended to pre-treat the product with water-based paint.
Even if the corners of the room itself are not very even, the skirting boards can still be installed correctly - all you need to do is follow the technology for this operation. Skirting boards should be laid from the corners located from the entrance to the room. To trim parts yourself, you need to use a miter box - a specialized tool that allows you to cut skirting boards at a certain angle (plinths most often have to be cut at an angle of 45 degrees).
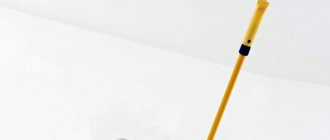
Miter box for skirting boards
A carpenter's miter box is a device for making cuts at a certain angle. It is used with a hacksaw. In principle, you can make a miter box yourself by assembling a guide from boards and making cuts in the walls. There are various models on sale ranging from $15 to several hundred dollars. They differ in capabilities and materials, although they are all called “miter box”. Professional models are made on the basis of a good hacksaw and have a scale that allows you to set the saw as needed. With such a tool, it is not a problem to set any desired cutting angle in order to correctly cut the plinth for a perfect fit.
Professional carpenter's miter box - a tool with a wide range
The simplest miter box is a plastic U-shaped profile with slots in the walls. These slots are used as a guide for the hacksaw. They do not allow the canvas to deviate. In any version there are two cuts - straight and at 45 degrees. Some may have a couple more options.
How to cut a baseboard at 45 degrees? One way is to use a miter box
Sometimes a hacksaw is included, sometimes not. Usually the ones included are not very good. You can use any hacksaw, selecting a blade for the material you plan to cut. It is important that the canvas moves freely in the slots.
Cutting ceiling plinths
To trim skirting boards before installation, you need to prepare the following tools:
- A stationery knife or a hacksaw for metal (the choice depends on the material of the baseboard);
- Miter box;
- Square;
- Ruler;
- Pencil;
- Construction knife (optional if it is necessary to cut the baseboard at non-standard angles).
To successfully cut parts, in addition to carefully performing all the necessary operations, you also need to take into account various nuances. For example, when cutting planks normally, you need to cut not only the inner, but also the outer edge of the parts. If you need to arrange an external corner, then the parts, accordingly, also need to be cut inside.
For cutting, it is best to take good tools that can provide high quality and precision cuts. Of course, you can use a regular saw, but such tools are not very suitable for fine work. When using low-quality tools, there is always a risk of damaging the material during the cutting process, so it is better not to skimp on installation.
The best tool for cutting is an electric jigsaw - it provides high precision work and the greatest efficiency. In addition, it is very easy to work with such a tool, since it makes it possible to accurately set the direction of the cuts and make them as neat as possible.
The miter box, despite its versatility, may not be suitable in a number of situations. In addition, this tool is used extremely rarely in everyday life, and it is difficult to use it for its intended purpose - not every apartment has straight corners. In such situations, only a template made of cardboard or paper that completely follows the shape of the corner will help.
To simplify the process of cutting hollow baseboards, you will need to make a corner from scrap materials. You can put the cut plinth in such a corner, and it will be fixed. There are no special requirements for the quality of the corner - the main thing is that it securely holds the product throughout the entire work.
The corner is applied to the prepared template from above so that the edge of the corner coincides with the corner of the template. The plinth is inserted into the corner and cut according to the template. The advantage of this method is the fact that the blade of the tool can only rest against the corner itself, so there are no restrictions on the work.
For cutting foam parts, a regular construction knife will do. The only nuance that requires attention in this case is the sharpness of the blade. If the knife is poorly sharpened, then there may be delaminations and breaks in the cut, which are unacceptable when it comes to high-quality joining of skirting boards.
How to properly cut the corners of a wooden baseboard
Ilyinskikh Dmitry Alekseevich head of construction and installation work
The most difficult and critical process when installing floor and ceiling skirting boards is joining the corners. Accurately and accurately performed work makes the interior beautiful, complete and holistic. To create a beautiful and correct joint, you need to know the cutting technique and installation methods.
What will you learn about in the article?
- Such different skirting boards for your home
- Tools required for work
- How to properly cut corners of ceiling plinths
- Trimming skirting boards in a miter box. Trimming technology
- The easiest way to cut skirting board corners is by trimming
- Cutting out "internal" corners
- What is necessary to form an internal angle that is not equal to 90º
- Cutting out "outside" corners
- Atypical configurations of rooms and corners
Such different skirting boards for your home
Currently, the construction market offers skirting boards made of various materials - wood, MDF, plastic.
Wooden skirting boards are considered traditional. They have been used for a long time for plank, parquet and laminate flooring. They are distinguished by a textured or smooth outer surface; many models have special cable channels. Installation is carried out using self-tapping screws, nails or glue for fixing to the floor.
When installing on self-tapping screws, it is important to choose the correct self-tapping screw design; there must be a cutter at the tip of the screw, otherwise you will have to do preliminary drilling, and this is your time.
The products are characterized by a long service life, environmental friendliness and safety. Can even be reused, dismantled and reinstalled with new floors.
Skirting boards must be painted with oils, varnishes or enamels. This is a prerequisite for their impeccable appearance, long service life and a variety of shades and colors to suit your interior.
Valuable wood is an expensive material, which affects the cost of the final product. To cut the corners here you will need special tools.
Photo 1. Wooden plinth
Plastic skirting boards are distinguished by their simplicity and convenience. They have a thoughtful design with cable channels. To form corners, hide joints, and mask attachment points, there are corners and plugs. They are quick to install and come in a variety of shade options. They do not require painting or putty and blend well with any coating.
Photo 2. Plastic plinth
MDF skirting boards have an attractive appearance, are protected from dust and dirt, and do not fade. It does not require special care and is easy to install. When trimming the edge of such a plinth, you should remember its fragility and carry out the work carefully.
Photo 3. MDF floor plinth
Skirting boards made of any materials have many color options. Therefore, it will not cause any complications to choose it to suit your interior. Often the color of the profile is matched to the shade of the floor or trim.
Trimming the edges of skirting boards made from different materials is not particularly different. The only difference is the density and density. Therefore, working with wood is quite simple.
Tools required for work
- A miter box is a special tray consisting of three surfaces. Its sides contain special slots located at certain angles to the axis. They guide the hacksaw blade at the desired angle when cutting.
- Pencil, washable marker, construction tape.
- Knife, fine-tooth hacksaw or good miter saw. Plastic skirting boards can be cut with an ordinary sharp knife or a hacksaw.
- Sandpaper; sanding a wooden baseboard before painting is a must.
- Fasteners, screws, nails, dowels.
- Hammer, screwdriver.
Photo 4. Miter box
Before starting work, you first need to calculate the required number of skirting boards. For this purpose, the standard length of the product (2.5 or 3 meters) is multiplied by the perimeter of the room and a margin of 10% is taken for trimming. For installation you will also need fasteners and plugs.
How to properly cut corners of ceiling plinths
Ceiling plinth can be made of wood, plastic, foam. The last option is the most common. It has an affordable price, many varieties and is easy to use. A sharp knife is usually used to cut it.
Before starting work, you need to cut the material in accordance with the perimeter of the room. You can first draw a diagram on paper, marking all the corner connections.
Photo 5. Technology for trimming baseboard corners
Trimming skirting boards in a miter box. Trimming technology
- The right strip is placed in the miter box from left to right. The wrong side, which will be attached to the ceiling, lies on the bottom.
- The profile is pressed firmly against the tray and cut at an angle of 45º.
- Another plank is placed from right to left and cut in the same way.
- The angles of the cuts are joined at the point of attachment and adjusted with a knife (for foam and plastic).
The easiest way to cut skirting board corners is by trimming
- The miter saw is set to an angle of 45º.
- The product is pressed tightly against the base of the machine.
- We saw off at the set angle.
Cutting out "internal" corners
The standard room has a rectangular appearance with corners of 90º. In fact, such ideal angles are quite rare and are only an installer's dream. If you are lucky, then the procedure for cutting the corner of the edge of the plinth occurs as described above; it is very easy to do this by trimming.
When cutting, you need to remember which side the baseboard will be located on. To create an ideal corner for wooden surfaces or a joint, you can use putty, but a good carpenter will never do this, but will simply saw it straight.
Photo 6. Cutting out the inner corner
What is necessary to form an internal angle that is not equal to 90º
- It is necessary to make preliminary markings on the floor with a pencil. Profiles are applied alternately on both sides and their boundaries are outlined. This creates a diamond in the corner. Its diagonal will be the cutting line.
- We apply the bar to the resulting figure and put a diagonal mark.
- We connect the mark and the corner of the plinth. This angle of inclination will be the cutting line.
- The resulting side edge must be painted the same color as the baseboard.
If the inside corner is cut with a slight exaggeration, this will enable the fit to be made more accurately. Sometimes a plug is inserted into the plastic or foam at the final stage into the joint and a beautiful, neat corner is obtained. In wooden products, the joints are simply carefully adjusted; putty is the province of incompetents.
Cutting out "outside" corners
If the external angle is standard and equal to 90º, then the stages of its installation are similar to the internal one. When carrying out work, you need to remember the location of the trimmed strip. But if it is not standard, then you will have to work hard...
Photo 7. External corners
A non-standard external corner is done like this:
- We place the profile against the wall and draw with a pencil all its internal and external edges.
- We carry out similar manipulations with another molding.
- By analogy with the inner corner, we get a rhombus. Only in this case it is outside. The diagonal of the resulting figure is the sawing line.
- Using a file, cut out the corners in the miter box.
- We clean the edges and mount them.
At the final stage, it is necessary to finally secure the plinth around the perimeter using self-tapping screws or liquid nails.
Atypical configurations of rooms and corners
Some rooms have original, atypical configurations. In such situations, it is quite difficult to install a skirting board beautifully. After all, angles are often external and internal at the same time. There are also rounded options. All the methods listed above do not work here.
If there is a round corner, the plinth strip is cut into several (usually 4-5) pieces. Using plugs, a neat corner is laid out from the parts. The plinth is fixed with liquid nails or self-tapping screws with or without plugs
Photo 8. Non-standard internal corner
The procedure for cutting corners for a ceiling or floor requires the preparation of the necessary tools (depending on the material). The work requires care and endurance.
Photo 9. Non-standard external corner
You can buy all the necessary materials for carrying out such work in our LesoBirzha online store. You can also order delivery throughout Moscow and St. Petersburg from us.
See how we can
May 27, 20191386
Ceilings made of Angara pine in the Extra grade under white covering paint
Angara pine... there is so much in this word that rings in my heart... After all, this is the only material that, in high grades, can be safely painted in white, covering color, without fear that over time yellow spots will appear in the area of the knot and resin pocket . Because there are no wood defects in the hangar in the Extra grade.
Ceilings made of Angara pine in the Extra grade under white covering paint
May 27, 2019
1386
May 27, 20191482
Vertically mounted lining made of Angarsk pine in color TV 34
Calm lining made of Angarsk pine "Prima" 145 mm wide, laid vertically along the walls. It was pre-painted in the workshop using a Teknos varnish scheme, color TV-34. A very interesting combination of white ceiling and gray walls in the bedroom.
Vertically mounted lining made of Angarsk pine in color TV 34
May 27, 2019
1482
May 14, 2019814
The natural charm of Angarsk pine in home decoration
A customer from KP “Zaokskie Prostori” contacted us with a request to install a ceiling with lining clapboard made of Angarsk pine in the Extra grade
.
Unique ceiling decoration, with harmoniously selected colors, for this special thanks to the workers of the brushes and paints of the paint shop. The natural charm of Angara pine in home decoration
May 14, 2019
814
03 April 2019575
Cedar ceilings in a two-level apartment
“Our Works” is with you again
And
. Another turnkey project, an apartment in the Naberezhnaya Khimki residential complex, and we begin to get acquainted with the amazing finishing material made from natural cedar - AB grade lining
.
We would like to tell you the main secret of this material. Cedar ceilings in a two-level apartment
April 03, 2019
575
View other works
Technology for joining skirting boards
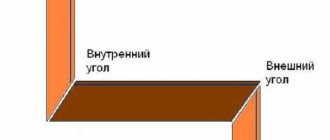
There are only two types of corners that require joining:
- Internal angles that occur most often are less than 180 degrees (most often 90);
- External angles, more rare - angles over 180 degrees (usually 270).
There are also sometimes non-standard configurations, but they can still be considered as a certain variety of external and internal angles. Regardless of the size of the angle, the joint always consists of a right and left strip, which need to be connected. The main differences are in the method of cutting the skirting boards for different angles, so it is worth understanding these differences before joining the skirting boards in the corner.
Features of the formation of floor edging catch
The plinth for framing the floor not only gives the covering a finished look, but also hides the joint along the perimeter of the wall and improves sound insulation in the room. The perception of the room as a whole will depend on how correctly and accurately you manage to join the planks in the corners.
How to cut a baseboard in a corner? Required tools:
- tape measure and pencil;
- miter box;
- a hacksaw or jigsaw for cutting the product;
- sandpaper;
- sealant or putty.
Step-by-step instructions for forming corners and joints of floor planks
First, the required edging material is marked and calculated. In order to get a neat angle, parts of the joined elements should be cut at an angle of 45 degrees. To do this, the part is placed in a miter box, fixed, and cut on one side with a hacksaw or jigsaw.
The opposite end of the second plank should be sawed in the same way.
To connect the baseboards along the perimeter of the wall, they are cut at an angle of 90 degrees. The cut edges of polyurethane products are treated with sandpaper to ensure their complete alignment and better adhesion.
Joining two planks cut at right angles
Before installing the skirting boards, first check the accuracy of their joining. Then glue the first part, join the second one, cut at an angle of 90 degrees, with it.
A special PVC connector is used to mask the joints
During installation, you can cut out part of the edging in order to lay communications in it. These could be sockets for sockets and switches.
Socket box embedded in PVC baseboard
Corners, internal and external, are formed in the same way as when installing ceiling moldings. Cutting baguettes is carried out in the same way.
In order to close the joints of trimmed PVC products, there are special decorative corners
How to join internal corners
In the vast majority of cases, it is the internal corners that have to be cut - i.e. corners of the room. The part of the plinth, which during the cutting process is adjacent to the sides of the miter box, will subsequently be glued directly to the wall. The other part, located at the bottom of the miter box, is connected to the surface of the ceiling. When arranging internal corners, the bottom of the plinth should be higher than its upper part, in contrast to external corners - in this case, everything will look diametrically opposite.
Before adjusting the corners of the ceiling plinths, you need to accurately measure the angle between the walls of the room. For right angles, planks cut at an angle of 45 degrees are used. If the corners in the room itself are uneven, then the radius of the corner should be divided in half. During the cutting process, you need to ensure that the parts ultimately fit together - the left plinth is cut on the right side, and the right one, respectively, on the left.
In the case of cutting for internal corners, the technology will look like this:
- Fitting the ceiling plinths in the corners begins by inserting them into the miter box and pressing the part a little further than the slot marking the 45-degree angle;
- The plinth is cut according to the side where it should be located;
- Before connecting the plinth to the ceiling, you need to attach it to its place to check whether it is suitable for installation in a certain area (small deviations can be carefully cleaned up with a construction knife).
Cutting strips for 90° angles
When decorating the ceiling, it may be necessary to join the plinth for the external and internal corners, depending on the configuration of the room. Every room has internal corners, but not every room has external corners.
Scheme for trimming adjacent fillets
When placing the fillet on the miter box, it is important to consider that the side of the plank that is pressed against the side wall of the installation will be glued to the wall, and the side located at the bottom of the miter box will be glued to the ceiling.
Straps for right angles are cut at an angle of 45°. The fillet, which is planned to be placed on the wall on the right, is cut off from the left end. The plinth is placed in the tool, fixed, then cut with a sharp tool. Wooden plinths are cut with a hacksaw or jigsaw, plastic ones with a stationery knife.
If you use a manual one (knife or hacksaw), act carefully so that the cut area is smooth and the edges are not torn. Having completed this operation with both planks, they are first applied to the installation site and examined to see how tightly they fit together. If it was not possible to join the parts closely, the cut location is adjusted or another, better cut is made.
Manual trimming
Trimming the baseboard manually may be necessary if the angle is not straight or if the miter box could not be found. How to join the plinth in this case?
The angle is measured with a protractor and the resulting value is divided in half. The final number is the angle at which the planks need to be cut.
Using a protractor and a pencil, markings are applied to both baseboards. Using a utility knife or jigsaw, cut off the excess part of the fillet along the marked lines.
Place the finished parts on the corner and check the accuracy. If there are any shortcomings, correct them using a sharpened stationery knife.
Slicing without a miter box
How can you join skirting boards if you don’t have a miter box or a protractor at hand?
You will need:
- pencil and ruler;
- jigsaw or stationery knife.
Operating procedure:
- One plank is applied to the joint of the walls.
- Using a pencil, draw lines on the ceiling where the baseboard meets the surface.
- Remove the first bar, take the second one, and apply it at the site of the planned installation. Draw another line.
- The intersection of two marks on the ceiling is the point that needs to be transferred to both planks.
- After completing this procedure, a cut line is drawn on each plinth (from the edge of one side to the intended point).
- According to the resulting marks, a cut is made using a jigsaw or a stationery knife.
It may not be possible to cut the fillets perfectly evenly the first time. It makes more sense to first try making cuts on small sections of the baseboard.
If you can’t make perfectly even cuts, you can use special decorative corners. In this case, there is no need to cut the strips - they are installed close to the decorative corner.
External corners
You have to deal with external corners much less often, but you still need to know about them so that if you need to work in such conditions, you don’t get lost in how to properly connect the ceiling plinth in the corners. Cutting external corners is carried out using the reverse technology to the previous option: first of all, you need to find the starting point of the corner, then mark the product in the place where it will be cut, and after that you can start cutting the plinth directly.
Before marking, the plinth must be completely prepared for installation or direct joining. The prepared product is placed in a miter box and pressed. If the long part of the plinth protrudes from the left, then you need to cut it according to the left 45 degree designation. On the right side the situation is completely repeated. Before joining the plinth in the corners, the parts need to be checked on site and modified if necessary.
What if the angle is uneven?
In this case, it is recommended to use wide serpyanka tape and gypsum plaster.
- At the joint, 10 centimeters of plaster should be applied in both directions.
- After this, a reinforcing tape is applied to the corner and pressed down with a block.
- That is, you need to give the corner the correct shape and perform the above-mentioned algorithm of actions.
Non-standard angles
It is quite difficult to encounter angles of non-standard values in modern construction - they are practically not equipped. However, such angles also occur - for example, in individual design projects there may be round areas. In such cases, the connection between the ceiling and walls still needs to be masked, so you have to figure out how to join the ceiling plinth in corners with a non-standard bend.
Usually the problem is solved by cutting the baseboard into several small pieces, the size of which directly depends on the bend of the corner. It is from these pieces that the connection of the ceiling plinths in the curved corners will be made. Having removed the excess putty after installation, you can begin installing the straight parts of the skirting boards.
Tools
What tool can be used to trim skirting boards to length and at corners? It is clear that the answer depends on the material.
| Material | Tool | Comments |
| PVC | Metal hacksaw, grinder with any type of abrasive disc | A hacksaw produces noticeable burrs on the cut that need cleaning. The cut made with a grinder will be as smooth as possible. In addition, the use of the cutting disk plane allows, if necessary, to slightly shorten the part or change the shape of the cut |
| Solid wood | Metal hacksaw, wood hacksaw with fine teeth | A hacksaw for metal gives a cleaner cut, but making it perfectly even is a serious problem: bending and twisting of the blade will constantly try to move the cut away from the intended position |
| MDF | Metal hacksaw, fine-tooth wood saw, grinder with diamond blade | A surprisingly accurate cut is obtained when using an angle grinder with a diamond cutting disc. If any abrasive discs overheat the material and cause charring of the cut edges, then a diamond-coated steel disc is completely free of this problem |
| Gypsum | Grinder with a cutting disc - for stone or diamond, hacksaw for metal | In this case, the grinder also provides the greatest accuracy and ideal cutting edges. |
| Expanded polystyrene, polyurethane | Hacksaw, stationery knife | The best results are obtained by using a sharp knife of large length (from 15 cm). All types of abrasive cutting are not suitable here: they will cause melting of the edges of the parts |
When cutting soft materials, fine teeth are preferred.
Please note: when cutting plastic or MDF with an abrasive or diamond wheel, a lot of fine and rather choking dust will rise into the air. A gauze mask and glasses will not hurt you.
Joining straight sections of skirting boards
When all the questions about how to connect the ceiling plinth in the corners have been considered, all that remains is to understand the technology for connecting straight sections of decorative strips. The importance of this stage of work cannot be underestimated - the slightest defects and irregularities will spoil the interior of the room.
You can begin installing straight skirting boards only after all corner elements have already been cut and installed. Before work, the products themselves should be carefully inspected, measured and modified if necessary - often skirting boards are cut unevenly during the production process, so their edges have to be aligned yourself.
The joining of ceiling plinths on straight sections looks like this:
- When the corner strip is assembled, you need to attach straight skirting boards to it on both sides so that they are located close to each other. In the future, this operation will be repeated with the remaining parts.
- At a certain point, the straight bar will reach the corner opposite to the one from which the installation began. At this stage, the smooth plinth must be marked and cut in accordance with the mark. To ensure that individual parts match perfectly on straight sections, it is worth sanding their edges with fine sandpaper.
- When joining skirting boards, you must use an adhesive suitable for the specific material. The planks must be pressed well, but carefully during installation, so that excess adhesive composition protrudes outward. Excess glue can be removed with a dampened rag - just be careful not to smear it on the wall and ceiling.
- Having installed all the parts in their places, all that remains is to process all the cracks and gaps using a special sealant or putty. Ceiling plinths can be left in their original form, or they can be covered with a layer of paint.
How to cut skirting boards at inner corners: step-by-step action plan
Begin installing the skirting boards in one of the corners. If this is your first experience, choose the part of the room in which something will stand. Not always, of course, the first pancake is lumpy, but still it’s better to play it safe. To make a neat corner on the baseboard, work slowly. One was sawed off, checked, adjusted. Let's move on to the next one. It is better to fasten after two adjacent corners have been assembled. But you shouldn’t delay the assembly too much either.
Trimming skirting boards in corners requires certain skills. But by making a few joints yourself, you can beautifully design complex angles
How to use a miter box to cut baseboards? Place the device in front of you, preferably on a table, but it can also be on the floor. It doesn’t matter which way you turn it, it’s symmetrical. Insert the bar into the profile and turn it so that it will stand against the wall. When cutting down a floor plinth in a miter box, the “wall” is the wall that is farthest from you. Once again: firmly press the baseboard strip against the back wall in the position in which it will be installed. Insert a hacksaw into the required slots. You can start sawing.
First joint in the room
The first strip of the baseboard should be cut as close to the edge as possible. Carpenters have their own jargon and they say to "cut" a corner. It doesn’t matter what you call it, it’s important that we set the bar in the miter box so that we can make the cut at the very beginning. We push the bar a short distance beyond the cutting line, for starters maybe 1-2 cm. Cutting off a smaller piece is more difficult, so save the savings “for later,” when you have at least some skill.
In the miter box, we place the floor plinth against the far wall “facing” ourselves. This makes it easier to check whether you are cutting/sawing correctly
Next, you need to make a corner on the baseboard like this:
- We place the plinth in the miter box and press it against the wall opposite to us. We set it in its mounting position - as it will stand against the wall.
- We insert the hacksaw into the required slots (see the picture below).
- We move the bar so that it extends slightly beyond the cutting line.
- Let's cut it off.
- We take the second piece of plinth, repeat the same operations, but change the position of the saw on the miter box to the opposite. We insert the bar on the other side. Be careful here, otherwise you will have to redo it several times, as the connection will not work.
How to properly cut a floor plinth in a miter box: for external and internal joints
We received two sections sawn down for joining in the inner corner. To make the joint perfect, we try on the parts in place. Most likely, there are some flaws. Take medium-grit sandpaper and remove everything that interferes with joining. Then using fine grain we achieve a tight joint without cracks or gaps.
When connecting skirting boards in a corner, use transparent silicone sealant. Before installing the fasteners, a layer of silicone is applied to the cut. Immediately after the plinth is fixed, we remove the excess that appears on the outside. Clean until the surface is completely clean. This method of connecting skirting boards in the corners looks more neat and does not get clogged with dirt and dust.
How to file a corner of a plinth at the required distance
The second and all other corners of the baseboards must be done at a certain distance. If the next corner is again an internal one and the distance to it is less than the length of the plank, we use the same fragment that already has a notch on it. We measure the distance using a tape measure - strictly from corner to corner. Then this distance is laid out on the bar using the same tape measure. We align the beginning of the measuring tape with the protrusion, measure the required distance, and make a mark with a pencil. This will be the starting point for the cutting.
You need to know at what distance to cut
The plinth with the mark is placed in a miter box, and the desired cutting direction is selected. The dash can be combined with a hacksaw blade or with a slot in a miter box. Whichever is convenient for you. Cut off. This segment must be “tried on” in place. If both corners rest against opposite walls or the gap is only 1 mm, everything is fine. You can cut a second strip from a new piece to form a joint. And again we remove the flaws with sandpaper.
If the length of the wall is greater than the length of the baseboard strip, take a new strip. We will cut the second corner on it. It is important not to make a mistake in which direction to cut. Having installed both planks along the wall, mark the junction on one of them and make a straight cut. There are also slots in the miter box for straight cutting. So there won't be any problems.
How to connect two skirting boards in a straight line
But a straight joint does not always look perfect, and during operation it often diverges, forming a visible gap. If you wish, you can cut two strips at an angle (any angle).
To do this, first cut off the edge of one plank at an angle and mark the joint on the second one. The mark is placed on the side of the plinth that is pressed against the wall. Using this mark, we saw off another section, without changing the position of the saw relative to the miter box, but inserting the bar on the other side. The joint is made obliquely. He's more careful. The difference is especially visible on wooden skirting boards and MDF. Once again, polish the cut using sandpaper.
Options for joining skirting boards made of wood or MDF
Making an external joint
In apartments or houses there are not only internal corners, but also external ones. In this case, first cut the nearest inner corner and finish it. When it is ready, you can make an outer corner on the baseboard. We put the bar in the corner as it should be. In the place of the outer corner, use a pencil to make a mark exactly at the point of rotation.
How to make an outer corner of a skirting board
Next, we transfer the bar to the miter box and select the appropriate position. To avoid mistakes, always imagine how the plinth stands against the wall and what you should get.
We cut the second section at 45 degrees so that it joins the already finished one. To do this, change the position of the saw to the opposite and insert the plinth on the other side.
Functionality of MDF plinth in the interior
This seemingly inconspicuous detail in the interior is quite important for its overall design. It is difficult to imagine the respectability of a room in which there is no baseboard framing of the floor covering. However, this element performs not only decorative functions, since previously it had a different purpose.
Initially, when arranging wooden floors, the baseboard was primarily intended for a kind of insulation. The fact is that there is always a gap left between the boards and the wall, which serves for thermal expansion of the wood. But such a remaining gap often became the reason for the unhindered flow of cold air from the underground. It was to avoid this that they began to fasten skirting boards along the walls.
Currently, this function of the plinth has practically lost its relevance. With the advent of modern construction technologies and materials, the problem of loose fit in the area of joints has practically exhausted itself. For example, laying MDF skirting boards does not serve the purpose of protecting against drafts or hiding flaws when installing the floor covering. The joints of MDF skirting boards fit very tightly to the wall and floor covering, so the installation of the floor covering must be done with the highest possible quality.
In modern apartments and private houses with concrete and other floors, the plinth serves to protect the edge of the flooring - laminate, linoleum or carpet, from damage and penetration under it, as well as into the gap between the flooring and the wall, dust, dirt and moisture. Installing MDF skirting boards is an excellent option for protection against contamination. In the manufacture of MDF skirting boards, a technology is used that turns the skirting board into a “repellent” of dirt. This means that dust and dirt do not eat into the surface of the baseboard, which is especially important, since white MDF baseboards are especially popular in the interior at present.
The presence of cable channels in the back wall of the plinth allows you to hide communications, for example, television cable, telephone or for connecting to the Internet. The design of the MDF plinth provides for the presence of grooves and cable channels for placing wires. The small thickness of the MDF plinth is not an obstacle to placing even several cable channels between the plinth and the wall.
Modern products have a very aesthetic appearance, which allows the plinth to be used as a special decorative element of interior design. MDF plinths have excellent aesthetic characteristics, can be used in interiors of any style, and have a wide range of colors and models.
Advantages and disadvantages of MDF skirting boards
- The MDF plinth has an easy-to-install design, so even a novice craftsman who is inexperienced in construction can handle its installation. Read below to learn how the MDF plinth is attached to the wall, as well as its connection and docking.
- The products are very well fixed tightly to a flat wall surface. Thus, the walls and floor in the room must be very well leveled before installing MDF skirting boards. Read about how to level walls HERE.
- The aesthetic appearance of plinths made from this material brings neatness and sometimes exclusivity to the interior design. Especially if the products are made to order or painted independently. MDF plinth can be attached to any wall. The main thing is that it is even. The most popular are white skirting boards, which can be used either ready-made or installed with subsequent painting and repainting.
- The fairly high moisture resistance of MDF allows the material to be used in rooms with slightly higher humidity levels. But direct ingress of water should still be excluded. Installation of MDF floor plinths should not be carried out in rooms with high humidity. It is not recommended to install MDF baseboards in bathrooms, bathrooms, laundries, and so on.
- The products have a certain flexibility, so they can be attached even to a slightly curved surface. However, we do not recommend attaching the plinth to a curved surface, since the disadvantage of products made from this material is their instability to fracture, that is, they can easily be broken by hand. Therefore, during installation you should act carefully, without applying excessive force.
- Although buyers are assured that MDF is an absolutely pure, harmless material, this statement should be treated with a certain degree of caution. In order to save money and speed up the manufacturing process of boards, some manufacturers (90% of the world production of this material comes from China) additionally use phenol-formaldehyde resins as a binder. And products may have a negative ability to emit toxic free phenol. We advise you to choose a reliable manufacturer of MDF skirting boards.