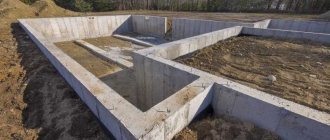
Advantages and disadvantages
A monolithic slab has characteristics that give it advantages over other types of subfloors:
- Strength. Concrete is able to withstand high loads and the total weight of furniture and household appliances.
- Durability. When properly filled, the service life of the screed is several decades.
- Resistant to rotting and corrosion. Concrete is not a breeding ground for microorganisms and does not react with alkalis, acids, or moisture.
- Non-flammability. Concrete does not burn, does not melt, and does not emit caustic or harmful substances.
- Environmental friendliness. When making the solution, only natural materials are used: crushed stone, sand, cement and water.
- Moisture resistant. Concrete floors are made in the wettest areas: bathrooms, toilets.
- Versatility of use. The screed can be given different shapes (for example, to form a drain in a bathhouse or bathroom, to make a podium or steps in the hallway, etc.). It is convenient to install coverings made of linoleum, laminate, parquet boards or tiles on a flat base.
Among the main disadvantages is low thermal insulation ability. Concrete floors in a private house must be insulated.
In addition, concrete work is physically difficult and requires a lot of money. On interfloor floors, it is necessary to take into account the considerable weight of the screed itself.
Composition of polymer flooring and its types
The composition of self-leveling floors varies. The first classification is based on the number of components:
- One-component is a monochrome coating that serves as a basis for decoration or as a single layer. This composition is thin and dries quickly.
- Two-component ones are a more interesting solution, since a decorative film is applied to the base of such a floor. A transparent polymer composition is poured on top of it, which both protects and gives volume to the image. Such self-leveling floors will become a real decoration and highlight for any home.
There is a classification according to the composition of the mixture for self-leveling floors: polyurethane, epoxy, methyl acrylate and epoxy-urethane.
Bright floor for bright design
Polyurethane
It is characterized by excellent impact resistance. When mixed with water, this composition is similar to oil paint. Since the polyurethane composition can withstand difficult operating conditions, it is installed in corridors, halls, and other traffic areas with intense traffic.
Epoxy
These are organic floors that contain two components. They performed well in the bathroom and other rooms with high humidity. Such floors are the most common among self-leveling floors because their price is the most affordable.
Other formulations
Methyl mate acrylates are suitable for rooms where there is no heating in winter and industrial buildings. Epoxy-urethane ones are distinguished by their highest strength and resistance to constant load, therefore they are used in any public places.
Tools
To make your own screed, it is best to rent a concrete mixer: for large volumes of work, the unit will provide good assistance. If the screed is done in a small room (for example, in a bathroom), then mixing the solution can be done manually.
The following tools will be required:
- trough;
- shovel;
- a tool for mixing the solution (hoe, cat-hoe);
- bucket for transferring finished products and measuring components;
- building level;
- usually a wooden board (1-1.2 m) with a handle for stretching the heaped mortar.
The materials that need to be prepared are cement, sand and gravel. Mix the concrete with plain cold water, but if desired, you can add plasticizers (PVA, etc.) to it. To make a smooth surface, you will need special beacon profiles or smooth wooden planks.
Self-leveling floor application technology
Let's consider the order of work when forming a self-leveling floor.
Prepare the base . At this stage, the floor is cleaned of all excess, and the cracks are sealed with tile adhesive. Instead, they also use a dry mixture for filling, which is diluted with PVA glue. Small cracks are thoroughly cleaned. At the end, they pass with a vacuum cleaner, removing any remaining dust. The perimeter of the room is lined with deformation tape. The quality of the entire work depends on this stage.
Primed . For optimal compatibility, use a primer from the same manufacturer as the floor composition. The product is selected according to the type of base. For rooms with high humidity there should be a primer with waterproofing properties. The substance should saturate the base. You can prime using a roller attached to a long stick or a brush; a wide spatula may be suitable. If the base is loose, it is better to prime several times. Further work is carried out only after this layer has completely dried.
Determining the fill level . To do this, you need to find the highest point of the room or the entire apartment if the floors are changing everywhere. This is done like this: take a water level or a laser level, draw any line, and then measure the distance between it and the floor. Where it is minimal is where the highest point of the floor is located. From this value, subtract the minimum thickness of the planned self-leveling floor. Now the result must be measured from the drawn line along the perimeter of the room. The floor must be filled to this level.
Preparing the solution . It is better to work with an assistant, as the solution quickly loses its elasticity. Water should be pre-filled in a container (200 liters) according to the number of batches in order to reduce the time. Prepared open bags will also help carry out the work faster. When preparing the solution, take water at a temperature of approximately 20°, add the dry mixture, stirring constantly. For mixing, use a construction mixer or a drill with a special attachment.
The process lasts about 5 minutes until a homogeneous mass is formed. It is infused for 2 minutes and mixed again. In general, it takes about 10 minutes to prepare the solution for pouring.
A threshold is installed at the door, which does not allow the liquid floor to flow out of the room. If you work with an assistant, it is better to divide the work like this: one person prepares the solution, the second pours and levels it.
Pouring the solution . Performed by pump or manually. Start from the far wall and move towards the entrance. Apply a layer 2-100 mm thick, evenly and carefully. Level the solution with a long spatula. In order to remove air bubbles formed after stirring, pass over the pouring with a needle roller. To ensure that the floor dries evenly, cover it with plastic film. Periodically it is necessary to moisten the surface to reduce the intensity of drying.
After pouring, you must close the doors to avoid drafts and wait the time specified in the instructions. As a rule, this is 12-24 hours. You can find out whether the floor is completely dry in this way: secure the polyethylene with 1x1 m tape and leave it for a day. If after this time there is condensation or a dark spot on it, it means that it has not dried completely.
When the floor is dry, use the rule to check its evenness. If you are not satisfied with the result, use a high-quality self-leveling mixture.
Preparatory work
The soil inside the house needs to be leveled and compacted. If the height of the room decreases significantly after pouring and installing all the layers, you will need to dig a pit over the entire surface of the room for concrete floors in a private house. Its bottom is compacted and leveled.
Prepare the base for the screed:
- Pour 10-30 cm of sand onto the bottom and compact it.
- Fill in about 15 cm of crushed stone, and for thermal insulation you can make an additional pillow of expanded clay (10-15 cm).
- A rough screed that strengthens the bottom layer is prepared from lean concrete, mixing 1 part of cement with 6-7 parts of crushed stone.
Waterproofing works
Before making a concrete floor in a private house, it must be protected from moisture penetration from below (condensation from wet soil, etc.). Rolled materials (roofing felt, thick polyethylene film) are spread over the prepared base with an overlap on the walls (10-15 cm). Adjacent panels should overlap each other by 5-7 cm. At the joints, the seams are filled with bitumen or taped with adhesive tape.
A damper tape made of elastic materials is installed on top of the waterproofing layer extending onto the walls. It will serve to compensate for the expansion of the screed in a warm room or during heating if a heated floor system is installed.
Waterproofing can also be carried out using liquid compositions resembling paint (mastic, rubber masses), or using molten bitumen. The entire surface of the base is filled with the compositions, and they are applied to the walls with a brush.
Reinforcement and placement of beacons
To carry out reinforcement, a small layer of concrete (3-5 cm) is poured. A flat welded mesh with a mesh size of 10-15 cm is laid out on it. The thickness of the rod is at least 3 mm.
In order for the floor in the house to have a flat surface, beacons (slats on which the rule will slide) must be installed on the prepared base. The basic requirements for installing beacons are a small step between them and installation of all guides in a single plane. You can check the horizontality of the beacons using a building level, placing it both along and across the planks.
You can change the height of the beacon if necessary and fix it in the desired position using cement or gypsum mortar. A pile of composition is formed under the bar, raising or lowering the lighthouse to the desired level. You can continue working only after the composition has hardened.
Composition of the solution
Concrete for pouring is prepared according to the following recipe:
- 1 part cement;
- 3 parts sand or ASG;
- 4 parts of crushed stone fraction 2-3 cm;
- 0.5 parts water.
The components are most often measured out with a bucket, gradually pouring them into the rotating drum of a concrete mixer. When kneading by hand, dry ingredients are poured in layers and mixed dry. When the ingredients are mixed, add water and begin to knead the solution until the consistency of a thick, creamy dough is obtained. If there is not enough water, you can add it little by little, constantly monitoring the thickness of the solution. Don't pour too much water.
In a properly mixed solution there are no dry or otherwise colored areas, and all components are distributed evenly. The solution is poured with a shovel into a bucket or wheelbarrow and delivered to the work site.
Use in different rooms
Each room in the house has its own specifics, so when deciding whether it is worth installing a self-leveling floor in it, you have to take into account many criteria.
Children's
The requirements for flooring for a children's room are high, but safety comes first, because the child is very susceptible to negative environmental influences. Since the self-leveling floor is still polymer, there is no 100% guarantee that it does not emit toxins, and besides, this type of coating is quite new when compared, say, with linoleum.
But that’s not all - a child in the process of active games will probably damage the glossy shiny coating, well, at least its characteristic shine will definitely go away. And this will lead to the need for repairs or even replacement of the floor - and this is not cheap.
In addition, no one has canceled the safety factor. Such a floor is hard, which means that a child can get injured by falling on it. There is no point in covering it with a soft rug. Therefore, in a children's room, self-leveling flooring is not the best solution.
Original liquid abstraction
Bedroom
Self-leveling flooring can be used for a bedroom, but it should be in calm and discreet colors, without 3D decor, to ensure peace and normal sleep. Therefore, the question arises whether there is any point in overpaying, and in addition to suffering with complex installation. It may be easier to choose a different type of coverage.
Bathroom
This is a room that will be “grateful” for the self-leveling floor, because it fully meets its conditions. Here the floor is not at risk of injury from furniture or shoes. In addition, it is moisture resistant, which is an excellent quality for the room itself. Mold does not grow on the polymer layer. It is in the bathroom that you can realize your fantasies regarding three-dimensional decor of the floor with a transparent layer of polymers.
In the bathroom under the self-leveling floor, it is permissible to use a warm electric floor, so the room will become comfortable and beautiful.
Using resin floors in other rooms
If you want to install a decorative floor in any room in the house, then you should consider a number of factors:
- A decorative floor can be created in a room with low traffic, that is, the kitchen and hallway are not an option.
- The room should be more aesthetic than functional. A suitable solution is the living room. Carpets are not laid on such a floor - it decorates the room itself.
- If the room is large, then the decorative pattern should not occupy the entire area - it will be difficult to perceive.
Screed device
Depending on the location of the room, the methods for making a concrete screed floor are slightly different.
In a private house on the ground
On a soil base, it is enough to lay out the solution in the corner farthest from the door. After this, they take the rule, press it against the beacons, capturing 1-2 stripes at once. Using rocking movements, stretch the solution without tearing the ends of the rule from the beacons.
When the layer begins to fall below the set level, add more solution, gradually filling the room over the entire floor area. They finish work near the exit.
Strengthening concrete screed using topping
The concrete surface can be further strengthened by filling with topping. This is a small fraction of quartz, corundum or metal chips. The material is poured in a thin layer onto a wet layer of concrete, and after 15-20 minutes (when the cement laitance has saturated the dry crumbs) the layer is processed with a special grinder - a “helicopter”. During the process, the material is rubbed into a pliable surface, and after setting, it makes it more resistant to loads when moving.
When using special toppings, you can get a beautiful surface that resembles a granite conglomerate. To do this, the process is repeated several times, and after setting, the coating is polished with a grinder.
Self-leveling floor
If the screed is installed on a ready-made base (for example, in an apartment, on floors or rough), then the filling layer will be small (3-5 cm). Construction organizations have a large selection of self-leveling mixtures.
These solutions can be purchased ready-made or the dry mixture can be diluted with water according to the instructions. Self-leveling mixtures can contain polymers and cement components with plasticizers. There are transparent varieties in which decor can be placed in a layer.
Working with such material is not difficult:
- the prepared solution is poured onto the floor;
- stretched to the desired thickness using needle rollers.
There is no need to level the surface along the beacons: the liquid composition itself forms a horizontal surface, like water poured into a flat tank. After hardening, the surface is ready for use.
Floating screed on the interfloor ceiling in a private house
Unlike a floor, a floating screed on the ground does not require the installation of a thick cushion, hydro- and thermal insulation.
The pie device is simpler:
- leveling layer of sand (no more than 5 cm);
- sound-absorbing material (EPS, Isover, etc.), and a heat insulator on the ceiling above the basement;
- reinforced screed about 5 cm thick;
- finishing coating.
Heated floor systems can be installed in interfloor screeds, taking into account that when installing a water system, the thickness and weight of the concrete layer will increase.
Do-it-yourself concrete floor on the ground - step-by-step instructions
When arranging the floor on the first floors of private houses, one of the most popular options today is to create a concrete covering directly on the ground, without laying any floors. First, let's look at the conditions under which such work should be carried out. Next, let's move on to describing the main stages of creating a concrete floor on the ground.
Double and concrete floor
Installation of a concrete floor on the ground
A concrete pavement laid over the ground consists of several layers of different materials, each of which performs a specific task. The first layer is the soil itself. It must be dry and thoroughly compacted. Pillows of sand and gravel are poured on top of it - they are necessary to further level the surface and distribute point loads over the area. These layers also help to reduce the influence of soil heaving, which occurs when temperature changes. In some cases, when creating a simplified concrete floor, only sand is poured over the ground, without a gravel cushion.
Diagram of a concrete floor
Options for flooring designs on the ground
Important! It should be understood that a concrete floor on the ground is allowed only if certain conditions are met - the groundwater level should be located at a depth of 4-5 m or more, and the ground should not be waterlogged. Also, various movements and heaving of the soil at the construction site should be minimal, otherwise such a coating will quickly become unusable.
Next, if a large load on the floor is expected, a rough concrete coating is placed. A film for vapor and waterproofing and insulation is placed on top of it. The latter, as a rule, is high-density extruded polystyrene foam. On top of them, a clean concrete screed with a thickness of 30-50 mm or more is created, reinforced with reinforcing mesh.
Concrete floor on the ground
vibratory rammer
Preparation and carrying out measurements
After purchasing the materials and missing tools, you need to prepare the construction site. First, clear it of debris that will interfere with work - stones, vegetation, pieces of brick and other unnecessary things. Next, if the walls have already been erected, mark the lowest point of the doorway in the room - this is the level of your future floor. If necessary, make an adjustment for the thickness of the finishing coating in the form of parquet, tiles or linoleum.
Now you need to make a solid line around the perimeter of the room, indicating the level of the concrete screed. For convenience, first make it at a height of 1 m from the bottom edge of the doorway, and then repeat this pattern at the bottom - where the floor is on the ground and will end. After this, use a shovel to remove the soil to the depth of all layers of the coating you are creating.
Compacting the soil, adding a layer of sand and insulation
Now let’s move on from preparation to a step-by-step description of the arrangement of all layers of a concrete floor on the ground.
Step 1. Level the soil with a shovel and rake so that it lies more or less evenly over the area. Remove stones from it if you see it.
Ground leveling
Step 2. Compact the soil in the area where the concrete floor will be installed. Most often, a manual rammer is used for this - with this tool they go around the surface with a “snake”, evenly tapping the ground with force. If necessary, repeat this step two or three times.
Soil compaction
According to the principle presented in the image, the site for the future concrete floor is walked around with a manual rammer
Important! If you don’t have a factory-made manual rammer, you can make it yourself from scrap materials found on the site. For this, either a piece of hand-cut log or a metal profile with a fairly heavy and thick steel sheet will do.
Step 3. Prepare the sand for backfilling. To create a cushion under a concrete screed, use high-quality material with a minimum amount of foreign inclusions. Pour sand onto the area where the floor will be built and distribute it evenly over the area. The minimum permissible layer thickness is 10 cm.
Distribution of sand over the site
Step 4. Distribute the sand more evenly over the area using a rake.
Sand is distributed by rake
Step 5. As in the case of soil compaction, take a manual or mechanical rammer and “snake” it across the entire area of the future floor.
Sand compaction
Step 6. Pour water over the sand - this will make it denser and it will be possible to compact it even better.
Sand is watered
Step 7. Go again with the rammer over the entire area of the sand cushion. If necessary, repeat this operation until there are no deep shoe marks left on the sand - only in this state will it be sufficiently compacted for a concrete screed.
Reconsolidation of the sand bed
Advice! To achieve the best condition of the sand cushion after compaction, level it horizontally using a rule or simply a fairly level wooden board.
Leveling the sand bed
Step 8. Place polyethylene or any other suitable film on the sand cushion to create a layer of vapor and waterproofing. “Adjacent” sections of the film are connected to each other with an overlap, which should be at least 5-10 cm - thus reducing the likelihood of moisture or water vapor penetrating through this layer from the soil to the concrete screed.
Laying polyethylene film
Advice! If the construction of a concrete floor on the ground is carried out when the walls have not yet been erected and there is strong wind on the site, then temporarily protect the film from blowing away with the help of boards or other objects.
The film is fixed with boards
Step 9. Lay a layer of insulation on top of the vapor and waterproofing, using high-density polystyrene foam. As a rule, working with it is not very difficult - individual panels can be easily adjusted to each other. If necessary, they can be cut with a regular construction knife with a retractable blade. When laying insulation, remember that the rows of slabs are joined according to the same principle as bricks with laminate - the transverse seams should not be on the same line.
Laying polystyrene foam
In the photograph you can see an example of how the joints of two rows of polystyrene foam insulation slabs should be made - the next row overlaps the transverse seams of the previous one with some displacement to the side
Pouring concrete cover
After creating the auxiliary floor layers, we will proceed to a step-by-step description of the arrangement of the most important part of the structure - the concrete screed.
Step 1. Prepare and install a reinforcing mesh over the insulation. Using plastic supports, slightly lift it so that it remains in the lower half of the concrete layer - the reinforcement will take on the tensile loads of the concrete slab on an elastic base made of insulation and sand cushion.
Laying reinforcing mesh
Step 2. Mix a sufficiently dense cement mortar to secure the beacons. They can be made from ordinary steel or aluminum profiles, cut to fit the width of the room. Each beacon is fixed at several points, each of which is a small amount of dense solution. The interval between beacons must be less than the length of the rule. The optimal figure is 70 cm.
Lighthouses are mounted on cement mortar
When placing beacons, be sure to check their position using a building level with the required value
Step 3. Wait until the cement mortar holding the beacons dries.
Next you need to wait for the solution to dry
Step 4. Mix the concrete, its grade should be at least M150. At the same time, try to minimize the amount of water used - this way you will achieve high quality material and a small number of cracks and microcracks formed during hardening. When mixing concrete, it’s a good idea to add special plasticizers to the mixer, which can be purchased at any large hardware store.
Mixing concrete in a concrete mixer
Important! Some craftsmen, when mixing concrete, use liquid detergent as a budget replacement for specialized plasticizers.
Step 5. Place the mixed concrete between the beacons and do the initial leveling with a trowel. Then take the rule and form as smooth a surface as possible, corresponding in level to the beacons. Work in small areas of concrete. Having finished with one of them, repeat the same steps - lay out the material, level it with a trowel and finally bring the surface to a smooth state using the rule.
Concrete is leveled using the rule
Step 6. Cover the concrete with plastic film to protect it from drying out too quickly - otherwise the risk of a large number of microcracks or cracks, but quite large, increases. In some cases, it is possible to moisten the concrete screed with a small amount of water. Wait until the mixture gains strength and hardens, and then apply a layer of self-leveling self-leveling floor - this will give you a perfectly flat surface suitable for any type of finishing.
Important! If there is an excessively large amount of water in the concrete, it comes out and washes away a certain amount of cement. As it dries, it remains on the surface in the form of a light-colored crust, also known as “cement laitance.” It must be cleaned off, otherwise the coating underneath will have less strength and durability than it should.
Video - Do-it-yourself floors on the ground
Video - Floating floor screed. Types of solutions, filling methods, nuances and subtleties
Pouring: main stages
Fittings and beacons
To prevent the floor from cracking, it is recommended to install a reinforced mesh before pouring.
To add strength to the floor base, concrete reinforcement is performed. To create the “skeleton” of the structure, metal rods or a mesh of large-section wire are used. When installing reinforcing elements, care is taken not to damage the film hydrobarrier. The fittings must be raised 2-3 cm onto special stands - “chairs”. The power of the frame is selected based on the loads on the monolithic structure.
Correctly pouring a concrete floor with your own hands is possible by using beacons set at the level of metal profiles on “splashes” of mortar, at a distance 100-150 mm less than the width of the rule, so that it is convenient to straighten the mortar. Pouring begins after the guide holders have hardened well, so that the constructed structure does not collapse from the poured concrete.
Pouring and screed
The concrete mixture is poured onto the prepared surface along the exposed beacons, bayoneting the solution with a sharp object, preventing the appearance of air pockets in the internal structure of the monolith. The material is distributed with a shovel or vibrator and aligned according to the rule along the profile guides. At the same time, the mixture is redistributed so that the voids are filled and excess concrete is removed.
Hardening
After the procedure, other construction work is prohibited, since the strength of the material will return to normal within 1 month.
It is recommended to carry out pouring work in one room at a time, otherwise the monolith will begin to crack. To strengthen the concrete, the surface of the structure should be moistened with water. The strength indicators of the structure will return to normal within 1 month. Until this time, construction work is prohibited.
Types of floor screeds
Semi-dry screed
There are different types of leveling layer. The selected type must be combined with the finish coating and the design features of the floor.
Classic wet
It involves filling the surface with a plastic solution, followed by leveling (manual or using machines). This is the most common screed format: construction teams building turnkey houses, as a rule, use it. The resulting surface has sufficient strength. Another plus is the ability to carry out work in the cold season. To do this, additives are added to the composition to prevent it from freezing, as well as plasticizing components.
Semi-dry
It uses a low-plastic composition containing a small percentage of water. The surface is very smooth, without requiring additional leveling with other mixtures. It is permissible to carry out such a screed before or after the construction of wall structures and partitions, including in buildings where plaster was used.
If a wet screed requires a long period of curing, then with the semi-dry method the topcoat can be laid within a week.
Self-leveling floor
Dry screed
One of the methods for finishing surface leveling using a liquid mixture containing a large percentage of plasticizing additives. Apply the mixture to the screed after it has dried. The method is also used in city apartments. The composition spreads over the surface in a thin layer (0.5-2 cm).
Dry screed
Does not involve the use of any liquid mixtures. The bottom layer is made of bulk material (for example, expanded clay), and gypsum fiber sheets are mounted on top of it. This design is suitable if the subfloor is made of logs and other wooden building materials (it can also be leveled with plywood). The method is attractive due to its purity, the absence of the need to work with mixtures, and also the speed of execution. The flooring can be installed in just a couple of days. The method is also suitable if you need to noticeably raise the floor plane without overloading the floors between floors.
