You may not be a perfectionist, but you must hide the cracks in the bathroom. Let us allow ourselves to paraphrase Nekrasov’s well-known “verses” to clearly illustrate a simple but practical idea: at the junction of the bathtub and the wall, ugly cracks often form, which not only spoil the overall appearance, but also allow water to flow down, thereby causing much more serious troubles . How to seal the gap between the bathtub and the wall? In today’s material we will analyze in detail 5 options for solving the problem and visualize each of them with photographic examples from life.
- Why is joint sealing necessary?
- We use cement mortar;
- We use polyurethane foam;
- Another option is silicone sealant;
- Ceramic skirting boards are a beautiful solution;
- Border tape is the final touch;
- Useful materials. 3 video instructions;
- Conclusion.
Why do you need joint sealing?
Imagine walking into a bathroom after renovation and meticulously inspecting every inch. What do you think your eyes will fall on first? Of course, on the bathtub itself, recently installed by specialists. And after the snow-white coating, you will be disappointed to discover that the distance from the wall to its edge is ugly empty. This will be your first moment of natural disappointment.
The second will come when you use the bathroom for its intended purpose for the first time. And you will find how water literally strives to seep into the recently discovered joint. The consequences of such a repair gap have not only a cosmetic aspect: water flowing onto the floor can ruin the coating and provoke the appearance of fungus or mold.
You need it?
Gaps most often arise due to the disproportion between the length of the bathtub and the wall part to which it is adjacent. You can provide for such a “jamb” even at the repair stage:
- having purchased a bathtub of the required length;
- installing an additional plasterboard partition.
How to calculate the amount of grout
To calculate the volume of grout, take the manufacturer's recommendations, which can be found on the label. However, in this case, averaged data is used, since it is difficult to provide for all possible factors: the use of tiles of different sizes, taking into account joints of different widths. It is recommended to purchase material with a reserve of 15-20% of the total volume. This will cover the seams for which the main amount of the composition is not enough.
If you need to more accurately calculate the volume of grout, you should use tables compiled by specialists.
To do this, you will need to take measurements of the tiles and determine the sufficient width of the seam between the products. Based on such data, you can find out the consumption of the grout mixture (kg/m²). If the table does not contain the required tile sizes, you can independently determine the approximate material consumption, based on values that are as close as possible to the calculated values.
We use cement mortar
- cheap universal option;
- needs additional processing for better visual reflection;
- reliable, but not durable fixation.
Probably the first thing that comes to mind when the need arises to seal the gap between the bathtub and the nearest wall. The first option is not always as bad as they say. The use of cement mortar is supported by low price and reliability; against - the need to additionally process the joints for a more or less normal decorative effect. This is what it looks like in a dry algorithm of actions:
- we clean the joint from all unnecessary things: dirt, dust, etc.;
- we treat the desired area on the wall with a primer for better interaction with the cement mortar;
- we prepare the solution itself, make it moderately thick;
- We close the gap with rags pre-soaked in the prepared solution;
- after they have dried, apply the solution directly along the entire length of the crack;
- As a means of camouflage, you can choose fragments of ceramic tiles, mosaics, or simply paint over the seam.
Good advice:
if possible, use the same coating as on the wall to obtain a bright decorative effect. It is especially easy to fulfill this condition if you have facing tiles. Buy a few extra tiles - you'll definitely need them, we assure you! Similar tricks can be done in cases where you used other options for decorating the walls in the bathroom.
Types of grout based on material of manufacture
Solutions are divided into groups based on the amount of active ingredients: one- and two-component. In addition, materials are distinguished by shade: colored and colorless. Substances with different properties are used in the form of active components: polymers, cement, resins. Each option differs in the degree of resistance to mechanical stress, moisture, chemicals and high temperatures.
Cement
The main component is cement. Materials in this group differ in the amount of active substances.
Cement grout for joints.
The following types of grout are distinguished:
- with sand;
- no sand.
Additionally, additives are used to ensure frost resistance and moisture resistance. The composition determines the operational properties: seam thickness, resistance to cracking, etc.
Advantages:
- high hardness;
- the ability to fill seams with a minimum width of up to 5 mm;
- properties can be improved by adding various components to cement: the presence of sand in the composition allows the material to be used to protect wide joints;
- cement putties are easy to apply;
- no negative impact on the tiles;
- abrasion resistance under moderate use;
- thanks to pigments, it is possible to choose the desired color to fill the joints on the floor and walls between the tiles.
The materials of this group last a long time.
Cement grout (fugue) also has many disadvantages:
- with prolonged contact with water, part of the liquid will be absorbed into the structure of the material, which will gradually lead to a deterioration of its properties;
- insufficient strength due to the low elasticity of the grout, this problem is partially solved thanks to special additives;
- with intensive use of the coating, the cement grout is subject to abrasion;
- over time, the fugue filling the space between the tile joints cracks, which leads to a reduction in the service life of the tile cladding;
- exposure to aggressive chemicals.
Hydrophobic grout.
To make moisture-resistant grout, hydrophobic compounds are used. To increase resistance to fungus, antiseptic additives are used. There are different types of cement grout depending on the area of application. For example, to protect the narrowest cracks, you can use a cement fugue without sand. This reduces its hardness and resistance to cracking.
Seams up to 1 cm wide are filled with cement-sand mixtures. As a result, cracks will not form under the influence of tensile and compression loads.
Cement fugue is available in the form of a ready-made mixture that does not need to be diluted; just open the container and you can start working. Dry powder for making grout yourself is also available on sale.
Its disadvantage is that the ratio of the components must be maintained, otherwise the material will lose its properties and the seams between the tiles will quickly collapse.
Epoxy
This type of grout performs a protective and decorative function. It belongs to the group of two-component materials. The main substance is epoxy resin, but it acquires the desired properties only in combination with a hardener. These components are produced in separate containers.
This need is due to the fact that when epoxy resin and hardener are combined, a chemical reaction immediately occurs, resulting in the formation of a high-strength polymer material.
The composition does not include cement, which eliminates the risk of water penetration into the structure of the epoxy grout. This increases the service life of the material. The excellent properties of this fugue are due to the almost complete absence of pores.
Epoxy grout for tiles.
As a result, a number of advantages are provided:
- high strength;
- moisture resistance;
- vapor tightness;
- resistance to aggressive chemicals;
- long service;
- resistance to cracking;
- versatility of use;
- resistance to abrasion during intensive use of the coating;
- epoxy resin fills seams from 1 to 15 mm;
- the material does not require maintenance;
- has antifungal properties;
- withstands temperatures within -20…+100°С;
- hypoallergenic;
- no shrinkage during drying;
- Epoxy resin can be used as an adhesive and grout.
There are also disadvantages. Note the complexity of the work. Mixing and application require skill as the composition polymerizes quickly. You will have to prepare the grout yourself, and to do it correctly, you need to use special tools. The price of the material is higher compared to cement fugue. If you need to replace the grout, it will be difficult to do so: you will have to remove it along with the ceramic tiles.
Polyurethane
The main difference between this material and other types is elasticity. Polyurethane does not absorb moisture, but can withstand tensile and tensile loads, which is due to its special structure.
Despite this, the grout is designed to fill joints from 1 to 5 mm. The reason is that the strength is not high enough. If polyurethane grout is used to protect wider joints, even low movement of the tiles can cause the material to fail.
Positive traits:
- low hardening rate, this allows you to eliminate all defects formed during operation;
- plastic;
- moisture resistance;
- the material is ready for use;
- ease of cleaning the tiles if there is mortar left on them;
- the seam does not crack;
- resistance to most aggressive substances.
The polyurethane composition has few disadvantages: high price, inability to fill wide seams with such material. In addition, this type of grout mixture does not tolerate exposure to chlorine.
Silicone
Performs the functions of a sealant. The material is universal; it is used for grouting tile joints, corner joints, and leaks when laying communications. This is a ready-made composition, after opening the container it can be used. Hydrophobic and antiseptic additives are not needed, since the product exhibits such properties. Silicone grout belongs to the group of one-component mixtures.
Silicone sealant for tile joints.
Most often, the material of this group is used in rooms with high levels of humidity.
Its advantages:
- water resistance;
- elasticity;
- ability to withstand tensile and compressive loads;
- safety for people;
- ease of use;
- ease of cleaning the tiles in the event that silicone gets on the lining.
However, the low strength of this composition is noted, so it is recommended to use it in complex, hard-to-reach areas. On surfaces that are subject to heavy loads, silicone is applied only in combination with more durable grouts. The disadvantage is the small number of options that differ in color: the silicone product can be purchased either white or transparent.
Latex
It is characterized by high ductility, therefore it can withstand temperature changes, the effects of tensile and tensile loads.
The advantages of such mixtures:
- Can be used for filling wide joints - up to 30 mm;
- they use the material to protect the external joints of tiles, since it can withstand the influence of extreme temperatures, ultraviolet radiation, and moisture;
- resistance to cracking;
- wide selection of colors.
Latex mixtures have few disadvantages. They note the need to quickly complete the work, since if the tiles become dirty, a cloudy film may remain on its surface after removing the grout. Despite its good tolerance to high temperatures, latex loses its properties if it is exposed to hot steam.
Furanic
The material contains resin. Latex is also used in production - this component helps to increase the plasticity of the mixture. Portland cement is sometimes added to increase the strength of the material. Such mixtures are not recommended for indoor use, as they react to certain chemicals. Furan grout is only resistant to acids. In addition, it is only sold in black.
Furan grout.
It is recommended to use this type of resin-based material in industrial premises. Thanks to the ability to withstand the influence of intense loads, tile joints will be well protected for a long period. This material is not sold in construction stores; it is made to order for large companies.
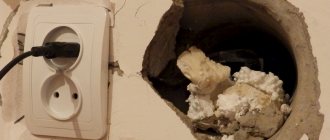
We use polyurethane foam
- a good option for sealing even the widest gap between the bathtub and the wall;
- Only types with increased moisture resistance are suitable;
- strong fixation, mold protection.
Pay attention to the composition of the polyurethane foam before purchasing: it is very good if it is made on the basis of polyurethane. The moisture resistance indicator is also more than important - the durability of the structure you create directly depends on it. The entire procedure is below:
- Clean the work surface well and degrease it;
- protect your hands with gloves;
- Shake the can thoroughly, point it into the slot and start spraying gently;
- try not to shake the balloon too much - the foam that gets into unnecessary places will later have to be torn off with force;
- After the joint is completely sealed, use a knife to trim off all the irregularities to get a perfectly smooth and beautiful joint.
Another option is silicone sealant.
- it is necessary to select the optimal sealant in terms of moisture resistance and sensitivity;
- It is best used in conjunction with a plunger gun, which allows you to confidently control the entire process;
- used in cases of a gap of no more than 5 mm.
- degrease the gap between the bathtub and the wall and dry thoroughly;
- cut the tube spout at a certain angle, the sharper the angle, the thicker the layer will be;
- Apply sealant along the entire length of the joint between the bathroom and the wall;
- wet your finger in water diluted with soap and walk along the entire seam, evenly pressing the sealant inward;
- apply another layer and repeat the pressing procedure.
If everything is done correctly, then you will be able to seal the gap in such a way that it will be difficult to even notice what you used.
Bonus. Detailed video instructions
Ceramic skirting boards - a beautiful solution
- ideal if there are tiles on the wall;
- attractive appearance;
- reliable protection against leakage;
- durability.
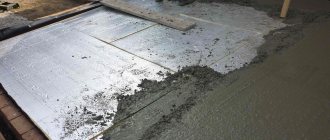
- Traditionally, we prepare the junction area with the wall, clean it from dust, and degrease it;
- seal the gap with cement mortar;
- laying ceramic plinth;
- We seal the seams with white sealant (to match the color of the bathtub).
Border tape - the final touch
- a practical option for finishing a silicone seam or processing a joint after polyurethane foam;
- does not require additional processing;
- high moisture resistance;
- fragility.
This solution will allow you to quickly and beautifully seal the gap, achieving a magnificent visual effect. Use only after you have already treated the joint with silicone or polyurethane foam. Please note the correct sequence:
- Apply any assembly adhesive from the “liquid nails” series over the seam;
- attach border tape to the wall and along the edge of the bathtub;
- carefully treat the joints and corners with silicone sealant.
The latter method requires more than a day to dry, but the result is a beautiful, modern option that will definitely please any housewife.
Advice:
The width of the tape should be at least 2 times the width of the gap between the bathtub and the wall.
Causes of a gap at the wall
No matter how levelly you try to install the bathtub, there will still be a small gap between its side and the tiles or concrete wall. The minimum gap is 0.1 cm, but in some cases it reaches 2-3 cm in width.
We do not take into account the distance to the wall of 10 cm or more, which remains on the narrow side of the bathtub - it can only be sealed using a structure made from a profile and plasterboard or other available materials.
There are several reasons for the appearance of a gap, and almost all of them come down to imperfections in the geometry of the room.
Even a small gap can cause big troubles both for the family of the apartment owners and for the neighbors on the lower floor.
Among the most common shortcomings are the following:
- uneven screed on the floor, causing the bathtub to skew - part of the problem can be solved by leveling the floor or tightening the bathtub installation bolts;
- “wavy” walls formed by a layer of poorly laid plaster;
- angles of non-standard size - more acute or obtuse than 90 degrees;
- defects in the plumbing product - not a perfectly smooth side.
The last problem is extremely rare, mainly in economy class bathtubs. Sometimes it is easier to seal an unsightly joint between a steel or acrylic bathtub and a wall than to change the product or re-plaster several walls.
It is impossible to leave even a slight gap. While bathing or taking a shower, liquid will definitely fall on the wall, and then not into the bath, as usual, but straight onto the floor. And water on the floor will certainly lead to a conflict with neighbors from the apartment below, regardless of the quality and reliability of the waterproofing done in the bathroom.
Through a narrow gap, drops of water roll under the bathtub, where they accumulate and begin to destroy building materials and provoke the appearance of mold and mildew.
You can get rid of trouble in different ways: with your own hands or with the help of professional finishers. Since special skills are not needed to seal the gap, many do it on their own.