A huge selection of finishing materials allows you to decorate the walls, ceilings, doorways of an apartment or house in the most daring and interesting decor options, but there is one condition. You need to think in advance about how to strengthen and protect the corner lines of the walls. The peculiarity of modern wall decoration is that the outer corners of the walls are the first to age and lose their appearance.
In some cases, you simply cannot do without protective plastic corners for walls, as in the case of tiling or wall panels. Therefore, people who are knowledgeable in matters of major repairs, when choosing a finish, are sure to look for plastic corners to protect the corners of the walls.
Where and how are profiles used to protect wall corners?
You have to get acquainted with the first version of the profile corner at the stage of plastering or leveling the surface of the walls using plasterboard. Installing a plastic corner under the wallpaper makes it possible to solve two problems at once:
- Strengthen the finishing layer of putty;
- Give the outer corner an ideal geometry, at least visually the line of junction of the two planes looks quite even.
Anyone who has at least once had to glue wallpaper on walls with crooked corners will appreciate all the benefits and practicality of a simple plastic profile.
Using a plastic corner, you can easily draw outer and inner corners even on the most uneven walls.
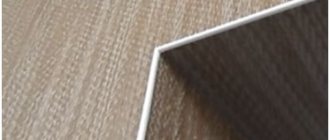
The main difference between corner profiles and decorative plastic corners is that the installation option always has perforation along its entire length. The corner does not need to be glued; it is simply imprinted into a layer of putty or plaster. Even professional plasterers always use a plastic corner in their work.
But the use of mounting profiles for leveling walls does not solve the problems of the appearance of corner edges, both internal and external, especially if the walls are decorated with light-colored trellises. Therefore, plastic corners are often installed in addition to the perforated profile.
- Complete corner protection. No matter how carefully the owners handle the decorative finishes at the corner joints of the walls, after a few months, or at most a year, marks, scratches and chips of the cladding will appear;
- Eliminate cracks and gaps between wall panels, especially at wall corners and baseboards, on curved surfaces;
- Dramatic improvement in appearance. Colored plastic wall corners will help you transform and significantly refresh your wall decor at minimal cost.
At the same time, it is not necessary to limit yourself to the outer corners of the walls, although they are, as they say, in plain sight and require protection in the first place. Often, a plastic corner on the corner of a wall has to be installed after the fact; it is worth rearranging the furniture once and moving the largest interior items. Scuffs and dirt can still be removed or washed, but chips and deep scratches on the walls have to be hidden.
Internal corners also have to be covered in order to disguise the transition from one type of finishing to another, for example, when simultaneously covering the corridor walls with plasterboard, MDF or DFP panels, and living rooms with wallpaper and wall boards.
Characteristics of PVC corners
Finishing is carried out with rigid PVC corners made by forming under the influence of elevated temperatures. This process is necessary to give them strength and long service life.
Applicable:
- when laying tiles;
- for framing arches, doors, windows;
- around windows, doors when framing slopes;
- for leveling and protecting corners of wall surfaces during plastering work.
The variety of shapes and colors makes it possible to choose the appropriate material to give a finished look to any interior. They do not fade, so they can be used for a long time.
In addition to aesthetic purposes, they have a lot of other advantages:
- close gaps, hide irregularities in finishing areas with 90° angles;
- lightweight – they weigh a little, which makes installation easier;
- do not need processing;
- long service life, without loss of basic qualities (up to 25 years);
- easy to install, fastened with glue;
- flexible, easy to trim;
- reliably protects corners from scratches and chips;
- unpretentious in care;
- have a low cost.
The window corner has disadvantages that do not affect its popularity:
- fragility, need to be cut carefully;
- when heated strongly, toxic substances are released;
- scratches may remain on the surface;
- After the expiration date it fades.
Plastic profile for sealing corners
For decorative purposes, corners made of polyvinyl chloride, polystyrene, polyurethane and even silicone are used. If the walls of the room are decorated with wood or tiles, then you will need a corner made of a similar material; a plastic profile for such decor looks unnatural. For all other cases, the list of the most suitable materials invariably tops the PVC corner; it remains the most popular. Almost everyone who is faced with the problem of finishing and protecting the corners of walls with an overlay profile is unanimous in their choice of PVC profile.
The exception is metal and MDF corners used as flashings, covering the line of the window opening from the street side. At the same time, for balcony doors they often use a plastic outer corner made of polyvinyl chloride.
The reason for the popularity of PVC profiles is determined by three important properties:
- Beautiful appearance, there are practically no problems with choosing the right shade of colored plastic corners to protect the corners of the walls;
- Plastic material is highly flexible and “democratic” during installation. There are no problems with gluing, as in the case of polystyrene or polypropylene corner profiles;
- Easy processing when adjusting the size of the corners. The material can be cut without problems with scissors, a bread knife or, best of all, a metal blade.
The good workability of the material does not exclude the possibility of cracking of the profile, especially if the plastic corner has been stored for a long time on the balcony or in the garage at low temperatures.
In this case, before cutting the plastic corner, it must be kept for an hour at room temperature.
Basic recommendations for choosing the size of the corner for plastic slopes
The dimensions of the starting profile depend on the parameters of the selected panel. Correctly taken measurements of a window or door, as well as choosing the length of the corner, will allow you to save as much money as possible when purchasing it.
Choose materials for finishing after installing the window, in this case, you will be able to assess the condition of the openings after dismantling. This approach will accurately allow you to choose the type and parameters of the profile for decoration.
When choosing the size of finishing materials, take into account the purpose of the room in which the opening is being made.
If this is a window in the kitchen or a door in the living room, through which friends will often go out onto the balcony, then it will be more practical to install a wide profile. Such a smart solution will make it possible to maintain the aesthetic and neat appearance of the room for a long time.
Do not install wide finishing elements on small and narrow windows; give preference to a thin decorative profile with parameters no more than 15 * 15 mm, it will add elegance and lightness to the interior of the room.
Plastic corner size
The advantages of a plastic corner include the low cost of the material. Depending on the height of the shelf, the price of a 2.7 m long strip ranges from 50 cents for a size of 10x10 mm to $1.7 for a profile of 50x50 mm. For cladding home walls and corners, a corner with a shelf of 20 mm and 15 mm is usually used; their cost is in the range of 0.7-1 dollars for a standard strip of 2.7 m.
On the PVC market, PVC profiles are represented by three types of plastic corners:
- Standard equal-shelf option, in which both shelves are the same size;
- Double corner or T-profile used for decorating interpanel and tile seams;
- L-shaped or arched plastic corner with different shelf heights.
No matter how hard the craftsmen try to level the planes of the walls, over time a gap will still form in the corner, which must somehow be masked by installing a plastic corner on the corner of the wall. Otherwise, there will be an unsightly transition line from one type of finish to another. For the case when you need to close the joint between wallpaper and decorative plaster on the wall, the smallest profile, 10x10 mm, is quite sufficient. The same size of shelves is selected for the outer corner for the plastic baseboard. The largest profiles, 50x50 mm, are used for installation on the corners of building facades; sizes 20x20 and 25x25 are the most popular for interior work.
Installing a corner: necessary materials
Installation of polyvinyl chloride corners does not require specific knowledge in the field of construction and can be done independently, subject to simple rules and the use of special materials. You will need:
- sharp knife or metal scissors;
- special glue or liquid nails;
- silicone;
- PVC corners.
Before purchasing tools and materials, you need to measure and write down the dimensions of the openings and slopes on which you plan to install plastic corners. There is no need to add up the length; it is better to select a corner individually for each element. Firstly, this way you can avoid unnecessary joints, and secondly, you can choose the required color and size of the corner for each element.
Options for using corner profiles for finishing corners
At first, most apartment owners are quite restrained about using corner profiles when decorating corners and wall junction lines. What hinders us, first of all, is the well-established classical opinion that the use of PVC materials in an apartment should be limited and used primarily in places where it is simply impossible to do without it. For example, for entrance doors in the bathroom or kitchen.
It is possible to destroy mistrust in plastic corners only if people see with their own eyes the difference between finishing walls without a corner and after installing a plastic corner profile. The difference in perception even with the simplest decor is significant.
The influence of using corner finishing in an apartment
Different options for finishing corners are accompanied by corresponding purposes. So, if there are small children or animals in the apartment, then the corners are treated for additional protection. A sharp impact can deform the desired shape and spoil the interior.
Fans of unusual design prefer non-standard design of corners. This could be built-in furniture or arrangement of additional space. Various building materials can be used as finishing to influence the interior.
Finishing door and window slopes
The most obvious example of the benefits of installing corner PVC profiles are the windows and doors of a modern apartment.
When replacing an old wooden window frame with a double-glazed window, as a rule, you have to re-plaster the slopes and look for a way and material to close the resulting external angle to the walls of the room.
Traditionally, window slopes are made on the basis of plasterboard sheets, with the outer corner reinforced with a perforated metal corner, photo.
This makes it possible to perfectly align the planes and achieve the most even angular line, but the edge will still remain a risk zone. The window is used quite often, so even curtains or curtains often cause damage to the edges. If you are finishing the slopes using MDF or PVC panels, then you simply cannot do without installing a plastic corner on the slopes. First of all, you will need to close the end of the facing panel, otherwise the entire decorative effect of using the finish will be blurred. The dimensions of the plastic corner for slopes depend on the height and width of the window opening.
A plastic corner for plasterboard and wallpaper is selected 20x20 mm; for the corner at the transition between MDF board and wallpaper, a corner profile measuring 25x25 mm is installed. In the latter case, if desired, you can hide the installation of the protective profile; to do this, you just need to select the right colored plastic corners for the slopes. PVC is quite difficult to paint, so the repainting option is used if the entire window with slopes and corners is planned to be painted.
In addition to finishing the outer edge, it is necessary to install plastic strips between the window frame and the plane of the slopes, and also close the line of intersection of the window sill with the walls. For these purposes, it is best to use a T-shaped profile with a deflection in the central part.
At first glance, the line of intersection of the slope and the window sill may not be covered with a plastic corner, but this is not entirely true. A plastic window sill springs quite strongly even under a small load, so after a few months the material with which the corner joint is sealed may simply spill out of the gap, so it is better to close it with a corner profile in advance.
The same plastic corners are often used for decorative sealing of the seam line between the bathtub and the tiled wall. PVC is ideal for the damp atmosphere of the bathroom.
The second section of the walls, where it is almost impossible to do without installing a decorative plastic corner, are the entrance doors. If the entrance doors in a house or apartment are changed, this means that the owners have a lot of work to do on finishing and decorating the vestibule and door slopes. Since the front door always remains the dustiest place in the house, the slopes of the doorway, with rare exceptions, are traditionally finished with MDF, lining and PVC panels, most often imitating wood or natural stone.
After the walls of the door vestibule are plastered and puttied, the cladding can be laid. Any craftsman can confirm that after finishing work, the ends of the facing panels will remain visible at the angle of intersection of the corridor walls and the plane of the slopes. They must be closed in order to achieve a finished appearance of the doorway and to prevent the accumulation of dirt and dust in the cracks.
If the vestibule was lined by directly gluing PVC tiles or panels onto a plastered surface, then in order to close the gaps, a plastic corner with a shelf width of 30 mm would be sufficient. For decorative trim laid on pre-stuffed sheathing or galvanized profile, you will need a 40-50 mm plastic corner profile.
Protect corners from damage
For protection, special protective corners are used. They differ from each other not only in the method of fastening, but also in the place of application.
The range of such products includes the following variations.
- By visual differences. Protective corners come in different shapes and shades, which allows them to combine two functions at once: aesthetic and protective. This way you can choose options to match the walls, doors, and baseboards. For a more unusual design, you can use different textures and eye-catching colors.
- According to the material used. A cheaper option is a plastic product. It comes in different colors, textures and even models with a transparent base. Metal options are more for protection than aesthetic appeal. To add a special touch to the room, you can use wooden options. In construction markets there are corners made of different types of wood and with different surfaces.
- Form. According to this criterion, two types of products are distinguished: sharp and round. You can choose any shape of protective corners. The parameter does not affect the main function. It's more a matter of aesthetic appeal.
- Dimensions. You can choose completely different dimensions. It all depends on the scale of the room and the walls as a whole. The largest option is considered to be a product measuring 10mm x 10mm x 2.75 m. The minimum size is 5mm x 17mm x 2.5m.
Arched doorways
Among the many options for designing an interior opening, the arched design is considered one of the most beautiful and expressive. The arch is most often assembled on the basis of a metal frame, lined with plasterboard sheets, or laid out with light wall foam blocks.
One of the problems encountered when assembling an arched arch is related to the inflexibility of drywall and galvanized profiles. Both of them are almost impossible to bend in a smooth curve. In order to obtain an arc, the supporting frame has to be assembled from a dozen short segments - chords. The lining of the inner surface of the arch is also made from short pieces of drywall.
You can simplify the task by finishing the arch with a plastic corner in the form of several straight sectors, photo.
There are two ways to solve the problem of making the arch as smooth as possible:
- Installation of a finished arched plastic corner photo. You only need to adjust the dimensions of the opening to the finished profile, install and secure the polypropylene frame;
- Make an overlap of plasterboard wall sheets with a curved arc cut out according to the template. The inside of the slope is filled with polyurethane foam, and the edge is sheathed with a decorative plastic arched corner.
The use of a decorative plastic profile allows you to close the joint and corner transition from the drywall to the slope. This method of arranging an arched passage is cheaper and simpler. But there is one condition: you need to know exactly how to bend the plastic profile under the arch. At first glance, bending a soft polyvinyl chloride profile is not particularly difficult. One of the simple descriptions of how to bend a plastic corner into an arch is shown in the video
An ordinary plastic corner is not suitable for these purposes. Any attempt to glue or nail it to the edge of the drywall results in the decorative profile moving away from the wall at the top and breaking into two parts. You have to cut one of the shelves of a regular corner into segments 25-30 mm long or, more conveniently, use a special plastic corner for the arch.
Most often, a profile measuring 17x5 mm is used for an arched doorway. Due to the reduced side flange of the plastic profile, the corner bends almost without distortion, which means that when laying the material with glue, the risk of detachment from the edge of the wall will be minimal.
If the arc radius of the arched opening is small enough, the plastic profile has to be bent so much that even a special decorative corner begins to warp. In this case, you can use the “hot” bending method. The corner is fixed at one end of the arch using a clamp or clamp. Next, the polyvinyl chloride profile is heated with a hairdryer to a temperature of 60-70°C and pressed against the edge of the drywall. While the material cools, it is rolled into place using a soft paint roller.
If it was not possible to bend the desired arc profile in two or three warm-ups, then bending should be stopped, since the material becomes hard and brittle after several heating cycles.
Before gluing the plastic corner to the arch, it is necessary to determine the contact points of the profile to the surface of the walls in order to apply glue exactly in these places. If you do this “blindly”, most of the adhesive material applied to the plastic profile will be wasted without benefit.
Do-it-yourself installation of a plastic corner
The process of laying a decorative profile on a corner or on the edge of an arch is not particularly difficult; it requires care and careful handling of plastic. Polyvinyl chloride scratches easily and loses its glossy shine. Often the front part of the plastic corner is sealed with paper to avoid damage and contamination with glue. After the adhesive base has hardened, the surface of the corner can be polished with a soft cotton cloth.
One of the advantages of using a PVC profile is the fact that during production the coloring of the material occurs throughout the entire mass; any scratches and abrasions do not lead to a change in color or shade. So you can polish the material an infinite number of times.
Advantages and disadvantages
Of course, plastic corners have their pros and cons. It is worth taking a closer look at the advantages of these products:
- They perfectly hide the corner junctions of materials that are located on adjacent sections of the walls.
- They smooth out small surface imperfections well, creating an angle of ninety degrees.
- The service life is tens of years.
- Installation does not require special skills, you just need to ensure that the trim is calculated correctly.
- Wide choice of colors.
- Low cost, which distinguishes the products favorably from aluminum options.
Installation of corners allows you to hide unevenness and resulting joints.
We must not forget about the existing shortcomings:
- Possibility of damaging the material when cutting. The fact is that plastic is quite fragile; using the wrong technique or tools is a guarantee that the fragment will become unusable.
- Release of substances harmful to human health during combustion. In this regard, the material is not suitable for finishing evacuation areas.
Naturally, negative parameters depend on the specific use case.
Plastic corners are quite fragile material, so trimming must be done very carefully
How to glue a profile to a corner joint
Working with a corner profile is no different from similar operations with polyurethane glazing beads or plinths. Initially, before gluing the plastic corners to the slopes, you need to do a little preparatory work.
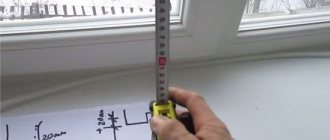
First, use a tape measure to measure the length of the PVC profile at each slope angle. Since the window opening has a rectangular shape, all plastic corners will fit together at right angles. We will cut the joint line at an angle of 45°. For other structures - arches or polygonal vaults, the cutting angle will need to be determined by the location of the sticker.
After marking, you need to cut the plastic strips according to the measurements taken. This must be done as carefully as possible, since the corner is quite thin, only 1-1.5 mm, so the material can easily be split if cut incorrectly.
Experienced craftsmen cut the profile with a construction knife under a ruler or with well-sharpened scissors. If you do not have relevant cutting experience, then it is better to use a carpentry tool for corner cuts. PVC is ideally cut with a regular hacksaw blade.
After cutting, we carefully remove the burrs and perform a final fitting of the cut blanks at the place of the sticker. To do this you will need tape and a building level. Having placed the plastic corner blank in place of the gluing, we level its position and fix it with several strips of tape. We install the upper corner strip in a similar way.
Only by installing all the cut sections of the corner “roughly” and aligning them to the building level, it becomes clear how correctly the corner was cut. Usually, amateurs create a gap of 1-3 mm wide at the joint line. It is clear that it is impossible to glue a plastic corner with such cracks.
When cutting an angle profile, add an allowance of 2-3 mm to the calculated size. This margin during adjustment will help correct the situation without any special consequences.
To get rid of the cracks at the joints of the walls, you will need to once again clarify the passage of the cut line along all three workpieces. To do this, draw a correction line with a pencil and disassemble the structure to adjust the corners. The cut line can be trimmed with scissors or sharpened with a piece of sandpaper wrapped around a block of wood.
How to glue corners to windows
The quality of the surface finish of the window slopes determines what material to use. Check them using a level. If the curvature is severe, bendable plastic corners are used. The installation technology does not depend on the type of slopes. The main thing is to choose an adhesive suitable for each surface.
Marking
Sequence of installation of a plastic corner:
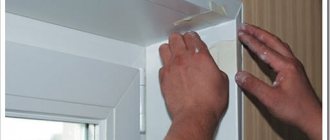
- Measure the height of the slope; the upper part of the segment is made with a margin. Mark an angle of 90 degrees on the wrong side, 45 degrees on the front side. Make cuts with scissors or a knife.
- Apply glue, install the part in place, wait for it to set.
- Measure the width of the opening, cut a strip of the required length, allowing for a margin that will be used to mate with the vertical parts.
- The workpiece on the front side is cut at an angle of 45 degrees on both sides (bottom and top).
- After trying on the vertical elements with side slopes, the excess is cut off.
- Apply adhesive to the top bar and place it in place.
- All parts are fixed using masking tape.
- After a day, the glue will harden and the tape can be removed.
Example of securing corners with tape
How and what to glue
All that remains is to glue the plastic corner onto the corner edge of the slope. First of all, you will need to choose how to glue the plastic corner to the wall. Salons and hardware stores will recommend the Liquid Nails adhesive composition as the most suitable product. The only positive characteristic is the convenient packaging in the form of a tube.
Everything else is up to the manufacturer. This composition can be used to glue lightweight polyurethane bovelacci or a plastic corner measuring 10x10 mm to the joint between the tiles. In addition, the white adhesive mass becomes beige-gray over time, so traces of glue are very clearly visible on the seams and joints.
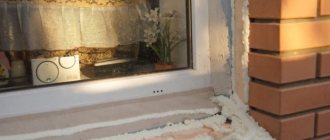
Slopes on windows and entrance doors must be glued with silicone; it can be transparent, but if desired, you can easily choose a colored version of the sealant. Not all adhesive materials adhere well to the smooth surface of PVC corner. Silicone sealant is a pleasant exception; it does not flow or shrink.
But the main advantage is to obtain a durable and elastic seam. If you have to glue something to a door frame or to light partitions that vibrate with every door slam, choose silicone. Any other adhesives that produce the strongest and stiffest seams cannot withstand vibrations and chip, especially when it comes to a plastic corner.
The technology for gluing a corner plastic strip is quite simple. Apply glue in thin lines to the inner surface of each shelf. If the glue is very thick, then the adhesive mass can be applied to the wall with short oblique lines or dots. You cannot cover the entire surface of the wall with a continuous layer. Firstly, such a plastic profile will be impossible to press into place, and secondly, 50% of the adhesive mass will be squeezed out uselessly beyond the corner. If the glue is too liquid, it will simply leak out from under the plastic strip.
Carefully place the prepared plastic corner with glue applied onto the gluing site. To ensure a strong adhesive seam, you need to carefully press the bar into place. A small amount of adhesive mass may be squeezed out from under the plastic profile, but do not rush to remove it - first you need to level the corner. The polyvinyl chloride profile is very flexible, and it will not be possible to straighten it by hand, so the laid corner is brought into a straight state using a metal ruler and a building level. To prevent the plastic corner from falling off the wall and sliding down until the glue dries completely, you need to secure it with several strips of tape.
We glue the next strip of plastic profile in the same way, but before laying it in place you will need to apply a small amount of glue to the joint line. After settling, part of the glue will protrude at the joint; all excess can be removed only after the adhesive mass has completely dried. Until the glue has dried, any attempts to remove excess glue will lead to stains on the wallpaper.
Sometimes there is a problem with the length of the arched corner. The maximum length of the plastic strip is 3 m. This may not be enough if the arched opening is made across the entire width of the room; the length of the corner profile on such an arch can reach 3.5-4 m. In this case, the arched arc has to be sharpened in a small piece. It is best to make the central part of the arc solid, add two small sections to the sides, and seal the joint line with silicone sealant in the color of the plastic material.
After a couple of years, due to shrinkage processes, the seams may come apart a little, but the arch will still retain its original effectiveness. If you increase the length of the plastic corner on one side, the joint will be perceived as a stain and spoil the impression of the entire structure.
How to glue a plastic corner to the wall and to the slope of a PVC window
Before mounting the profile, you need to select an adhesive, study the instructions and characteristics.
The quality of the material determines which product to use and what to glue with:
- silicone-based sealants - designed to work with tiles, ceramics, wallpaper;
- liquid plastic – only for plastic surfaces;
- polyurethane glue – sets quickly;
- “liquid” nails are easy to apply, do not corrode, and glue well.
The adhesive is applied to the inner surface of the profile in dotted lines 1 cm long.
Application example
