Windows are the weakest link when it comes to inevitable heat loss in a house or apartment. At the same time, it doesn’t matter at all what type of them we are talking about: telltale cracks sooner or later appear in both plastic and wooden windows. To minimize damage and ensure the reliability and tightness of the structure, owners often have to carry out repair work themselves. And in this case, knowledge of how to seal cracks in windows, what composition or material is optimal, is necessary. There are different ways to keep warm, but to find the best method for your specific situation, you need to take a closer look at each.
Symptoms and causes of the threat
Often the first sign of the appearance of cracks is dust, which accumulates on the windowsill with enviable consistency, despite all the efforts of the owners to remove it.
- Fogging windows in the cold season is another symptom, indicating that cold air is freely passing through the cracks that appear.
- Noise and drafts, a decrease in room temperature are the following indisputable evidence. If measures are not taken in time, then soon more serious problems with heating will arise, and they can already make a hole in the family budget.
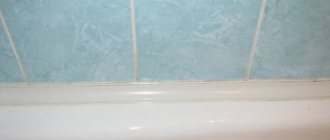
- Mold, getting wet, darkening of the wallpaper are symptoms of cracks that have arisen that are simply impossible not to notice.
In order to successfully eliminate the emerging threat, you need to understand what exactly is to blame for this consequence. Understanding the reason for the appearance of “criminal” gaps can eliminate the problem once and for all. There may be several of them; the “provocateurs” of the cracks are also different.
Incorrect installation of windows
Unfortunately, unprofessionalism is not uncommon. Incorrect installation of the window, during which the gaps between the window frame and the wall were not foamed very well, will lead to drying out of the installation material, and the result of work under the motto “slip-scratcher” will be voids.
It is unlikely that it will be possible to check the level of skill of workers immediately after installation, since special knowledge is required. However, the presence of cracks can be determined using a regular lighter or candle. Their flame is simply brought to all joints. Pay attention to the outside of the structure. The places where the frame is adjacent to the wall must be thoroughly blown in with foam; real professionals also protect its surface - paint over it or putty on it, both outside and inside.
Seal that has become unusable
Errors during installation are often accompanied by wear and tear of the material, since, untreated with paint, putty or plaster, it is not able to withstand temperature changes, rain, snow, wind and sunlight.
Even the highest quality polyurethane foam intended for outdoor work begins to crumble over time. Foam rubber or other sealant will suffer the same fate. The result is widening gaps. To ensure a longer service life, materials must be inspected. It is recommended to check their integrity in the spring, once every 2 or 3 years. If necessary, the seals are provided with a protective layer - paint, putty.
Wear of elements: fittings and frames
This reason for the occurrence of cracks also does not depend on the type of window structure, because any material has a limited service life. To a greater extent, this factor still applies to wooden windows, since natural material is more sensitive to adverse external conditions.
Over time, the tree dries out, and the inevitable result is the appearance of cracks. Windows made of metal-plastic have another Achilles heel - failure of the rubber seal. In order not to encounter such problems prematurely, regular inspection of structures and their maintenance is necessary: adjusting fittings for plastic products, painting frames for wooden windows.
Gaps between frame and slopes
A foamed area that they “forgot” to protect is a fairly common occurrence. However, the problem can be solved, since sealing the cracks in the windows in these cases is quite simple. To eliminate excess ventilation you will need:
- alkyd paint;
- rags (simple rag);
- newspapers or plastic film;
- sealant for external work - acrylic (frost-resistant), polyurethane or rubber-bitumen;
- mounting gun for it;
- polyurethane foam, a stationery knife to remove excess foam;
- screwdriver (long), spatula (narrow);
- gloves;
- White Spirit;
- brush.
The silicone type of sealant is used extremely rarely, because our frosty winters are contraindicated for it.
First, the windows are prepared for work - the old foam is removed.
- If there are screws on the low tide, unscrew them.
- They pick out the old browned foam from the substitution profile and the gutter.
- The same tool is used to remove foam from the joints of the walls and the profile.
- The smallest residues are removed from all surfaces with a brush.
Repair and finishing begins - eliminating cracks.
- Surfaces are covered with newspapers or film.
- All joints are covered with polyurethane foam. In narrow places, the nose of the tube is slightly flattened with your fingers.
- Immediately after the operation is completed, the ebb is attached to its rightful place. Then they take a break for a day.
- The next day, cut off the excess foam with a knife.
- The nose of the container with sealant is cut off at an angle. The material is applied over the foam.
- The excess is removed from the frame with a rag soaked in white spirit.
- The sealant is leveled with a spatula and left to dry.
- The dried composition is protected by applying alkyd paint.
All work takes a minimum of time: no more than an hour, but for some time after this operation you can forget about the common window disease.
How to cover cracks in wooden windows
The appearance of cracks in wooden window structures is a common occurrence.
Even a new window can let in cold air if it was not installed correctly. You can check the quality of window installation in the old proven way, using a spark from a lighter. By running it next to all the joining seams, you can make sure that the master installer did everything correctly and did not leave any gaps anywhere. However, this method does not provide a 100% guarantee, because some defects may not show themselves immediately. Do not be upset in advance if you are installing wooden windows. The risk of frames being installed incorrectly is quite low. It is enough to contact a specialized company with a good reputation; their help will cost you much less than repairing a window just a few months after installation. But the formation of cracks due to drying out and desiccation of wood is a more common cause. Even with high-quality installation, the use of good wood as a material and proper operation, windows tend to change their ability to begin to let in air from the street.
In this case, you need to think about how to cover the cracks in wooden windows. There are several methods for getting rid of cracks. The old method, proven over decades of Soviet reality - sealing the crack with a newspaper rolled into a bundle - is not suitable if you have modern windows installed. Neither from an aesthetic point of view, nor from a functional one.
This also includes caulking cracks with cotton wool, rags, gluing them with paper strips and other methods that involve the use of improvised materials. Their effectiveness is extremely low.
A more modern solution is to use a sealing cord made of foam rubber, rubber or polyvinyl chloride. But when choosing them, you need to take into account a lot of nuances such as climate, frequency of opening and closing windows, and much more. And such a cord, even a wide one, cannot provide 100% protection against heat loss. Without additional putty, it will still allow warm air from the room to escape to the street.
If you are still looking for a budget option, ordinary paraffin can act as a window sealant. It needs to be heated in a metal bowl, preferably in a water bath, then a plastic syringe is heated in warm water, the needle is removed from it, liquid paraffin is drawn into it and problem areas are treated, for example, where the sash does not fit tightly to the glass. This treatment of problem areas is quite effective, but only from the inside. In addition, after it the window will require painting. Although paraffin does not leave a mark on glass or wood, it can crumble in winter or melt out of cracks in summer.
Large cracks, especially if the outside needs treatment, can be covered with a homemade mixture. To do this, you need to take one part of gypsum and two of chalk, fill them with water, stir until smooth and apply with a spatula. A place treated in this way will not stand out too much against the background of whitewashed or painted walls, much less than a window opening covered with polyurethane foam.
Gaps between sashes and frame
This is a disease of the rubber seal that has become unusable. The operation to correct the problem is to replace it. In this case, they buy new material, arm themselves with a small wooden spatula, and then do this:
- Carefully remove the worn seal from the grooves in the frame.
- Then the vacated area is wiped with a rag (vacuumed).
- The new material is carefully inserted into the groove.
To extend the life of the “newbie”, it is recommended to treat it once a year with silicone spray, which protects the seal from drying out.
The nuances of repairing wooden windows
These methods are also suitable for such windows, but there are some differences: both in preparation and work.
- The tree must be carefully checked at the preparatory stage, special attention is paid to glazing beads. If damaged (rotted areas) elements are found, they are replaced with new products.
- The same rubber or foam rubber can act as a seal for wooden windows (frames and sashes). In these cases, the material is simply glued to the frame.
- Foam rubber is used as a seal between frames, but then it is not firmly glued.
An alternative is the installation of external slopes
The previous methods are temporary measures, since sealing cracks in windows or protecting the seal in such ways does not mean that it will be possible to completely get rid of these “diseases.” From time to time these operations will have to be repeated. Installation of external slopes, on the contrary, is free of such disadvantages; it will reliably protect the windows. To get started, you need to obtain in advance:
- alkyd paint;
- U-profiles plastic (8 mm);
- the same panels;
- sealant, polyurethane foam;
- primer;
- White spirit and a rag - to remove foam or sealant stains;
- 6 wooden spacers: 3 equal to the height of the opening (or longer, for the role of jibs) + 3 parts similar in width;
- small pieces of foam rubber or soft material.
You will need the following tools:
- mounting gun;
- hacksaw for metal (replacement - jigsaw);
- ruler, marker, tape measure.
Repair and finishing in this case proceed according to the following scenario:
- Dirt is removed from all working surfaces, then old paint is removed.
- Carefully double-checking the numbers, take measurements from the slopes: first from the top, then from the sides.
- The measurement results are transferred to plastic, and the parts are carefully cut out.
- Put on U-shaped profiles. For vertical slopes they are provided on each side, for horizontal slopes - only on the inner and outer sides.
- Installation begins from the top element. The foam is applied to the wrong side in a zigzag manner. After installing the slope, spacers are placed under it - 2 at the edges, one in the middle. To prevent damage to the plastic surface, pieces of foam rubber are placed on the wooden elements.
- Installation of vertical slopes begins after the foam on the top part has dried enough to remove the spacers. The stage of installing the sidewalls is similar to the previous one - foam in a zigzag plus “crutches”.
- Sealant is applied to the outer part of the slopes, leveled, and allowed to dry. The last stage is the application of alkyd paint.
The result of such relatively large-scale work is a longer period of time without the need to patch holes and cracks. However, the reliability of the design depends more on the diligence and care of the author.
External slopes: what are they for?
The finishing of external slopes should not be postponed, as they protect the thermal insulation layer from degradation, and structural elements from environmental influences.
Proper preparation of the outer part of the opening significantly increases the sound and heat insulation properties of the double-glazed window. In addition, it will make your home much more attractive from the outside.
Most often, plaster or various facade mixtures are used for such work. It is recommended to lay them in several layers, and the previous one must dry normally before applying a new layer.
After the last layer has dried, it needs to be painted - this will provide additional protection from moisture and temperature.
If cracks are scary only in winter
In most cases, a “terrible problem” appears only with the arrival of cold weather, because the complete tightness of the room does not at all contribute to good ventilation. How to seal cracks in windows only for the cold season? Many materials can cope with this task: both improvised “helpers” and “specialists”.
Paper, clay, chalk
This almost universal material has been known to many since early childhood, because a large number of people still live in old apartments with wooden window frames, but not everyone is ready to say goodbye to them for the sake of metal-plastic. Here, insulation with cellulose fibers is very popular.
The easiest way to obtain repair and finishing material is to shred newspapers or toilet paper and then fill the raw material with water. Then the mass is squeezed out; many do not limit themselves to cellulose alone, but add clay (the same amount) and crushed chalk (twice as much) to the composition.
The mixture is placed into the cracks with a ruler or knife. After this operation, tape and strips of soapy paper (cloth) are glued to the protected gaps. The disadvantages of this insulation method are the difficulty of removing such protection, the need to finish (paint) the window due to the traces left by the mixture.
Express option - cotton wool
This is the fastest way to achieve the goal - the desired warmth. Small pieces of cotton wool are torn off and then placed tightly into the cracks. Small and narrow “gaps” are eliminated using an accessible tool - a thin screwdriver or knife.
The advantages of the method are the absence of traces that must be painted over after removing the insulation. The disadvantage is the fragility of the material, because cotton wool, which is exposed to moisture, will begin to lose its shape quite quickly - to cake.
Troublesome sealant
This option is suitable not only for the cold season. It is reliable, durable, but in addition to time and labor, it requires financial investments. In this case, transparent compounds are used. The glass seats are sealed with sealant, for which the fragile material is first removed.
The compound is applied along the entire perimeter of the hole, then the glass is returned to its place, and the entire seam is again treated with sealant. There are practically no downsides to this method of providing heat. Except for the impossibility of re-dismantling the glass.
Putty is an old tradition
This method was one of the few types of heat recovery in Soviet times. Now, caulking is another additional method to ensure there are no drafts. In this case, the material also seals the places where the glass adheres to the window frame. Two candidates are used as putty: either a special window composition, or ordinary plasticine for crafts.
Materials are applied to the outside of the window opening - at the joints of the frame and glass. First, small pieces are thoroughly kneaded between the fingers, then sausages are made from them, which are sunk into the holes. The most important disadvantages of putty are its destruction under the influence of frost and melting in the sun.
Polyethylene for a wooden house
This method is new, so there are not enough reviews from those who have used it, but they say that sealing an entire window opening is much more effective than dealing with a large number of small cracks.
The main disadvantage of this method is the not very aesthetic appearance of the window, since it is almost impossible to ensure uniform tension of the polyethylene. Pros - the ability to reuse the film, ease of operation. The polyethylene material is fixed in several ways - with a furniture stapler, double-sided or masking tape.
Foam rubber is a professional
This type of material is often used to insulate old wooden windows. Its most popular types are ordinary foam rubber and tapes with an adhesive base. Both cope well with the task of providing heat, but they cannot save you from noise.
The advantages of ordinary foam rubber are ease of work. It is either hammered into the cracks, or the sashes are opened, laid around the perimeter, and then the window is closed. If adhesive tapes are used, then the foam rubber is attached (even in several layers) to the frames taken out of the box. Its disadvantages are the removal of paint strips along with the tapes, and the remaining traces of glue.
Thermal reflective film
This energy-saving material is not intended to seal cracks, but to reduce heat loss (up to 30%) through glass. The heat reflective film is glued directly onto it. To ensure winter protection, the glass is first washed and then degreased with any product containing alcohol.
A piece is cut from the heat-insulating material with a margin - 20 mm larger than the dimensions of the glass itself. Having torn off the bottom layer, the film is glued, smoothing it over the entire area of the window. The folds are heated with a hairdryer, and excess material is removed with a knife.
How to seal cracks in wooden windows?
Wooden window frames are good for everyone: they are environmentally friendly - they do not affect the health of the inhabitants of the house, and there are no problems when disposing of old, worn-out products. Such windows breathe (they allow air to pass through and do not allow moisture to accumulate).
And in general, they have a lot of advantages. The bad thing is that wood is not durable , and after several years it begins to deform under the influence of external factors. Constant seasonal changes in temperature, moisture absorption and drying, and winds create cracks in the frames. At first invisible to the eye, they gradually expand, increase in size, and begin to cause concern.
