During a major or cosmetic repair, it is very useful to know how to repair a crack in a wall, because without rough preparation, further work is useless. Even a small crack requires special attention, since over time it will increase, leading to serious consequences. When starting to eliminate a crack, it is important to take into account its width and depth, the material of the wall, since the methods and tools used in each individual case may differ. In addition, after eliminating the defect, the restored surface must be properly cared for.
Types of defects
Building brick is a common material used for the construction of internal and external walls. It is considered durable, strong, and lasts for decades.
If cracks appear on brick walls, it means the surface has been exposed to external or internal destructive factors. Therefore, it will be necessary to identify the reason why the chip occurred.
Perhaps somewhere the load on the walls has increased or these are the consequences of man-made circumstances . In any case, you need to carefully examine the entire surface of the wall that is cracked, paying attention to the direction and width of the chip.
Under a strong vertical load, the crack will expand downward, and if the problem is in the foundation (sagging, groundwater has washed away, mistakes were made in construction), then the crack will expand upward. If the material has become unusable, then a fine network of cracks will be located closer to the surface.
Cracks are divided into the following types:
Vertical.- Horizontal.
- Narrow (up to 5 mm).
- Wide (more than 1 cm).
- Superficial.
- Deep.
- Medium (5-10 mm)
- Inclined.
- Direct.
- Closed.
- Through.
- Curvilinear, etc.
The listed types are clearly visible upon visual inspection; they can be located both on the external facade of the building and on the inside of the house. The size of the defect can be easily determined using a construction tape.
Small chips can be quickly fixed with your own hands using sealants , concrete mortar or by injection. For very large gaps, professional intervention and replacement of the damaged area will be required.
Wide cracks with dimensions greater than 1 cm are considered critical defects that require elimination by special repair methods.
Causes of cracks in masonry
Defects that appear on brick walls are classified into types depending on the specific reasons that contributed to the cracking of the surface. The following types of cracks occur, depending on the factors influencing them:
- Constructive. Influencing factor:
- incorrect calculation of foundation dimensions (depth);
- increased load on the walls;
- broken construction technology;
- unsuitable brand of solution;
- lack of reinforcement.
Shrinkable. Main factor:- a nearby pit with a building;
- construction of buildings on soils classified as bulk.
- Deformation. Main factor:
- man-made causes;
- incorrect selection of materials for laying.
- Worn out. The main reason: the service life of the brick has expired.
- Temperature. Factors:
- unprotected, constantly freezing foundation;
- constant temperature changes indoors and outdoors.
The method of eliminating the defect directly depends on the factor series, which must be established independently or with the assistance of a qualified specialist. There can be many reasons for the appearance of faults.
Factors that cause the formation of cracks in brick walls are also:
- Broken ligament between bricks (or lack thereof). A vertical gap appears, which will require a tie with an armored belt.
- Mistakes when laying a house (failure to take into account the level of freezing and type of soil, the use of silicate materials (blocks), the use of poor-quality fill. Cracks in the corners of the building quickly expand. In this case, only deep strengthening of the foundation will help, and only then - repairing the wall.
- Lack of consideration of soil during construction. Nearby drains, nearby highways, and groundwater can damage walls over the entire surface. Here, before repairing the walls, it will be necessary to strengthen the base at the level of concrete pouring.
- Shrinkage of the building in the first year of construction. Initially, thin cracks appear, which can then expand. But, if they are repaired using cosmetic repairs, the defect will be eliminated.
- Load from top coverings, floors, balconies and other load-bearing structures. Here you will need professional construction assistance with a reinforced screed in order to redistribute the weight on the problem area of the wall.
When cracks are identified on a brick wall and the cause of their formation is established, the factor is first eliminated, and only then repairs begin. This rule is observed both for repairing the facade of the building and indoors.
How to repair cracks in different types of walls
Having figured out the causes and types of cracks, you finally come to the main question: what to do now with these zigzag lines on the wall of your home? There are many ways to seal cracks. And a lot depends on the materials in which the destruction occurred. The purpose of the wall is no less important - it is external or internal, load-bearing or just a partition. Below are the most common cases when high-quality sealing is necessary.
Repairing cracks in brick walls
Brick is one of the most common building materials. And despite the widespread use of reinforced concrete structures in the construction of multi-apartment residential buildings, and in private construction - frame structures and cellular concrete, brick is still very familiar to any resident of Russia. Non-load-bearing walls continue to be built from it in high-rise buildings of the “monolith-brick” type. They are also common for construction on their own site.
A crack in a brick wall often follows the line of least resistance
Having discovered a crack in brickwork, you should not panic, but do a little research. You can determine the type of crack using the table:
| Crack width | Classification | Possible repairs |
| Up to 5 mm | Small | Sealing with putty is allowed |
| 5 - 10 mm | Average | Sealing of DSP with preliminary jointing |
| More than 10 mm | Large | Sealing of central fiber cement board with crushed stone, reinforcement is required |
After this, use plaster beacons on the street side or paper strips on the inside wall to record the current state of the crack, indicating the date and month. If you see that the crack is not growing, good, you can start sealing it. The paper is torn, and the beacon is cracked or moved away from the wall - look for the cause of the cracking. Be guided by the direction - usually vertical cracks are characteristic of a weak foundation, they expand upward when part of the house seems to fall away from another. If the crack runs askew along the wall, the foundation is strong and the mortar has been damaged.
Important! Repairing any crack should only begin when measures have been taken to stop its further growth and spread. Otherwise, the work of sealing cracks may go down the drain.
Small surface cracks are sealed using cement-sand mortar. The solution is prepared quite liquid, thinner than masonry and plaster. This is done so that the solution can be fed directly into the crack, because no hand tool will fit into a 5 mm wide crack.
For small cracks, ordinary mortar is sufficient.
It is best to use a construction syringe to pump the solution into the crack. It is often found in tubes with sealant. The tube is inserted into the plunger gun, the rod presses on the bottom, and the sealant comes out of the neck like a sausage. Such syringe pistols can be reloaded. Here is an example of such DIY work:
Repairing a crack in a garage wall yourself
Shallow cracks between bricks or along the body of the brick are simply filled with mortar. To do this, you need to add a little less water to the mixture to get a thicker composition. Having collected a little mortar on a trowel or trowel, throw it on with a characteristic pull-back motion. Due to the speed with which it flies off the trowel, the solution not only sticks to the wall, but also penetrates into the crack. Afterwards the surface is leveled with a trowel or trowel.
Sometimes the cracking of the mortar between the bricks in the masonry is mistaken for a crack. This can be easily eliminated by driving the solution into the resulting gap. If the house is lined with facade brick, then the question of aesthetics arises. Then a special narrow spatula comes to the rescue. It can be made from a piece of metal of the required width. By moving this tool along the crack, the builder compacts the mortar and removes excess.
You can restore a layer of fallen plaster with this spatula
But if the crack penetrates the wall to a considerable depth, the solution may not hold. They carry out a whole range of activities:
- The crack is cleaned of dust, stuck debris, and fragments of old dried mortar.
- On both sides of it, holes are drilled for dowels for self-tapping screws.
- Wet the gap with water to increase the adhesion of the cement to the brick and prevent cracking of the applied layer when drying.
- Fill the crack with mortar. For deep penetration, you can find flat chips along the width of the gap.
- A reinforcing mesh is attached to the top. Screw the self-tapping screws into the pre-inserted dowels.
- Plaster work is performed on top of the mesh. The mesh will prevent cracking if the force is negligible.
For wide cracks, the tensile force of the reinforcing mesh may not be enough. Even if a set of measures is taken to eliminate the cause of cracking, the weight of the masonry and thermal compression-expansion of materials can still widen the crack and even cause the metal mesh to lag behind the walls.
For such situations, more serious strengthening of the wall is provided. The two diverging sides can be secured with an iron strip, the so-called bus, or preferably several. Such tires are anchored either by directly driving them into the wall, or by screwing them with special fasteners. Ordinary self-tapping screws will no longer be enough; anchors are used. Tires welded to embedded parts
Removing bricks around a crack
When the crack is through, it is not enough to simply fill it with mortar. Using a scarpel and a hammer, adjacent bricks, including whole ones, are removed along the crack line. By and large, the wall is partially dismantled in the area of the crack. After the bricks are removed, the surface of the remaining ones is leveled with the same scarpel from the remnants of the old mortar.
Then part of the removed masonry is restored. New bricks are laid on fresh mortar. For the solution, it is better to apply it in excess, and then hammer the brick into the wall on the old seat using a rubber tamping hammer, which is used when laying paving slabs. As a result, part of the crack is filled with solution more densely. Even if it is squeezed out through the joints between the bricks, it can always be collected or smeared on the wall with a trowel.
A part of the masonry laid out in this way will be much stronger than simply filling the crack with a cement-sand mixture diluted with water. This happens because the adhesion between the edges of the crack is supplemented by the adhesion of the top, bottom and sides of the bricks, which are also recommended to be sprayed with water before work.
If the tires are buried, they are covered with mortar
In order to completely get rid of further divergence of the edges of large cracks, metal tires, most often iron, are used. This tire is a strip 3-5 cm and 2-3 mm . The length of the tire must be selected so that on each side of the crack it extends onto the wall no less than 25 - 30 cm.
At the ends of the strip, holes are drilled with which it will be attached to the wall. You can attach it in two ways:
- On the anchor. Threaded anchor rods are inserted into the drilled holes. Then a splint is put on them. After this, the nuts are screwed onto the threads with a wrench. Due to a special petal mechanism, the anchor shank diverges into a cone in the hole and wedges. After this, you can pull it out of the brick wall only by destroying this area. The reliability of such fastening is considered high and can withstand significant loads.
- For mortgages. Mortgages are also metal rods. They have threads on one end and feathering on the other to help them stick into the wall better. It is driven into a hole drilled or punched with a hammer with a hammer, and then covered with mortar. After the solution has dried, the mortgage remains firmly fixed in the wall, then you can put a tire on it and tighten it with nuts.
Sometimes a tire is made of two parts. This option is convenient if you don’t want to bother with drilling holes, but have a welding machine. The pieces are hammered into the wall on both sides of the crack, then bent at right angles towards each other. The ends of the strips are overlapped and the tire is ready.
Two parts will also be required in the case of a through crack. Now they should be the same size, and the holes should be drilled through the wall. One strip is placed on the inside of the wall, the other on the outside. To tighten them, studs with two nuts are used.
Good to know! For wide cracks in which large volumes of voids need to be filled, it is convenient and useful to include a crushed stone fraction in the solution. Firstly, this will reduce the consumption of mortar, which is made with a high cement content for cracks. Secondly, the crushed stone will act as reinforcement, turning the solution into concrete and thereby increasing the strength of the aggregate after hardening and standing.
Prices for different types of cement
Cement
Repairing cracks in the plaster of internal walls
Cracks in internal walls bring owners of residential premises no less anxiety and trouble than in external ones. Plaster is a finishing layer that is applied over the base material of the wall. It seems that its cracking does not have any catastrophic consequences such as re-building a wall or digging up a foundation. However, cracks in the plaster cause an irreparable blow to the appearance of the room. Cracks on the interior walls cause irreparable damage to the appearance
Previously, when the interior decoration of walls everywhere included wallpapering, a crack could sometimes be discovered only during repairs, by tearing off the old wallpaper and preparing to glue new ones. Modern ideas about renovation have promoted coating plastered walls with water-based paint as an alternative to wallpaper. The surface for this procedure must be perfectly flat.
There is nothing that can be done to shrinkage cracks in a high-rise building other than sealing them
A layer of plastic putty is applied on top of the plaster to remove the smallest irregularities. Mixture for plastering, putty, paint - all these products cost a lot, especially from famous manufacturers. Imagine the disappointment of the owners when they see all this expensive beauty covered with a network of cracks. Therefore, sealing cracks in the plaster of internal walls is a task where, first of all, aesthetic issues are solved. The end result should be made as invisible as possible against the background of the overall picture.
In the case of cracks in plaster, it is not necessary to determine the stability of the cracks, unless the finishing layer is deformed due to displacement in the walls themselves. Fortunately, this doesn't happen very often, although it does happen. For example, in an apartment building, where cracks in the plaster may be caused by shrinkage of the house due to miscalculations at the stage of laying the foundation, it is impossible to do anything at all. All that remains is to seal the cracks.
But what you really need to do is go along the entire length of the crack with a spatula and a hammer. Use a spatula to remove plaster dust and fragments, and tap along the entire crack on both sides with a hammer. If you feel emptiness under the hammer and the blow is muffled by an air cushion, feel free to hammer this piece of plaster. If you don’t do this now, it will still fall off and all your efforts will be in vain.
After thoroughly cleaning the crack, it is moistened with water and filled with mortar or a special plaster mixture. If you want to be on the safe side, prime the surface before applying the mixture - this will improve adhesion and reduce the possibility of new cracks appearing. Level the applied composition with a trowel, and if the plaster has moved away from the wall at a large width, use the rule. After plastering, the sealed area is puttied.
If the layer of plaster was thick enough, and during the process of cleaning the crack it collapsed all the way to the wall, then you cannot do without a reinforcing mesh. It can be metal or polymer, with cells of different sizes. Typically, the thicker the layer is applied, the larger the cells chosen. Attach the mesh with nails or screws. The plaster holds better on the mesh.
Even old shingles will hold up well to new plaster
For narrow vertical cracks that, when tapped with a hammer, did not produce any falling pieces, it is permissible to use reinforcing tape. It is made of fine mesh, and the material - fiberglass - is chemically inert and physically durable. For small cracks with a shallow depth, it is permissible not to use a plaster mixture at all, but to get by only with finishing putty.
Quickly repair a crack in a wall
The appearance of cracks on the walls of old houses - private and apartment buildings - is generally a natural thing. Previously, there were no special high-tech building mixtures, housing had to be cheap, and appropriate materials were used. If you lived in an old house, then you probably saw from the fallen layers of plaster that there was too much sand in the mixture, and some of the cement was replaced with lime. Under the layer of plaster you can see the shingles - these are special wooden planks nailed crosswise, onto which a layer of plaster was thrown. This replaced the reinforcing mesh, and I must say, quite well. Therefore, do not rush to dismantle the shingles, unless you plan to remove the plaster in the entire room. It will hold both cement-sand mortar and modern gypsum mixtures well. The latter, by the way, often do not require reinforcement.
Video - How to repair a crack in the wall?
Tip: to seal cracks in internal walls, it is recommended to use the finest fractions of river sand for the solution. Then the solution turns out to be homogeneous, it is easy to apply it in a thin layer and level it.
Prices for different types of plaster
Plaster
Sealing cracks in concrete walls
Concrete has long been trying to displace older building materials like brick and wood. Perhaps only in private low-rise construction are monolithic concrete and reinforced concrete used only in foundations and floor slabs. In the construction of high-rise buildings, retail and industrial premises, concrete has long been number one.
Cracks in concrete are an unpleasant thing, given that this material itself is quite strong and has a monolithic structure. However, even despite reinforcement with corrugated steel rods and embedded concrete, concrete can still crack. Then the resident of a panel or large-block house will be faced with the question of the features of sealing cracks in concrete.
Often small cracks can be found in the concrete walls of apartments. They do not pose any danger, but they greatly spoil the appearance and sometimes interfere with finishing or wallpapering. They can form even at the production stage of concrete panels as a result of improper drying or disruption of other technological processes. If you bought an apartment without finishing, found cracks and sinks there and rush to the hardware store to buy the most expensive and sophisticated building mixture, do not rush. Perhaps one very simple and effective method will be enough for you.
The fact is that it is quite difficult for a beginner to apply putty in an even, thin layer. In addition, this material is not that cheap, and there can be a lot of cracks. But to seal small cracks, you can use ordinary cement-sand mortar.
To this it can be argued that the solution, as a heavier and less “sticky” material, requires even more skill than putty. And if she can still forgive a beginner’s inability, then the solution will either fall to the floor or freeze on the wall in ugly humps. Leave skepticism and prepare sand of the finest fraction and Portland cement grade M-400 or M-500. You will also need a wonderful tool that looks like a grater, but has two bars at the top that are pressed down with wing nuts. Next, you need to find a piece of an old fur coat or sheepskin coat with short, dense fur. Don't let the materials confuse you - sometimes the folk method works better than scientific developments.
Step-by-step instructions for sealing cracks in concrete
Step 1. Wrap the grater in a piece of fur and secure its edges with clamping strips. Fasten with the fur facing out.
The trowel will help deal with cracks
Step 2. Prepare a liquid cement-sand mortar. Be sure to sift both sand and cement. The smaller the particles, the better the result. The consistency should be like that of a ready-made mixture for pouring floors along beacons.
Cement-sand mortar
Step 3: Prepare a second bucket of water.
Step 4. Dip the fur-wrapped grater into water, then use a spatula to scoop up a little solution and apply it to the surface of the grater.
A bucket of water
Step 5. Press the trowel onto the concrete surface and make movements as if rubbing the mortar into the wall. Movements can be circular, reciprocating, sliding. It is best to move across the crack.
Semi-rag with thick pile
Step 6. When the solution dries, wet the fur again and continue applying the solution.
This is what a concrete wall looks like after grinding
This method is called “grinding” by builders; it can be used to remove all unevenness in concrete, including up to 1.5 cm in depth and width, but for greater depth the solution must be thicker. The fact is that during rubbing, particles of cement and sand evenly and thinly fill everything they cling to - holes, holes, cracks, holes, seams and even shallow grooves. With the help of a piece of unnecessary fur it is simply very convenient to gain the necessary skill; even a beginner can cope with this. The method is 100% working and has been tested when finishing houses made of monolithic reinforced concrete.
Epoxy resin is very easy to apply
True, it is not always possible to get by with such simple means. If only because the crack can be deep and wide, then the solution will simply spill out of it. If the cracks are wide enough, they can also be sealed using reinforcing tape. But a special material for concrete repair is epoxy resin. It has different versions depending on the scope of application. For construction work it is packaged in plastic buckets of 5-10-15 kg. In addition, you will need to buy a bottle of hardener. The good thing about using epoxy is that it has high adhesive properties, fills voids well, and when dried, acquires the hardness of stone.
Epoxy resin can be applied to medium-depth cracks with a spatula. Special epoxy compounds are injected into deep and narrow gaps in the middle of thick load-bearing walls using a special syringe through nozzles. The nozzle is a special plug with a pipe that is installed into the crack through prepared holes. The crack itself is closed with mastic made from the same epoxy. The resin mixed with the hardener begins to be pumped through the lower nozzle, when the resin is squeezed out through the nozzle, it is plugged with a stopper, and proceed to the nozzle located above. So gradually the entire crack turns out to be filled with epoxy sealant, which dries for about a day. After this, the plugs are cut off and the sealed area is puttied with a finishing mixture.
Test for determining the dynamics of destruction
Before starting the restoration process, make sure that the crack does not expand. The readiness of the wall for repair is determined by a construction beacon installed on the wall , the readings of which are recorded within 2 weeks.
Small deviations may indicate that the main cause of the formation of cracks has not been eliminated, so it will be necessary to strengthen the base again, check the efficiency of groundwater drainage and the load on the wall.
In addition to beacons, there are tests with cement mortar or a strip of paper . For the first option, take a little liquid cement and seal the gap, which is left to dry. Then they look to see whether the crack has healed or whether the defect remains unchanged.
The test with a strip of paper is as follows: a little cement is placed in the gap, and when the solution has dried a little, a strip of paper of any length is placed on it, the width of which should be 1-2 cm larger than the defect.
Then, as the solution dries, look at the strip . If it stays in place, does not tear, does not heal, and the width of the crack does not increase, then you can begin repairing the surface.
Changing the position of the strip or its damage will indicate that a good screed will be needed. And only after the surface has completely dried can you apply cosmetics. If the strip of paper changes its position and retracts, it will need screeding, drying, and then a finishing coat.
If desired, you can conduct a professional engineering examination . The engineer will be able to accurately determine the cause of defects on the brick wall, and will perform all the test work himself.
Experts most often control surface tensile tests using plaster or plate beacons with a scale. The paper test is carried out at home.
Repairing cracks in drywall sheets
Before covering up the cracks in the apartment wall, which are made of gypsum plasterboard, the size of the defect is analyzed. Using a narrow spatula, remove the paint until the serpyanka mesh is visible; if it is not deformed, then the cause of the gap is a poor putty mixture, or the order of the layers is disturbed.
Repair defects as follows:
- The crack widens at the edges; a spatula, chisel and knife are suitable for this purpose; the expansion should be approximately 2-3 cm.
- This area is sanded to remove the putty layer. Next, sand the edges to remove traces of paint.
- Clean the area and carry out priming.
- Apply putty to obtain a smooth finish.
- The primer is applied again and the dried surface is painted, usually white.
Apply putty to obtain a smooth finish.
Sealing through cracks and defects in drywall
Drywall is often used to create partitions. Including on the balcony. Sometimes the cracks are deep. The repair process will be slightly different:
- Remove the damaged mesh.
- If there is no serpyanka at all, then the space for a new tape is expanded along its width, and the putty layer is removed.
- The joint parts of the sheets must have a cut angle of 25 degrees. Or it is cut off during repairs.
- The wall is cleaned and primed.
- They install the serpyanka and apply putty.
- The primer solution is again applied to this area, then the technology described above for working with small flaws is followed.
Drywall is often used to create partitions.
Sealing options
Brick walls can be sealed in different ways, which have more advantages than disadvantages. The choice of option depends on the type of crack, area of distribution and its depth. In some cases, a combined sealing option is used (2-3 options simultaneously, applied to the surface one by one).
Injection
This method consists of eliminating the seal by sealing existing leaks and restoring the load-bearing capacity of the brick. This method is especially recommended after eliminating accidents associated with leaks (pipe burst, precipitation) that caused the crack to appear.
The advantage of this method is the ability to quickly restore a brick wall, without the need for dismantling and re-laying. But injection must be carried out by qualified workers using special equipment. They also select the necessary material.
For the chosen method, different materials are used:
- microcements;
- polyurethane, one-component, silicate compounds;
- epoxy resins;
- methyl acrylate gels.
The injection method resembles drilling, and large cracks must be opened. For drilling, points (holes) are marked, which are placed in a checkerboard pattern, after blowing them with compressed air. The repair composition is pumped with a construction tool (pump, gravity), which is filled into the existing pores through a special hose.
The only downside of this method is that you cannot do it yourself without special qualifications and equipment, and hiring a specialist will require additional financial costs.
Injection allows you to penetrate deeply into the damaged area and completely fill the crack and damaged parts of the wall with a repair compound.
Concrete mortar
Cement mortar with the addition of fine crushed stone is suitable for sealing the surface of a brick wall. This is a popular and quick type of repair, and you can do it yourself.
Many specialists, just in case, to prevent the gap from widening, make a screed using T-shaped anchors on both sides. The anchors are tied together with metal strips.
Polymers or milk of lime are added to the finished repair mortar to increase strength. Cement, sand, water (cement composition) are construction classics. If you add crushed stone to it, you get a concrete solution.
The proportion of the concrete composition for repair is 1 (cement): 3 (river sand): 5 (crushed stone up to 15 mm) . Water is added to the finished mixture gradually, the composition is mixed until creamy and applied to the wall using a trowel and spatula.
For repair work, you need to use a small amount of the composition, so it needs to be done in small quantities, as it hardens quickly (in 1-1.5 hours).
Sealant
The substance of this plan helps prevent moisture from entering. The sealant is made from polymers; it seals seams well, adheres to any stone surfaces and dries quickly.
This material penetrates deeply into the pores, performs a protective function and does not change the appearance of the wall.
There are different types of sealants. There are single-component and multi-component materials that are characterized by varying degrees of hardening and elasticity. Also, sealants are silicone, acrylic, mixed, bitumen, polyurethane. An example of a polyurethane sealant is foam concrete (spray foam).
When choosing a sealant for repairing brickwork, you need to pay attention to the fact that the packaging indicates that the material must be moisture resistant, withstand temperature changes and exposure to sunlight. This material is considered fast and effective, and this is its main advantage. The only downside is its cost .
Experts recommend choosing a breathable sealant for brick walls that will resist peeling.
Elimination technology in brick construction
After preparing the tools and materials, they begin to work. Step by step it looks like this:
Inspection and cleaning of the damaged surface .
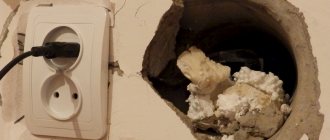
Once a hole is discovered, it must be carefully inspected. It is necessary to check whether the defect has spread over a long distance - in this case, repairs may be useless. If the hole has clearly defined contours, you can begin repairs. Using a small spatula, you need to remove the remaining bricks; you can help yourself with your hand. You should not throw them away - they will be needed for the mixture.When the hole is empty, use a brush, small brush or a construction vacuum cleaner to keep the hole free of dust and dirt. The clean hole is moistened with water.
- Mixing the solution . Mix the solution in the proportions of 1 part cement to 3 parts sand. Crushed brick is also added here, and then water. The brick can be added at the end so that the drill can mix the mass properly. If there is a lot of work, then it is better to mix the solution in a concrete mixer, then the order in which the components are added does not matter.
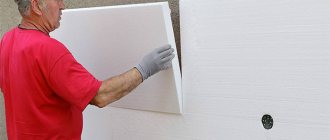
- Sealing the hole . The mixture with the addition of brick is placed in the prepared hole and compacted well. Wait until the mixture is completely dry and seal the surface with putty.
- Finishing . When the putty dries, use sandpaper and carefully rub the surface. This stage is necessary to level the surface.
To check the evenness of the surface, use a building level.
This video will show you how to repair a large hole in a concrete or brick wall:
What is the best way to cover it?
Choosing the best option for restoration work depends on:
- crack sizes,
- its depths
- surface damage area,
- the main cause of occurrence,
- choice of material by the master.
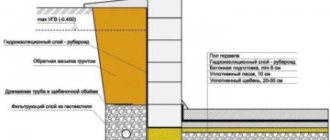
For example, if the defect arose due to an incorrectly poured foundation, then in this case it is best to start by strengthening the concrete belt of the base of the building.
To do this, a trench is dug around the perimeter of the house, which will be much deeper in depth than the foundation. The issue of soils, groundwater drainage is resolved, backfilling is done with bulk and then the concrete solution is poured in accordance with the technology.
If the cracks are only superficial, not deep, and there is no need to strengthen the foundation of the building, then sealants or concrete mortar can be used to seal them. In difficult cases, concrete screed and injection are used.
Basic methods of sealing holes in the wall
The method of eliminating the defect should be chosen based on the size and location of the hole. The main way to solve the problem is to fill the damaged space with special compounds. Materials suitable for sealing include repair mixtures, polyurethane foam, and several types of putty. To restore the surface, the following actions are carried out:
- Cleaning the space inside the crack;
- Filling the defect with a special composition;
- Grouting with sandpaper.
The method of eliminating the defect should be chosen based on the size and location of the hole.
Consumables and tools
To perform repair and restoration work on a brick surface, you may need:
- container for mixing concrete mortar, shovel;
- trowels, spatulas;
beacons, protractor, construction centimeter;- brush, hammer, dowels, anchor bolts;
- sealant (foam);
- cement, sand, gravel, running water (or ready-made dry concrete mixture);
- sheets of reinforcement and rolled metal;
- sledgehammer, crowbar, pickaxe, scarpel;
- drill, pump;
- rags, gloves, work clothes;
- ladder.
All materials and tools (their quantity) are selected depending on the magnitude of the damage and the chosen sealing option. For concrete mortar, it is best to use cement grade M 400.
Many craftsmen advise preventing further opening of the crack by hammering steel staples into both sides of the crack. The ends of the brackets must be bent towards the wall and secured with bolts.
Repair technology
inside or outside the building, applies
- The repair site must be cleared of contamination (debris, dust).
- Then pour the surface with clean water and leave until dry.
- Expand the crack to lay the mortar or, conversely, screed it with a metal profile and anchors.
- Treat the crack with concrete mortar or apply sealant. Leave until completely dry.
- Clean and remove the remaining mortar, cut off excess pieces of polyurethane foam with a construction knife.
- You can apply reinforced fly, having previously strengthened it with dowels on the surface. Then apply cement mortar.
- After complete drying, they begin to finish.
If the crack needs injection, then after thoroughly cleaning and washing the crack, use a construction pump (gun, syringe) to fill the empty space on the wall.
Seal a crack in a brick wall with your own hands, video instructions:
How to dilute the solution yourself
Cracks in walls can occur both outside and inside the building. Therefore, there are two main types of mortar - plaster for external and internal work.
I. Mortar for sealing cracks outside the building
Restoring the integrity of the surface of the walls outside the building is carried out using cement mortar plaster. It is prepared as follows: use cement and sand in a ratio of 1 to 3, add PVA glue, dilute with water to a medium-thick consistency. You can use ready-made dry solutions, which just need to be diluted with water in the ratio indicated on the package.
II. Interior solution
For interior work, lime mortar is used: lime and sand are mixed in a ratio of 1 to 4, diluted with water. The consistency should be such that when thrown onto the wall, the mixture forms a dense “pancake” and not a lump.
What not to do?
During the process of repairing cracks in brick walls, errors may appear :
- Failure to eliminate the main reason that caused the defects. If the cause is problems with the foundation or loads, then surface repairs will only give a short-term effect.
- Uneven masonry during deep wall repairs and poor binding of bricks. Deviation in level (vertical or horizontal) can form a bulge that cannot be eliminated with plaster. Vertical seams should not coincide with adjacent ones.
- Sealing on an uncleaned surface. Dirt, debris, mortar and brick residues that are not removed before starting restoration work can cause poor adhesion to the new mortar or sealant. This will lead to ineffective ongoing repairs.
- Inaccuracy when filling the pores with a solution of concrete or sealant. If the solution has not completely filled the space, then there is a possibility that under the influence of atmospheric air pressure the crack will begin to diverge again.
- Refusal of the screed. In case of serious damage, it is better to tighten the edges of the crack. This will help prevent further destruction of the masonry, and will provide a good stable base for filling the pores of the wall.
Failure to comply with the temperature conditions when performing repair work can also be considered a mistake. Normally, it is believed that the entire process with a brick wall should be carried out at a temperature above + 5°C.
What to do if the crack is long and deep
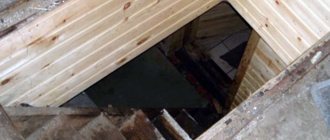
How to repair a crack in a wall if it is deep? Slots wider than 15 mm are considered dangerous because... may cause wall destruction. If such gaps appear on the brickwork, the defective area is dismantled and replaced with new masonry. In this case, the bricks are laid in a special, interlocking way, strengthening the rows with pieces of reinforcement.
New masonry will help such a crack
You can protect the wall from destruction due to significant cracks by installing lintels or making metal reinforcement. This method is effective for monolithic concrete walls: metal corners are tightened with long bolts, sometimes it is necessary to install reinforcing belts along the entire perimeter of the room or building. The reinforcing belt is installed before sealing a crack in the wall - under the roof, above the foundation, sometimes in several rows.
Such a crack should be sealed with foam, cement, reinforced with a reinforcing belt
A wide and deep gap in drywall can be filled with gypsum plaster
Cost of repair work in the Russian Federation
Repair of cracks in brickwork in the Russian Federation depends on the region. You can present it in the form of a table:
| City (region) | Average cost of repairs (RUB/m2) |
| Moscow | 800 |
| Novosibirsk | 600 |
| Krasnodar | 450 |
| Ekaterinburg | 500 |
| Khabarovsk | 400 |
The indicated cost includes repair work to restore:
- brick walls;
- masonry surfaces in separate places;
- cracks in the masonry.
The price may differ from the indicated one if the specialist is very highly qualified and offers sealing with his own materials. The cost of professional services from construction companies is much higher than hiring individual specialists offering their services as a contract.
If you are interested in the issue of repair and restoration of brickwork, take a look at this section.