Radiator heat transfer - ways to increase
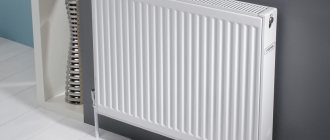
Heat transfer from a heated battery occurs:
- heat exchange;
- convection;
- radiation.
Each radiator model, whether cast iron, aluminum, steel or bimetallic, has a certain rated power. When calculating heating, many factors are taken into account, including climatic conditions, temperature conditions of the room, the location of the room, the type of insulation of walls, ceilings, etc.
Correct calculation ensures effective heating of a house or apartment during the cold season. But if there is not enough radiator power, the room does not warm up well. Also, the cause of cold may be a connection with non-compliance with the circulation regime.
There are radical measures that will help correct the situation:
- increasing the number of sections;
- changing the connection diagram;
- replacing radiators with more efficient ones.
But very often, a lack of heat transfer occurs as a result of less serious reasons and is compensated for in other ways.
Malfunctions
In some cases, the operation of the device is disrupted by air pockets. They can be eliminated by bleeding the air using a Mayevsky valve. A decrease in heat transfer results from blockage of the pipe passage with sediment or rust. To get rid of dirt, it is recommended to rinse the radiator with special products.
In centralized systems, the temperature of the coolant may decrease as a result of an emergency on the main pipeline or unauthorized actions of neighbors that caused a change in the flow parameters in the common riser. Circulation is worsened by a broken valve at the radiator inlet or an incorrectly installed plug.
Since there are many reasons, before adjusting the heating batteries, you need to perform diagnostics taking into account all possible faults. Determining the cause is difficult, but possible. If the battery previously heated well and the riser is hot, the search for problems is narrowed to the radiator. We have an article about installing radiators with your own hands, read the link for more details.
Most likely it will be enough:
- release air;
- wash the battery from the inside;
- change the valve.
As a rule, after performing one or several actions, the previous heat transfer is restored.
The need to adjust heat transfer
There are two reasons why heating radiators need to be adjusted:
- Reducing home heating costs. True, in an apartment located in a multi-storey building, it is possible to reduce the amount of payments only if there is a common building heat meter. In a private household, if an automated boiler is installed, installation of regulators is unlikely to be required. The amount of savings will be significant.
- There is a need to maintain the desired temperature in the premises. For example, in one room it may be 17 degrees Celsius, and in another – 25 degrees. To do this, you need to set the appropriate numbers on the thermal head or close the valve.
In this case, it does not matter how the heated coolant enters the radiators - centrally or autonomously. It also does not matter which heating unit is installed in the system. The fact is that the regulators on the batteries are not connected to the boilers - they function independently.
Benefits of adjustment
Not everyone knows that there is regulation of heating radiators in an apartment. Moreover, not everyone understands why it is needed.
However, adjusting the temperature of radiators has at least 3 advantages:
- Thanks to it, water can move freely through the pipes. As a result, the likelihood of so-called airiness is significantly reduced. The heating system has a high efficiency, while creating a favorable microclimate.
- By adjusting the temperature, you can reduce the financial costs of heating batteries. If you lower the room temperature by just one degree, you can achieve savings of over 5%.
- By adjusting the heating during particularly cold times, you can increase the heat supply.
It should be remembered that it is best to start working on changing the system in an apartment in the summer, when there is still no need for heating.
You can see the operating principle of a radiator thermostat in the video:
Thermostatic heads
There are three types of thermostatic elements for heating thermostats - manual, mechanical and electronic. They all perform the same functions, but in different ways, provide different levels of comfort, and have different capabilities.
Manual
Manual thermostatic heads work like a regular faucet - you turn the regulator in one direction or another, allowing more or less coolant to flow through. The cheapest and most reliable, but not the most convenient devices. To change the heat transfer, you must manually turn the valve.
Manual thermal head - the simplest and most reliable option
These devices are quite inexpensive, they can be installed at the inlet and outlet of a heating radiator instead of ball valves. Any of them can be adjusted.
Mechanical
A more complex device that maintains the set temperature automatically. The basis of this type of thermostatic head is a bellows. This is a small elastic cylinder that is filled with a temperature agent. A temperature agent is a gas or liquid that has a high coefficient of expansion - when heated, it greatly increases in volume.
Thermostat device for a heating radiator with a mechanical thermostatic head
The bellows supports the rod, which blocks the flow area of the valve. Until the substance in the bellows heats up, the rod is raised. As the temperature rises, the cylinder begins to increase in size (gas or liquid expands), it puts pressure on the rod, which increasingly blocks the flow area. Less and less coolant passes through the radiator, and it gradually cools down. The substance in the bellows also cools down, due to which the cylinder decreases in size, the rod rises, more coolant passes through the radiator, and it begins to warm up a little. Then the cycle repeats.
Gas or liquid
With such a device, the room temperature is fairly maintained at exactly +- 1°C, but in general the delta depends on how inert the substance in the bellows is. It can be filled with some kind of gas or liquid. Gases react faster to temperature changes, but are technologically more difficult to produce.
Liquid or gas bellows - not much difference
Liquids change volumes a little more slowly, but are easier to produce. In general, the difference in the accuracy of temperature maintenance is about half a degree, which is almost impossible to notice. As a result, most of the presented thermostats for heating radiators are equipped with thermal heads with liquid bellows.
With remote sensor
The mechanical thermostatic head should be installed so that it faces the room. This way the temperature is measured more accurately. Since they are quite large in size, this installation method is not always possible. For these cases, you can install a thermostat for the heating radiator with a remote sensor. The temperature sensor is connected to the head using a capillary tube. You can place it at any point where you prefer to measure air temperature.
With remote sensor
All changes in heat transfer from the radiator will occur depending on the air temperature in the room. The only disadvantage of this solution is the high cost of such models. But the temperature is maintained more accurately.
| Name/Company | Setting range | Operating temperature range | Control type | Functions/purpose | Connection type | Price |
| Danfoss living eco | from 6°C to 28°C | from 0°C to 40°C | Electronic | Programmable | RA AND M30X1.5 | 70$ |
| Danfoss RA 2994 with gas bellows | from 6°C to 26°C | from 0°C to 40°C | Mechanical | For any radiators | clip-on | 20$ |
| Danfoss RAW-K with liquid sponge | from 8°C to 28°C | from 0°C to 40°C | Mechanical | For steel panel radiators | M30x1.5 | 20$ |
| Danfoss RAX with liquid sponge | from 8°C to 28°C | from 0°C to 40°C | Mechanical | For design radiators white, black, chrome | M30x1.5 | 25$ |
| HERZ H 1 7260 98 with liquid sponge | from 6°C to 28°C | Mechanical | M 30 x 1.5 | 11$ | ||
| Oventrop "Uni XH" with liquid sponge | from 7°C to 28°C | Mechanical | with zero mark | M 30 x 1.5 | 18$ | |
| Oventrop "Uni CH" with liquid sponge | from 7°C to 28°C | Mechanical | without zero mark | M 30 x 1.5 | 20$ |
Electronic
The electronic thermostat for a heating radiator is even larger in size. The thermostatic element is even larger. In addition to the electronic filling, it also contains two batteries.
Electronic thermostats on batteries are large in size
In this case, the movement of the rod in the valve is controlled by a microprocessor. These models have a fairly large set of additional functions. For example, the ability to set the room temperature by the hour. How can this be used? Doctors have long proven that it is better to sleep in a cool room. Therefore, at night you can program the temperature lower, and in the morning, when it’s time to wake up, you can set it higher. Comfortable.
The disadvantage of these models is their large size, the need to monitor battery discharge (enough for several years of operation) and high price.
Temperature standards
When it is possible to regulate the temperature in the radiators, it is important to be able to correctly determine in what cases and how much it is necessary to reduce or, conversely, increase the temperature in the apartment. The main thing is not to make it too hot or too cold.
You need to learn to determine a comfortable temperature for yourself.
You need to learn how to quickly determine what temperature will be most comfortable for living. SNiP can help in determining the optimal temperature for an apartment. For corner rooms, the best temperature is a little more than +20°C, but for all other rooms, on the contrary, a little less than this value. Knowing this, the owner of the apartment can change the air temperature in his rooms without any problems and feel quite comfortable.
Setting methods
Not every residential building has adjustable heating radiators; moreover, their installation in many cases may simply be impossible. For example, control valves cannot be installed if the building has a vertical top distribution, i.e. when heat is supplied from above. Consequently, it is always too hot on the upper floors, and apartment owners even have to open their windows wide. At the same time, on the lower floors of the battery it is a little colder.
If the building has a single-pipe system, this problem does not arise, since the water, after passing through the radiators, returns back to the central riser. Thanks to this, warm air is evenly distributed throughout the rooms, regardless of what height they are at - be it on the first floor or on the twentieth. At the same time, the batteries have control valves on the supply pipe.
The best option for supplying heat and the ability to regulate it is a two-pipe heating system. It has separate pipes both for supplying heated water and for returning it to the system. In this case, the radiators in each room are regulated separately, because each of them has special valves.
By regulating the heat supply, you can create comfort and significantly reduce heating costs
The main goal pursued when adjusting heat supply is to achieve a certain air temperature in the room. This can be achieved in one of two ways:
- High quality . The method involves changing the quality of water. To do this, you need to have some influence on its heating.
- Quantitative . When using it, it is necessary to change the speed at which water is supplied. This is done through a circulation pump or a locking mechanism. If the volume of water supplied is reduced, this will help lower the temperature. If, on the contrary, you increase the water flow rate, the room will become warmer.
If the building has high-quality equipment, it is possible to use two methods simultaneously.
Ball Valves
Valves are cheap, but at the same time ineffective control devices. Ball valves are often installed at the entrance to the radiator, with the help of which they regulate the flow of water.
But this equipment also has another functionality - shut-off valves. Valves are used to completely shut off the flow of coolant into the system. For example, in the event of a leak in a heating device, ball valves located at the inlet and outlet of the radiator allow repairs to be made without stopping the heat supply and draining the liquid.
Radiator network adjustment
The balancing method practiced by our expert is equally suitable for closed single-pipe and two-pipe heating systems of country cottages. Manifold wiring and heated floors are regulated in a different way, which we will discuss in the next section.
The essence of the technique is to measure the surface temperature of all radiators and eliminate the difference by limiting the coolant flow with balancing valves. How to adjust radiators using a thermometer:
- Warm up the coolant to 70-80 °C, fully open all control valves. If the boiler does not show the actual supply water temperature, determine it yourself by placing a meter on the metal outlet pipe.
Initially, the valve preset ring is adjusted to maximum flow - Measure the surface temperature of the first radiator supply in two places - near the supply and return connections. If the difference is within 10 degrees, the battery warms up normally.
- Repeat the operation on all heating devices, recording the readings. Move along each heating branch, one by one recording the temperature of the batteries up to the last one.
- If the temperature difference between the supply of the first and last radiator does not exceed 2 °C, close the valves of the first two batteries by 0.5-1 turn and repeat the measurements.
The measurement is taken at the supply and return pipes, the maximum permissible difference is 10 degrees - When the difference reaches 3-7 degrees, the control valves of the first heaters close by 50-70% (calculated by valve rotations), the middle ones - by 30-40%, the last devices remain completely open.
- Wait 20-30 minutes to allow the batteries to warm up after the new settings, then repeat the measurements. The goal is to achieve a normal difference of 2 °C (3 degrees is allowed for long highways) between the last and first device.
- Repeat the adjustment procedure, turning the balance valves a quarter or half a turn, until you achieve the same heating of all batteries. “Listen” to each radiator for noise indicating increased coolant consumption.
Important point. Don’t get carried away by excessively tightening the taps; you won’t get any savings this way. Compare the temperature at the inlet and outlet of the heater - if the difference exceeds 10 °C, the valve must be released. Due to too little coolant flow, the room will become cold.
Approximate adjustment of the batteries of a closed two-pipe system is shown using the example of a heating circuit for a two-story house. Why is it approximate: the number of batteries to be closed and the number of turns of the tap are purely individual for each wiring; it is necessary to understand it locally. If you doubt the correctness of your actions, press down the coolant gradually, making half a turn of the valve and repeating the measurements.
As a rule, a single-pipe “Leningrad” of 3-4 batteries does not need balancing; it is enough to lightly “press” the first radiator. In the associated wiring (Tichelman loop), you need to limit the first and last device. An expert will show you the adjustment procedure more clearly in the video:
Needle valve
This device is usually installed in the heating system in front of the pressure gauge. The valve smoothly and effectively changes the flow of coolant, gradually blocking it. The design feature of this device is that the width of the passage in it is half as much.
For example, when installing inch pipes and the same cross-section of a needle valve, its capacity will be only ½ inch. As a result, each device built into the system reduces this parameter. Several products installed in series, for example in a single-pipe design, result in the latter devices being lukewarm or cold.
Since the passage is greatly narrowed, a needle device is not recommended to be installed when solving the problem of how to regulate the temperature of the battery, since its heat transfer is greatly reduced.
You can increase it as follows:
- removing the valve;
- doubling the number of sections;
- by installing a device that has twice as many couplings.
Control valves for radiators
To manually regulate the operation of heating devices, special valves are used. Such taps are sold with straight or angular connections. The procedure for regulating heating batteries using these devices manually is as follows.
When the valve is turned, the shut-off cone lowers or rises. In the closed position, the coolant flow is completely blocked. Moving up or down, the cone regulates to a greater or lesser extent the amount of circulating water.
Due to this operating principle, such valves are also called “mechanical temperature controllers”. They are installed on batteries with threads, and connected to pipes with fittings, most often of the crimp type.
The control valve used for heating devices has the following advantages:
- the device is reliable, it is not dangerous from blockages and fine abrasive particles present in the coolant - this applies exclusively to high-quality products in which the valve cone is made of metal and carefully processed;
- the product has an affordable price.
Control valves also have disadvantages - each time you use the device, its position has to be changed manually and for this reason it is quite problematic to maintain a stable temperature regime.
For those who are not satisfied with this procedure and are thinking about how to regulate the temperature of the radiator using another method, the use of automatic products that allow them to control the degree of heating of the radiators is more suitable.
If the batteries are too hot
In this case, the question arises of how to adjust the heating radiators in the apartment. The user cannot change the network temperature; all that remains is to reduce the fluid flow rate in the heating devices. For this purpose, special manual or automatic devices are used.
A manually operated valve is the simplest and long-known method. By reducing the available cross-section of the pipe using a rod, we reduce the flow of heated liquid into the radiator and thereby reduce its heat transfer. In this case, you should check whether such “heat adjustment” will not be an unprofitable enterprise: when all batteries are connected in parallel, a decrease in the flow in the first one automatically causes cooling of the others. Thus, if the first radiator in the chain is located in the bedroom and it is too hot, you can reduce its heating. But then the last radiator - for example, in the kitchen - will turn out to be almost cold and the heating in the room will be insufficient.
Important: if it is hot in the apartment, but the heating system is single-pipe, adjustment can only be made if there are bypasses (jumpers). Otherwise, by “screwing on” the batteries at home, you can get into trouble with neighbors living “further down the riser” or with utility employees
With a two-pipe scheme, such problems do not arise.
To regulate heating radiators, install either a valve and a ball valve on the inlet and outlet pipes, respectively, or a thermostat on the heating radiator.
Important: a valve must be installed on the supply pipe, not a ball valve! The valve is a purely shut-off valve with two operating positions - “open” and “closed”. Intermediate positions of the ball lead to its gradual destruction by solid particles of the coolant, therefore the “lifetime” of such a valve is much shorter than that of a valve
The valve is considered a shut-off control valve for heating and has a wider range of operating positions between the extremes.
To manually adjust the heating system in an apartment, special control valves with direct or angular connections are used.
The choice of the desired position of the rod in this case depends on the outside temperature, the heating of the water supplied to the heating system and the wishes of the users. How to regulate radiators with a regulator? Carefully monitor the temperature in the apartment (house) and “tighten” the valve to the desired result. Interestingly, manual valves have a built-in thermal valve and you can relatively easily turn a device for manual adjustment into an automatic one by purchasing and attaching a thermal head to it.
Automatic regulators
Automatic devices consist of a thermal valve and a thermal head.
The valve allows you to change the cross-section in the supply pipe; the thermal head, based on remote or built-in temperature sensors, as well as additional controllers, gives a command to change the position of the rod in the valve.
The simplest (and cheapest) version of the device contains a capsule of gas or liquid, which expands and contracts under the influence of temperature changes. The rod piston located next to this capsule moves towards decreasing or increasing the flow area of the pipe. More complex devices are powered by a battery or accumulator and transmit force to the rod using electric current. Some options connect to the home electrical network, for example, thermostats built into the overall smart home system.
The question of how to regulate the temperature of a heating battery using a thermostat - in a fully automated mode or with the control of the homeowner - is decided depending on the general scheme of the smart home system and the features of its operation.
An important nuance: for normal operation of a device with a remote temperature sensor, it is necessary to ensure constant and free air circulation near the thermometer. If the sensor is located directly in the thermal head, it is better to mount it horizontally (perpendicular to the main plane of the radiator), since it is in this position that the heating elements have the least effect on the thermometer.
The quality of operation of remote temperature sensors is also affected by:
- thick curtains covering it;
- the distance between the window sill and the sensor is too small;
- installation of a heating device in a niche.
Adjusting heating flow or return
You can partially regulate the heating of all heating devices in an apartment or house using the so-called hydraulic balancing. To more evenly distribute water in the system, install thermostats and taps on all batteries. When setting up the system, the return temperature in the radiators is checked. It should have a difference of +- 1 degree Celsius.
Balancing is carried out with the thermal heads fully (maximum) open. To check the return temperature, a contact temperature sensor is used, for example, in a multimeter.
For radiators with an increased temperature of the output pipe, reduce the cross-section of the input pipe and check the system again.
Radiator temperature
Very often, residents of apartment buildings and country houses wonder what temperature the heaters themselves should be in the room according to the standard and how to properly adjust the heating radiators. In fact, there is no such standard for the temperature of radiators. There is only such a thing as heat transfer. It completely depends on what material the radiator is made of. Aluminum radiators are considered the most effective for quickly warming up a room, bimetallic ones transfer heat a little worse, and cast iron ones are in last place. (See also: Steel heating radiators)
Instead of standards for the temperature of heating units, there are standards for the level of air heat in rooms. According to these standards, the temperature in living rooms should be no lower than 18C and no higher than 24C. In other rooms (toilet, bathroom, kitchen, hallway, storage room) it should be from 14 to 22C. The ideal temperature is considered to be 21C. if you manage to achieve uniform heat distribution throughout the entire area of the apartment or house, this will be the best option of all possible.
Thermostatic thermostats
In its design, the thermostatic regulator resembles a manual valve, while a thermostatic head is installed on its valve, which controls its operation. Thermal head includes:
- a temperature sensor that responds to air temperature and is connected to the valve shut-off head;
- an adjustment mechanism having a control handle and an adjustment scale.
You can select the room temperature, which will be maintained at a constant level without your further participation, by turning the knob in accordance with the required value on the scale.
Disabling radiators without fittings
It is no secret that in most apartments to this day there are old cast iron radiators or steel convectors without any shut-off fittings, which makes it impossible to shut them off during the heating season. Moreover, according to the old heating scheme, convectors in high-rise buildings are connected to risers without straight sections - bypasses. Therefore, if an accident occurs with a coolant leak, you must act as follows:
- Try to provide some kind of container to collect hot water. If the stream flows to the side, wrap a thick cloth over the break site so that the water flows along it into a bucket.
- Call the dispatch service of your heating energy supply company and report the accident.
- While the service personnel are getting there, provide them with access to the basement, find the keys, open the door, and so on.
- Try to block the riser yourself.
While your water is flowing onto the floor, your neighbors below have a suspended ceiling turning into a bubble.
A few words about how to properly turn off the heating riser. Find in the basement the heating point of your entrance and vertical pipes embedded in a large-diameter main or into a common collector. Follow where they go to determine the emergency riser, and turn it off with a tap. Contact by cell phone someone in the household who can confirm that the geyser eruption in the apartment has stopped. If you couldn’t find your pipe, close all the valves one by one until you find the one you need.
Attention! Don't try to force yourself on basement valves that are stuck due to rust. When they cannot be closed manually, it is better to wait for a team of plumbers; they will find a way to stop the flow of coolant. Otherwise, a very awkward situation will arise when you also break the main fittings, leaving the apartment building without heat during repairs.
An example of an access heating point and connecting a riser.
It is also worth considering the question of how to shut off the radiator if it is hot in the apartment due to the service provider’s failure to comply with the temperature schedule of the boiler room. It would seem that if there are shut-off valves, the problem is solved by manually closing the taps. But after the temperature in the rooms drops, the valves will have to be opened again. This way you will get tired of turning the taps long before the end of the heating season, so you need to think about how you can adjust the heat output of the radiators. The options are:
- if possible, install a thermostatic valve on each radiator, limiting the flow of coolant and automatically maintaining the set temperature in the room;
- It is nice to cover the heating device with a blank screen with small holes if there are no shut-off valves on the connections.
Important. The ball valve is not a means of adjustment; it is intended only to completely cut off or open the passage of the coolant. In the “half closed” mode it will not give the desired effect and will fail much earlier.
Thanks to worn-out pipelines, district heating systems are notorious for dirty water that quickly clogs small passages. Therefore, ordinary valves with thermal heads will not last long here; you need to buy special valves with increased capacity, which are produced by the well-known brands Danfoss and Herz. How to install them on the connection to the radiator is shown below in the diagram and described in this material.
Radiator thermostat installation diagram
When it’s hot in an apartment in the middle of winter and there are no control valves, residents have no choice but to cover the radiator in the room with a decorative screen. The principle is simple: the radiator will heat the air inside the box, after which the intensity of heat transfer will sharply decrease due to the small difference in the temperatures of the air and the surface. That is, the coolant will give off less energy, and the amount of hot air coming out from under the screen will be limited by the size of the decorative openings. How to assemble and install a nice MDF box on a heating device is shown in the video:
Electronic thermostats
Electronic control devices equipped with a control unit have maximum functionality. In addition to the electronic temperature sensor, it includes a microprocessor circuit and a control panel equipped with buttons and a display. The locking head is moved by an electromechanical relay based on a signal from the control circuit.
Electronic thermostats allow you not only to maintain the required temperature with maximum accuracy, but also make it possible to program their operation. For example, every day on weekdays, during the absence of residents in the apartment, the heating level of the appliances will automatically decrease, and before the owners arrive, the rooms will be warmed up again to the optimal temperature.
Tip: To change the way the batteries are regulated, it is not necessary to buy a new thermostat. You can usually install any type of thermocouple on one valve: manual or automatic.
Three-way valve
An unconventional device for regulating the temperature of heating devices is a three-way valve. It is placed at the connection between the bypass and the supply pipe that goes to the battery. In order for the valve to perform the function of stabilizing the heating level of the radiator, it must have a thermostatic head. If the temperature near the head rises above the required value, the supply of coolant to the battery stops, and the liquid flow moves through the bypass. When cooling occurs, the valve opens again and the radiator heats up. This adjustment method is suitable for single-pipe systems with vertical wiring.
Important! In homes with a central heating system, the coolant usually contains foreign particles that clog thermostats. Therefore, you can safely install manual taps or valves, as well as three-way valves, in your apartment. If you want to install automatic heat regulators, you must install filters in front of them, which will have to be cleaned regularly.
Automatic adjustment
Automatic maintenance of room temperature is good because once you set the control knob to the desired position, you will get rid of the need to twist and change something for a long time. The temperature of the heating radiators is adjusted constantly and continuously. The disadvantage of such systems is their significant cost, and the more functionality, the more expensive the device will be. There are some other features and subtleties, but more on them below.
Adjusting radiators with thermostats
To maintain a constant set temperature in a room (room), thermostats or thermostats for heating radiators are used . Sometimes this device may be called a “thermostatic valve”, “thermostatic valve”, etc. There are many names, but one device is meant. To make it clearer, it is necessary to explain that the thermal valve and thermal valve are the lower part of the device, and the thermal head and thermoelement are the upper part. And the entire device is a radiator thermostat or thermostat.
This is what the thermostat on the radiator looks like
Most of these devices do not require any power source. The exception is models with a digital screen: batteries are inserted into the thermostatic head. But their replacement period is quite long, the current consumption is low.
Structurally, the radiator thermostat consists of two parts:
- thermostatic valve (sometimes called “housing”, “thermal valve”, “thermal valve”);
- thermostatic head (also called “thermostatic element”, “thermoelement”, “thermal head”).
The valve itself (body) is made of metal, usually brass or bronze. Its design is similar to that of a manual valve. Most companies make the lower part of the radiator thermostat unified. That is, heads of any type and any manufacturer can be installed on one body. Let us clarify: you can install a manual, mechanical, or automatic thermocouple on one thermal valve. It is very comfortable. If you want to change the adjustment method, you do not need to buy the entire device. They installed another thermostatic element and that was it.
The difference between a manual radiator regulator and an automatic one is only in the installed thermal head
In automatic regulators, the principle of influencing the shut-off valve is different. In a manual regulator, its position is changed by turning the handle; in automatic models there is usually a bellows that presses on the spring-loaded mechanism. In electronic devices, everything is controlled by the processor.
The bellows is the main part of the thermal head (thermoelement). It is a small sealed cylinder containing liquid or gas. Both liquid and gas have one thing in common: their volume is highly dependent on temperature. When heated, they significantly increase their volume, stretching the bellows cylinder. It puts pressure on the spring, blocking the flow of coolant more strongly. As it cools, the volume of gas/liquid decreases, the spring rises, the coolant flow increases, and heating occurs again. This mechanism, depending on the calibration, allows you to maintain the set temperature with an accuracy of 1oC.
Watch the video to see how the thermostat works.
The radiator thermostat can be:
- with manual temperature control;
- with automatic; with built-in temperature sensor;
- with remote (wired).
There are also special models for one-pipe and two-pipe systems, housings made of different metals. Read more about radiator thermostats here.
Using Three-Way Valves
A three-way valve is rarely used to regulate battery temperature. He has a slightly different task. But in principle, it is possible.
By installing a three-way valve on the supply side, you can also regulate the coolant temperature
A three-way valve is installed at the junction of the bypass and the supply pipe going to the radiator. To stabilize the temperature of the coolant, it must be equipped with a thermostatic head (of the type described above). If the temperature near the head of the three-way valve rises above the set value, the flow of coolant to the radiator is blocked. It all rushes through the bypass. After cooling, the valve operates in the opposite direction and the radiator heats up again. This connection method is implemented for single-pipe systems, more often with vertical wiring.
What to do with a stuck ball valve
If the ball valve is stuck, you can try to repair it yourself. For this:
- Unscrew the fixing nut and remove the handle. Below it is the upper part of the rod.
- If there is a hexagon clamping sleeve, you can loosen it a little.
- Using an adjustable wrench, turn the rod from side to side. Attention! You need to act slowly and smoothly. If you apply too much force or turn the key too quickly, you can deform the ball or the entire mechanism.
- Check the system. If the mechanism works normally and there are no leaks, you can install the adjusting knob. To do this, rotate it to the protrusions of the permitted degree of opening to determine whether it is possible to clamp the clamping sleeve all the way.
Important! If it is not known what material the device is made of, it is not recommended to repair it. After all, the use of additional mechanical tools can lead to its complete deformation.
To avoid damage to the ball valve, it is necessary to use only high-quality products. It is not recommended to purchase silumin devices with pipe wall thicknesses less than 2.8 mm. It is better to give preference to taps from European or Turkish manufacturers.
To prevent breakdowns, it is necessary to periodically change the position of the mechanism in order to develop the crane. It is recommended to do this at least once a month.
How to adjust heating radiators in a private house with a boiler
If the heating system is individual and “powered” by a gas or electric boiler, then, in addition to the proposed adjustment measures, you can simply change the settings of the heating device. Typically, the heating range of coolants is 58...84 degrees Celsius. Excessive heating is prohibited to avoid damage to the pipes. Less heating than specified can lead to the formation of acidic condensate, which damages the boiler.
Thus, adjusting heating radiators in a private house by adjusting a gas heating boiler occurs as follows:
- increasing or decreasing heating of the coolant;
- waiting to stabilize the temperature in the system (it is advisable to check the return temperature on each of the radiators using a contact temperature sensor);
- new adjustment.
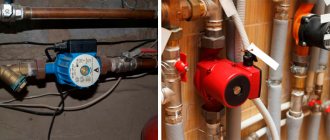
Also, in individual heating systems, heat transfer can be adjusted by adjusting the heating circulation pump.
The speed of movement of the heated liquid through the heating devices depends on its speed - minimum, medium, high. The faster the water moves through the pipes, the more efficiently the coolant transfers heat. Since the movement speed is usually 30...90 l/min, the adjustment possibilities are quite wide.
The device can be adjusted manually or automatically, depending on the model.
For some devices, only automatic adjustment is provided.
Important: despite the fact that in systems with natural circulation you can do without a pump, installing one can save up to 20...30% of energy. This is due to the higher speed of coolant passing through the system and supplying it to the boiler for new heating at a higher temperature. At the same time, heating efficiency does not decrease, the heat transfer of radiators remains constant or even increases.
By increasing - or decreasing - the speed at which heated water passes through the radiators, you can significantly change the parameters of the heating system. With hydraulic balancing, the quality of heating increases by 20...45%, and savings (gas, electricity, money on utility bills) can reach 30...35%.
Warm floors and radiant wiring
Since the underfloor heating circuits and radiator radiators are connected to a common comb, balancing is carried out directly on the collector. The setting method depends on the availability of rotameters - transparent flow meter flasks installed on the supply or return lines.
To correctly configure the coolant supply using rotameters, you should calculate the water flow through each loop using the formula:
- G – mass flow rate of heated water flowing through the circuit, kg/h;
- Q – the amount of heat that the circuit or radiator should release into the room, W;
- Δt – temperature difference at the inlet and outlet of the loop, the calculated value is taken to be 10 °C.
The power of one floor circuit Q is determined based on the heat demand of a separate room. The parameter is calculated according to the specific ratio of 100 W/m² of room area or according to the method of calculating the heating load. The flowmeter scales are marked in l/min, which means the result must be divided by 60.
Calculation example. Heating a room with an area of 10 square meters requires 1 kW of heat. Coolant consumption will be 0.86 x 1000 / 10 = 86 kg/h or 86 / 60 ≈ 1.43 l/min.
Clarification. If a large area is divided into 2 identical heating monoliths with separate water loops, we also divide the calculated flow rate in half.
Here the rotameters are installed on the supply line of the comb, but can also be installed on the return line.
Further balancing of the underfloor heating loops is carried out according to the instructions:
- With the system filled and pressurized, turn on the underfloor heating circulation pump. It is not necessary to start the boiler.
- Using the manual adjustment caps, close all thermostatic valves on the second part of the comb.
- Open the first valve completely and adjust the corresponding rotameter. The required flow volume is set by rotating the lower ring of the flow meter.
- After adjustment, close the valve again and move on to the next circuit. At the end, open all the regulators and check the water flow again using the rotameters.
Reference. On manifolds from different manufacturers, flow meters are installed on the supply or return manifold (they also differ in design). To adjust the maximum flow, the location of the rotameters does not matter.
Beam batteries are balanced in a similar way. To be sure, you can combine 2 options - according to the calculated flow rate and the temperature of the radiator surface (the method is described in the previous section).
Scheme of flow control with a rotameter. The flow rate through each circuit is shown by control washers in transparent flasks, the unit of measurement is liters per minute
If, in order to save money, you managed to buy a collector without rotameters, the setup will take several days. The goal is to achieve the same temperature in the return pipelines of all loops. That is, the initial installation is made approximately according to the power and length of the circuit, then the return temperature is measured and the flow rate is adjusted.
To check the balancing of the heated floor, you need to start the heating boiler. Negative point: after adjusting the flow rate, you will have to wait several hours until the thickness of the concrete warms up and the temperature of the return lines stabilizes.
How to turn on the heating in an apartment correctly? What is needed for this?
Happy owners of new apartments, residents of housing who have made major repairs and decided to abandon the services of centralized heating, are awaiting the arrival of cold weather with some caution and apprehension. Many people ask one question. How to turn on the heating in your apartment if you do all the necessary work to install autonomous heating yourself? Are the radiators connected correctly, will the new, independent heating system in the apartment work normally in the future?
Your comfort and living conditions in the apartment depend on how correctly the new heating system is installed in the apartment and how the heating equipment is installed.
The main problem that will have to be solved by switching to your own heating system in the apartment
All repair and technical work with elements of the heating system in apartments must be carried out before the onset of cold weather, when the heating season has not officially begun. It is during this period that it is time to reconstruct the heating in the house.
The absence of coolant in the central heating system will allow shutdown without problems. Dismantling of old pipes and radiators can be carried out without fear of disrupting the operation of the main life support systems of an apartment building.
Moreover, when there is official permission to refuse the services of centralized city heating and hot water supply.
How to properly replace old batteries with new radiators, how to connect a gas or electric boiler. It all depends on how technically prepared you are for such a step. All such work requires a competent technical solution, taking into account the seriousness of the problem. You live in an apartment building, you are surrounded by strangers. Any defect in the operation of the new heating can lead to dire consequences. The figure shows an ideal diagram of the equipment of an autonomous heating system.
Important! Work on dismantling and subsequent connection of a new heating system should begin only on the basis of an approved project. Any deviations from the design data, neglect of hydraulic calculations and other design data can cause unsatisfactory operation of the home heating system and cause interruptions in the operation of home heating networks.
Autonomous heating mode is associated not only with improved comfort in your own apartment, but also with an increased share of responsibility. Owners of apartments with autonomous heating are responsible for all concerns about the serviceability of heating boilers and the functionality of pipelines. The comfort of your neighbors also depends on the technical condition of the internal engineering networks in your apartment. Don't forget about this.
Removing an apartment from the general energy supply system in an apartment building is a complex process. Initially, a multi-storey residential building is designed for a centralized supply of heat and hot water. All diagrams and technological features of the heating system are recorded in the technical passport of the building.
Any change due to the individual improvement activities of the residents of the house may disrupt the existing balance of the entire heat supply complex. Only those owners who have separated from the centralized system benefit from installing autonomous heating. For other residents of the house, such events can result in trouble.
The single complex may begin to operate intermittently. In some apartments it will be very hot in winter, in others, on the contrary, the radiators will be barely warm.
It would be a good idea to think about environmental safety in advance. A gas boiler is a unit that requires constant access to fresh air.
A switched-on boiler is not only pleasant warmth and hot water in the house, but also an object of increased danger that requires constant monitoring.
A working unit must be equipped with a chimney for normal and stable removal of combustion products. Automation requires special attention, thanks to which the entire system should work normally and without interruptions.
By neglecting such technical nuances, you can not only create a threat to your own life and health, but also incur the righteous anger of your neighbors due to poor ventilation, chimney operation, or misadjustment of the central heating.
We make heating with our own hands
Modern gas boilers, which are designed for installation in apartment buildings, are highly safe and economical. Despite the apparent simplicity of the device, the new boiler requires special attention. During the installation process, it is important to ensure high-quality connection of all systems and debugging of equipment in all modes.
In addition to the equipment itself, it is necessary to have a working diagram of the air duct and ventilation system on hand. Only in the complex, with the appropriate technical documentation, will you be able to correctly and competently organize the operation of your autonomous heating.
How to regulate radiators
To influence the microclimate in the apartment, you need to reduce the volume of coolant passing through the heating device. In this case, it is only possible to reduce the temperature value. The heating system is adjusted by turning the valve/faucet or changing the parameters of the automation unit. The amount of hot water passing through the pipes and sections is reduced, and at the same time the battery heats up less intensely.
To understand how these phenomena are interconnected, you need to learn more about the operating principle of the heating system, in particular, radiators: hot water entering the heating device heats the metal, which, in turn, releases heat into the air. However, the intensity of heating the room depends not only on the volume of hot water in the battery. The type of metal from which the heating device is made also plays an important role.
Cast iron has a significant mass and releases heat slowly. For this reason, it is not advisable to install regulators on such radiators, since the device will take a long time to cool. Aluminum, steel, copper - all these metals instantly heat up and cool down relatively quickly. Work on installing regulators should be carried out before the start of the heating season, when there is no coolant in the system.
In an apartment building, there is no way to change the average water temperature in the heating system pipes. For this reason, it is better to install regulators that allow you to influence the microclimate in the room in a different way. However, this cannot be realized if the coolant is supplied from top to bottom. In a private house there is access and the ability to change individual equipment parameters and coolant temperature. This means that in this case it is often impractical to mount regulators on batteries.
How to turn on a heating radiator in an apartment - We build and repair
Good afternoon, dear readers! Today I will continue the topic of central heating batteries. We will talk to you about the operation of heating batteries.
Almost everyone needs this topic, and my task is to help you understand this issue once and for all. So, I hope you have already read my article: Correct installation of a central heating battery in an apartment.
We will assume that the battery has been installed for you. What's next?
How to turn on the radiator correctly for the first time
A very important point is to turn on the central heating battery for the first time in your home. When a long period of time has passed, and the thermal power plant begins to supply water to our batteries, then usually the first water flowing through the heating systems is the dirtiest and rustiest. Imagine.
You have just installed a brand new battery, one might say, off the assembly line, and suddenly a powerful stream of dirt is thrown in there. It is not surprising that many batteries become clogged precisely from the first such inclusion, and then we are surprised that out of 12 battery bends, only 8 are heated, the rest remain cold. To prevent this from happening, a jumper (bypass) is needed when installing the battery.
If you have done the installation correctly, then set the position of the ball valves as shown in the figure:
In this case, the entire flow of dirt when turned on for the first time will go through the jumper, keeping your battery intact and safe. In this option, it is better to keep hot water running for several days.
Of course, many are looking forward to when it will be turned on. However, my advice is, if you can’t wait a few days, wait at least one day.
By the way, here is a detailed article on how to turn off the battery.
How to regulate heat in batteries
Suppose you put a battery of 10 bends in the room, and you feel good with it when it’s -20 degrees outside. But now, the cold has passed and now it’s been -2 degrees for several days.
Hot water, as often happens with us, at the same temperature continues to flow through our pipes in a powerful stream and a gas chamber is formed in the room, from which there is no escape. In this case, the temperature regulator comes to the rescue.
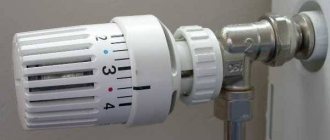
There are many of them in nature. In the picture below you see one of them.
What brand of thermostat should be is the topic of a separate article. And now it is important for you and me to understand the principle. The figure shows one of the simplest thermostats. It has a knob on top that you can rotate and set values from 0 to 5:
5 - means that the entire flow of hot water will pass through the battery; 4, 3, 2, 1 - means that the regulator will reduce the diameter of the flow pipe, providing less hot water flow through the battery per unit time. Thus, at 4 the battery will be colder, at 3 even colder, etc.
If you want to disconnect the battery altogether, you can set it to “*” - the water current will be very small. Practically it will not exist:
Or you can simply close the ball valves on the battery. The effect will be approximately the same:
If you have 2 windows in your room and 2 radiators under them, then during installation it is advisable to install them wisely. For example, you need 20 sections for the entire room. Then it is better to put, for example, 12 sections on one battery, and 8 sections on the other. In this case, in addition to the regulator on each battery, you can completely turn off or turn on 8, 12 or all 20 sections at the same time.
When to turn off radiators
There are several situations when you need to turn off the water in the battery:
- in the event of an emergency that threatens to flood your own and neighbors’ homes with hot coolant;
- if you decide to paint the radiator during the heating season;
- when you need to change or wash the battery without blocking the riser;
- you need to limit the flow of heat into a room that is hot in winter.
Radiators that are too hot are the cause of heat and stuffiness in the apartment
Note. Some apartment owners practice shutting off heating radiators for the summer while preserving the coolant. The goal is to protect heating devices from clogging during the autumn start-up of the system, when a lot of rust flows through the pipes. Below we will explain how to do this correctly.
Now the main point: you will never have problems with how to disconnect a radiator from a centralized system if it is connected according to the correct circuit using shut-off valves (ball valves). You will be able to shut off the coolant flow at any time if such a need arises, without disturbing the thermal conditions of adjacent apartments. The shutdown algorithm is simple:
- Close the lower and then the upper valve on the battery.
- If you plan to paint the heating device, then the previous step is sufficient. Wait until the radiator is cold and paint.
- When it is necessary to replace batteries in the middle of winter, before removing each heater, release the pressure through the Mayevsky valve. Then unscrew the bottom plug and carefully drain the water, then unscrew the joints and dismantle the device.
Correct connection of the heating device to the central heating risers
A separate question is how to properly turn on the heating radiator so that there is no air pocket left in it, which prevents maximum heating of the surface and air in the apartment. Here the algorithm is similar: you need to open the lower valve, then the upper one, and at the end release the remaining air using the Mayevsky tap.
The handle stands along the axis of the pipe - the valve is open, across it - closed
Note. If you do the opposite and open the top valve first, you risk leaving some air inside the sections of the device. This is not critical, but the de-airing procedure will have to be repeated several times.
Location of the Mayevsky tap on the heating device
