Wood is considered an environmentally friendly material for the construction of residential buildings, so it is not surprising that the demand for beautiful and comfortable houses made of timber or rounded logs is not decreasing. First of all, a residential building must be safe from an electrical installation point of view.
It is important to understand how electrical wiring should be done in a wooden house. You need to know how to install and organize the electrical system so as not to harm the health of residents and ensure the safety of property. We have presented in detail all aspects of this issue.
Our article will introduce you to the general requirements for wiring. We will talk about methods for installing an electrical network in a house, rules for arranging an electrical panel and methods for installing cables. All electrical installation work must be carried out in strict accordance with the fire safety regulations we provide.
General wiring requirements
The main difference between wooden houses and reinforced concrete and brick structures is their high degree of fire hazard. This means that increased requirements apply to the selection of electrical devices, cables and the conditions for their installation.
According to statistics, about 1/2 of fires or ignitions in wooden houses or in houses with wooden trim occur due to gross errors by electricians.
If you install the socket incorrectly, do not connect the wires in the junction box carefully enough, or ignore the grounding rules, a fire may occur, followed by a fire.
Undemanding owners of a wooden house entrust electrical installation work to neighbors, acquaintances, or do it themselves, without thoroughly knowing the PUE standards. The sad result of gullibility and unprofessionalism - in the photo
It is necessary to know the basic rules of electrical installation for two reasons: to be able to carry out some of the installation or repair work yourself and to control the actions of unscrupulous “specialists”.
The following requirements should be remembered:
- The technical characteristics of cables and electrical equipment must correspond as closely as possible to the power consumption of the devices of each individual group.
- The operation of sockets, switches, and emergency shutdown devices must be carried out taking into account the load placed on them.
- It is prohibited to use cables, wires, and terminal connections when they are regularly heated.
- It is necessary to completely prevent the transfer of fire from the cable to structures made of wood or other flammable materials using fireproof protection.
Electrical wiring must be completely safe for home owners, their families (especially small children) and pets.
Strict requirements come to the fore, and sometimes aesthetics have to be sacrificed. For example, owners of a wooden cottage need to come to terms with external sockets and enhanced protection for both hidden and open electrical wiring (NPB 246-97)
Material from video reviews and instructions posted on the Internet is very contradictory, so you should not rely entirely on the opinion of people in work overalls. You should focus on excerpts from regulatory documentation - sections of PUE, SNiPs, GOSTs.
Features of the electrical panel
Externally, the distribution board is a plastic or metal (which is preferable) box with a door with fastenings for automatic machines and an electricity meter.
It has no size restrictions, and when a new box is installed, a little free space is always left for further connections.
Inside there is a meter (sealed), a main automatic shutdown device (RCD), which is also sealed, and single-pole circuit breakers for various groups of electrical wiring (lighting, socket, etc.)
Circuit breakers are mounted on the DIN rails provided for this purpose. The nominal value of the machines directly depends on the parameters of the connected line: if the permissible limit of the socket group is 16 A, then the machine must correspond to this value.
If you have automatic machines, installing an RCD is not necessary, but its installation should not be neglected. Additional protection is triggered when a leakage current appears. The RCD is manually turned off when it is necessary to cut off the flow of electricity into the house.
Despite the expensive cost of the equipment, responsible electricians insist on installing zone-based protection, which increases the safe use of the electrical network in a wooden house.
The nuances of connecting RCDs and circuit breakers in the panel are described in this article.
Step-by-step installation instructions
Electrical wiring in a wooden house is a rather complex undertaking that requires perseverance and responsibility from the installer. You can do this work with your own hands, the main thing is to remember that electricity in a wooden house can cause a fire.
Cabling
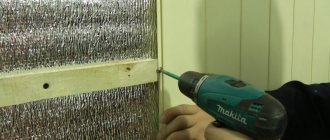
Work begins with cutting and laying the cable. In case of open installation, the box is pre-screwed. Particular attention is paid to the formation of corners. The plastic is trimmed at the turning points, the fasteners are screwed in closer to the edge, which will not allow the box to sag. In the case of retro-style wiring, insulators are attached along the entire route.
The cable is laid in channels or put on insulators, while leaving a margin on each side (approximately 200 mm at each point). This will compensate for possible inaccuracies in calculations and, if necessary, will greatly facilitate repairs.
Installation of distribution boxes
In places of branches, distribution boxes are installed on sockets or lighting fixtures. They allow you to change the direction of the wire, make it easier to maintain the wiring and check its condition.
Important! Regardless of the type of wiring, all wire connections are made only inside the junction box. There should be no twists in the box or channel for hidden installation.
Inside the box, the wire can be connected in one of the following ways:
- twist plus electrical tape;
- insulating caps;
- connection on connectors.
The first option has been used for decades and, when executed correctly, provides high reliability and durability. Both wires to be connected are stripped at a distance of about 3 cm. The wires are twisted together and insulated. As insulation, you can use traditional electrical tape or heat shrink tubing.
Using plastic caps is quite simple. In fact, this is an ordinary cap, the inner surface of which vaguely resembles a thread. The cap is simply screwed on. Several varieties of this product go on sale, the main parameter for selection is the wire cross-section.
Detachable connectors with insulation (wags) allow you to do without twisting at all. To connect, the cable is stripped to 1–1.5 cm. The cores to be connected are inserted into the connector holes until they click.
Whatever method is used, the final stage of installing the junction box will be laying the wires. The cable must be positioned so that the connections do not touch each other. It is easier and more efficient to lay the twists in a circle, clockwise.
Installation of switches and sockets
Depending on the chosen wiring option, surface-mounted or mortise sockets and switches are used. The installation rules for both are noticeably different, but in any case it is necessary to ensure complete protection of the wall from possible sparks or heating of the contacts.
Sockets and switches are installed on metal or asbestos substrates. In the case of hidden installation, be sure to use socket boxes (glasses) made of non-flammable material.
Surface-mounted sockets and switches are screwed to wood with self-tapping screws, and internal ones are wedged using standard clamps. After attaching the devices, a cable is connected to them.
Installation of lighting fixtures
When choosing light sources for a wooden house, you should give preference to models with a metal base, the installation of which does not require complex fasteners. Such chandeliers or shades are simply screwed to the walls or ceiling.
It is more convenient to start work from the top, from the chandelier. As a rule, a chandelier allows you to change the degree of illumination, therefore, several wires are connected to it. There is no need to rush, it’s worth checking once again that the connection is correct so that you don’t have to redo the entire area later.
Power cable entry and distribution panel
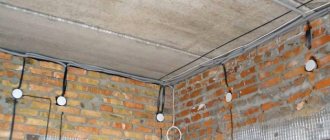
The power cable can be inserted into a wooden house in two ways: underground or with a cable from a support. The second option is more in demand. In most populated areas of our country, an overhead line consisting of two twisted aluminum wires is used to transmit electricity.
The overhead line conductors are not brought into the house; for this purpose, a multi-core cable is used, which is connected to the distribution panel and the meter. Depending on the requirements of the service company, the meter can be installed on the outside of the wall or inside the house.
In the first case, electricity passes through the meter and circuit breakers, and only after that it can be brought into the house. To secure the entrance, a metal sleeve is used, which is pressed into the hole in the wood.
The second option involves installing a shield inside the building. Then the cable is also led inside the building through a metal sleeve and is already connected there to an electricity metering device. In any case, they check that the panel is installed correctly, and then the service company’s specialists connect the electricity.
Installing the memory
The panel is used not only for installing energy metering equipment, but also for placing protective devices (SD). All panels that go on sale have a special rail designed for mounting machine guns.
The number and parameters of protection devices are determined at the stage of drawing up the circuit. In any case, we must strive to ensure that groups of electrical appliances, especially those with high consumption, have their own circuit breakers (separate switches for the kitchen, heating appliances, etc.).
Fire protection measures
If we analyze the entire process of electrical installation work in a wooden house from a safety point of view, we can highlight the main rules:
- correct selection and installation of RCD;
- installation of a grounding loop using a modular-pin method (with a resistance of 4 Ohms);
- installation of a potential equalization system;
- ensuring grounding continuity throughout the entire network;
- installation of overhead sockets only;
- hidden installation - in metal boxes and pipes.
Upon completion of electrical installation work, the risk of accidental fire or electric shock, as well as breakdown of household appliances due to unsatisfactory wiring conditions, must be completely eliminated.
Electrics in a wooden house can be:
Internal
- It is not noticeable and does not spoil the interior.
- The risk of damage to wires is lower.
- More durable than outdoor.
- Installation of hidden wiring is possible only at the stage of construction of a wooden house.
- Installation of hidden wiring is much more expensive than external wiring.
- After completing the house, installation of new sockets or switches not provided for in the diagram is possible only externally.
Outdoor
- Installation of external wiring is much cheaper than internal wiring. Complies with safety standards.
- You can change the layout of switches, sockets or electrical appliances without significant costs.
- Fast wiring installation times.
- In case of damage, it is easy to replace the wire.
- The wiring is always under your control: you can find out the condition of the insulation and find any damage.
- The appearance of the room suffers a little.