Do-it-yourself features
Why even bother with such a complex campaign? In fact, there are plenty of arguments in favor of creating a door on your own. Here are some of them:
- the presence of a non-standard opening - ordering a non-standard door in a workshop will cost much more. If the dimensions of a product go beyond the standards, its price soars at jet speed;
- the inability to purchase a suitable model that will fit into the design and be combined with other interior elements;
- desire to save money - if there is an opportunity to make a budget door from natural wood yourself, and not buy a ready-made one for crazy money, why not take advantage of it;
- the presence of outbuildings in the courtyard of a private house - a barn, a bathhouse, a barn - they have no need for expensive doors;
- the desire to create a unique, inimitable product and to know that you made this wonderful door yourself.
How to make a panel door
It is not difficult to make such a design yourself. All necessary materials and suitable tools of good quality must be prepared. It will be necessary to maintain all dimensions, and the edges must remain smooth.
- First, a frame frame, the so-called harness, is assembled. The required size is taken into account. The internal space must be filled (partially, completely). In other words, the inside of the frame becomes solid, but a finely filled shield can also be constructed.
Door frame made of boards
- The frame (binding) determines the size of the canvas, so it is designed first. To create it, a timber is prepared, the approximate cross-sectional size of which is 3x12 cm. It is cut taking into account the size (width, length) of the fabric being prepared.
The timber is ready. Now you need to choose a method for connecting the fabric at the corners. Of all the types of connections, it is better to choose the simplest one - “half a tree”.
- Grooves are marked along the edges of the prepared timber. This work must be done with extreme precision. Next, a hand saw and chisel are used to remove the wood. The depth of the groove is equal to half the thickness of the timber.
- At the corners, the grooves are connected; they are first coated with glue. Accuracy control is carried out using a construction angle.
- The glue on the joints will dry out after a while, and then the joints are fastened with dowels. Through holes are prepared for these elements, their diameter is 0.8-1.0 cm. Dowels treated with glue are driven into the holes. You need to work carefully.
- Now the frame is glued, the glue has dried. Then one side of it is lined with a suitable material - usually fiberboard or plywood. The sheet of material is cut according to the required dimensions. It is laid on a flat table surface. Next, the frame is laid on the sheet. The facing material is marked.
- The frame must be removed to apply wood glue to the highlighted strips. Then the frame is installed in its original place. You will need to press it firmly to connect to the facing material.
- The resulting internal space of the frame should be filled. Materials for filling can be:
- MDF pieces;
- timber
Filling the panel door with filler
- The filling elements should be glued together. They should also be glued to both the frame bars and the facing material (to the sheet below). Such elements will be required for the rigid installation of the door handle and lock mortise.
- Before covering the structure with cladding, the glue must dry completely. In the meantime, while the glue dries, the material required for cladding is being prepared.
- Measure the perimeter of the frame. Using these dimensions, sheets of finishing material (one, two) are cut out. When it is planned to glue two sheets, first glue the fiberboard and then glue it on top:
- veneered plywood;
- laminated sheet.
Door trim laminated veneer
- If it is possible to put the door leaf under the press, this should be done. You can even create such a device yourself. For example, cover the product with plastic film, and then place gypsum boards or other suitable weights on top.
- If the apartment owner wishes, he can create the cladding not from laminated sheets, but from natural wood slats. However, then each element will need to be screwed to the frame.
To do this, holes are drilled for countersunk holes in order to “sink” the heads of the screws. And so that the holes are visually invisible, they are subsequently filled with a mixture consisting of wood glue and sawdust. After drying, such places are treated with a knife.
Wooden door covered with slats
- All ends, as well as corner areas of the blade, are processed with a router. A high-quality processed surface will be presented in a neat form.
- A lock (latch handle) is cut into the prepared canvas, and the hinges are also secured.
Now the finished door leaf can be hung in the door frame.
Installation of roller blinds on plastic windows without drilling, see here.
Video: How to make a door to a bathhouse from boards with your own hands:
(No Ratings Yet)
What type of wood to choose
One of the most critical stages is the choice of source material. Each type of wood is endowed with special mechanical and physical qualities. It is necessary to know the features of different types in order to determine which one is ideal for solving a particular problem. All wood can be divided into two categories - deciduous and coniferous.
Hardwood
This series contains the most valuable species, endowed with extraordinary strength, high density, expressive texture and attractive natural shades.
Wood has the highest value:
- beech;
- nut;
- mahogany.
If there is no reason to spend money on expensive raw materials, you can get by with more affordable ones. Pay attention to the advantages:
- cherries;
- oak;
- ash
These rocks also have high strength, but will not require such significant costs as representatives of the first category.
Oak wood is very durable and resistant to rotting. Due to the content of tannins, which react with dyes during etching, it allows you to achieve intense color effects. Processing the material is not difficult - it lends itself well to simple tools. Making parts of unusual, curved shapes from it is not a problem.
Ash is as hard and durable as oak. However, this material requires regular treatment with antiseptic compounds. Otherwise, when the first wet season arrives, it will begin to rot.
Conifers
Coniferous wood never loses its popularity. This is explained by its availability and a wide range of positive qualities. The most popular materials are those made from pine, followed by spruce.
The strength characteristics of pine are slightly lower than those of deciduous trees. This disadvantage is more than offset by high resistance to biodegradation, mold and mildew, excellent thermal conductivity and extraordinary flexibility during processing. High air and moisture permeability guarantees decent quality of treatment with protective compounds.
Spruce is more susceptible to rotting compared to pine, but has less hygroscopicity and thermal conductivity. Products made from this material retain their original shape much longer.
If you choose between these two species, you should give preference to pine.
Deciduous tree wood is ideal for making interior doors. And for entrance structures, pine would be the best choice.
DIY interior door at home
The quality of the interior doors offered, which can be purchased at most hardware stores, cannot always satisfy customers. They can be beautiful and attractive, but the strength and durability of these products leaves much to be desired. Therefore, many home craftsmen have no choice but to make interior doors with their own hands. Moreover, there are no great difficulties in this if you select the material and follow a certain plan.
Materials for making canvas
Before starting work on making an interior door yourself, you need to prepare the material. In most cases, wood is used for this purpose. The frame of the door leaf, as well as the door frame, is made from it . In addition to wood, the following can be used:
- Styrofoam;
- Cardboard honeycombs;
- Glass;
- Fiberboard;
- MDF.
Polystyrene foam and cardboard honeycomb are used as filler for the door leaf; it is not made of solid wood. These materials are lightweight, which is important for subsequent use. In addition, polystyrene foam can reduce noise levels by making the fabric more sound-absorbing.
The use of glass for the manufacture of interior doors is primarily due to the aesthetic side. Such inserts visually expand the room and also allow you to diversify the design of the room. Glass also has one more property. It perfectly transmits daylight. Therefore, with glazed interior panels, the corridors of the apartment will be much lighter, even if the door is closed.
Fiberboard or its more advanced version MDF is used as a cladding material. In the design of the canvas, these materials are responsible for the decorative finishing of the future product. At the same time, MDF is the finishing element, but fiberboard will have to be further processed to give it an attractive appearance.
In addition to the listed materials, sheets of laminated chipboard can be used as cladding. A wide selection of colors that imitate natural wood makes this type of finish very popular. It should be noted that the use of laminated chipboard will give the doors more rigidity in the diagonals.
PVA glue or confirmats can be used as fastening material. To coat the finished canvas you will need varnish. If you need to add color, the problem is solved thanks to stains and tinted varnishes.
Necessary tool
The next stage of preparation will be preparing the tools that will be needed to make an interior door. You need to have on hand:
- Manual or electric plane;
- Hacksaw or electric jigsaw;
- Set of chisels and chisels;
- Manual electric router;
- Grinding machine;
- Miter box;
- Square and ruler;
- Hammer and mallet;
- Pencil and tape measure.
With this set you can safely start making any carpentry product. You should also prepare a vacuum cleaner to quickly remove not only sawdust, but also dust, which should not end up on the surface of the product during paintwork.
Manufacturing and assembly
When the preparation ends, it’s time for the main work. You will need to perform the following steps step by step:
- Take dimensions;
- Process the material;
- Perform markup;
- Cut down and assemble the frame of the canvas;
- Install fittings.
To ensure that the work proceeds quickly and the product turns out to be of high quality, it is worth preparing a drawing. Thanks to it, it is easy to mark and not make a mistake with the configuration of the future door.
The principle of assembling a paneled door
Milling scheme 2
Measuring the canvas
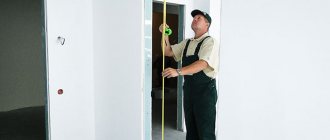
Work should begin by measuring the doorway. This operation will allow you to calculate the dimensions of the box and canvas, as well as determine the configuration of the future product . If the opening does not exceed 80 cm, then a single-leaf door block should be made. For a larger size, you need to make two canvases to reduce the load on the loops and give a more attractive appearance to the entire product.
The resulting size must be reduced in height and width by 2 cm. This is required to create an assembly seam obtained between the frame block and the opening slope. After installation, it is filled with polyurethane foam. Using the obtained dimensions, a drawing is drawn up according to which the interior door needs to be made.
Door leaf dimensions
Such a manual should also contain the dimensions of the door leaf. To calculate them, you should subtract from the width and height of the opening the thickness of the box beam in the place where the quarter will be selected. From the resulting size it is necessary to subtract another 4 mm in width and from 4 to 12 mm in height. These values correspond to the gap that should remain for the free rebate of the door leaf. This defines all the data for the drawing.
It should be noted that the box beam does not have to cover the entire thickness of the wall. The remaining space can easily be covered by an extension installed after installation work.
Making door trim
As soon as the drawing with dimensions is completely ready, you can move on to the next stage of work. At this stage, the material should be processed and the frame of the door leaf should be prepared. To do this you should use a plane.
For the frame of the door leaf you need to use planed boards
For the frame, you can take a 40 x 100 mm edged board. The ideal option would be to purchase planed material, which will make the work easier and significantly speed it up . But you can also use simply sawn boards. They will have to be processed with a plane to make them smooth. During planing, you should carefully monitor the corners of the bars. They must have a strict 90 degree angle. You can check the work using a square.
Selection and technique of applying varnish to wooden doors
Connection diagram of frame elements
Next, the parts are marked according to the dimensions indicated in the drawing. They will need to be sawed off. If the parts must be secured with tenons, then all horizontal parts of the frame will be longer by the size of two tenons. For example, for bars 100 mm wide, a tenon 70 mm long will be required for connection. In this case, 140 mm should be added to the size of the workpiece, which means two tenons on both sides of the part.
During processing, it is necessary to select a groove or quarter in the sides of the workpieces. This is necessary for installing glass or inserting panels if solid wood was chosen as the door manufacturing option. This work can be done using a hand-held electric router. A cutter of the appropriate profile is inserted into the tool and a cut is made on the side indicated in the diagram.
The groove in the workpieces is cut using a router
The parts for the door frame must contain a quarter, thanks to which the leaf can cover the opening. It is also made with a router, setting the depth and width of the cut. The size of the quarter should be based on the thickness of the door leaf. You need to add 1 mm to it for a better rebate. The depth of the quarter must be at least 10 mm.
Pre-assembly of the canvas
When the frame parts are processed and the places for the fasteners are sawn down, preliminary assembly of the interior door leaf can be done with your own hands. This operation will allow you to check the correctness of the marking and filing of all elements. The structure is assembled dry, which means without using glue. If the type of connection was chosen to be confirmed, then you will simply need to bait them without performing a tight twist .
Panel door assembly diagram
When all the parts are assembled and fastened, check the width and length of the door leaf. If deviations from the drawing are found, then it is necessary to adjust the parts. After finishing work, the product is reassembled and inspected. If all parameters are met, you can proceed to the next stage.
Marking and making cuts
Separate mention should be made of marking parts and making cuts. This is a step-by-step process where an error can result in the entire product being remade and the material being damaged. Therefore, all pencil lines should be made only after checking the size. And before starting sawing, the marking itself should be checked against the drawing.
When marking, you should strictly adhere to the dimensions
When marking, you can add 1 mm for adjustment. In this case, even if the workpiece is sawed off unevenly, it will be possible to correct it painlessly. If everything works out the first time, then the extra millimeter can be simply removed with a plane. To transfer the drawn line to the other side of the block, you should take a square and place it directly at this point. Since the part has an even angle of 90 degrees, the lines on all sides will exactly repeat the markings made at the very beginning.
If spikes and eyes are chosen as a connection, then you will have to completely mark these elements. The place for the nest should be located strictly in the center. To calculate this data, you simply need to divide the thickness of the bar by 2, and then mark the resulting number from any plane of the part. The size of the tenon itself should be equal to 1/3 of the thickness of the workpiece. The width of the nest can be half a millimeter less than the width of the spike.
The eye should be carefully drilled strictly according to the markings made, and then cleaned with a chisel. You cannot protrude beyond the edges of the lines, otherwise the connection will be weakened and the structure will be fragile. According to the instructions, it is necessary to precisely adjust the tenon joint, so it is imperative to leave a half-millimeter margin.
Assembling the canvas and inserting fittings
When all connections have been checked and the dimensions exactly match those indicated in the drawing, assembly of the door leaf begins. When making a tenon connection, it is necessary to apply glue to the plane of the tenons and the inner surface of the sockets. After this, the parts are inserted into each other, followed by tamping with a mallet. If this procedure is performed with a hammer, then a small wooden block should be placed on the surface to be hammered. This way you can avoid damage to the assembled product.
After assembling all the parts, there should be no gaps left at the joints. If they are present, then you should knock out this place again. The ideal option would be to tighten the canvas with webbing . If they are missing, you can install a metal corner on the board, measure the width of the canvas from it, add 3–4 cm to this size and secure another corner. Three boards are needed on which the door is laid. A wedge is inserted into the gap between the canvas bar and the corner and tapped until the cracks completely disappear.
The door is assembled until the cracks disappear
Once the door is assembled, the trim is attached to its surface. First, the sheets are cut to fit the frame and then laid on it. Fastening is done using glue. Additionally, nails can be used. This operation must be performed carefully and carefully so as not to damage the surface of the cladding, especially if it has a finishing coating.
DIY ways to update interior wooden doors
Before laying the second sheet, the filler is installed on the back side of the interior door. To do this, foam plastic or cardboard honeycombs are cut to the size of the free internal space between the parts of the canvas. A tight fit will ensure the integrity of the future door. Next, the second sheet of cladding is laid and the canvas gets its finished look.
Paneled door in section
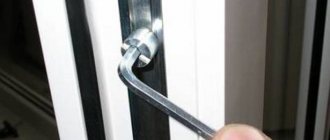
In order for the door to open, you need to install hinges. They are located at a distance of 20 cm from the edges of the door. The markings are made with a finely sharpened pencil. The nest must be selected with a chisel strictly along the inside of the line, without protruding beyond its limits. The hinges in the seats should fit without gaps. When the socket is ready and checked, the part is fastened using self-tapping screws or the screws included in the kit. Read more about this in the article “Installing hinges on a door.”
Door hinges are secured with self-tapping screws or self-tapping screws
Another element of an interior door is the handle. A lock is often inserted into it, which makes it possible to lock the room if necessary.
The hole for the lock is made using a drill
The center of the handle should be 1 meter from the floor . A through hole for the lock is drilled with a drill. The seat is also cleaned with a chisel. Once the lock is inserted, there should be no gaps left. Read more about installing a handle on an interior door.
Installing glass in the opening
If the interior door requires glazing, then you need to prepare a glass cutter and select the desired type of glass. This element is inserted into a quarter, which is selected along the entire inner perimeter of the door. The glass is cut 2 mm smaller than the size of its installation space.
Glass cutting is done with a glass cutter
If after working with a glass cutter the sheet has irregularities, they must be removed. You can use pliers for this. If there is a large remainder (from 2 mm), another cutting line should be drawn. This will make it easier and more efficient to remove excess. When the procedure is completed, you need to sand the edges of the glass with sandpaper.
Next, the glass is installed in the quarter of the door. Fastening is done with a decorative layout, which is nailed down with small nails. This ensures the possibility of quick repairs if the installed glass is damaged.
Interior door finishing
The assembled door, if it is not covered with laminated chipboard, requires finishing work. They can be of the following types:
- Coloring;
- Tinting;
- Lamination.
Depending on the type of finishing chosen, appropriate operations must be carried out.
Coloring
Before painting the surface of the door leaf, it is necessary to prepare it. And the first thing to do is sand it completely. An electric sander is ideal for this purpose. You need to use a tape that is not too abrasive so that there are no small scratches left on the surface. You need to work in the direction of fiber growth. Perpendicular grinding is allowed only if it is necessary to level the surface and as a rough grind.
Before painting the door, its surface must be sanded.
If there are any chips or dents on the door, they should be filled with putty. The color of the putty must be selected to match the shade of the wood from which the canvas is made. So, during subsequent painting, this place will not stand out from the general background. After applying the putty, you need to let it dry and sand it again.
Wood surface defects can be eliminated using putty.
Next, you need to clean the surface from dust and only then start painting. To apply the material, brushes, rollers or paint sprayers are used. The latter option allows you to get the job done quickly and with minimal paint consumption. There should be no drips on the surface during painting. They need to be removed. To get a quality painted door, you need to apply two or three coats of paint .
The door must be painted in 3 layers
Toning
Unlike painting, door tinting involves the subsequent application of varnish. You need to apply a tinting material to the prepared surface, which can be:
- Stain;
- Mordant;
- Acrylic paint.
Either type of material will give the wood a new color while leaving the grain exposed. The stain is applied with a brush, roller or spray gun. If necessary, repeat the procedure after the material has completely dried.
Stains, mordants or paints are used as tinting materials.
When the desired shade is achieved, the canvas is varnished. To achieve a glossy surface, more than three coats should be applied. Moreover, each stage involves sanding with a fine sanding belt. This will remove raised lint and make the surface smooth.
Lamination
An alternative to paint and varnish materials is the use of films and veneers. The gluing of these materials is called lamination. For home production, the best option would be the cold gluing method .
The surface of the interior door must be prepared in the same way as in the case of painting or tinting. The film or veneer is cut to the size of the door leaf, making an allowance of up to 3 cm. Then, starting from one edge, the material is glued. If a self-adhesive film is used, then the protective paper is gradually removed from it as it is glued to the surface of the door.
Self-adhesive film is used for door lamination
The veneer is applied to glue, which is used to pre-lubricate the canvas. The material should be smoothed from the middle to the edges. This will make it easier to remove air trapped under it. If the bubble cannot be expelled, then it can be carefully pierced with a needle. This place must be pressed firmly so that the adhesive layer can connect the surface of the door and the veneer. Excess material around the edges is carefully trimmed with a knife.
Excess film is removed with a knife
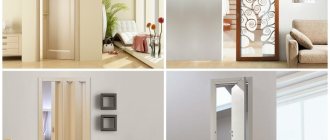
Types of doors by design
Doors are classified according to various criteria - the design of the door leaf, the method of opening.
The following types of door leaves are distinguished:
- massive;
- paneled;
- panel;
Groups of door structures by opening method
- hinged - with one or two doors;
- sliding – so-called compartments, equipped with a guide system;
- folding - doors resemble an accordion or a book;
- radial.
To make wooden doors, boards, beams, and furniture panels are used. To decide on the choice of material, you need to understand the pros and cons of each of them. Let's look at the characteristics of the various options.
Massive doors
To make doors from solid wood, planed or grooved boards of large thickness are suitable. The latter are convenient because they are easily combined into a single fabric without forming cracks. This becomes possible thanks to the locking system, which consists of a longitudinal protrusion and a corresponding slot on the edges of the board. The canvas, made up of boards, is fastened with transverse or diagonal jumpers.
When making a front door, you should give preference to more expensive breeds. Oak, larch or cedar are suitable. For outbuildings, budget options are quite suitable - pine, linden or spruce.
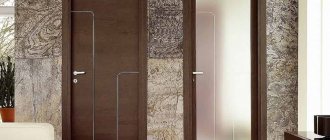
Panel doors
This is a separate category of doors with its own design features. Their canvases consist of a frame and rectangular inserts - panels.
The main load-bearing element of this structure is the frame, which is otherwise called the frame. The remaining elements are attached to it - wooden inserts. The harness is usually made from solid wood. Glued laminated timber will also work. Four parts connected to each other form a frame. The bottom element is wider than the top and side panels. This provides the structure with additional strength. You can further strengthen the bottom of the door by covering it with sheet metal. Galvanized steel or aluminum will do. This is especially true for strengthening entrance panels.
No less important elements are the transverse strips - in other words - the middle ones. They are bars that are attached horizontally in the middle of the future canvas.
And finally, the details that gave the name to the entire structure - panels. These fragments are inserted into the frame, resulting in the formation of a single piece. Special grooves are provided for their installation. The panels are attached using a tongue-and-groove system or decorative beads, which allow you to quickly and without damaging the door replace the damaged element. Panels can be made from chipboard, MDF, plywood and even glass. They are installed in the door frame, and in addition to their main purpose, they also have a decorative function. They are given interesting shapes and decorated with carvings or paintings.
Panel doors
The design of the panel door is much simpler than the previous version. It consists of a box and the main part - the shield itself. Fiberboard, veneer or laminate are suitable for making the box. The frame is first made from boards. It is advisable to use sheets of chipboard, MDF or fiberboard as a shield.
Panel sheets can be:
- solid - made from interconnected bars;
- hollow - a frame of connected beams is sheathed with lamellas;
- small-hollow - have a variety of fillings, for example, honeycomb.
Types of interior doors
Doors are classified according to the type of construction:
- Paneled (including side panels), distinguished by thinner inserts (panels) in the door leaf.
- Panel panels, consisting of a frame covered with MDF or plywood, and filler laid in the voids.
- Hollow (“voids”) In principle, these are the same panel boards only without filler.
According to the type of opening, doors are: 1. Swing: one-, one-and-a-half and two-leaf. 2. Sliding interior doors: sliding (compartment type), cassette (when opened, the door goes into the wall), double-leaf. 3. Folding (“accordion”).
Natural wood and its artificial substitutes are used as the main material for the manufacture of interior doors. Metal is used for hinges, handles, and locks. Decorative inserts can be made of glass.
The types of coverage also differ. Doors made of wood are painted or varnished. They also produce laminated (decorated with a special film) and veneered (finished with a thin layer of wood) doors.
Necessary materials and tools for making doors
Before you start, make sure you have all the tools available. If something is missing, it is better to purchase the necessary tools in advance than to discover their absence during the manufacturing process.
So, for work you will need:
- a workbench or large, durable table;
- hand router for wood - with its help you can easily form grooves, holes, grind the surface and trim the corners of the product;
- plane - it will be an excellent assistant in leveling and grinding the ends;
- regular hacksaw;
- different-sized chisels;
- rubber hammer;
- regular hammer;
- sandpaper, or even better, a sanding machine;
- building level, tape measure, pencil;
- screwdriver or Phillips screwdriver;
- self-tapping screws of various calibers;
- wood glue.
Materials are purchased depending on the type of door chosen and its manufacturing technology. It can be:
- grooved or planed boards;
- particle boards;
- plywood;
- glass;
- laminated timber.
Necessary tool
To make an interior door with your own hands, you will need the following tools:
- pencil and ruler;
- roulette;
- hammer and screwdriver;
- building level;
- chisels;
- mallet;
- milling machine;
- sandpaper or sanding machine;
- plane;
- hacksaw;
- screwdriver;
- wood glue;
- square;
- clamps;
- self-tapping screws
Step-by-step door manufacturing technology
The first step is to thoroughly dry the purchased wood. This step can significantly delay the manufacturing stage, but is necessary. Drying on average takes from 1 to 2 months. The boards should not touch each other. They are interspersed with special gaskets. This technology ensures unhindered release of moisture from the material. Using undried wood can lead to door deformation and the formation of fungus.
When drying conifers in a special chamber, it is unacceptable to set the temperature above 50 °C. The resin will leak out, which will lead to a decrease in the strength characteristics of the material.
Making a solid door
In order to make a solid wood door, you will need to complete the following steps:
- mark and cut the boards into fragments of the required size;
- check the location of the resulting segments - they need to be rotated so that the growth rings “look” in one direction;
- If there is a tongue-and-groove fastening system, connect the fragments into a single web. First you need to coat the joints with wood glue. This will provide the structure with additional strength;
- the spike remaining on the end of the canvas should be cut off and the resulting plane processed;
- the resulting structure must be fixed with clamps and left until the glue dries completely;
- the next stage is surface treatment using a milling cutter and subsequent grinding;
- The final stage is fastening the canvas using crossbars. To do this, it is necessary to prepare bars of the required length, preferably trapezoidal in shape, to ensure a tight connection. Next, you need to form the grooves - usually their depth is equal to half or one third of the thickness of the canvas. After this, all that remains is to drive the crossbars into the grooves coated with glue using a rubber hammer or mallet.
Making a paneled door
Manufacturing a panel door is a complex process that requires a variety of tools, as well as specialized knowledge and experience.
The first step is to prepare the timber for making the frame. It is processed using a milling cutter, after which grooves are cut out on the pillar elements, and tenons are made on the transverse elements. Next, the panels are made. Solid wood, plywood, chipboard, glass are suitable for this.
All elements are connected into a single structure, and all tenons are coated with wood glue. You will need a large space to work.
Step-by-step assembly instructions:
- We coat the tenons of the crossbars with glue and install them in the grooves of the vertical elements.
- We install the middles.
- We install panels.
- We glue the vertical beam.
- We fix the panels with decorative glazing beads.
Use a rubber mallet to tightly connect the parts. Align the corners, focusing on the construction corner. Clamp the product with clamps and leave to dry.
Manufacturing of a panel door
To make a thyroid cloth you need:
- assemble a frame from beams connected at the corners using the “half-tree” technology;
- line the frame on one side with plywood or fiberboard. The material is fixed with glue;
- the resulting void is filled with cellular material or MDF bars. They are glued from the inside to the existing cladding layer.
- The structure is covered with a second sheet of fiberboard and sent under the press.
If desired, you can make an additional facing layer from laminated material or sheathe the canvas with wooden slats.
Making a door from clapboard
The basis of such a door is a frame made of beams. It can be made according to the same principle as the frame for panel panels. We cover the finished frame with clapboard and the door is ready for installation.
It's actually not that simple. Keep in mind that each board needs to be coated with glue for a more secure fit. On the first day, it is recommended to install only two slats - on both sides of the canvas. Glue the lamella and secure it with a self-tapping screw. After this, we clamp it with a clamp until the glue protrudes along the entire perimeter of the rail and wait for it to dry completely. On the other side we do the same actions. Every day we add only two boards and gradually cover the entire plane. It is better to drill the connecting holes in the lamellas in advance, since when screwing in the self-tapping screw, the panel may split.
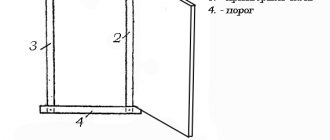
How to make and assemble a door frame with your own hands
Before describing the process of manufacturing a door frame, it is necessary to familiarize yourself with its structure. It is a frame structure that is mounted on the edges of the doorway. The frame is necessary for installing the door, which is attached to the base using hinges. The following materials are suitable for manufacturing: wood, MDF.
The design includes the following elements:
- counter beam - a post on which the lock's strike plate is installed;
- loop beam - loops are attached to it;
- ceiling beam - top bar;
- threshold - bottom beam, relevant for entrance doors.
Manufacturing stages
- We make the necessary calculations. To the dimensions of the door leaf we know, we add an additional distance to create small gaps - 3 mm on the top and sides and a few mm on the bottom.
- We saw off the necessary parts at an angle of 45°. A miter box will help you avoid making mistakes when forming an angle.
- We connect the bars into a U-shaped or rectangular composition using self-tapping screws.
Manufacturing of accessories and platbands
The following materials are suitable for these elements: MDF, wood, chipboard.
To make the extension, measure the width of the wall that needs to be covered with a plank. We select a wooden lamella of the appropriate size. We file one of the long sections. A chamfer is formed that can easily extend beyond the box part. We sand the surface of the lamella to an ideal state, after which we paint it with stain and cover it with two layers of varnish.
In the case of MDF or chipboard, everything is much simpler. You will only need to veneer the edges of the slats, covering them with edge PVC using a hot iron.
It is best to fasten homemade extensions using self-tapping screws. You need to start from the top horizontal bar to leave the opportunity to adjust the length of the side slats.
For homemade platbands, it is better to use solid or glued bars. Solid products require painting. Glued ones often have a coating in the form of veneer or laminate.
When making a decorative element yourself, you can choose their shape to your liking. Your platbands can be:
- smooth - have a flat shape, are the easiest to manufacture;
- profiled - have various recesses or protrusions on the surface. In order to make them, you will need at least a hand router;
- figured - the most complex type of platbands. They are manufactured using special programmable machines according to specified drawings. You can make figured platbands yourself or order them from a wood carver. Products decorated with hand carvings are the most expensive version of curly planks.
What your platbands will be like depends only on your taste and financial capabilities.
Installation of ready-made decorative elements is carried out either using special nails without a head or mounting glue. When fixing massive planks, it is better to choose the first option. The platbands will be securely fastened, and traces of thin nails will be practically invisible.
Before installation, the ends of the platbands are cut using a miter box at an angle of 45°. The planks are fastened in the following sequence:
- strip near door hinges;
- second side element;
- top panel.
To hide the fastening points as much as possible, you can rub these places with mastic or a cosmetic pencil.
Independent insertion and installation of fittings
Mortizing a lock is a rather complex stage at which you cannot make mistakes.
The first step is to lay the door flat. After that, drill a hole at a distance of 100-120 cm from the bottom. Insert the latch and trace the hardware along the outline with a marker. After this, we make a recess under the front cover. For this work, you can use a chisel or milling cutter. We place the housing in the recess so that its edge is level with the end of the door. We mark the places where the handles are attached and drill holes. The latch is installed in place and fixed with self-tapping screws. Next comes the turn of the handles and decorative trims. Special hexagons are provided for their installation.
Covering the door leaf, attaching hinges and installing fittings
Before final finishing (coating with decorative film), it is necessary to prepare samples for hinges and latch. Accurate measurements are taken and the location of the loops is determined. Hinges are placed on the side edge of the door leaf at the required distance from the end and their contours are traced. The boundaries are cut with a chisel, after which a sample is made: a layer of material is removed to a depth equal to the thickness of the loop map.
Next, mark the places for the handles and drill holes. A latch is inserted into the previously prepared slot and the contours of the fastening strip are marked with a pencil. They cut a recess under it.
Having completed the preparatory work, they begin to cover the door leaf. To create a perfectly smooth surface, the plywood is sanded with fine-grained sandpaper, wiped and coated with a layer of varnish. It is more convenient to paste with an assistant who will hold the free part of the film and separate the paper backing. If you don’t have experience working with self-adhesive film, you can watch the video and learn the nuances. To avoid the appearance of wrinkles and small bubbles, the film should be glued evenly across its entire width, carefully smoothing it out, but not allowing it to stretch. The film is folded over the side edges of the door leaf and overlapped. After completing this important process, screw the hinges with screws and install the latch with handles. They hang the door.
One of the methods for manufacturing a panel door is presented. You can choose a “lightweight” version of the canvas and not fill the voids with polystyrene foam, but use MDF instead of plywood.
Installing a latch on an interior door
Installation of door frame and door
The next step is to install the frame and hang the door.
- We install the formed box in the opening and fix one side with long self-tapping screws in places that will be closed with hinges.
- We attach the hinges to the door leaf and frame and hang the door.
- We close the door and mark a place for the locking plate. Drill a hole to fit the latch.
- We secure the second side of the box. Before this, you need to close the door and adjust the gap, making it the same over the entire height of the door.
- We install a wooden wedge between the frame and the doorway at the latch level and fix it with a self-tapping screw through the hole provided for the locking hardware.
- We install the locking plate and secure the box with wooden wedges.
Calculation of door dimensions
The dimensions of doors and frames are regulated by GOST 6629-88. Based on the requirements of this act, design documentation is coordinated during private construction. If repairs are carried out in multi-storey buildings, standard openings are made in them.
In order not to carry out unnecessary measurements and calculations, you can use a ready-made table, where the data is indicated in millimeters:
| Blade width | 600 | 700 | 800 | 900 | 1100 | 2×600 | 2×700 | 2×900 |
| Box width | 670 | 770 | 870 | 970 | 1172 | 1272 | 1472 | 1872 |
| Canvas height | 2000 | 2300 | ||||||
| Box height | 2071 | 2371 |
There will be other indicators only if a decision is made to expand or narrow the opening. But here, too, the following calculation methodology can be taken as a basis.
If planning is carried out independently, the dimensions of the opening should be determined in proportion to the area and configuration of the room. For narrow corridors, a wall-to-wall passage is installed.
How to seal cracks
In order to ensure additional stability of the structure, and to insulate a house or room, it is necessary to fill all the cracks with polyurethane foam.
Before starting work, cover the face strips with masking tape. We moisten the cracks with water and fill them with foam. After hardening, we trim the protruding bubbles of the sealant with a construction knife and tear off the tape along with the splashes adhering to it.
Metal entrance doors - constructive
In a typical version, a metal door consists of a frame, a leaf, hinges and mounting elements (plates, eyes, pins). You cannot do without certain costs for materials and components, but a self-made door will cost much less than a purchased one. The exact list of consumables depends on the design, dimensions and purpose - if for a utility unit a simple frame with lining and a latch is sufficient, then to enter the house the door must be multi-layered, with effective locking fittings and decorative cladding. In the second case, an approximate set of what is needed looks like this:
- Metal corner (from 5 mm) or profile - for the box;
- Metal corner or profile pipe - for the frame, stiffeners;
- Sheet of metal - for power sheathing (optimal thickness 2-3 mm).
- Thermal insulation material (mineral wool, polystyrene foam, EPS or PSB);
- Components – hinges (preferably with bearings), seal, peephole, lock/locks, handle, etc.;
- Finishing – wood, forging, plastic (for the inside there are various panels or laminate).
One of the most important stages is measurements; if you make a mistake, the installation of the door will become much more difficult in the future, so you should adhere to certain recommendations:
- All measurements are taken not from the finishing layer, but from the rough wall;
- There should be a groove left between the frame and the opening, the standard one is 2 cm (for alignment and installation seam);
- The gap between the box and the canvas on the hinge side is 3 mm, on the lock side – 5 mm.
Having a working drawing with dimensions or at least a sketch will be a good help; not everyone’s imagination is developed enough to imagine the end result in their mind. Fortunately, there are plenty of quite workable drawings on the Internet, although drawing and drawing are also difficult.
Ideas and options for processing and decoration
Before decorating a wooden door, you need to thoroughly sand its surface. The next very important stage is treating the product with an antiseptic solution. After the product has dried, you can begin decorating.
First, cover the door with primer or putty in two layers. After this, the door can be painted or a couple of layers of varnish applied to the surface. If you have the necessary available tools, minimal artistic abilities and decorating skills, you can decorate the canvas with carvings, polyurethane stucco molding, stencils, and mosaics.
Interior doors can be “revitalized” with wallpaper, fabric, and vinyl stickers.
Assembly of a frameless solid wood door
For such doors, lumber of the required thickness is selected and preferably even in texture, without a large number of knots and defects on the surface. If possible, calibrate by thickness (discrepancy no more than 1 mm). The base is a sheet of plywood or other material. On it, a sheet of lumber sawn along the length is laid out so that it evenly covers the entire surface of the sheet.
The sheet on which the layout was made is smeared over the entire area with wood glue and selected pieces of lumber are laid out on it tightly to each other, while their end sides adjacent to each other are smeared with glue. After all the workpieces have been completely laid out, they must be tightened with clamps or a tie for floor boards (laminate) and a load placed on top, or the boards placed across the door must be tightened with short clamps.
After the glue has dried, the door is processed with a plane along the long side - excess lumber is removed to the required width, then sanded with a grinder to completely equalize any possible differences in the thickness of the lumber blanks.
This results in a door that has a base on one side, and a solid wood surface on the other side, which can be kept in its natural form or covered with some decorative material.