Materials
The hinged base is lightweight and does not require excavation work.
Let's consider how to cover the pile foundation from the outside
It is important that the material used for finishing is durable and frost-resistant, and does not lose its qualities under the influence of temperature changes and ultraviolet radiation.
More reliable is finishing the base of a pile foundation with stone, brick, cinder block, or concrete. This will require excavation work similar to the construction of a shallow foundation.
The suspended structure is lightweight and does not require excavation work. Polymer, wood and composite materials are used, which are quickly and easily installed.
Basement siding
Basement siding is most often used for finishing screw foundations.
It is produced in the form of decorative panels with a thickness of 1 to 2.5 mm.
Advantages:
- Possibility of use in any climate zone, including the north;
- resistance to mechanical stress;
- light weight, ease of installation;
- has low thermal conductivity, retains heat;
- durability 40-50 years;
- does not collapse under the influence of moisture or ultraviolet radiation.
It is possible to cover the foundation of a house with semicircular shapes. For this purpose, a technology was launched into production, thanks to which the material bends easily. Panels of small thickness (1.1 mm) with the addition of synthetic threads are produced.
Profile flooring
One sheet of corrugated board will cover a significant space
Sometimes the question arises of how to cover screw piles so that work can be completed during the day.
In 4-7 hours you can cover the pile foundation with profile sheets.
The width is available from 1 to 4 m, due to this one sheet can cover a significant space.
Advantages:
- sheets with a polymer coating have a service life of 30-50 years, galvanized sheets last 10-15 years;
- Available in various shades and sizes;
- a light weight.
Disadvantages include:
- in places where the coating is damaged, the sheet is susceptible to corrosion;
- The zinc coating gradually evaporates.
Flat slate
Asbestos boards are not an environmentally friendly material
Every year this material is losing its popularity; it is being replaced by modern, environmentally friendly materials.
Advantages:
- resistant to atmospheric influences;
- durable.
Flaws:
- asbestos is dangerous to human health and pollutes the environment;
- fragile;
- unattractive appearance.
Frame system
Is a budget option. To install the sheathing, we use vertical posts made of timber (metal) with horizontal slats and metal profiles attached between them. We attach acrylic and vinyl siding to a pre-fabricated frame. For more information on how to close the basement space in a house on screw piles, watch this video:
Leaf system
You can lay tiles on the mounted profile
It is economically beneficial to use a sheet system.
Device stages:
- We fix a metal profile (corner, pipe) or wooden beam vertically;
- we fasten cement-bonded or asbestos-cement slabs;
- We lay tiles, porcelain tiles, and bituminous shingles on the slab.
Composite materials
As a composite material we use:
- lightweight polymer-sand panels reinforced with cellulose threads;
- fiber cement sheets have great strength and reliability;
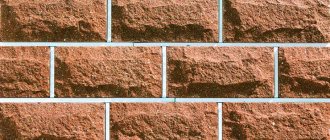
Facing brick
Facing brick
Brickwork is a reliable, but expensive and labor-intensive method of finishing a foundation on screw piles. To lay the cladding correctly and evenly, you need to have construction skills.
Advantages:
- durability, strength, reliability;
- high thermal insulation qualities;
- additional support for house construction;
- aesthetic appearance.
Flaws:
- high price;
- labor intensity.
How to cover a basement space with a brick:
- remove the fertile layer by 30-40 cm;
- we fill in a cushion of sand, crushed stone, and tamp it;
- insulate the sole;
- we lay a brick.
The masonry must be connected using metal pins to the piles. The metal is welded to the sheathing and bonded to the brick using cement mortar.
Articles on the topic
Calculation of the foundation for a house. What load is permissible?
Types of soil for the foundation of a frame house and their features
Which reinforcement is better - metal or fiberglass?
How to cover a columnar foundation of a private house: backfills, siding, natural stone
How and with what to finish the base of a pile foundation of a house. Adviсe
How to choose and install basement siding with your own hands. Instructions for dummies + Video
Vibrating screed for concrete: how to make your own
Rotting floors in the house: tips on how to treat them to prevent them from rotting
Reviews ()
Flat slate
Previously, flat slate was used in almost any type of decoration. Now this option is used in rare cases, as it is considered unreliable. Among the main advantages it is worth highlighting:
- possibility of self-installation if you have a special set of tools;
- increased resistance to decay and negative environmental influences;
- slate allows the use of thermal panels for insulation;
- practically unlimited service life.
However, this type has a large number of disadvantages. The main ones worth highlighting are:
- Increased fragility of the material. It is quite dense, but if it is cut incorrectly or drilled poorly, the slate crumbles and is destroyed.
- Increased complexity of fastening to piles.
- The price of flat slate is significantly higher than most other materials.
- Requires additional work using other materials to give the slate a presentable appearance.
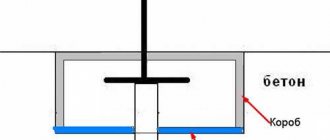
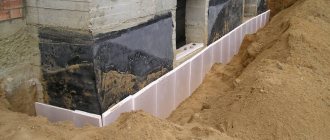
Thermal insulation of a screw foundation
One of the main negative characteristics of this technology for creating a foundation for a house is that the foundation design on screw piles has an underground space, and this, in turn, allows cold air to penetrate from below, which will certainly affect the comfort and microclimate in the entire building.
Thermal insulation of the foundation on screw piles has its own characteristics. The first step is to create a structure similar to the missing base, which is subsequently insulated. Insulation must be carried out in a complex - inside and outside.
Scheme of thermal insulation of the foundation with polystyrene foam.
So, the entire thermal insulation procedure is divided into the following stages:
- treating piles with a waterproofing agent;
- erection of a structure that will replace the permanent base;
- covering the constructed base with decorative panels;
- installation of insulating material slabs from inside the base;
- foaming of insulation joints.
Experts recommend two methods for constructing an imitation plinth:
- lightweight brickwork;
- the use of support bars or slats.
The first method involves digging a small depression (150-200 mm) between the support posts, then pouring a reinforced foundation into it. After it has set, it is necessary to lay half a brick and glue the insulating material to this wall.
The second method is to fix wooden beams on piles in a horizontal position using bolts or metal guides, but then you will need a welding machine. After this, insulation sheets are attached to the constructed structure. According to experts, the insulation can also be fixed directly to the cladding material. It is best to use penoplex or polystyrene foam as insulation material. In addition to excellent thermal insulation properties, these materials have good sound insulation.
Basement siding
The easiest and cheapest way to cover a building on screw piles is with this material. Cladding has the following advantages:
- low cost (even taking into account components);
- ease of installation with your own hands;
- durability;
- wear resistance;
- resistance to rotting and mold;
- wide range of colors;
- ease of operation.
Basement siding
But along with its advantages, siding also has a number of disadvantages. For example, it will not be suitable if it is necessary to insulate the basement of a house on screw piles.
Installation technology
It is quite simple to do house cladding; you just need to know the order of work and the nuances of their implementation. The construction of the plinth is carried out in the following order:
- Installation of sheathing under siding. First of all, fix the bottom bar. It is located parallel to the ground. The distance from the soil surface is set to 150-200 mm. This gap is necessary to raise the skin above the ground. The distance from the panels to the ground after installation should be 50-70 mm. This layer compensates for soil heaving in winter. In warm regions or on coarse foundations, the gap can be made smaller.
- Wooden boards are attached to the piles. To do this, special brackets must be welded to the heads in advance. You can also use a metal profile as a frame, which is welded to the foundations without additional elements.
- Similarly to the first, a plank is attached to the upper part of the base of the house on a screw foundation.
- A vertical sheathing is sometimes made between the longitudinal guides. The need for it depends on the height of the base. When the building is raised high from the ground, it is worthwhile to provide additional elements as reinforcement.
- Siding begins to be installed from the bottom starting strip. Base panels are installed on it. The elements are fastened to the sheathing using self-tapping screws. To install corners, special profiles will be required.
- To remove precipitation from the basement part, flashings are installed on the siding.
- The finishing of the lower part of the house is completed after completing the gap between the ground. The space must be closed so that air can enter, but small debris, insects and other living creatures do not have access.
All wooden elements are treated with antiseptic compounds before starting work. This is necessary to prevent damage by fungus, mold and rot. As an additional measure, fire-fighting treatment with fire retardants can be performed.
Siding is the most common option. In this case, finishing the building is easy and quick. The installation should begin after the construction of the house is completed, when all communications have already been completed. To prevent pipes from freezing in a ventilated underground, they are wrapped in heat-insulating material. Most often, mineral wool is used for these purposes. You can use ready-made thermal insulation elements for pipes, or you can make insulation using mineral wool mats (wrapped in rolls).
Pay attention to the soft waterproofing of the blind area
Siding will be an excellent option to cover the space under the house. To attach the panels to the sheathing, you need to prepare self-tapping screws.
57288f60f8363074e1c9c02a9712267c.jpe
Finishing the base with siding
The siding is mounted on wooden guides.
The market for construction and finishing materials offers many types of siding - plastic and metal, including those with imitation of natural stone and brick. Basement siding:
- durable, its service life is up to 50 years;
- wear-resistant;
- inexpensive;
- easy to install;
- easy to care for.
You can easily and quickly finish the foundation with your own hands using siding. The disadvantage of siding is that it cannot be used if there is a need to insulate the house.
The process of finishing the foundation plinth is simple:
- The sheathing is carried out - vertical strips are attached to horizontal guides. All wooden parts of the sheathing must be treated with antiseptics and fire retardants.
- The lower starting bar is attached. The distance from the panels to the ground should be 5-7 cm.
- Wall panels are fastened using self-tapping screws. They do not need to be fastened by screwing them tightly - you need to leave a compensation gap of 1 mm.
- Corners and tides are installed.
- The lower part of the facade is being formed.
Other options for finishing the basement of a house on screw piles
In addition to base siding, the finishing of the base of a screw foundation can be made from other materials. At the same time, they have advantages and disadvantages, after familiarizing themselves with which, everyone chooses the appropriate option.
Brick finishing
Brick is considered a reliable building material. But to make smooth and high-quality masonry you need experience. Therefore, for such a matter it is better to use the services of professionals.
The cladding is laid on a concrete base or on a metal beam, which will serve as a support. Ventilation gaps must be left in the brickwork. The process takes time and money.
Plastic panels
This option is an affordable and quick way to finish the base. The panels are universal and can be attached to any foundation. They reliably protect against external influences, including biological and chemical. The finish is flexible and can withstand heavy loads.
Corrugated sheet
Another way to arrange a basement is corrugated sheeting. This option is not suitable for wooden and frame houses, because the material is hardly considered universal. But it is durable, perfectly protects from wind and water. It is installed on the sheathing, which makes the process quick and simple.
Flat slate
The appearance of this finish wants to be the best. But slate is used as a base for other decorative finishes, for example, tiles or special plaster.
Several options for this finish can be seen in the photos on the Internet. Asbestos cement sheets are secured with slate nails or bolts. But during installation, you need to remember that slate is quite fragile and cannot withstand strong impacts.
Cement particle board
Instead of flat cement boards, cement-bonded particle boards are chosen. They are more durable, but at the same time lightweight. They are much easier to work with. DSPs are easy to drill and trim. Nails and screws are used as fasteners. This is an excellent base for decorative material.
Moisture-resistant plywood
This is another option that is used as a basis for decoration. Plywood is suitable for the construction of frame houses. The material does not deform under the influence of water. Some craftsmen do not even apply a primer before applying the cladding.
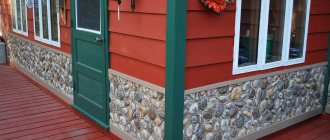
Facing the base with stone
It doesn’t matter whether the stone is natural or artificial, but it is difficult to lay. Therefore, it is better to use the services of a professional team
The material is reliable, durable and resistant to all external influences. But natural stone will be quite expensive, and artificial stone will be cheaper.
Comparison of different types of plinth finishes
To make it easier for you to decide how to cover the foundation of a house built on stilts, study the table, which indicates the advantages and disadvantages of all types of finishing.
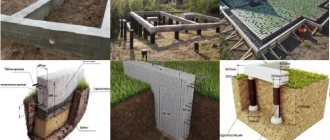
The need to select and arrange a pile-screw foundation is dictated by the need for:
- instability of the soil - its instability, moisture saturation;
- relief features - if the height difference is too large at different points of the base plane; This must also be taken into account when choosing the type of finishing for the basement space.
Considering the characteristics of the unstable foundation, it is recommended to carry out cladding of the base 1-3 years after completion of construction. Then the amplitude of soil movement will be clear - this will determine the decision on how to cover the pile foundation from the outside.
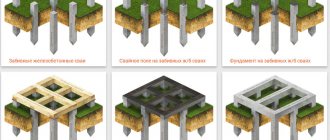
Types of finishing of screw pile foundations
There are quite a lot of finishing options, but there are only two types:
- hinged screen;
- shallow strip foundation.
Screw pile foundations form a basement or ground floor. With the help of piles, a small space is created between the soil and the lower supports of the structure.
During the construction process, the foundation is covered with a suspended or strip structure. With the help of this, a semi-basement space is obtained, which is subsequently used for its intended purpose.
Closing the plinth is necessary. Screw piles are used in three options:
- screw compartment on the tip;
- all-screw design;
- paddle tip.
With all these options, the hinged type is most often used, which is the most popular. This is due to the fact that the hanging screen is more practical and easier to install. Sometimes mixed options are used, when a secondary foundation is laid between the casing. This is especially true when insulation is necessary.
Also, regardless of what types of piles or cladding method were chosen, a lathing made of a profile pipe should be used to strengthen the base. The profile can be selected in accordance with the parameters and lower elements of the house, including pile areas. This must be done for durability.
In this video you will learn how to close the base:
56de7a799c375ed8d294079b59e9564c.jpe
The finishing largely depends on the type of building and the requirements for the basement
Availability of materials is also important. Each type has its own characteristics due to different installation work
The mounted version is aligned along the walls of the house and is not buried in the ground. Fastening occurs using self-tapping screws and other additional elements.
The standard installation time is one day; installation is simple and economical. The finish can be of any material, including stone or wood.
A strip foundation will require a certain set of materials. Typically, such a foundation is constructed using stone or brick masonry in combination with concrete elements.
This type of finishing is buried in the ground; for this reason, certain properties of the soil under the house are required, as well as a flat surface in the area where the load-bearing piles are installed.
Methods
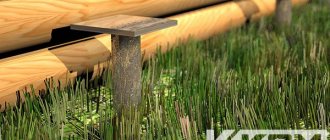
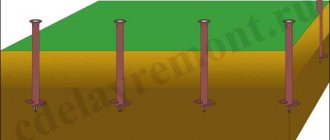
A screw pile is a metal pipe with a thread at one end and a flat head at the other, somewhat reminiscent of a huge nail. Piles can be up to 2.5m long and have a blade at the end rather than threads or threads throughout the body. To prevent corrosion, the products are coated with black ship primer.
Empty space under a building not only looks unsightly, but also poses a threat to the structure. Evaporation of wet soil, snow and rain getting under the building, grass sprouting - all this does little to preserve the building, and small animals - from lizards to cats - willingly use this space.
But how the foundation base is insulated from the outside, and how to do the work yourself, can be seen here.
Video showing the finishing of the base of a pile-screw foundation:
Finishing allows you to solve the listed problems. The general principle of cladding is very simple and does not require costs.
- First of all, install the sheathing. It is allowed to use a wooden beam pre-impregnated with an antiseptic and a metal profile. The latter option is much more durable, since the tree will not withstand constant contact with wet soil. But how the sheathing for siding occurs is described in more detail in this article.
- The dimensions of the frame are determined by the dimensions of the finishing sheets.
- Insulation is attached to the frame, if necessary, and then the selected finishing material is installed.
But how the foundation is insulated from the outside with penoplex, and what you should pay attention to during the work, is indicated here. Brick, basement siding, and even simple plaster are used as cladding.
Brick, basement siding, and even simple plaster are used as cladding.
Brick finish
This is the most expensive method, and also requires certain knowledge and skills. If they exist and the costs do not scare the building owner, then this option is easy to implement. It has a lot of advantages:
The disadvantages include the cost of such a solution and the duration of installation: masonry takes time.
Basement siding
This option successfully imitates brick and stone masonry, but is much lighter in weight and costs noticeably less.
Basement siding consists of vinyl panels of increased strength and rigidity. It is also distinguished by a more reliable joining method and high resistance to wind loads.
2ac0b7b8ccbe91c4947b2945c29c698e.jpe 63bafb50010f04108c5a606f1f83b400.jpe
Their advantages are:
- ease of installation - finishing can be completed in one day, and on your own;
- relatively affordable cost;
- excellent choice of colors and textures, you can choose the best option for any type of building;
- strength and good durability: plastic does not rot, does not corrode, is resistant to ultraviolet radiation and is designed for 50–60 years of service;
- The base can be washed with plain water or detergents.
It will also be interesting to learn about how the foundation of a house is insulated from the outside with polystyrene foam.
The only drawback is that in terms of durability, plinth panels are still inferior to brick.
Corrugated sheet
This is a metal profiled sheet with a zinc coating that protects the steel from corrosion. Available in a variety of colors, thicknesses range from 9.5 to 0.7 mm, and are more than affordable.
Advantages of the material:
- these are lightweight materials, so there are no difficulties with installation;
- the finishing process itself takes several hours, no more;
- low cost;
- complete fire safety;
- rich color range.
Disadvantages of the product:
- corrugated sheeting is afraid of damage: a deep scratch damages the polymer coating and the zinc layer. As a result, moisture can reach the steel and in this area the metal begins to rust;
- leaf shape varies within very small limits;
- the paint loses intensity and shine over time;
- in fairness, such cladding is only suitable for buildings finished with plastic or metal slats.
But what a canopy made of corrugated sheets adjacent to a house looks like, and how it can be made, you can read and see the video in this article.
In the video, finishing the base of a pile-screw foundation with corrugated sheeting:
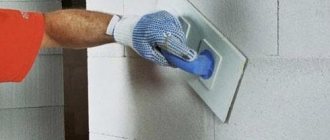
Decorative plaster
This option can only be implemented in conjunction with insulation of the base. Its essence boils down to attaching heat insulating slabs made of dense material to the frame and applying a plaster layer to them.
The slabs are pre-primed. It is better to use silicone or fiberglass as a plaster mixture, since they are most resistant to moisture. You can see how façade plaster on polystyrene foam is used here.
Communities › DRIVE2 At The Dacha › Blog › Closing the pile-screw base.
Warm dacha greetings to all Drayvovites. I went through different options for the subject, and finally settled on this one. Cover it with extrusion and cover it with aceid. You can then stick anything on top of the aceid or just paint it. And so, step by step. We dig a trench 30-70 cm deep, depending on how heaving the soil is. Mel1971 and I have clay, so we dug 50 cm (we didn’t have enough strength for more).
The top board goes along the top of the piles and is attached with self-tapping screws directly to the frame of the house, the bottom board is parallel to it, 5 centimeters above the ground level at the lowest point.
Since the piles somehow protrude or move away from the vertical, we adjust the places where they intersect with the bottom board so that they are in the same plane with the top one.
Creating a shallow strip plinth
Stage 1. Preparatory work.
05d315fee2378252e7589ead343feb11.jpe
Before starting work, a trench is dug around the perimeter of the house, the depth depends on the type of soil, usually 30-60 cm, after which a sand cushion with a thickness of 10 cm is poured into the bottom of the trench.
2. Stage. Creation of formwork.
This stage is typical for any type of monolithic foundation. To create formwork, boards are most often used.
3. Stage. Reinforcement
For reinforcement, metal rods with a diameter of 10-16 mm are usually used, which are laid along the entire trench
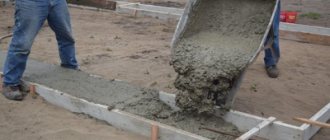
4. Stage. Filling.
The formwork is filled with concrete mixture. You should be careful to prevent the formation of voids in the concrete by compacting the poured mortar every 20-30 cm. After 2-3 days, the formwork is removed, the top and side are waterproofed using mastic or roofing felt.
5. Stage. Masonry.
Brick or cinder block masonry is laid on the finished shallow strip foundation, vents are created, and brickwork is placed under the log.
6. Stage. Finishing work.
After the entire structure is ready, the façade of the plinth is finished (plaster, cladding with decorative stone or panels).
When covering the base with siding, you should use a metal sheathing, and place a heat insulator in the formed cavity, between the base and the siding. This will allow the basement of the building to be highly insulated.
Conclusion
In conclusion, I can say that there are many options for covering the base of a screw pile foundation. It all depends on the financial component, the type of soil and the terrain. In most cases, the hinged type of plinth wins, as it gives a wide choice in the use of materials, is suitable for any terrain, self-assembly is possible, and most importantly, you will save the family budget. I hope this article will help you make the right choice in such a difficult issue as closing the base of a foundation made of screw piles.
How to sheathe the base of a pile-screw foundation with your own hands
To cover a pile-screw foundation with your own hands, you need:
- Attach the starting strip of siding to the bottom rail of the frame with a self-tapping screw pitch of 30 cm.
- The corner strip is attached with a gap of 10 mm, observing a screw pitch of 30 cm.
- Secure the third panel into the groove of the starting strip and slide it into the corner strip, leaving a small space for possible expansion of the material.
- Secure the bar using self-tapping screws.
- Insert the next strip into the corner strip and slide it towards the bottom rail and secure it.
- Install the remaining panels. The height of the last panel can be trimmed if necessary.
- Install a second corner strip, which will act as a starting corner for the next wall.
- Secure the finishing strip.
All panels must be installed with small gaps of 20-30 mm and secured with 5 self-tapping screws. Installation of the cladding should be carried out without tension, since under the influence of temperature the material can change its dimensions by 6-7 mm.
Instead of self-tapping screws, galvanized nails (30-40 mm) with a wide head can be used. In this case, a small gap must be left between the cap and the finishing material.
How to make a hanging plinth with your own hands?
Soil preparation
- The site is cleared of vegetation and debris.
- A 50 * 40 cm trench is dug along the perimeter of the screw foundation, the inner border of which goes under the walls of the house. The bottom of the trench deepens away from the walls by 3 cm every 2 cm.
- The ditch is waterproofed. Possible materials: roofing felt, galvanized steel, PVC film.
- Drainage is installed - a polyvinyl chloride perforated pipe. Lay it on a 10 cm layer of crushed stone.
- Drainage wells are brought to the surface to flush the system.
- The drainage is filled with crushed stone (10 cm).
- A sand cushion is formed along the perimeter with a slope from the walls 10-50 cm thick.
- A blind area is constructed - a waterproof strip around the perimeter of the house with a slope from the walls. Purpose – protection from rain and melt water. Width not less than 50 cm. Materials: concrete, asphalt, paving stones, tiles.
Hanging structure - frame for finishing
- Guides, for example, wooden beams or metal profiles, are attached to the piles with self-tapping screws or welding. Metal parts are installed in close proximity to the ground. The pitch between vertical guides is 90 cm, between horizontal ones is 45 cm. It is recommended to use horizontal sheathing for the base.
- The lathing is constructed from metal corners, wooden boards or pipes. The sheathing covers the visible part of the screw foundation. First, a starting strip is attached at a height of 15-20 cm from the plant layer, then vertical slats are mounted. The pitch between the slats is 40-45 cm.
- The wooden frame is treated with a protective compound, for example, an antiseptic.
Finishing
- Finishing materials are fixed on the sheathing layer by layer: from insulating to decorative. Insulating materials: asbestos-cement slabs, slate sheets, thermal panels. Before small-piece finishing, such as natural stone, plinth panels are installed. The base is polystyrene or thermal insulating polyurethane foam.
- Corners are formed corresponding to the corners of the house.
- The seams are treated with a protective compound, for example, sealant.
- Additional elements, ebbs and drips are installed - optional components.
Installation technology for suspended plinth finishing
Installation begins with assembling the sheathing. For its manufacture, either wooden slats or a metal profile are used. In the first case, the frame elements are screwed to steel brackets, which are welded to the piles in advance. The profile is welded directly to parts of the screw foundation.
As a rule, the sheathing consists of two parallel boards, one of which is attached directly under the wall of the house, and the second at a height of 150–200 mm from the ground. This distance may vary depending on the climate conditions in the region. It is necessary to ensure that 50–70 mm remains from the edge of the decorative slabs to the ground surface - this is necessary to compensate for the thermal expansion of the soil.
After installing the parallel elements of the sheathing, vertical slats or a metal profile are mounted. This is done to ensure greater structural strength if the base is too high. In this case, the installation step is 400–450 mm.
A shallow trench 30 cm wide is dug along the perimeter of the house and filled with sand. Then insulating material is installed on the sheathing. A roll of waterproofing is fixed on top of it, the end of which is lined with sand. The edge of the roll is compacted into sand. Paving slabs are laid on top. This design is called a blind area and plays the role of a drainage system that protects the base from excess moisture.
If siding is chosen as the finishing material, a starting profile is installed at the bottom of the base on top of the insulation. Decorative panels are inserted into it, which are then mounted to the sheathing through the thermal insulation using self-tapping screws. The corners of the structure are reinforced with special profiles that come with the siding. To protect the base from precipitation flowing down the walls, metal flashings are installed on top of the finish.
Mount the hinged panels following several rules:
- the wooden elements of the sheathing are carefully treated with antiseptic and antifungal impregnations;
- The drainage area is constructed at a slight slope from the building (no more than 5°).
slabs of decorative material are installed with small gaps to ensure ventilation of the space under the house;
If plastic panels or corrugated sheets are used instead of siding to finish the foundation, the technology for installing the material is even simpler. A starting profile is not needed; the trim is attached directly to the sheathing, maintaining a gap between the lower edge of the sheathing and the ground surface.