What to choose a septic tank or cesspool
The wastewater from the outlet pipeline is collected in a reservoir, which can be a septic tank or cesspool. +
A cesspool is a deep pit dug in the ground and reinforced with brick or concrete. Some of the wastewater decomposes, some goes into the ground, but most of it remains in the pit, so it is regularly pumped out. This type of tank is suitable for private houses with a small amount of drainage, or for the time being until a septic tank is built. +
A septic tank consists of a settling tank where wastewater is decomposed bacterially to an insoluble residue. The clarified wastewater enters the filtration well and then disperses through the filter layers into the ground. It is extremely rare (compared to a cesspool) that a septic tank will have to be cleaned of insoluble residues.
Answers from experts
Sergey Parfilov:
A separate foundation is ALWAYS made for the stove. Do waterproofing and fill the slab. The soil inside the perimeter of the house will not freeze, so the groundwater level is not critical
HARSH DECEMBER:
My personal opinion is, in any case, on a separate foundation.
Wanderer:
A separate foundation for the stove, I think... It might “float” relative to the house. In general, I don’t see the point of putting a stove in a house on stilts. Install a modern one made of metal...
Natalya Klemyatich:
and you don’t know how the ancestors solved this issue?... When... they didn’t lay the foundations? and nothing left and the stoves were more respectable
Aa Kk:
We poured a separate slab under the stove. Then on top - a reinforced screed for the entire house, 8-10 cm thick.
Alexei:
Your house is raised on stilts, it is not very convenient to place the stove on stilts, and the slab on the ground will be low for the stove.
Conclusion - arrange a slab foundation on piles. Piles, formwork, reinforced frame, slab
Dmirtit Raskol:
Whatever one may say, you will need a formwork device, if you don’t know the technology, then consult, I just ordered, I would advise you to change the foundation structure, if there is good drainage of groundwater, you can install a prefabricated strip foundation and it will be much easier to install the furnace)
Stewardess DK Death Guard:
what kind of piles?
Bison Che:
In such cases, I recommend that you turn to professionals, they will do everything for you quickly and you will be satisfied with yourself!)
Georgy Glurjidze:
Plywood is not allowed - it can get damp in winter
You can put plastic sheets or make boxes - glue them with foam or silicone and insert them bottom up
The soil under the box will swell upward - there is enough space - and the column will not be pushed out
You can simply fill it with sand without compacting it - it won’t put pressure - it’s plastic.
Druid:
Fuck you Leo Tolstoy, while I read half the question I drank a mug of tea and ate three cakes. Now I’ll finish reading the second half and answer. Let’s go. 1. Question: if you fill a depression under a corner with concrete, then in winter there will be heaving of the soil? Answer: where did you get the idea that there will be heaving of the soil? Are there any places nearby where this is happening or has already happened? Even if the enemies pour you water under the hangar, which freezes and causes heaving, it will be at a depth of half a meter, the remaining one and a half meters of the piles will be in clay.
2.: ...which will be quite bad for a welded hangar... Answer: If you have trusses and not beams, then heaving will not affect much.
3. ...a damper layer was proposed...Answer: The damping effect reaches its maximum effect in a short period of time, such as during a push or impact. When gradual pressure occurs, the effect decreases.
4. ..lay plywood...Answer: a dubious option.
5. Question: To what extent is this idea not crazy and correct? Answer: in fact, all you offer is stucco molding and bells and whistles. To be honest, there are doubts that the soil under the asphalt in the hangar will heave, but the hangar will be at least somehow heated, which means it will not freeze, and even if it is not heated, the soil there will not freeze. In the mid-2000s, I worked in a motor transport company and we had a hangar there for all sorts of rubbish, a huge one, 500-600 square meters, so the ground there never froze, and if water spilled on the floor it froze, but the ground underfoot was always soft and dusty.
Alexander:
This is from the series: everyone should mind their own business. The designer must design, the builder must build according to the drawing. And so at first you did something stupid and now you think. And I don’t know where this will lead. Fill it with heaped asphalt and tamp it down more firmly. Asphalt is plastic, if anything cracks then use primer and mastic and sand. But in my mind it was necessary to weld other heads and place them above the asphalt level. Dig the pile to a depth of 30 centimeters, wrap it with hydroglass insulation and fill it with any concrete above the asphalt level so that no random water flows down along the wall of the pile. And so that the pile does not move to the side less, they make a strapping. Now compare with what was done.
Mark Imm:
Look here id=”nickname”>Alexey:
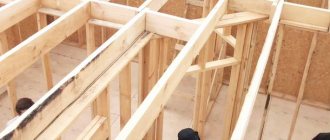
Communications in a frame house. Ventilation
Ventilation in a frame house
- an absolutely necessary thing, because it works like a huge “thermos” and is completely covered with plastic film, on which steam settles. It needs to be ventilated, and people need fresh air.
Ventilation of a frame house is needed for: the influx of fresh air and the extraction of already used air (with carbon dioxide) outside.
Inflow
air in frame houses is usually provided through windows (micro-ventilation, or vent), although there are also options with KIV dampers (and their analogues) mounted directly into the wall, as well as more advanced systems of forced air flow with recovery (but not entirely relevant for an economical home ).
Extracting used air
usually done through a pipe that goes from the room to the roof. It can work both in the “natural draft” mode (but this is a problem this summer, because the temperature difference is small, which means it won’t “pull”), and on fans that force air out when turned on (which can be also powered, for example, from the light in the bathroom or kitchen).
Hood in a frame house
must be done: a) in the kitchen (through a special umbrella) b) in the bathrooms (you can through the wall, but it’s better not to do that) c) from a gas boiler in the boiler room (you can through the wall) d) from the hall with bedrooms (and if under the door There are cracks in the bedroom, then the air will be drawn out through this corridor and from there) d) from (if a gas boiler with an open burner is used).
Ventilation of a frame house is a very responsible and important matter; do not listen to those who say that the walls “breathe”. A frame house breathes only if you have a frame-slit house from crooked builders, a real frame house does not breathe, it’s a thermos with a sealed film inside
Schematic diagram
After considering different options, I decided to do this.
- The main line is 110mm. There is a main drain line of 110 diameter that runs under the house to the corner. There is a vertical transition and then the pipe goes underground to the septic tank. Why not go straight into the ground? Firstly, because I’m too lazy to dig under the piles. Secondly, there is a fairly long distance to the septic tank and a high groundwater level. If the required slope is observed, the pipe will approach the septic tank at a decent depth, which increases the labor costs for its implementation. The air section will be properly insulated in the future.
- Secondary highways. There are several of them in the house, in addition to sinks, a shower and a toilet, there are also emergency drains in wet rooms (an extremely useful thing) and water drains from household appliances. It was decided to install these pipes in the ceiling. With exits to the toilet or independent exits to the main highway under the house.
In the diagram: the orange line, the main line, running in insulation through the air, the blue ones, those that go in the ceiling. Branch 1 pipe of 40 diameter from the washing machine, then switch to 50, connect to the shower drain branch, exit to the washroom at the toilet and down, to the main highway
Branch 2 Emergency drain from the technical room, on the way to this branch the emergency drain of the bathroom is connected, through the sink drain we bring everything into the main line.
Branch 3 The drain from the kitchen sink connects to the emergency drains in the steam room and dives into the main line.
The central highway runs at a slight angle, because direct installation under the house is hampered by the diagonal jibs that connect the screw piles + there is a Christmas tree growing on the corner of the house, into which the pipe would directly rest.
How to properly insulate water supply and sewer systems
Schematic diagram of insulation of water supply to a bathhouse frame installed on screw piles
Layers of insulation of a water pipe at the water inlet into the bathhouse
Often, as an argument in favor of building a bathhouse on a strip foundation rather than on screw piles, considerations are given about the impossibility of installing winter communications, water and sewerage in the underground space of the log house. The strip foundation seems to be warmer and protects the pipes from freezing. Let’s not deny that “bare” screw piles and concrete strips with closed vents retain heat differently. However, to protect communications from freezing, it is better to provide local protection (insulation and heating) of pipes, rather than warming up the entire underground space under the bathhouse. In severe frosts, strip foundations cannot always maintain a positive temperature under the log house, because the floors of the log house are insulated and do not allow heat to pass down, and besides, according to the laws of physics, warm air always rises to the top. Any temperature below 0°C is enough for a water pipe to freeze. Freezing of a sewer pipe of standard diameter (110 mm), taking into account the fact that warm water enters the drain, often with organic impurities, and does not linger in the pipe, is practically impossible in any case that occurs in our latitudes (in Moscow and St. Petersburg) negative temperatures.
To prevent the water pipe under the bathhouse from freezing, the pipe from the water intake source (no matter what: central water supply, well or well) is laid underground below the freezing depth of the soil. For the Central and North-Western regions of Russia, the freezing depth is in the range of 120-150 cm and depends on how much snow fell in a particular winter, what kind of frost there was and how much water is contained in the surface layer of soil at the site of construction of the log bathhouse
The ditch for the water pipe is placed inside the dimensions of the log house, so that the pipe can be lifted strictly vertically and get to the right place in the bathhouse. It is not allowed to lay water pipes horizontally in the underground space - this can lead (and will certainly lead - a matter of time) to freezing of the pipe. For pipes, it is best to use HDPE (low-density polyethylene) pipe with a diameter of 32 mm (inch). HDPE pipes can withstand repeated freezing without compromising the integrity of the structure. So even if they are completely frozen, it is enough to simply warm them up.
To insulate a vertical section of a water pipe (from the freezing depth to the entry into the bathhouse), a heating cable is wound onto it in a free spiral, then a casing made of foamed polyethylene is put on, after which the entire structure is placed in a drainage pipe with a diameter of 200 mm, into which expanded clay is poured. For waterlogged soils, instead of backfilling with expanded clay, we recommend pouring foam. The bottom of the insulated drainage pipe is laid at the freezing depth, the top is brought to the floors inside the log house of the bathhouse. The heating cable does not have to be turned on all the time: only in severe frosts or if, after a break in the use of the water supply, water has stopped flowing into the bathhouse due to the formation of an ice plug in the pipe.
It is best to also thermally insulate sewer pipes running in the open part of the subfloor under the bathhouse frame using casings made of foamed polyethylene. If pipes with a diameter of less than 110 mm, for example 40 or 50 mm, are used to drain wastewater from the bathhouse, for safety reasons we recommend running a heating cable along the bottom of the pipe (not in a spiral, as in a water pipe, but in one line, strictly below). It is permissible to stretch sewer pipes in a horizontal direction (a slope of 2-3 cm per 1 m of length for fecal waste; for water drainage, the slope is not important), however, the shorter the horizontal section in the underground space of the bathhouse log and the faster the pipe gets underground and then into septic tank (or other type of wastewater intake), the less likely it is for ice to freeze and clog inside the pipe.
Is insulation mandatory when installing sewerage in a house on screw piles?
Often, when leaning in favor of a concrete foundation, customers say that they find it the least cold. They are confident that choosing this type of foundation will allow them to keep the floor in the house warm and protect the pipes from freezing. Floor insulation is a topic for a separate big conversation, in this article we will try to figure out whether this statement is true for the sewerage system.
Based on regulatory documents, the approach to insulating water supply and wastewater systems is the same for all existing types of foundations. Since concrete, for example, has high thermal conductivity, the only thing you will be guaranteed to be protected from is the wind. In the case of screw piles, the same effect can be achieved, for example, by covering the base of the house with decorative panels, siding, fiberboard or chipboard, etc. Thus, both in the case of a concrete foundation and in the case of a foundation on screw piles, it will be much easier to take care of local protection (insulation and heating) of pipes rather than warming up the entire underground space.
It should be said that insulation can be abandoned altogether if during the construction process you take care to comply with several conditions.
- The correct angle of inclination of the highway. Since the installation of a sewerage system is carried out, as a rule, using the gravity method, then at a certain slope (2-2.5 cm per 1 meter of laid pipeline) water will not stagnate in the pipes, which will avoid blockages, traffic jams and subsequent freezing at subzero temperatures.
- Constant availability of hot water in the house. If any temperature below 0°C is sufficient for freezing of a water pipe, then freezing of a sewer pipe of a standard diameter, taking into account the fact that the water mostly enters the drain is warm, often with organic impurities, and does not linger in the pipe, is practically excluded in any event. in our latitudes there are negative temperatures.
- The location of pipes beyond the depth of soil freezing. In accordance with SNiP 2.04.03-85 “Sewerage. External networks and structures”, the minimum depth of pipes depends on the climatic characteristics of a particular region, soil composition and groundwater level. For example, for the Central and North-Western regions of Russia, the freezing depth indicator is in the range of 120-150 cm. Accordingly, the sewer pipe in these regions should be laid below the specified level of soil freezing.
If you cannot meet at least one of the listed conditions, then it is better to take care of sewer insulation.
Communications in a frame house. Electrics
The power supply system of a frame house consists of an external and internal electrical network. The internal one, in turn, consists of a panel, sockets, switches and current consumers. In our area, the current is usually connected from a pole through the air, after which the input node into the house must be grounded again, even if grounding has already been done at the pole. First, we decide on the layout, then we think through all future consumers (household appliances, appliances, etc.) in our layout. It is especially necessary to determine precisely the “special” consumers (stove, refrigerator, hob, boiler). These consumers are special, they either have their own special automatic machine or they must be placed on a special non-disconnected line, etc. This is not your headache, but a headache for the designer of your future shield (I wouldn’t dare to design a shield myself, there are a lot of subtleties in this matter.) It’s best to find a craftsman whom you trust. As with, it’s better to trust this matter to an experienced designer, and not to a fly-by-night company.
After you have designed and installed the shield, you will need to route the cables from the circuit breakers around the house. Ideally, you should be provided with a specific panel diagram with an explanation for each machine. In my case, it looks like this:
Those. from two circuit breakers that are attached to one RCD there are 3 phase wires going to 3 bedrooms. And already there they come to the first block of sockets in the bedroom, from which they go to the second block of sockets, etc. The same applies to the kitchen and living room and other rooms. Ideally, you also need to have a separate shield for (if you have one in the house).
This is what my two electrical panels look like:
Features of sewerage in houses on screw piles
The preference for a pile-screw foundation imposes only one essential requirement on sewer installation: the ditch for laying pipes must be at a standardized distance from the piles. That is why a project is prepared in advance, where the plan shows the placement of screw piles and sewers.
Schematic diagram of sewerage
Clause 5.1.2. SNiP 02/31/2001 the sewerage system in a house on screw piles connected to a centralized network includes: +
- internal network;
- release from the building;
- outlet pipeline.
If it is necessary to build an autonomous sewer system, the concept diagram is supplemented by a septic tank and treatment facilities. +
Internal sewer network
The choice of size and configuration of the internal sewer network is determined by: +
- dimensions of the house;
- location of water supply sources.
The internal network includes plumbing fixtures (sinks, sinks, toilets, bidets, bathtubs, showers, washing machines, dishwashers, etc.), which require their own drainage to operate. The schematic diagram of the internal sewer network consists of: +
- The main line with a diameter of 100 mm, to which the toilet and bidet are connected;
- The main line with a diameter of 50 mm, to which all other plumbing fixtures in the bathroom and toilet are connected;
The main line with a diameter of 50 mm, to which all plumbing fixtures and equipment in the kitchen are connected. +
External sewerage
The lack of connection to a centralized sewer network forces the installation of a wastewater collection tank on the site. According to the standard, it should not be located closer than 5-8 m from the house. The reservoir and the house sewer network are connected by an outlet pipeline laid in a trench with a slope of 2-2.5 cm per linear meter of pipe. +
Advantages of polypropylene pipes
All work is greatly facilitated if you use polypropylene pipes, which are compatible with other materials, they are durable, do not corrode and are lightweight. Cutting such pipes will not be difficult with a regular hacksaw or special scissors for cutting pipes.
To ensure that your indoor water supply system works properly, install faucets on hot and cold water pipes, as well as on other plumbing fixtures, such as toilet tanks, sinks, washing machines, and dishwashers. In cases when you need to turn off the water in the right place, you do not have to turn off the entire “riser” but just turn off the tap to the consumer. If you plan to have water-heated floors in a frame house, be sure to install taps. Technological hatches are used for access to cranes; they must be located in a convenient and accessible place. <.p>
Open the ball valves smoothly so that water slowly fills the entire system. Water hammer damages plumbing fixtures and pipes. During operation, it is necessary to open/close the ball valve completely - since when the valve is not completely closed or opened, salts will be deposited on the ball, and they prevent the valve from opening and closing.
For a strong threaded connection, use tow, wind it clockwise, use a special sealant paste to improve the tightness of the connection. Tighten the threads well with a pipe wrench, but do not overtighten or twist the threaded connection.
To install plumbing in a frame house with your own hands, we need the following tools:
- Manual pipe wrench – designed for a strong grip and grip on pipes;
- Adjustable wrench – designed for tightening and unscrewing nuts;
- Scissors for cutting polypropylene pipes;
- Construction tow – for winding pipes;
- Adapters for pipes of various shapes;
- Soldering iron for soldering polypropylene pipes;
Mistakes when installing water supply and sewerage systems, how to avoid them?
The installation of sewerage and water supply systems must begin with a ready-made design of engineering systems. Maintain the correct slope of the pipes. Do not try to insert additional risers into the common sewer riser for cold and hot water supply using one hole. Always install shut-off valves on each plumbing fixture so that you can turn off the water not only in the entire house, but also separately at the plumbing fixture and service or replace it.
The cutting line of the polypropylene pipe must be exactly at a right angle. The pipes are connected to each other using a rubber gasket; if the pipes are difficult to connect due to the rigidity of the rubber bands, spray them with silicone grease. Assemble short structures and install them on site.
The following pipe diameters must be used in the drainage system:
- For the central riser and toilet drain outlet - a 100 mm pipe;
- For vertical outlets of the riser - pipes from 65 to 75 millimeters;
- For a combined bathtub and sink drain, 50 mm pipes are required;
- Bathtubs and sinks - for them use pipes measuring 40 millimeters;
- For sinks and sinks, pipes with a diameter of 32 millimeters are suitable.
Internal networks
To install a sewerage system in a frame house with your own hands, you need to study all the intricacies of this matter.
So, when installing internal sewerage, it is necessary to take into account the gaps to protect the pipes and the shrinkage of the building that will occur with a foundation on screw piles. Horizontal elements must be placed in such a way that they have a minimum length and are attached to the walls without rough connections.
The optimal material for internal sewerage is polypropylene or PVC pipes with a diameter of 50 mm. As for the toilet, you need to use a 110 mm pipe. Initially, install the distribution pipes from the common bathroom. This means that pipes must be used to connect the toilet, shower, bathtub, and washing machine to the sewer.
To ensure that pipe cleaning in the future occurs as quickly and conveniently as possible, it is recommended to install an inspection at each turn. In addition, it is necessary to seal each seam and joint to increase the strength of the sewer system. The installation of external sewerage does not begin until the internal part has been assembled.
Useful: Water supply for a frame house
Communications in a frame house. Heating
First of all, you need to decide what fuel to use to heat your frame house
. Heating can be gas (mainline or from a cylinder), electric, diesel or solid fuel (in particular, a stove).
After you have decided on the fuel, you need to choose pipes for heating: - polypropylene
(PPR) - the simplest option and the most frequently used “by the people”. Among the advantages: the cheapness of pipes and fittings (although real European PPR is no longer so cheap, if the PPR is very cheap, think about it, this is clearly a Chinese fake), ease of installation (even by a non-professional), the tools you need are special budget scissors and the same budget soldering iron. disadvantages: not the most reliable pipe, the quality of installation is not obvious (you can’t look inside).
— metal-plastic
- also a frequently used material.
Pros: pipe flexibility, easy installation, average price. of the minuses: frequent complaints about the quality of pipes and the tightness of fittings. — cross-linked polyethylene PeX
is a more decent material, used for underfloor heating pipes.
Pros: reliability, durability. of the minuses: the price is already decent, you need an expensive tool for installation, installation is more complicated, the pipe is “unruly”. — copper
is the most expensive and “cool” material. In Canada, this is essentially the only one they use. A very durable material, but also very expensive (but then the fittings are cheap).
For installation you only need a torch and, most importantly, “straight” hands. They often say that in the end the cost turns out to be a little more expensive than even PPR, I myself have not yet decided on the final opinion, but copper is certainly good.
Frame house
Can be heated with both underfloor heating and radiators. The second, although not so beautiful, is much simpler and more repairable, but we are building a frame for ourselves? I chose bimetallic radiators for myself, which combine the advantages of steel (strength) and aluminum (heat dissipation) radiators. Perhaps I will still install heated floors, but I will add this information to the post later.
Now you need to decide on the heating system
.
It can be either single-pipe
or
double-pipe
. Single-pipe is a relic of the past and now it is not recommended to use it, the pipes for it need to be thick, and the heat regulation in it is lame. So I am definitely in favor of a two-pipe heating system in a frame house, and in any other one.
After choosing a system (if it is a two-pipe system), you need to determine whether your pipes will go in the same direction throughout the house ( sequential diagram
), or in two or even three (
collector circuit
). In the first case, if the route turns out to be too long, then the last rooms in this sequence may not have enough heat, do not forget also the need for “high thresholds” at the entrance doors, a pipe will go into them, so I am in favor of a two-pipe collector system. For example, it looks like this:
Correct connection of a large radiator (diagonal).
If you do not connect it diagonally, but, for example, make both the entrance and exit from it in its lower parts, then such a radiator will give off much less heat, it will simply not warm up all the way.
Is it necessary to insulate the sewer system in a house on screw piles?
Often, a concrete foundation is chosen precisely because it reliably protects the house from the cold, including protecting sewer and water pipes from freezing. Regulatory documents state: there is no fundamental difference in the insulation of sewers under foundations of various types. +
Concrete easily conducts heat, so it protects the pipes only from the wind, so in both cases the pipes need insulation, and in cold regions, heating. This is much more profitable than heating the entire space under the floor of the house, unless it is used for any purpose. A number of measures will allow you to eliminate the cost of pipe insulation from the estimate. +
Highway slope
. Maintaining an inclination angle of 2-2.5 cm for each linear meter of the sewer line guarantees the movement of waste in the direction of the reservoir by gravity, which will prevent plugs from forming and freezing of the pipes.
Year-round use of hot water
. The water supply runs the risk of freezing at any negative temperature, while the sewer drains are replenished with hot water, so they are not in danger of freezing.
Laying pipes below the ground freezing level
. According to SNiP 2.04.03-85, in the North-Western and Central regions, pipes should be laid to a depth of 1.2-1.5 m.
It is important to comply with all these conditions exactly, because only then can you avoid spending on insulating sewer pipes. +
Sewerage wiring in a frame house: main points
If we consider the sewerage system in more general terms, then it is a network of branched systems that are designed to carry and discharge waste water. At the inlet, all these pipes are connected into one common flow, which exits to the outside of the building and is recycled.
Sewerage in a frame house: stages of formation
Below we will look at the sequence of actions, following which you can install a sewer system into a frame house with your own hands.
- Drawing up an internal network diagram
Drawing up an internal network diagram. It is better if this work was carried out during the design of the future house, when you will estimate the location of the rooms and their functional purpose. Having an idea of where and how the rooms and plumbing will be located, the developer will be able to determine where and how the sewer pipes will be laid. This means that already at the time of construction and construction, it will be possible to provide, if not all, then most of the technological openings for pipes in the walls and ceilings.
Advice!
- Determining the location of the central riser
The complexity of these works lies only in their volume. Modern pipeline elements are quite easy to install. All straight elements are hermetically connected into a groove with a rubber seal. For additional protection against leaks, it is recommended to treat the joints with silicone.
.
Sewer pipes are usually located in the walls or under the floor of a frame house. The system is built on the principle of gravity, when the movement of water is directed from bottom to top under the influence of gravity. An important condition in this case is the following: the sewer outlet must be located below the other pipes.
There is also an option for installing a pressure sewer system; its installation uses pumps that direct the water flow in the desired direction. Pressure sewerage justifies itself when there is a need to install plumbing or equipment below the level of the outlet pipe, for example, installing a laundry room in the basement of a house.
In the case of a gravity sewer system, the slope of the pipeline should be monitored. For pipes with a diameter of 5 cm, a slope of at least 3-4 cm is required, when using pipes with a diameter of 10 cm - 2-3 cm for each meter of length.
- We organize sewerage release
Regardless of whether a sewerage connection from a frame house to a central one will be organized or a septic tank will be provided, the installation of a sewerage outlet is important. Its main function is to connect the internal and external sewage systems in a frame house
This element of the sewer system is most often located directly next to the riser. It is best to install the outlet at the initial stages of laying sewerage in the house.
Usually, in order to avoid freezing of wastewater in the pipeline, the outlet is installed deep in the foundation with a depth of at least 1 meter. In some regions with warm climates, a shallower outlet location is possible. The outlet hole should be provided at step. If this has not been provided, you will have to put in quite a lot of effort to make a hole of the required size in the concrete base.
- Installation of the riser and connection of wiring
The best option is to install a riser in the room where the toilet is located, i.e. in the bathroom or, because there are recommendations according to which the length of the waste pipe from the toilet to the riser should not exceed 1 meter.
As we have already said, sewer pipes are usually located in the walls or under the floor. In this case, the installation of pipes can be open or closed. Despite the fact that closed installation is certainly more aesthetically pleasing, it causes certain difficulties if repairs or sewer cleaning are necessary.
For more efficient operation of the sewerage system, when connecting horizontal pipes to a riser, it is better to use tees and bends with an oblique entrance.
- Removing the drain pipe
This part of the sewer system is, although inconspicuous, a very important component of the internal system. Its function is to supply atmospheric air into the system, which prevents the formation of blockages.
In accordance with the technology, the fan pipe is connected to the riser. To avoid the appearance of an unpleasant odor in the house, you should not connect this sewerage element to the ventilation system or kitchen hood. You should also ensure that there are no residential windows or balconies at the outlet of the waste pipe.
Sewerage wiring in a frame house: materials used
Most often, plastic pipes are used to install internal sewerage in a frame house. These are gray polymer pipes.
External sewerage
External sewerage in a frame house includes a centralized drain pipe and a septic tank for wastewater treatment. The centralized pipe in the area from the exit from the house to the connection with the septic tank must be insulated using special heat-insulating materials and buried in the ground to a depth below the freezing point.
Failure to comply with the rules for thermal insulation of the central pipe can result in serious problems: from simple freezing of liquid and disruption of the outflow of wastewater, to a pipe break. At the same time, it is extremely difficult to carry out work on repairing the sewer system in winter conditions.
Septic tank for frame.
Septic tank
A septic tank in a frame house is a special system that is used to sediment and filter human waste. Filtration is carried out by mechanical action or with the help of special bacteria; the type of filtration depends on the design of the septic tank. You can equip the system on the site yourself using reinforced concrete rings, or purchase a ready-made device.
After filtration, relatively clean water comes out of the septic tank; it undergoes additional purification while seeping through the ground, as a result, the wastewater becomes absolutely safe and does not pollute the ground. Regardless of the septic tank used, the system requires maintenance every 3-5 years.